| Author |
 Topic Search Topic Search  Topic Options Topic Options
|
frnkeore 
Silver Level


Joined: 07 May 2019
Location: Southern Oregon
Points: 362
|
 Post Options Post Options
") Thanks(0) Thanks(0)
 Quote Quote  Reply Reply
 Posted: 25 Jun 2019 at 11:49am Posted: 25 Jun 2019 at 11:49am |
|
Yes, it is the engine # I was referring to.
So, I would say the the lower bores were re-bored to the later spec. I would say the re-bore left something to be desired, also and that is why the finish doesn't look like I think a factory finish should.
After typing my response last night, I though of a one time, "save this block", one last time fix. You can do it to the pinned cylinders or the whole bottom of the block.
Make some dummy plugs (I would use plastic) that extend at least 3/8" above the bore. Then fill the bottom with epoxy, to a depth of at least 1/4" and while the epoxy is still wet, push your sleeves in (with O-rings old or new) and pushing the plugs out. Let it cure 2 days and the re-assemble the engine. The O-rings will help center the sleeves.
Epoxy isn't cheap but, should save at least $500, over re-sleeving the lower bores.
You might also use some of the stuff that that they fill race blocks with.
That said, I wouldn't want to be the guy that try's to pull the sleeves, in 20 - 50 years :(
Edited by frnkeore - 25 Jun 2019 at 11:56am
|
|
Frank
1959 D17 Series I #24001+, '59 D14
'55 & '59 Ford 850 & 861
Ferguson TO 35 Deluxe, Oliver 70 and 5 more.
|
 |
|
Sponsored Links
|
|
|
sploke
Silver Level
Joined: 27 Jul 2015
Location: CT
Points: 113
|
Post Options
Thanks(0)
Quote Reply
Posted: 25 Jun 2019 at 11:58am |
|
The other option that came to mind as a last-ditch fix, could I possibly find thicker o-rings to go on the liners that would help make up the difference?
|
|
sploke
Silver Level
Joined: 27 Jul 2015
Location: CT
Points: 113
|
Post Options
Thanks(0)
Quote Reply
Posted: 25 Jun 2019 at 12:05pm |
 DrAllis wrote: DrAllis wrote:
Well at $400 to $500 for a used block, I'll buy one for $200 and bring it to you. That old block is junk and not worth even trying to fix. Maybe used parts are scarce where you live, but not around here. Those blocks are easily checked with your eyes. Clean it up and if no cracks are visible on the top deck or the bottom, it is probably OK fine. |
Those prices were based on a quick ebay search...AC tractors are not at all common around here in New England, as far as antiques go. Everything seems to be either JD or Farmall. Parades or shows will be 90% green or red, with an occasional one-off AC or McCormick thrown in the mix.
|
|
frnkeore
Silver Level
Joined: 07 May 2019
Location: Southern Oregon
Points: 362
|
Post Options
Thanks(0)
Quote Reply
Posted: 25 Jun 2019 at 12:18pm |
|
O-rings have a tolerance of OD to ID (a finish tolerance, too). So, if you install larger O-rings, you will have to re-machine the groove in the sleeve, to get the fit and with a out of round of .070 and .090, it won't be possible.
Also, note that the O-rings are torn on those 2 sleeves. I believe that is a product of the rough finish or, those 2 cyl, possibly have larger o-rings and they tore on installation.
|
|
Frank
1959 D17 Series I #24001+, '59 D14
'55 & '59 Ford 850 & 861
Ferguson TO 35 Deluxe, Oliver 70 and 5 more.
|
|
Sugarmaker
Orange Level


Joined: 12 Jul 2013
Location: Albion PA
Points: 8662
|
Post Options
Thanks(0)
Quote Reply
Posted: 25 Jun 2019 at 9:31pm |
sploke, Not a easy answer here. I had that point in my project. But for some reason I never once considered stopping and selling it or parting it out. My brain says keep going and try to do the best to make it work again. That's why I come here instead of going to a bar or to a shrink. Projects keep me out of trouble and are my mental and physical therapy. Wishing you the best. Regards, Chris
Edited by Sugarmaker - 25 Jun 2019 at 9:32pm
|
|
D17 1958 (NFE), WD45 1954 (NFE), WD 1952 (NFE), WD 1950 (WFE), Allis F-40 forklift, Allis CA, Allis D14, Ford Jubilee, Many IH Cub Cadets, 32 Ford Dump, 65 Comet, 66 F100.
|
|
sploke
Silver Level
Joined: 27 Jul 2015
Location: CT
Points: 113
|
Post Options
Thanks(0)
Quote Reply
Posted: 26 Jun 2019 at 7:26am |
|
Getting some parts from Steiner tonight, and will make some final measurements on the sleeves w/ o-rings installed and better bore measurements to compare, but I'm not overly optimistic at this point. Starting the search for a semi-local WD45 block I can use as a replacement.
|
|
sploke
Silver Level
Joined: 27 Jul 2015
Location: CT
Points: 113
|
Post Options
Thanks(0)
Quote Reply
Posted: 26 Jun 2019 at 7:37pm |
|
Just for kicks, I dry fit a few of the liners. In the repaired area, I can get a .005" feeler gauge between the liner and the lower bore.
Is the block from a D17 engine the same p/n or a direct replacement for the WD45 block?
|
|
Don(MO)
Orange Level
Joined: 12 Sep 2009
Location: Bates City MO.
Points: 6862
|
Post Options
Thanks(0)
Quote Reply
Posted: 26 Jun 2019 at 7:42pm |
sploke wrote:
Just for kicks, I dry fit a few of the liners. In the repaired area, I can get a .005" feeler gauge between the liner and the lower bore.
Is the block from a D17 engine the same p/n or a direct replacement for the WD45 block? |
The D17 block is not the same as the WD45.
|
|
3 WD45's with power steering,G,D15 fork lift,D19, W-Speed Patrol, "A" Gleaner with a 330 corn head,"66" combine,roto-baler, and lots of Snap Coupler implements to make them work for their keep.
|
|
SteveM C/IL
Orange Level Access
Joined: 12 Sep 2009
Location: Shelbyville IL
Points: 8989
|
Post Options
Thanks(1)
Quote Reply
Posted: 27 Jun 2019 at 11:09pm |
|
17 has larger dia mains so you'd need the crank too(but you need one anyway) but they also have a different crank pulley which don't line up with the WD/WD45 water pump. Can't remember if crank nose is longer too or what. Don't think you can use 45 pulley on 17 crank. Bore size? There's some different between them but some one who knows what will have to speak up.
|
|
sploke
Silver Level
Joined: 27 Jul 2015
Location: CT
Points: 113
|
Post Options
Thanks(0)
Quote Reply
Posted: 28 Jun 2019 at 7:49am |
frnkeore wrote:
Yes, it is the engine # I was referring to.
So, I would say the the lower bores were re-bored to the later spec. I would say the re-bore left something to be desired, also and that is why the finish doesn't look like I think a factory finish should.
After typing my response last night, I though of a one time, "save this block", one last time fix. You can do it to the pinned cylinders or the whole bottom of the block.
Make some dummy plugs (I would use plastic) that extend at least 3/8" above the bore. Then fill the bottom with epoxy, to a depth of at least 1/4" and while the epoxy is still wet, push your sleeves in (with O-rings old or new) and pushing the plugs out. Let it cure 2 days and the re-assemble the engine. The O-rings will help center the sleeves.
Epoxy isn't cheap but, should save at least $500, over re-sleeving the lower bores.
You might also use some of the stuff that that they fill race blocks with.
That said, I wouldn't want to be the guy that try's to pull the sleeves, in 20 - 50 years :(
|
someone on the AC facebook group mentioned a product called Hard-Blok or other engine block fillers, which sounds similar, I'd think I could install the sleeves then pour it through the coolant holes on the top of the deck. You're right, it would be a one-and-done fix, but if the block is otherwise scrap anyway, it might be a stop-gap measure. Anyone ever used this stuff?
|
|
frnkeore
Silver Level
Joined: 07 May 2019
Location: Southern Oregon
Points: 362
|
Post Options
Thanks(1)
Quote Reply
Posted: 28 Jun 2019 at 11:19am |
|
I read the reviews and it sounds like it might work but, it also sounds like you have to be prepared and work fast.
If it were me, and I couldn't find a replacement block, I would try it and it certainly sounds like it starts out thin enough to pour in from the coolant holes and I think 1 gallon would be plenty. You might want to test and see how much 1 gal water will fill the block, I wouldn't want to fill more than 1" deep but, the head is where most of the cooling is needed.
Of course pressure test it to at least 20 or 30 lb, before assembling it.
I would also, try to talk to someone that has done it before. I think that there are people on here that have preped puller blocks that way, maybe they can give advice.
Edited by frnkeore - 28 Jun 2019 at 11:23am
|
|
Frank
1959 D17 Series I #24001+, '59 D14
'55 & '59 Ford 850 & 861
Ferguson TO 35 Deluxe, Oliver 70 and 5 more.
|
|
drak
Silver Level

Joined: 03 Apr 2013
Location: uk
Points: 142
|
Post Options
Thanks(0)
Quote Reply
Posted: 04 Jul 2019 at 12:28pm |
hat a great thread, thank you for sharing, very interesting, as I am about going down this road!!!! good luck with the project and please continue posting your progress take care and good luck john
|
|
sploke
Silver Level
Joined: 27 Jul 2015
Location: CT
Points: 113
|
Post Options
Thanks(0)
Quote Reply
Posted: 09 Jul 2019 at 9:58am |
|
So after doing some more research, I ended up going the block filler route, really for lack of another viable option. I used the Moroso brand filler, since it was the only one I could find that didn't come in a huge package, and still only used half of the container to get about a 3/4" fill. I replaced the liner o-rings, cleaned everything up and installed the liners. I plugged the block drain with a hose to leave a path to keep the drain petcock functional. I then filled the block up to the water pump hole with white vinegar and let it soak for 24hrs, which did a pretty good job of cleaning the inside up. Drained it, rinsed everything very well with fresh water, then filled with rubbing alcohol, drained, and blew out with compressed air until dry inside. I mixed up half a container of the block filler, about to the consistency of pancake batter, filled into the block, and knocked on it for a while with a deadblow mallet to settle everything nicely. It should be dry/hard by tonight so the plan is to dry-assemble everything, paint everything up tonight, then do full reassembly this week and hopefully drop the motor back in this weekend.
|
|
frnkeore
Silver Level
Joined: 07 May 2019
Location: Southern Oregon
Points: 362
|
Post Options
Thanks(0)
Quote Reply
Posted: 09 Jul 2019 at 12:31pm |
|
Great, I'm looking forward to it running again :)
|
|
Frank
1959 D17 Series I #24001+, '59 D14
'55 & '59 Ford 850 & 861
Ferguson TO 35 Deluxe, Oliver 70 and 5 more.
|
|
SteveM C/IL
Orange Level Access
Joined: 12 Sep 2009
Location: Shelbyville IL
Points: 8989
|
Post Options
Thanks(0)
Quote Reply
Posted: 09 Jul 2019 at 10:22pm |
|
Keep us posted on how well this works.
|
|
sploke
Silver Level
Joined: 27 Jul 2015
Location: CT
Points: 113
|
Post Options
Thanks(0)
Quote Reply
Posted: 10 Jul 2019 at 8:13am |
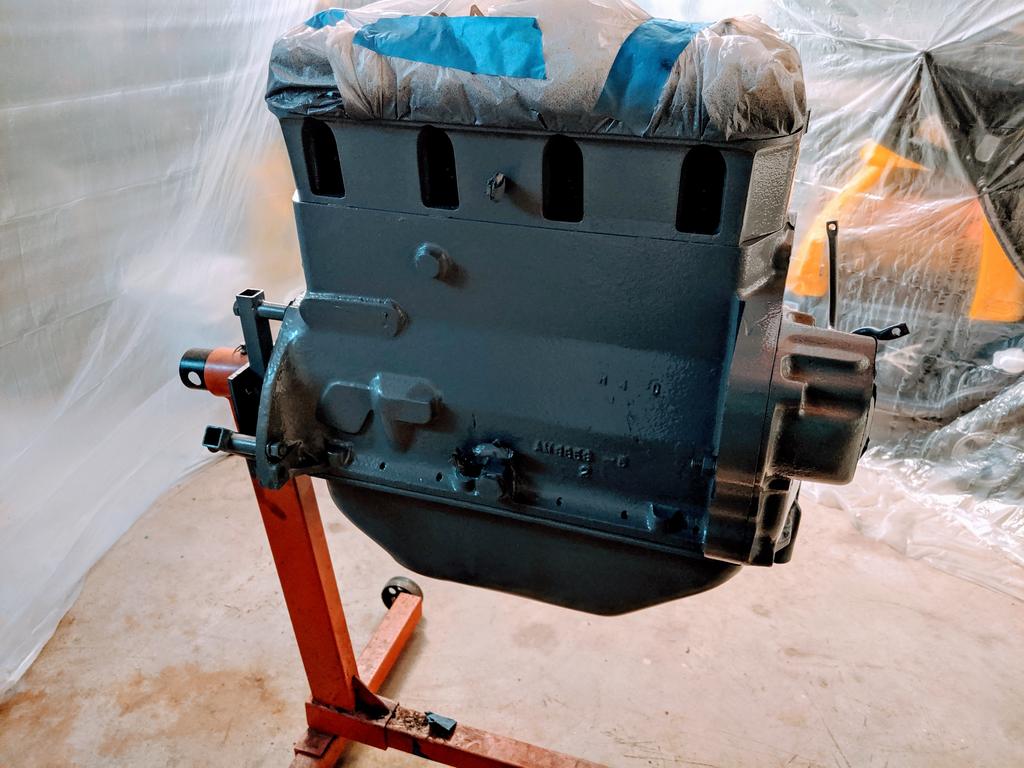
Dry-fit the head, valve cover, oil pan and timing cover to get it primed last night. Shooting the orange tonight. Valve cover is covered because it was painted silver by a previous owner and I kind of liked the look so I'm leaving it. Even in primer it looks pretty good being all one color! I'll still have to do some of the piece parts, not sure how I'm going to handle those. I have some rattle can orange, so I'm thinking I might clean any aluminum pieces and leave them plain, and anything else do orange...that will probably happen as I'm working on final assy.
|
|
Sugarmaker
Orange Level
Joined: 12 Jul 2013
Location: Albion PA
Points: 8662
|
Post Options
Thanks(0)
Quote Reply
Posted: 10 Jul 2019 at 8:28pm |
sploke, Hope it runs as good as it looks too! Thanks for the pictures and updates on your progress. Coming right along! Regards, Chris
|
|
D17 1958 (NFE), WD45 1954 (NFE), WD 1952 (NFE), WD 1950 (WFE), Allis F-40 forklift, Allis CA, Allis D14, Ford Jubilee, Many IH Cub Cadets, 32 Ford Dump, 65 Comet, 66 F100.
|
|
sploke
Silver Level
Joined: 27 Jul 2015
Location: CT
Points: 113
|
Post Options
Thanks(0)
Quote Reply
Posted: 11 Jul 2019 at 9:02am |
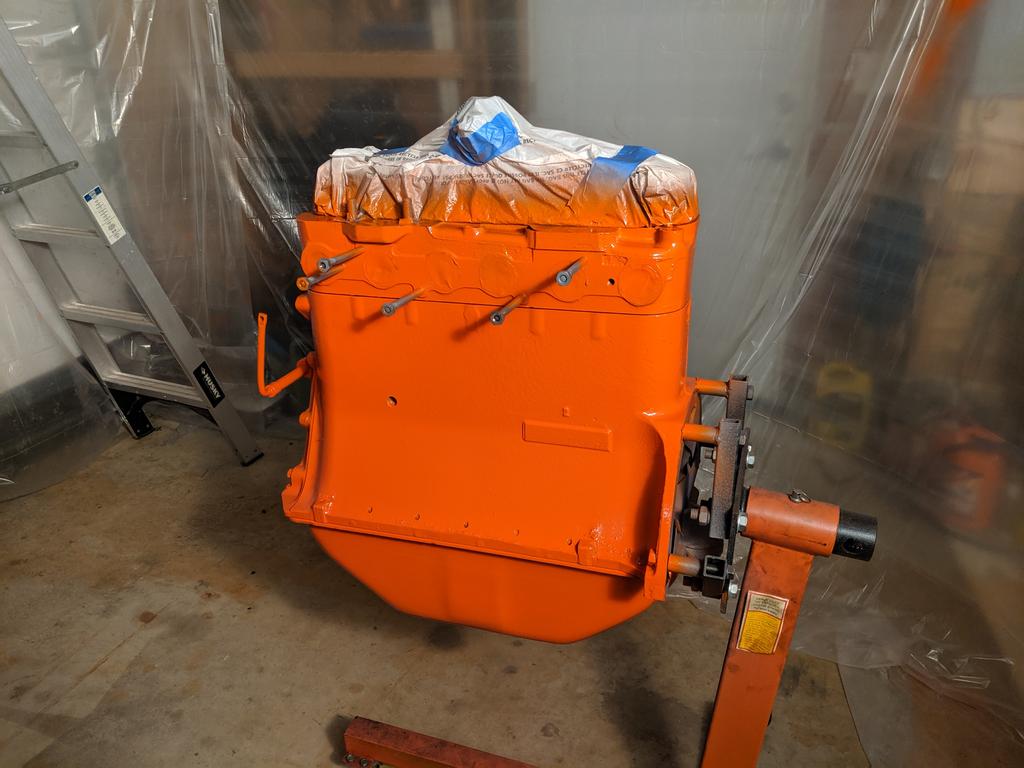
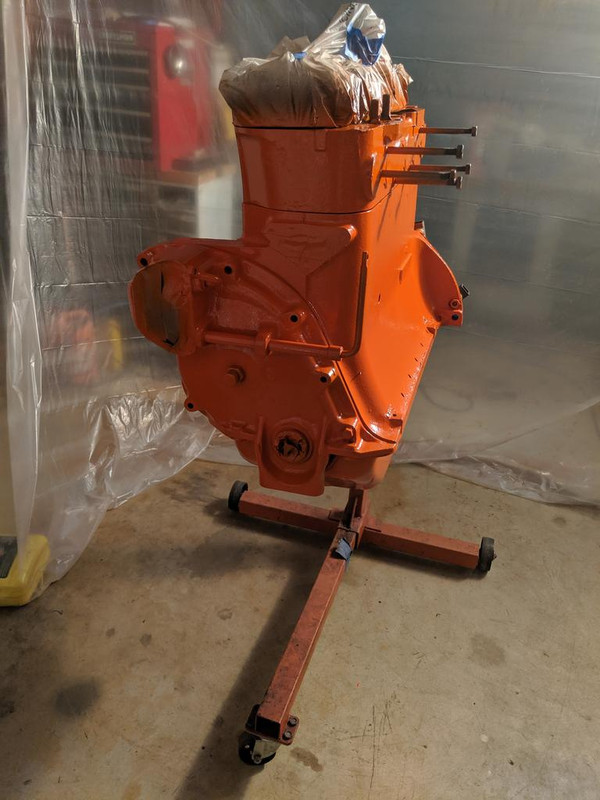
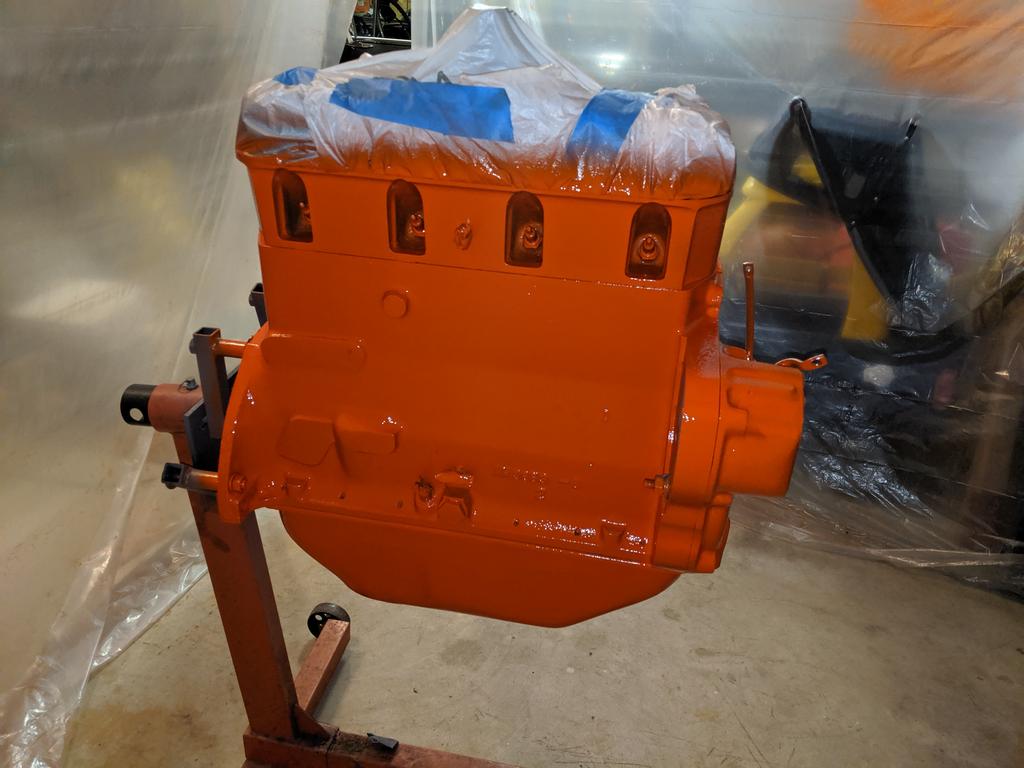
Well...it's orange!
Also got the water pump and t-stat housing cleaned up last night, I'll paint those separately prior to assembly. Also need to decide if I want to paint the carb as well, while it's apart. Internal engine assembly begins tonight!
|
|
sploke
Silver Level
Joined: 27 Jul 2015
Location: CT
Points: 113
|
Post Options
Thanks(0)
Quote Reply
Posted: 12 Jul 2019 at 7:35am |
Well, I had a pretty spectacular "wow, that was dumb" moment last night. Started final assembly last night and my previous time being in a rush is biting me in the butt. When I originally broke down the motor I just pulled everything apart and laid it out on the bench and didn't give it too much thought, knowing I'd give everything a good cleaning prior to reassembly. I pulled the piston rings off pistons 1 and 4 as a representative sample to check out their condition and end gap, and they checked out. Based on the overall general condition of the sleeves and pistons I didn't think much more about it. Well, I started cleaning pistons last night and realized #3 had a broken oil ring, and #2 was missing one of the compression rings altogether! Lesson learned - inspect EVERYTHING upon disassembly if I plan on reusing it. So, now waiting on parts again. 
|
|
frnkeore
Silver Level
Joined: 07 May 2019
Location: Southern Oregon
Points: 362
|
Post Options
Thanks(0)
Quote Reply
Posted: 12 Jul 2019 at 1:39pm |
Not a bad thing, in the end, you may pick up a couple of horses out of it and save on oil 
|
|
Frank
1959 D17 Series I #24001+, '59 D14
'55 & '59 Ford 850 & 861
Ferguson TO 35 Deluxe, Oliver 70 and 5 more.
|
|
sploke
Silver Level
Joined: 27 Jul 2015
Location: CT
Points: 113
|
Post Options
Thanks(0)
Quote Reply
Posted: 26 Jul 2019 at 8:19am |
|
Got the engine set back in the tractor last night...no pics because I was so fed up with it by the time I got it in a 10:30 last night I didn't have patience left to deal with it. Still need up button up the new spark plug wires and the muffler clamps, but hopefully get it all bolted in tonight.
|
|
sploke
Silver Level
Joined: 27 Jul 2015
Location: CT
Points: 113
|
Post Options
Thanks(0)
Quote Reply
Posted: 29 Jul 2019 at 7:00am |
|
Finally got this thing moved out of my driveway. Oil still pouring from the rear main seal. It's like there isn't even a seal there, practically a steady stream of oil pissing from the crank output at high idle. Extremely frustrated at this point.
|
|
Don(MO)
Orange Level
Joined: 12 Sep 2009
Location: Bates City MO.
Points: 6862
|
Post Options
Thanks(0)
Quote Reply
Posted: 29 Jul 2019 at 7:16am |
Sorry to here this. Take a look at my video on main seals and pan gaskets might help.
|
|
3 WD45's with power steering,G,D15 fork lift,D19, W-Speed Patrol, "A" Gleaner with a 330 corn head,"66" combine,roto-baler, and lots of Snap Coupler implements to make them work for their keep.
|
|
sploke
Silver Level
Joined: 27 Jul 2015
Location: CT
Points: 113
|
Post Options
Thanks(0)
Quote Reply
Posted: 29 Jul 2019 at 7:50am |
|
Hi Don, thanks...I watched that previous to doing the repair and referenced it while I was doing the work as well. I'm not sure what I'm missing, but either something isn't right with the motor or I'm royally screwing something up in the process.
|
|
Sugarmaker
Orange Level
Joined: 12 Jul 2013
Location: Albion PA
Points: 8662
|
Post Options
Thanks(0)
Quote Reply
Posted: 29 Jul 2019 at 8:17am |
Sploke, Can you better describe where you see the oil coming from? Maybe someone can determine the cause. I dont have a answer for you at this time. I would consider pulling the engine again and going through the sealing process again. I dont have a better answer for you. I know there is a reason for your oil leak. Just need to find what it is and correct it. Regards, Chris
|
|
D17 1958 (NFE), WD45 1954 (NFE), WD 1952 (NFE), WD 1950 (WFE), Allis F-40 forklift, Allis CA, Allis D14, Ford Jubilee, Many IH Cub Cadets, 32 Ford Dump, 65 Comet, 66 F100.
|
|
frnkeore
Silver Level
Joined: 07 May 2019
Location: Southern Oregon
Points: 362
|
Post Options
Thanks(0)
Quote Reply
Posted: 29 Jul 2019 at 12:01pm |
|
Sploke,
Aside from the oil leak, I take it that there is no water in the oil and the block repair is successful?
|
|
Frank
1959 D17 Series I #24001+, '59 D14
'55 & '59 Ford 850 & 861
Ferguson TO 35 Deluxe, Oliver 70 and 5 more.
|
|
sploke
Silver Level
Joined: 27 Jul 2015
Location: CT
Points: 113
|
Post Options
Thanks(0)
Quote Reply
Posted: 29 Jul 2019 at 12:36pm |
I honestly haven't even gone far enough to check the oil/coolant situation. Once the tractor started, I adjusted the throttle linkage and timing, idled it up to temp, shut it down to torque the head bolts and adjust valve lash. Started it again to move it, saw how much it was still leaking, moved it out of the driveway, and started drinking beer. 
|
|
frnkeore
Silver Level
Joined: 07 May 2019
Location: Southern Oregon
Points: 362
|
Post Options
Thanks(0)
Quote Reply
Posted: 30 Jul 2019 at 1:18am |
A good way to cool off 
|
|
Frank
1959 D17 Series I #24001+, '59 D14
'55 & '59 Ford 850 & 861
Ferguson TO 35 Deluxe, Oliver 70 and 5 more.
|
|
sploke
Silver Level
Joined: 27 Jul 2015
Location: CT
Points: 113
|
Post Options
Thanks(0)
Quote Reply
Posted: 06 Aug 2019 at 7:12am |
Finally got up the motivation to take another look at this thing last night. I took a video because it was very hard to see what is going on just from pictures. I also captured a sample of the oil leaking out and sucked some up into a syringe to get a good look...I'm not pleased. I left it on the bench overnight to see if I get any water separating out from it, but this was fresh new oil and has about 20 min of engine run time on it. 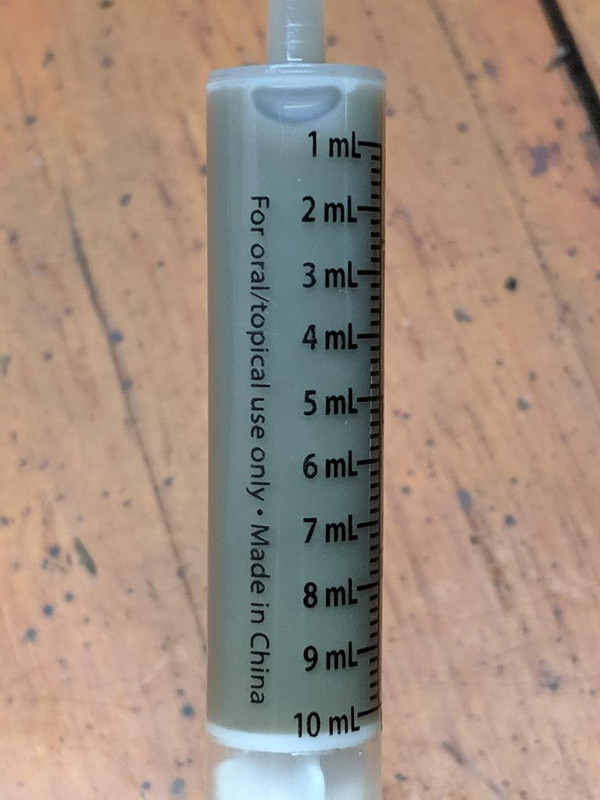 https://www.youtube.com/embed/9Sr7NjhoR9k
Edited by sploke - 06 Aug 2019 at 7:41am
|
|
chaskaduo
Orange Level

Joined: 26 Nov 2016
Location: Twin Cities
Points: 5200
|
Post Options
Thanks(1)
Quote Reply
Posted: 06 Aug 2019 at 7:39am |
The video [TUBE]9Sr7NjhoR9k[/TUBE]
|
|
1938 B, 79 Dynamark 11/36 6spd, 95 Weed-Eater 16hp, 2010 Bolens 14hp
|
|