| Author |
 Topic Search Topic Search  Topic Options Topic Options
|
CA13414 
Silver Level


Joined: 25 Feb 2024
Location: Nebraska
Points: 385
|
 Post Options Post Options
") Thanks(0) Thanks(0)
 Quote Quote  Reply Reply
 Topic: Grandfathers CA Topic: Grandfathers CA
Posted: 13 Mar 2024 at 5:24pm |
|
My Grandfather purchased a 1953 CA with many stories, but one that is quite central to our family history.
Thus, I have always love idea of rebuilding this tractor. Not so sure it is possible since it has been sitting in the trees for almost 40 yrs. However, with an extra CA for parts, two shall become one with the help of my bother, and a great longtime friend.
Edited by CA13414 - 16 Jul 2025 at 6:43am
|
|
Helping the aged survive and thrive! 1953 CA
|
 |
|
Sponsored Links
|
|
|
CA13414
Silver Level
Joined: 25 Feb 2024
Location: Nebraska
Points: 385
|
Post Options
Thanks(0)
Quote Reply
Posted: 13 Mar 2024 at 5:34pm |
The family story: After my Dad enlisted in the Navy during the Korea war, and after finishing basic training, he was helping my Grandfather on the farm when he injured his little finger in the belt of this CA that was running a belt pump used to irrigate.
Instead of heading out to sea, he was stationed in San Francisco until the finger healed. It was during those months as a MP for the Navy keeping everyone out of trouble in San Fran he met my Mom! If it wasn't because of the injury from the belt pump, he may have never met my Mom.
< id="idg-io-safe-browsing-enabled" ="" oninit="true">
Edited by CA13414 - 15 Jun 2024 at 11:15pm
|
|
Helping the aged survive and thrive! 1953 CA
|
|
steve(ill)
Orange Level Access


Joined: 11 Sep 2009
Location: illinois
Points: 90463
|
Post Options
Thanks(0)
Quote Reply
Posted: 13 Mar 2024 at 6:01pm |
|
Ya never know till you get it apart.. If the PAN is full of water, you can have rusted crank and bearings... If it had water and no antifreeze, the block can freeze and split.. Those are the WORST case senarios... If it has antifreeze, or empty... and the muffler / pipe was covered, you can have a usable unit.......... It is supprising what condition they can be in and brought back to life.
|
|
Like them all, but love the "B"s.
|
|
CA13414
Silver Level
Joined: 25 Feb 2024
Location: Nebraska
Points: 385
|
Post Options
Thanks(0)
Quote Reply
Posted: 13 Mar 2024 at 6:45pm |
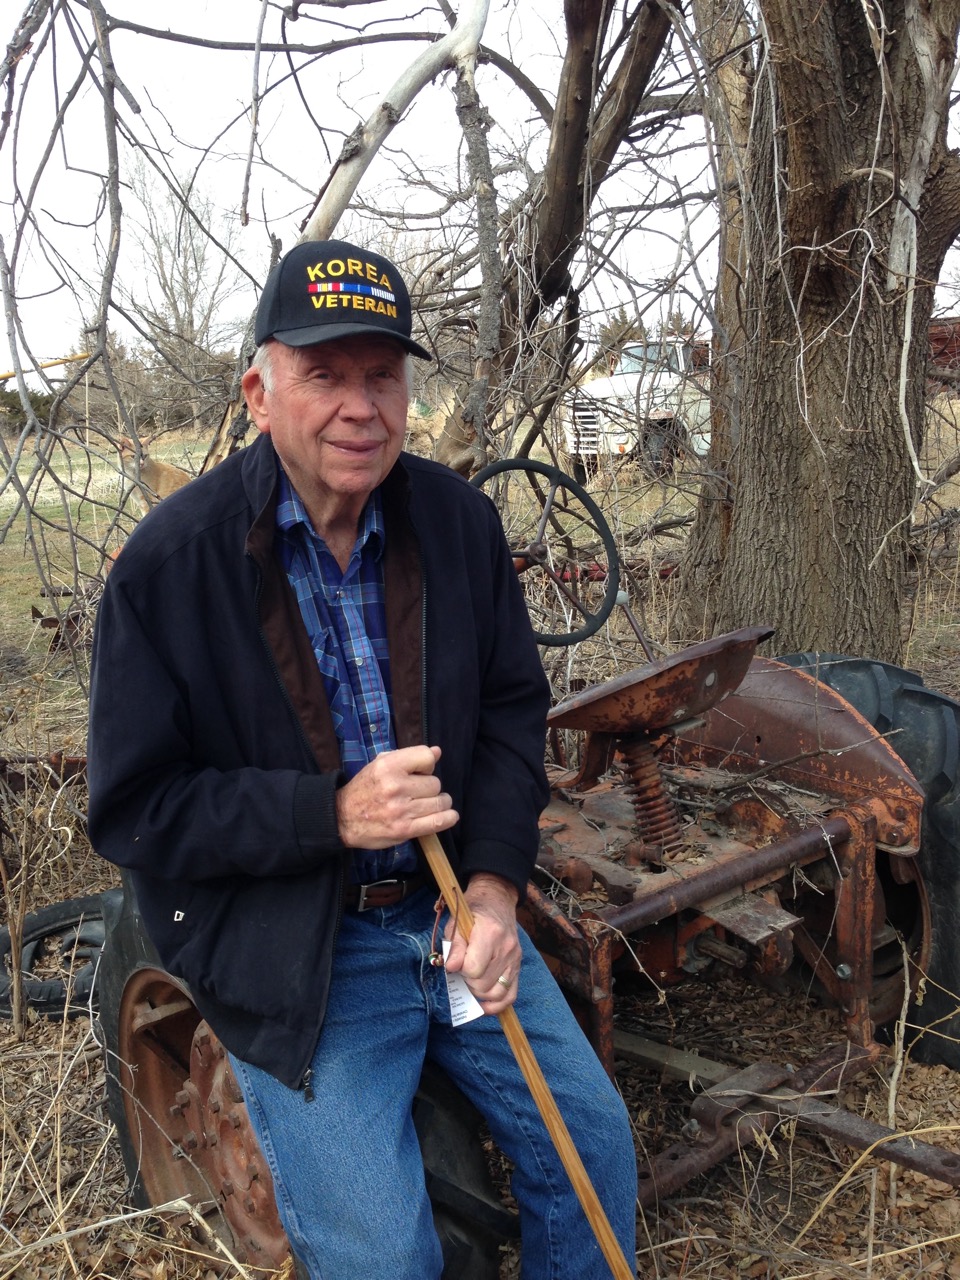
Here is a >10 year old pic of my Dad sitting on the tire of this CA on the farm. He was telling my sister the story briefly detailed above in a much longer version!
< id="idg-io-safe-browsing-enabled" ="" oninit="true">
Edited by CA13414 - 14 Mar 2024 at 4:21pm
|
|
im4racin
Orange Level
Joined: 12 Jun 2017
Location: Garrison ND
Points: 1122
|
Post Options
Thanks(0)
Quote Reply
Posted: 13 Mar 2024 at 6:54pm |
|
Looks about like mine was when I got it. Now the most dependable tractor on the place!
|
|
CA13414
Silver Level
Joined: 25 Feb 2024
Location: Nebraska
Points: 385
|
Post Options
Thanks(0)
Quote Reply
Posted: 13 Mar 2024 at 6:54pm |
Steve. Thank you. Unfortunately, someone came out to the farm and stole the head. Thus the block is frozen and the the oil pan rusted out, thus, the block is not likely useable.
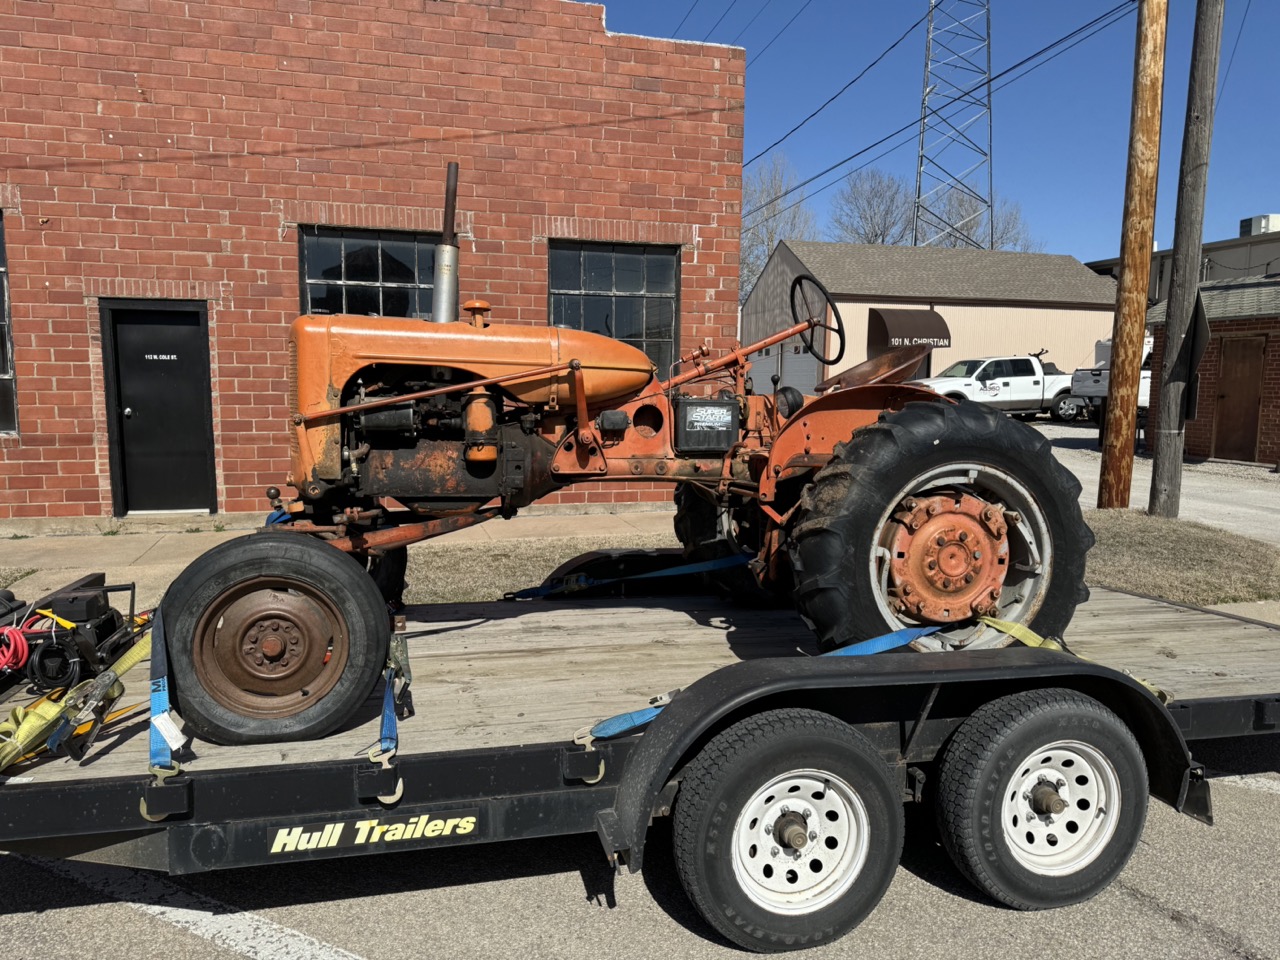
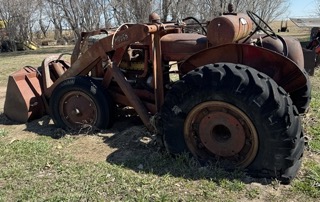
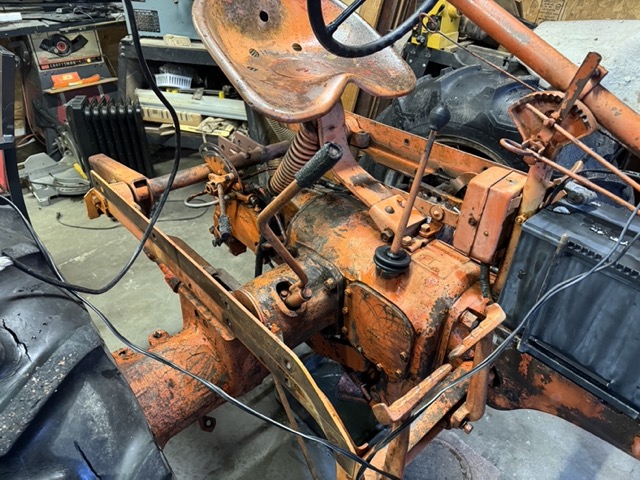
Here are a few pic's of the other CA we bought. Was a 750 mile road trip with my friend... was a great day. Has not run for a number of years. While it was outside, it had been covered and turned over (vs. my Dad's).
Between the two tractors, and a few other parts we will put it together.
Edited by CA13414 - 16 Jul 2025 at 6:44am
|
|
Helping the aged survive and thrive! 1953 CA
|
|
CA13414
Silver Level
Joined: 25 Feb 2024
Location: Nebraska
Points: 385
|
Post Options
Thanks(1)
Quote Reply
Posted: 13 Mar 2024 at 7:19pm |
It did take a few hours to get the other one running. Was a combination of fresh gas, ignition and retiming. The magneto was off by 180 degrees when at TDC w/ compression. Not sure why, but suspect it was removed and replaced at TDC exhaust vs. compression.
Once running and timed, there was good oil pressure and no leaks. Coolant was in good condition as well. Actually ran well after the carb was adjusted. Definitely needs a carb rebuild and we will check compression. If needed, excited to rebuild the engine.
Back on the Farm: GP/Dad's CA transmission was frozen. Could not take it out of gear, the clutch was frozen, the PTO was frozen and could not engage or disengage. When we pulled it from the trees, the wheels were also frozen. Not sure there is much to salvage without an entire rebuild of the transmission which would be a much larger project. While I would love to carry over the serial number, not likely or practical to do such. Maybe someday when we have a bunch of time.
Thus, for now we took the tin, radiator leuvers, seat, platform, fenders, throttle and choke control rods. Everything we could strip down to engine and transmission. My GP/Dad's front end was in great shape and much better than the other.
This past weekend my bother and friend took the loose parts and sandblasted them. Also took out all dents and primed the pieces. Awesome job Bro!!! Will store these until we have replaced all the hoses, rebuild what we need, cleaned and sandblast the remaining and assembled.
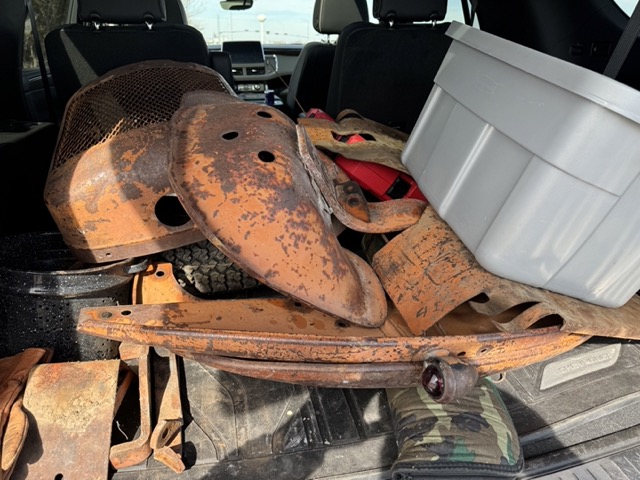
More to come. Here are all our parts from GP/Dad's CA!
The skeletal remains of GP/Dad's CA. 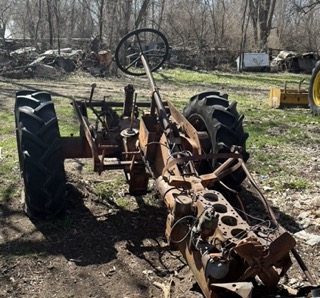
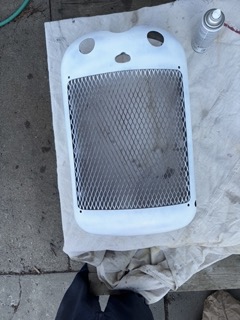
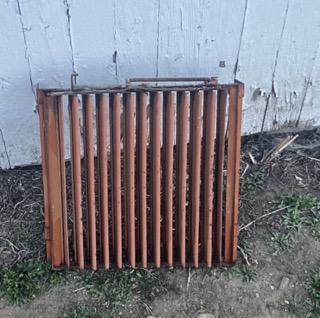
Here is the primed Grill...... part of "Team CA Restoration" efforts!! Awesome job!
< id="idg-io-safe-browsing-enabled" ="" oninit="true">
Edited by CA13414 - 15 Mar 2024 at 9:56pm
|
|
dfwallis
Orange Level
Joined: 09 Mar 2023
Location: DFW
Points: 925
|
Post Options
Thanks(0)
Quote Reply
Posted: 13 Mar 2024 at 7:29pm |
|
Looks similar to my 1952 (~35 years in the brush) except the engine was fairly well protected. Engine was stuck but we've got it rebuilt and nearly ready to fire up (rebuilt generator, starter, new wiring harness, fuel tank being straightened, carb rebuilt ready to install). I should have the front half pretty much fully renovated this May (mostly tin work remains besides finished parts install). I've got the steering wheel mostly epoxied, just some sanding and tweaking low spots. Need to reline the hand clutch before I work the rear half. New tires (new rear rims) all around last May. Front rims were pretty rough but a lot of sand blasting/grinding/sanding cleaned them up pretty good. The tire guy was very happy with them. Was bought new by my grandpa's brother who decided he wanted to go into politics instead of farming and it transitioned to grandpa then to my uncle and my dad.
|
|
1952 CA13092
|
|
CA13414
Silver Level
Joined: 25 Feb 2024
Location: Nebraska
Points: 385
|
Post Options
Thanks(0)
Quote Reply
Posted: 13 Mar 2024 at 7:49pm |
Outstanding Job on your rebuild of the engine and front.
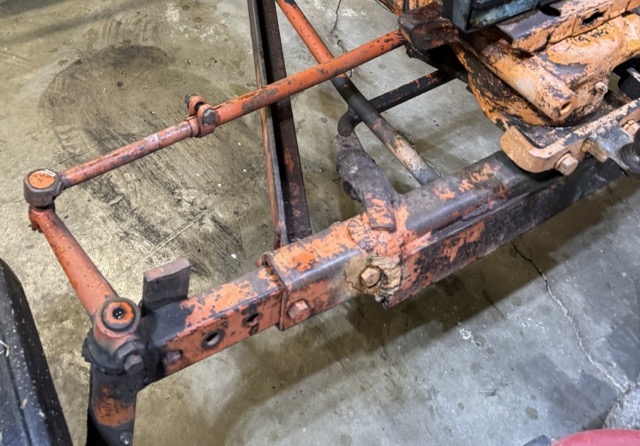
The front end looks simple, but suspect there will be surprises. I was looking for front end spindle bushings but cann't find any. Just in case old ones are shot. Hope I will be able to get them freed up. Tie-rods appear good but we will see.
< id="idg-io-safe-browsing-enabled" ="" oninit="true">
Edited by CA13414 - 14 Mar 2024 at 12:39pm
|
|
Ted J
Orange Level

Joined: 05 Jul 2010
Location: La Crosse, WI
Points: 18962
|
Post Options
Thanks(0)
Quote Reply
Posted: 14 Mar 2024 at 6:39am |
I'm really happy for you to be bringing a piece of your family history back from the dead. It's the relationship with a 'family' tractor that makes it even better to be rebuilding, albeit with some 'farmed in' pieces. You CAN save the serial #, but it'll entail a lot of work, but in the end you'll be VERY happy with the outcome and have the family heirloom back in working order. You should have NO problem with finding parts as there were a number of these made, although they are getting scarcer all the time. It is a GREAT little tractor with a lot more guts that it looks capable of. Thanks fro saving another Allis!! Keep the pics coming and the progress as you go along! If you need anything, just ask and you can follow another CA rebuild by looking at a thread that is being done by 'Sugarmaker'. Good luck and ENJOY!! The accomplishment is worth all the grief, swearing and busted knuckles!!
|
|
"Allis-Express"
19?? WC / 1941 C / 1952 CA / 1956 WD45 / 1957 WD45 / 1958 D-17
|
|
CA13414
Silver Level
Joined: 25 Feb 2024
Location: Nebraska
Points: 385
|
Post Options
Thanks(0)
Quote Reply
Posted: 14 Mar 2024 at 9:22am |
Ted thank you!
Agree it is exciting to bring back that piece of history. Love the comment about having "farmed in" pieces.
At least we will keep the skeleton of the my GP/Dad's CA in the trees. Will keep it in mind and when I have some time and set aside some $.
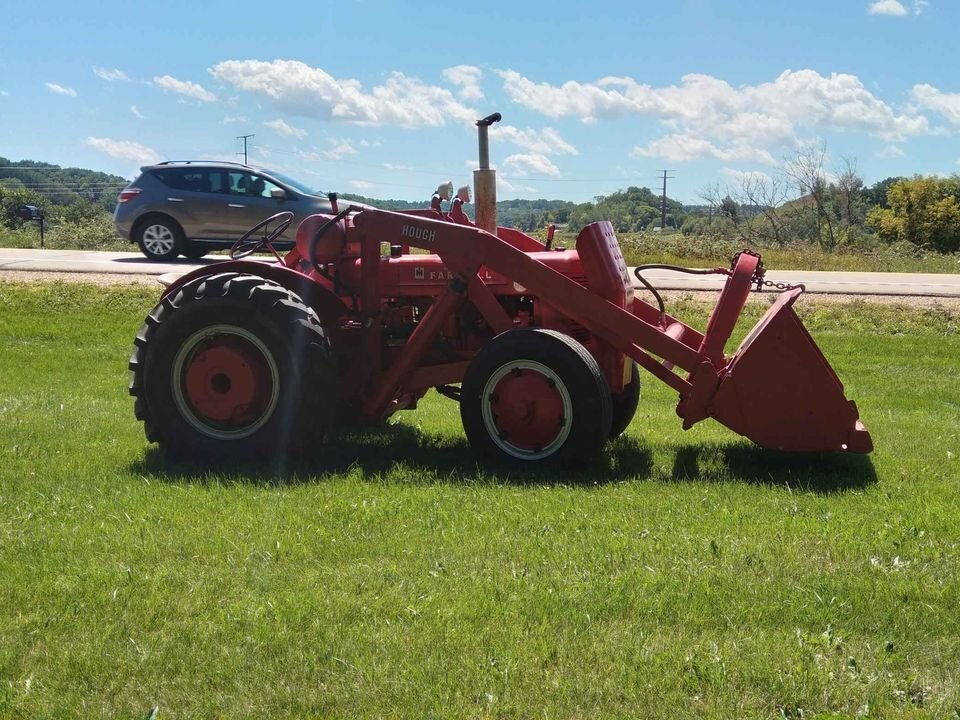
The last tractor transmission I rebuilt was years ago and was a old Hough payloader model ? that my Dad bought used in the late 50's. I convinced my mechanic's teacher in high school (early 80's) to let me rebuild the "M" engine and parts of the transmission and back end. Took most of my senior year but was successful. It worked well, but was a beast to drive without power-stearing. Used this on the farm for over a decade, until Dad had carb troubles and he replaced it with a used tractor loader.
Thus, ~40 years later it also sits parked. :'( It still turns over, but has not ran for ~25-30 years. I will load up a picture of this unique loader later. < id="idg-io-safe-browsing-enabled" ="" oninit="true">
Edited by CA13414 - 14 Mar 2024 at 4:17pm
|
|
CA13414
Silver Level
Joined: 25 Feb 2024
Location: Nebraska
Points: 385
|
Post Options
Thanks(0)
Quote Reply
Posted: 14 Mar 2024 at 12:11pm |
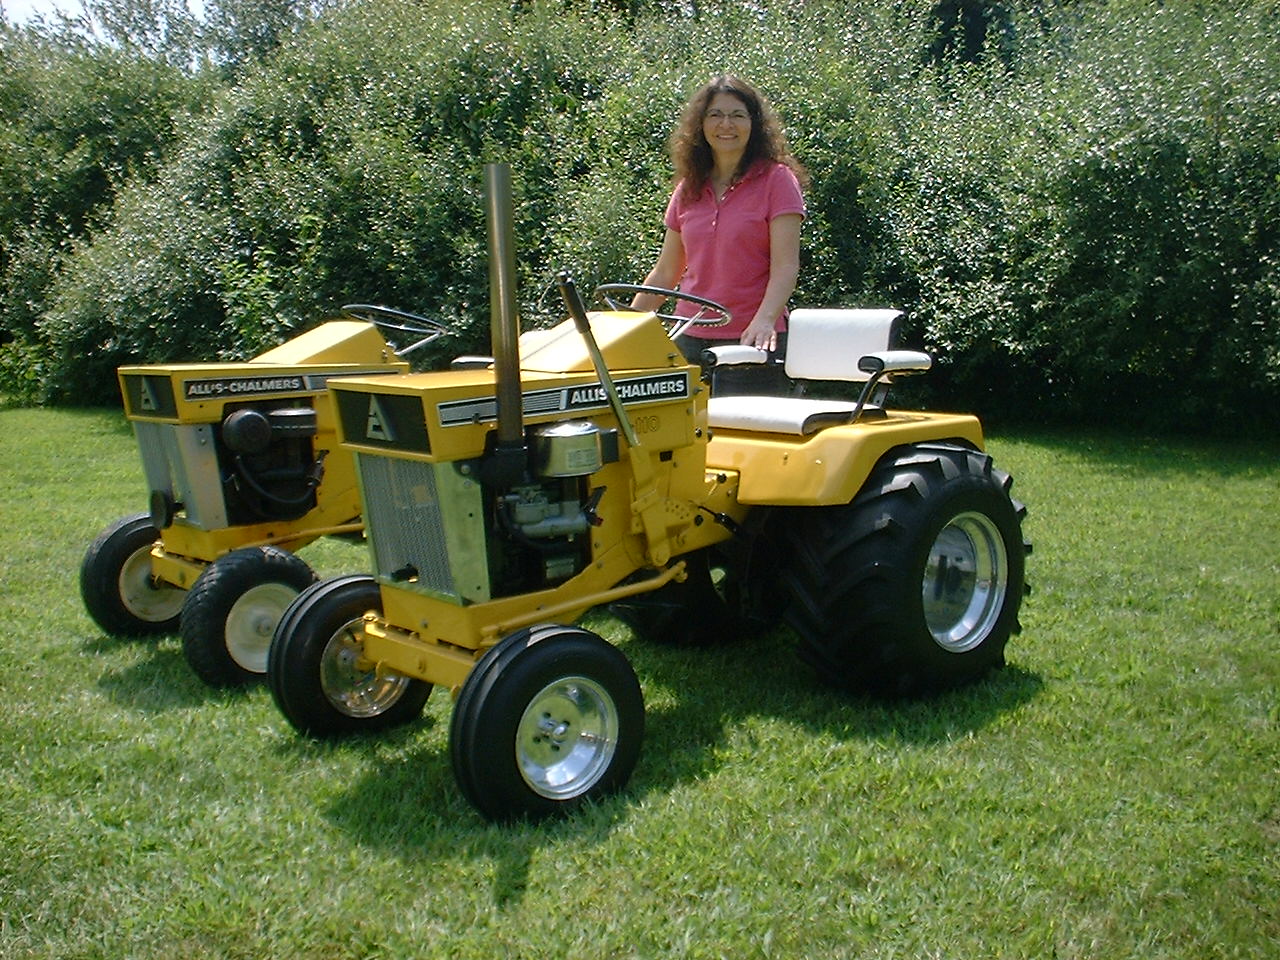
Found a picture from someone else on the web who has restored the exact Hough loader I rebuilt in High School. Ends up this is a rare Hough combination with a Farmall M. Ours is missing the tin, but otherwise looks the same with bad tires and weathered paint.
< id="idg-io-safe-browsing-enabled" ="" oninit="true">
Edited by CA13414 - 14 Mar 2024 at 4:03pm
|
|
CA13414
Silver Level
Joined: 25 Feb 2024
Location: Nebraska
Points: 385
|
Post Options
Thanks(0)
Quote Reply
Posted: 14 Mar 2024 at 12:14pm |
Ted, I did find "Sugarmaker's" thread which was fun to read. Thanks for the reference.
< id="idg-io-safe-browsing-enabled" ="" oninit="true">
Edited by CA13414 - 14 Mar 2024 at 4:04pm
|
|
CA13414
Silver Level
Joined: 25 Feb 2024
Location: Nebraska
Points: 385
|
Post Options
Thanks(0)
Quote Reply
Posted: 14 Mar 2024 at 1:00pm |
My sister took off the radiator leuver. Awesome job!
We will pick it up tomorrow!!!
< id="idg-io-safe-browsing-enabled" ="" oninit="true">
Edited by CA13414 - 14 Mar 2024 at 4:23pm
|
|
CA13414
Silver Level
Joined: 25 Feb 2024
Location: Nebraska
Points: 385
|
Post Options
Thanks(0)
Quote Reply
Posted: 14 Mar 2024 at 1:46pm |
OK, so up to this thread, the prior posts covered the past month. Now the posts slow down and I plan to keep up in "real" time!
Yesterdays Tractor Co. and DJ's Tractor Parts will likely know me by name when this is all done!!!
< id="idg-io-safe-browsing-enabled" ="" oninit="true">
Edited by CA13414 - 14 Mar 2024 at 4:25pm
|
|
Steve in NJ
Orange Level Access
Joined: 12 Sep 2009
Location: Andover, NJ
Points: 12071
|
Post Options
Thanks(0)
Quote Reply
Posted: 14 Mar 2024 at 7:32pm |
Sounds like a family affair goin' on there!! Keep us posted! We love pics to! When the time comes and you need wiring for that puppy, keep us in mind. Good Luck! Steve@B&B bb-customcircuits.com
|
|
39'RC, 43'WC, 48'B, 49'G, 50'WF, 65 Big 10, 67'B-110, 75'716H, 2-620's, & a Motorhead wife
|
|
CA13414
Silver Level
Joined: 25 Feb 2024
Location: Nebraska
Points: 385
|
Post Options
Thanks(0)
Quote Reply
Posted: 15 Mar 2024 at 8:07pm |
Here is the unique Hough Farmall M that I rebuilt in HS. Not as nice as the prior post but the same model without the tin. Does need a little TLC from someone.
< id="idg-io-safe-browsing-enabled" ="" oninit="true">
Edited by CA13414 - 15 Mar 2024 at 8:34pm
|
|
CA13414
Silver Level
Joined: 25 Feb 2024
Location: Nebraska
Points: 385
|
Post Options
Thanks(0)
Quote Reply
Posted: 15 Mar 2024 at 8:58pm |
Questions for the group. Planning to use this not only for mowing, but also to grade/move sand. Any suggestions on tire size or type.
< id="idg-io-safe-browsing-enabled" ="" oninit="true">
Edited by CA13414 - 15 Mar 2024 at 9:47pm
|
|
DiyDave
Orange Level Access

Joined: 11 Sep 2009
Location: Gambrills, MD
Points: 55173
|
Post Options
Thanks(0)
Quote Reply
Posted: 16 Mar 2024 at 4:11am |
I'd leave the front tires/rims stock. It has no PS, and the wider fronts are harder to steer with, and tend to skid more than turn... 
|
|
Source: Babylon Bee. Sponsored by BRAWNDO, its got what you need!
|
|
CA13414
Silver Level
Joined: 25 Feb 2024
Location: Nebraska
Points: 385
|
Post Options
Thanks(0)
Quote Reply
Posted: 17 Mar 2024 at 7:31pm |
Thanks you, appreciate the notion of sliding tires if too wide and being hard to stear. I do not want to tear up the grass, thus, maybe stick with a narrow flat profile tire vs. ribbed?
Thoughts on the rear tires?
< id="idg-io-safe-browsing-enabled" ="" oninit="true">
Edited by CA13414 - 17 Mar 2024 at 7:31pm
|
|
Helping the aged survive and thrive! 1953 CA
|
|
CA13414
Silver Level
Joined: 25 Feb 2024
Location: Nebraska
Points: 385
|
Post Options
Thanks(0)
Quote Reply
Posted: 23 Mar 2024 at 9:23pm |
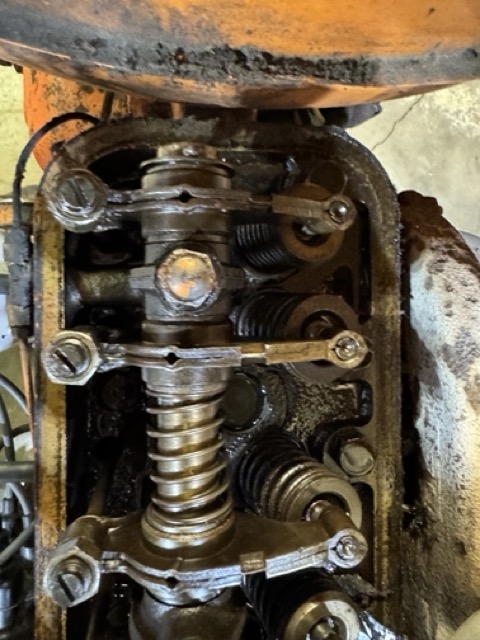
Changed the oil and filter today. Also took off the valve cover and was pleased to see this was very clean. Very easy to start and runs awesome.
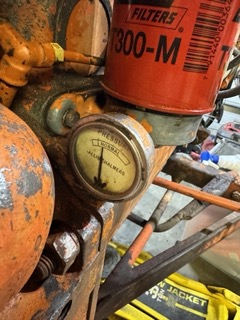
After warming up the engine, the oil pressure at an idle was awesome! From others in the forum, would suspect this is 15 PSI.
We also checked the compression pressures in each cylinders. Cylinder #1: 130 PSI Cylinder #2: 135 PSI Cylinder #3: 135 PSI Cylinder #4: 130 PSI
These were awesome and better than expected. Great news!
I do not think we should do anything else with the engine but clean it up and work on the rest of the tractor.
I have no history on this unit, but I have to think this has been rebuilt with all the above. As well, I know the last owner did have the Mag rebuilt and put on a new water pump.
So overall excited about the condition of the engine.
< id="idg-io-safe-browsing-enabled" ="" oninit="true">
Edited by CA13414 - 25 Mar 2024 at 6:09am
|
|
Helping the aged survive and thrive! 1953 CA
|
|
CA13414
Silver Level
Joined: 25 Feb 2024
Location: Nebraska
Points: 385
|
Post Options
Thanks(1)
Quote Reply
Posted: 23 Mar 2024 at 9:42pm |
Power washed the whole unit. Took about 4 hours total with a ton of degreaser.
 . 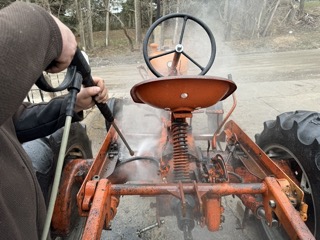
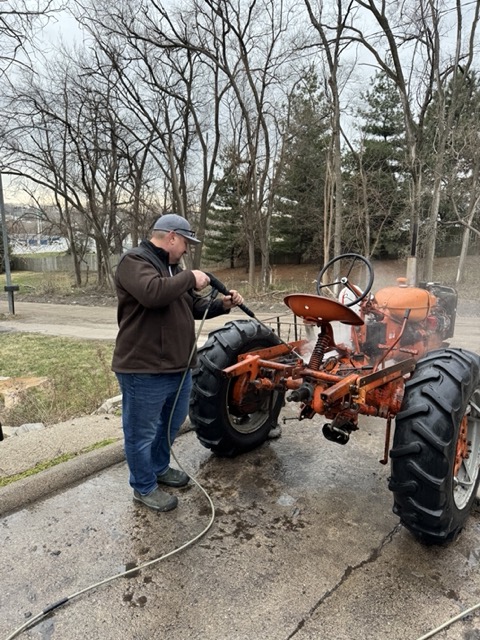
After power washing. Much better. Still needs a bit of "elbow grease" in a few spots.
Need to clean up the brake pad and drums within the axil. They both are are full of years of dirt, corn shucks and other. Weep holes are also plugged up!! Drums look Ok, and it looks the the pads have been replaced at some time. Will still replace them now since it is stripped down.
Also noted that all that the prior owner put wax plugs into each threaded hole in the chassis to prevent rusting. Someone who took care and thought ahead.
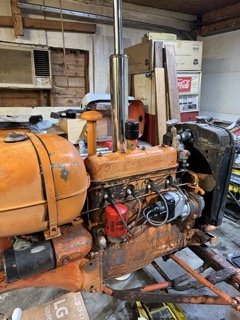
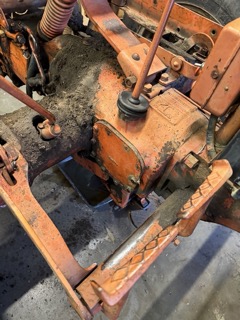
Before we tear it down to clean, repair and rebuild, and replace gaskets that are leaking, we did want to change out the muffler. OK, just wanted to put it on to see how it looked and sounded.
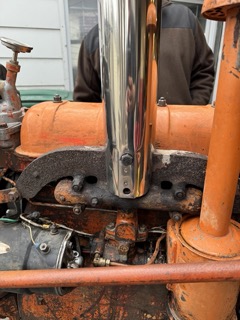
HOWEVER, as you might expect, I broke off the bolt in the exhaust manifold despite some heat. This was the bolt that passes completely into the manifold. The other one came out with a little heat from the torch.
Thus, our 5 min project became 90 min. We drilled out the bolt and retapped the manifold (used magnets to catch the shavings). Here it is with the new muffler which really changed the sound of the tractor. Sounds and looks awesome.
Has anyone ever used stainless steel bolts in the manifold to prevent future breakage?
Here is a link to the pre-wash and pre-"new muffler" run:
Here a link after we power washed and with the new muffler. Love the sound of the new muffler! Drove it outside and let it warm up! Is quite responsive and smooth, even with the governor, in increasing or decreasing throttle speed. :')
< id="idg-io-safe-browsing-enabled" ="" oninit="true">
Edited by CA13414 - 24 Mar 2024 at 1:25pm
|
|
Helping the aged survive and thrive! 1953 CA
|
|
CA13414
Silver Level
Joined: 25 Feb 2024
Location: Nebraska
Points: 385
|
Post Options
Thanks(0)
Quote Reply
Posted: 28 Mar 2024 at 9:44pm |
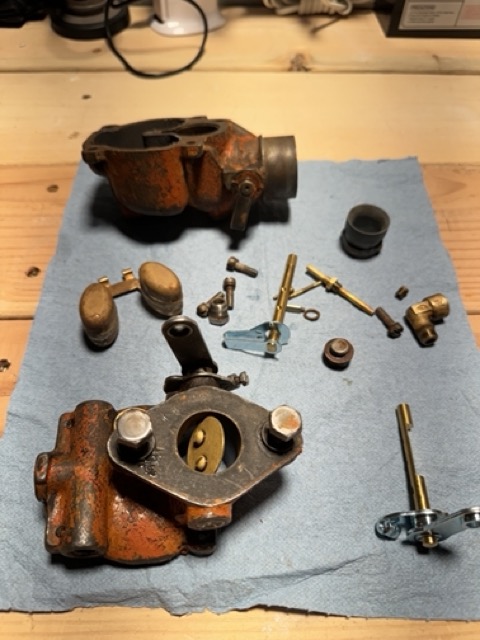
Pulled the carb and stripped it down. After a soak in the cleaner, it is now ready to reassemble.
 .
|
|
Helping the aged survive and thrive! 1953 CA
|
|
CA13414
Silver Level
Joined: 25 Feb 2024
Location: Nebraska
Points: 385
|
Post Options
Thanks(0)
Quote Reply
Posted: 29 Mar 2024 at 7:13am |
Reassembled and will put it back on tomorrow. I am always amazed how many little parts there are and yet quite simple overall!
< id="idg-io-safe-browsing-enabled" ="" oninit="true">
Edited by CA13414 - 29 Mar 2024 at 7:14am
|
|
Helping the aged survive and thrive! 1953 CA
|
|
SteveM C/IL
Orange Level Access
Joined: 12 Sep 2009
Location: Shelbyville IL
Points: 8944
|
Post Options
Thanks(0)
Quote Reply
Posted: 29 Mar 2024 at 8:07am |
|
stainless bolts are usually not hard bolts. I would use grade 5 with antisieze. Grade 8 ok too.
|
|
CA13414
Silver Level
Joined: 25 Feb 2024
Location: Nebraska
Points: 385
|
Post Options
Thanks(0)
Quote Reply
Posted: 29 Mar 2024 at 4:19pm |
Thanks Steve! Will do exactly that!!
< id="idg-io-safe-browsing-enabled" ="" oninit="true">
Edited by CA13414 - 29 Mar 2024 at 4:20pm
|
|
Helping the aged survive and thrive! 1953 CA
|
|
dfwallis
Orange Level
Joined: 09 Mar 2023
Location: DFW
Points: 925
|
Post Options
Thanks(0)
Quote Reply
Posted: 29 Mar 2024 at 6:25pm |
 SteveM C/IL wrote: SteveM C/IL wrote:
stainless bolts are usually not hard bolts. I would use grade 5 with antisieze. Grade 8 ok too. |
316 stainless has a tensile strength of 180000 psi which is higher than grade 8 of 150000 psi. Just don't use 314 or 18-8.
|
|
1952 CA13092
|
|
CA13414
Silver Level
Joined: 25 Feb 2024
Location: Nebraska
Points: 385
|
Post Options
Thanks(0)
Quote Reply
Posted: 29 Mar 2024 at 8:27pm |
Thank you!!
I do love marine grade (316) since it is the only one who will not rust in harsh conditions. I use it all the time for that reason. Did not know it had that tensile strength.
If this is used, I would expect you would not "rust" to the manifold, and still have the strength to remove from the manifold years from now. If you did break it, it would be a pain to remove/drill out!
< id="idg-io-safe-browsing-enabled" ="" oninit="true">
Edited by CA13414 - 29 Mar 2024 at 8:28pm
|
|
Helping the aged survive and thrive! 1953 CA
|
|
CA13414
Silver Level
Joined: 25 Feb 2024
Location: Nebraska
Points: 385
|
Post Options
Thanks(0)
Quote Reply
Posted: 30 Mar 2024 at 4:40pm |
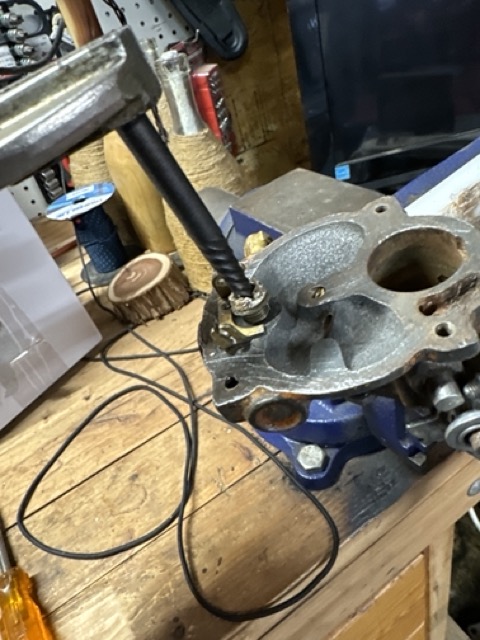
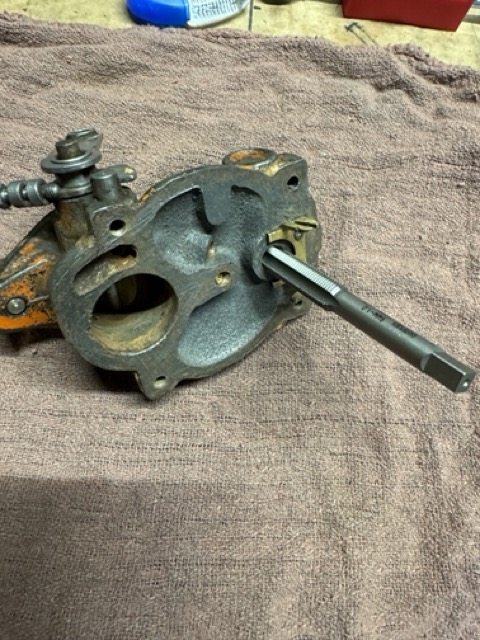
Still needed to change out the float valve needle and seat, however, after decades of fuel it took a screw extractor to remove the brass seat. Also had to tap out the threads to put n the new valve seat!! Re-attached the carb and it ran beautifully.
 .
Also was able to remove one of the front spindles arms and remove the spindle on my GP/Dads front end that was frozen up. Sprayed down the other one with Panther Piss. Yes that is what my Dad called it back in the 60's and it as stuck!! Will have to do the other one on another day. I already ordered new spindle bushings. Then need new front bearings and we will replace whole front end. I will add pics of this effort later.
Replacing the front end with my GP/Dads CA........ Mostly to have parts from the family tractor and since the current front end is quite damaged with much artful welding of everything including angle-iron reinforcements.
< id="idg-io-safe-browsing-enabled" ="" oninit="true">
Edited by CA13414 - 30 Mar 2024 at 8:47pm
|
|
Helping the aged survive and thrive! 1953 CA
|
|
CA13414
Silver Level
Joined: 25 Feb 2024
Location: Nebraska
Points: 385
|
Post Options
Thanks(0)
Quote Reply
Posted: 30 Mar 2024 at 7:29pm |
Took it out for a spin. Mostly to see if the clutch held tight. Was able to stall the engine with a quick release. http://youtube.com/shorts/RIyl1zqUqos
As well, in 4th gear and going up the hill, definitely did not slip as it overloaded the engine. Great news. http://youtube.com/shorts/8Xhocc4aG18
Thus, do not plan to break away the engine and put in a new clutch plate and disk.
< id="idg-io-safe-browsing-enabled" ="" oninit="true">
Edited by CA13414 - 30 Mar 2024 at 7:34pm
|
|
Helping the aged survive and thrive! 1953 CA
|
|