Grandfathers CA
Printed From: Unofficial Allis
Category: Allis Chalmers
Forum Name: Farm Equipment
Forum Description: everything about Allis-Chalmers farm equipment
URL: https://www.allischalmers.com/forum/forum_posts.asp?TID=200284
Printed Date: 19 Mar 2026 at 7:59am
Software Version: Web Wiz Forums 11.10 - http://www.webwizforums.com
Topic: Grandfathers CA
Posted By: CA13414
Subject: Grandfathers CA
Date Posted: 13 Mar 2024 at 5:24pm
|
My Grandfather purchased a 1953 CA with many stories, but one that is quite central to our family history. Thus, I have always love idea of rebuilding this tractor. Not so sure it is possible since it has been sitting in the trees for almost 40 yrs. However, with an extra CA for parts, two shall become one with the help of my bother, and a great longtime friend. ------------- Helping the aged survive and thrive! 1953 CA |
Replies:
Posted By: CA13414
Date Posted: 13 Mar 2024 at 5:34pm
|
The family story: After my Dad enlisted in the Navy during the Korea war, and after finishing basic training, he was helping my Grandfather on the farm when he injured his little finger in the belt of this CA that was running a belt pump used to irrigate. Instead of heading out to sea, he was stationed in San Francisco until the finger healed. It was during those months as a MP for the Navy keeping everyone out of trouble in San Fran he met my Mom! If it wasn't because of the injury from the belt pump, he may have never met my Mom. ------------- Helping the aged survive and thrive! 1953 CA |
Posted By: steve(ill)
Date Posted: 13 Mar 2024 at 6:01pm
|
Ya never know till you get it apart.. If the PAN is full of water, you can have rusted crank and bearings... If it had water and no antifreeze, the block can freeze and split.. Those are the WORST case senarios... If it has antifreeze, or empty... and the muffler / pipe was covered, you can have a usable unit.......... It is supprising what condition they can be in and brought back to life. ------------- Like them all, but love the "B"s. |
Posted By: CA13414
Date Posted: 13 Mar 2024 at 6:45pm
Here is a >10 year old pic of my Dad sitting on the tire of this CA on the farm. He was telling my sister the story briefly detailed above in a much longer version!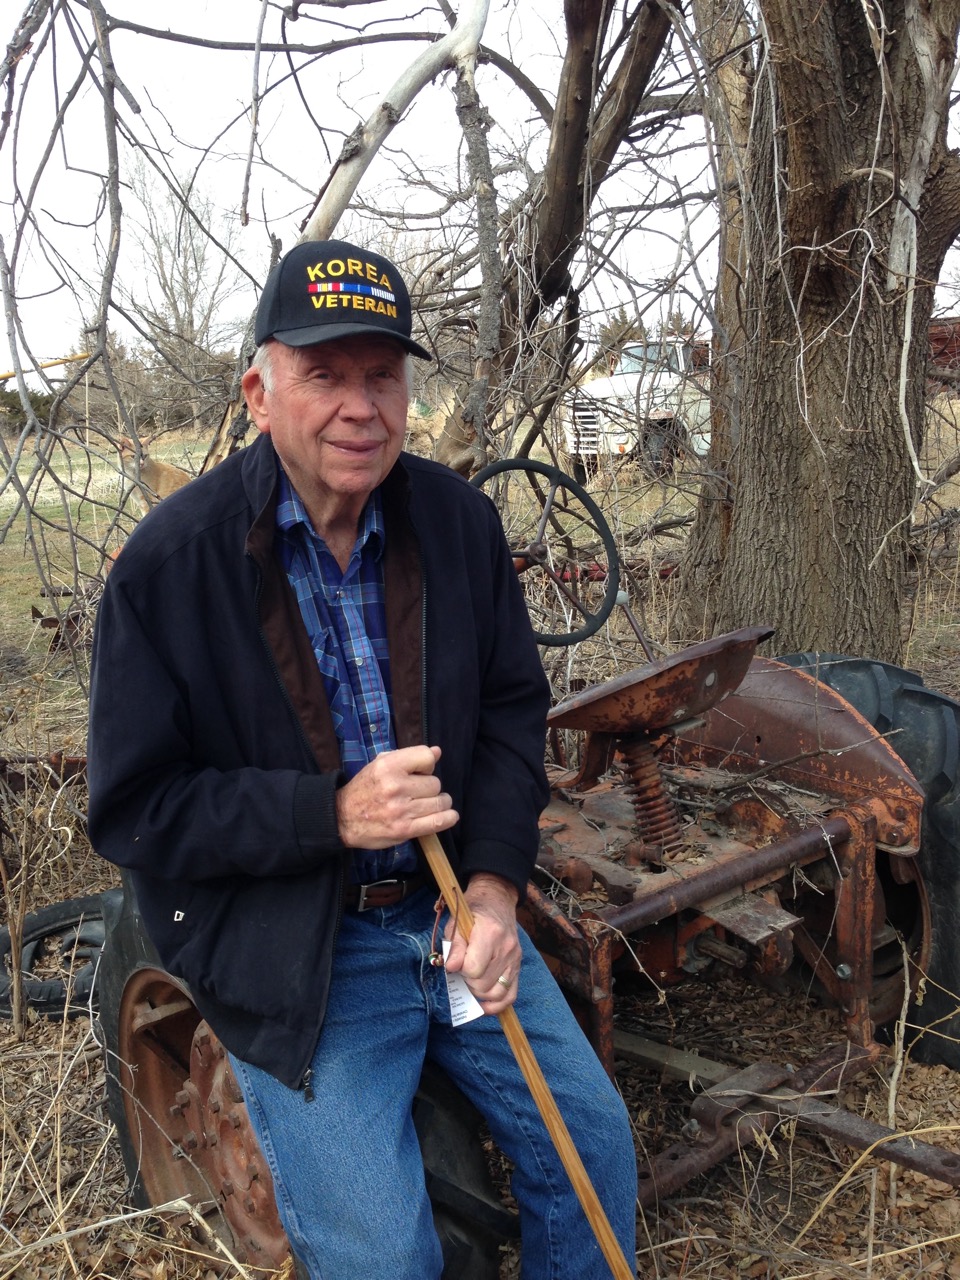 |
Posted By: im4racin
Date Posted: 13 Mar 2024 at 6:54pm
| Looks about like mine was when I got it. Now the most dependable tractor on the place! |
Posted By: CA13414
Date Posted: 13 Mar 2024 at 6:54pm
|
Steve. Thank you. Unfortunately, someone came out to the farm and stole the head. Thus the block is frozen and the the oil pan rusted out, thus, the block is not likely useable. Here are a few pic's of the other CA we bought. Was a 750 mile road trip with my friend... was a great day. Has not run for a number of years. While it was outside, it had been covered and turned over (vs. my Dad's). Between the two tractors, and a few other parts we will put it together. 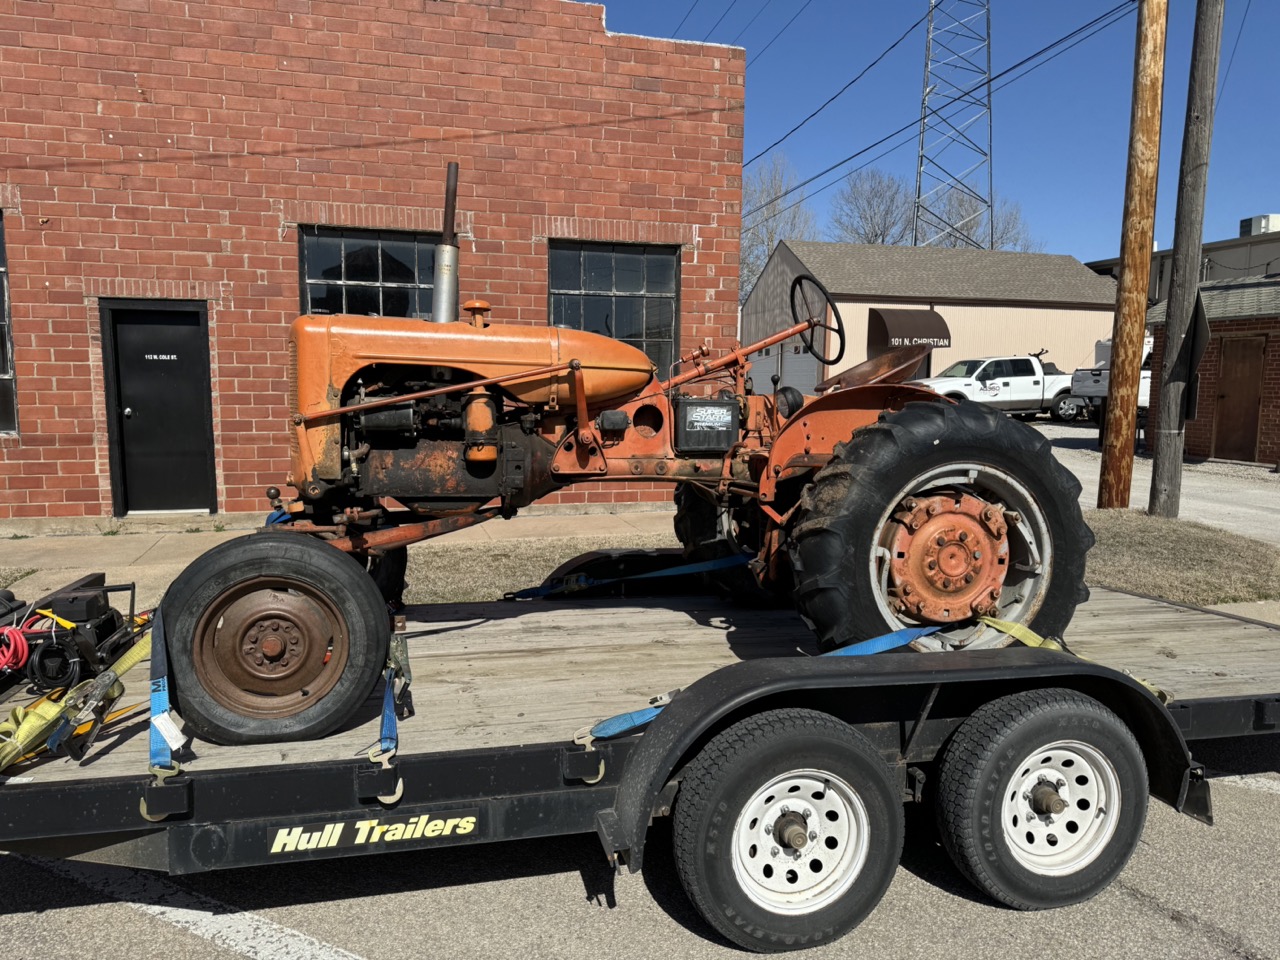 ------------- Helping the aged survive and thrive! 1953 CA |
Posted By: CA13414
Date Posted: 13 Mar 2024 at 7:19pm
|
It did take a few hours to get the other one running. Was a combination of fresh gas, ignition and retiming. The magneto was off by 180 degrees when at TDC w/ compression. Not sure why, but suspect it was removed and replaced at TDC exhaust vs. compression. Once running and timed, there was good oil pressure and no leaks. Coolant was in good condition as well. Actually ran well after the carb was adjusted. Definitely needs a carb rebuild and we will check compression. If needed, excited to rebuild the engine.
Back on the Farm: GP/Dad's CA transmission was frozen. Could not take it out of gear, the clutch was frozen, the PTO was frozen and could not engage or disengage. When we pulled it from the trees, the wheels were also frozen. Not sure there is much to salvage without an entire rebuild of the transmission which would be a much larger project. While I would love to carry over the serial number, not likely or practical to do such. Maybe someday when we have a bunch of time. Thus, for now we took the tin, radiator leuvers, seat, platform, fenders, throttle and choke control rods. Everything we could strip down to engine and transmission. My GP/Dad's front end was in great shape and much better than the other. This past weekend my bother and friend took the loose parts and sandblasted them. Also took out all dents and primed the pieces. Awesome job Bro!!! Will store these until we have replaced all the hoses, rebuild what we need, cleaned and sandblast the remaining and assembled. More to come. Here are all our parts from GP/Dad's CA!  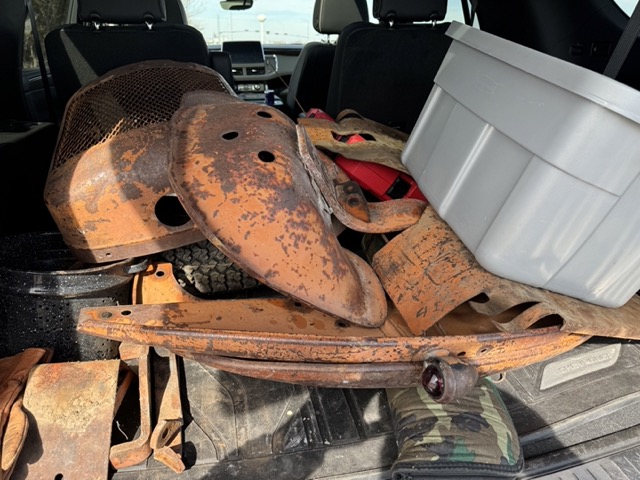 The skeletal remains of GP/Dad's CA. 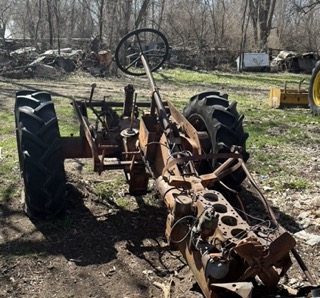 Here is the primed Grill...... part of "Team CA Restoration" efforts!! Awesome job! 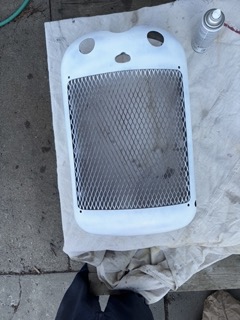 < id="idg-io-safe-browsing-enabled" ="" oninit="true"> |
Posted By: dfwallis
Date Posted: 13 Mar 2024 at 7:29pm
|
Looks similar to my 1952 (~35 years in the brush) except the engine was fairly well protected. Engine was stuck but we've got it rebuilt and nearly ready to fire up (rebuilt generator, starter, new wiring harness, fuel tank being straightened, carb rebuilt ready to install). I should have the front half pretty much fully renovated this May (mostly tin work remains besides finished parts install). I've got the steering wheel mostly epoxied, just some sanding and tweaking low spots. Need to reline the hand clutch before I work the rear half. New tires (new rear rims) all around last May. Front rims were pretty rough but a lot of sand blasting/grinding/sanding cleaned them up pretty good. The tire guy was very happy with them. Was bought new by my grandpa's brother who decided he wanted to go into politics instead of farming and it transitioned to grandpa then to my uncle and my dad. ------------- 1952 CA13092 |
Posted By: CA13414
Date Posted: 13 Mar 2024 at 7:49pm
|
Outstanding Job on your rebuild of the engine and front. The front end looks simple, but suspect there will be surprises. I was looking for front end spindle bushings but cann't find any. Just in case old ones are shot. Hope I will be able to get them freed up. Tie-rods appear good but we will see. |
Posted By: Ted J
Date Posted: 14 Mar 2024 at 6:39am
|
I'm really happy for you to be bringing a piece of your family history back from the dead. It's the relationship with a 'family' tractor that makes it even better to be rebuilding, albeit with some 'farmed in' pieces. You CAN save the serial #, but it'll entail a lot of work, but in the end you'll be VERY happy with the outcome and have the family heirloom back in working order. You should have NO problem with finding parts as there were a number of these made, although they are getting scarcer all the time. It is a GREAT little tractor with a lot more guts that it looks capable of. Thanks fro saving another Allis!! Keep the pics coming and the progress as you go along! If you need anything, just ask and you can follow another CA rebuild by looking at a thread that is being done by 'Sugarmaker'. Good luck and ENJOY!! The accomplishment is worth all the grief, swearing and busted knuckles!! ------------- "Allis-Express" 19?? WC / 1941 C / 1952 CA / 1956 WD45 / 1957 WD45 / 1958 D-17 |
Posted By: CA13414
Date Posted: 14 Mar 2024 at 9:22am
|
Ted thank you! Agree it is exciting to bring back that piece of history. Love the comment about having "farmed in" pieces. At least we will keep the skeleton of the my GP/Dad's CA in the trees. Will keep it in mind and when I have some time and set aside some $. The last tractor transmission I rebuilt was years ago and was a old Hough payloader model ? that my Dad bought used in the late 50's. I convinced my mechanic's teacher in high school (early 80's) to let me rebuild the "M" engine and parts of the transmission and back end. Took most of my senior year but was successful. It worked well, but was a beast to drive without power-stearing. Used this on the farm for over a decade, until Dad had carb troubles and he replaced it with a used tractor loader. Thus, ~40 years later it also sits parked. :'( It still turns over, but has not ran for ~25-30 years. I will load up a picture of this unique loader later. < id="idg-io-safe-browsing-enabled" ="" oninit="true"> |
Posted By: CA13414
Date Posted: 14 Mar 2024 at 12:11pm
Found a picture from someone else on the web who has restored the exact Hough loader I rebuilt in High School. Ends up this is a rare Hough combination with a Farmall M. Ours is missing the tin, but otherwise looks the same with bad tires and weathered paint. 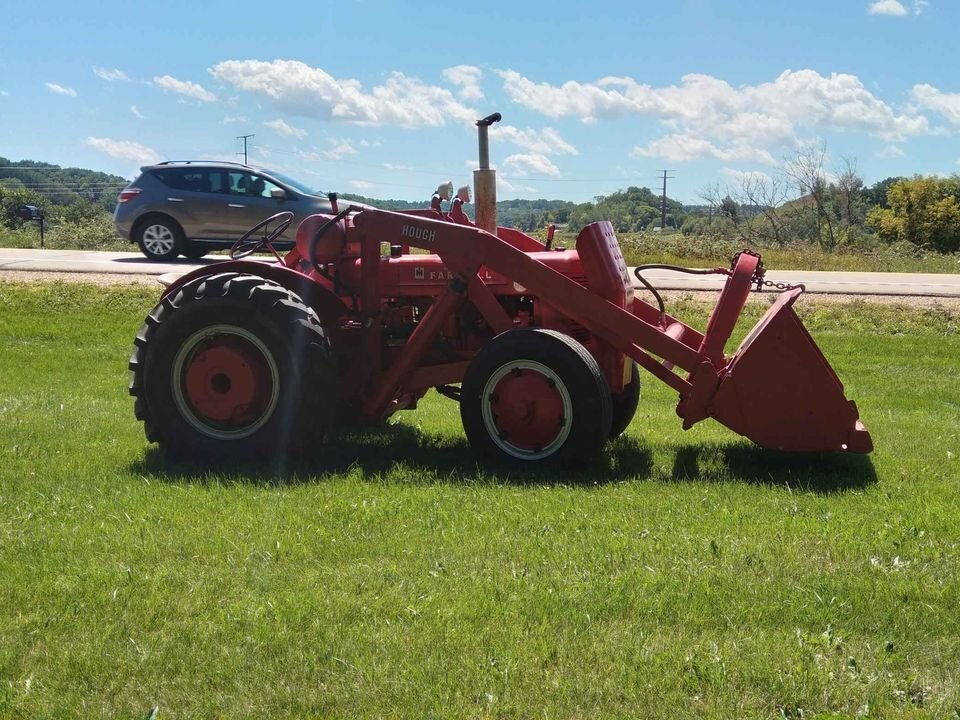 |
Posted By: CA13414
Date Posted: 14 Mar 2024 at 12:14pm
|
Ted, I did find "Sugarmaker's" thread which was fun to read. Thanks for the reference. |
Posted By: CA13414
Date Posted: 14 Mar 2024 at 1:00pm
|
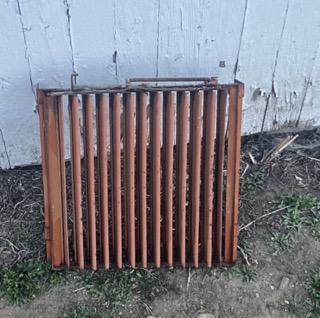
My sister took off the radiator leuver. Awesome job! We will pick it up tomorrow!!!
 |
Posted By: CA13414
Date Posted: 14 Mar 2024 at 1:46pm
|
OK, so up to this thread, the prior posts covered the past month. Now the posts slow down and I plan to keep up in "real" time! Yesterdays Tractor Co. and DJ's Tractor Parts will likely know me by name when this is all done!!! |
Posted By: Steve in NJ
Date Posted: 14 Mar 2024 at 7:32pm
|
Sounds like a family affair goin' on there!! Keep us posted! We love pics to! When the time comes and you need wiring for that puppy, keep us in mind. Good Luck! Steve@B&B bb-customcircuits.com ------------- 39'RC, 43'WC, 48'B, 49'G, 50'WF, 65 Big 10, 67'B-110, 75'716H, 2-620's, & a Motorhead wife |
Posted By: CA13414
Date Posted: 15 Mar 2024 at 8:07pm
Here is the unique Hough Farmall M that I rebuilt in HS. Not as nice as the prior post but the same model without the tin. Does need a little TLC from someone.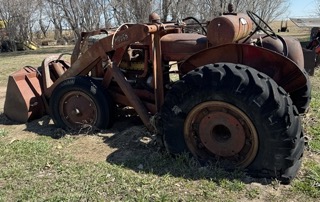 |
Posted By: CA13414
Date Posted: 15 Mar 2024 at 8:58pm
|
Questions for the group. Planning to use this not only for mowing, but also to grade/move sand. Any suggestions on tire size or type. Thinking about a 12" X 24" turf tire ( https://www.prioritytire.com/firestone-all-non-skid-tractor-8-3-24-88a7-4-ply-as-a-s-all-season-tire?gad_source=1" rel="nofollow - https://www.prioritytire.com/firestone-all-non-skid-tractor-8-3-24-88a7-4-ply-as-a-s-all-season-tire?gad_source=1 ) for the rear tire but 12 vs shown 8. Or stick with the traditional 12X24? < id="idg-io-safe-browsing-enabled" ="" oninit="true">
As well, 7.6" front implement tire for the front ( https://www.prioritytire.com/ceat-farm-implement-i-1-7-6-15-109b-10-ply-as-a-s-all-season-tire" rel="nofollow - https://www.prioritytire.com/ceat-farm-implement-i-1-7-6-15-109b-10-ply-as-a-s-all-season-tire ). Have 5 bolt 15x6, 5 lug on 4.5 with a 2.75 center hole rims for these. Might need a 7" wide rim or narrower front tire? Any insights or thoughts are appreciated. Thanks! |
Posted By: DiyDave
Date Posted: 16 Mar 2024 at 4:11am
I'd leave the front tires/rims stock. It has no PS, and the wider fronts are harder to steer with, and tend to skid more than turn... ------------- Source: Babylon Bee. Sponsored by BRAWNDO, its got what you need! |
Posted By: CA13414
Date Posted: 17 Mar 2024 at 7:31pm
|
Thanks you, appreciate the notion of sliding tires if too wide and being hard to stear. I do not want to tear up the grass, thus, maybe stick with a narrow flat profile tire vs. ribbed? Thoughts on the rear tires? ------------- Helping the aged survive and thrive! 1953 CA |
Posted By: CA13414
Date Posted: 23 Mar 2024 at 9:23pm
Changed the oil and filter today. Also took off the valve cover and was pleased to see this was very clean. Very easy to start and runs awesome.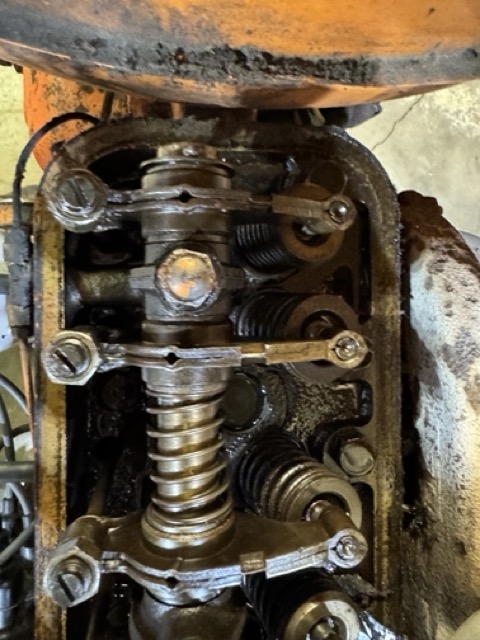 After warming up the engine, the oil pressure at an idle was awesome! From others in the forum, would suspect this is 15 PSI. 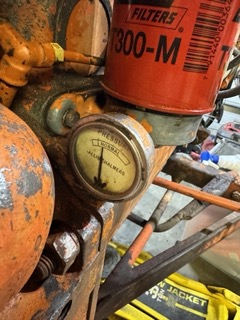 We also checked the compression pressures in each cylinders. Cylinder #1: 130 PSI Cylinder #2: 135 PSI Cylinder #3: 135 PSI Cylinder #4: 130 PSI These were awesome and better than expected. Great news! I do not think we should do anything else with the engine but clean it up and work on the rest of the tractor. I have no history on this unit, but I have to think this has been rebuilt with all the above. As well, I know the last owner did have the Mag rebuilt and put on a new water pump. So overall excited about the condition of the engine. ------------- Helping the aged survive and thrive! 1953 CA |
Posted By: CA13414
Date Posted: 23 Mar 2024 at 9:42pm
Power washed the whole unit. Took about 4 hours total with a ton of degreaser. 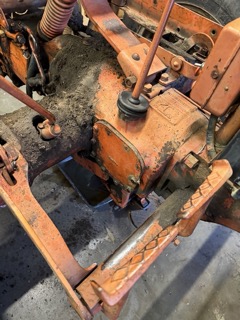 . . 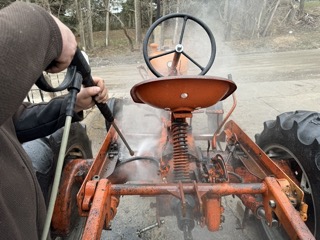 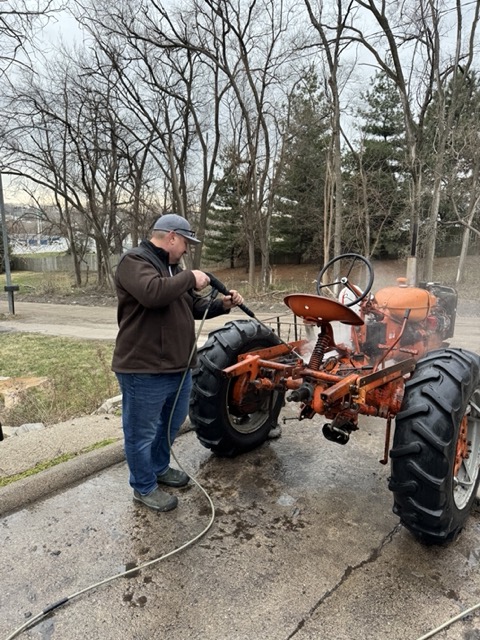 After power washing. Much better. Still needs a bit of "elbow grease" in a few spots. Need to clean up the brake pad and drums within the axil. They both are are full of years of dirt, corn shucks and other. Weep holes are also plugged up!! Drums look Ok, and it looks the the pads have been replaced at some time. Will still replace them now since it is stripped down. 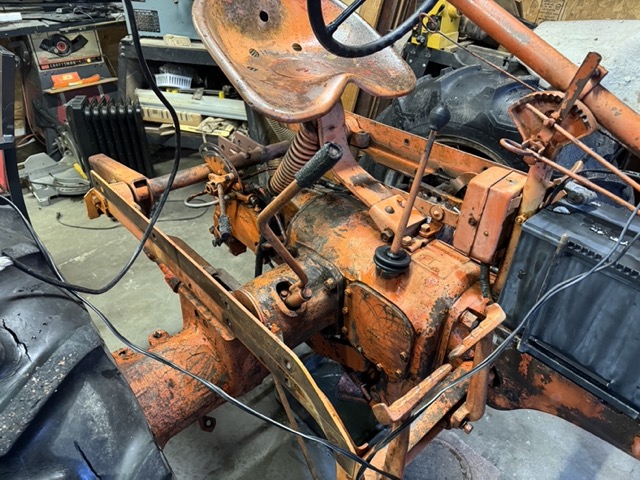 Also noted that all that the prior owner put wax plugs into each threaded hole in the chassis to prevent rusting. Someone who took care and thought ahead.  Before we tear it down to clean, repair and rebuild, and replace gaskets that are leaking, we did want to change out the muffler. OK, just wanted to put it on to see how it looked and sounded. HOWEVER, as you might expect, I broke off the bolt in the exhaust manifold despite some heat. This was the bolt that passes completely into the manifold. The other one came out with a little heat from the torch. Thus, our 5 min project became 90 min. We drilled out the bolt and retapped the manifold (used magnets to catch the shavings). Here it is with the new muffler which really changed the sound of the tractor. Sounds and looks awesome. Has anyone ever used stainless steel bolts in the manifold to prevent future breakage? 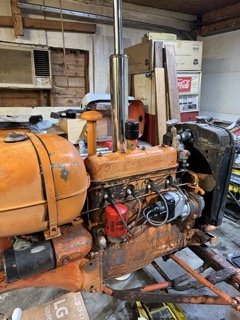 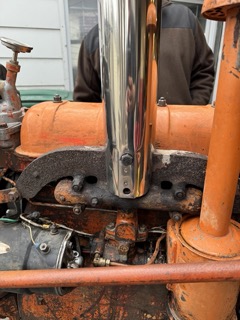 Here is a link to the pre-wash and pre-"new muffler" run: http://www.youtube.com/watch?v=60iFqXCQgzE" rel="nofollow - Here a link after we power washed and with the new muffler. Love the sound of the new muffler! Drove it outside and let it warm up! Is quite responsive and smooth, even with the governor, in increasing or decreasing throttle speed. :') https://youtube.com/shorts/VYrAoq9-ByM" rel="nofollow - ------------- Helping the aged survive and thrive! 1953 CA |
Posted By: CA13414
Date Posted: 28 Mar 2024 at 9:44pm
Pulled the carb and stripped it down. After a soak in the cleaner, it is now ready to reassemble. 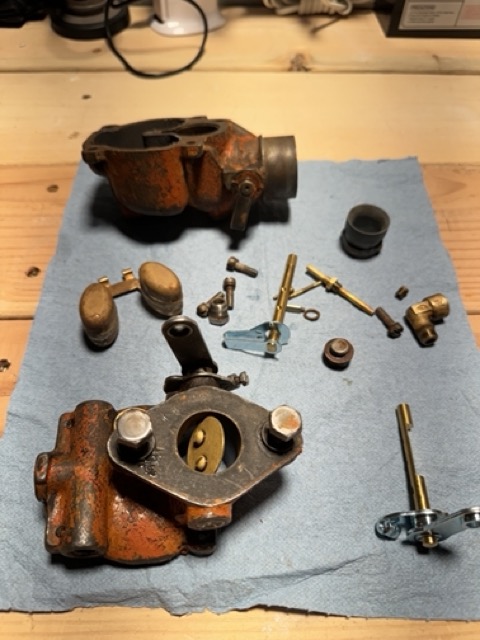 . . ------------- Helping the aged survive and thrive! 1953 CA |
Posted By: CA13414
Date Posted: 29 Mar 2024 at 7:13am
Reassembled and will put it back on tomorrow. I am always amazed how many little parts there are and yet quite simple overall! ------------- Helping the aged survive and thrive! 1953 CA |
Posted By: SteveM C/IL
Date Posted: 29 Mar 2024 at 8:07am
| stainless bolts are usually not hard bolts. I would use grade 5 with antisieze. Grade 8 ok too. |
Posted By: CA13414
Date Posted: 29 Mar 2024 at 4:19pm
|
Thanks Steve! Will do exactly that!! ------------- Helping the aged survive and thrive! 1953 CA |
Posted By: dfwallis
Date Posted: 29 Mar 2024 at 6:25pm
316 stainless has a tensile strength of 180000 psi which is higher than grade 8 of 150000 psi. Just don't use 314 or 18-8. ------------- 1952 CA13092 |
 SteveM C/IL wrote:
Posted By: CA13414
Date Posted: 29 Mar 2024 at 8:27pm
|
Thank you!! I do love marine grade (316) since it is the only one who will not rust in harsh conditions. I use it all the time for that reason. Did not know it had that tensile strength. If this is used, I would expect you would not "rust" to the manifold, and still have the strength to remove from the manifold years from now. If you did break it, it would be a pain to remove/drill out! ------------- Helping the aged survive and thrive! 1953 CA |
Posted By: CA13414
Date Posted: 30 Mar 2024 at 4:40pm
Still needed to change out the float valve needle and seat, however, after decades of fuel it took a screw extractor to remove the brass seat. Also had to tap out the threads to put n the new valve seat!! Re-attached the carb and it ran beautifully. 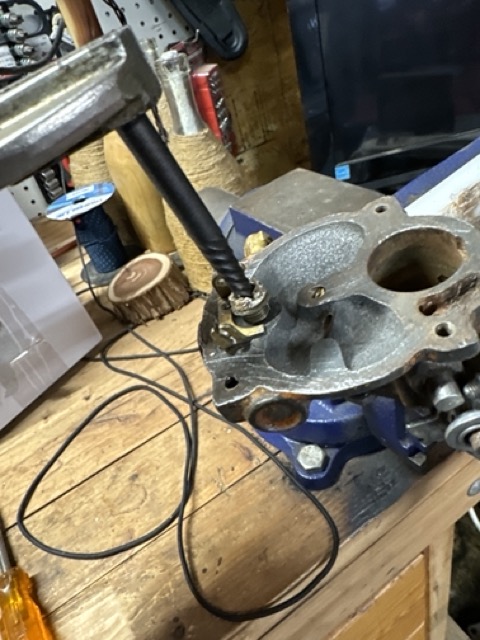 . . 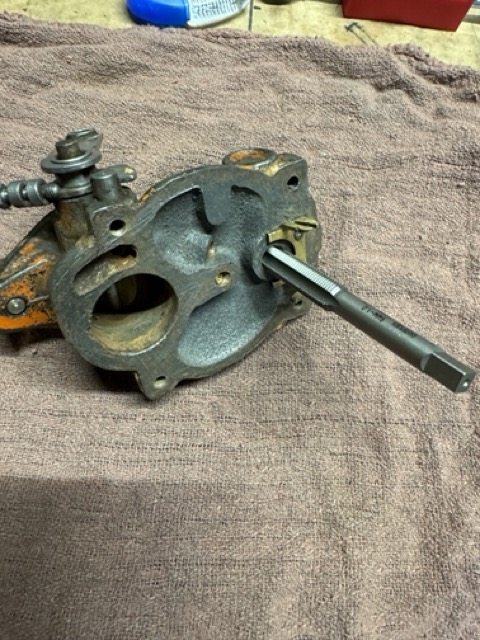 Also was able to remove one of the front spindles arms and remove the spindle on my GP/Dads front end that was frozen up. Sprayed down the other one with Panther Piss. Yes that is what my Dad called it back in the 60's and it as stuck!! Will have to do the other one on another day. I already ordered new spindle bushings. Then need new front bearings and we will replace whole front end. I will add pics of this effort later. Replacing the front end with my GP/Dads CA........ Mostly to have parts from the family tractor and since the current front end is quite damaged with much artful welding of everything including angle-iron reinforcements. 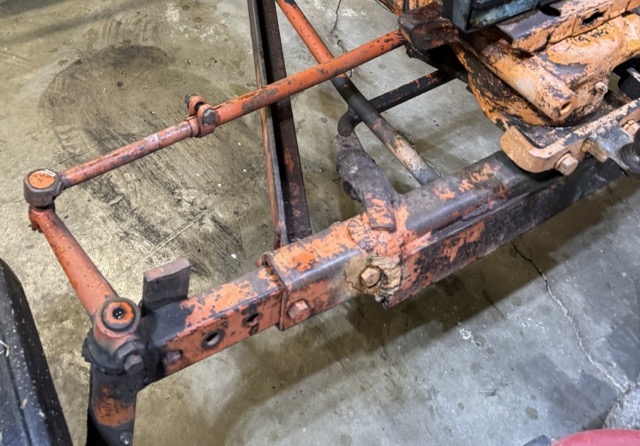 ------------- Helping the aged survive and thrive! 1953 CA |
Posted By: CA13414
Date Posted: 30 Mar 2024 at 7:29pm
|
Took it out for a spin. Mostly to see if the clutch held tight. Was able to stall the engine with a quick release. http://youtube.com/shorts/RIyl1zqUqos" rel="nofollow - http://youtube.com/shorts/RIyl1zqUqos As well, in 4th gear and going up the hill, definitely did not slip as it overloaded the engine. Great news. http://youtube.com/shorts/8Xhocc4aG18" rel="nofollow - http://youtube.com/shorts/8Xhocc4aG18 Thus, do not plan to break away the engine and put in a new clutch plate and disk. ------------- Helping the aged survive and thrive! 1953 CA |
Posted By: CA13414
Date Posted: 30 Mar 2024 at 7:38pm
|
Well at the end of the day it was a blast to hang and work on the tractor!! Here is a video of me driving up the hill in 4th gear..... Yes I definitely date myself with the tag line of a long ago sit-com. :') Make sure you turn up the volume. http://youtube.com/shorts/n8sLnPg5cZU" rel="nofollow - http://youtube.com/shorts/n8sLnPg5cZU ------------- Helping the aged survive and thrive! 1953 CA |
Posted By: Alberta Phil
Date Posted: 30 Mar 2024 at 8:13pm
|
That 'ol girl sound pretty healthy!! |
Posted By: wjohn
Date Posted: 30 Mar 2024 at 11:14pm
|
Agreed! It sounds like it's running well. ------------- 1939 B, 1940 B, 1941 WC, 1951 WD, 1952 CA, 1956 WD-45 |
Posted By: CA13414
Date Posted: 02 Apr 2024 at 8:08pm
Pulled the gas tank and will sand blast that with a bunch of other small parts. 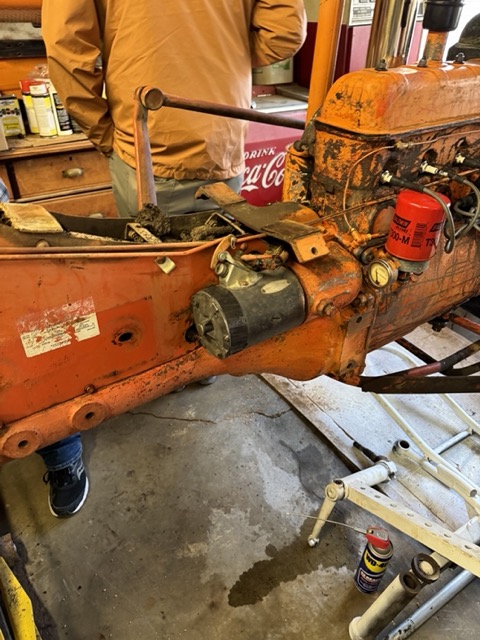 Also took off the brakes. The pads were quite worn and broken up. "Drums" do look good, not 100% but reasonable for now. 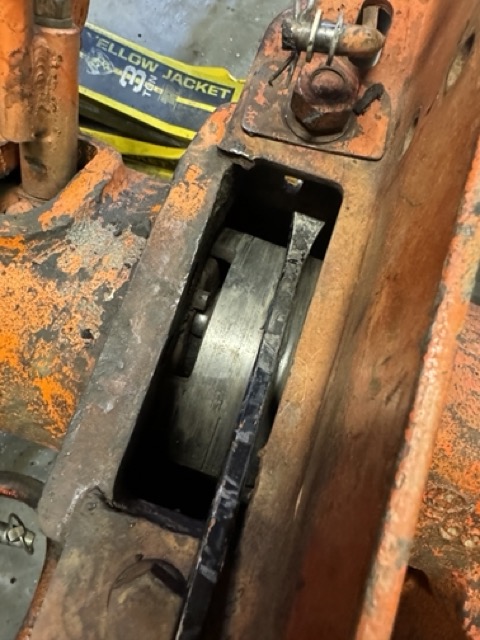 Do appreciate the prior owners who drilled out the middle side of the pins. Was easy to remove after a couple of days of panther piss. However, there was a ton of dirt, oil and etc which made it a challenge to remove the pads due to the space being full of organic material. We prevailed. 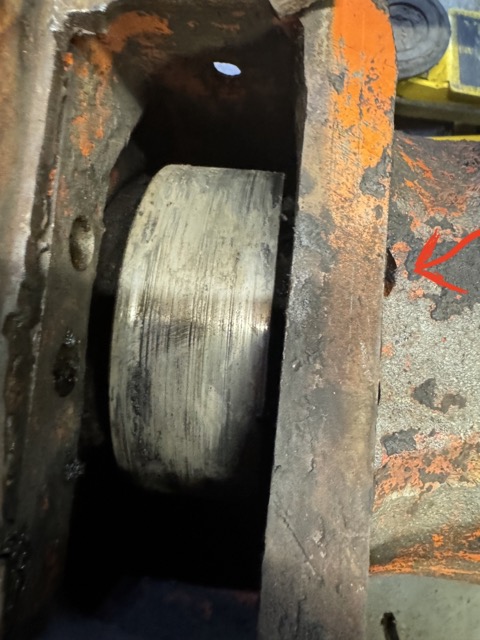 Next is to remove all other sand blast-able parts including the tire rims. ------------- Helping the aged survive and thrive! 1953 CA |
Posted By: CA13414
Date Posted: 06 Apr 2024 at 5:11pm
Stripped down a bit more..... almost as far as we go in that regard. 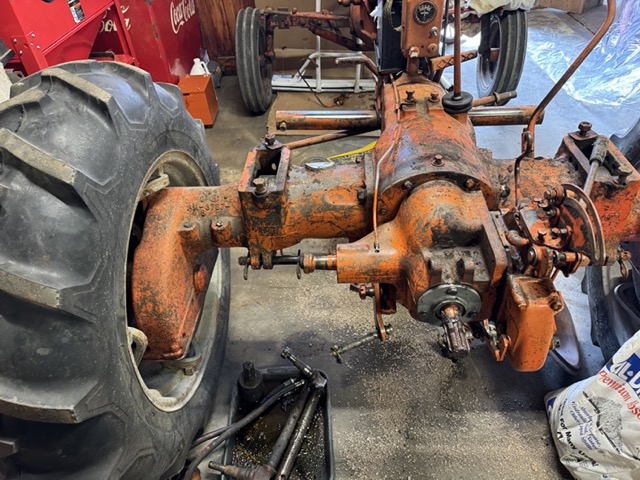 One of the major oil leaks is the hydraulic system. It is coming from the upper side. Not sure exactly what it will be but suspect an "O" ring is bad. 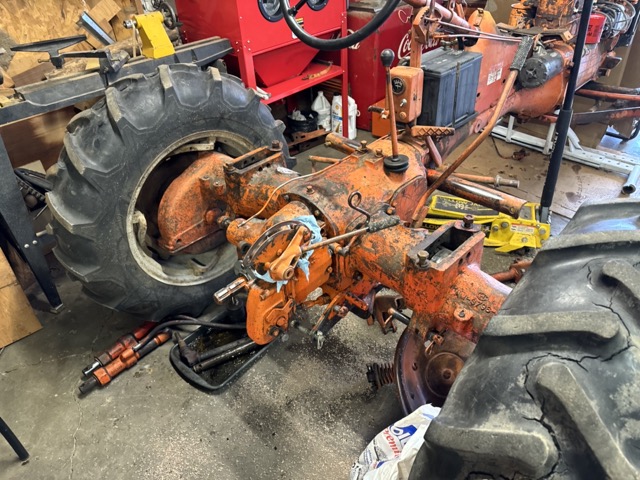 Here are a few of the last parts for sand blasting. 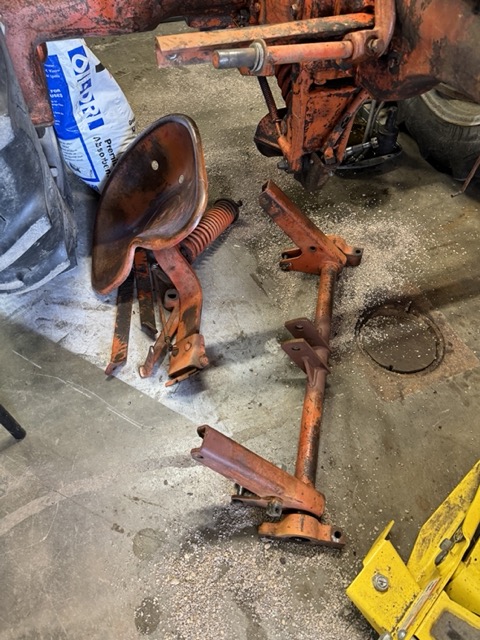 Was a bit of a pain, but removed the spindles out of the front end. Next to remove the old spindle bushings and press the new ones in after cleaning them up. 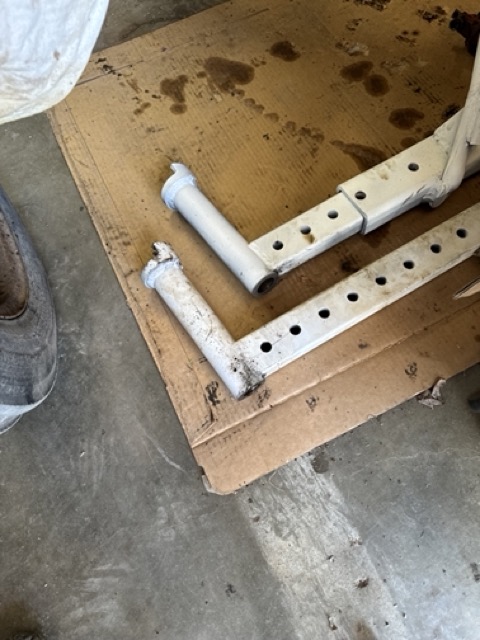 Overall a very productive day. I think we have found all but one oil leak. This is on the left side and leaking between the differential and final drive housing. I suspect it is the inner oil seal for the upper drive shaft which was leaking into the left housing. Here is the brake pad that was buried in dirt and leaves in the housing and soaked with oil.  < id="idg-io-safe-browsing-enabled" ="" oninit="true"> ------------- Helping the aged survive and thrive! 1953 CA |
Posted By: CA13414
Date Posted: 07 Apr 2024 at 6:45am
The last parts to remove for sand blasting are the steering shaft and tool box. Then we will clean the rest with wire brushes and cleaner.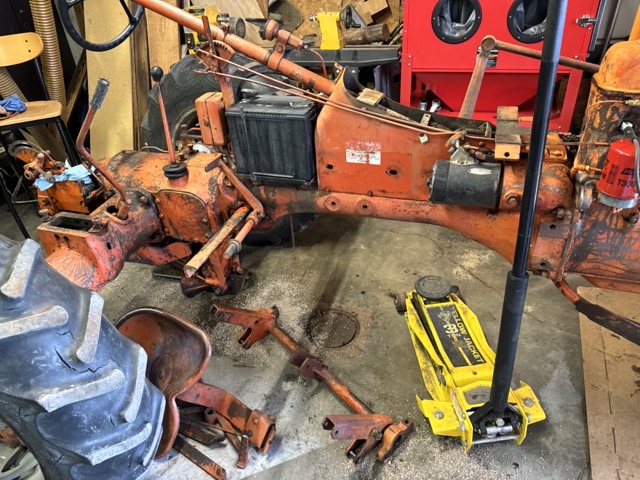 At this point the only other thing we have noticed is a small antifreeze leak from the upper seam of the radiator. Hope it is a quick fix with the MAP torch and solder. ------------- Helping the aged survive and thrive! 1953 CA |
Posted By: CA13414
Date Posted: 09 Apr 2024 at 8:10pm
Removed the battery box, tool box and steering column/shaft. 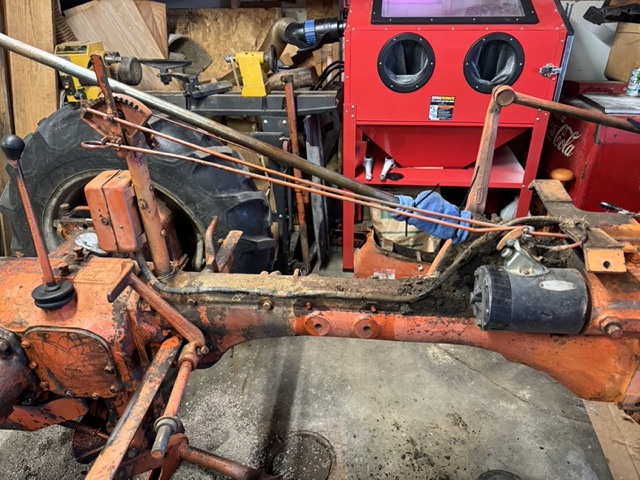 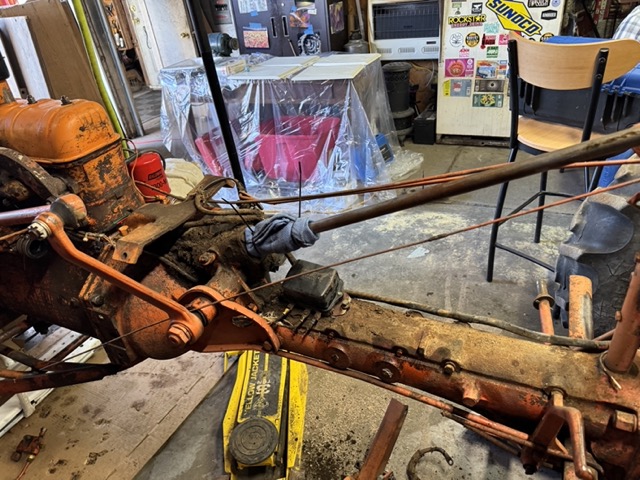 Need to figure out how to tighten up the steering boxes to take out the extra play. ------------- Helping the aged survive and thrive! 1953 CA |
Posted By: dfwallis
Date Posted: 09 Apr 2024 at 8:50pm
|
Steering play adjustment: That would be interesting. Mine seemed to be all related to gear teeth meshing. ------------- 1952 CA13092 |
Posted By: CA13414
Date Posted: 10 Apr 2024 at 5:43am
Indeed, after reading, this is not adjustable. Will make sure there is oil/grease and clean it up. Will see what it looks like after we get the front put together. Overall it is not terrible, thus, maybe will just hold on anything else for the moment. ------------- Helping the aged survive and thrive! 1953 CA |
Posted By: CA13414
Date Posted: 13 Apr 2024 at 5:41pm
|
A few more pictures. Radiator is off, now need to pressurize and find any leaking spots. Hope to fix vs. buy a new one for ~$200. :'| Wiring, generator and starter are now off. We set aside the wiring as a template when reassembling. I have new wire and connectors with heat resistant black wrap. 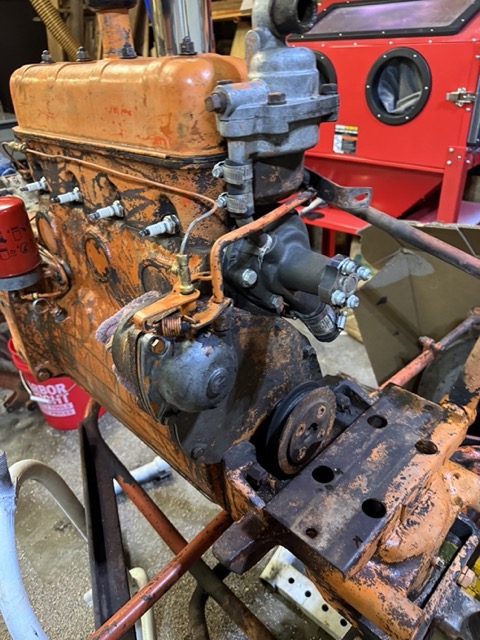 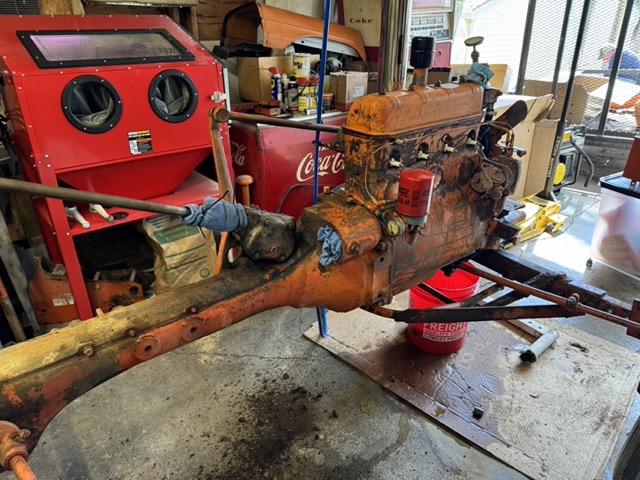 Was able to remove the front spindle bushings and clean up the spindles. Do need to use a bit of emory cloth to finalize before assembly. Did find out the mid steering box is adjustable. An 8th of a turn took out almost all of the slack. Need to check/add oil grease. 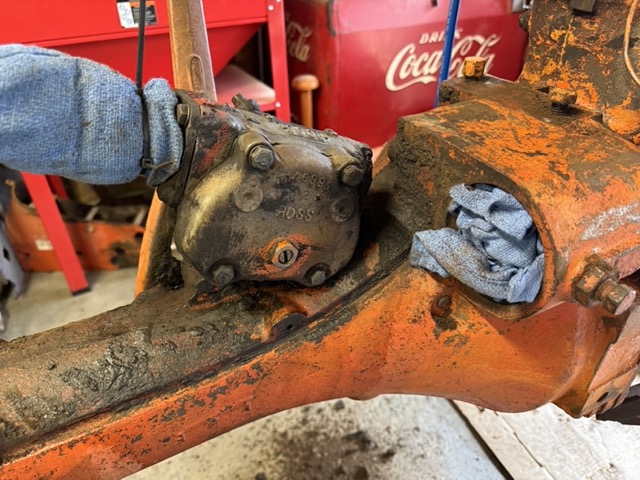 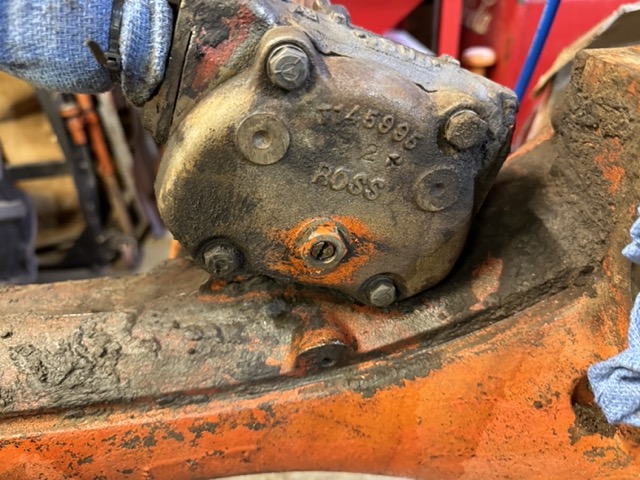 This week we will pick up a new rear tire. One is in good shape the other has many cracks. Realized our center pivot tires on the farm are 11.2"X24" and plan to use one of those tires. I did find many on FaceBook for $50 or more which would also work. Ironically, when I was looking at the other rear tires to see if I should replace it I realized it was also an old pivot irrigation tire! Next steps: Continue clean up!! Press in the new spindle bushings, reassemble the spindles, rebuild/repack the the front wheel hub bearings and with new seals reassemble. Then swap out the front end. ------------- Helping the aged survive and thrive! 1953 CA |
Posted By: Ted J
Date Posted: 14 Apr 2024 at 12:41am
|
You're doing great and the pics help immensely. Keep at it!! They are a real pleasure to work on and an even better one to drive! ------------- "Allis-Express" 19?? WC / 1941 C / 1952 CA / 1956 WD45 / 1957 WD45 / 1958 D-17 |
Posted By: CA13414
Date Posted: 20 Apr 2024 at 10:33pm
|
A bit slower progress this week. Spent the day cleaning. With a putty knife, screwdriver and wire brush, took all the "chunks" off the engine, torque tube and part of the transmission and differential. Cleaned up the air filter and should be ready for a bit of sanding and then paint (planning black). You just gotta love "Brake and Parts Cleaner" for removing the oil and grease as well! Pretty much strips off everything which was awesome. Here is air filter, ready for sanding and then paint.  The engine and torque tube! 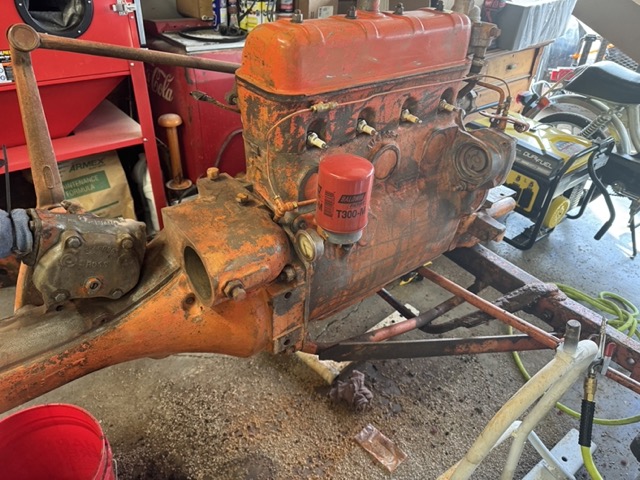 Torque tube and steering box! 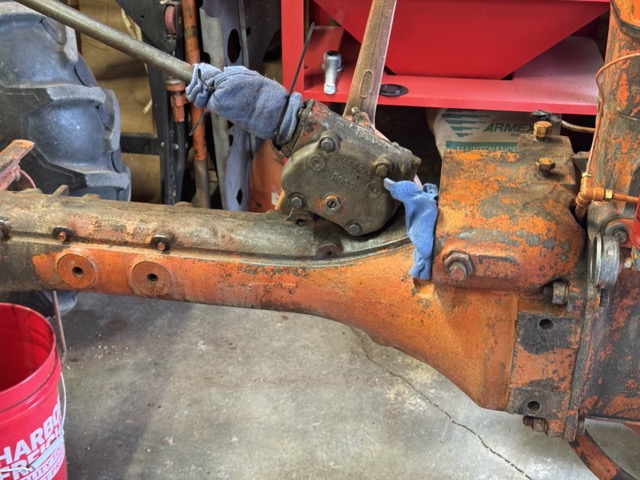 Transmission, differential and PTO/hydraulics!! 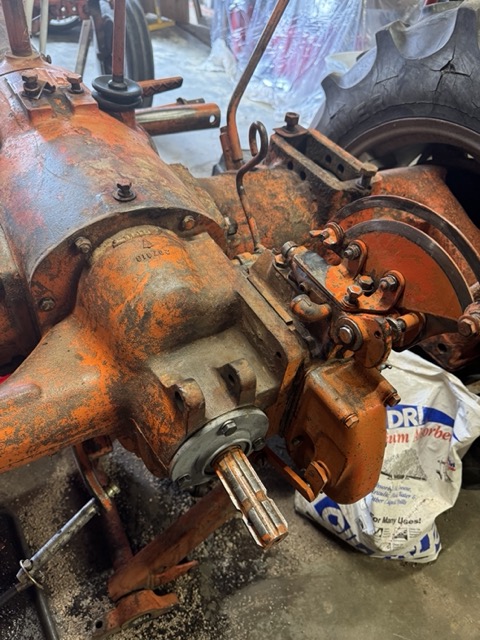 A bit backwards, but before all the above, we spent a few hours cleaning. The results of the day were achieved by the right tools and as previously note...... brake and parts cleaner. Notably the best kick ass tool of the day was..... a cordless Milwaukee Hand grinder. This was awesome to clean up the rest. The Milwaukee drill with a SS wire bur was also a huge thumbs up!!! 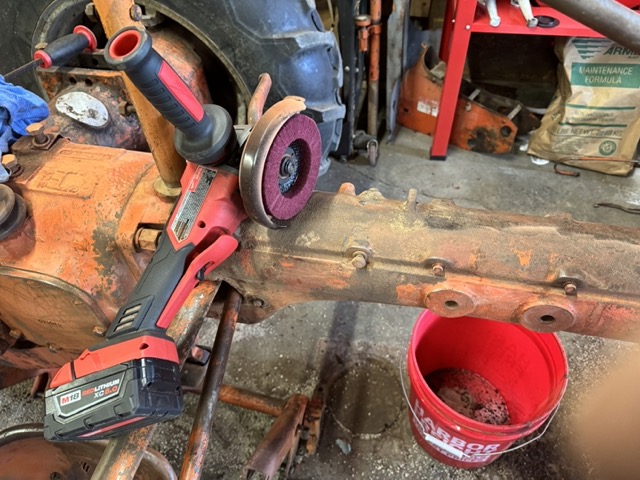 Replaced the gasket on the oil filter mount... which was leaking. 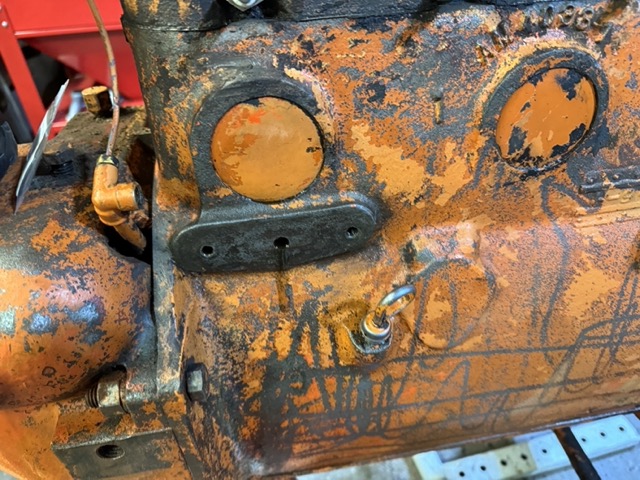 Also took off the radiator support to check out the front steering bearing cone and capscrew. There was oil present and no notable issues. Decided to leave it as is and not dig deeper. Thus, filled it with Lucas Hub Oil and made a new gasket with the ball ping hammer. Will watch and make sure there is no oil leak (if so replace the oil seal). 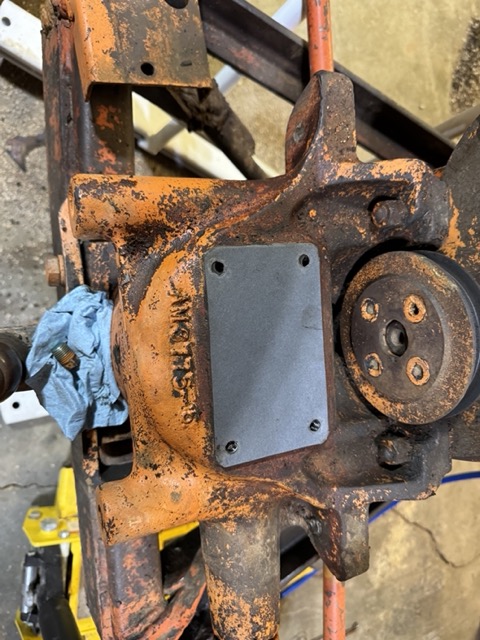 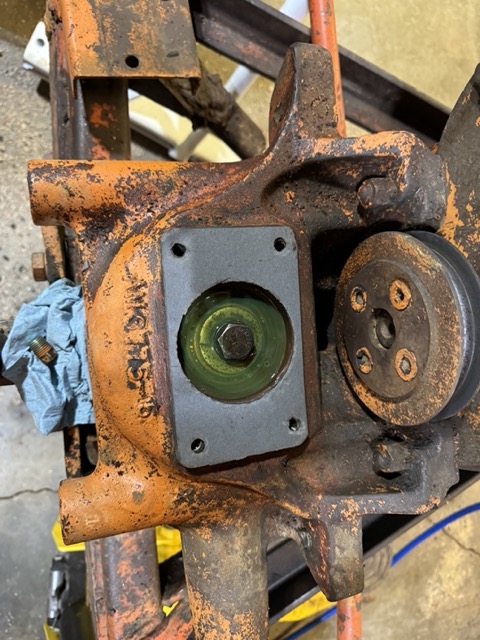 Also filled the steering box with Lucas Hub Oil and will check for leaks. Still need to dig into the hydraulic system and find the suspected bad "O"-ring. Then the inner final drive seal need to be replaced!! ------------- Helping the aged survive and thrive! 1953 CA |
Posted By: CA13414
Date Posted: 20 Apr 2024 at 11:45pm
|
Spent the rest of the day replacing electronic hardware at the house after a lightning strike  . It took out our internet router, network switch, all the TV's, my Hubitat Hub, security cameras, smart switches and a few sound system amps. Thankfully, furnace and appliances are OK. . It took out our internet router, network switch, all the TV's, my Hubitat Hub, security cameras, smart switches and a few sound system amps. Thankfully, furnace and appliances are OK. Thank goodness we didn't have a fire or anything more serious!!! ------------- Helping the aged survive and thrive! 1953 CA |
Posted By: CA13414
Date Posted: 20 Apr 2024 at 11:54pm
|
Paint!! Thoughts on the following..... Planning Persian Orange #1 and black. Black paint: Air filter, front wheel hubs and lug bolts (rims are orange), rear wheel power rims (inner to be orange), steering shaft, gear shifter, hand clutch lever, alternator and starter. Orange: Everything else. Thoughts??? ------------- Helping the aged survive and thrive! 1953 CA |
Posted By: CA13414
Date Posted: 21 Apr 2024 at 12:29am
Also, any insight on this engine block number? Found it when cleaning. Mostly currious!!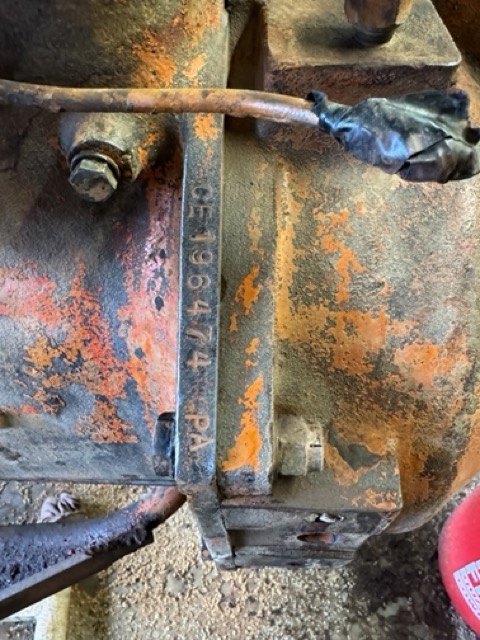 ------------- Helping the aged survive and thrive! 1953 CA |
Posted By: WF owner
Date Posted: 21 Apr 2024 at 6:17am
It's your tractor and you should paint it whatever you want, but there was nothing painted black when it left the factory.
|
Posted By: IBWD MIke
Date Posted: 21 Apr 2024 at 6:18am
|
Keep up the good work, will be a nice one when you're done. |
Posted By: CA13414
Date Posted: 25 Apr 2024 at 7:52pm
|
Ready to remove the front end and clean up everything under the front steering. We pulled a couple of cold rolled angle iron from the iron pile to support the front end while we rebuild and change out the front axil. Didn't take much with the drill press and pilot hole and a 11/16" bit. Bought some 5/8" schedule 8 bolts and put it all together. A piece of C-channel at the base wire welded, to fix the base, just because!!!  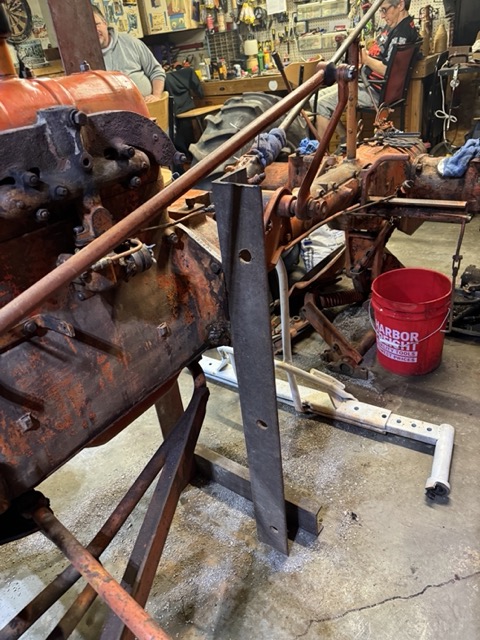 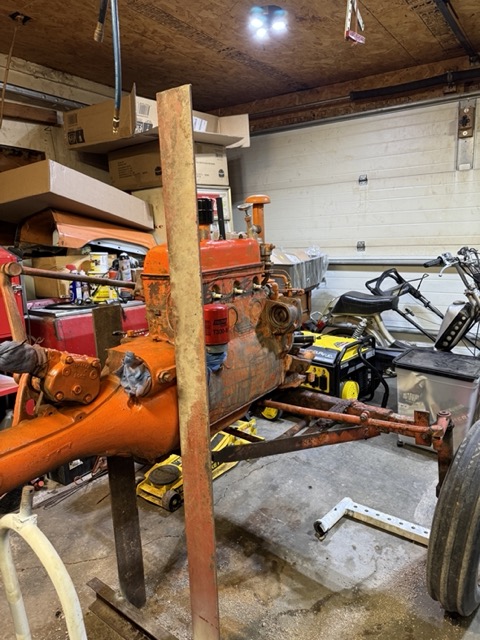 ------------- Helping the aged survive and thrive! 1953 CA |
Posted By: CA13414
Date Posted: 25 Apr 2024 at 8:10pm
|
It has been a sad week. A tribute to "Jax"! Was an awesome English Cream Golden Retriever. He was 82 years old in human years!!!! An amazing family member. Yes, he is chasing rabbits in the field!! 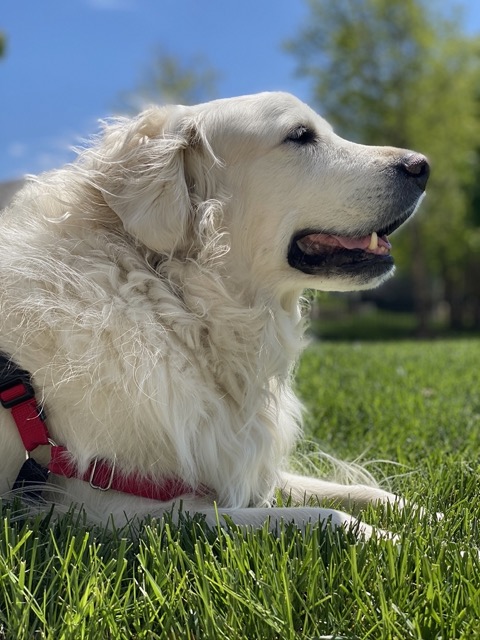  Yep even like the cat and the cat liked him!!! 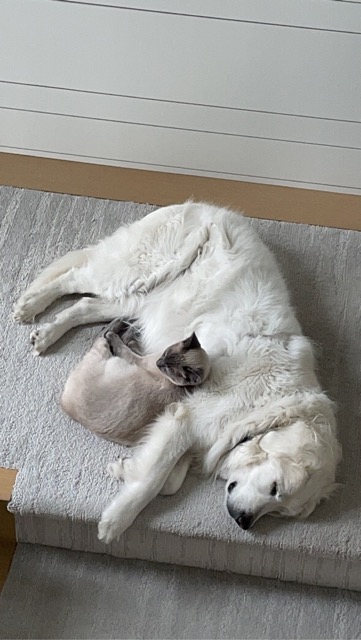 ------------- Helping the aged survive and thrive! 1953 CA |
Posted By: IBWD MIke
Date Posted: 26 Apr 2024 at 8:10am
|
Golden retrievers are just great animals, sorry for your loss. |
Posted By: CA13414
Date Posted: 26 Apr 2024 at 7:16pm
|
Thank you! He was such a great dude. We miss his "ever-presence" or as we always say that he was ....... "under-foot!" ------------- Helping the aged survive and thrive! 1953 CA |
Posted By: steve(ill)
Date Posted: 26 Apr 2024 at 9:59pm
|
Sorry about the pup... You do a good writeup on the overhaul.. Pictures are GREAT... Would make a good BOOK ! ------------- Like them all, but love the "B"s. |
Posted By: CA13414
Date Posted: 26 Apr 2024 at 10:22pm
|
Thank you! It has been fun to "document" the journey. Family and friends are following along. It has been about..... bringing back something that reminds us of our Dad and Grandfather and the family farm which was homesteaded by my Great Grandfather almost 150 years ago. While I will not use the CA as my livelihood like my Dad and Grandfather, I love that it is still used and part of the family. < id="idg-io-safe-browsing-enabled" ="" oninit="true"> ------------- Helping the aged survive and thrive! 1953 CA |
Posted By: CA13414
Date Posted: 26 Apr 2024 at 11:03pm
|
As most of you would guess....... with a farm that has near a 150 year history, we now need to decide what to do with the numerous vehicles and many, many other old long abandoned tractors and implements that have been used over the past 150 years. We have everything from the horse drawn plow which is now the mail box, to modern equipment. It is a constant clean up and my Sis has been awesome!! Still have my 68 Pontiac LeMans I drove in High School (it is not salvageable due to rust). We rebuilt the engine, added a low ratio Muncie transmission and changed to a 4.88 rear end. Was a rocket off the line with 12' slicks!!! Was pretty sly and never really got in trouble..... or caught.!!!! My driving: After the green light, the clutch is not needed!!! ------------- Helping the aged survive and thrive! 1953 CA |
Posted By: Ted J
Date Posted: 27 Apr 2024 at 9:01am
|
Sorry for your loss of your best friend. I still look down so I'm not stepping on ours. On the oil filter mount, take a straight edge and check the mount. A lot of times they are 'warped' because of over tightening the two bolts, causing them to curve. A little flat file on em works good. A family heirloom is a wonderful thing!! Think about how the farm went from horses to where it is now. Things have gotten a lot easier! ------------- "Allis-Express" 19?? WC / 1941 C / 1952 CA / 1956 WD45 / 1957 WD45 / 1958 D-17 |
Posted By: CA13414
Date Posted: 27 Apr 2024 at 3:44pm
|
Thanks Ted, I will check the filter mount with a straight edge. It didn't look bent, but I was probably looking through my bifocals thus, who knows. :') It is really impressive how it changed within 3 generations starting with the horse and manual labor... Today it is still hard work but as you mentioned easier to get things done on a larger scale. Amazing to think that the CA was ~$1,900 in 1958. In contrast:
------------- Helping the aged survive and thrive! 1953 CA |
Posted By: CA13414
Date Posted: 27 Apr 2024 at 4:09pm
|
Of interest I used an inflation calculator and $1,900 in 1958 is worth $20,533.94 today. Thus not too far off for the HP purchased. ------------- Helping the aged survive and thrive! 1953 CA |
Posted By: CA13414
Date Posted: 28 Apr 2024 at 11:42am
Next step in all of this was to find a solid 3-point 6'-blade for maintaining part of our property. Just picked this up this morning after a purchase via MarketPlace. Was a fun 90 mile road trip into greater Nebraska. 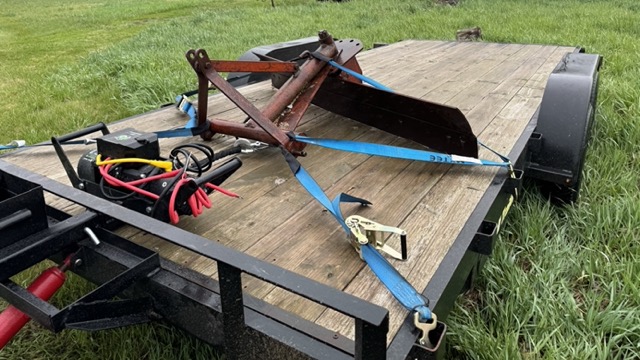 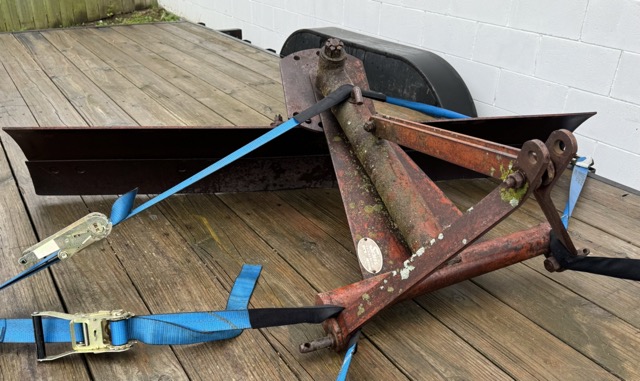 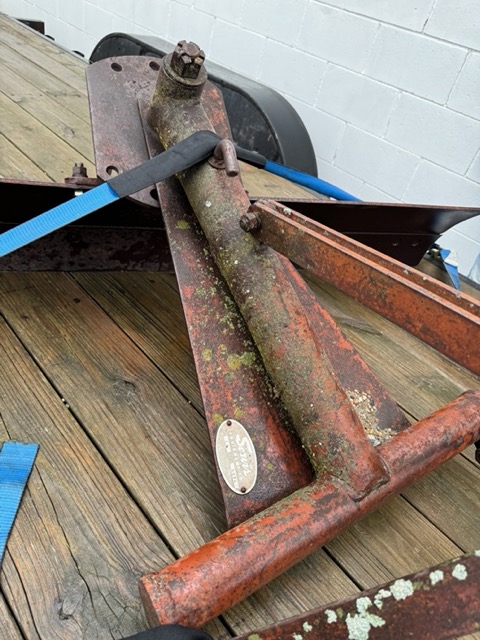 Was a pleasure visiting with the gentlemen selling the blade. Cheers to their spectacular and beautiful country home. Is a historical house that is amazingly maintained. ------------- Helping the aged survive and thrive! 1953 CA |
Posted By: CA13414
Date Posted: 02 May 2024 at 9:55pm
|
Today was able to spend a few hours. We took off the old, bent and welded front end, and put on my GrandPa's/Dad's front end. Here is the old unit (snagged the hubs and wheel bearings which look to be in condition). 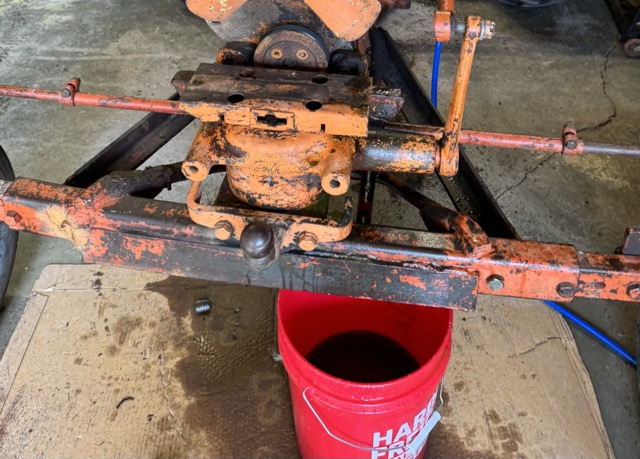 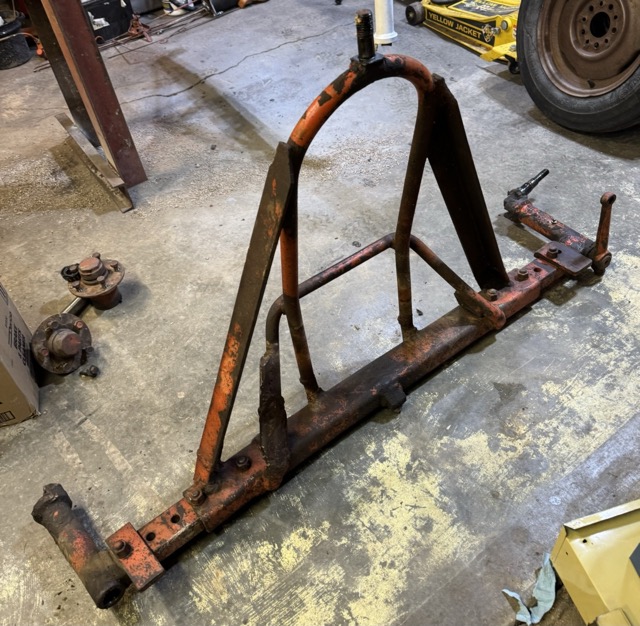 Here is sand blasted and primed front end from my family CA. 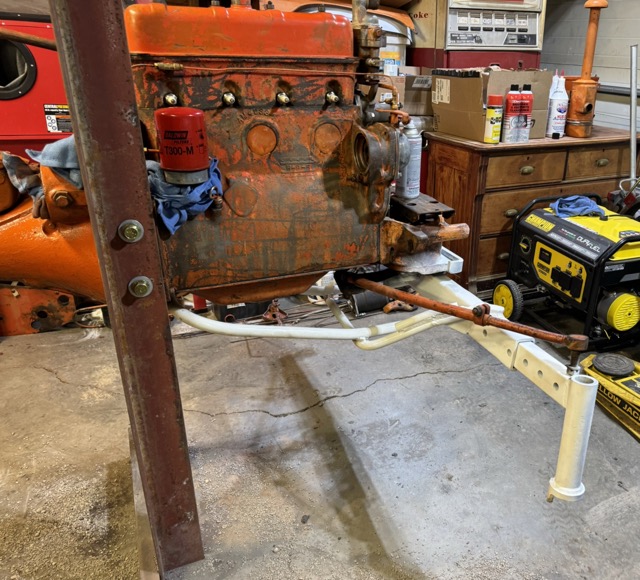 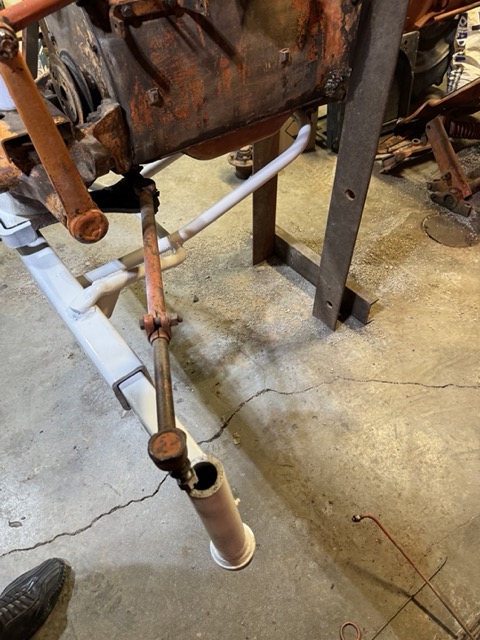 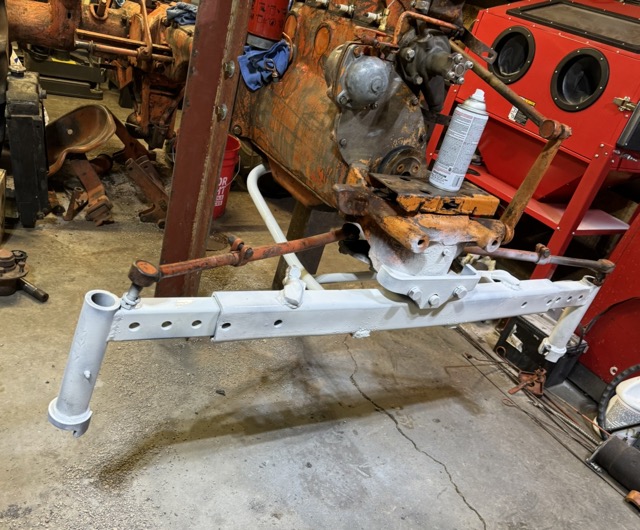 Next will be to put on the spindles and hub after repacking. ------------- Helping the aged survive and thrive! 1953 CA |
Posted By: IBWD MIke
Date Posted: 03 May 2024 at 9:30am
|
Did you change the bushings in the knees? Perfect time to do that. |
Posted By: CA13414
Date Posted: 03 May 2024 at 7:23pm
|
Agree and thank you! I do have new bushings! Planning to put them in this weekend and finish up the front. Will still need to sandblast the front rims with the back rims and mount new tires. Getting closer!! ------------- Helping the aged survive and thrive! 1953 CA |
Posted By: CA13414
Date Posted: 05 May 2024 at 6:44pm
We worked on the front axil bearing and hubs. Cleaned them up. Wire brush, drill with a wire burr, and emory cloth. Then pressed on the front wheel seals. Used the front wheel hub flipped over and with a rubber mallet "pressed" them....... or more appropriately hammered them on! The bearing cones were in good condition thus, we repacked them using a bearing repacking cup, cone and grease gun. WOW the cup and cone was a ton easier and faster than doing it by hand!!! Here it is reassembled with a new cotter pin!! 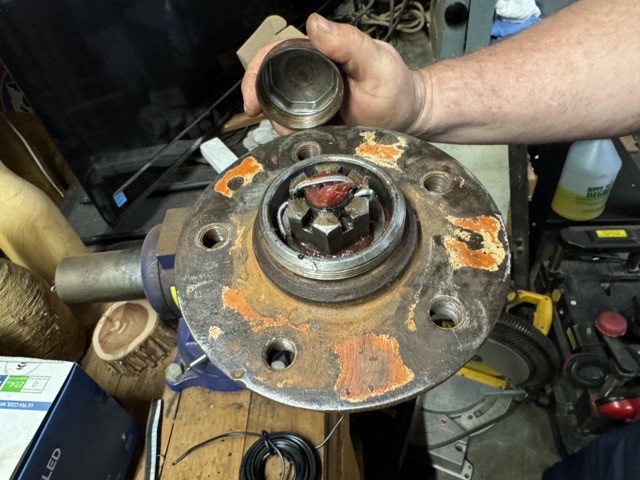 The assembled hubs, ready to put into the front end. 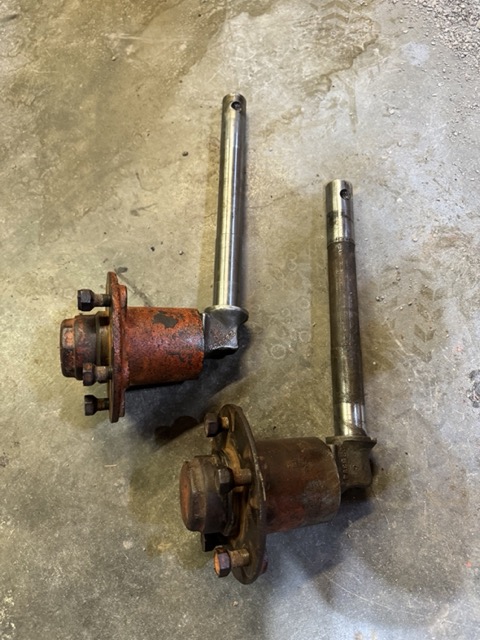 We did have enough time to press in three of the spindle bushings. However, we didn't really press them in (just like the front wheel seals) but used a rubber mallet and a piece of hard wood to set them in the front end spindle. Was a bit of a pain to get the job done without damaging the bushings, but we succeeded. This is where I miss all the tools on the farm. Today I wish I had the hydraulic press!!! Finally, started painting parts that we have stripped and cleaned. This is going to look awesome!! 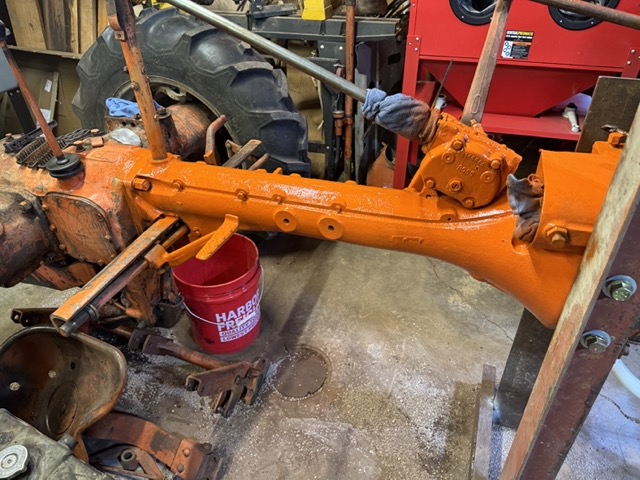 < id="idg-io-safe-browsing-enabled" ="" oninit="true"> ------------- Helping the aged survive and thrive! 1953 CA |
Posted By: IBWD MIke
Date Posted: 06 May 2024 at 7:12am
|
That's progress for sure. I use a 1" piece of all thread to pull those bushings in with, works pretty good.
|
Posted By: CA13414
Date Posted: 06 May 2024 at 8:00am
That is awesome!! Will definitely do that for the last one vs. taking it off the front end. Thank you! ------------- Helping the aged survive and thrive! 1953 CA |
Posted By: IBWD MIke
Date Posted: 07 May 2024 at 9:13am
|
You're welcome. I've changed more of those bushings than it seems like I ever should have had to! If I have a spindle out for whatever reason, new bushings go in. I kind of have a thing about sloppy steering. |
Posted By: CA13414
Date Posted: 07 May 2024 at 8:54pm
|
I could not find a 1" all-thread, but did find a 5/8"! It really worked awesome to set the spindle bushings. The washer did spin a bit and flared the bushing. Nothing that a dill burr and emory cloth won't quickly fix. Awesome job!!! Very much appreciate the suggestion, IBWD Mike!!! 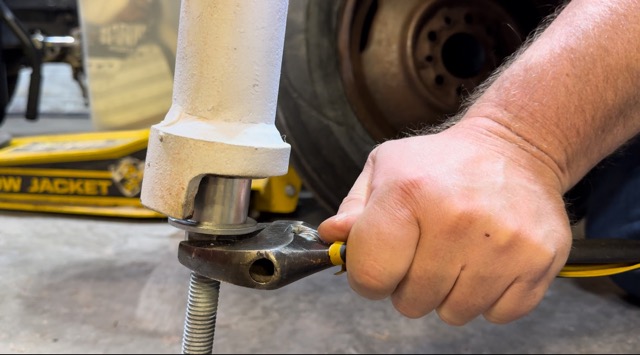 ------------- Helping the aged survive and thrive! 1953 CA |
Posted By: IBWD MIke
Date Posted: 08 May 2024 at 8:36am
|
Glad it worked for you! I think I have used two big flat washers on both ends. 1" are pretty heavy stuff and didn't deform. |
Posted By: CA13414
Date Posted: 11 May 2024 at 5:27pm
Well had Friday off from work and got a ton done. Finished assembling the front end by installing the spindles and attaching the tie rods. Had a few burrs, wear edges and rust on the spindles that had sat for 40 years in the trees. Took them off and finished up with some emory cloth. When installed, were awesome, tight and rotated super easy. Thanks to everyone for their help!! Also the first coat of paint! < id="idg-io-safe-browsing-enabled" ="" oninit="true"> ------------- Helping the aged survive and thrive! 1953 CA |
Posted By: CA13414
Date Posted: 11 May 2024 at 5:37pm
|
Today we spent some time cleaning up other parts. Again love that brake clearner. While I was working on the CA, we also installed new bearings and hubs on the trailer that went out. Primed the engine first. 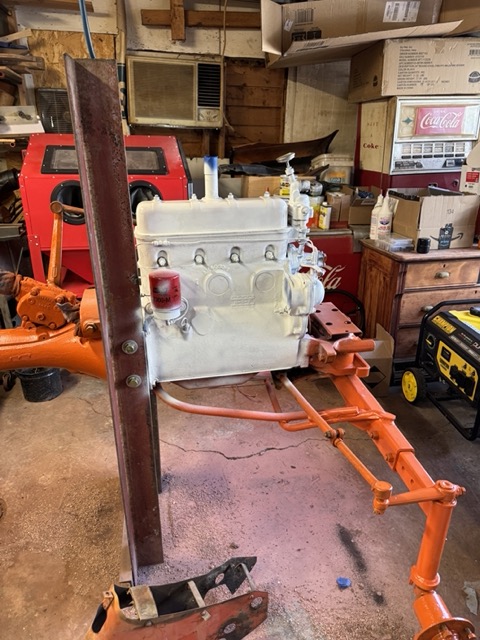 Next is black manifold paint. Ceramic and "resistant" to 2000 degrees. We will see, but I am skeptical!! 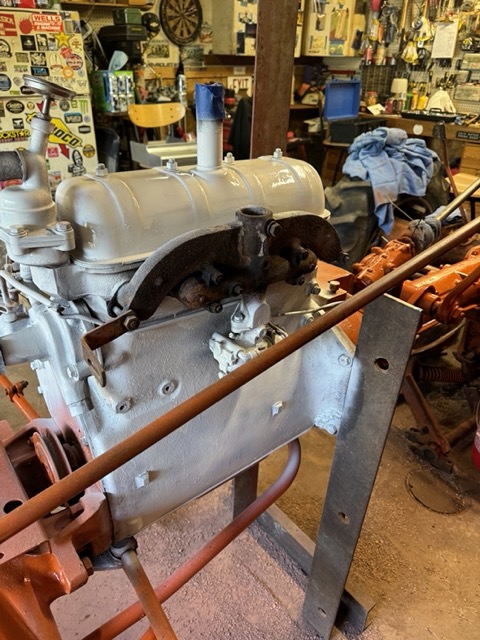 Cleaned up the rims with a wire brush and drill. There were a few bent parts of the rims that we straightened and cleaned up. Then primed them and finally at the end of the day gave them the first coat of gloss black. New tires go on this week. You can also see the air filter that has its first coat of gloss black.  Then after more clean up..... and when the primer was dry, we painted more. It looks awesome!!!  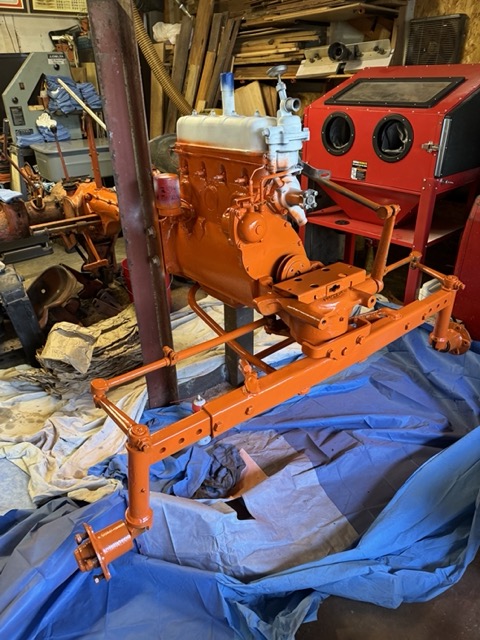 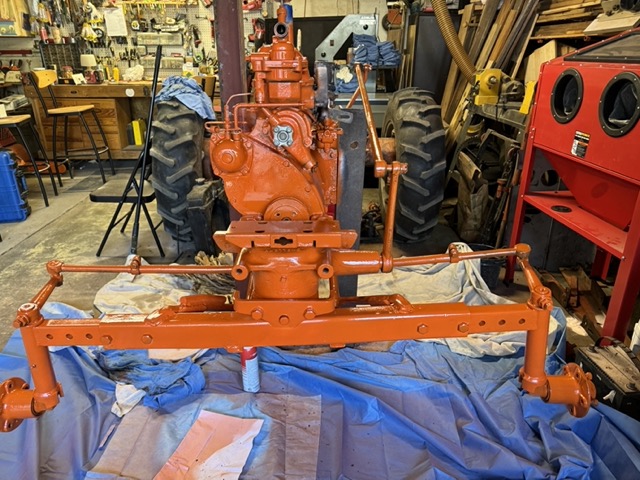 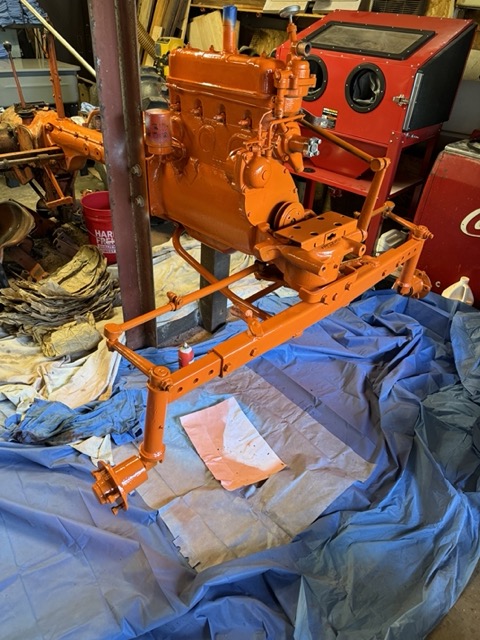 And some miscellaneous pieces painted and to be painted. 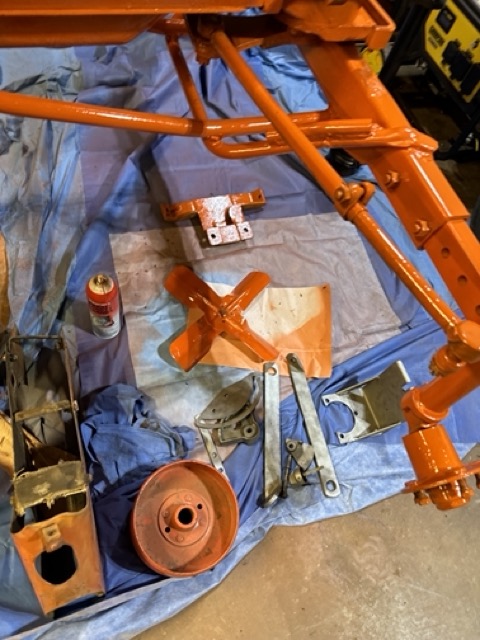 < id="idg-io-safe-browsing-enabled" ="" oninit="true"> ------------- Helping the aged survive and thrive! 1953 CA |
Posted By: CA13414
Date Posted: 11 May 2024 at 7:52pm
As an aside, the Northern Lights were spectacular here in Nebraska early this AM. We were up at 0200 this morning and took these pictures.  ------------- Helping the aged survive and thrive! 1953 CA |
Posted By: CA13414
Date Posted: 12 May 2024 at 2:56pm
|
As a general rule, we are straightening everything but not making it perfect to show the years. We plan to finish the fenders, tank, engine cover and radiator cover/grill as a professional finish with a clear coat. Today, we straightened out the "tool box", took off the old hinge to the tool box cover and ground down the prior spot welds. Then wire welded the new cover on and ground down the wire weld. Plan the new battery box this week with new tires on the front rims. Did find a battery that will fit in the battery box. Ended up being a DieHard, which I thought was fitting!Also cut a hole for an hour meter just because...... I am curious how much we run the CA in its new life! After sliding it over the steering shaft and onto the torque tube we did have to use a tap to clean out the threads. 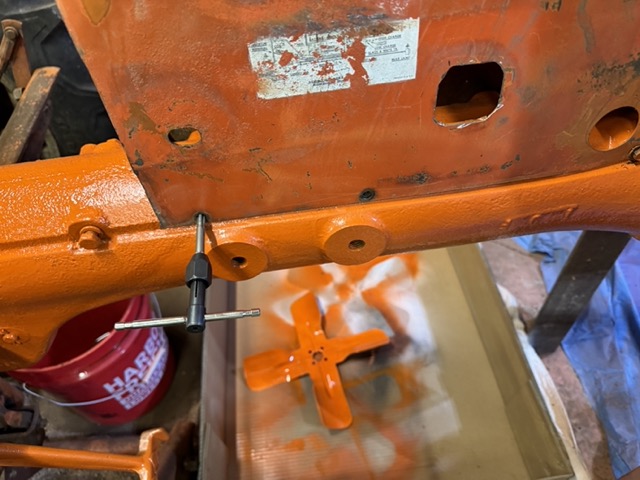 Then hit it with a coat of paint.  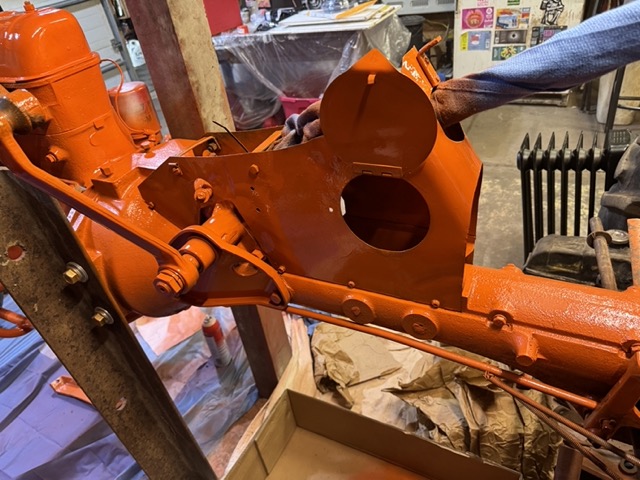 Then hit the tire center with paint. The outer rim will be black, then the middle orange and the wheel hub and hub bolts black. My bother masked this off and put on the first coat. His idea.... I think it will look awesome. 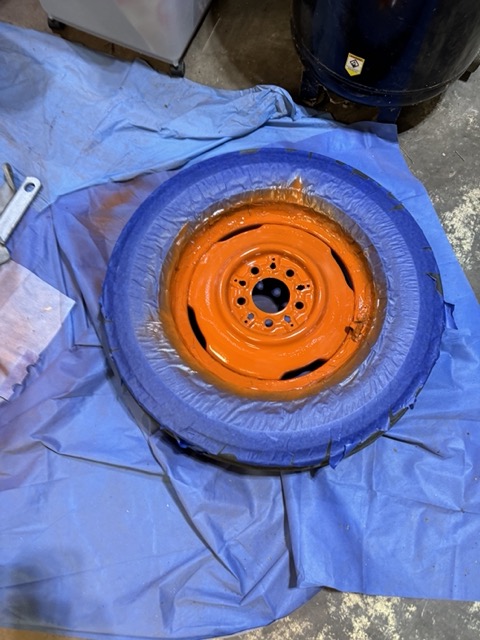 Finally bought a Delco-Remy 63 amp alternator. Partly straightened the old generator bracket..... need some heat to finish. Then chop saw some iron and weld the support for the alternator mount on the underside, and finally drill new mounting holes. Next time on the farm need to snag an alternator off one of the old cars so I can get the core charge refunded! < id="idg-io-safe-browsing-enabled" ="" oninit="true"> ------------- Helping the aged survive and thrive! 1953 CA |
Posted By: IBWD MIke
Date Posted: 13 May 2024 at 5:19am
|
It's coming right along. |
Posted By: CA13414
Date Posted: 13 May 2024 at 6:02pm
My brother has been painting....... ready for the new tire!! Excited to see how it looks with the black hub!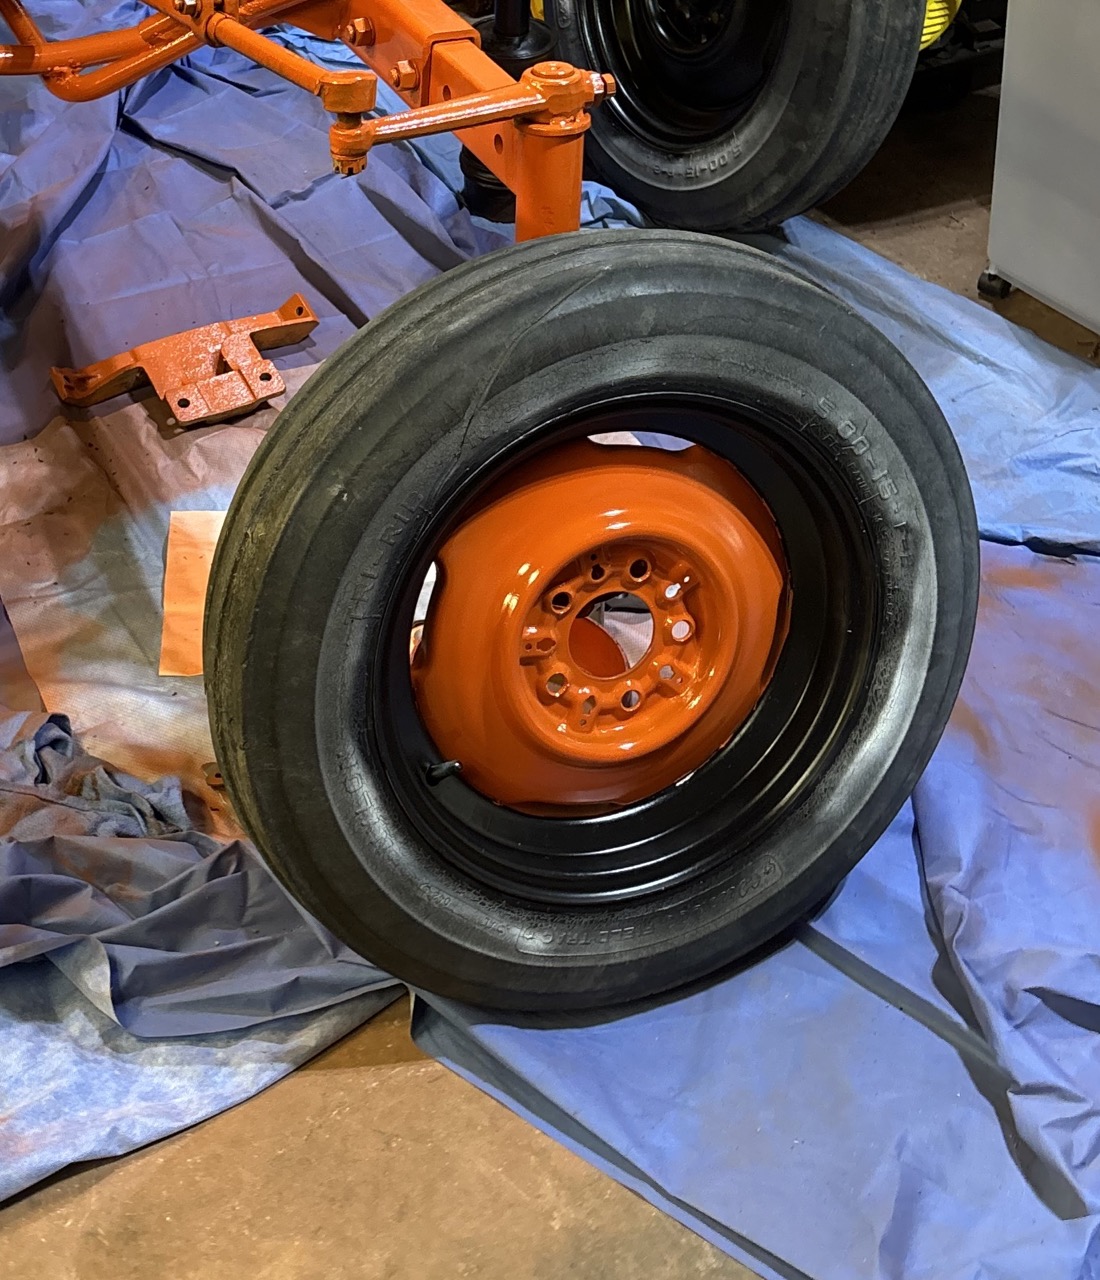 < id="idg-io-safe-browsing-enabled" ="" oninit="true"> ------------- Helping the aged survive and thrive! 1953 CA |
Posted By: CA13414
Date Posted: 14 May 2024 at 7:36pm
Attached the battery box tonight. Also painted the first coat of black on the front wheel hubs.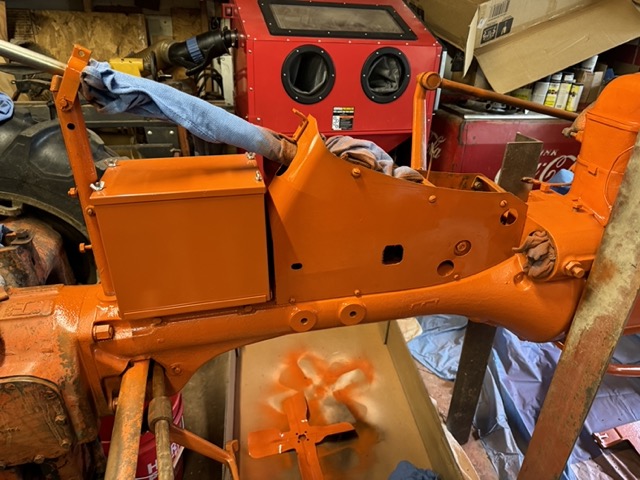  ------------- Helping the aged survive and thrive! 1953 CA |
Posted By: CA13414
Date Posted: 17 May 2024 at 6:03pm
|
Yes, I was planning to fix the radiator myself, but realized the leak was from one of the inner rows and the top of the radiator, thus realized not as simple as hoped. After getting an estimate for fixing the leak, $$$, decided to buy a new one for $179. Here is a three row aluminum that fits perfectly...... Just need to make sure the hood and grill fit without issue!! 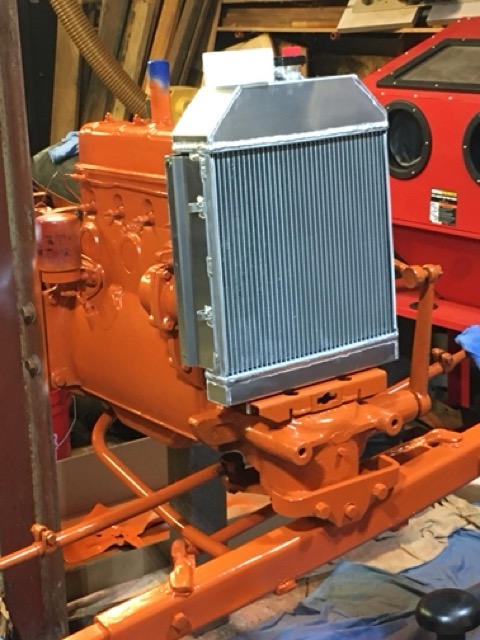 < id="idg-io-safe-browsing-enabled" ="" oninit="true"> ------------- Helping the aged survive and thrive! 1953 CA |
Posted By: CA13414
Date Posted: 19 May 2024 at 10:45pm
|
Was a busy weekend with the fam...... but did spend a few hours with my father-in-law cleaning parts and spraying them with primer! Was great to spend the time together rebuilding a bit of history!! Sorry not a lot of pictures, but some to show progress Here we cleaned the lower radiator pipe with the drill and wire brush. Excited to connect them to the new radiator. After cleaning with a wire brush, we primed them!! 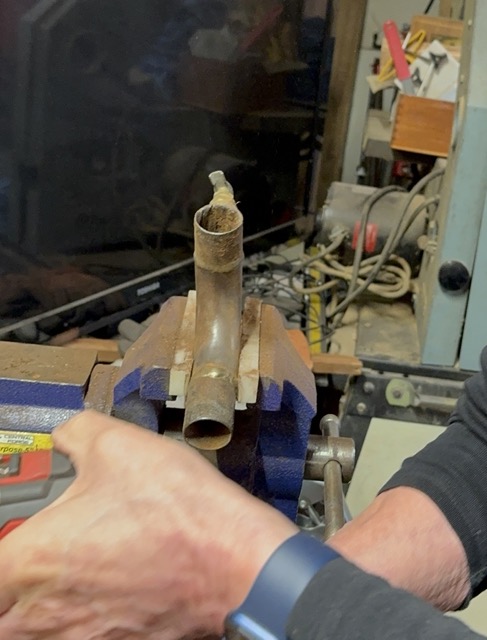  Also cleaned up a number of small items and primed them including the stearing tube and PTO guard.. more pictures later to show these items..... 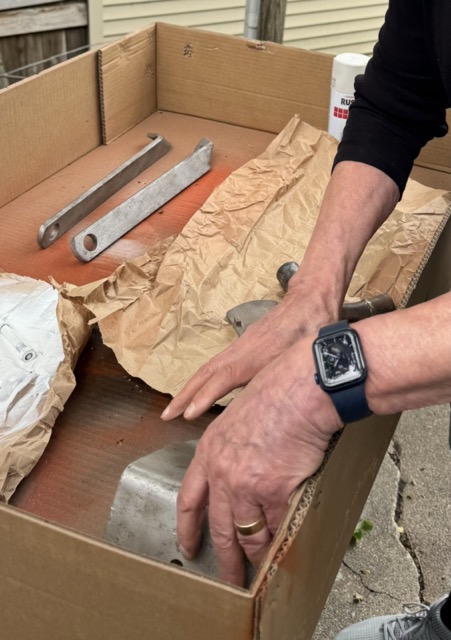 ------------- Helping the aged survive and thrive! 1953 CA |
Posted By: CA13414
Date Posted: 21 May 2024 at 8:22pm
|
Spent part of the day putting things together and painting a few items. Seems like it was a day to work on the parts that we want to paint black! Here is the fan installed with the fan pulley painted black. Also you can see the manifold that we painted black with 2,000 degree ceramic paint. Always a bit skeptical of heat resistant paint and if it really is heat resistant..... we will see. 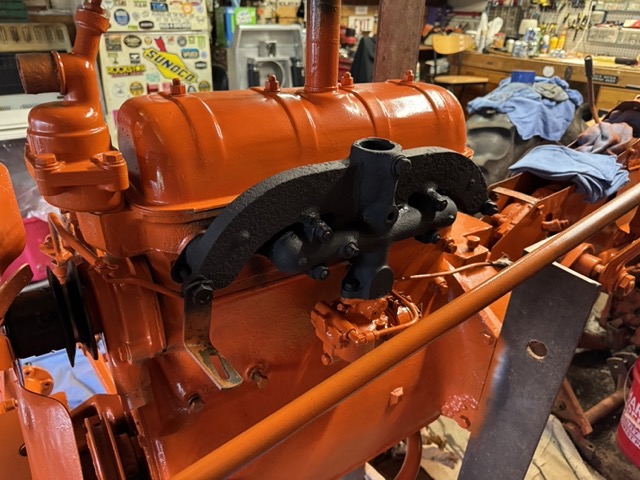 Another view of the manifold and assembled fan and pulley. Excited to install the new aluminum radiator this weekend. 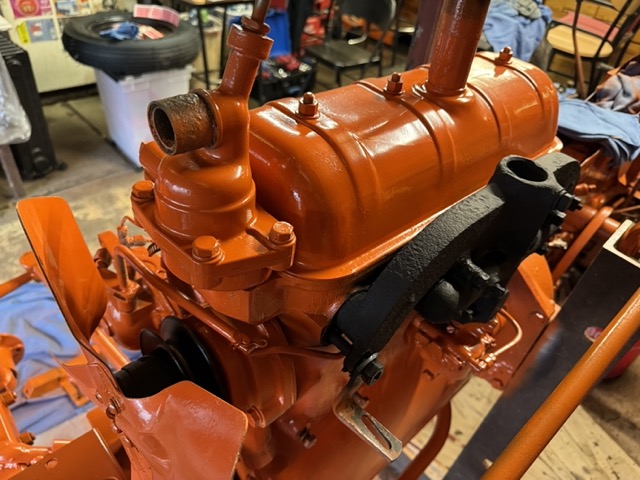 Final touch up of the air filter. Plan to install this Friday when the new air cleaner hose arrives. 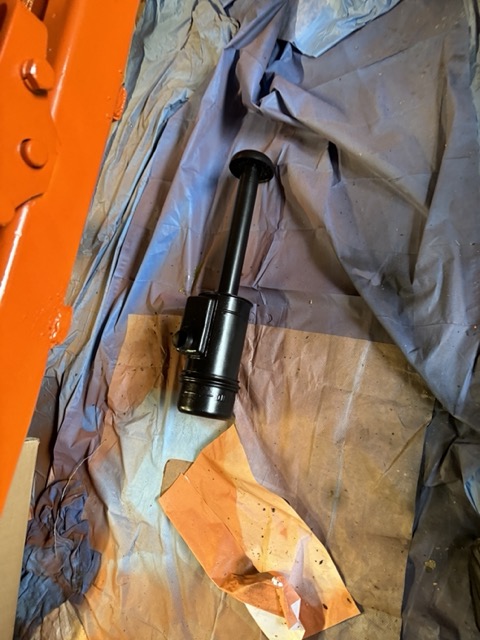 Painted the gear shift black.. Next is to paint the clutch handle black. 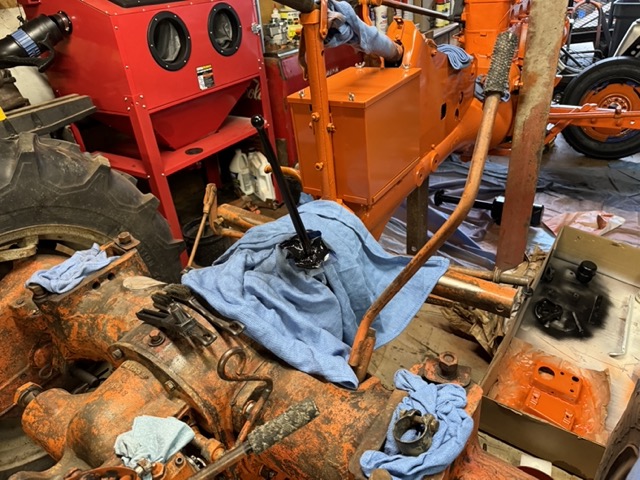 ... and the steering tube black as well! It will need a bit of sanding and a final coat before we re-install the steering tube and steering wheel.  Final coat of paint to the front wheel hubs. 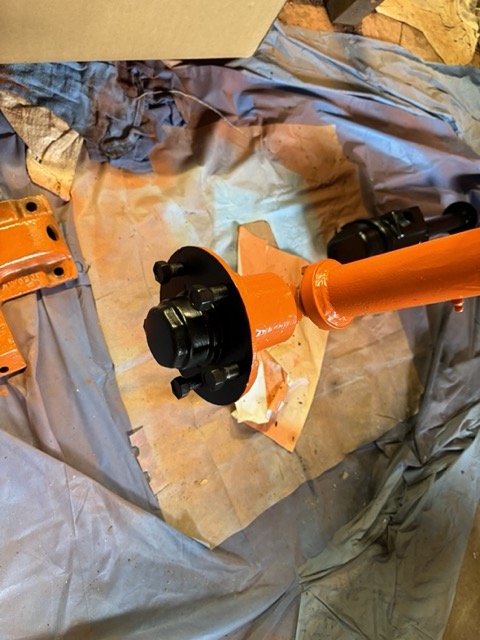 Just need the final touches on the front wheels and tires and then install. More to come on that..... 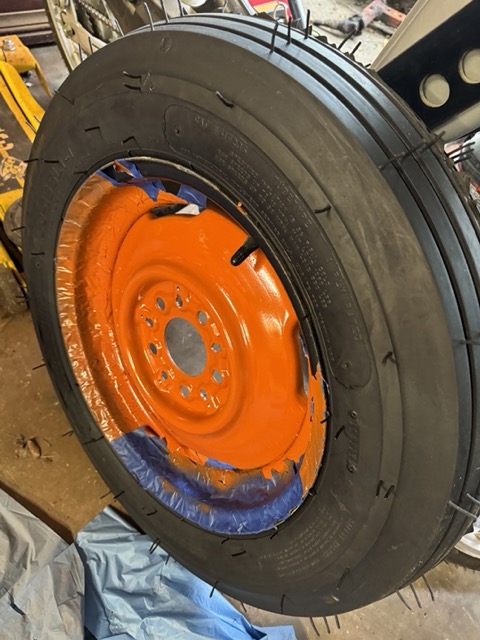 Finally a few random parts we painted! 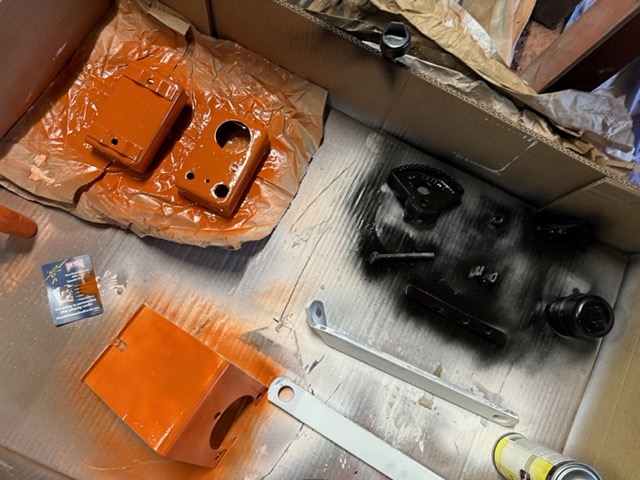 Next is the alternator when it arrives and then the wiring. Just remembered I want to paint the starter black and need to re-install the magneto. < id="idg-io-safe-browsing-enabled" ="" oninit="true"> ------------- Helping the aged survive and thrive! 1953 CA |
Posted By: CA13414
Date Posted: 21 May 2024 at 8:43pm
|
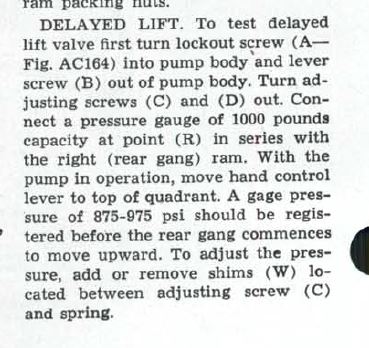
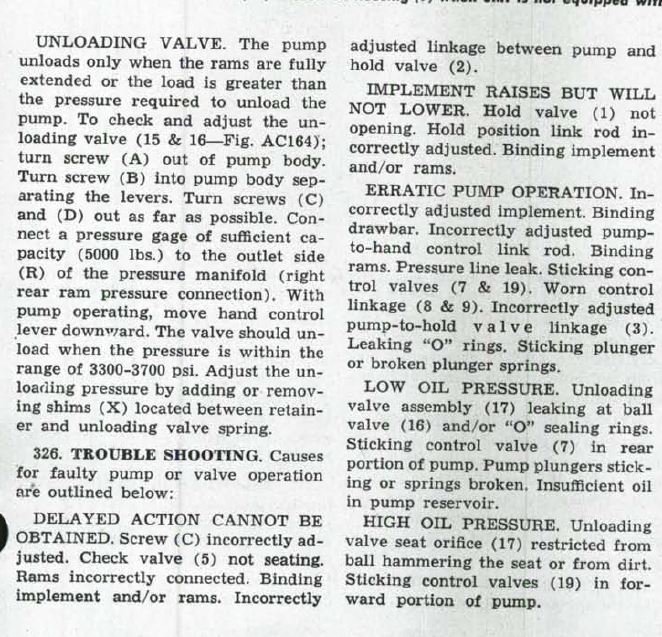
Started to break down the hydraulic and quickly realized where the leaks were coming from. First there was no gasket between the upper controller lever and the pump at the arrow below. No doubt this was leaking when the hydraulics were under pressure with a load on the cylinders. Thus, I cleaned up both surfaces which had pieces of old gasket and made a new gasket with a ball-ping hammer. 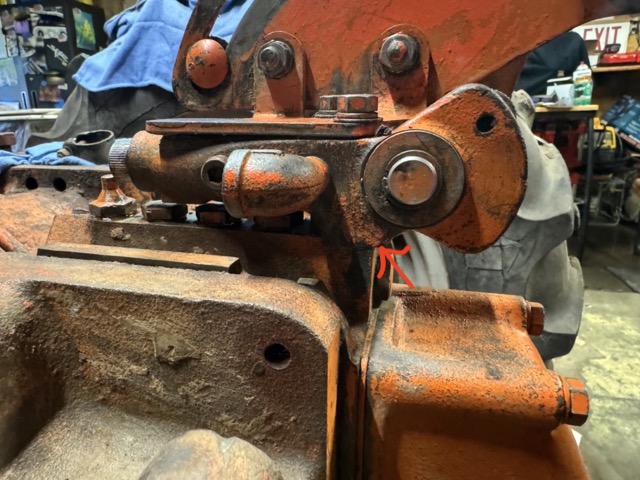 Hahaha, in looking at these pictures above, I see yet more 70 year old hard dirt/grime/grease on the differential..... just more to clean before we paint!! Another area there is a leak... what is referred to as "screw C" in the service manual (red arrow). 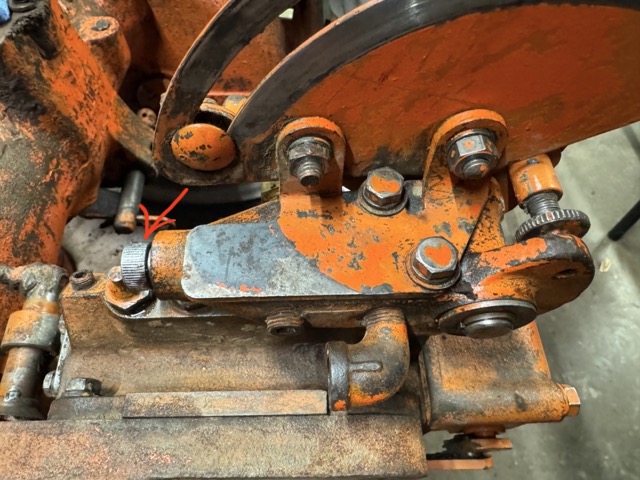 Not sure what that is at this point, but when removed you can see the "O"-ring is hard as a rock and flat. Will need to find one that will replace this "O"-ring (see red arrow below). Anyone with insight on what "Screw C" does would be awesome? 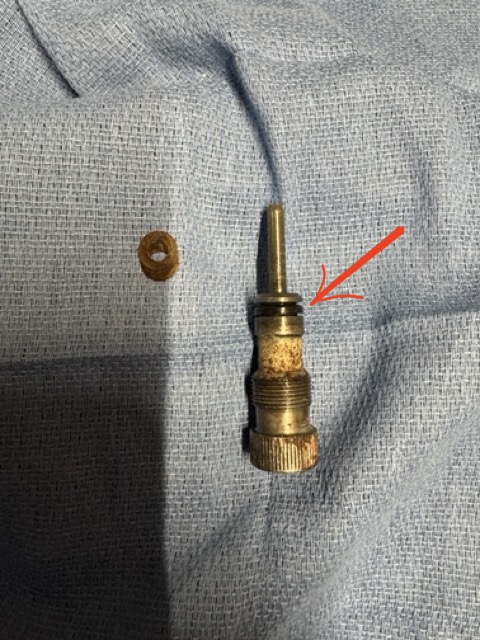 I have "O"-rings and hopefully something will fit and take care of the leak.  ------------- Helping the aged survive and thrive! 1953 CA |
Posted By: IBWD MIke
Date Posted: 22 May 2024 at 10:11am
|
As to the high heat paint; I've used grill paint some, think it's supposed to be good to 1400 degrees. It does hold up better than regular paint but still burns off manifolds. Recently picked up a can of VHT header paint, haven't tried it yet. Says good to 2000 degrees and has a good reputation, we'll see. You're doing a great job on this and documenting it well. Keep up the good work!
|
Posted By: WF owner
Date Posted: 22 May 2024 at 8:06pm
| When I was a kid, riding on the fender of Dad's WD45, I have seen him (many times) get off and light a cigarette off the exhaust manifold. I expect the CA manifold reached similar temperatures. I doubt that any paint is going to hold up to those temperatures, very long. |
Posted By: CA13414
Date Posted: 22 May 2024 at 9:11pm
Thank you! It has been fun for us to hang and work on this. We often joke to our better-halves that we are off to "hammer on the tractor" or we are "tractoring" today!! ------------- Helping the aged survive and thrive! 1953 CA |
Posted By: CA13414
Date Posted: 22 May 2024 at 9:15pm
I would agree, maybe this "Ceramic Black" will actually hold a color. Ceramic does appear to work on the space-shuttle...... so maybe we can light a cigarette and not burn off the black paint. I hope to get it running again soon once I rewire and connect everything. I'm thinking I try lighting one up!! ------------- Helping the aged survive and thrive! 1953 CA |
Posted By: steve(ill)
Date Posted: 22 May 2024 at 10:07pm
 ------------- Like them all, but love the "B"s. |
Posted By: CA13414
Date Posted: 22 May 2024 at 10:28pm
Thank you Steve. That make sense now reading that. What manual is that you posted. Need to get buy that for reference!! ------------- Helping the aged survive and thrive! 1953 CA |
Posted By: CA13414
Date Posted: 22 May 2024 at 10:43pm
|
So I am ready to rewire everything and I do have 10, 12 and 14 gauge heat resistant wire that I have planned to use to do the rewire. We will have a new single wire alternator and front lights with the single rear light. Want to have the "Key" turn every thing on and the toggle switch with two positions control the engine and alternator. When the toggle switch is grounded we kill the magneto and remove power from the alternator. When the toggle switch is on, the alternator is powered (only when the key is on) and the magneto is "hot" and we can start the CA. That way I can run the lights when the key is on weather or not the toggle switch is on or off. Thoughts?? 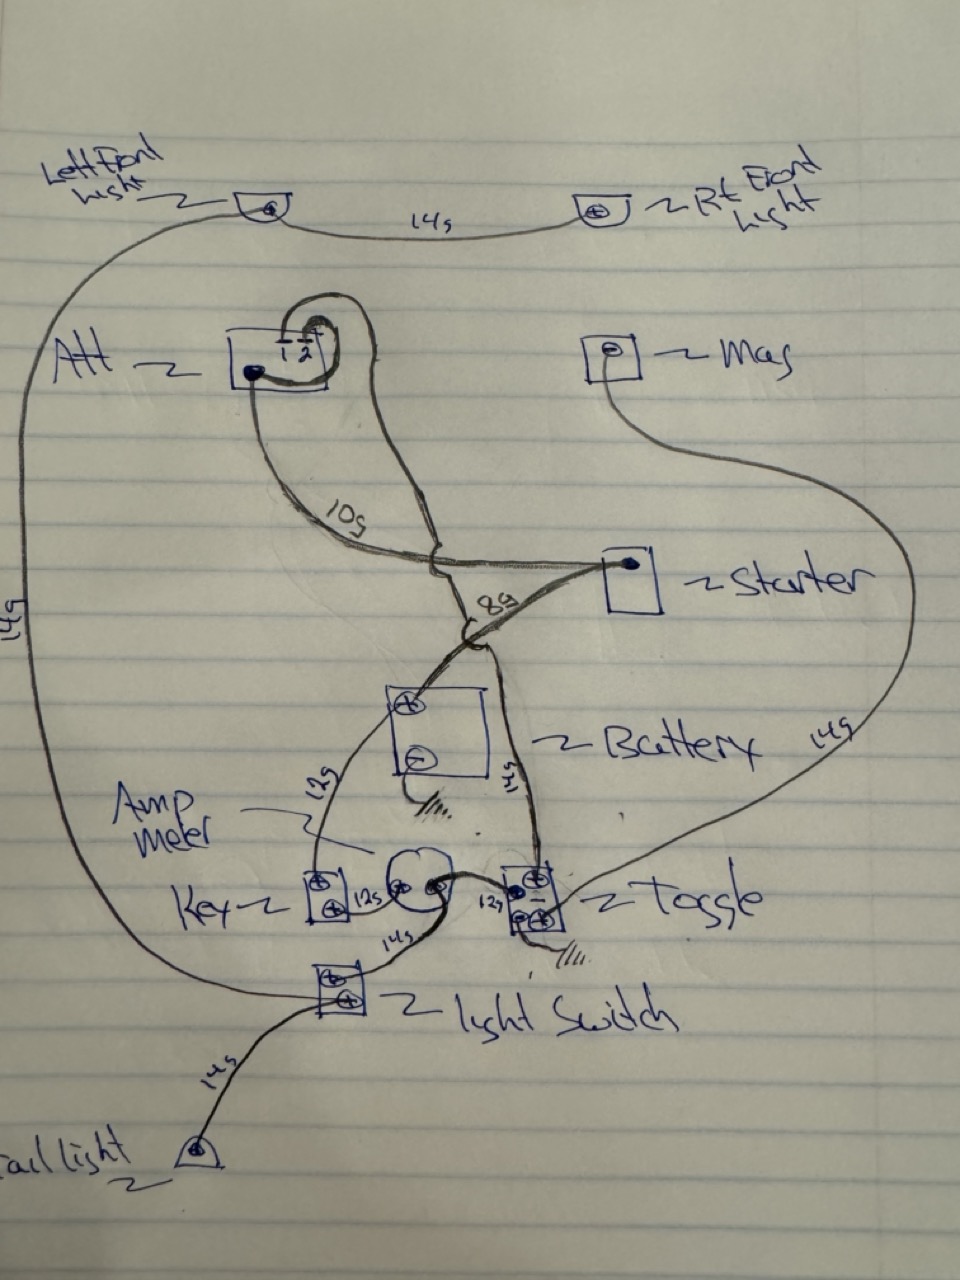 < id="idg-io-safe-browsing-enabled" ="" oninit="true"> ------------- Helping the aged survive and thrive! 1953 CA |
Posted By: CA13414
Date Posted: 23 May 2024 at 10:09pm
|
A bit more today. Installed the alternator, radiator and the air filter. With the alternator, had to modify the bracket and drill a hole for the "adjustable" part of the alternator. Other wise was a simple install. Awesome job on the bracket from DJ's since it fit perfectly in the tight space. Much more efficient that making my own. The radiator with the rubber pads and after connecting all the the hoses and radiator tube. 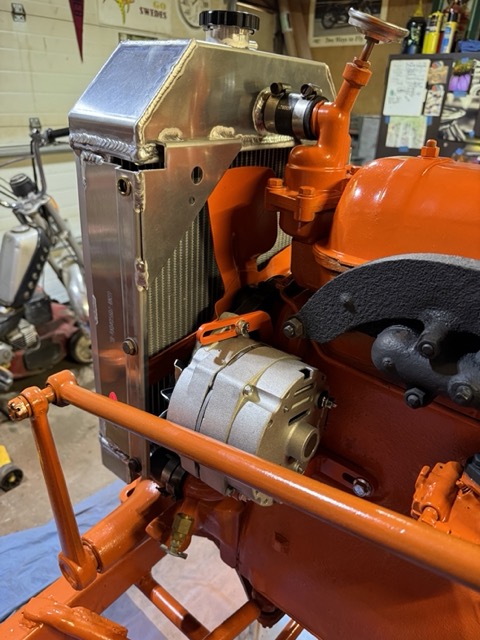 Radiator tube/drain looks awesome. 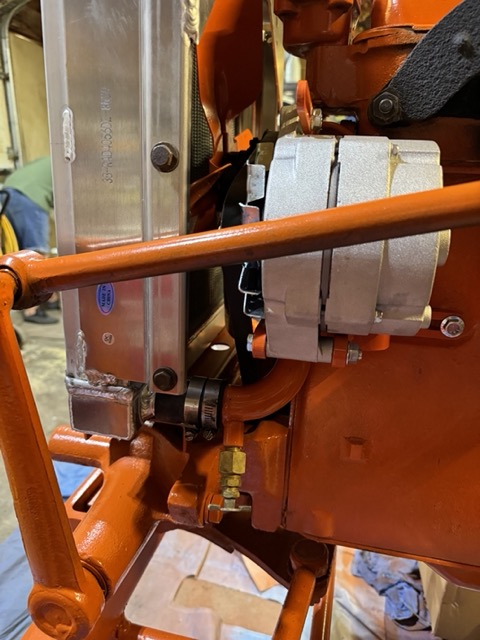 Here is the radiator and a side shot of the alternator and air filter installed. 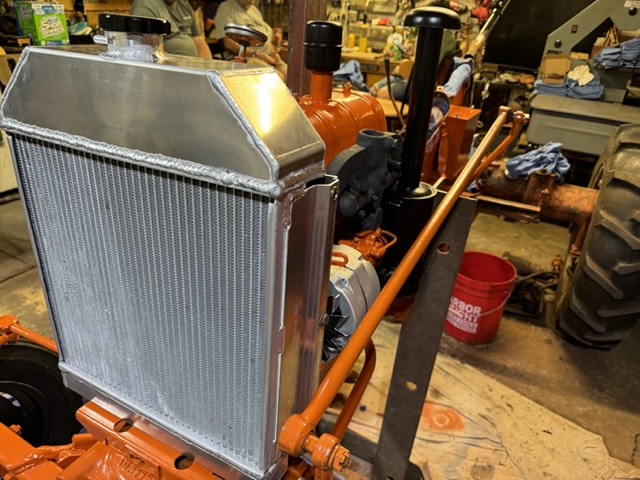 Air filter and connected to the carb. 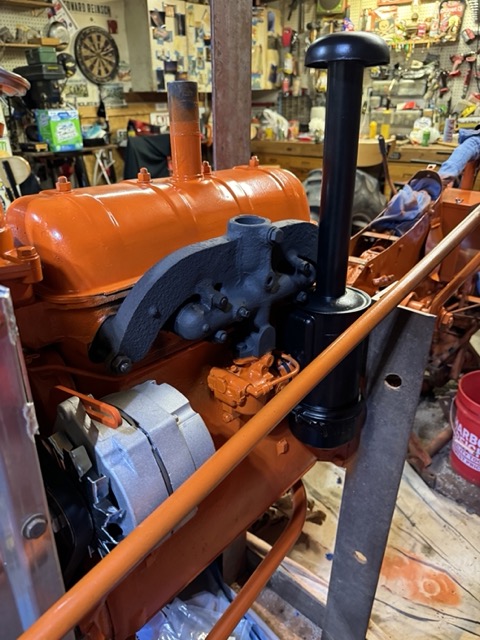 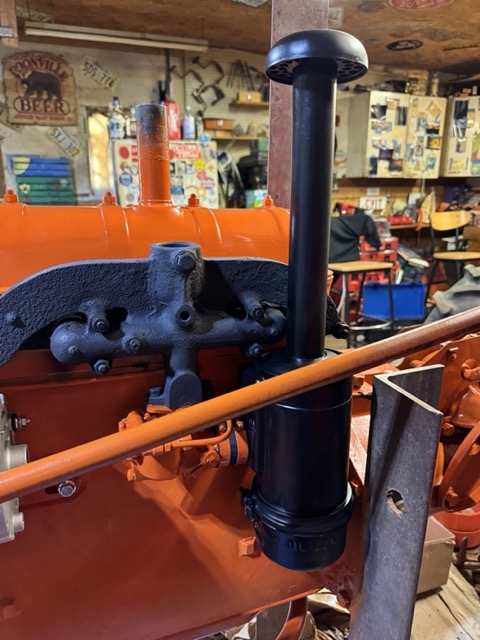 Finally bolted on the right tire. Once the left tire is done with paint, will bolt that in place then remove the angle iron supports we have been using for working on the front end. 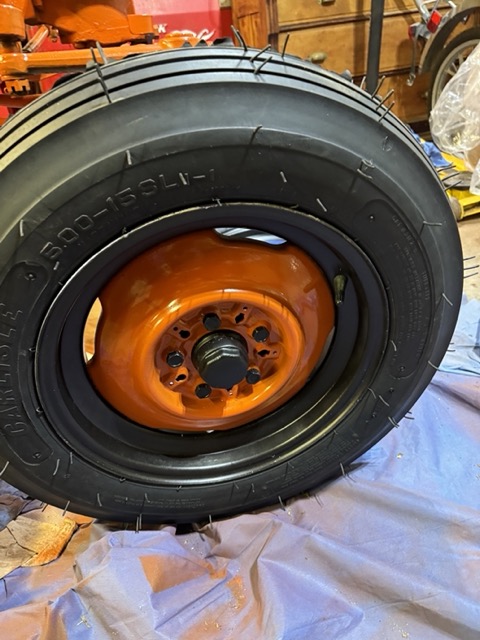 Next is the wiring, fuel tank then final drive seals. ------------- Helping the aged survive and thrive! 1953 CA |
Posted By: IBWD MIke
Date Posted: 24 May 2024 at 10:16am
|
You keep making progress, that always feels good! Stupid weather around here, can't string two days together to work on anything. I may change my CA-1 over to 12v and alternator. Had the generator rebuilt some years back but it periodically quits charging. I can never remember how to 'flash' the stupid thing and getting tired of having to run a battery charger. CA-2 is 12v and alternator but not wired correctly so it doesn't charge right either. Doesn't help that I'm electrically challenged!
|
Posted By: CA13414
Date Posted: 25 May 2024 at 7:10pm
|
Was a good day with the CA. First decided to change the electrical. Mostly to use a volt meter vs. amp meter and that my toggle switch is only three poles and my Ohm meter shows that it can not switch off the power and with the same toggle motion ground out the magneto. Definitely do not want to power the grounding stud of the magneto, or poof!!! Will use the key to power everything (light switch, the terminal 1 of the alternator, hour meter, and volt meter). The light switch to lights, and then wires to the volt meter and hour meter. The toggle switch will simply ground out the magneto. Thus a bit simpler. As well adding fuses (30 amp for the alternator and 10 amp for the key). 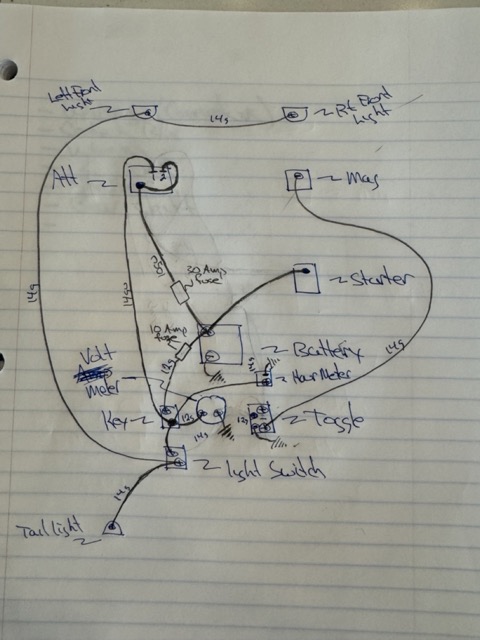 ------------- Helping the aged survive and thrive! 1953 CA |
Posted By: steve(ill)
Date Posted: 25 May 2024 at 7:22pm
|
this is the I&T ALLIS SHOP MANUAL for the G thru the WD45 tractors...Book number AC-11. i have a PDF file, but its 23 MB BIG... If you can handle that, send me a PM with your e- mail... I will be gone sunday am for several days.
 ------------- Like them all, but love the "B"s. |
Posted By: CA13414
Date Posted: 25 May 2024 at 7:37pm
Cleaned up the starter with the wire brush and taped off the starter for black paint. Did take off the paint on "pot metal" end, just to give some color variations.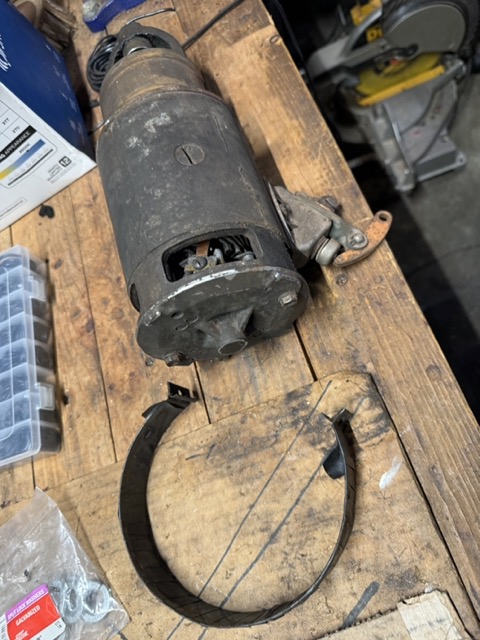 And cleaning with the drill which worked awesome!! 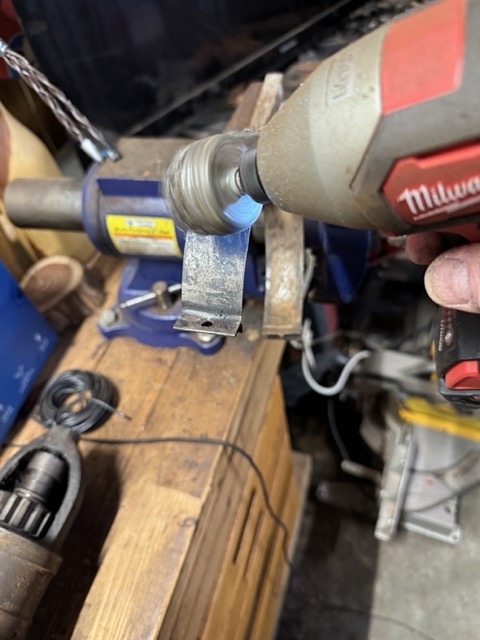 ------------- Helping the aged survive and thrive! 1953 CA |
Posted By: steve(ill)
Date Posted: 25 May 2024 at 7:41pm
|
I use a single throw, double pole switch on the B tractors... Two positions... on is ground the wire from the mag... the other is power (excitation) to the alternator / dash... Then i have a push button for power to the solenoid to start. ------------- Like them all, but love the "B"s. |
Posted By: CA13414
Date Posted: 25 May 2024 at 7:54pm
Next paint and installing the starter.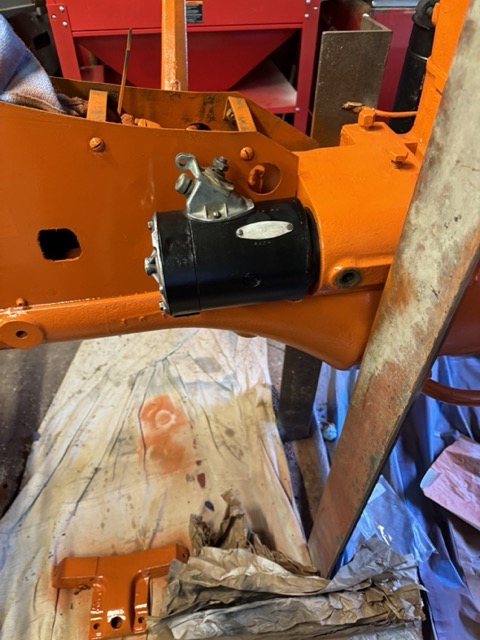 With the starter arm painted orange. Here is the "pot metal" after removing the old black paint. 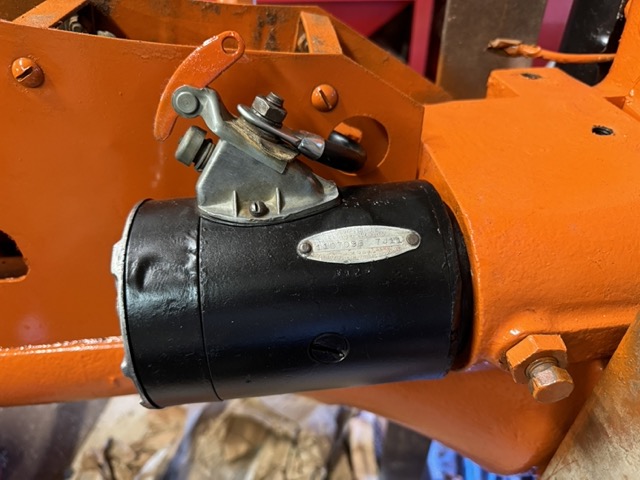 ------------- Helping the aged survive and thrive! 1953 CA |
Posted By: CA13414
Date Posted: 25 May 2024 at 7:58pm
|
I do like both those ideas. Do you have the toggle and push button? < id="idg-io-safe-browsing-enabled" ="" oninit="true"> ------------- Helping the aged survive and thrive! 1953 CA |
Posted By: CA13414
Date Posted: 25 May 2024 at 8:03pm
Was excited to put on the left tire. First a bit of touch up after the tire was mounted and the rims scratched. Used the deck of cards trick (cheers to my bro for this trick) to prevent painting the tire. As well, ironically, and not intentional, did deal myself a hand that wasn't too bad!!! Honestly, this is how put them down.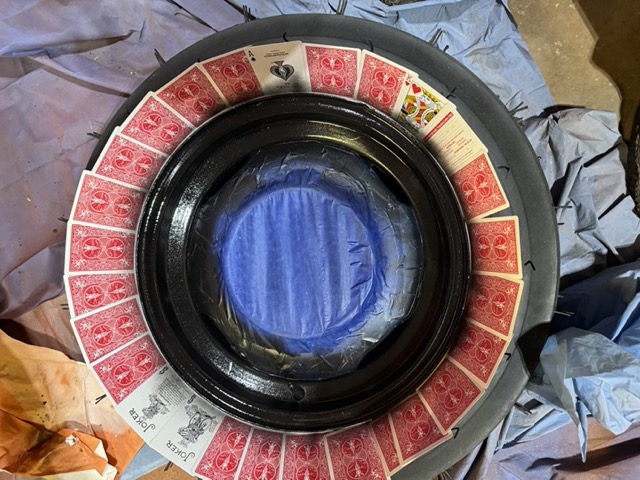 ------------- Helping the aged survive and thrive! 1953 CA |
Posted By: CA13414
Date Posted: 25 May 2024 at 8:06pm
The best part of bolting on the left tire was to remove the angle iron supports and touch up the areas with paint. Love how it looks with everything coming together.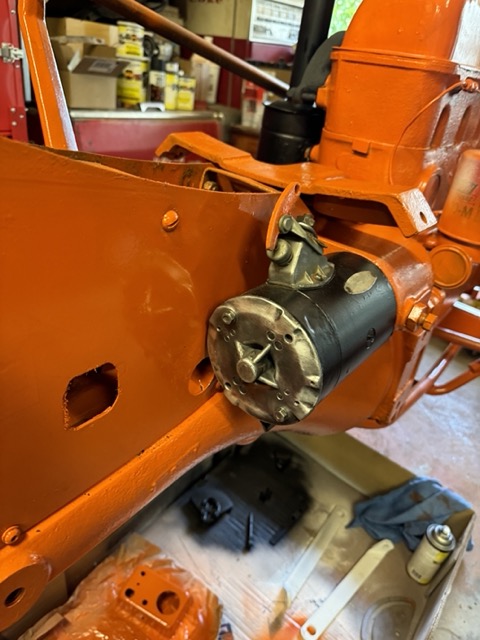 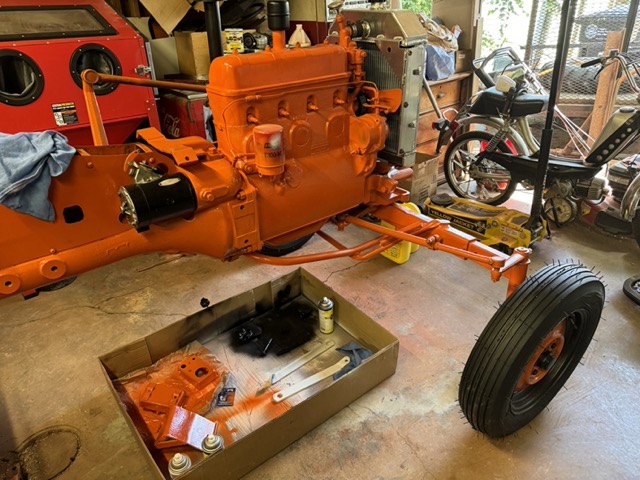 ------------- Helping the aged survive and thrive! 1953 CA |
Posted By: steve(ill)
Date Posted: 25 May 2024 at 8:16pm
I guess the switch i used is a double pole / double throw switch.. no center off.. ON- ON.. one side is power to the alternator/ dash ... the other is ground for the mag.. something like this............ Alli have is a light switch, this "power" switch and the start button.. no key.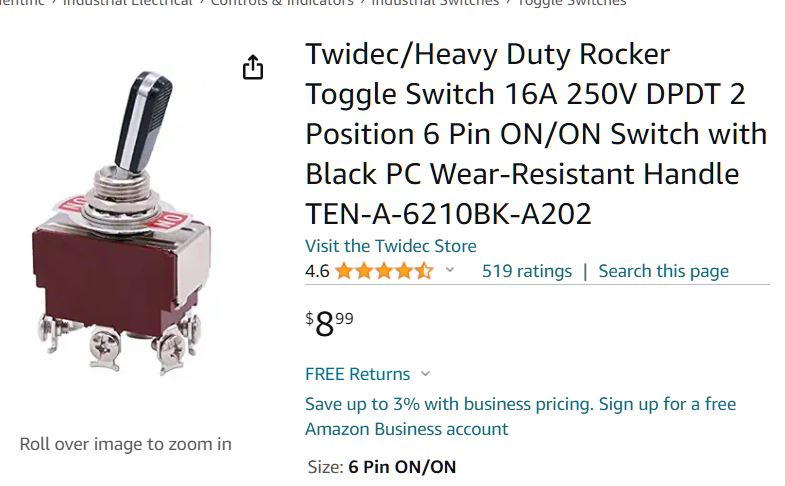  ------------- Like them all, but love the "B"s. |
Posted By: steve(ill)
Date Posted: 25 May 2024 at 8:28pm
swith works something like this.. center and lower terminal on left when down.. center and upper terminal on right when up..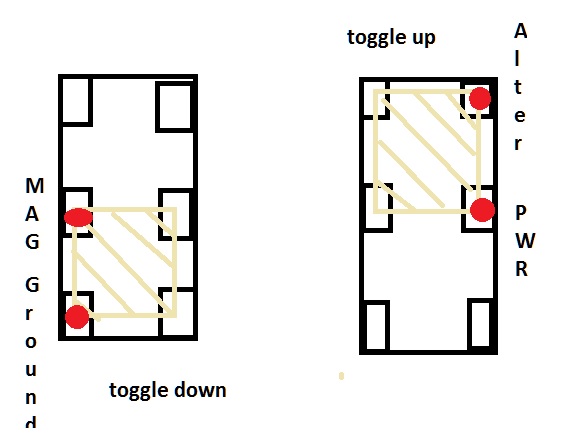 ------------- Like them all, but love the "B"s. |
Posted By: CA13414
Date Posted: 25 May 2024 at 8:28pm
|
Then put oil in the air filter and filled with antifreeze. Then started wiring. Measured and cut all the wires. Was easy to put them into the heat resistant braided cable sleeve. Then made up the ends and used shrink tubes with a heat gun to finish off each connector. Note the braided sleeve next to the governor rod which passes to the right side and has the wire to power the front lights and the grounding wire which is green, to kill the magneto Here is the finished alternator. Connected the charging post to the 10 gauge wire to the battery, and terminal #1 and #2, to the key (via a soldered connection) and to the battery via the charging post, respectively. Need to secure the grouped wires to the alternator bracket.  Here on the right side are the wires for the lights and kill switch. I am holding the wire for the lights with a finished female end. Will connect both headlights to this terminal. Hanging below this is the terminal end of the grounding wire for the magneto kill switch. 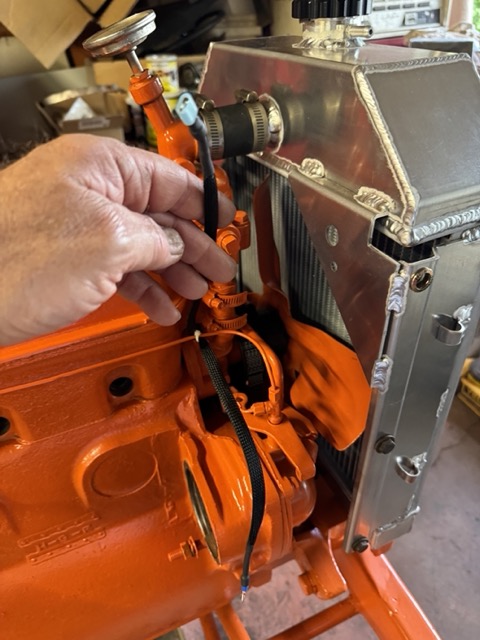 ------------- Helping the aged survive and thrive! 1953 CA |
Posted By: CA13414
Date Posted: 25 May 2024 at 8:33pm
Awesome, this is perfect! Thank you Steve! ------------- Helping the aged survive and thrive! 1953 CA |
Posted By: CA13414
Date Posted: 25 May 2024 at 8:38pm
Connecting the DieHard battery. Yep will wait to connect the positive until it is done and the fuses are in place.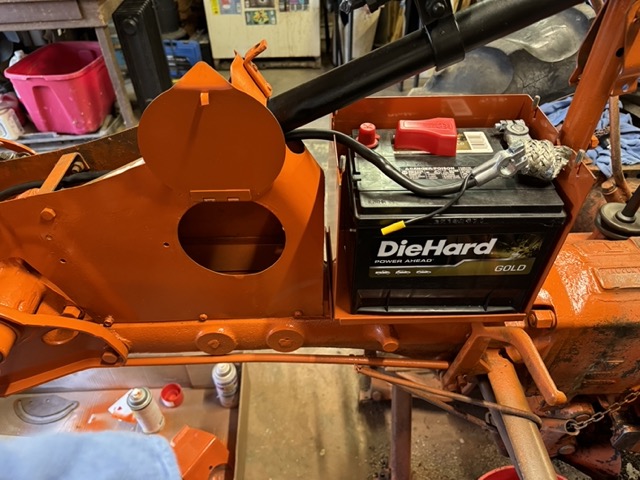 Also sanded and put on the final paint for the steering tube. Also reinstalled the support for the tank, which was important since the wires pass through this support. 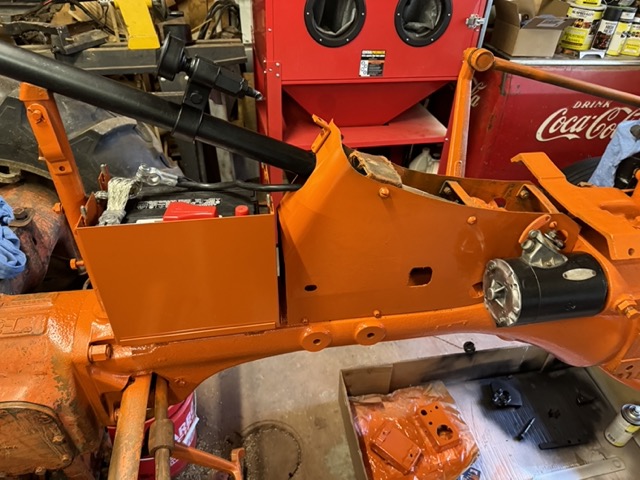 ------------- Helping the aged survive and thrive! 1953 CA |