| Author |
 Topic Search Topic Search  Topic Options Topic Options
|
CA13414 
Silver Level


Joined: 25 Feb 2024
Location: Nebraska
Points: 384
|
 Post Options Post Options
 Thanks(0) Thanks(0)
 Quote Quote  Reply Reply
 Posted: 10 Aug 2024 at 5:30pm Posted: 10 Aug 2024 at 5:30pm |
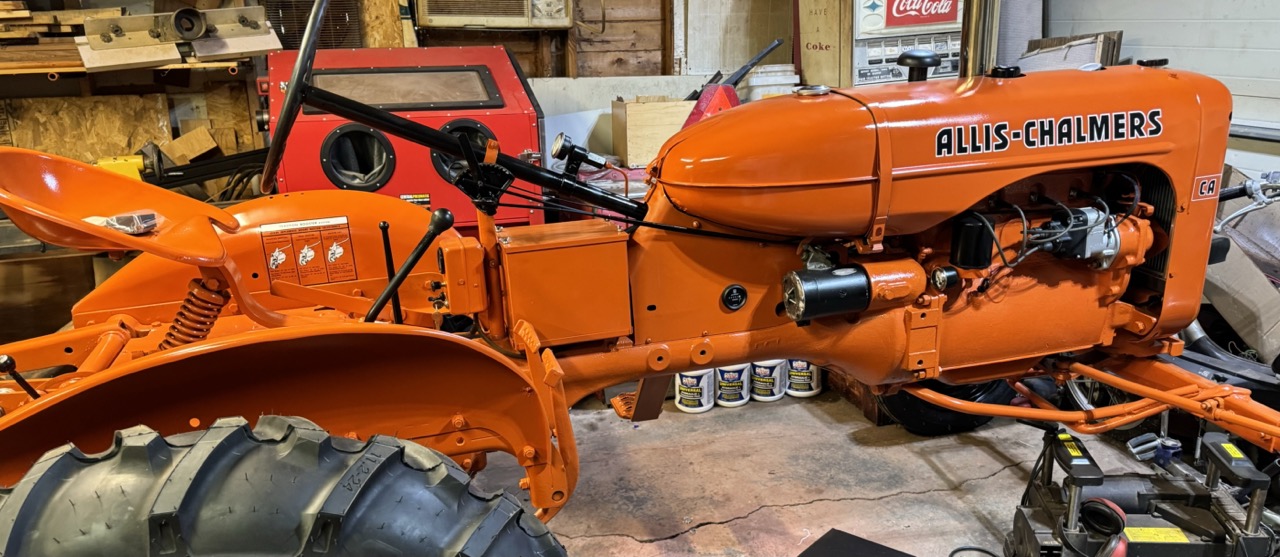
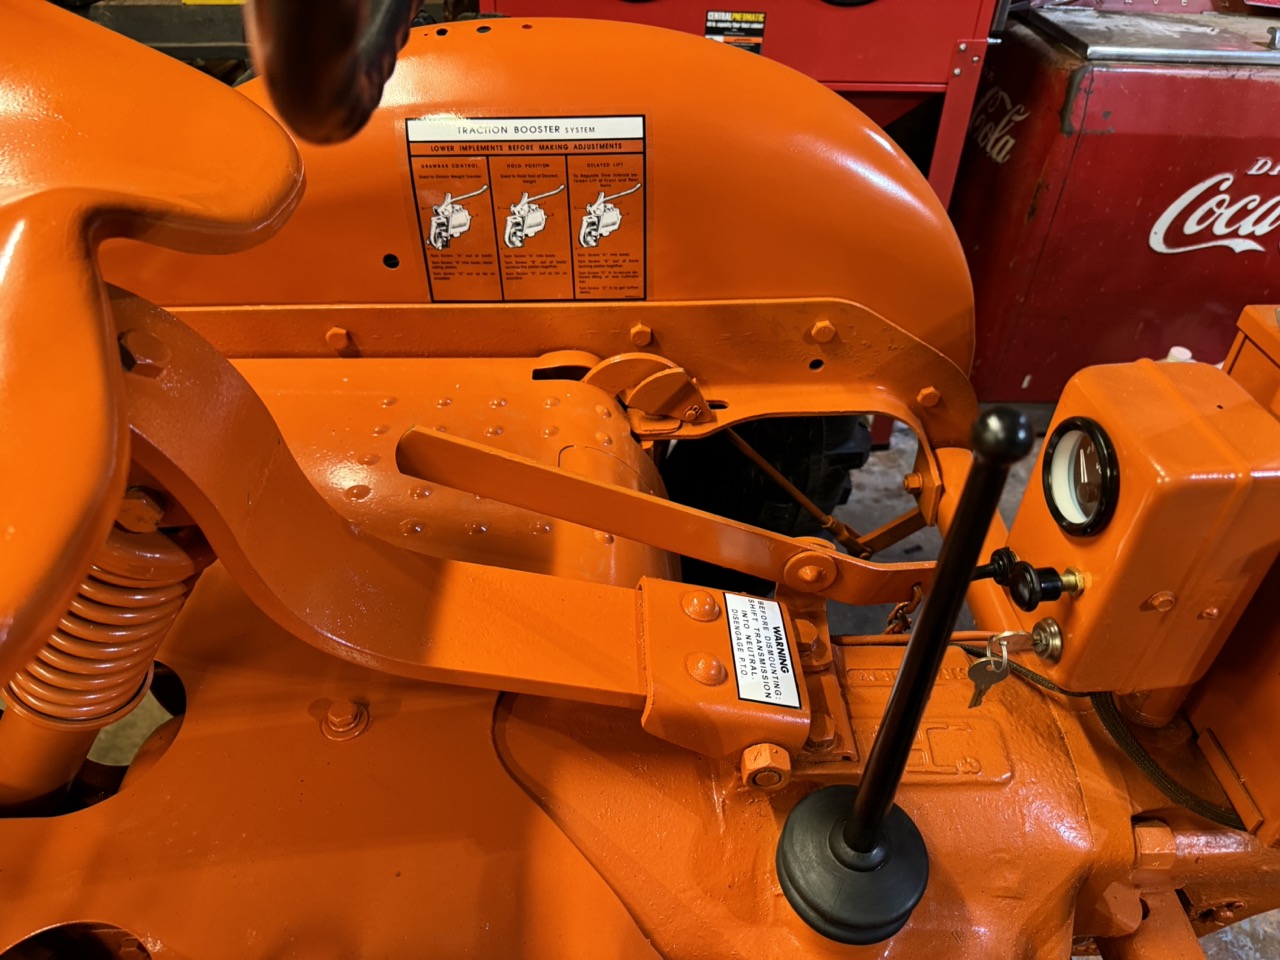
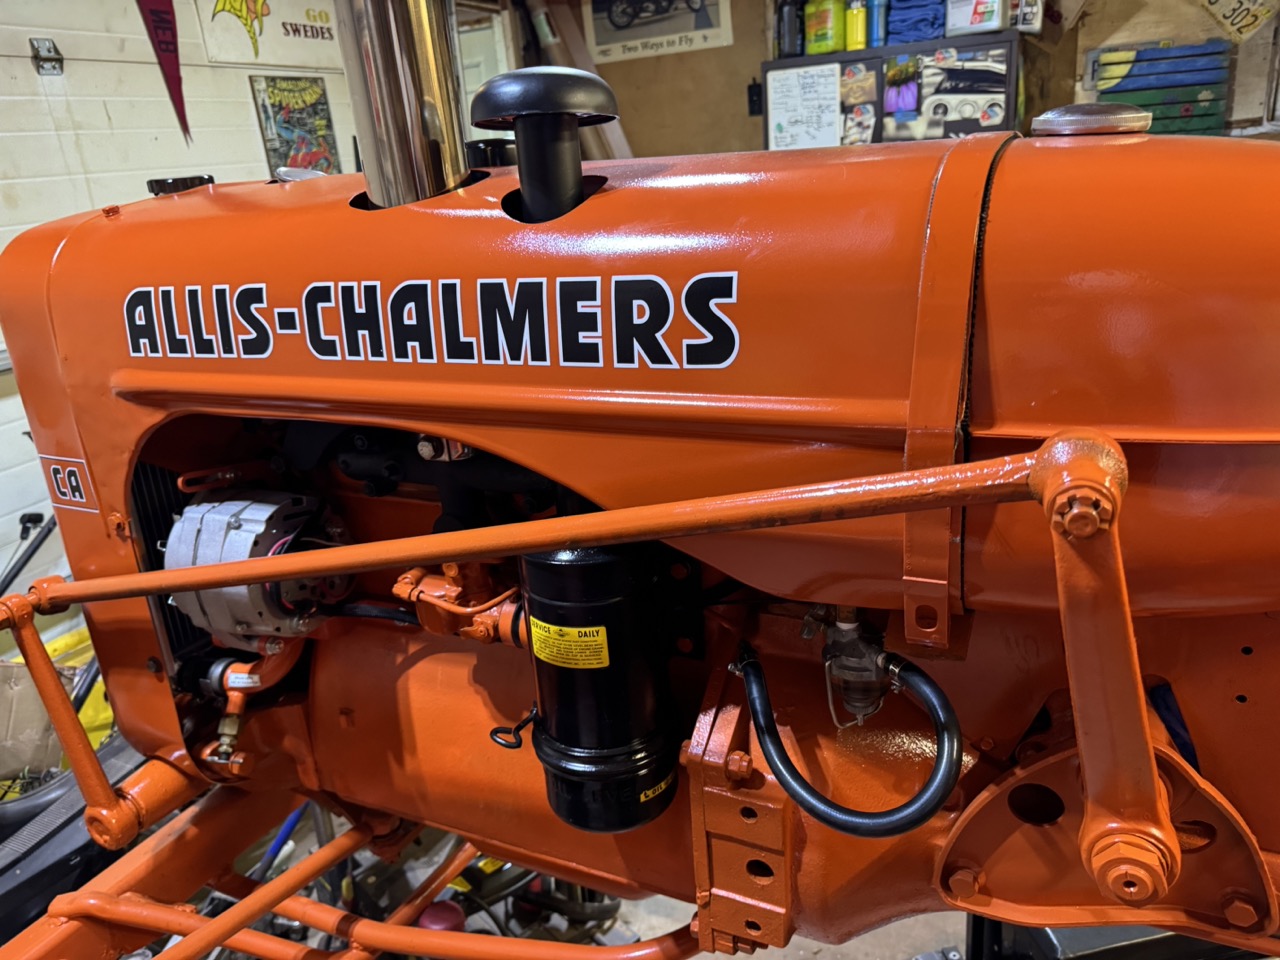
Touched up the rear wheels lug nuts and rims where we damaged them with the socket. Then, once it was 60 degrees in our "outside paint shop," we mixed a bit of thinner with the paint and sprayed on the second coat. Everything is looking really good. Amazing how good the sprayer works vs. the spray can. Also painted the bolts for the fenders which are hanging from the seat mount.  Tomorrow we will mix the paint with a clear coat resin. Pending how this looks, that may be the last coat. I expect we will assemble everything on Wednesday and Thursday. All of the paint and clear coat (i.e. acrylic hardener) we have used is from Yesterday's Tractors Co.
Edited by CA13414 - 11 Aug 2024 at 6:09am
|
|
Helping the aged survive and thrive! 1953 CA
|
 |
|
Sponsored Links
|
|
 |
CA13414 
Silver Level


Joined: 25 Feb 2024
Location: Nebraska
Points: 384
|
 Post Options Post Options
 Thanks(0) Thanks(0)
 Quote Quote  Reply Reply
 Posted: 10 Aug 2024 at 5:48pm Posted: 10 Aug 2024 at 5:48pm |
Then we pulled the blade in place. Made some measurements and have ordered the top link and lift links. Will need to drill in holes into the snap bell adapter for the lift links. Plan to get a 1/2" piece of plate steel that is 2.5" x 6" to connect to the snap bell adapter to the blade. Will drill a 7/8 hole in this 6" piece which will connect to the 3-point pins. Then bolt this with 2, 1/2" blots, to the snap bell adapter. Expect this will work well, however, will not be a "quick connect!!!" Will see how this comes together! Anyone have another suggestion for connecting this snap bell adapter to the 3-point pins of the blade? Once this is together and we will sand blast the blade and adapter, we will paint it all black. 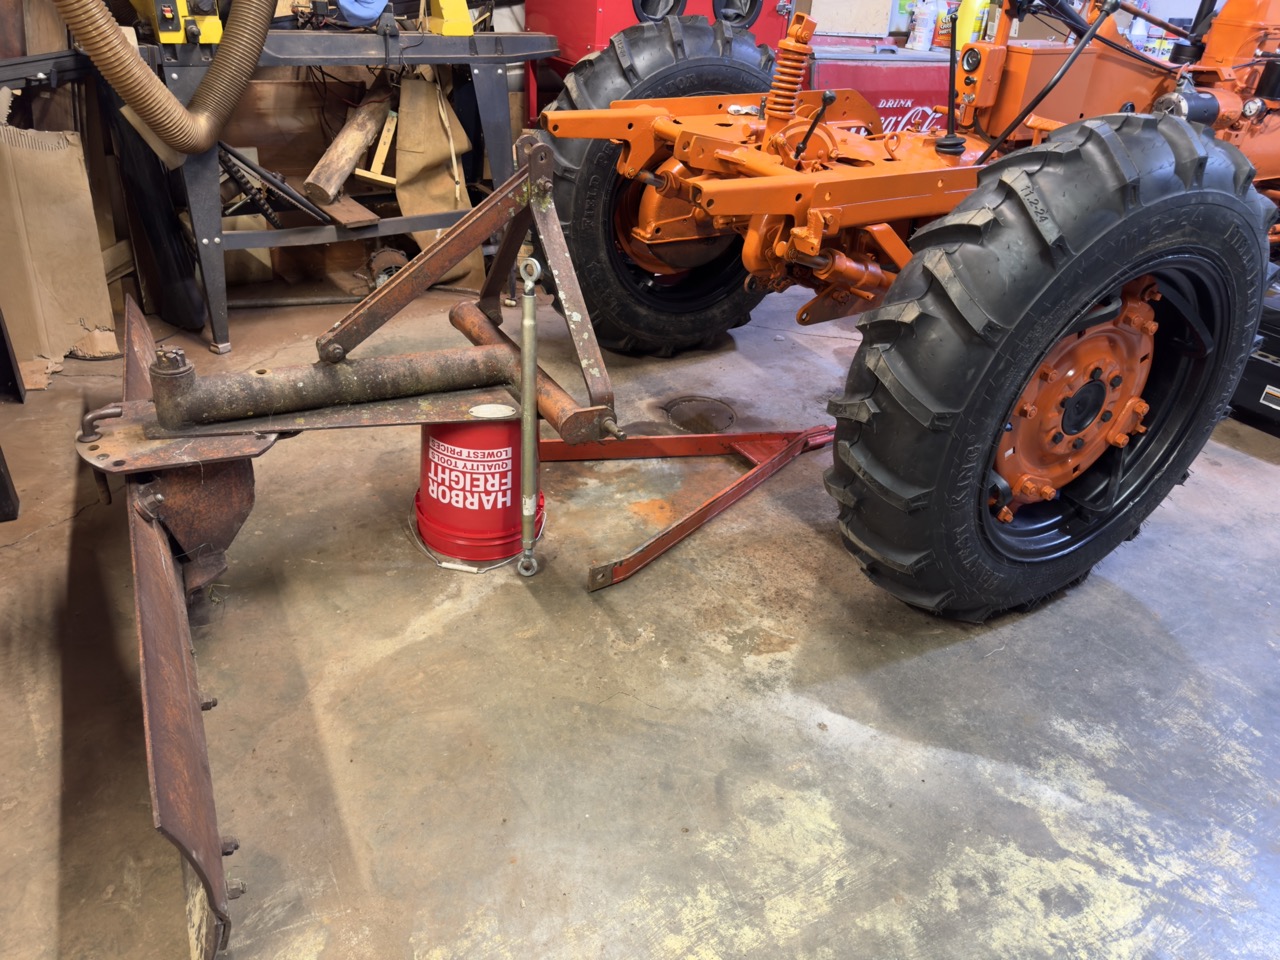
Edited by CA13414 - 11 Aug 2024 at 6:03am
|
|
Helping the aged survive and thrive! 1953 CA
|
 |
CA13414 
Silver Level


Joined: 25 Feb 2024
Location: Nebraska
Points: 384
|
 Post Options Post Options
 Thanks(0) Thanks(0)
 Quote Quote  Reply Reply
 Posted: 11 Aug 2024 at 4:21pm Posted: 11 Aug 2024 at 4:21pm |
Today we sanded all the tin again with 1500 grit paper. Then mixed 16 oz of paint with 2 oz of acrylic hardener. Then after letting the mix sit for 15 min, started painting the final coat. Again looks awesome and excited to assemble all the tin this week. Did also spray other parts with the acrylic clear coat. Gives quite a shine and looks great. We did bring them inside after about 8 hours since we are expecting storms tonight. Thus, set the tank on the supports and placed the rest on some rags. 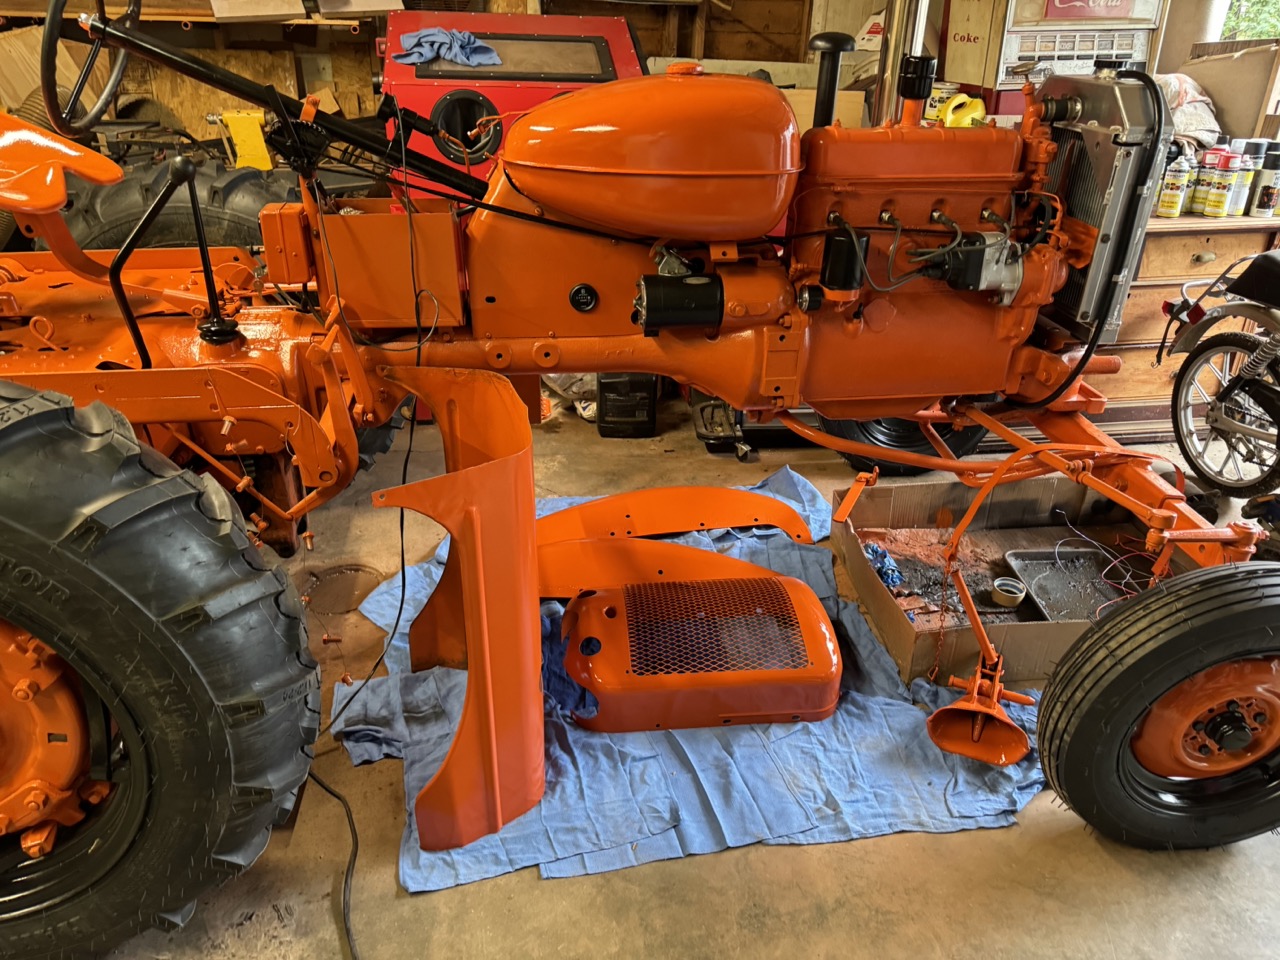 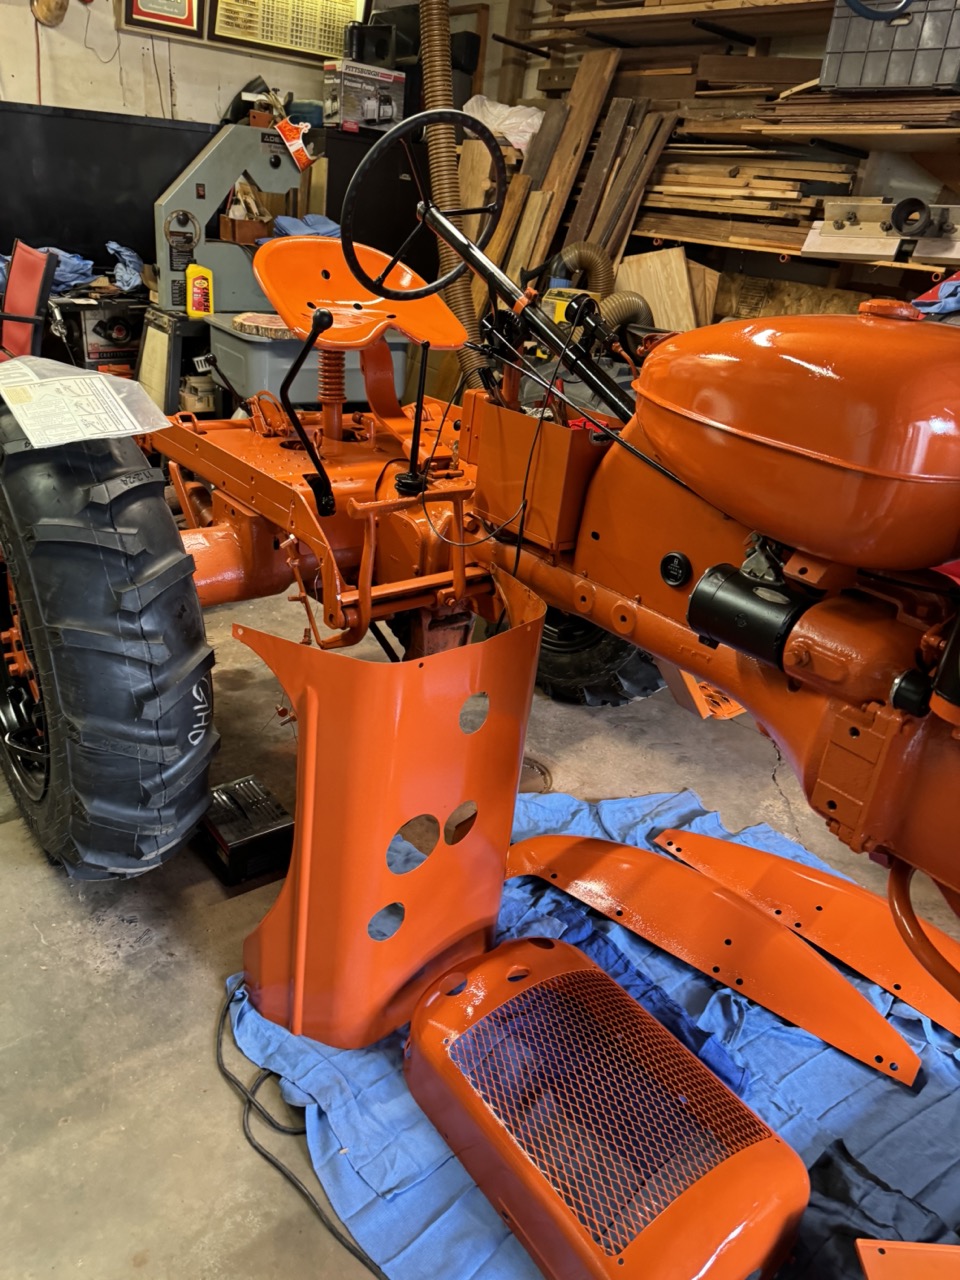 Will let these sit until Wednesday or Thursday before putting this together.
Edited by CA13414 - 11 Aug 2024 at 8:31pm
|
|
Helping the aged survive and thrive! 1953 CA
|
 |
CA13414 
Silver Level


Joined: 25 Feb 2024
Location: Nebraska
Points: 384
|
 Post Options Post Options
 Thanks(0) Thanks(0)
 Quote Quote  Reply Reply
 Posted: 11 Aug 2024 at 5:26pm Posted: 11 Aug 2024 at 5:26pm |
Had a bit of trouble starting the tractor after about 4 months. Mostly to find no spark. Took off the magneto and checked everything. There was no spark from the distributor cap when hand cranking the mag, however, there was one from the magneto coil electrode. Ended up the magneto coil electrode was not making contact with the conducting rod on the distributor cap. 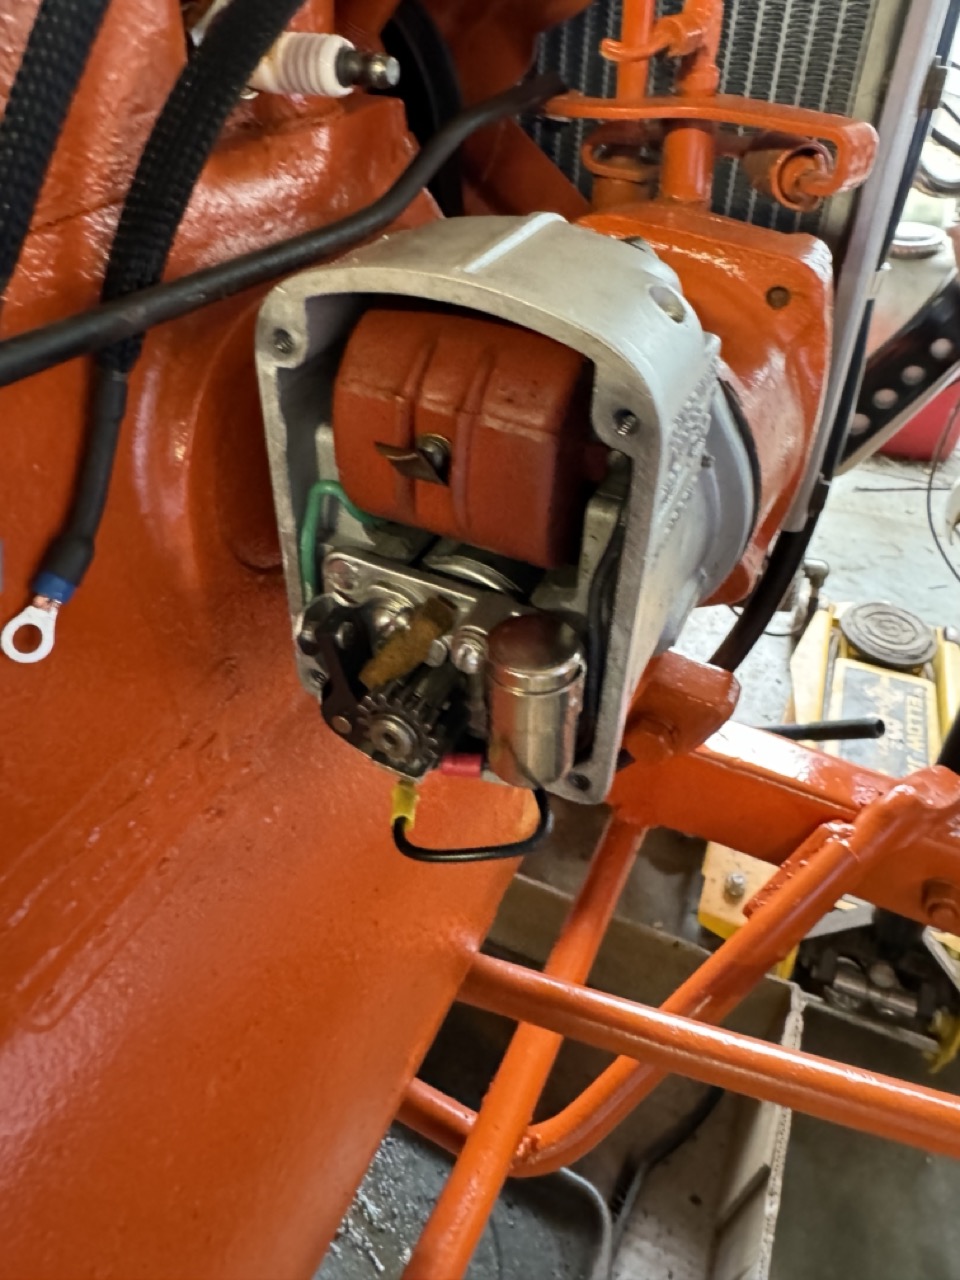 Once we bent this to ensure there was contact and a bit of "spring/push back" on the cap, there was a great spark. In retrospect, this had been happening from time to time and we had no idea why we would loose spark. I suspect this was the issue and when we would disassemble and reassemble, it would come in contact. We then once again, found TDC on one cylinder #1 and set the Mag. With this it fired up immediately and ran awesome! It was the most exciting part of the day!!! Here is a video link of it running at an idle.Turning the key off and on powers the alternator. This definitely pulled a load and bumped up the voltage. Awesome that the alternator works!! Oil pressure was great as well at an idle! 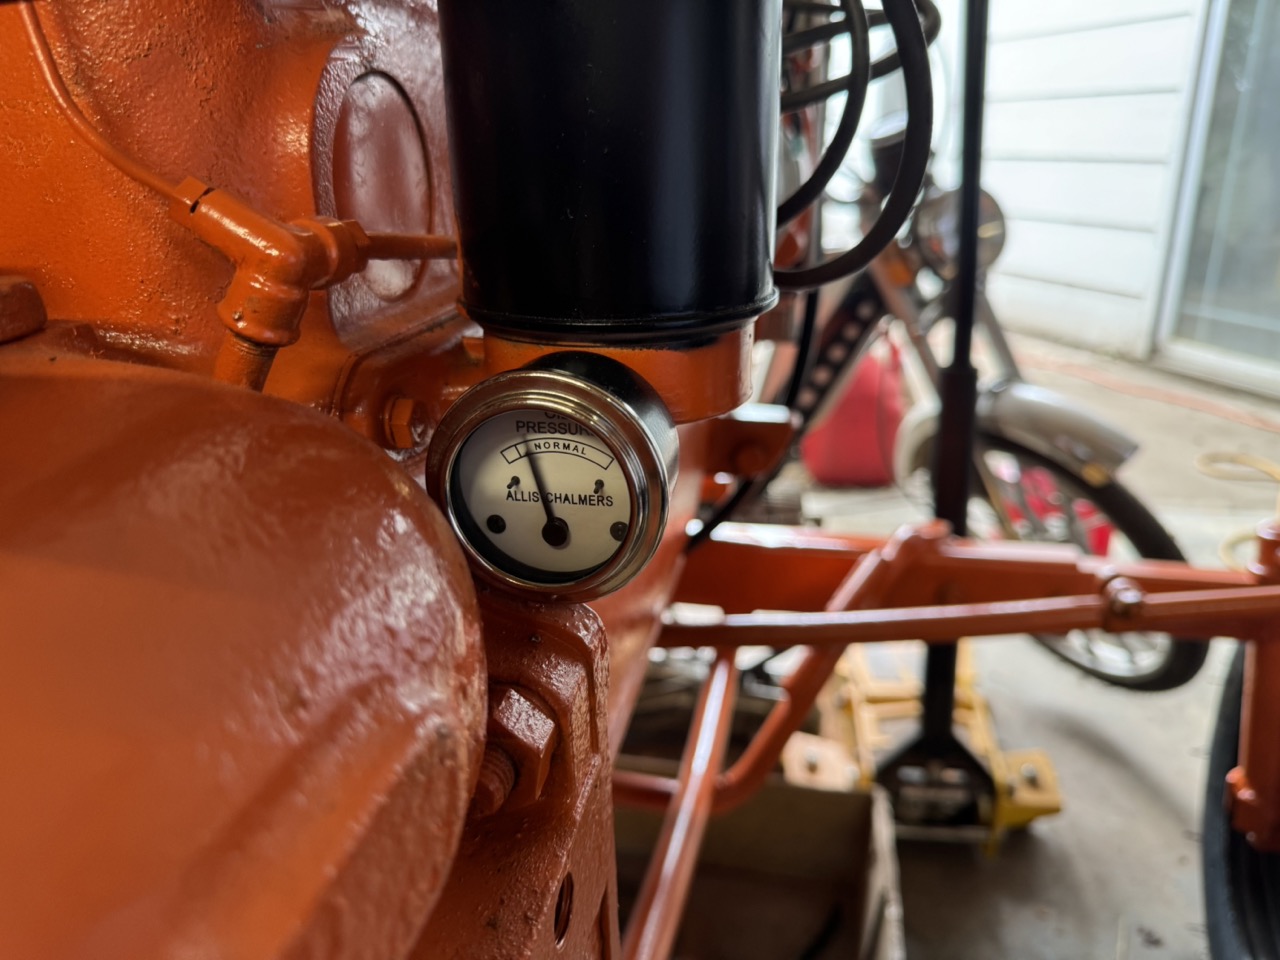 And full throttle. 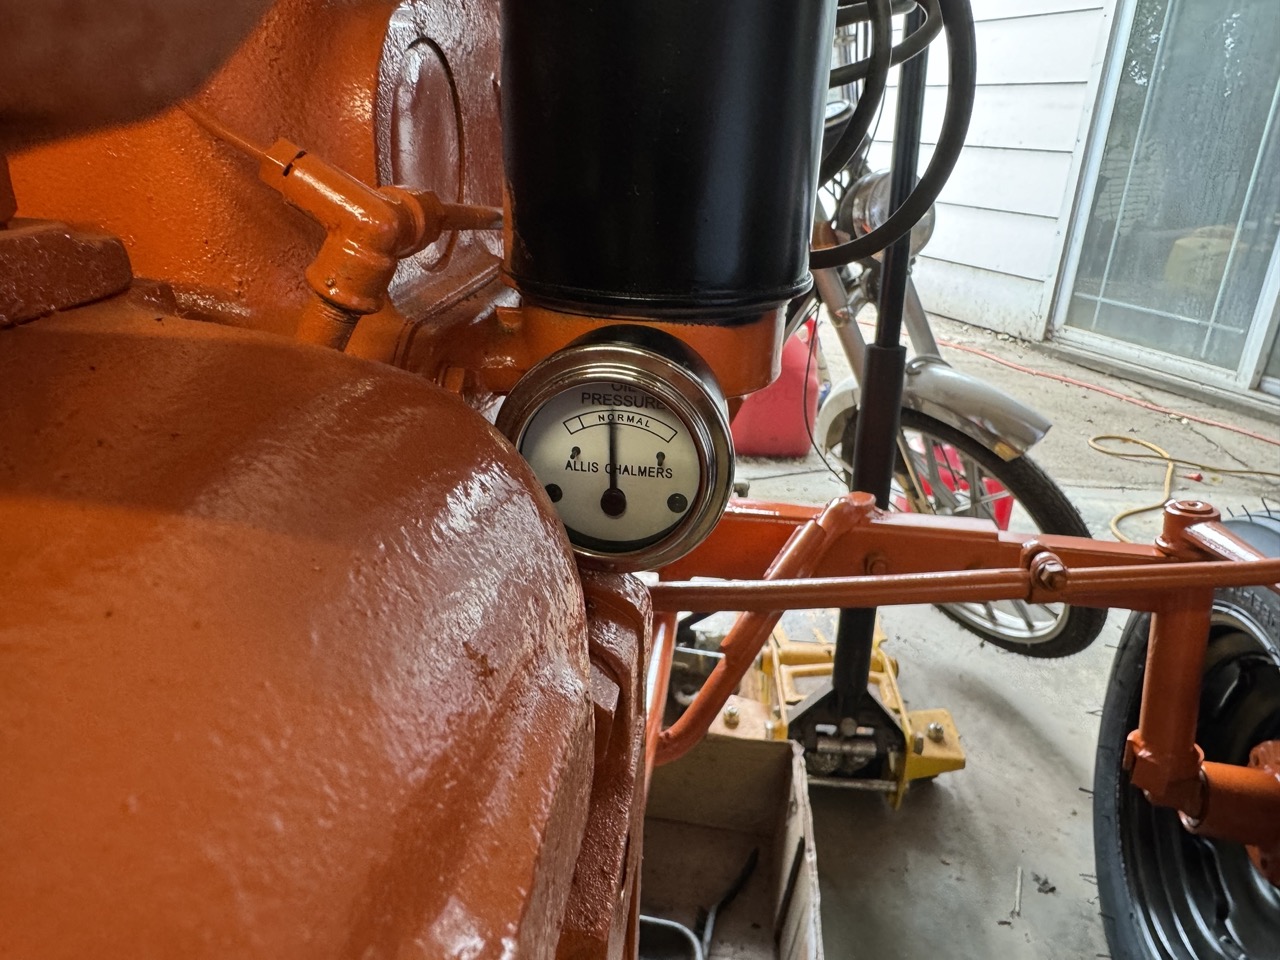 However, did bounce quite a bit. Not sure why but I am thinking this is some air in the line that will get better over time. But that is me guessing. You can see from this image and the other images that it is not steady. Any other ideas why? Thanks! 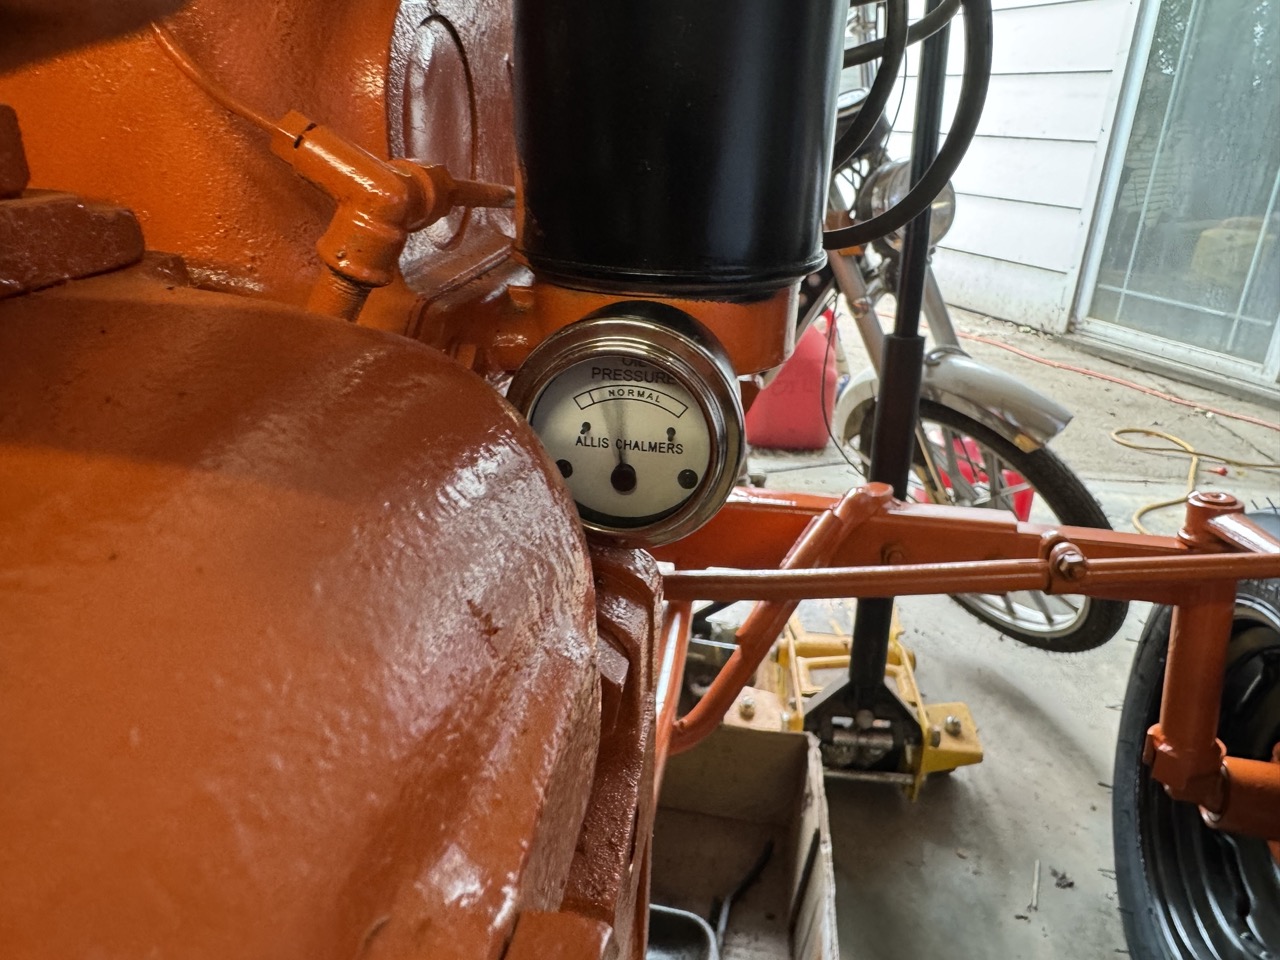
Edited by CA13414 - 11 Aug 2024 at 8:22pm
|
|
Helping the aged survive and thrive! 1953 CA
|
 |
Sugarmaker 
Orange Level


Joined: 12 Jul 2013
Location: Albion PA
Points: 8627
|
 Post Options Post Options
 Thanks(1) Thanks(1)
 Quote Quote  Reply Reply
 Posted: 11 Aug 2024 at 8:22pm Posted: 11 Aug 2024 at 8:22pm |
Dan, Your thread has got me slightly off center on my CA project. Thanks! Looking forward to your work as you finish your family CA project! Your body work looks very good and with paint, even better! Regards, Chris and Cheryl
Edited by Sugarmaker - 11 Aug 2024 at 8:26pm
|
|
D17 1958 (NFE), WD45 1954 (NFE), WD 1952 (NFE), WD 1950 (WFE), Allis F-40 forklift, Allis CA, Allis D14, Ford Jubilee, Many IH Cub Cadets, 32 Ford Dump, 65 Comet.
|
 |
1955CA 
Orange Level

Joined: 10 Sep 2018
Location: Ontario, Canada
Points: 602
|
 Post Options Post Options
 Thanks(0) Thanks(0)
 Quote Quote  Reply Reply
 Posted: 11 Aug 2024 at 8:59pm Posted: 11 Aug 2024 at 8:59pm |
Can you give us more info on the paint and gun you used? And how you mixed it. That is one thing I know nothing about, but I'd sure like to try and paint mine. Paint shops around here would be in the thousands.
My original oil pressure gauge read what my owners manual says it should, but it was rusty looking so I went and got one from Steiner, and it isn't even close to accurate. It reads around the R at idle and the L at wide open.
Edited by 1955CA - 11 Aug 2024 at 9:00pm
|
 |
steve(ill) 
Orange Level Access


Joined: 11 Sep 2009
Location: illinois
Points: 89296
|
 Post Options Post Options
 Thanks(0) Thanks(0)
 Quote Quote  Reply Reply
 Posted: 11 Aug 2024 at 10:00pm Posted: 11 Aug 2024 at 10:00pm |
|
Gauges should have an ORIFICE in them to keep the BOUNCE down... Needle movement is the pulsing of the oil from the pump.. A SNUBBER or ORIFICE/ RESTRICTOR is needed.. MOST gauges have them as part of the gauge.
|
|
Like them all, but love the "B"s.
|
 |
CA13414 
Silver Level


Joined: 25 Feb 2024
Location: Nebraska
Points: 384
|
 Post Options Post Options
 Thanks(0) Thanks(0)
 Quote Quote  Reply Reply
 Posted: 12 Aug 2024 at 6:14am Posted: 12 Aug 2024 at 6:14am |
 steve(ill) wrote: steve(ill) wrote:
Gauges should have an ORIFICE in them to keep the BOUNCE down... Needle movement is the pulsing of the oil from the pump.. A SNUBBER or ORIFICE/ RESTRICTOR is needed.. MOST gauges have them as part of the gauge. |
Thanks Steve. Picked this up from DJ's. I will see about an exchange.
Edited by CA13414 - 12 Aug 2024 at 6:14am
|
|
Helping the aged survive and thrive! 1953 CA
|
 |
CA13414 
Silver Level


Joined: 25 Feb 2024
Location: Nebraska
Points: 384
|
 Post Options Post Options
 Thanks(0) Thanks(0)
 Quote Quote  Reply Reply
 Posted: 12 Aug 2024 at 6:55am Posted: 12 Aug 2024 at 6:55am |
 1955CA wrote: 1955CA wrote:
Can you give us more info on the paint and gun you used? And how you mixed it. That is one thing I know nothing about, but I'd sure like to try and paint mine.Paint shops around here would be in the thousands.
|
This was the first time I had done any body work or painting. My brother had done quite a bit thus was our advisor. First was to buy an auto body tool kit. Then sand from Menards for sand blasting the tin and other parts. My friends Dad has a air powered sand blaster that we used for the tin and larger parts. I did also buy an adaptor for my power washer ($100) that will sand blast the blade in the near future and then paint it black. All the paint was from Yesterday's Tractor Co. which included spray cans of paint (orange, black and clear coat), a gallon of orange paint, a pint of black, and a pint of clear coat (i.e. acrylic hardener). Of interest, the paint at Yesterday's Tractor is from Tallmans in Lincoln, Nebraska. Bought primer, paint thinner and sandpaper from Ace Hardware. Bought bondo from Amazon. Bought a simple spray gun from Harbor Freight. This worked quite well and is really going to be a single use gun. Total Painting Cost: $628 Auto body repair tool kit: $31 Sand for Sandblasting: $50 Power washer sand blaster:$100 Paint: $350 Bondo: $25 Spray gun: $17 Paint Thinner: $10 Sand Paper: $45 I thinned the paint for the spray gun by adding a couple of tsp of thinner to 12 oz of paint. Just enough to give a nice spray on my test sheet metal. For the final coat, mixed in the acrylic hardener at an 8:1 ratio and then slightly thinned with the thinner. Used our portable air compressor which was set at 50 psi. 12-16 oz of paint was just right for each coat of paint. Overall, very happy with the outcome. There are a few subtle dints which for me reflects the prime age of being a 71 year old tractor. Will send close up pictures when assembled this week. At the end, I will have about 2-4 spray cans of each paint (orange, black and clear coat) which I plan to keep on the shelf for touch up paint. Also a bit more than half a gallon of orange and the acrylic hardener left over. Not sure what it would have cost to have someone paint it but suspect we saved $500-$1000.
Edited by CA13414 - 12 Aug 2024 at 7:46am
|
|
Helping the aged survive and thrive! 1953 CA
|
 |
1955CA 
Orange Level


Joined: 10 Sep 2018
Location: Ontario, Canada
Points: 602
|
 Post Options Post Options
 Thanks(0) Thanks(0)
 Quote Quote  Reply Reply
 Posted: 12 Aug 2024 at 7:30am Posted: 12 Aug 2024 at 7:30am |
|
Thanks for the info!!
|
 |
DiyDave 
Orange Level Access


Joined: 11 Sep 2009
Location: Gambrills, MD
Points: 54730
|
 Post Options Post Options
 Thanks(0) Thanks(0)
 Quote Quote  Reply Reply
 Posted: 12 Aug 2024 at 3:30pm Posted: 12 Aug 2024 at 3:30pm |
Re the blade mounting. Since the SC tongue is mighty close to the width of a cat one tph lower links, take the lower pins out, and mount the tongue to the blade with bolts. You may have to jigger the fit by spreading or compressing the tongue, or adding some washers. the lower link pins might work for this, or get some that are threaded longer, make the lift pin the bolt that holds the tongue on... 
|
|
Source: Babylon Bee. Sponsored by BRAWNDO, its got what you need!
|
 |
CA13414 
Silver Level


Joined: 25 Feb 2024
Location: Nebraska
Points: 384
|
 Post Options Post Options
 Thanks(0) Thanks(0)
 Quote Quote  Reply Reply
 Posted: 12 Aug 2024 at 6:54pm Posted: 12 Aug 2024 at 6:54pm |
 DiyDave wrote: DiyDave wrote:
Re the blade mounting. Since the SC tongue is mighty close to the width of a cat one tph lower links, take the lower pins out, and mount the tongue to the blade with bolts. You may have to jigger the fit by spreading or compressing the tongue, or adding some washers. the lower link pins might work for this, or get some that are threaded longer, make the lift pin the bolt that holds the tongue on... |
That is such an awesome and simple suggestion vs. making the 6" x 2", 1/2" plate steel bracket. Thank you, will run with your suggestion. At some point I may make the full 3-point conversion.
|
|
Helping the aged survive and thrive! 1953 CA
|
 |
jvin248 
Silver Level


Joined: 17 Jan 2022
Location: Detroit
Points: 499
|
 Post Options Post Options
 Thanks(0) Thanks(0)
 Quote Quote  Reply Reply
 Posted: 13 Aug 2024 at 4:34am Posted: 13 Aug 2024 at 4:34am |
. For 1955CA equipment Q:
+1 on the Harbor Freight "purple sprayer". They are famous in a good way.
Key though is get the sprayer cleaning kit and clean the unit before the first use. Shipping and storage oils tend to gum it up.
I have the five gallon vertical HF air compressor.
Plus a regulator and water trap where air enters the sprayer. Make yourself a hook to hold the hand spray unit if you need to "set it down" to have hands free to do something.
Mask is a must, especially a better mask if using epoxy hardener automotive paint (it hardens in lungs).
Watch YouTube for spraying techniques. An auto body pro I talked with said most of technique is really just painting a lot of things, practice.
I painted electric guitars with this rig before tractor painting.
I got "close enough" Rust-Oleum colors at Menards for my family heirloom 1955 Ferguson TO35 "green belly" machine grey tinwork and wheels and darker green engine trans rear end. My Orange 1952 WD came with a ten to twenty year old paint restoration so I haven't needed any orange paint yet.
I didn't sand blast, just power washed (wimpy 1500psi portable) after soaking down the engine and chassis with a can of engine degreaser. My goal was not a parade show car but a working tractor that didn't frighten the non-farm neighbors (subdivision came in next door) when parked in the yard.
So you have a lot of options.
.
Edited by jvin248 - 13 Aug 2024 at 4:48am
|
 |
CA13414 
Silver Level


Joined: 25 Feb 2024
Location: Nebraska
Points: 384
|
 Post Options Post Options
 Thanks(0) Thanks(0)
 Quote Quote  Reply Reply
 Posted: 13 Aug 2024 at 9:26pm Posted: 13 Aug 2024 at 9:26pm |
Was able to spend a couple of hours. Reinstalled the snap hook. 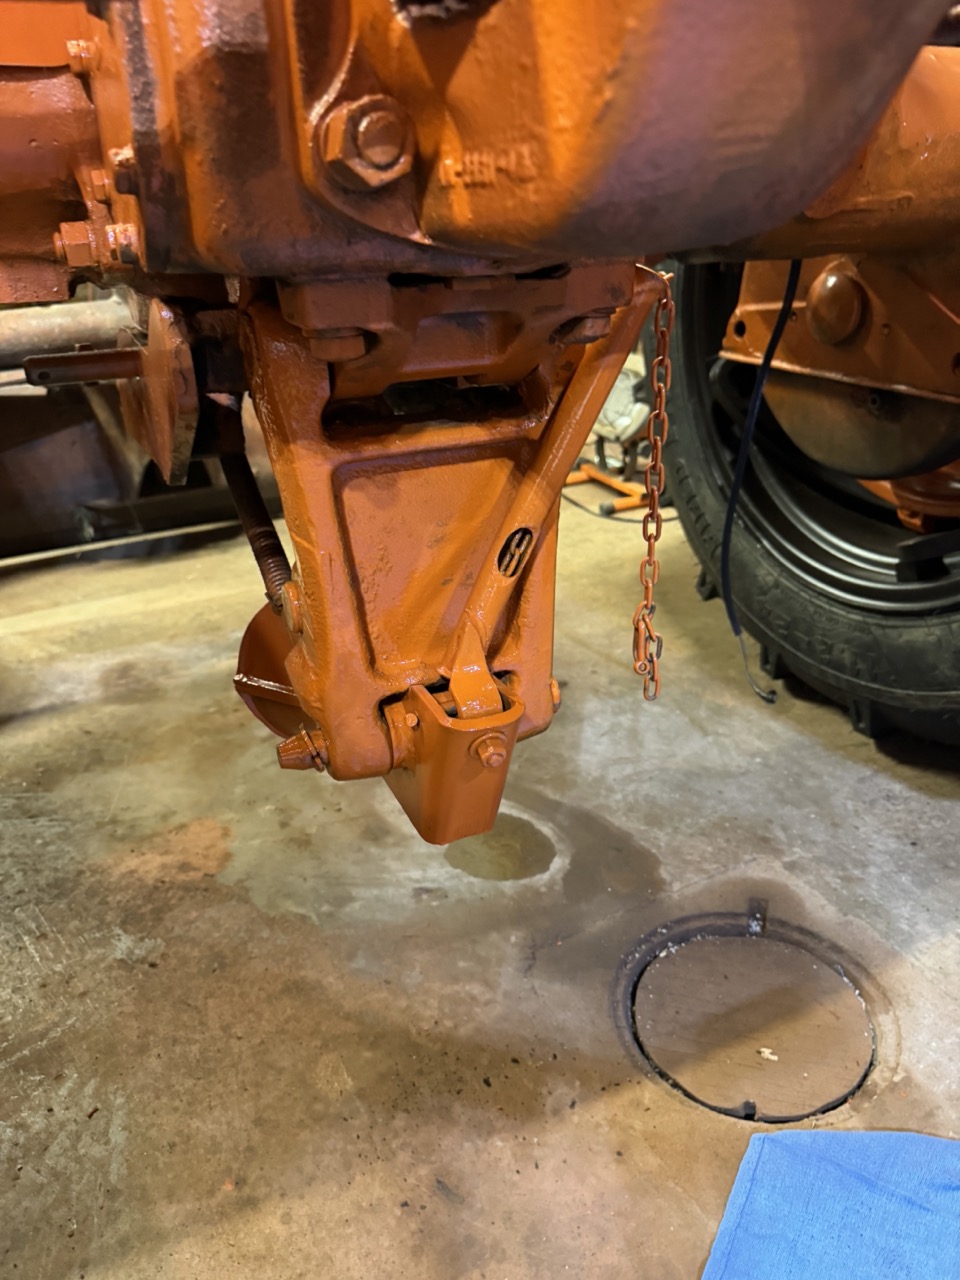
Edited by CA13414 - 13 Aug 2024 at 9:27pm
|
|
Helping the aged survive and thrive! 1953 CA
|
 |
CA13414 
Silver Level


Joined: 25 Feb 2024
Location: Nebraska
Points: 384
|
 Post Options Post Options
 Thanks(0) Thanks(0)
 Quote Quote  Reply Reply
 Posted: 13 Aug 2024 at 9:35pm Posted: 13 Aug 2024 at 9:35pm |
Also reinstalled the gas tank, hood, fenders and the grill. Started with the grill which was a bit of a pain, but was able to get it installed. Then the tank and then the hood. 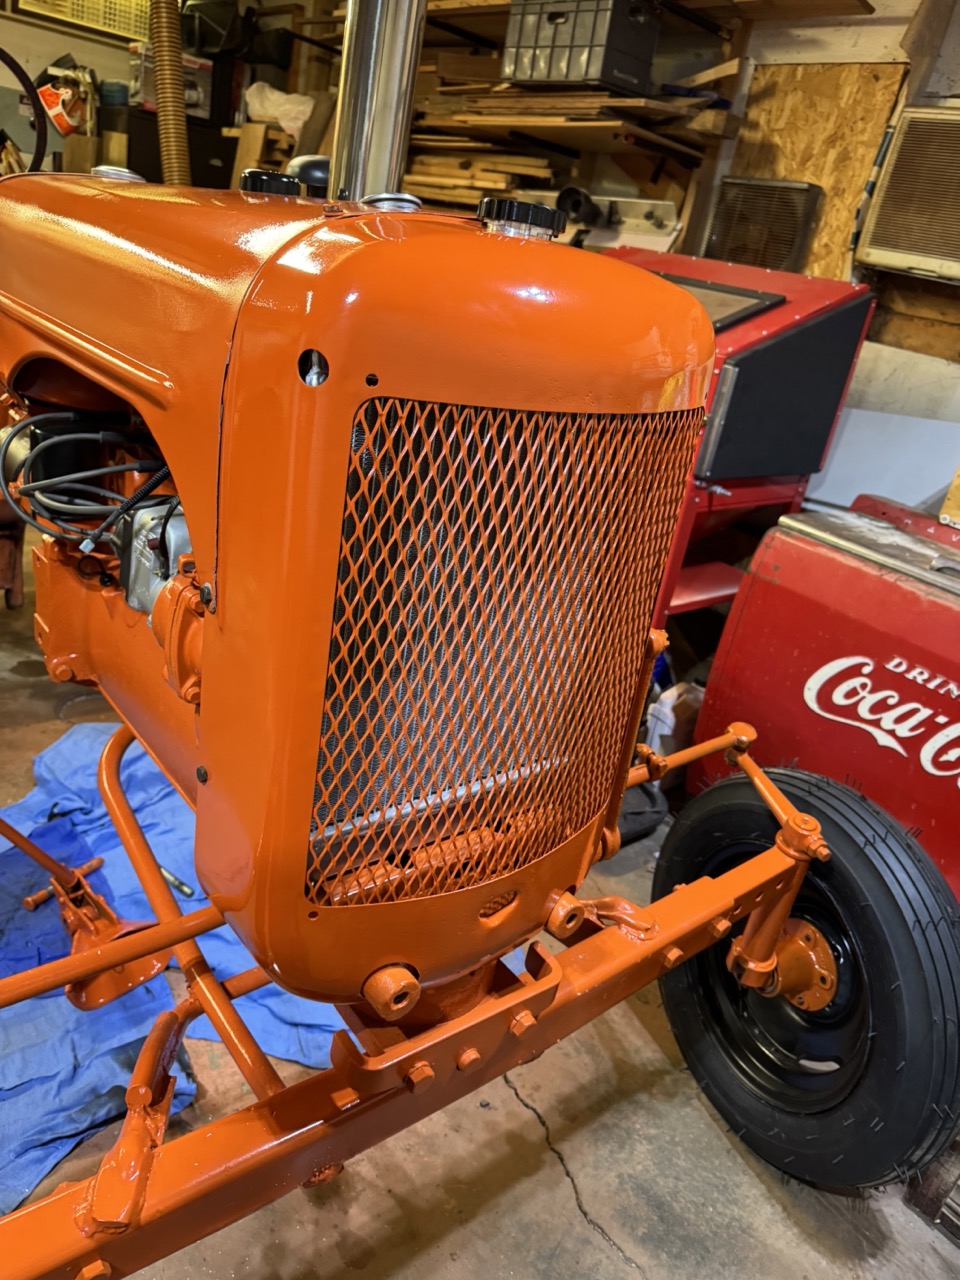 Did notice the tank and hood strap was not vertical after I took this picture, thus did adjust such that it was straight.  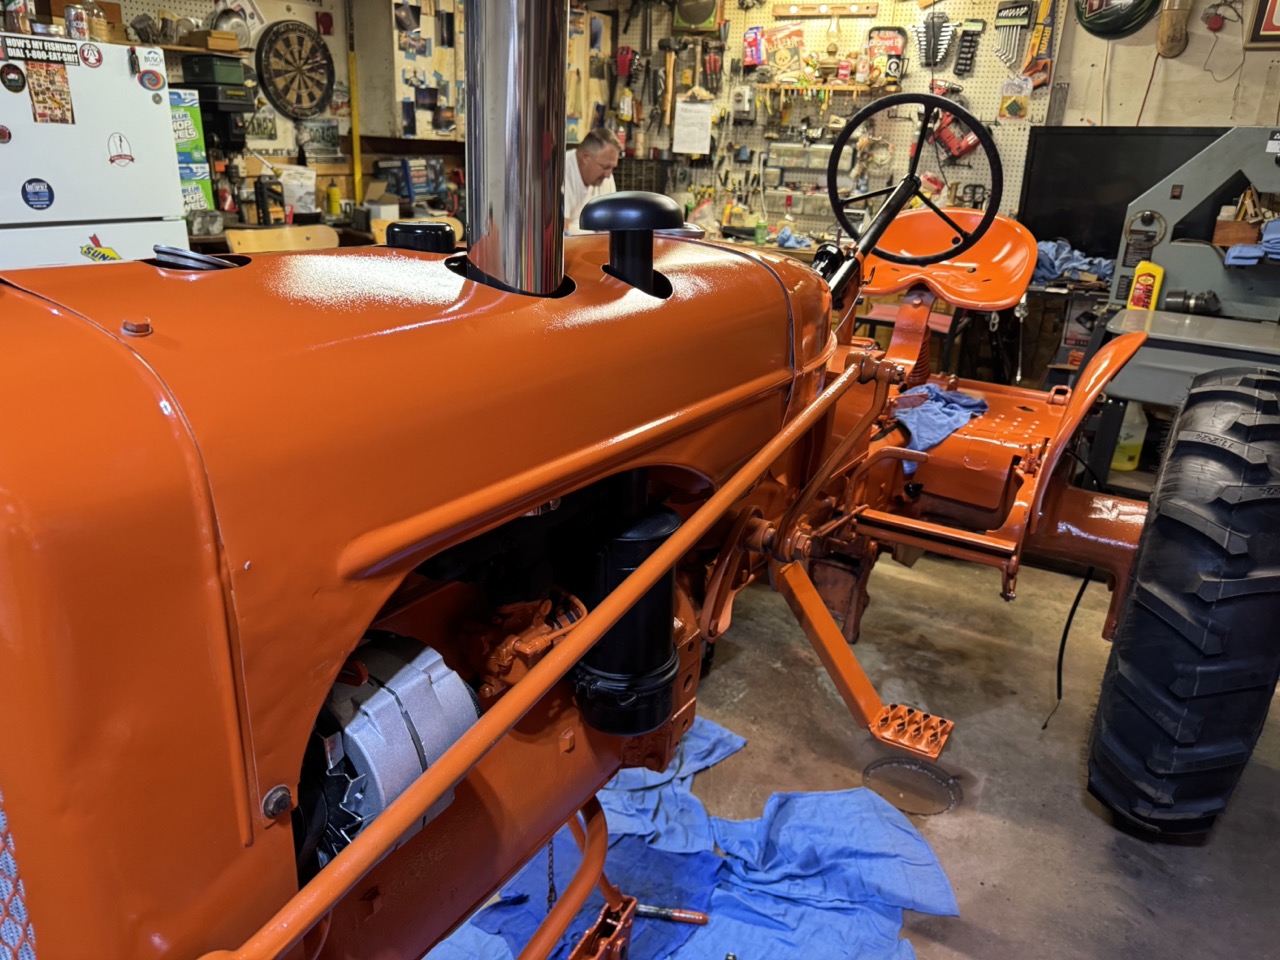 The fenders were easy since it was only 5 bolts and nuts on each. Connecting the seat shock was quick to do and this was much better than the old one which bottomed out. 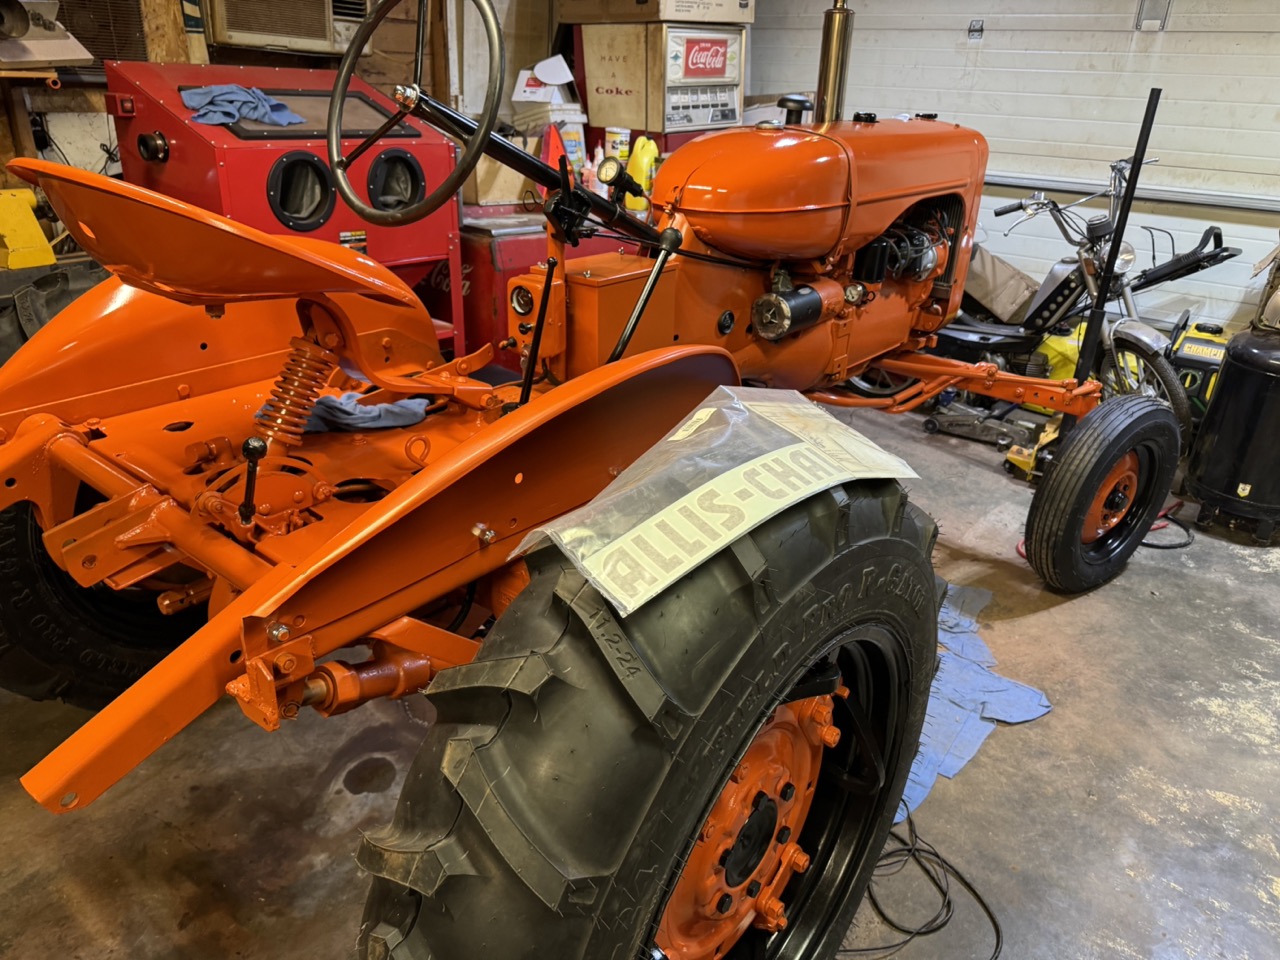 Now only need to connect the sediment bowl to the gas line. Need to stop and get a brass connector to connect the bowl and line. I think this is the only thing we lost in all of this. On Thursday will set up the 3-point blade. The upper links and side links arrived today, thus will hopefully have this all done on Saturday other that sandblasting the blade and painting it black. Will also clear coat todays touch up spots on Thursday. In addition to finishing up the 3-point on Saturday, will put on the decals after the clear coat is dry. On Sunday, I plan to put her to work!! Have a bunch of sand to move around and we will see what happens!!
Edited by CA13414 - 13 Aug 2024 at 10:09pm
|
|
Helping the aged survive and thrive! 1953 CA
|
 |
CA13414 
Silver Level


Joined: 25 Feb 2024
Location: Nebraska
Points: 384
|
 Post Options Post Options
 Thanks(0) Thanks(0)
 Quote Quote  Reply Reply
 Posted: 15 Aug 2024 at 9:29pm Posted: 15 Aug 2024 at 9:29pm |
 DiyDave wrote: DiyDave wrote:
Re the blade mounting. Since the SC tongue is mighty close to the width of a cat one tph lower links, take the lower pins out, and mount the tongue to the blade with bolts. You may have to jigger the fit by spreading or compressing the tongue, or adding some washers. the lower link pins might work for this, or get some that are threaded longer, make the lift pin the bolt that holds the tongue on... |
Again, awesome suggestion to take the pins off and bolt the quick link adapter/SC tongue directly to the blade. This worked spectacular and took very little time. Mostly waited for panther piss to work on the rusted pin nuts! Thank you!! 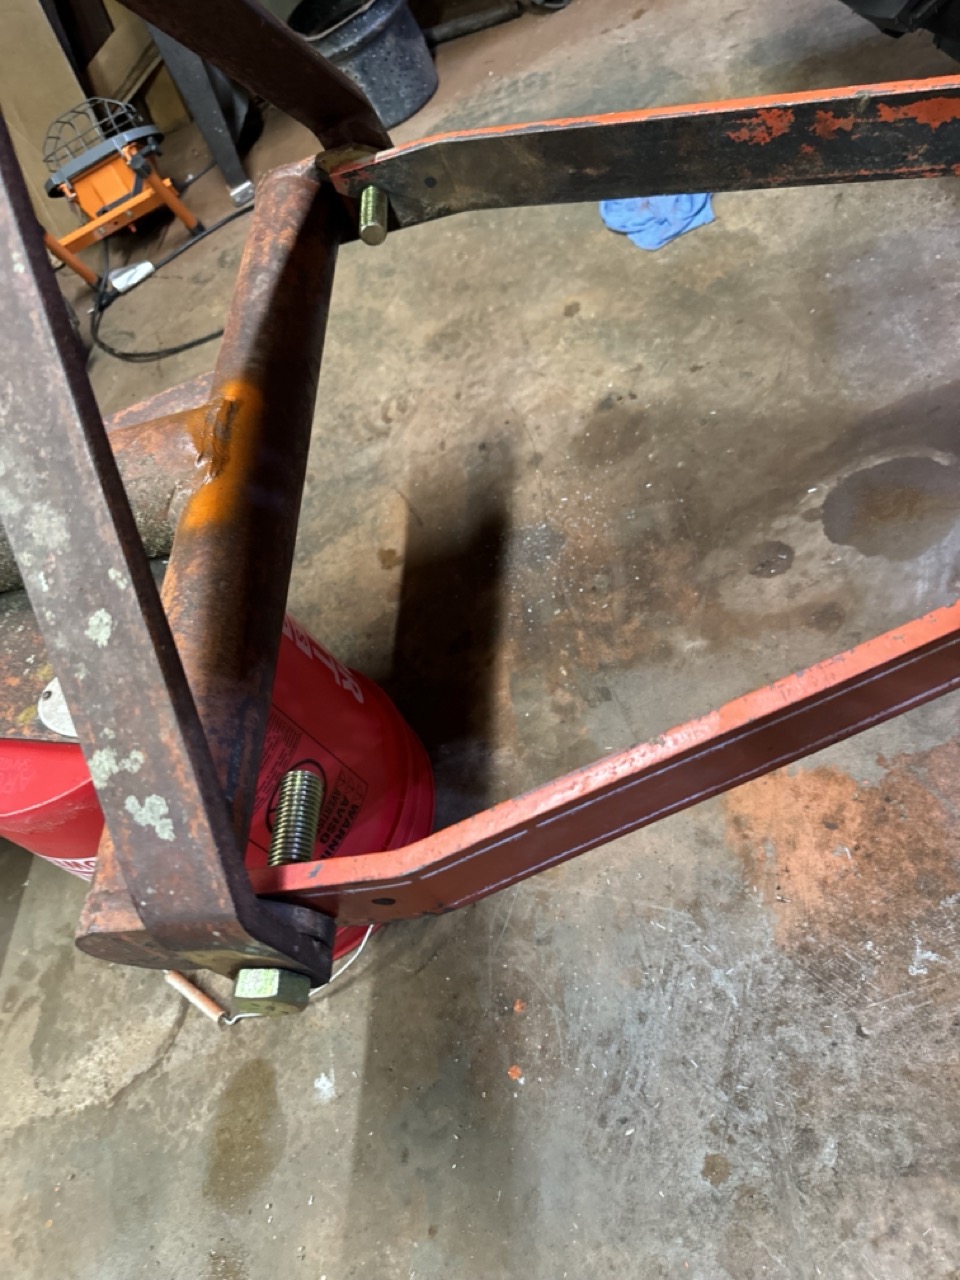
Edited by CA13414 - 16 Aug 2024 at 5:21am
|
|
Helping the aged survive and thrive! 1953 CA
|
 |
CA13414 
Silver Level


Joined: 25 Feb 2024
Location: Nebraska
Points: 384
|
 Post Options Post Options
 Thanks(0) Thanks(0)
 Quote Quote  Reply Reply
 Posted: 15 Aug 2024 at 9:35pm Posted: 15 Aug 2024 at 9:35pm |
We did have to drill out the holes for the 7/8" bolts to attach to the SC tongue. Here is a drill bit my bother had which was super sharp and worked well. We used a small drill since using the drill press was not an option. It worked well and we quickly learned to use very little pressure and let the drill do the work. Pushing to hard simply resulted in the drill becoming a wrist twister. 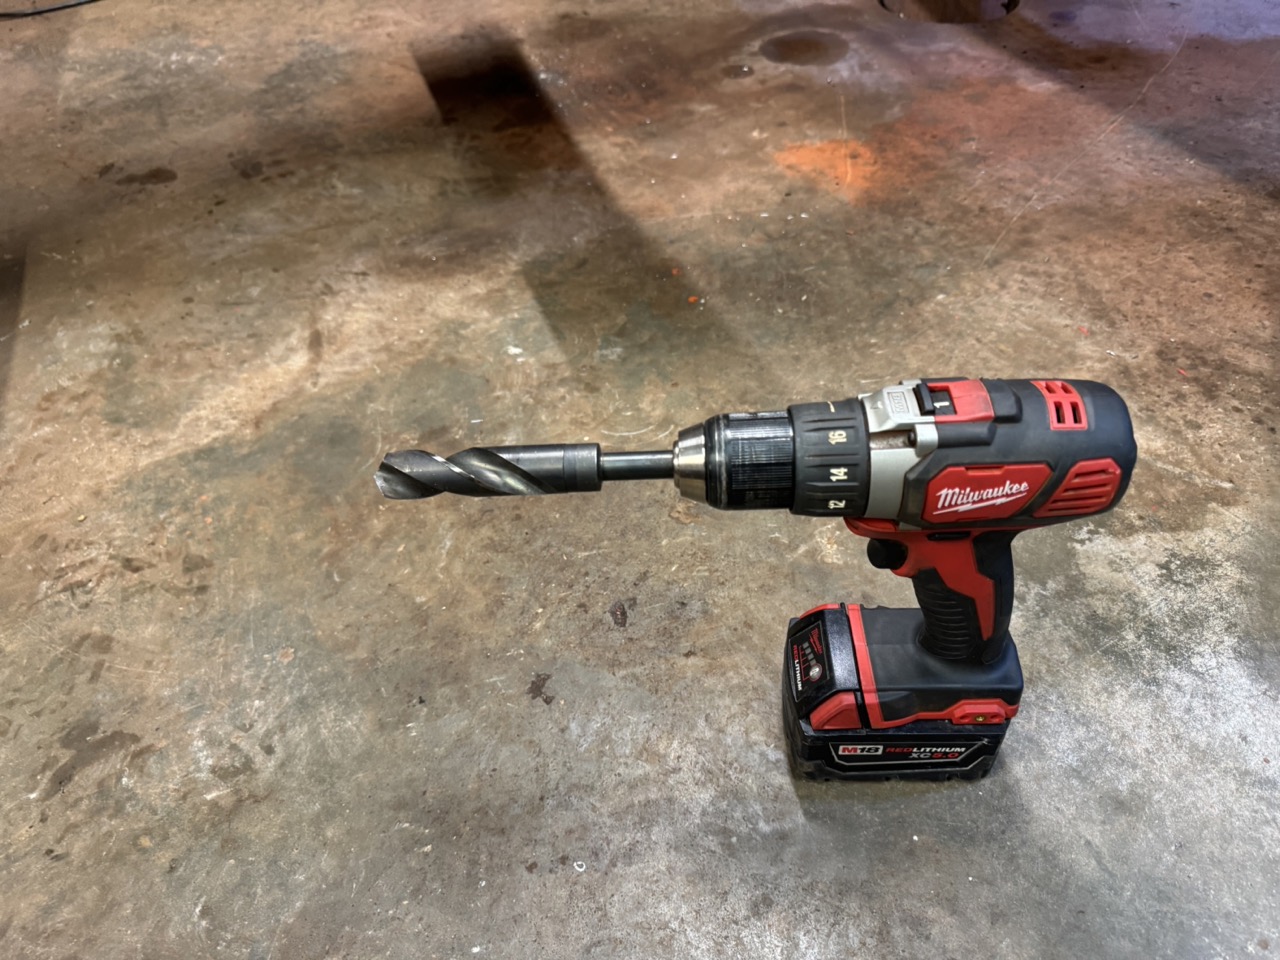 Then drilled a 1/4" pilot hole in the SC tongue for the side links to connect. This was easy on the drill press. 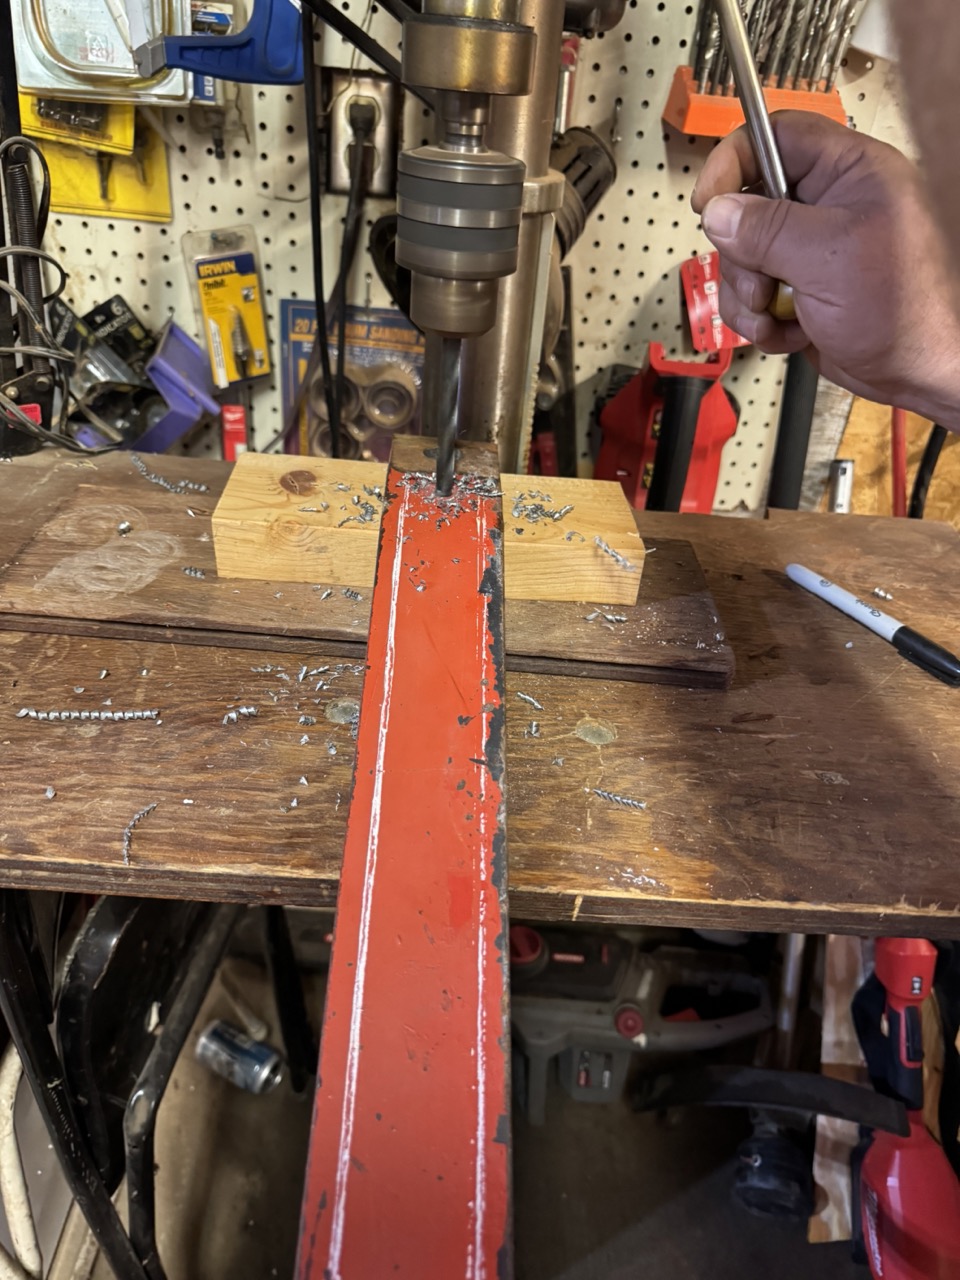 Then drilled the same hole with a 5/8" drill bit to fit the side link pins. 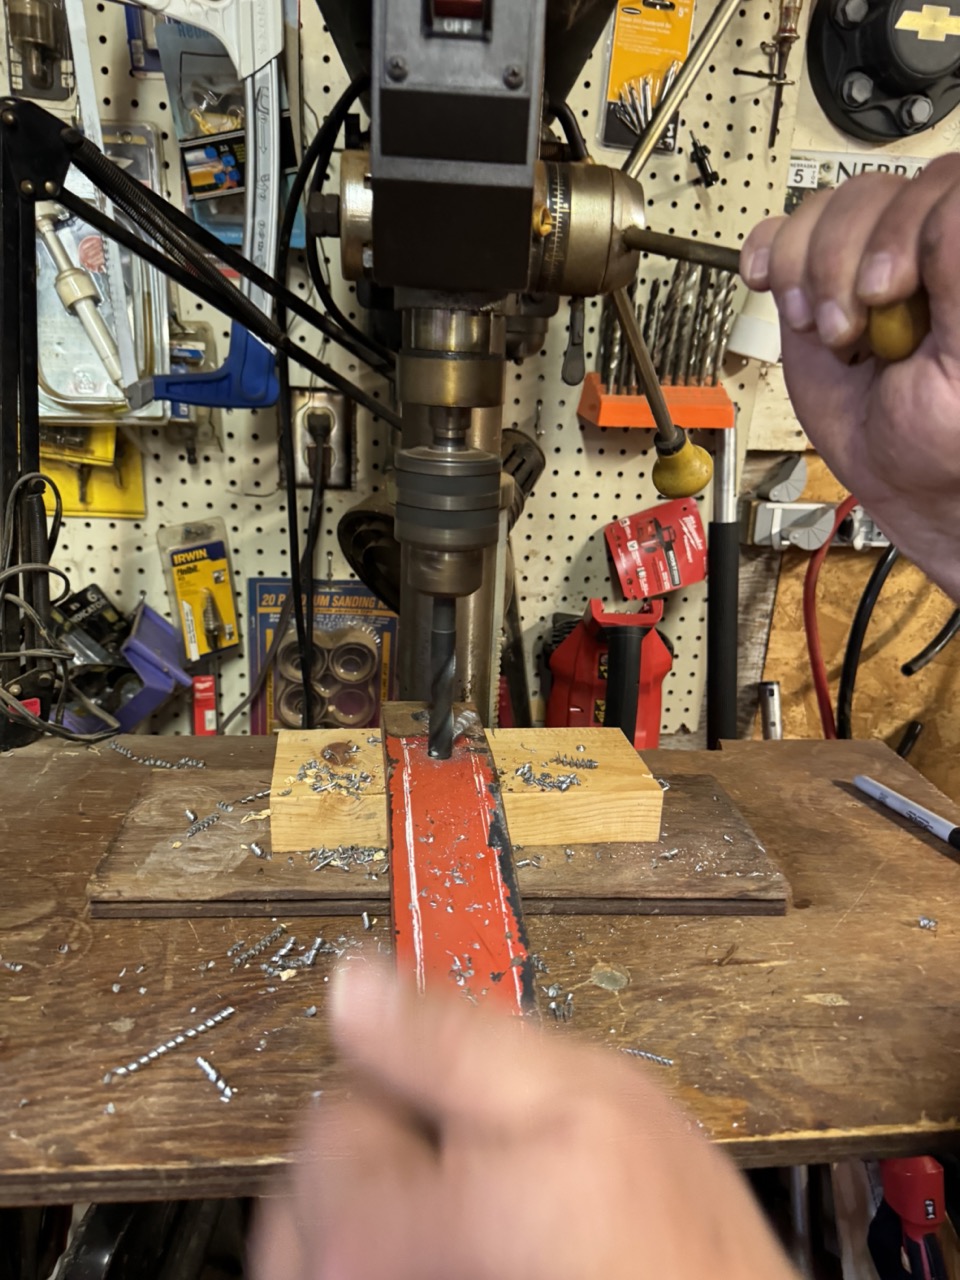
Edited by CA13414 - 15 Aug 2024 at 10:16pm
|
|
Helping the aged survive and thrive! 1953 CA
|
 |
CA13414 
Silver Level


Joined: 25 Feb 2024
Location: Nebraska
Points: 384
|
 Post Options Post Options
 Thanks(0) Thanks(0)
 Quote Quote  Reply Reply
 Posted: 15 Aug 2024 at 9:39pm Posted: 15 Aug 2024 at 9:39pm |
Here we put together the SC adapter with the blade. Again was easy to do and fit quite nicely. Did have to cut off the sides of each pin swivel. Both the top link and side links swivels were too wide to fit. Was easy to do with a Milwaukee hand grinder and a cutting blade. 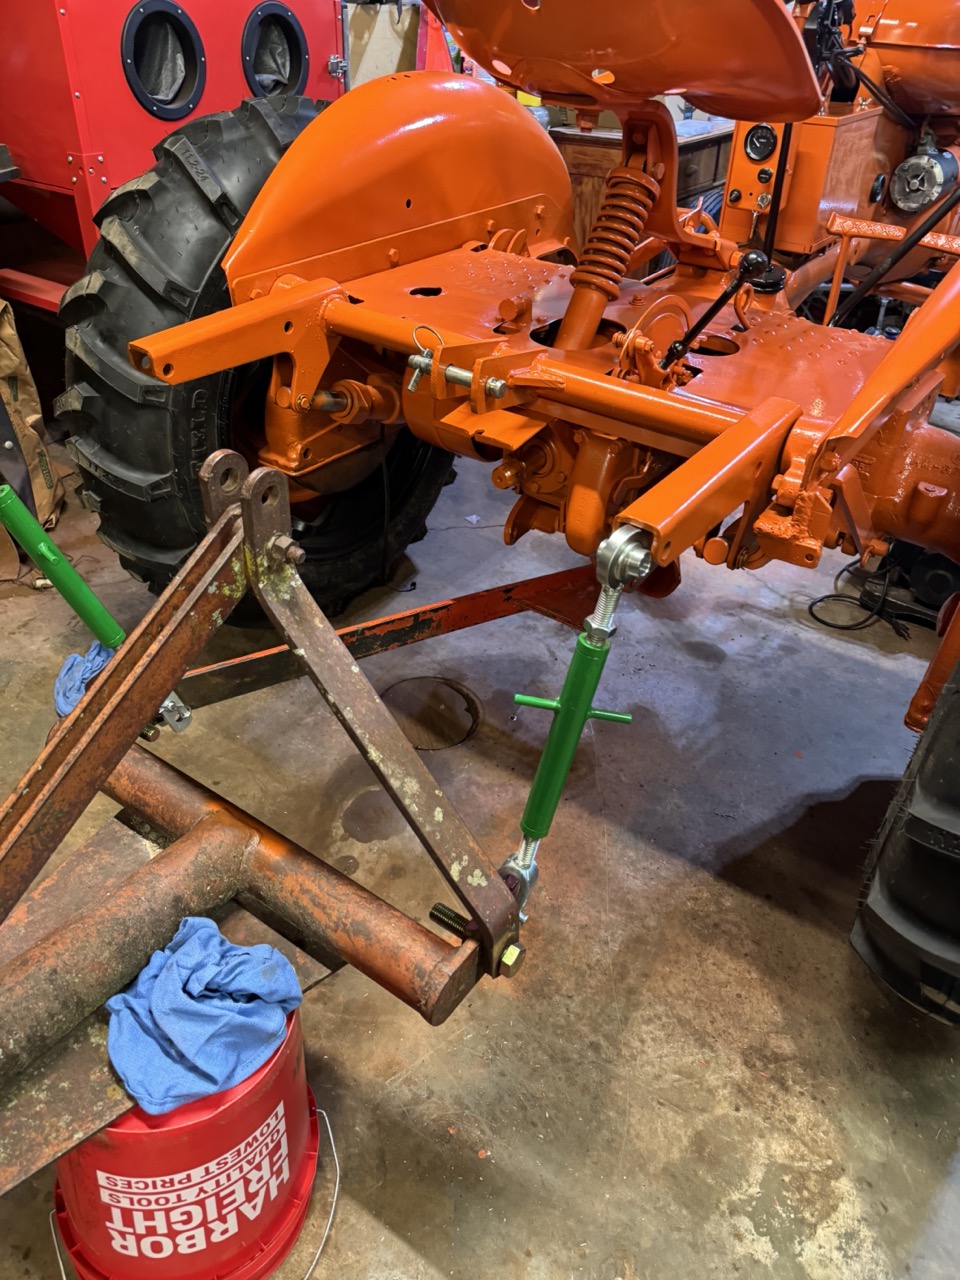 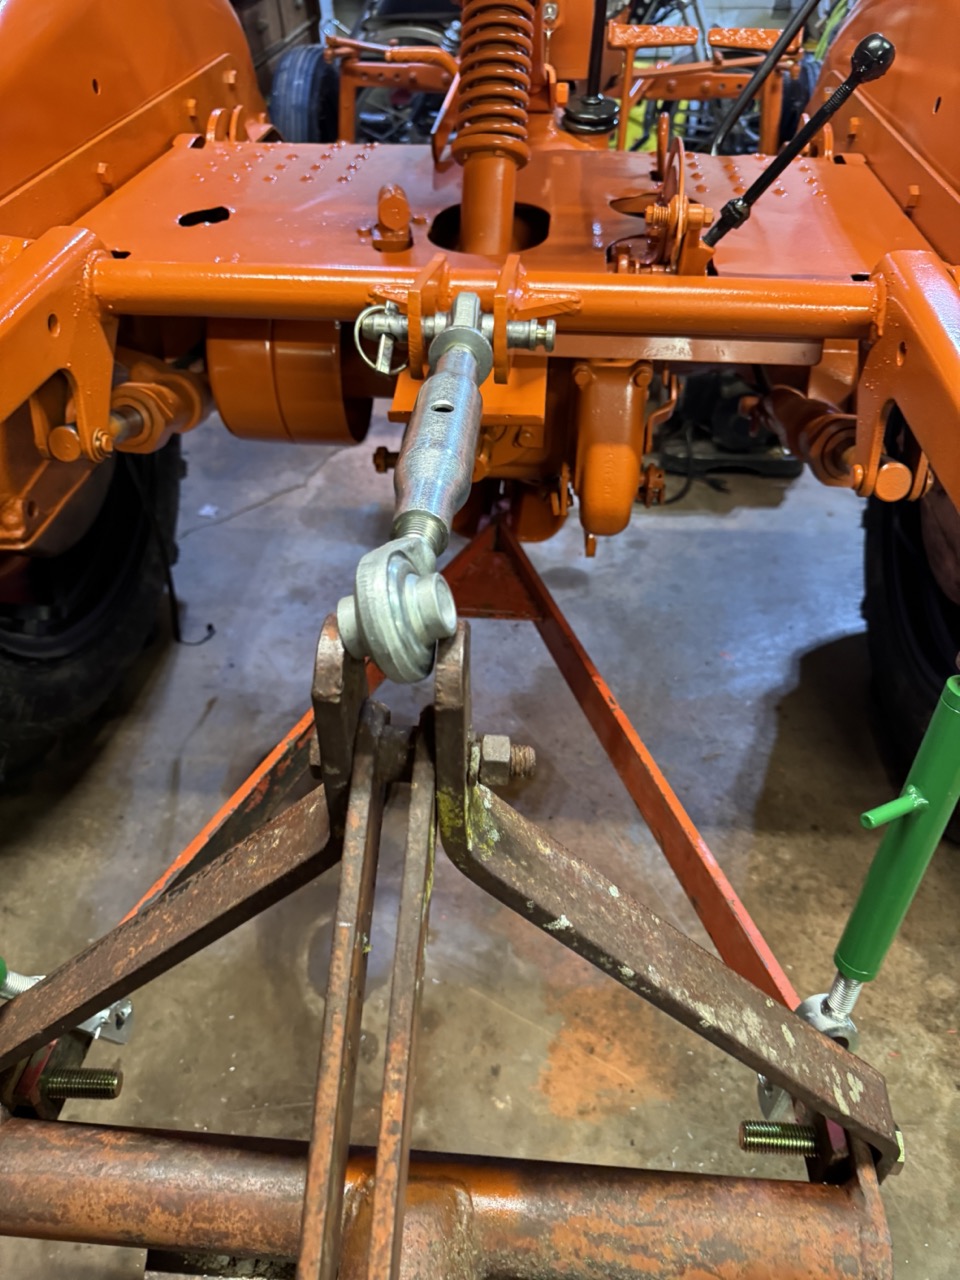 Once we cut off about 1/4" off each side, they fit nicely. Here is the assembled unit. Still need a few pins which I have ordered from Amazon. Went to Tractor Supply to get some but I swear they only had one thing of each item, and I needed two. Thus, Amazon wins on that sale. 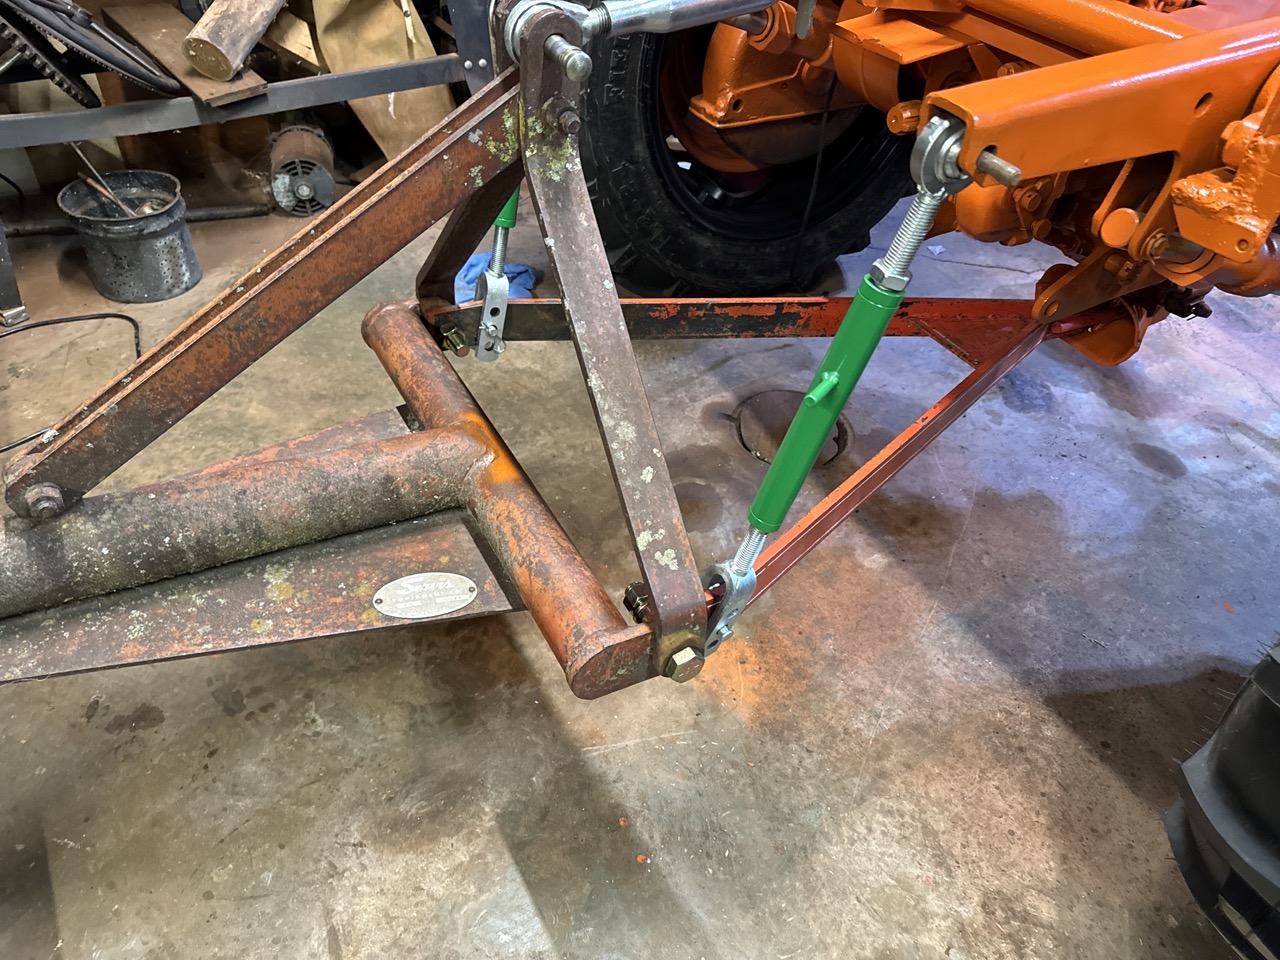 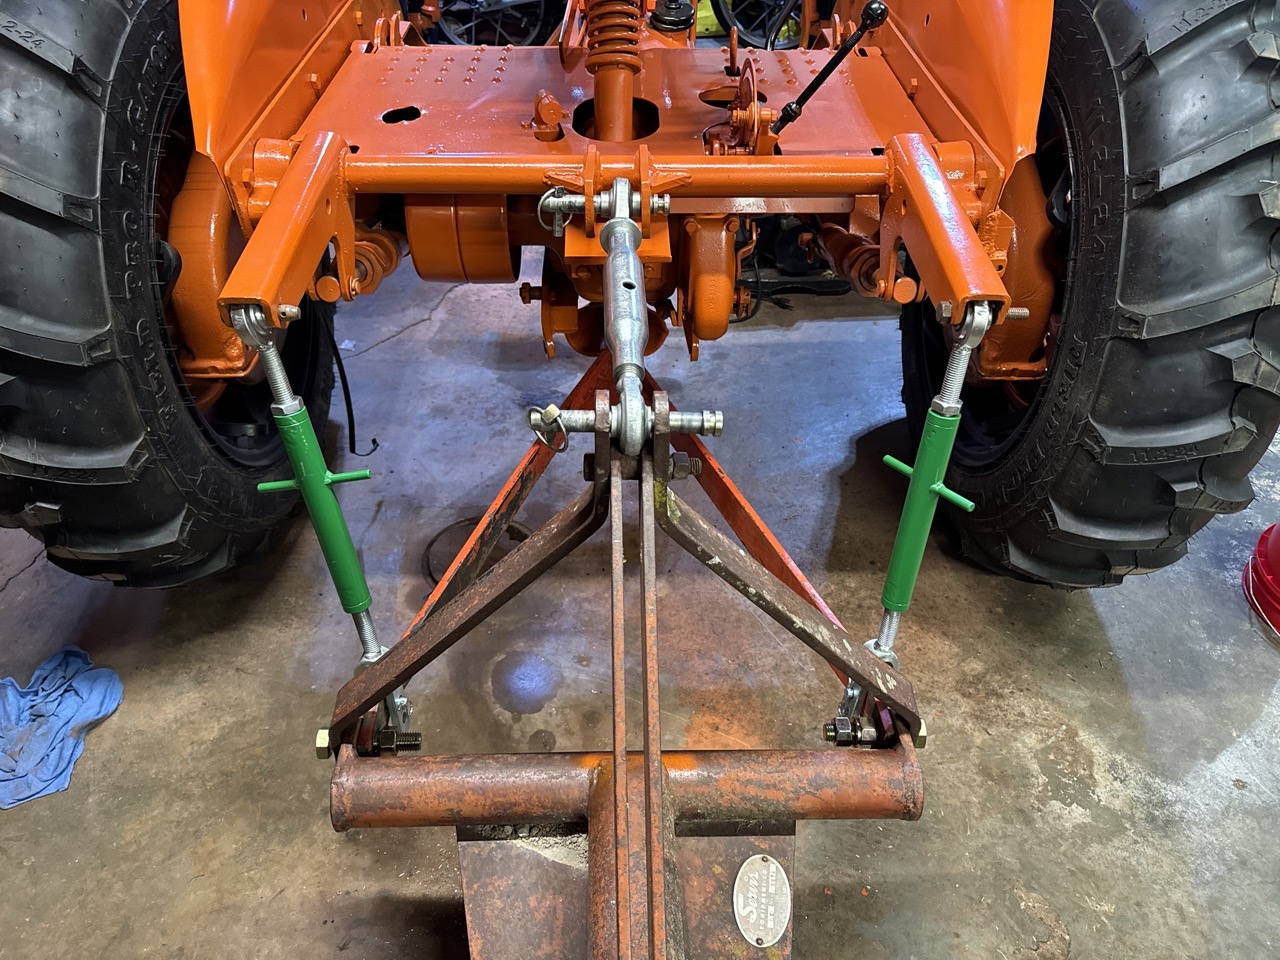 I do worry a bit about the side links and the angle they take. There isn't any binding, but in my mind would rather each were vertical vs. angling inward. I also do not have any chain stabilizers yet to prevent sideways motion which will just bend things. However, as I think about this, maybe the angles will stabilize the blade a bit. Still think I need two chains. We will see how this swings when lifted and when used this weekend.
Edited by CA13414 - 16 Aug 2024 at 5:28am
|
|
Helping the aged survive and thrive! 1953 CA
|
 |
CA13414 
Silver Level


Joined: 25 Feb 2024
Location: Nebraska
Points: 384
|
 Post Options Post Options
 Thanks(0) Thanks(0)
 Quote Quote  Reply Reply
 Posted: 15 Aug 2024 at 10:03pm Posted: 15 Aug 2024 at 10:03pm |
I did also do a bit more touch up on the bolts which hold the tin. Hope to give them a quick clear coat tomorrow such that we can do the decals on Saturday. While I love John Deere tractors, and we have a G, 60, 70 Diesel (with that crazy little 4 cylinder gas starter) a 620, and a 820 diesel on the farm, I simply could not let the JD green side links hang from our little AC. Thus, hit them with some orange and black paint, just to sleep better. Also hit the blade with a little black, just to see how it looked! :') Yes will still sand blast this on Saturday and paint them black!! 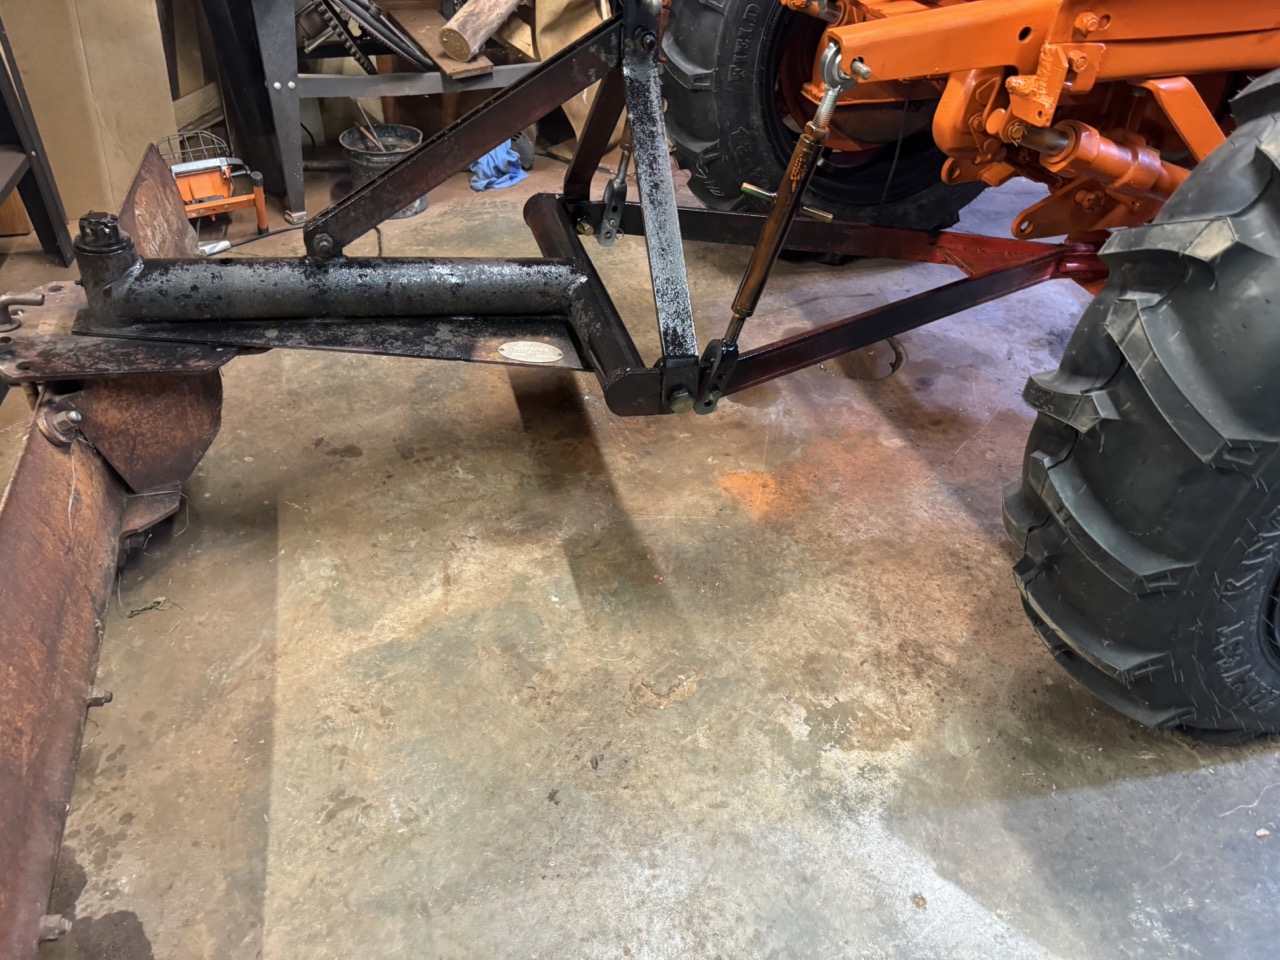
Edited by CA13414 - 16 Aug 2024 at 5:56am
|
|
Helping the aged survive and thrive! 1953 CA
|
 |
CA13414 
Silver Level


Joined: 25 Feb 2024
Location: Nebraska
Points: 384
|
 Post Options Post Options
 Thanks(0) Thanks(0)
 Quote Quote  Reply Reply
 Posted: 16 Aug 2024 at 5:41am Posted: 16 Aug 2024 at 5:41am |
|
Was thinking overnight that I will cut some 1/4" plate steel and bend them at to a slight angle. Then, drill a 7/8th" hole in 2 and 5/8" hole in 2. then another 5/8 hole in each of the 4. This will allow me to put one on each of the 7/8" bolts on the blade and criss-cross two chains to the pins on the hydraulic lift arms.
This should work to stabilize and prevent excessive swinging or pulling.
Was just thinking about the new "O-Rings" I put in the hydraulics (screw-C). Anxious to see if they hold when we lift the blade!
Edited by CA13414 - 16 Aug 2024 at 6:02am
|
|
Helping the aged survive and thrive! 1953 CA
|
 |
CA13414 
Silver Level


Joined: 25 Feb 2024
Location: Nebraska
Points: 384
|
 Post Options Post Options
 Thanks(0) Thanks(0)
 Quote Quote  Reply Reply
 Posted: 17 Aug 2024 at 4:23pm Posted: 17 Aug 2024 at 4:23pm |
Have looked every where and can not find the fitting to attach the gas line to the sediment bowl. Thus, for now, while I order a new line and fitting, will use flexible gas line. Connected this with a barbed fitting. Worked well and at least was able to get it running. 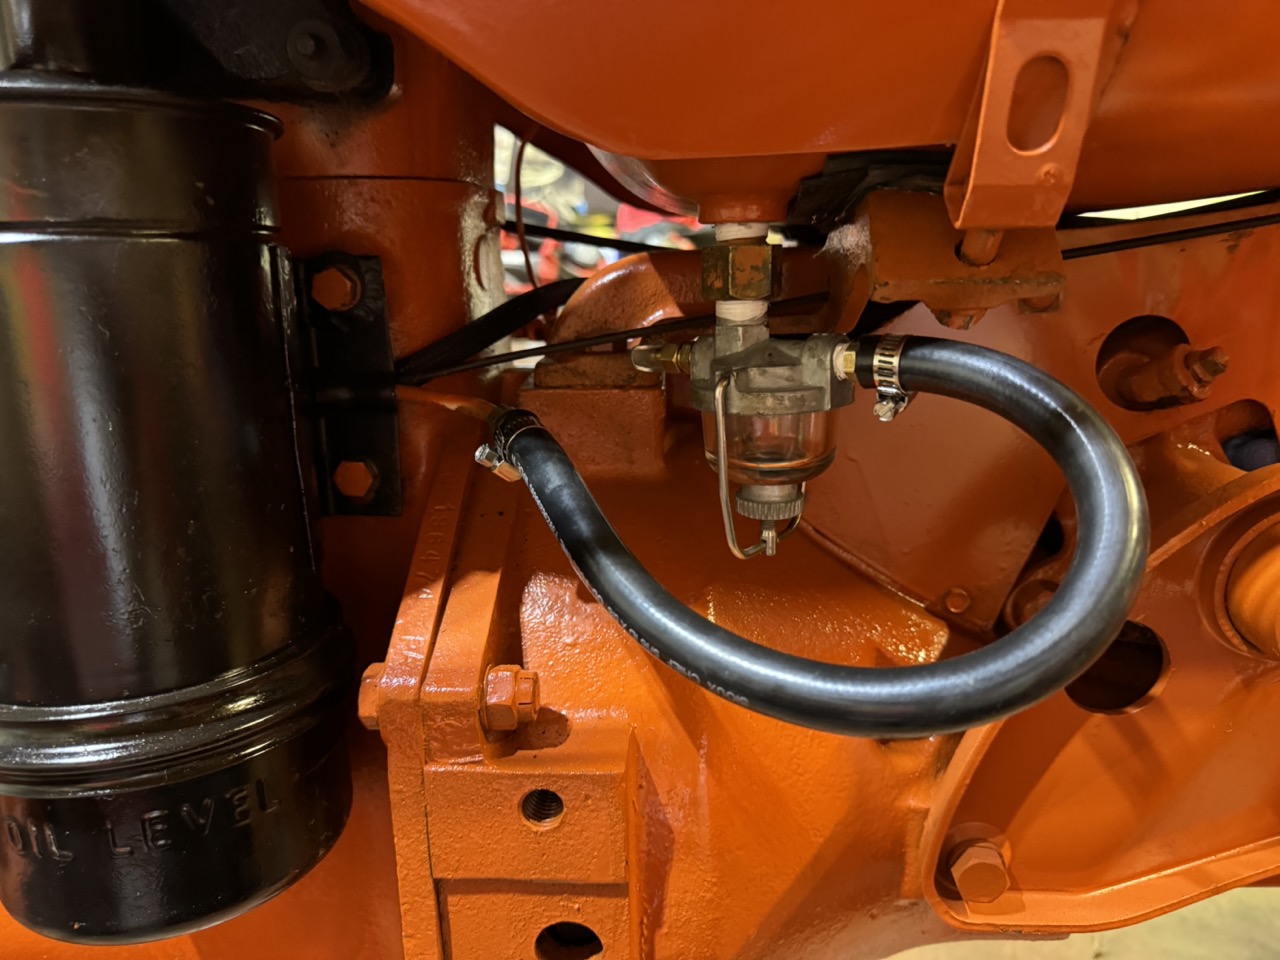 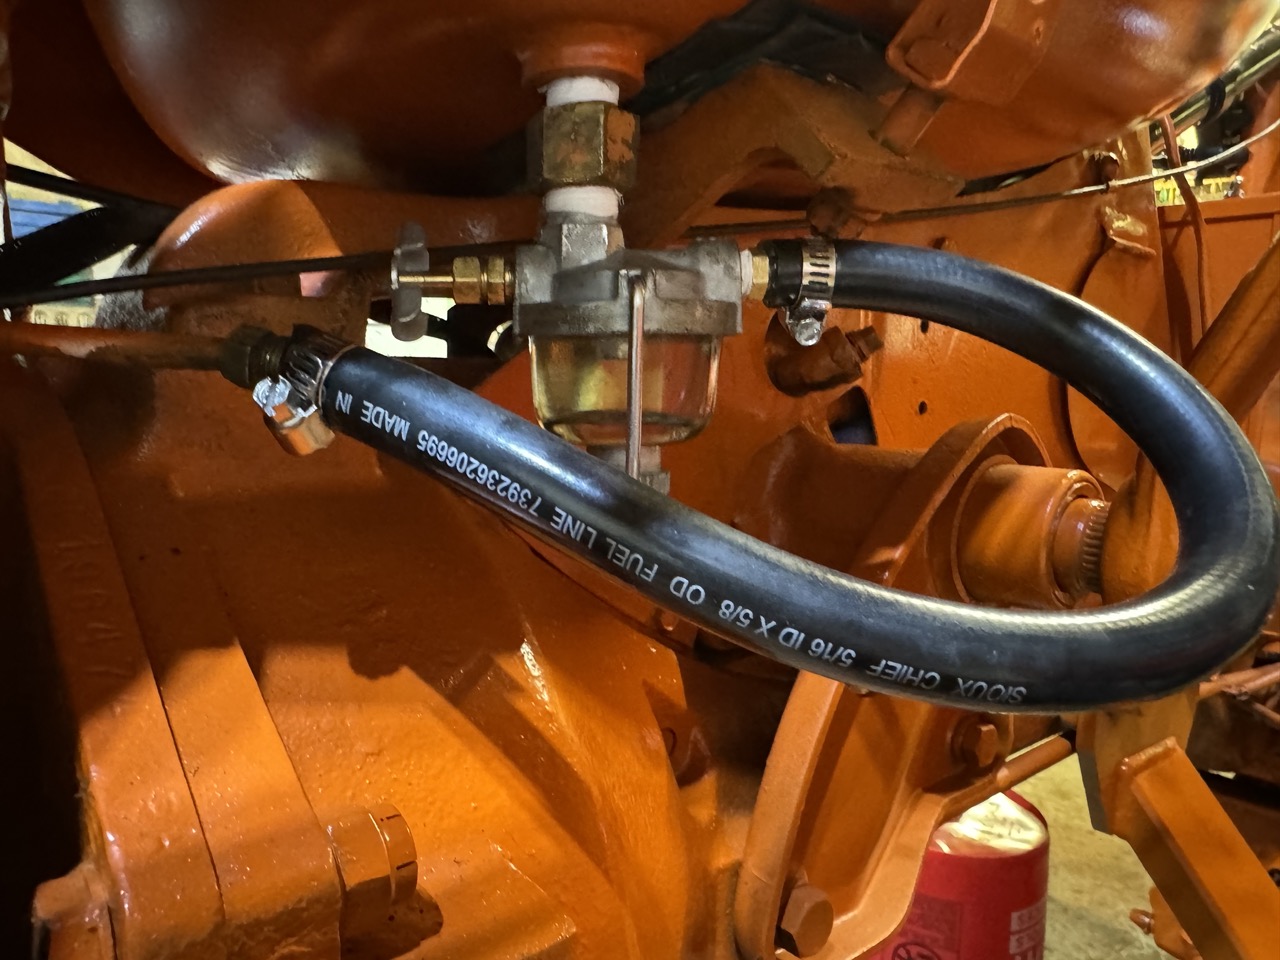
Edited by CA13414 - 17 Aug 2024 at 10:18pm
|
|
Helping the aged survive and thrive! 1953 CA
|
 |
CA13414 
Silver Level


Joined: 25 Feb 2024
Location: Nebraska
Points: 384
|
 Post Options Post Options
 Thanks(0) Thanks(0)
 Quote Quote  Reply Reply
 Posted: 17 Aug 2024 at 4:25pm Posted: 17 Aug 2024 at 4:25pm |
|
|
|
Helping the aged survive and thrive! 1953 CA
|
 |
Sugarmaker 
Orange Level


Joined: 12 Jul 2013
Location: Albion PA
Points: 8627
|
 Post Options Post Options
 Thanks(0) Thanks(0)
 Quote Quote  Reply Reply
 Posted: 17 Aug 2024 at 6:40pm Posted: 17 Aug 2024 at 6:40pm |
Dan, Only hope my old CA puller looks as good as your tractor! When the decals go on your getting close to the finish line! Regards, Chris and Cheryl
|
|
D17 1958 (NFE), WD45 1954 (NFE), WD 1952 (NFE), WD 1950 (WFE), Allis F-40 forklift, Allis CA, Allis D14, Ford Jubilee, Many IH Cub Cadets, 32 Ford Dump, 65 Comet.
|
 |
CA13414 
Silver Level


Joined: 25 Feb 2024
Location: Nebraska
Points: 384
|
 Post Options Post Options
 Thanks(0) Thanks(0)
 Quote Quote  Reply Reply
 Posted: 17 Aug 2024 at 7:57pm Posted: 17 Aug 2024 at 7:57pm |
 Sugarmaker wrote: Sugarmaker wrote:
Dan,Only hope my old CA puller looks as good as your tractor! When the decals go on your getting close to the finish line! Regards, Chris and Cheryl |
Thank you. You are doing and awesome job! I don't think it will ever end. I keep thinking of little things to do and as always, I suspect there will be a never ending lis to do. That is OK and honestly, will be fun to keep 'tinkering!"
Edited by CA13414 - 18 Aug 2024 at 9:10am
|
|
Helping the aged survive and thrive! 1953 CA
|
 |
CA13414 
Silver Level


Joined: 25 Feb 2024
Location: Nebraska
Points: 384
|
 Post Options Post Options
 Thanks(0) Thanks(0)
 Quote Quote  Reply Reply
 Posted: 17 Aug 2024 at 8:26pm Posted: 17 Aug 2024 at 8:26pm |
Started it up and was not able to lift the blade. After a few min, realized the oil was low. Suspect this was in part due to filling the lines and cylinders and circulating since draining everthing. It was just below the "low level." Added almost another 1/2 a gallon and it worked well. Was not totally smooth and was a little jumpy. Not sure if that is normal for this hydraulic pump. Here is a link to a video which shows raising and lowering the blade. I did have to pull up the control handle almost half way before it lifted. I will play with this a couple more times. I may just need to be patient and see if it will come up a little bit with each movement. Here is the blade after about 30 min and it did not drift down!! When I left my bothers shop about 2 hours later was still up which was awesome. 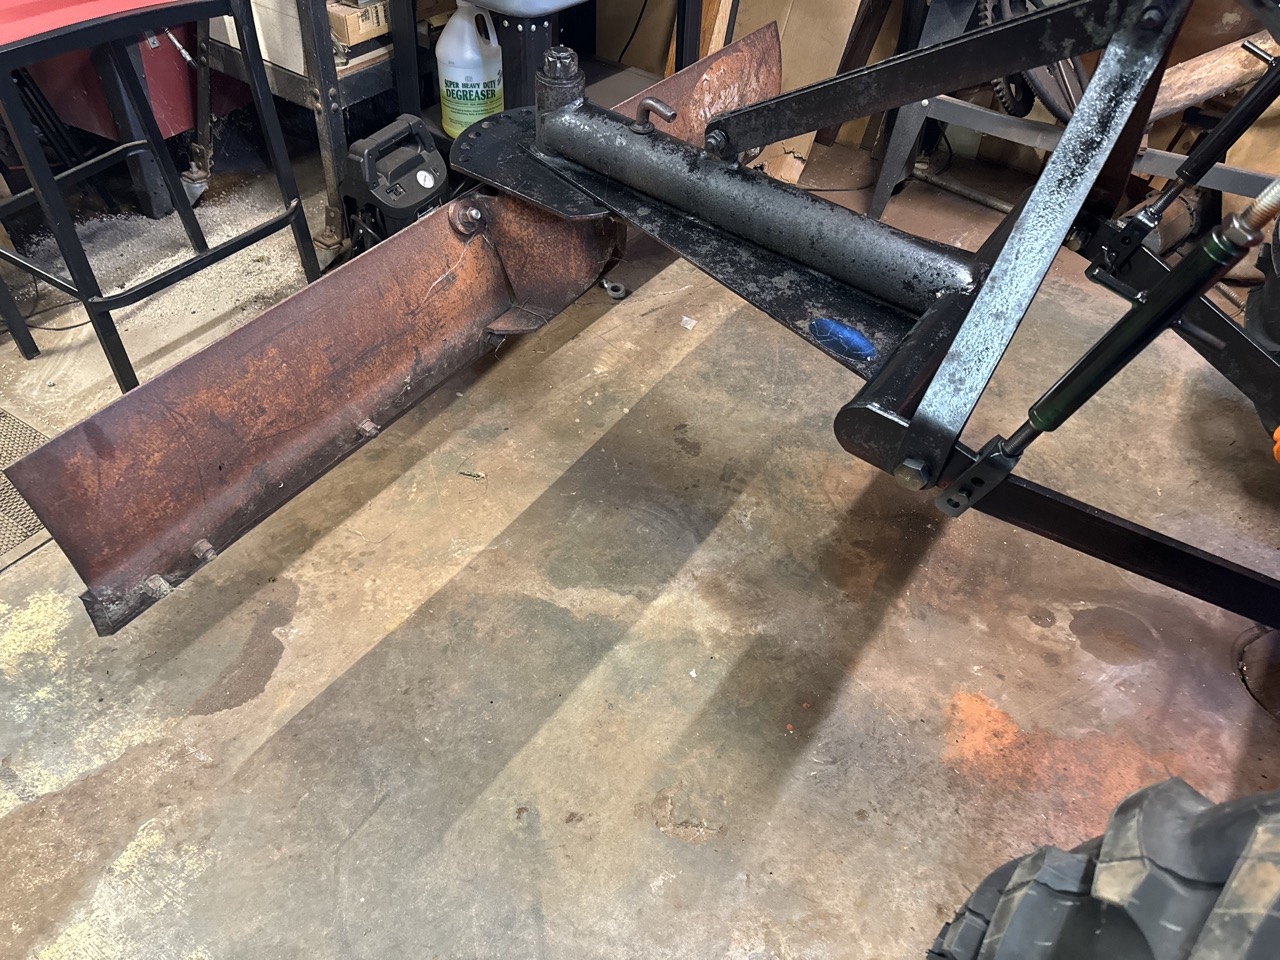
Edited by CA13414 - 17 Aug 2024 at 10:39pm
|
|
Helping the aged survive and thrive! 1953 CA
|
 |
CA13414 
Silver Level


Joined: 25 Feb 2024
Location: Nebraska
Points: 384
|
 Post Options Post Options
 Thanks(0) Thanks(0)
 Quote Quote  Reply Reply
 Posted: 17 Aug 2024 at 8:29pm Posted: 17 Aug 2024 at 8:29pm |
|
There is also quite a bit of play in the PTO and pulley when engaged. I will take a video tomorrow. Was reading about this and need to figure out how to tighten up this up if possible and even if needed.
Edited by CA13414 - 17 Aug 2024 at 9:09pm
|
|
Helping the aged survive and thrive! 1953 CA
|
 |
CA13414 
Silver Level


Joined: 25 Feb 2024
Location: Nebraska
Points: 384
|
 Post Options Post Options
 Thanks(0) Thanks(0)
 Quote Quote  Reply Reply
 Posted: 17 Aug 2024 at 8:55pm Posted: 17 Aug 2024 at 8:55pm |
My wife bought me a new Traction Booster gauge for my B-day. Was totally stoked to install it on the "little orange dude." Looks awesome! 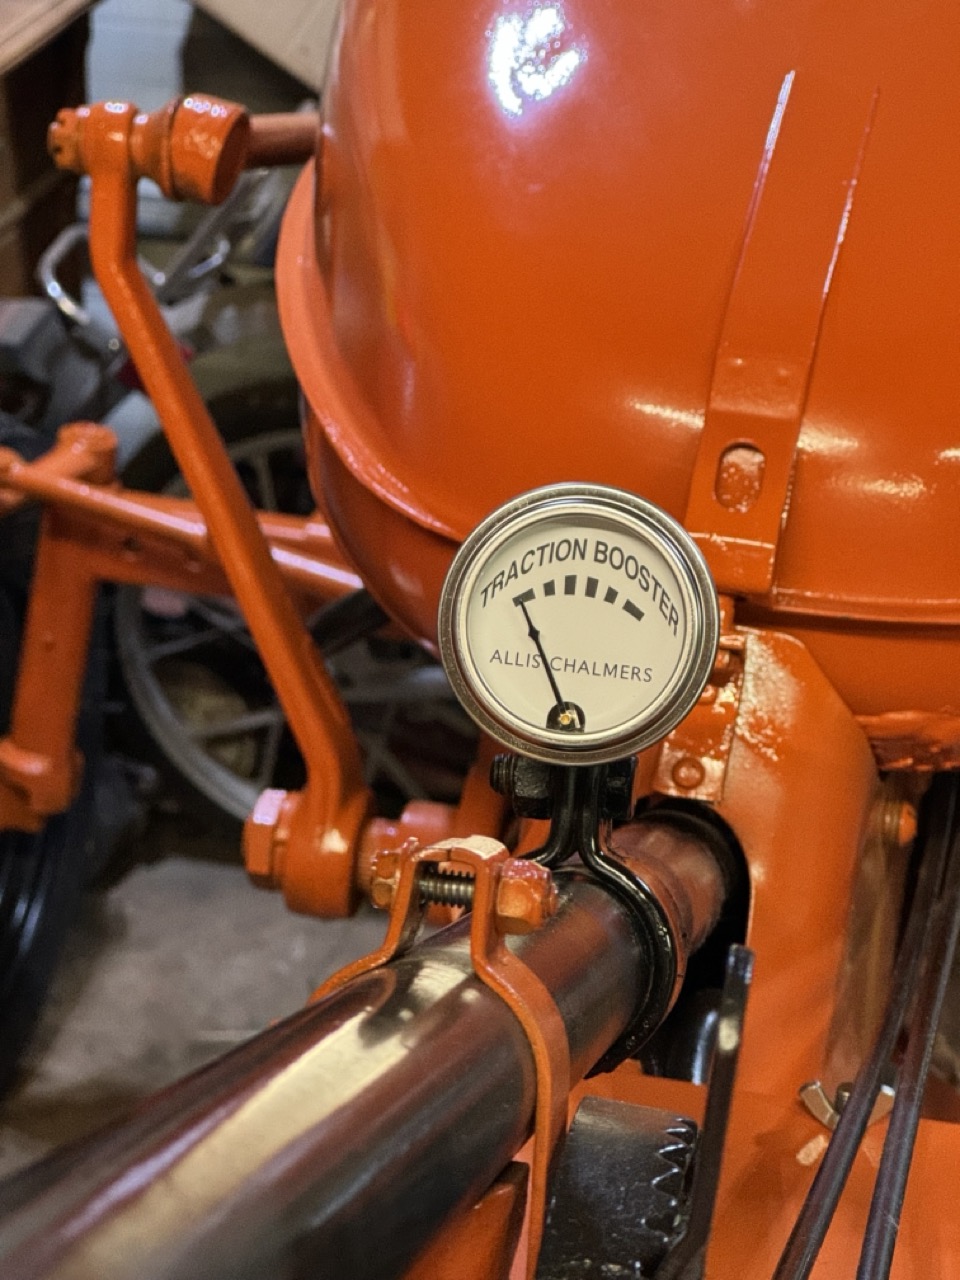
Edited by CA13414 - 17 Aug 2024 at 9:08pm
|
|
Helping the aged survive and thrive! 1953 CA
|
 |
steve(ill) 
Orange Level Access


Joined: 11 Sep 2009
Location: illinois
Points: 89296
|
 Post Options Post Options
 Thanks(1) Thanks(1)
 Quote Quote  Reply Reply
 Posted: 17 Aug 2024 at 9:18pm Posted: 17 Aug 2024 at 9:18pm |
|
looking good !!..... lift mods for the "ALLIS TO 3 POINT" worked out well.... also like the BLACK color on a few items, sets off the ORANGE nice..... and your right.. 100% BETTER after the decals are installed... i have noticed that before !
|
|
Like them all, but love the "B"s.
|
 |
CA13414 
Silver Level


Joined: 25 Feb 2024
Location: Nebraska
Points: 384
|
 Post Options Post Options
 Thanks(0) Thanks(0)
 Quote Quote  Reply Reply
 Posted: 17 Aug 2024 at 9:33pm Posted: 17 Aug 2024 at 9:33pm |
 CA13414 wrote: CA13414 wrote:
 CA13414 wrote: CA13414 wrote:
 1955CA wrote: 1955CA wrote:
Hey CA, did you end up getting the proper o-ring for this? Anyone have the AGCO part number? Mine has a slight leak also. |
I have not. I did go to AGCO and look around but there were hundreds of "O-rings" and I could not find anything. Mostly because, there was nothing to guide me since they just list O-rings without measurements, sizes or description on where they fit.
I was planning to see if it leaked once up and running. Hoping the shaved O-ring from amazon is enough and doesnt leak.
However, now thinking about it, I will look around again and see if I get lucky!!!!
|
I did just order a 110 Silicone O-Ring, 70A Durometer, Red, 3/8" ID, 9/16" OD, 3/32" Width.
Will see if that works!!
|
A follow up on the O-ring for the hydraulic "screw C. The link above for a 3/8" ID, 9/16" OD, 3/32" width works well. Thus far after raising and lowing multiple time and holding the blade up for a few hours..... no leaking. Will check again tomorrow. 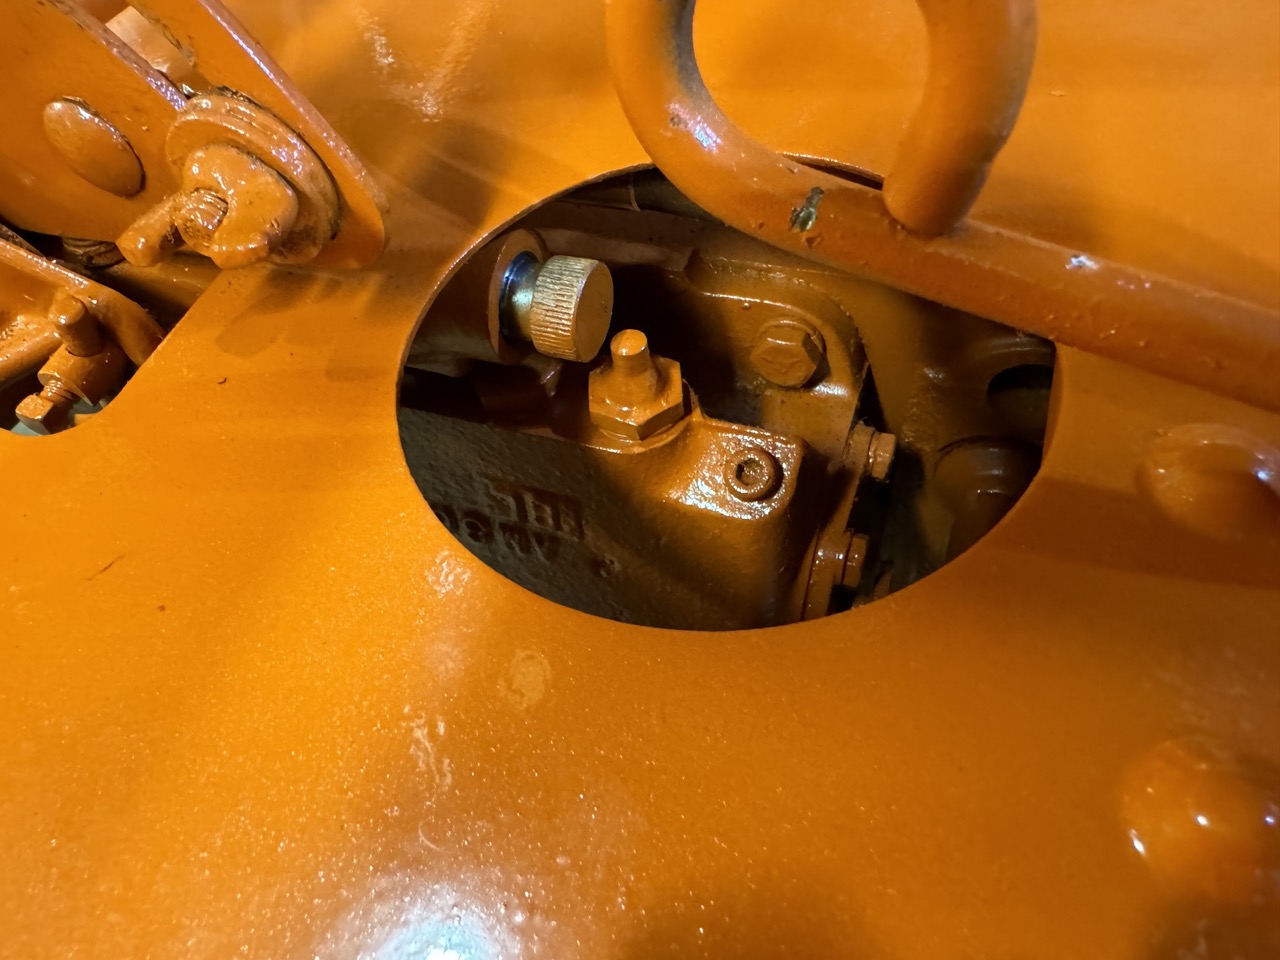
Edited by CA13414 - 17 Aug 2024 at 9:45pm
|
|
Helping the aged survive and thrive! 1953 CA
|
 |
CA13414 
Silver Level


Joined: 25 Feb 2024
Location: Nebraska
Points: 384
|
 Post Options Post Options
 Thanks(0) Thanks(0)
 Quote Quote  Reply Reply
 Posted: 18 Aug 2024 at 6:43pm Posted: 18 Aug 2024 at 6:43pm |
Here is the CA out of the shop and ready to drive it on the trailer. We did notice that one of the side links weld to the top swivel was cracked. Thus, ground off the weld and re-welded both sides. It really was a poor weld, thus I am glad we saw this and fixed it. 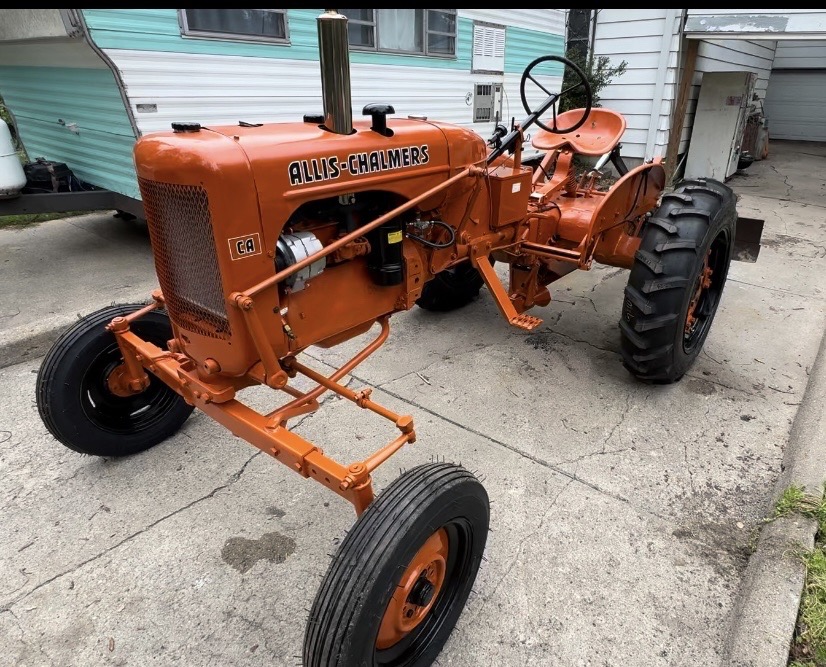 Here is a video of the tractor walk around today. Compared to the original walk around about 6 months ago right after we got it running. Then drove it up on the trailer and secured it with straps. 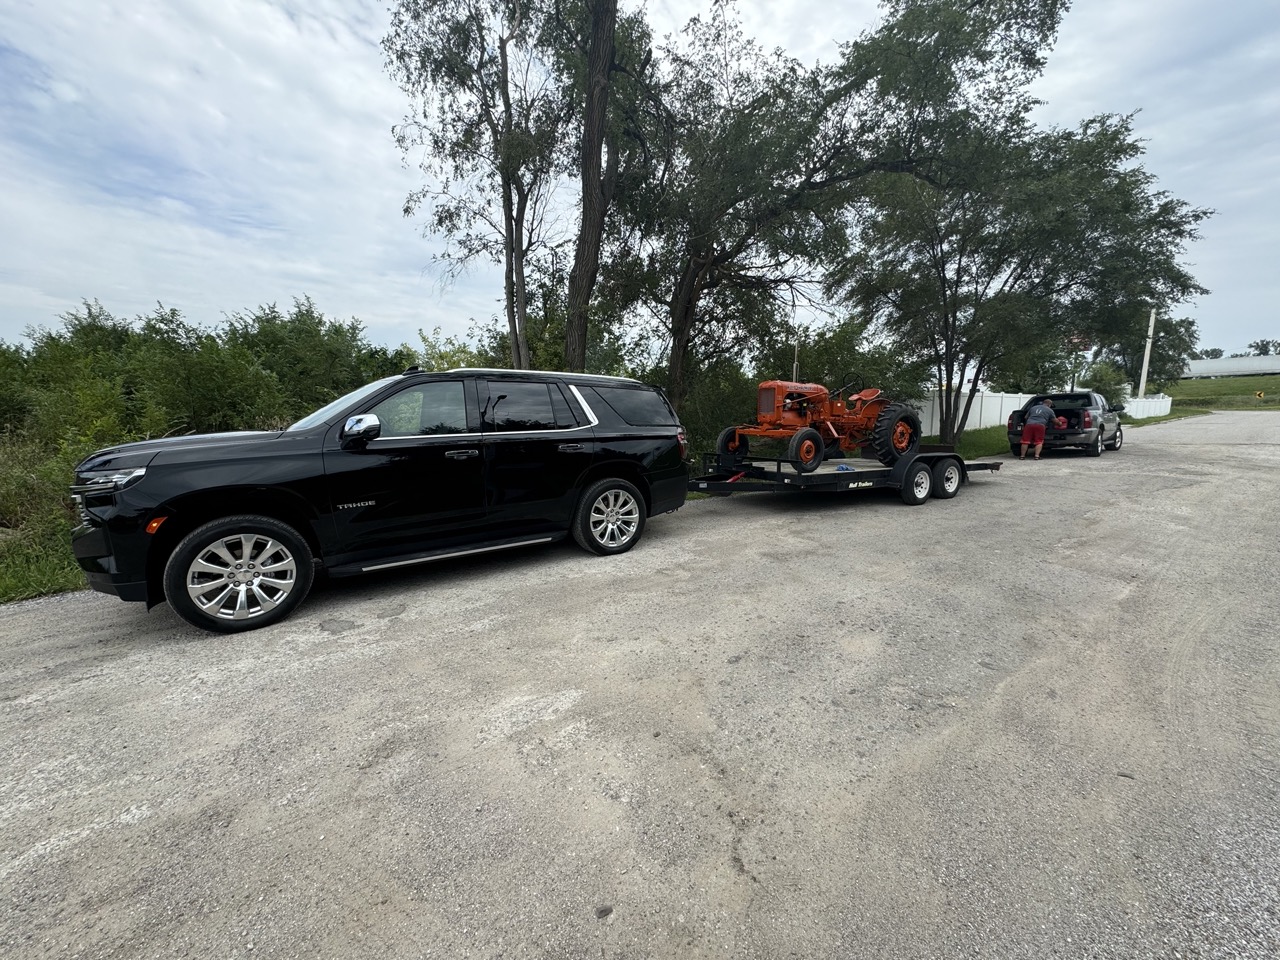 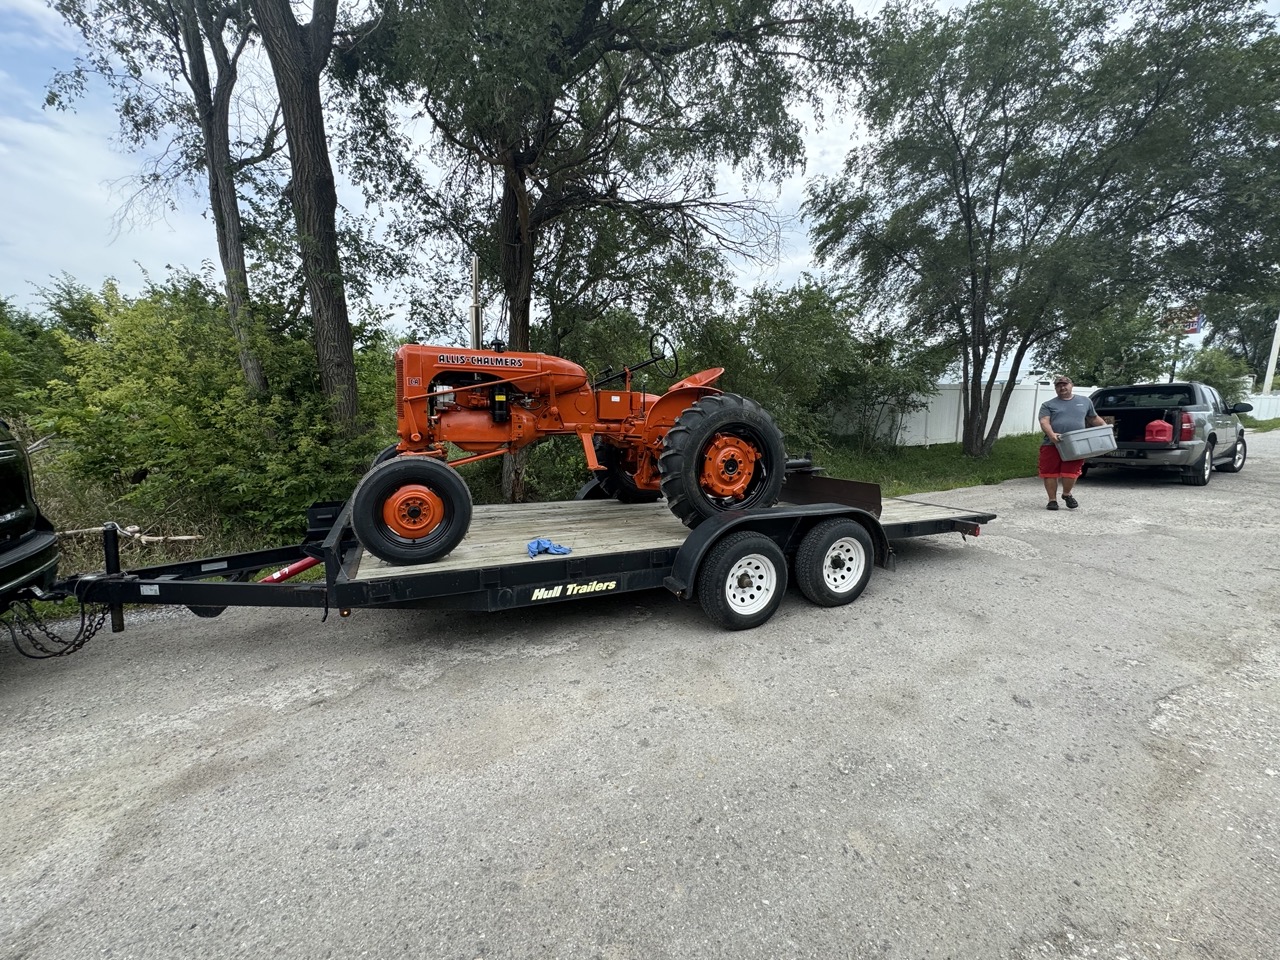 Then drove out to the house. Will use our little orange friend (I have been calling him our "Little Orange Dude") to keep our lake beach in shape (i.e. sand pit on the Platte River in Nebraska turned residential).
Edited by CA13414 - 19 Aug 2024 at 6:25am
|
|
Helping the aged survive and thrive! 1953 CA
|
 |


 Topic Options


 Post Options
 Thanks(0)


 steve(ill) wrote:


