| Author |
 Topic Search Topic Search  Topic Options Topic Options
|
steve(ill) 
Orange Level Access


Joined: 11 Sep 2009
Location: illinois
Points: 77939
|
 Post Options Post Options
") Thanks(0) Thanks(0)
") Quote Quote  Reply Reply
 Posted: 02 Feb 2023 at 9:16pm Posted: 02 Feb 2023 at 9:16pm |
|
like Steve mentioned, loosen the head while on the tractor... I have done several loader / backhoe cylinders by pulling the rod pin at the end, unscrew the cylinder head, and pulling the rod and head out of the barrel and leave barrel on the tractor, hoses still connected.... take the rod and head to the shop for repairs..
Edited by steve(ill) - 02 Feb 2023 at 9:17pm
|
|
Like them all, but love the "B"s.
|
 |
|
Sponsored Links
|
|
|
steve fischer
Orange Level
Joined: 11 Jul 2011
Location: sleepy eye mn
Points: 927
|
Post Options
Thanks(0)
Quote Reply
Posted: 02 Feb 2023 at 9:09pm |
have rebuilt lots of them for the 400 and 500 loaders can do in 15 min if they come apart and i do have the allis tool to do them do not miss up the piston halves they are matched sets also have been using a quad ring for the rod seal ,number 222 ,work better then the oring on rod would not use a hammer and screw driver you will damage the thread inside the tube also i loosen the cap nut before i take cylinder off of loader ,the loader holds it solid to get the end cap lose
|
|
MACK
Orange Level
Joined: 17 Nov 2009
Points: 7664
|
Post Options
Thanks(0)
Quote Reply
Posted: 02 Feb 2023 at 8:37pm |
|
If you have a snap ring inside, grind burs from snap ring Grove. Don't clamp barrel of cylinder in vice over piston. Most don't pull that hard unless barrel has been mashed or dented. MACK
|
|
calico190xt68
Orange Level

Joined: 12 Jan 2017
Location: Frankton, IN
Points: 729
|
Post Options
Thanks(0)
Quote Reply
Posted: 02 Feb 2023 at 1:42pm |
After watching the video, I understand better now how the spanner wrench is used. So big thanks on that!
Will it really take that much force to remove the cylinder from the outside casing? Looks like he was fixing a much bigger cylinder so not sure I will encounter the same pressure. If it takes a bunch of pressure like that, I may have to work on my setup.
|
|
80 7010 w/Cab, 67 190XTD Series I w/500 Loader, AC 2000 Plow, AC 4 row Planter, AC 77G Rake, Member Indiana A-C Partners, Member TAC
|
|
steve(ill)
Orange Level Access
Joined: 11 Sep 2009
Location: illinois
Points: 77939
|
Post Options
Thanks(0)
Quote Reply
Posted: 02 Feb 2023 at 12:50pm |
this guy is rebuilding a cylinder ( not Allis) that has a head similar to yours and shows how to use the tools.... general idea..
|
|
Like them all, but love the "B"s.
|
|
calico190xt68
Orange Level
Joined: 12 Jan 2017
Location: Frankton, IN
Points: 729
|
Post Options
Thanks(0)
Quote Reply
Posted: 02 Feb 2023 at 12:29pm |
|
Thanks everybody for the additional direction and tool picture. I thought I would tackle one of the tilt cylinders first since they are smaller. My seal kits should be showing up by Friday. I haven't envisioned everything yet so may have some more questions. Once I dig into it, it may be more obvious.
|
|
80 7010 w/Cab, 67 190XTD Series I w/500 Loader, AC 2000 Plow, AC 4 row Planter, AC 77G Rake, Member Indiana A-C Partners, Member TAC
|
|
SteveMaskey(MO)
Orange Level

Joined: 11 Sep 2009
Location: Wellsville, MO
Points: 591
|
Post Options
Thanks(0)
Quote Reply
Posted: 02 Feb 2023 at 10:03am |
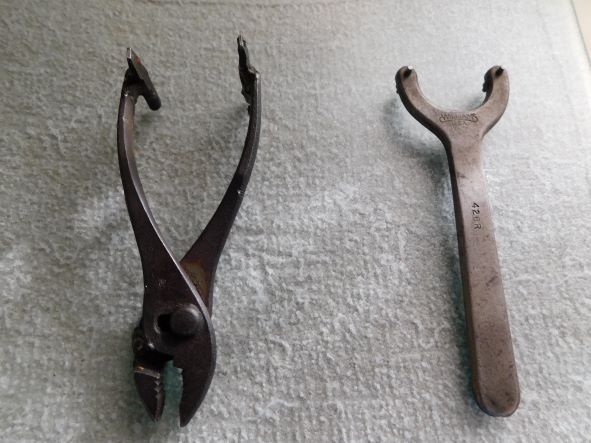 Here is one I made and one I bought. Unscrew
the cap where the shaft comes out and pull rod out. There will be a plug with
Orings and backups then on the end of shaft is the piston with cup seals. Pretty
straight forward just remember where everything goes when you take it apart
|
|
MACK
Orange Level
Joined: 17 Nov 2009
Points: 7664
|
Post Options
Thanks(0)
Quote Reply
Posted: 01 Feb 2023 at 9:46pm |
|
A hammer and punch can be used in place of special tool. Once started to turn, it should turn easy. Tool could be easily made by welding two pins in a piece of flat metal. MACK
|
|
HudCo
Orange Level

Joined: 29 Jan 2013
Location: Plymouth Utah
Points: 3299
|
Post Options
Thanks(0)
Quote Reply
Posted: 01 Feb 2023 at 9:44pm |
|
are they the ones that have the lock ring or wire that turns out by turning the cap
|
|
steve(ill)
Orange Level Access
Joined: 11 Sep 2009
Location: illinois
Points: 77939
|
Post Options
Thanks(0)
Quote Reply
Posted: 01 Feb 2023 at 6:00pm |
|
like you say, its not Rocket Science..... THe big thing is being able to unscrew the head off the cylinder to pull the rod and piston out... then having the right size socket to get the piston off the rod ( depending on cylinder design).... Im not familiar with that cylinder, but look at the HEAD where the rod comes out of the barrel and see how it unscrews.
|
|
Like them all, but love the "B"s.
|
|
calico190xt68
Orange Level
Joined: 12 Jan 2017
Location: Frankton, IN
Points: 729
|
Post Options
Thanks(0)
Quote Reply
Posted: 01 Feb 2023 at 3:17pm |
I understand the value of using a professional and know that is the safe thing to do, but I saw this as an opportunity to learn how to do it.
I have had cylinders fail on my equipment and waited days to a week or more to get them rebuilt. I thought since this wasn't an emergency, I could take my time and not be pressed. I do realize not every cylinder is built the same nor the process the same but this would give me start.
I also thought these cylinders might be easier to work on since they are older and possibly simpler. So I am not just being cheap in trying to save $200 per cylinder but trying to learn. If the tool to do this becomes a problem, then I may have to punt and go to a professional.
|
|
80 7010 w/Cab, 67 190XTD Series I w/500 Loader, AC 2000 Plow, AC 4 row Planter, AC 77G Rake, Member Indiana A-C Partners, Member TAC
|
|
DSeries4
Orange Level

Joined: 12 Sep 2009
Location: Ontario, Canada
Points: 7205
|
Post Options
Thanks(0)
Quote Reply
Posted: 01 Feb 2023 at 2:45pm |
|
If you have never done it before, just take the cylinders to a local hydraulic shop. They have the tools and experience to do the job properly and will stand behind their work.
|
|
'49 G, '54 WD45, '55 CA, '56 WD45D, '57 WD45, '58 D14, '59 D14, '60 D14, '61 D15D, '66 D15II, '66 D21II, '67 D17IV, '67 D17IVD, '67 190XTD, '73 620, '76 185, '77 175, '84 8030, '85 6080
|
|
calico190xt68
Orange Level
Joined: 12 Jan 2017
Location: Frankton, IN
Points: 729
|
Post Options
Thanks(0)
Quote Reply
Posted: 01 Feb 2023 at 11:05am |
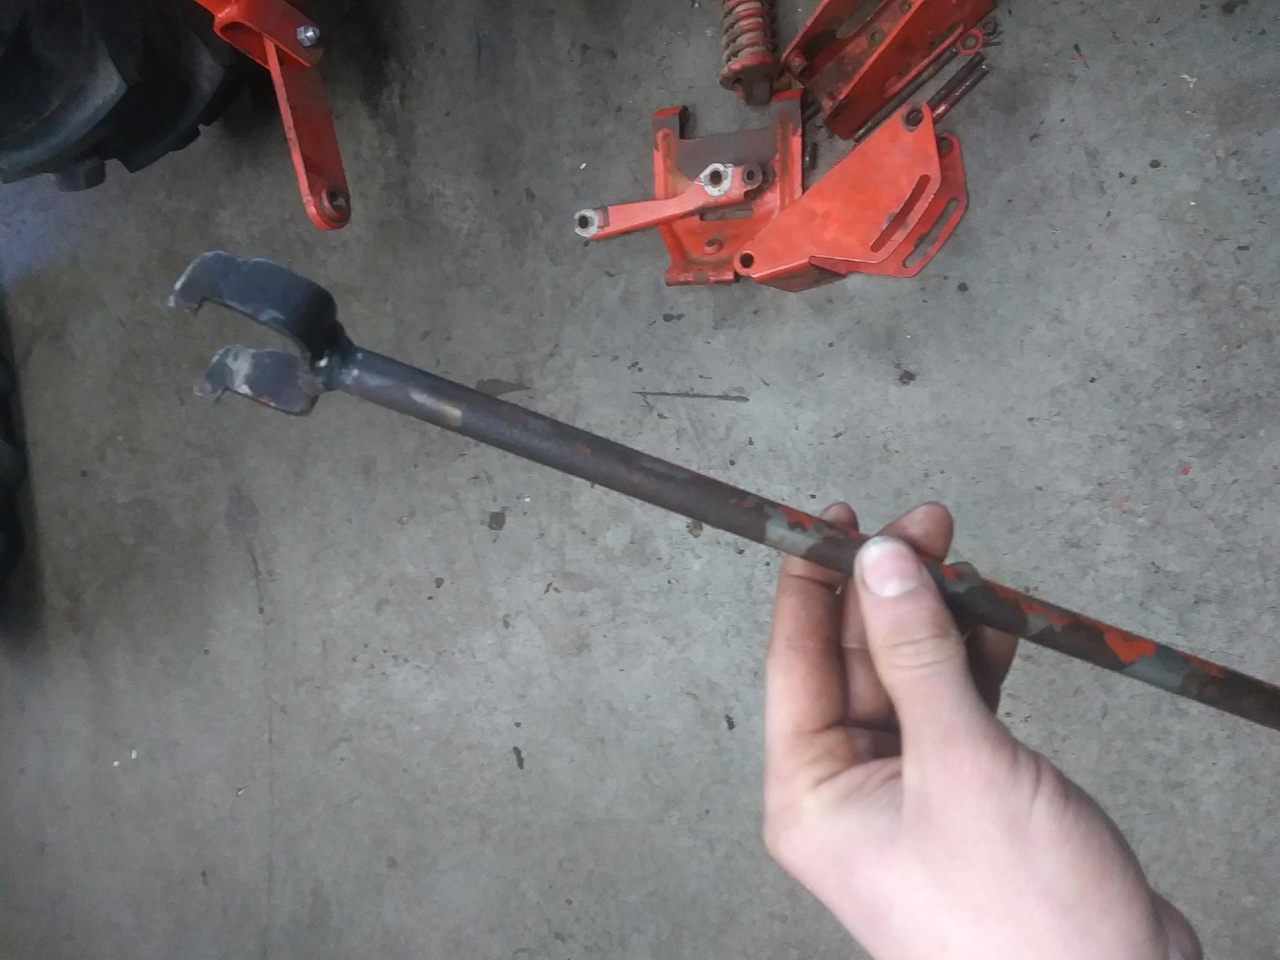
Bought new seal kits from A&W to fix all of my cylinders. I have not done this before so I am looking for advice. A&W did send me a picture of a special tool that helps remove the cylinder but I can't envision it's use until I dig into it. It appears I have to make one like they have unless someone has another suggestion? Here is what it looks like.
Any help and guidance on the steps to disassemble would be greatly appreciated.
|
|
80 7010 w/Cab, 67 190XTD Series I w/500 Loader, AC 2000 Plow, AC 4 row Planter, AC 77G Rake, Member Indiana A-C Partners, Member TAC
|
|