| Author |
 Topic Search Topic Search  Topic Options Topic Options
|
jlbintn 
Bronze Level

Joined: 28 Nov 2019
Location: Charleston, TN
Points: 138
|
 Post Options Post Options
") Thanks(0) Thanks(0)
 Quote Quote  Reply Reply
 Topic: drawbar question for a B Topic: drawbar question for a B
Posted: 02 Jan 2021 at 11:42pm |
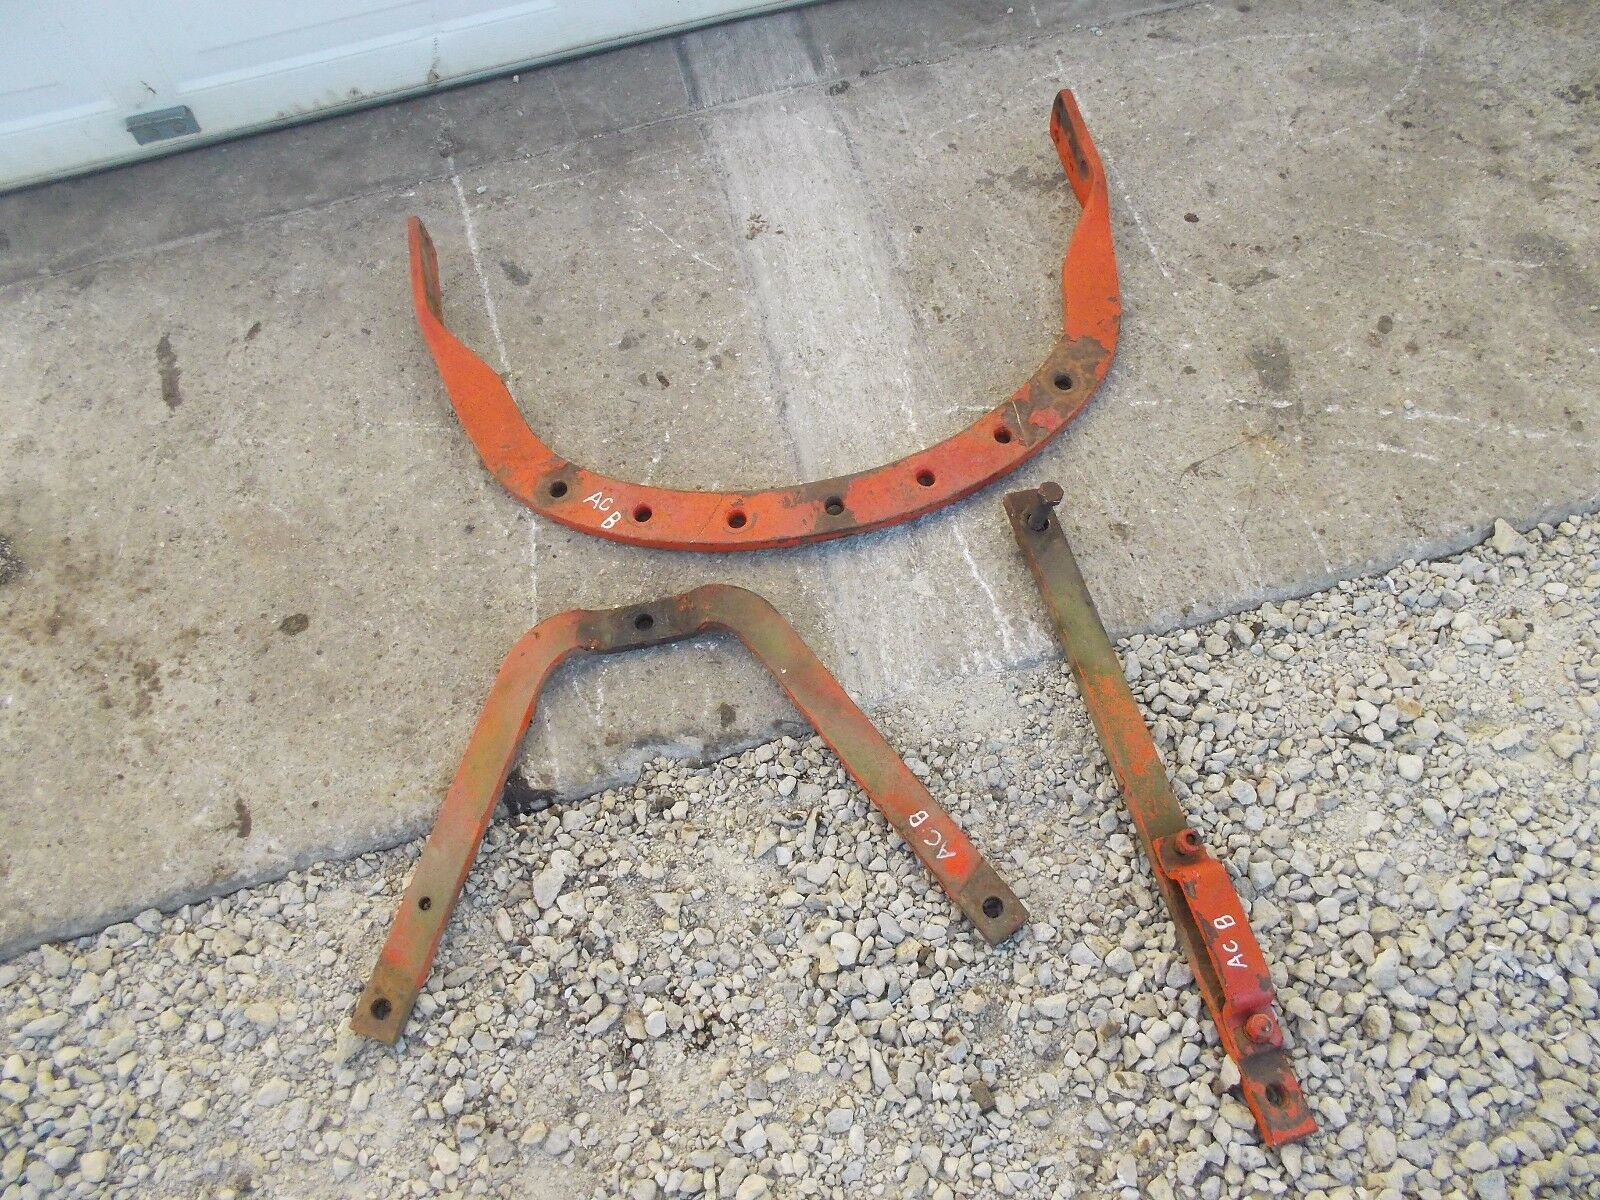
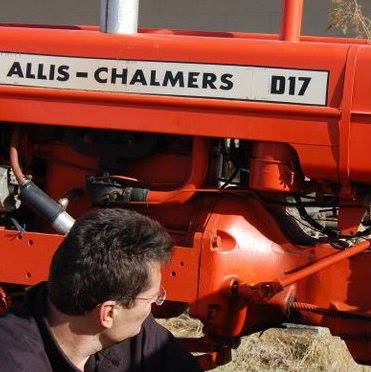
This looks to be an original B drawbar, but it doesn't look like everything needed to get it in working form on the tractor.
|
 |
|
Sponsored Links
|
|
|
B26240
Orange Level

Joined: 21 Nov 2009
Location: mn
Points: 3866
|
Post Options
Thanks(0)
Quote Reply
Posted: 03 Jan 2021 at 6:02am |
|
Yes John that is the swinging drawbar, the "a" shaped piece bolts to the "u" shaped piece in the direction they are facing. Then the drawbar "fork fits the "u" piece and bolts to the "a" piece. It seems to me that you don't see many B's with this setup. Bill Long will be able to tell us if it was standard equipment or if it was extra........ right Bill?
|
|
PaulB
Orange Level
Joined: 12 Sep 2009
Location: Rocky Ridge Md
Points: 5190
|
Post Options
Thanks(0)
Quote Reply
Posted: 03 Jan 2021 at 7:54am |
|
The only thing that looks to be missing are the "Hammer Straps" to attach the drawbar to the final drive housings and a couple of bolts to attach the swinging drawbar U piece to the standard drawbar.
|
|
If it was fun to pull in LOW gear, I could have a John Deere.
Real pullers don't have speed limits.
If you can't make it GO... make it SHINY
|
|
steve(ill)
Orange Level Access

Joined: 11 Sep 2009
Location: illinois
Points: 89106
|
Post Options
Thanks(0)
Quote Reply
Posted: 03 Jan 2021 at 9:31am |
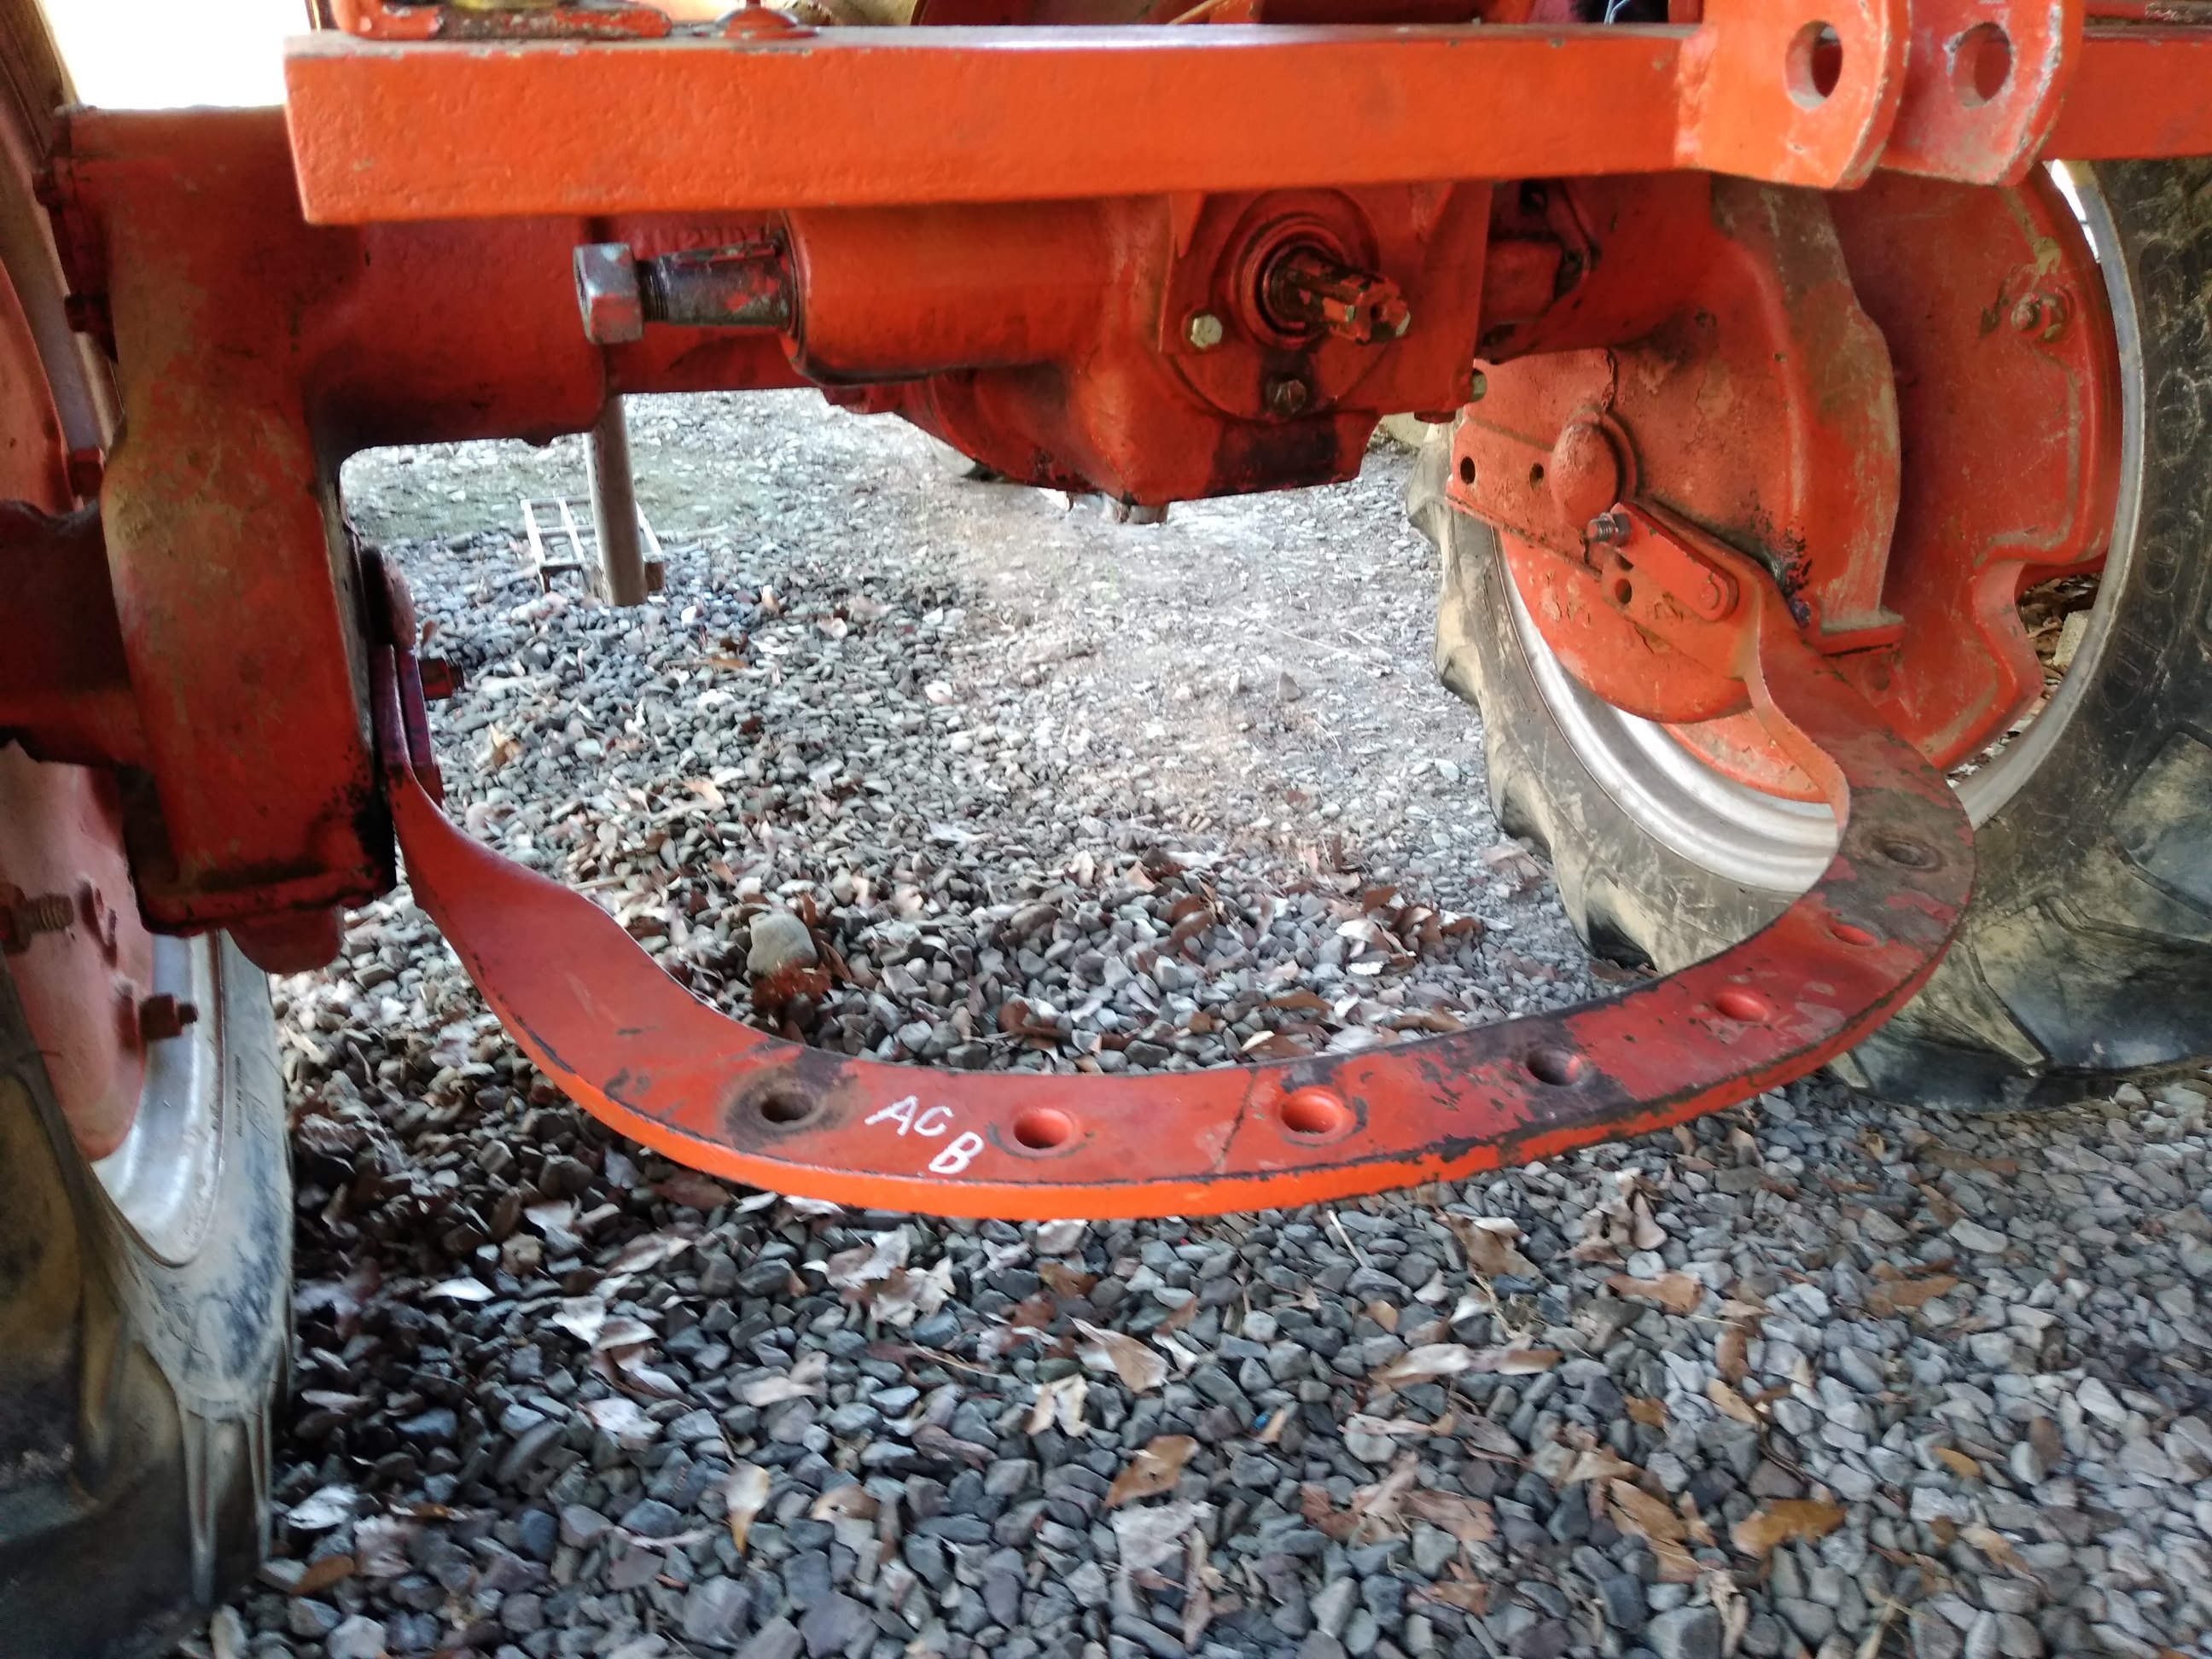
there are two BRACKETS that mount the U shaped drawbar to the final drive case.. and there are two BRACKETS that hold the drawbar up to the seat frame
vertical braces below
attachment bracket / pin for each side into final drive case
Edited by steve(ill) - 03 Jan 2021 at 9:35am
|
|
Like them all, but love the "B"s.
|
|
Bill Long
Orange Level
Joined: 12 Sep 2009
Location: Bel Air, MD
Points: 4556
|
Post Options
Thanks(0)
Quote Reply
Posted: 21 Jan 2021 at 10:04pm |
Sorry I am so late. However, as Steve states, the swinging drawbar was an "extra" for the B. Also to my recollection there may have been brackets that went from the drawbar to the seat frame to keep it steady Good Luck! Bill Long
|
|
jlbintn
Bronze Level
Joined: 28 Nov 2019
Location: Charleston, TN
Points: 138
|
Post Options
Thanks(0)
Quote Reply
Posted: 21 Jan 2021 at 11:37pm |
Thanks, Bill.
I'll keep everyone appraised on the progress. I may be able to manufacture the seat frame brackets, if I can't find them.
Edited by jlbintn - 21 Jan 2021 at 11:39pm
|
|
1949 Allis B
|
|
steve(ill)
Orange Level Access
Joined: 11 Sep 2009
Location: illinois
Points: 89106
|
Post Options
Thanks(0)
Quote Reply
Posted: 22 Jan 2021 at 9:03am |
|
some had brackets made from steel strap... some had a turnbuckle for minor adjustments.
|
|
Like them all, but love the "B"s.
|
|
1947WC
Silver Level

Joined: 11 Dec 2015
Location: Wisconsin
Points: 214
|
Post Options
Thanks(0)
Quote Reply
Posted: 25 Jan 2021 at 2:11pm |
|
We use to have a hitch that looked like that , It had a long handle to move it side to side it was called a side hill hitch.
|
|
jlbintn
Bronze Level
Joined: 28 Nov 2019
Location: Charleston, TN
Points: 138
|
Post Options
Thanks(0)
Quote Reply
Posted: 25 Mar 2021 at 1:14pm |
Got the drawbar yesterday. I have the two final drive brackets already, they were used on the farmerized drawbar that came with the tractor. I don't have the two stabilizing braces. I was hoping to get it on the tractor today, but we are getting soaked here in this part of Tennessee.
It was really good to find this, as I have noticed they are very hard to come by. Ended up paying $419 for it, $80 of which was shipping. The seller allowed me to work out payments over the last few months.
I still need to get to the hydraulics, but the tractor has drug a couple of big oak and pine logs to a place for proper cutting. It will be nice to have a hitch setup so I can drag my trailer to the mulch pile, or to where I need to pick up wood to burn, instead of logging a wheelbarrow across half of the county just to get what I need to the other side of the county  |
|
1949 Allis B
|
|
BrianC
Orange Level Access
Joined: 16 Jun 2011
Location: New York
Points: 1619
|
Post Options
Thanks(0)
Quote Reply
Posted: 25 Mar 2021 at 1:39pm |
What if one doesn't have the seat rail support brackets? Are they essential? Would you be flirting with a broken final drive casting if using the draw bar without them? Any stories?
|
|
Scott B
Orange Level
Joined: 14 Sep 2013
Location: Kansas City
Points: 1051
|
Post Options
Thanks(0)
Quote Reply
Posted: 25 Mar 2021 at 5:13pm |
 BrianC wrote: BrianC wrote:
What if one doesn't have the seat rail support brackets? Are they essential? Would you be flirting with a broken final drive casting if using the draw bar without them? Any stories?
|
I have 2 B’s. I’ll need to look but think one has the seat brackets and the other doesn’t. Both have the drawbar. I have two swinging draw bars that can be mounted but don’t use them.
|
|
D17 Series 1
Allis B- 1939
Allis B- 1945
|
|
steve(ill)
Orange Level Access
Joined: 11 Sep 2009
Location: illinois
Points: 89106
|
Post Options
Thanks(0)
Quote Reply
Posted: 25 Mar 2021 at 5:24pm |
|
You better have at least one of the upper braces or you could bust the final drive case. In a steady flat pull on a log might be OK... but a trailer tongue will put the weight DOWN... also when you mount the drawbar without the braces, you will notice the bar will move up and down an inch due to the clearance around the mounting bolt into drive case.
|
|
Like them all, but love the "B"s.
|
|
1939Dodge
Orange Level
Joined: 18 Jan 2014
Location: Pa.
Points: 554
|
Post Options
Thanks(0)
Quote Reply
Posted: 25 Mar 2021 at 8:41pm |
|
Drawbar braces are on EBay. $54 for a pair. Plus shipping. Kammerer Inc. make a number of repro parts.
|
|
1939Dodge
Orange Level
Joined: 18 Jan 2014
Location: Pa.
Points: 554
|
Post Options
Thanks(0)
Quote Reply
Posted: 25 Mar 2021 at 8:42pm |
|
Steve, what book did you get the rear photo of the drawbar from?
|
|
steve(ill)
Orange Level Access
Joined: 11 Sep 2009
Location: illinois
Points: 89106
|
Post Options
Thanks(0)
Quote Reply
Posted: 25 Mar 2021 at 9:10pm |
I cant find the EXACT drawing now.. Very similar drawing in the AC - B or C "operating instructions and maint manuals"... part no 257986 or 257985.
You can make the hanger straps from various things.. I have one tractor that has like 1.5 x .25 inch strap .... i have one that has turnbuckles someone obviously bought at the hard ware store.......... and i have one that has 1/2 inch allthread.... Probably costs $10.... i think a lot of guys decided the "needed" the anchors and "home made" them. The "standard" drawbar did not include the straps...the "ASAE" did... PULLING is ok... If you want to put down pressure on the bar ( trailer hitch, etc), then add some type of straps.
Edited by steve(ill) - 25 Mar 2021 at 9:12pm
|
|
Like them all, but love the "B"s.
|
|
steve(ill)
Orange Level Access
Joined: 11 Sep 2009
Location: illinois
Points: 89106
|
Post Options
Thanks(0)
Quote Reply
Posted: 25 Mar 2021 at 9:16pm |
here is a good read on why you need the STRAPS... and the same drawing from Dick L.
|
|
Like them all, but love the "B"s.
|
|
Dakota Dave
Orange Level

Joined: 12 Sep 2009
Location: ND
Points: 3973
|
Post Options
Thanks(0)
Quote Reply
Posted: 26 Mar 2021 at 9:07am |
|
I used all thread for my swinging drawbar supports. you need supports the extended length of the swinging drawbar adds leverage and it will droop when you add hitch weight. the hammer straps are only about 4' between the pin and bolt. the seat support straps are another foot and a half further back. the all thread was extreamy easy just a slight bend near each end nuts and washers on each end and its solid.
|
|
jlbintn
Bronze Level
Joined: 28 Nov 2019
Location: Charleston, TN
Points: 138
|
Post Options
Thanks(0)
Quote Reply
Posted: 26 Mar 2021 at 12:29pm |
Well, it's never as simple as it should be.
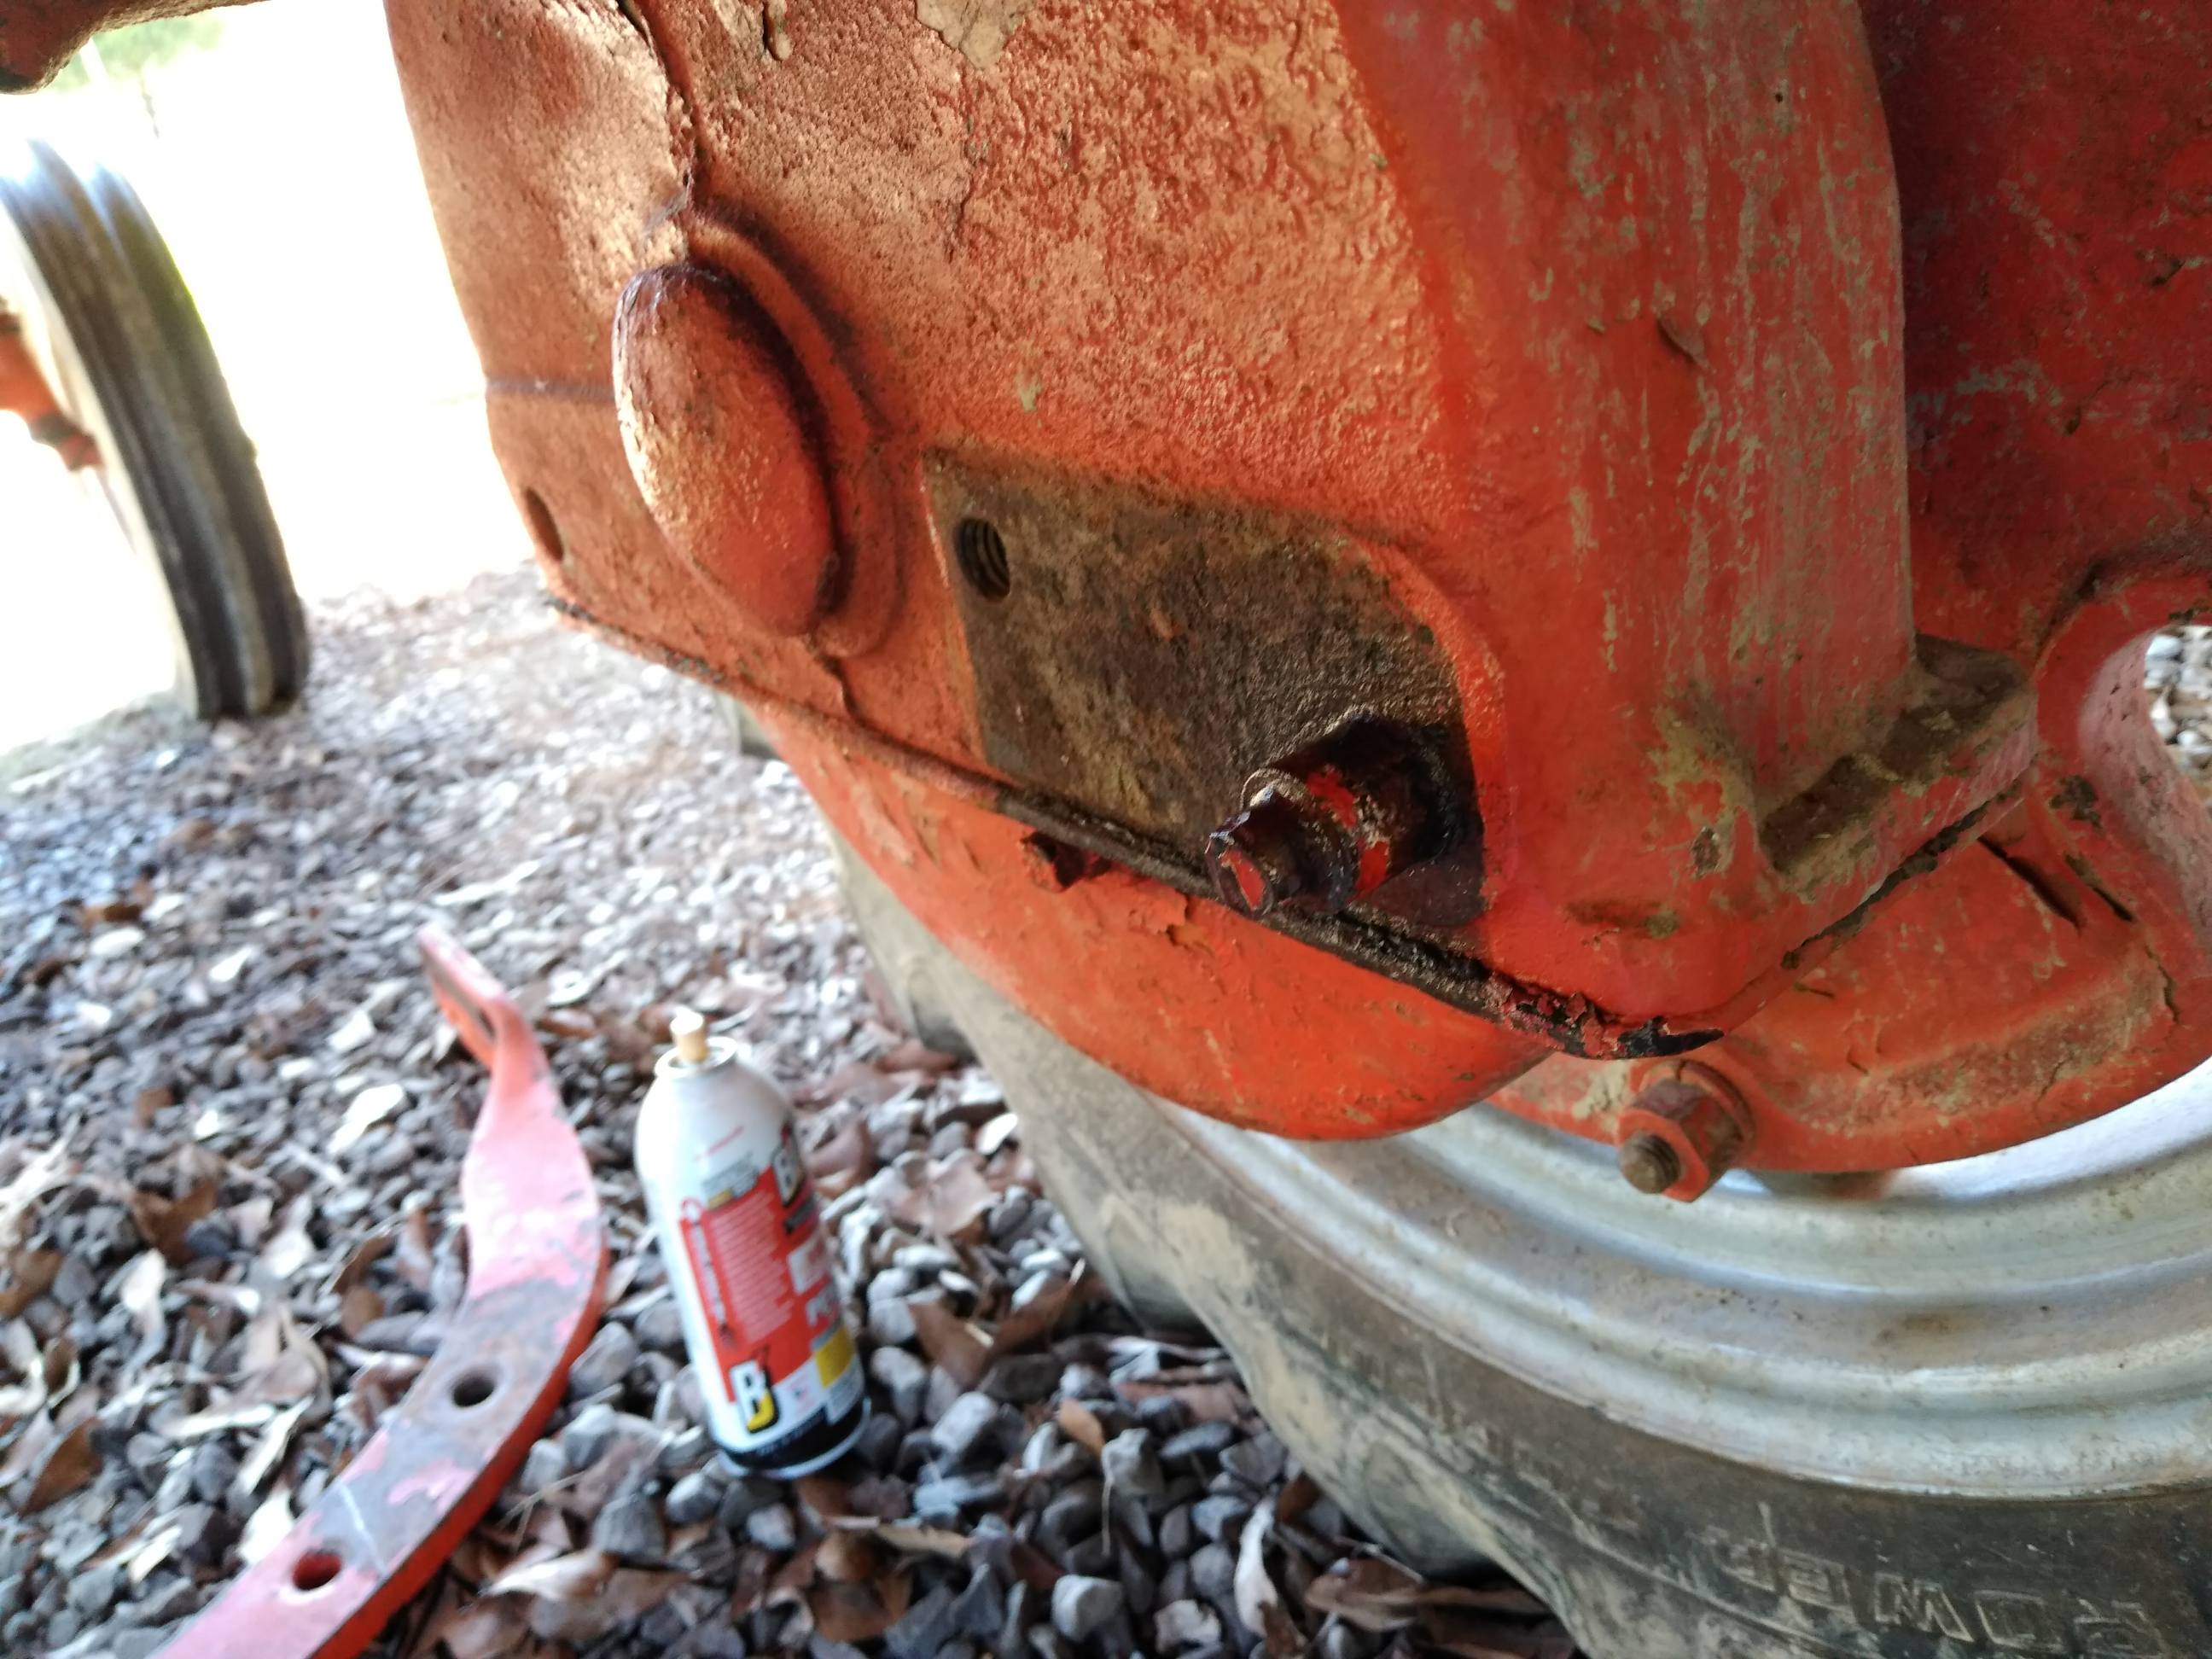
Somebody manufactured the pin assemblies on both sides. I was able to get the threaded cap bolts out with no issue, but the clamp pin is another issue altogether.
Here's what the situation is. First picture is what was on the tractor. Second picture is the right side final drive unit, and the clamp pin, or what looks like is left of it. Both sides are the same. They're not coming out, and both look to have been broken. Were I able to get the drawbar on, it would suffice, but that's not happening. The old farmerized drawbar was either purchased (or manufactured) with this setup in mind, or when it was installed, something broke on the clamp and somebody improvised.
All guesses on my part, obviously. Only way I can see to get that out, is to cut and drill. It's not budging, and I don't think it would be a good idea to heat it with what would be necessary to break it. Unless I'm missing something. I'm open to suggestions.
Edited by jlbintn - 26 Mar 2021 at 12:31pm
|
|
1949 Allis B
|
|
steve(ill)
Orange Level Access
Joined: 11 Sep 2009
Location: illinois
Points: 89106
|
Post Options
Thanks(0)
Quote Reply
Posted: 26 Mar 2021 at 7:09pm |
It kind of looks like the original pin was stuck in the hole and would not come out.. The guy cut off the "bar" and left the "pin" in the hole... Then made a 2 piece draw bar to fit over it ? ..... You could check the diameter of the PIN sticking in the case and the diam of the HOLE in the new drawbar to confirm this. .... If that is the case, then you need to get ONE of the pins out of ONE final drive.. You could then slide the drawbar up at an angle and pilot on the ONE STUCK PIN.. then lift the drawbar up and put in the OTHER PIN... Your "PIN and BOLT" on one side could be two pieces.. dont need the strap between them.
I think i would try to grind the outside 1/2 inch of the pin and make it square. Get an impact stocket and impact gun and try to BUDGE it... I think some heat would be OK.. Not much there you can hurt........... If all else fails, you can cut if off flush, then drill a 1/4 inch hole thru the center of the pin, then keep going up in size until your NEW pin fits.
if you look at your NEW PIN/ BOLT ......(BELOW)..... it does look like the guy cut the ARM off and left the PIN in the hole.... I have seen quite a few TIGHT ones.. I have sprayed with penetrant like you, then beat on the arm trying to TWIST it .. and have the arm break off... HEAT is normally your friend, and impact will help instead of hammer.
Edited by steve(ill) - 26 Mar 2021 at 7:12pm
|
|
Like them all, but love the "B"s.
|
|
steve(ill)
Orange Level Access
Joined: 11 Sep 2009
Location: illinois
Points: 89106
|
Post Options
Thanks(0)
Quote Reply
Posted: 26 Mar 2021 at 7:17pm |
|
John... i dont know if you are a welder or not... You could take that old plate and set back over the pin and WELD the pin to the plate... that would give you something to BEAT on to try to TWIST the pin.. Would also put some heat into the pin ... probably even need MORE heat. .... if it dont work, your going to cut the pin off anyway to drill into it.
Edited by steve(ill) - 26 Mar 2021 at 7:18pm
|
|
Like them all, but love the "B"s.
|
|
jlbintn
Bronze Level
Joined: 28 Nov 2019
Location: Charleston, TN
Points: 138
|
Post Options
Thanks(0)
Quote Reply
Posted: 26 Mar 2021 at 10:49pm |
Good tips, Steve. Thanks.
I'm a novice at welding, but my MIG only works effectively up to 1/4 inch stuff. My neighbor welds and has a better setup, so that's an option.
I already started cutting the pin, but left enough to work with on both drives. Enough to grind it square and put an impact on it. Good idea. My neighbor and I are coming up with a plan. He has an oxy setup, and we're going to explore heating it. If all else fails, your idea to grind it flat, then bit by bit ream it out is where I'll go.
I've got two new pins on order and also found the brace set mentioned earlier in this thread, and got a set.
Edited by jlbintn - 26 Mar 2021 at 10:51pm
|
|
1949 Allis B
|
|
steve(ill)
Orange Level Access
Joined: 11 Sep 2009
Location: illinois
Points: 89106
|
Post Options
Thanks(0)
Quote Reply
Posted: 26 Mar 2021 at 10:56pm |
|
Normally you would heat the case to EXPAND it to remove a stuck bearing, etc... In this case i would heat the PIN... it will have to transfer THRU THE RUST to get the case warm / hot... that should break some of the bond loose.
|
|
Like them all, but love the "B"s.
|
|
jlbintn
Bronze Level
Joined: 28 Nov 2019
Location: Charleston, TN
Points: 138
|
Post Options
Thanks(0)
Quote Reply
Posted: 27 Mar 2021 at 9:45am |
A close look at the inside drive casing, especially the right side, it appears as though the plug is part of the case housing. 
It's going to be a hoot, trying to grind those plugs square, not slipping and "decorating" the inside drive housing with "character" scars. 
Edited by jlbintn - 27 Mar 2021 at 9:48am
|
|
1949 Allis B
|
|
Dakota Dave
Orange Level
Joined: 12 Sep 2009
Location: ND
Points: 3973
|
Post Options
Thanks(0)
Quote Reply
Posted: 27 Mar 2021 at 11:11am |
|
the strap was originaly held to the pin by riveting to the pin. we welded the strap to the pin use a lot of heat. wack the strap back and forth use some freeall. it should come out. as a last ditch take swap the right and left final drives and use what are now the front holes they will be in the back after swap. I helped dad swap his back in the 70's thew bolt holes were stripped over sized twice and stripped again. as I stated in the other post use the upright drawbar supports. all thread works great.
|
|
steve(ill)
Orange Level Access
Joined: 11 Sep 2009
Location: illinois
Points: 89106
|
Post Options
Thanks(0)
Quote Reply
Posted: 27 Mar 2021 at 3:52pm |
|
John. the plug is not part of the case. They are PINS that are heavily rusted into the hole.. You need HEAT and BEAT to get them out.... IMPACT or weld the plate back on the PIN and beat back and forth as Dave said.
|
|
Like them all, but love the "B"s.
|
|
Dakota Dave
Orange Level
Joined: 12 Sep 2009
Location: ND
Points: 3973
|
Post Options
Thanks(0)
Quote Reply
Posted: 27 Mar 2021 at 8:26pm |
|
If you just want it on and don't care if it comes apart easy just jack and block the transmission take out he brake cover bolts and seat bolts on one side. Remove the 4 final drive bolts on that side and slide it out 1 1/2" put the draw bar in slide the final drive back in and bolt everything back. I did it on my C many years ago I welded a pipe across between the plow mounts. I built a grader blade that attached to them and they put to much side force on the mount welded a pipe across tight between the to pins. It never moved again. Had to pull a final drive to get it out put the woods mount on and put it back in. Was still that way when I gave it to nieces husband.
|
|
steve(ill)
Orange Level Access
Joined: 11 Sep 2009
Location: illinois
Points: 89106
|
Post Options
Thanks(0)
Quote Reply
Posted: 27 Mar 2021 at 9:32pm |
|
Now thats a great idea... If the pin wont come out !
|
|
Like them all, but love the "B"s.
|
|
wjohn
Orange Level

Joined: 19 Jan 2010
Location: KS
Points: 2276
|
Post Options
Thanks(0)
Quote Reply
Posted: 28 Mar 2021 at 8:54am |
The very first B I ever bought had the final drive drawbar bracket bolt holes stripped out. A previous owner did something along the lines of what Dave mentioned, with a bar going from hole to hole... But they cut the bar in half and welded a bolt and nut into each side, so you could thread the bar in or out and it would get wider or narrower, and you could remove it without pulling a final drive.
Well, you could have decades ago... By the time I got it, the threads had rusted too much and I had to just cut it off. Anyways, I thought it was a good idea.
But, you couldn't do that until you got the existing pins out, so that doesn't help much right now.
|
|
1939 B, 1940 B, 1941 WC, 1951 WD, 1952 CA, 1956 WD-45
|
|
HudCo
Orange Level

Joined: 29 Jan 2013
Location: Plymouth Utah
Points: 3987
|
Post Options
Thanks(0)
Quote Reply
Posted: 28 Mar 2021 at 12:05pm |
|
i just had to do that on a c that i just got, just start working the pin with a pipe wrenchand blowing air around it to start clearinig the rust it will come out or weld a 1 inch nut to it it with a little gap gap so you can pry and turn then put a new piece of round on the strap and be done with it
|
|
jlbintn
Bronze Level
Joined: 28 Nov 2019
Location: Charleston, TN
Points: 138
|
Post Options
Thanks(0)
Quote Reply
Posted: 12 Apr 2021 at 9:25am |
Well, it's done. My neighbor was hesitant to want to apply oxy, even though I told him I wasn't going to hold him responsible.
Sooooo.... it was drill baby drill.
Finally got it done yesterday. Using a battery run drill and a power drill, finally got both sides deep enough to put in the new clamps. The power drill broke away from me a couple of times. Sore hand notwithstanding, that could break one's hand, considering the angle one has to work to drill in that area.
|
|
1949 Allis B
|
|