| Author |
 Topic Search Topic Search  Topic Options Topic Options
|
SEIA Farmer 
Bronze Level


Joined: 03 Apr 2019
Location: keota
Points: 49
|
 Post Options Post Options
") Thanks(0) Thanks(0)
 Quote Quote  Reply Reply
 Topic: WC Dilema Topic: WC Dilema
Posted: 10 Apr 2023 at 7:19am |
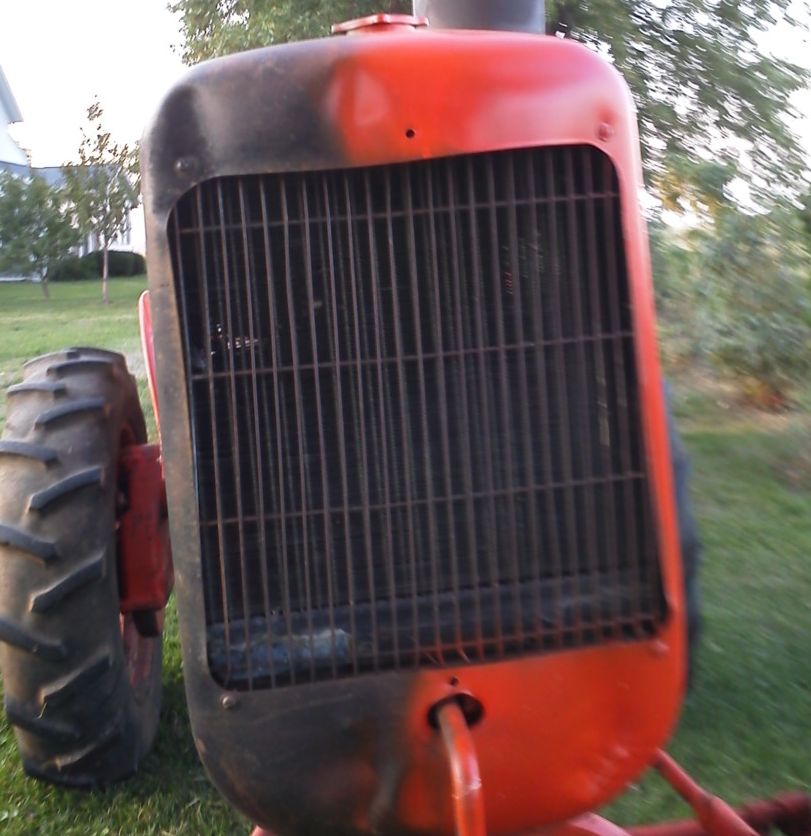
I've been working on a '37 WC project for 3 years now, and am finally getting close to the finish line, but hit a snag.  First some history. This was a family tractor that I started on about 3 years ago as a pandemic project. It was a nut and bolt rebuild with a new overhaul kit, crank was ground, head was sent to a machine shop and checked out, planed, new valves, new gasket set, etc. I've been taking my time to do a meticulous restoration, spare no expense! I finally got the motor back in the frame a year ago, and got it started (by hand cranking), but had to shut it down after a couple minutes of running because it had no radiator or coolant in it. About a week later I tried starting again after installing the radiator with a new core, new hoses, clamps, antifreeze, but couldn't get it to start again. It was getting time to work on machinery to go to the field, to get ready for planting, so it got shoved back in the corner of the shop, and left until now. I finally got the tin work back from a proffesional painter on Saturday, so got interested in getting it finished, because I want it done for a show coming up in June. We got it out yesterday, and pulled it around the yard to get it started, and after a little tweaking on the carb, it ran fairly well, but I noticed it was pressurizing the coolant in the radiator, and forcing it out the overflow tube before it got much heat built up. We ran it around for maybe half an hour to get it warmed up, then backed it into the shop and shut it down. Checked the oil, and it looked like chocolate milk!  Horrified, I dropped the oil out, after getting about half a cup of antifreeze on the bottom first. Then I drained the antifreeze out of everything. Then I put some new oil back in, and tried to crank start to get it circulated in the bearings etc., but not a pop, or any starting attempt. It was dark, and my pulling help went home, so that's where I left it in the shop. Anyone have any suggestions what to do next, before I start to tear down the motor? We're getting into planting season again, so this will have to be an after-hours project, once I figure out how to proceed. I'm going to do a compression check on the cylinders to see if they're consistent with each other. This is a new rebuild which needs to be broken in, so I'm thinking of filling the cooling system with diesel fuel, and doing a pull start again to get it warmed up, to seat the rings. Dad said they used to do that trick on the new JD 4010's when they came out, because the first ones had head gaskets blowing regularly before they got the uneven sleeve-deck issues figured out. It has sat over a year with antifreeze in it, and no external leaks, and the oil looked fine before we got it running. Like I said, it seemed to be pressurizing the cooling system, so that has to be a cracked head, or head gasket fail, right? Like I said, the head was all proffesionally checked and redone, and all new gaskets installed, so I'm baffled. I'm a JD man, so thought I might see if any of you AC guys can set me staight, and tell me what I'm doing wrong! Thanks!
|
 |
|
Sponsored Links
|
|
|
HudCo
Orange Level


Joined: 29 Jan 2013
Location: Plymouth Utah
Points: 4079
|
Post Options
Thanks(0)
Quote Reply
Posted: 10 Apr 2023 at 8:55am |
|
re torque the head .if there ia still a problem take the pan off and pump up the cooling system up to five to ten psi and watch from the bottom to see where it leaks from liner o rings wont make it pressure up the cooling system
|
|
DaveKamp
Orange Level Access
Joined: 12 Apr 2010
Location: LeClaire, Ia
Points: 6126
|
Post Options
Thanks(0)
Quote Reply
Posted: 10 Apr 2023 at 10:29pm |
 SEIA Farmer wrote: SEIA Farmer wrote:
I finally got the motor back in the frame a year ago, and got it started (by hand cranking), but had to shut it down after a couple minutes of running because it had no radiator or coolant in it.... |
IMO, that is probably the root cause here.
A full rebuild engine generates significant internal heat when it's in the break-in process, as the parts fit tight. Add combustion heat to that, and running with no coolant really is not a good idea.
If you're lucky, it's just a head gasket, and all your bearings haven't been ruined by pushing water through the babbit.
|
|
Ten Amendments, Ten Commandments, and one Golden Rule solve most every problem. Citrus hand-cleaner with Pumice does the rest.
|
|
Eric B
Orange Level

Joined: 09 Feb 2012
Location: British Columbi
Points: 1012
|
Post Options
Thanks(0)
Quote Reply
Posted: 13 Apr 2023 at 2:55pm |
|
If it's any comfort to you, I don't think any internal parts would've been damaged from a two minute 'dry' start up. When I was about 12 years old I took to the field with my Dad's WF with the same 201 engine like you have in your WC. I was harrowing in 3rd gear. After maybe ten minutes I could hear the engine start to labor more than normal and OUCH... then I remembered, I forgot to fill the cooling system! I let the tractor do a slow cool down in the field before filling the water. No damage was done, thankfully. The engine is OK and still untouched all these decades later.
|
|
Currently- WD,WC,3WF's,2 D14's B. Previously- I 600,TL745,200,FL9,FR12,H3,816 LBH. Earth has no sorrow that Heaven cannot heal!
|
|
PatrickCobb
Bronze Level

Joined: 02 Feb 2023
Location: USA
Points: 2
|
Post Options
Thanks(0)
Quote Reply
Posted: 15 Apr 2023 at 2:35am |
I don't know much. If you are a college or school student looking for free essay online, you should go to https://writinguniverse.com/free-essay-examples/friendship/ ; You will discover a large selection of free essay examples on many themes, including friendship, here. These essay examples could be useful for finishing your essay assignments.
Edited by PatrickCobb - 21 Apr 2023 at 8:41am
|
|
WF owner
Orange Level
Joined: 12 May 2013
Location: Bombay NY
Points: 5192
|
Post Options
Thanks(0)
Quote Reply
Posted: 15 Apr 2023 at 5:42am |
Eric B wrote:
... then I remembered, I forgot to fill the cooling system! I let the tractor do a slow cool down in the field before filling the water... |
I remember, when I was a kid, my Dad, grandfather and uncle draining the water out of the tractor engines every night during cold weather. I thought they were the only ones.
Sorry to be off topic!
When you assembled your engine, did you put the head gasket in dry or did you coat it? What did you use for lubricant on the O rings on the sleeves?
|
|
SEIA Farmer
Bronze Level
Joined: 03 Apr 2019
Location: keota
Points: 49
|
Post Options
Thanks(0)
Quote Reply
Posted: 15 Apr 2023 at 8:48am |
Sorry for the slow response, but like I said, this is going to be a weekend or rainy day project until the field work is all caught up. Thanks for all the responses, guys. I knew I would get some valuable comments on here about this.
I don't recall exactly what I did 2 years ago (a senior moment), but I always use copper coat when installing head gaskets, and I always lube the o-rings before installing the cylinder liners. What was used for lube, I don't recall, but I usually use whatever they recommend in the instructions with the liner kit.
Like I said, the coolant was getting pressurized after starting, before we had much heat built up in the engine, so I don't think it was over heated. In fact, I could hold my hand on the radiator after I shut it off, after running maybe 15-20 minutes. The coolant in the bottom of the radiator was still cool also.
Here's the plan for now: Do a compression test, which is easy to do, and see if I can isolate a weak cylinder. Then I'll re-torque the head bolts and check it again to make sure all the cylinders are consistent. Then we'll put the coolant back in and pressurize the cooling system to figure out if it's the head gasket, or a liner seal leaking, and go from there. I'll keep you posted, but it might be a week again! |
|
SEIA Farmer
Bronze Level
Joined: 03 Apr 2019
Location: keota
Points: 49
|
Post Options
Thanks(0)
Quote Reply
Posted: 18 Apr 2023 at 7:50am |
Update: Did a compression check, and only one cylinder was holding compression...not surprised because the motor has less than 30 minutes of run time on a new rebuild, so the rings haven't had a chance to get seated yet. Took HudCo's advice, re-torqued the head, and refilled the cooling system with antifreeze, then pressurized the system, with the oil pan off, and it looked like it was leaking down through the push rod ports and dripping on the camshaft. The liner seals all looked OK, so I'm getting a new head gasket. Any suggestions on how to best install it? Best sealer to use? Best way to prep the block while in the tractor, short of having it planed? I haven't removed the head yet...would stop-leak in the coolant be an option? I removed a bunch of foamy gunk from the bottom of the oil pan and pump screen. Would it be better to use something different than antifreeze in the cooling system, to get it cleaned out, until I get it all sealed up, warmed up, and broke in? Thanks guys!
|
|
DrAllis
Orange Level Access
Joined: 12 Sep 2009
Points: 22855
|
Post Options
Thanks(0)
Quote Reply
Posted: 18 Apr 2023 at 8:24am |
|
Not sure exactly what "type" of gasket you are or will be using BUT, installing it dry will get you exactly what you've got.....leaks. Personally, I use a modern day gasket maker from Loctite that is called an "anerobic" sealer. "Hylomar" is another brand name. Kind of like toothpaste and what I use is dark blue in color. Rub a thin layer all the way around the head gasket on both sides with your finger. Rub a thin layer around any and all water passages !! Assemble with a brake kleened off block surface and head surface and air dry both. Torque bolts to specs and let it cure at least overnite. A retorque when COLD after running for a couple hrs or more is advised. DOES YOUR ENGINE HAVE THREE 3/8" STUDS OR BOLTS ON THE SPARK PLUG SIDE ?? Many older engines do not and should be added for more clamping of the head to the block. A-C did it because it was NEEDED.
|
|
BrianC
Orange Level Access
Joined: 16 Jun 2011
Location: New York
Points: 1619
|
Post Options
Thanks(0)
Quote Reply
Posted: 18 Apr 2023 at 5:56pm |
Doc, adding studs/bolts bolts? Sounds like drilling 3/8 clearance holes through the head, maybe spot face also. And drilling and tapping into the block. I would wonder if this is liable to spring a coolant leak? Past the threads or around the bolt, weep out the head of bolt. Hopefully the locations chosen don't hit water.
If there is a potential for a new leak location, any special sealing needed?
With any luck he has the latest design iteration. They made like 175,000 WC/WF. At about 29,000 they seemed to have changed the head.
From reading this forum during the last 13 years or so, I see that many rebuilds have issues. Other brands also. Rebuilt engine letting go is far to common. I would research for problems and solicit advice from others before starting a rebuild.
|
|
DrAllis
Orange Level Access
Joined: 12 Sep 2009
Points: 22855
|
Post Options
Thanks(0)
Quote Reply
Posted: 18 Apr 2023 at 6:44pm |
|
Some heads have been replaced over the years and already have the 3 holes in them, but no one takes the time to drill the block and thread new holes. The head gasket works for a template to drill the head, then set the head on the block and use the freshly drilled holes to drill the block. Then, slightly oversize the holes in the head for easy installation of gr 8 bolts with hard washers.
Edited by DrAllis - 18 Apr 2023 at 6:45pm
|
|
SEIA Farmer
Bronze Level
Joined: 03 Apr 2019
Location: keota
Points: 49
|
Post Options
Thanks(0)
Quote Reply
Posted: 18 Apr 2023 at 8:39pm |
|
My tractor is SN 38443, and only has ten 1/2" studs for clamping the head to the block. The only 3/8" studs are on the rocker arm assy. This is the first I've ever heard of drilling and adding head bolts! I do think I'll get a new set of head "bolts" and replace the original studs.
|
|
SteveM C/IL
Orange Level Access
Joined: 12 Sep 2009
Location: Shelbyville IL
Points: 9002
|
Post Options
Thanks(0)
Quote Reply
Posted: 19 Apr 2023 at 9:41am |
|
Even with the 3 little bolts they have a tendency to leak to the outside of head/block. Can't imagine how the ole WC's made out.
|
|
SEIA Farmer
Bronze Level
Joined: 03 Apr 2019
Location: keota
Points: 49
|
Post Options
Thanks(0)
Quote Reply
Posted: 19 Apr 2023 at 9:04pm |
|
I've got a head gasket coming, new head bolts, and doing research on what gasket sealer to use on the head gasket. I don't have the guts to start drilling extra holes in the 86 year old head and block...just going to seal the new HG real good. What do you all think of using the good ole black Permatex. That's my gasket sealer of choice when I've got a tough leak to stop, I have some on hand, it's resistant to antifreeze and oil, and it's rated to 400 degrees! I've also noticed some antifreeze oozing out of one of the stems of the rocker assy. where it clamps down to the head. Those 3/8 studs must be tapped into a coolant port in the head, so I'm going to be sure to seal them up good with something also.
|
|
SEIA Farmer
Bronze Level
Joined: 03 Apr 2019
Location: keota
Points: 49
|
Post Options
Thanks(1)
Quote Reply
Posted: 23 Apr 2023 at 9:53pm |
Here's a progress report. I've got good news and bad news! After removing the head, I found 3 issues. 1) The head gasket looked like the copper coat had deteriated the asbestos layers of the gasket, as about half of it stayed on the block and head when it was removed. 2) After checking the sleeves with a straightedge, they were protruding anywhere from .002-.010 above the block. and 3) There were 3 cracks in the block between #1, #2, and #3 sleeve decks as well as around one of the head bolts. I made a flat sanding block from 3/4 plywood and a piece of plexiglass, and sanded the liners and deck down with 150 grit sand paper until I had less than .004 of clearance all across the deck. After everything was cleaned with brake cleaner several times, I installed a new Felpro head gasket, which looked like a much higher quality head gasket than the one I removed, and took DrAllis' advise, and used the anerobic gasket sealer on both sides of the HG. Put it all back together, and torqued the head studs to 80 ftlbs. After another pull start, got it running today, and happy to report everything looks and sounds good, with a few minor antifreeze leaks on the waterpump and rad hoses. That gasket sealer should take care of the block cracks just fine. Just wanted to report back, so maybe someone else can use this experience of mine to head off some of their potential problems. Now, the bad news! After running it at low and high idle for about 30 minutes, or so, it started to labor, then locked up! Now I'll need to drop the oil pan again, and start checking bearings! Any advice where to look first? It was running good, and never really got too hot, so I'm hoping it's just a bearing that had too little clearance, and siezed up from the antifreeze that got mixed in from the first startup. I'll let you know what I find! Thanks again!
|
|
HudCo
Orange Level
Joined: 29 Jan 2013
Location: Plymouth Utah
Points: 4079
|
Post Options
Thanks(0)
Quote Reply
Posted: 23 Apr 2023 at 10:09pm |
|
if it had to little of clearance a little antifreeze would not have made any differance
|
|
DrAllis
Orange Level Access
Joined: 12 Sep 2009
Points: 22855
|
Post Options
Thanks(1)
Quote Reply
Posted: 24 Apr 2023 at 6:15am |
|
I'd have been very concerned about any sleeve that was .010" above the deck !! They all should have been .002" to probably .003". So, there were either poor quality sleeve manufacturing OR dirt under the sleeves upper flanges, holding them up to make them more than .002" to .003". If dirt is/was the cause, those sleeves may sink in time and then you'll potentially have sleeve/head gasket issues again.
|
|
SEIA Farmer
Bronze Level
Joined: 03 Apr 2019
Location: keota
Points: 49
|
Post Options
Thanks(0)
Quote Reply
Posted: 25 Apr 2023 at 9:31pm |
It must have been a manufacturing issue because I had the block super clean in an automated parts washer. It's been a couple winters ago when I put everything together, and I can remember a couple of the sleeves being out of specs, but I just assumed the headgasket would seal up a few thousands around them...wrong! Now I just hope I can find the bearing (or bearings) that seized up, and get them shimmed, smoothed up and running without too much more trouble. I can faintly remember a couple of them tighening up on me after checking with plasti-gauge, and torqueing them down. Trouble is, I don't remember what I did at the time to correct the problem! I think I just added a shim, or two to get them loosend up. That's probably what I'll have to do this time, after getting everything cleaned up and re-spec'd again! Sounds like rain this weekend, so I'll have more shop time.
|
|
DrAllis
Orange Level Access
Joined: 12 Sep 2009
Points: 22855
|
Post Options
Thanks(0)
Quote Reply
Posted: 25 Apr 2023 at 9:46pm |
|
A properly clearanced connecting rod bearing can be tapped side to side on each crankshaft journal and it will move a few thousands. Won't move side to side ?? There's a problem. Also the crankshaft itself should move front to back a few thousandths with a prybar. Won't move ?? There's a main brg problem.
|
|
SEIA Farmer
Bronze Level
Joined: 03 Apr 2019
Location: keota
Points: 49
|
Post Options
Thanks(0)
Quote Reply
Posted: 30 Apr 2023 at 8:05am |
Update: Found front main bearing had galled with a ball of "solder like" material in the crank journal's oil port. Nothing looks extremely marred up. The crank journal looks OK, other than maybe a chip out of the oil port hole, but still feels smooth to the touch. The bottom bearing half was a little rough, but polished up pretty well. Of course I can't see the condition of the top bearing half, without removing it. I have two questions: 1) Can I get by just to polish up the main bearing half and put it back together? or 2) Will I need to disassemble the whole main bearing (both halves) and install a new one? How much disassembly has to be done to get the crank loose enough to remove the bearing? (Guess that's 3 questions!) I had the crankshaft ground at a machine shop for new undersized bearings, but I can't remember what they sized it to. It was over 2 years ago, and I'd have to go back to see if I could find an record of it, so I would know what size of new bearing to get for a replacement. I'm assuming it was .010" under, but not sure, and I can't find it stamped anywhere on the crank from underneath the tractor. Thanks again guys, for all the help with this!
|
|
DrAllis
Orange Level Access
Joined: 12 Sep 2009
Points: 22855
|
Post Options
Thanks(0)
Quote Reply
Posted: 30 Apr 2023 at 8:28am |
|
What about the "shims" between the main cap and the block ??
|
|
SEIA Farmer
Bronze Level
Joined: 03 Apr 2019
Location: keota
Points: 49
|
Post Options
Thanks(0)
Quote Reply
Posted: 30 Apr 2023 at 10:02am |
|
The main bearing caps have no shims. I do remember when putting them together, I always check all the bearings with plasi-gauge, and had to leave the original shims out, in order to get the correct clearance on the mains. I didn't want excess clearance in the mains because I was concerned about the oil pressure getting too low. The rod bearings all have shims in them, but not the mains.
|
|
DrAllis
Orange Level Access
Joined: 12 Sep 2009
Points: 22855
|
Post Options
Thanks(0)
Quote Reply
Posted: 30 Apr 2023 at 11:09am |
|
Something is terribly WRONG here. Freshly reground crankshaft and new correctly sized main and rod bearings shells and NO SHIMS on the main caps ??? Cannot and will not work. And it didn't work.
|
|
SEIA Farmer
Bronze Level
Joined: 03 Apr 2019
Location: keota
Points: 49
|
Post Options
Thanks(0)
Quote Reply
Posted: 30 Apr 2023 at 12:09pm |
|
I need to get some plasti-gauge and check the clearance. May need to get some shims to add. The shop that ground the crank furnished the bearings, so maybe they gave me the wrong size and sent standard ones, because I had to take out the shims to get the clearance within specs. Will I need to sand down the caps to make them fit with the shims added?
|
|
DrAllis
Orange Level Access
Joined: 12 Sep 2009
Points: 22855
|
Post Options
Thanks(0)
Quote Reply
Posted: 30 Apr 2023 at 12:31pm |
|
With each laminated shim stack in place and the main cap bolts torqued to spec, the main bearing bore is ROUND. Each shim stack is 4 or 5 thin shims glued together to make .010" total thickness. The design from 80+ years ago, allowed you to peel away one thin shim at a time, then file off some material from the edge of each bearing shell and the torque the bolts up to now squeeze the whole thing back together making the bearing shells SLIGHTLY tighter to the crank. Notice I said FILE off each bearing shell a little before reassembly, to keep from distorting the main caps themselves. With a correctly reground crankshaft, correctly sized bearing shells, and correct NEW shim stacks, you should be able to assemble things and not worry about checking or changing anything !!! I can only imagine what kind of shape the main caps are in after this. There were shims in there to begin with, right ?????
|
|
SEIA Farmer
Bronze Level
Joined: 03 Apr 2019
Location: keota
Points: 49
|
Post Options
Thanks(0)
Quote Reply
Posted: 30 Apr 2023 at 12:58pm |
|
I went back through my leftover used parts supply to see if there were any shims, and only found a couple from the rod bearings, none from the main caps. I'm not sure there were any in there when I removed them. What's the best way to proceed from here? Do I remove the crank, mic the journals, and order new bearing shells and shims? I do have a parts tractor, if you think the bearing caps were ruined.
|
|
DrAllis
Orange Level Access
Joined: 12 Sep 2009
Points: 22855
|
Post Options
Thanks(0)
Quote Reply
Posted: 30 Apr 2023 at 3:28pm |
|
I think the crankshaft needs to be removed, main cap (s) bolted back on and torqued, and using a dial calipers measure the front main bearing bore and see if it is round (or not) without shims. Top to bottom dimension should (I think) be approx .010" less than side to side dimension. Also should verify that the front cam bearing didn't spin in its bore cutting off oil flow to the front main bearing.
|
|
HudCo
Orange Level
Joined: 29 Jan 2013
Location: Plymouth Utah
Points: 4079
|
Post Options
Thanks(0)
Quote Reply
Posted: 30 Apr 2023 at 10:02pm |
|
the last wd 45 i did for my self i had the block line bored and the rods done and got rid of the shims alltogether
|
|
SEIA Farmer
Bronze Level
Joined: 03 Apr 2019
Location: keota
Points: 49
|
Post Options
Thanks(0)
Quote Reply
Posted: 02 May 2023 at 8:17am |
Thanks Doc, The front main was getting all kinds of oil, as it was dripping everywhere when I removed the bearing cap. The cam bearings were not changed in the rebuild, as I checked the clearances and they were within specs, so I would think they would stay in place after 45+ years. I was able to get confirmation from the machine shop that the mains and rods on the crank were turned down .020" when re-done. Pretty good records after being done 4 years ago! The engine had been overhauled at some point 50+ years previously because it had the bigger sleeves and pistons when I took it apart. I kinda remember now thinking that the under side probably needed renewed, while I had it apart, because all the shims had been removed. I'm a self taught, apprenticed, farm shop mechanic with no formal schooling, just mainly learning from my uncle, and shop manuals. On the old JDs we worked on, you just checked the rod bearings with plasi-guage, and removed shims from the caps until it was back within specs...but they were a slower running engine! I've rebuilt several Deeres and a couple Olivers, but this is my first AC. It's also the first time I've removed a crankshaft and done a complete "underhaul". I wish now that I'd had someone like DrAllis guide me through it, because you explain things much more clear than the service manuals do. I just want to get it to start and run well...it's not going to do any "work" anymore because I'm putting it back on steel rears with roadbands. I appreciate all you guys are doing to keep the old tractors going, and the hobby alive. I want to do whatever I need to get it running well to "play" with. I'll have a couple weeks to get advice, parts, or whatever I need, because the calendar says it's now time to plant corn!
|
|
steve(ill)
Orange Level Access
Joined: 11 Sep 2009
Location: illinois
Points: 90980
|
Post Options
Thanks(0)
Quote Reply
Posted: 02 May 2023 at 8:37am |
The engine had been overhauled at some point 50+ years previously because it had the bigger sleeves and pistons when I took it apart.
Maybe the block was line bored years ago... and therefore no shims needed ??
|
|
Like them all, but love the "B"s.
|
|


