| Author |
|
Sugarmaker 
Orange Level


Joined: 12 Jul 2013
Location: Albion PA
Points: 8659
|
 Post Options Post Options
") Thanks(0) Thanks(0)
 Quote Quote  Reply Reply
 Topic: WD45 shift tower details (picture heavy) Topic: WD45 shift tower details (picture heavy)
Posted: 02 Apr 2020 at 11:47am |
Folks, I have a WD45 that is currently having issues with the shift lever getting out of correct position and the tractor ends up in the wrong gear. I am going to try to document the work and information that I find as I attempt to repair, improve this issue. As these tractors get older and worn you may run into similar problems if you own a WD45. I am not the expert on these and hope to get good information from many others that know much more about these than I do.
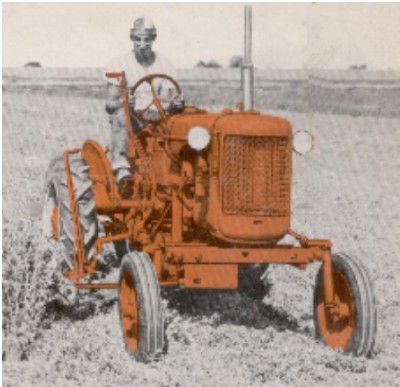
The subject tractor. It was a well worn unit that I have had for a couple years . But had really never used it a lot. So I did not really know the condition of the shifting issues. It had so many other issues the shifter system did not get much attention.
It went through a refurb, clean, and paint. Came out the other end with a lot of things fixed:
So back to the shift tower: I pulled it back off last night: Removed the snap coupler lever, the battery, dash, battery box, steering support, rear hydraulic line, brake lock bracket, and left foot pad.
Today I called Bill at Sandy Lake and got some tips for repairs. They have a rebuilt tower/s in stock ready to ship. I believe they are around $400. With his information I am going to disassemble the tower I have and see if we can repair/ save it, and maybe some funds. Learning along the way if possible too. If you have information and or suggestions jump right in please!
Underside of the shift tower: The top long shift fork is reverse, middle is 3rd and 4th. Lower one is 1st and 2nd.
A service manual is good to have on hand. I will try to use that as a guide also.
Couple things come to mind. One is that this casting may need to be attached to something to make it easier to work on the unit in various positions! Thinking on that one! Disassembly will start now. Removed the lock wires and the tapered lock screws from the center shaft:
Regards, Chris
Edited by Sugarmaker - 19 Jul 2020 at 5:14pm
|
|
D17 1958 (NFE), WD45 1954 (NFE), WD 1952 (NFE), WD 1950 (WFE), Allis F-40 forklift, Allis CA, Allis D14, Ford Jubilee, Many IH Cub Cadets, 32 Ford Dump, 65 Comet.
|
 |
|
Sponsored Links
|
|
|
Boss Man
Orange Level
Joined: 03 Mar 2018
Location: Greenleaf, WI
Points: 617
|
Post Options
Thanks(0)
Quote Reply
Posted: 02 Apr 2020 at 4:25pm |
Not really necessary to take the shifter housing off. Most times pull the shift boot, snap ring and washer. Lift the shift lever out. Clean the grove in the ball up to match oversized pins. Weld the end of the lever and reinstall
|
|
Sugarmaker
Orange Level
Joined: 12 Jul 2013
Location: Albion PA
Points: 8659
|
Post Options
Thanks(0)
Quote Reply
Posted: 02 Apr 2020 at 4:35pm |
Boss man, You may be right, I tried and completed those steps prior to this. Will see what I find when I get it further apart. When this thing lets me down several times with the fixes you described, I need to dig a little deeper. Nothing more frustrating than a tractor that does not work/ move. I actually added a additional pin in the tower to help stabilize the ball on the shift lever.
Here is my attempt to make this easier to work on.
Its an attempt to work on this in various positions.
Got distracted this afternoon so not much happened on the 45 shift tower. Regards, Chris
Edited by Sugarmaker - 02 Apr 2020 at 5:30pm
|
|
D17 1958 (NFE), WD45 1954 (NFE), WD 1952 (NFE), WD 1950 (WFE), Allis F-40 forklift, Allis CA, Allis D14, Ford Jubilee, Many IH Cub Cadets, 32 Ford Dump, 65 Comet.
|
|
Dave(inMA)
Orange Level

Joined: 12 Sep 2009
Location: Grafton, MA
Points: 2400
|
Post Options
Thanks(0)
Quote Reply
Posted: 02 Apr 2020 at 4:48pm |
|
Right now, getting distracted is a really good thing, Chris! Nice setup for working on the shift tower.
|
|
WC, CA, D14, WD45
|
|
Gary
Orange Level Access
Joined: 13 Sep 2009
Location: Peterborough,On
Points: 5911
|
Post Options
Thanks(0)
Quote Reply
Posted: 02 Apr 2020 at 4:53pm |
|
Hey Chris
There is an added feature when you are working out in the warm sunshine like that -
- when those 3 little steel ball and springs go fly-en
- ain't no way in hxll you're ever gonna find them !
They'll be long - gone LOL
Gary
|
|
Sugarmaker
Orange Level
Joined: 12 Jul 2013
Location: Albion PA
Points: 8659
|
Post Options
Thanks(0)
Quote Reply
Posted: 02 Apr 2020 at 5:28pm |
Gary, Folks Thanks for the support! I will try to keep the parts in control some how too. Since I have never had one apart, I do appreciate the hints. I sure don't need help getting distracted! Regards, Chris
|
|
D17 1958 (NFE), WD45 1954 (NFE), WD 1952 (NFE), WD 1950 (WFE), Allis F-40 forklift, Allis CA, Allis D14, Ford Jubilee, Many IH Cub Cadets, 32 Ford Dump, 65 Comet.
|
|
Boss Man
Orange Level
Joined: 03 Mar 2018
Location: Greenleaf, WI
Points: 617
|
Post Options
Thanks(0)
Quote Reply
Posted: 02 Apr 2020 at 5:38pm |
|
Sweet way of handling the cover. Beats laying on the bench and trying to hold with a vice.
|
|
B26240
Orange Level
Joined: 21 Nov 2009
Location: mn
Points: 3866
|
Post Options
Thanks(0)
Quote Reply
Posted: 02 Apr 2020 at 6:30pm |
Nice work holding setup !! Be careful with those detent balls, I had one go wizzing past my face years ago when working on a WC  tower. Good Lord was watching over me that I didn't lose a eye.
|
|
HaroldOmaha
Orange Level Access

Joined: 11 Sep 2009
Location: Omaha
Points: 862
|
Post Options
Thanks(0)
Quote Reply
Posted: 02 Apr 2020 at 7:52pm |
|
I bought a 45 gas 25 years ago. After about 5 years I discovered the shifter locking in 2 gears. pulled the shifter and used the long screw driver to put the gears back in neutral. Did this a few times for a few years, then realized that when shifting I was moving the lever diagonally to the shift pattern. Since then I learned that if I moved the lever straight left and right and straight forward and back, the last 10 years or so I've had no problem with it getting into the wrong gears. I realize it is not what a person wants in a restored tractor, but I use this tractor to do a lot of plowing, and tractor pulls, and my kids use it a lot too. and understand the shifting pattern. And for a cheap playing around machine it works great. May be this will help someone that has a tractor that they would like to fool around with but can't put the money in to fix it.
|
|
MACK
Orange Level
Joined: 17 Nov 2009
Points: 7664
|
Post Options
Thanks(0)
Quote Reply
Posted: 02 Apr 2020 at 9:09pm |
|
Get two new oversize pins, drill housing to fit pins, machine slots to fit new pins. Then buildup bottom end of gearshift. Stay out of bottom side unless you just want the experience. It may be a learning experience. MACK
|
|
MDWilliams338
Silver Level


Joined: 19 Nov 2018
Location: NC
Points: 476
|
Post Options
Thanks(0)
Quote Reply
Posted: 02 Apr 2020 at 9:50pm |
|
Hate you’re having to do this but it’s very informative for sure.Guess I’ve been lucky so far as to not had any troubles with any of ours so when the time comes all this info and pics will sure help.
|
|
‘42B,’45B,’48C,’51CA,’52CA,’69170,1935WC,1936WC,WD,WD Highcrop,WD45,WF,D10/14/15/17/19
It isn’t how you die.It’s what you live for.-Daniel Boone
|
|
HD6GTOM
Orange Level

Joined: 30 Nov 2009
Location: MADISON CO IA
Points: 6627
|
Post Options
Thanks(0)
Quote Reply
Posted: 02 Apr 2020 at 10:04pm |
|
I put the over size pins I mine and a new shift lever. That was 25+ years ago. Still working fine. Be sure and replace the double C spring in the snap coupler bell. I have a huge scar on my back where a plow came unhooked from the bell and landed on my back. I thought I had been shot again. That was in the 1970's and my back is still messed up. It still caused me lots of pain.
|
|
Sugarmaker
Orange Level
Joined: 12 Jul 2013
Location: Albion PA
Points: 8659
|
Post Options
Thanks(0)
Quote Reply
Posted: 03 Apr 2020 at 11:53am |
Humm, MACK says stay out of that bottom end! Sounds like the voice of experience talking there too! And If Don(MO) were still here I would sure call him also! I can see the areas (top of fork slots) where the bottom stem of the shifter fits in. Do they look real bad? Well, I dont know because I am not a good judge of what new ones look like. I think my plan is to disassemble and check for wear especially in these upper slots. I may have to take all the the parts to Sandy Lake and have Bill look at them with me. Might cost me a quart of maple syrup?:)
What I do see is that the spring detent tab for pushing the shifter into reverse is pretty much gone. And the ball socket area of the tower looks to be very worn/ enlarged. I do like the idea of the enlarged pins for the sides of the shifter too. I did look at the service manual, I do not know where the interlock pins are (yet) any hints??
Weather is nice and I may have to set this aside for a few hours/ days? I have some slabs to buzz for making syrup next spring. As usual it will be a journey. Good comments! Thanks!
Regards, Chris
Edited by Sugarmaker - 03 Apr 2020 at 12:02pm
|
|
D17 1958 (NFE), WD45 1954 (NFE), WD 1952 (NFE), WD 1950 (WFE), Allis F-40 forklift, Allis CA, Allis D14, Ford Jubilee, Many IH Cub Cadets, 32 Ford Dump, 65 Comet.
|
|
MACK
Orange Level
Joined: 17 Nov 2009
Points: 7664
|
Post Options
Thanks(0)
Quote Reply
Posted: 03 Apr 2020 at 10:16pm |
|
After working on them for nearly 60 years, I have tools that I made to put rails back in. With out them, you can get them in, but you may learn some new words. Good luck and happy ball hunting.
MACK
|
|
Sugarmaker
Orange Level
Joined: 12 Jul 2013
Location: Albion PA
Points: 8659
|
Post Options
Thanks(0)
Quote Reply
Posted: 03 Apr 2020 at 10:18pm |
Ok I am going to dump a bunch of pictures in here then sort out the words to go with them.
Tapping out the front welsh plugs with drift and hammer:
Took the center rail out first (third and fourth gear)
Per the book turn the rail a 1/4 turn to compress the ball in the detent area, and allow the rail to slide past the detent ball.
You can see the detents in the rail when you turn it.
Now you can tap out the rail through the other welsh plug.
As the center rail came out there was a small cross pin:
I had a burr on the end of this shaft and it had to be smoothed before the shift fork would slide off the rail.
Welsh plug and cross pin: Still learning about the pins function?
center shift component off the rail:
some wear here, but not too bad.
Put a cloth over the spring loaded detant ball as the rail was removed and it did not escape:
Regards, Chris
Edited by Sugarmaker - 19 Jul 2020 at 5:19pm
|
|
D17 1958 (NFE), WD45 1954 (NFE), WD 1952 (NFE), WD 1950 (WFE), Allis F-40 forklift, Allis CA, Allis D14, Ford Jubilee, Many IH Cub Cadets, 32 Ford Dump, 65 Comet.
|
|
garden_guy
Orange Level
Joined: 05 Jul 2013
Location: Illinois
Points: 1167
|
Post Options
Thanks(0)
Quote Reply
Posted: 03 Apr 2020 at 11:55pm |
Best of luck sugarmaker. I've gotten mine stuck in reverse twice in the past 20 years. Have a welded up pin, but had a single pin tower. I bought a new gear shift from Steiner but haven't installed it yet, as the old one is a bit too gone. But I've had good luck trying to force myself to shift straight, but reverse is the one that seems to be easy to slip by on with mine.
 HD6GTOM wrote: HD6GTOM wrote:
I put the over size pins I mine and a new shift lever. That was 25+ years ago. Still working fine. Be sure and replace the double C spring in the snap coupler bell. I have a huge scar on my back where a plow came unhooked from the bell and landed on my back. I thought I had been shot again. That was in the 1970's and my back is still messed up. It still caused me lots of pain. |
I have heard of this happening but always thought the snap coupler latches were supposed to "open" if this happened and release the plow. Yikes! 
|
|
DrAllis
Orange Level Access
Joined: 12 Sep 2009
Points: 22777
|
Post Options
Thanks(0)
Quote Reply
Posted: 04 Apr 2020 at 6:43am |
|
That small pin thru the rail is called an interlock pin. It sees to it only one rail can move out of neutral.
|
|
Sugarmaker
Orange Level
Joined: 12 Jul 2013
Location: Albion PA
Points: 8659
|
Post Options
Thanks(0)
Quote Reply
Posted: 04 Apr 2020 at 7:07am |
Folks, I found a post on YT from Butch in Ohio. It has some good suggestions on assembly methods. Also some hints about the interlock system which prevents two gears being engaged at the same time.
"1. Put the tower in a vise with the rail side up.
2. Slide one of the outside rails and stop just short of the detent, install the detent spring and ball with a dab of grease and hold down with a 1/4" soft wood dowel.
3. Slide the rail up to the dowel and then give it a good crack with a soft hammer. That will shear the dowel and leave the detent parts under the rail.
4. Slide the fork(s) on as you push the rail inward. Pay attention to the grooves on the rail so it is turned correctly and tap it to the neutral position which is the center groove on 1-2 & 3-4 rails and the front groove on the R rail.
5. Turn the tower sideways in the vise with the just installed rail down. 6. Grease the 1/4 x 1/2 interlock part and the hole between the center rail bore and just installed rail and place the part in the hole. This will try your nerves a bit. A rod held from the back of the center rail bore will help so you can't get the part past it. If it will not go in flush with the bore you don't have the installed shifter rail in nuetral, or it is turned wrong.
7. Repeat above for the other outside rail
8. install the center rail with smaller interlock pin installed and greased.
9. Resist the temptation to play with the shifter until you have it on the transmission and held down with a bolt or two"
I may need some of this when I start the reassembly process.
Here is the center rail removed and the detent ball setting on top of the spring:
This center detent spring has some damage at the lower end, may not be a serious issue:
Nut, lock washer and plate on the rail for 1st and 2nd gear:
Lock screw is turned out with a cresent wrench.
Regards, Chris
|
|
D17 1958 (NFE), WD45 1954 (NFE), WD 1952 (NFE), WD 1950 (WFE), Allis F-40 forklift, Allis CA, Allis D14, Ford Jubilee, Many IH Cub Cadets, 32 Ford Dump, 65 Comet.
|
|
Sugarmaker
Orange Level
Joined: 12 Jul 2013
Location: Albion PA
Points: 8659
|
Post Options
Thanks(0)
Quote Reply
Posted: 04 Apr 2020 at 7:15am |
Folks, Another group of pictures:
The lock screw for securing the fork to the shaft and the plate to the shaft:
Rotate the rail 1/4 turn to keep the detent ball in the home position:
Tap the rail out which pops out the welsh plug:
Remove the fork:
Regards, Chris
|
|
D17 1958 (NFE), WD45 1954 (NFE), WD 1952 (NFE), WD 1950 (WFE), Allis F-40 forklift, Allis CA, Allis D14, Ford Jubilee, Many IH Cub Cadets, 32 Ford Dump, 65 Comet.
|
|
Sugarmaker
Orange Level
Joined: 12 Jul 2013
Location: Albion PA
Points: 8659
|
Post Options
Thanks(0)
Quote Reply
Posted: 04 Apr 2020 at 7:32am |
Folks, One more installment of pictures then I need to go do something constructive like cut slabs!
Here you can see some wear from the knob of the shift lever. May need to weld this up:
The bottom of the shift lever as I had welded it up before. I think its going to need some tuning. I can do some measuring on the forks now too.
The think I am going to look at is the relationship of the knob on the bottom to the slots in the ball. Mine seems to be out of position by maybe 10 to 15 degrees:
The fit is not to bad and should function:
Regards, Chris
Edited by Sugarmaker - 04 Apr 2020 at 7:43am
|
|
D17 1958 (NFE), WD45 1954 (NFE), WD 1952 (NFE), WD 1950 (WFE), Allis F-40 forklift, Allis CA, Allis D14, Ford Jubilee, Many IH Cub Cadets, 32 Ford Dump, 65 Comet.
|
|
IBWD MIke
Orange Level
Joined: 08 Apr 2012
Location: Newton Ia.
Points: 4270
|
Post Options
Thanks(0)
Quote Reply
Posted: 04 Apr 2020 at 8:50am |
|
Hey Chris, could I just take one off a parts machine, box it up and send it your way? I need to go through one for the wide-front but this looks time consuming. I could pay with firewood, though shipping would likely be impractical!
|
|
SteveM C/IL
Orange Level Access
Joined: 12 Sep 2009
Location: Shelbyville IL
Points: 8973
|
Post Options
Thanks(0)
Quote Reply
Posted: 04 Apr 2020 at 9:09am |
|
while apart would have been good time to "move" the notch for 3rd to achieve full engagement of sliding collar
|
|
Rick of HopeIN
Orange Level
Joined: 11 Sep 2009
Location: Hope, Indiana
Points: 1329
|
Post Options
Thanks(0)
Quote Reply
Posted: 04 Apr 2020 at 9:25am |
Looks like a good topic to go into the knowledge base. The WC is a bit different but similar. I had one ball fly when trying to put mine back together. I was in luck since my issues were confined to the shift lever groove and pin wear so I only had to disassemble my center rail. Still lots of small parts. Those pics are handy. One of those projects you hope to never have to tackle again.
Edited by Rick of HopeIN - 04 Apr 2020 at 5:52pm
|
|
1951 B, 1937 WC, 1957 D14, -- Thanks and God Bless
|
|
garden_guy
Orange Level
Joined: 05 Jul 2013
Location: Illinois
Points: 1167
|
Post Options
Thanks(0)
Quote Reply
Posted: 04 Apr 2020 at 5:41pm |
SteveM C/IL wrote:
while apart would have been good time to "move" the notch for 3rd to achieve full engagement of sliding collar |
Is this a thing? 
|
|
MDWilliams338
Silver Level
Joined: 19 Nov 2018
Location: NC
Points: 476
|
Post Options
Thanks(1)
Quote Reply
Posted: 04 Apr 2020 at 7:50pm |
|
I like pictures Chris! I’m getting edumakation here.
|
|
‘42B,’45B,’48C,’51CA,’52CA,’69170,1935WC,1936WC,WD,WD Highcrop,WD45,WF,D10/14/15/17/19
It isn’t how you die.It’s what you live for.-Daniel Boone
|
|
Sugarmaker
Orange Level
Joined: 12 Jul 2013
Location: Albion PA
Points: 8659
|
Post Options
Thanks(0)
Quote Reply
Posted: 04 Apr 2020 at 9:17pm |
Folks, As you can see I changed the title to picture heavy, probably should say VERY picture heavy. I was always leary of taking one of these apart. Not any more. We have more pictures to come but you will be happy to know its back on the tractor and feels like factory. The trip is not going to be for the weak of heart. Some will even frown on some of my repairs and fixes. But i did not want to spend a lot. At this point I have some time and some welding consumables.
Reverse spring loaded "lock out" WD's did not have this feature:
Note there is some wear on the lugs: these will get Mig welded and hand worked back closer to spec. somewhere around .560 inches wide between the lugs.
This is the fork, spring and ball detent and rail for first and second gear:
Reverse fork and rail coming out. Gentle taps after turning the rail (shaft) 1/4 turn:
My crude method to spin the rails. duct tap on the jaws:
Reverse fork, detent, spring, plus spring for the lock out lever and lock out : the end is totally gone so this was not even functioning as a lock out: Regards, Chris
Edited by Sugarmaker - 04 Apr 2020 at 9:21pm
|
|
D17 1958 (NFE), WD45 1954 (NFE), WD 1952 (NFE), WD 1950 (WFE), Allis F-40 forklift, Allis CA, Allis D14, Ford Jubilee, Many IH Cub Cadets, 32 Ford Dump, 65 Comet.
|
|
Sugarmaker
Orange Level
Joined: 12 Jul 2013
Location: Albion PA
Points: 8659
|
Post Options
Thanks(0)
Quote Reply
Posted: 04 Apr 2020 at 9:34pm |
More<
Here is several views of the reverse lock out system, just a spring loaded tab to make it hard to move the shift lever over into reverse. Except when it is totally gone as in this unit! I looked like some one had welded a tab on here once, but it had fell off or was worn off?
Shift lever in picture to check fit, yes these lugs need work too:
Just reassembling to get familiar with how it all works:
This is how I kept the detent balls from flying around. Rag over the area when removing the rails:
Tipping the tower up in a vertical position made it easier to do things like get these springs out:
Regards, Chris
|
|
D17 1958 (NFE), WD45 1954 (NFE), WD 1952 (NFE), WD 1950 (WFE), Allis F-40 forklift, Allis CA, Allis D14, Ford Jubilee, Many IH Cub Cadets, 32 Ford Dump, 65 Comet.
|
|
Sugarmaker
Orange Level
Joined: 12 Jul 2013
Location: Albion PA
Points: 8659
|
Post Options
Thanks(0)
Quote Reply
Posted: 04 Apr 2020 at 9:56pm |
A few more if you can stand it!
Not a great picture, your under the tower looking up at the shift lever. I was checking for possible solutions to repair worn socket where shifter rides. Bill at Sandy lake said they go in and weld in the socket. It was just too tight for me. I came up with another option. This shift lever was about a good 1/8 inch too low in the socket.
Just shining a light through from under neath. A cat could crawl through there!
Here I put 3rd gear lug back in place and now can see the lever is too long and is hitting the lug. I could have just taken some off the bottom of the shift lever but that seemed too easy!
While looking the lever over for repair ideas I put my good eye on it and realized when I welded it up it was too wide so I whittled it down to .312 wide. Also got it more inline with the slots in the ball, and the original flats in the bottom end near the repairs.
Time to start some repairs. The ball of the shift lever was welded with 6 vertical areas and 4 horizontal areas. These were just hand smoothed with a die grinder. Pretty crude but I bet it will last a long time. Brought the lever up just right to clear the lug of 3rd gear. Next a small tab was whittled out of some scrap steel and welded to the lever arm for the reverse lock out. about 1/8 material. The lugs for reverse were both welded and hand worked.
Mock up of the reverse tab. Just right clearance for the shift lever width too!
Regards, Chris
Edited by Sugarmaker - 04 Apr 2020 at 11:05pm
|
|
D17 1958 (NFE), WD45 1954 (NFE), WD 1952 (NFE), WD 1950 (WFE), Allis F-40 forklift, Allis CA, Allis D14, Ford Jubilee, Many IH Cub Cadets, 32 Ford Dump, 65 Comet.
|
|
Sugarmaker
Orange Level
Joined: 12 Jul 2013
Location: Albion PA
Points: 8659
|
Post Options
Thanks(0)
Quote Reply
Posted: 04 Apr 2020 at 10:33pm |
Ok so we have turned the corner and started to fix this old worn out shift tower.
So yes 1st gear lug needed welded also to remove years of wear:
As I looked over the side pins I decided to make some that could be installed and not fall into the transmission while the shift lever is out. 1/4 inch bolt with head ground to fit slots in ball. (mine are custom offset to compensate for me not drilling the second hole exactly where it should be!) Then a small slot cut in the protruding end to allow it to be opened up. Pretty crude but darn effective!
Here are the custom side pins and the repaired sphere of the lever in place for trial fit and function. This also raised the ball up to allow for the retainer and a custom washer and then the snap ring. A much better fit than before.
I forgot to take pictures of the interlock plungers. Those little rascals stayed put the whole time, until I was ready to put the rods back in, and then one jumped out and of course fell into the inside of the casting. You need a small pen magnet for this project to retrieve items that fall into that area right under the shift pattern.
I used the service manual as a guide to do the assembly. It says use a punch to push the detent balls down to get the rails started past the balls. Very hard on the hands a much better tool would have been a Allen wrench with a plastic tee handle. It takes a lot of force, and a punch is hard on the hand. With this being on the engine stand I was able to push the ball down with a punch, and move the rail into position with pressure from my thigh. It worked. Then I tapped the rail with a hammer to get it started past the ball. I did have one detent ball get loose and could have hit me in the eye! Be careful! Don't forget to wire tie the tapered bolts around the shafts!
I added some good wheel bearing grease to the socket where the new welded shift ball is to set. Then dropped in the shifter lever and placed the tower in second gear, as recommended for installation. Some gasket sealer, and dropped the tower in place on the tractor. I put a bolt in the right side where the steering support attaches. I had to move third gear slider in tranny forward a little bit, and on the second stab ,it seemed to fall into the home position!
Put two bolts in the tower to secure it, and then installed the shift lever. Tried all the gears and rocked the tractor to make sure they all engaged. Wow! a totally different feel, and I hope it tests ok. Have to finish all the other install items tomorrow.
Side note: Oh yes those little interlock plungers are real cute. About 1/4 dia pin, maybe 1/2 inch long with a sphere on each end. Two of them. One in between each rail. Then the small interlock pin goes in the center rail. it is maybe 3/16 dia x about 1/2 inch long. It would be real easy to loose when taking out that center rail. as it is loose by design! I used grease to hold it in place while installing that center rail.
I hope this may help someone on a WD45 or WD series tractor. As Don would have said Ahhh! it only nuts and bolts!
And for MACK. Well a new shift lever and oversize side pins would have helped but this tractor needed the tower to come apart for several other things! Thanks guys for the support! Hope things are good In Orange Land!
Regards, Chris
Edited by Sugarmaker - 15 May 2020 at 6:57pm
|
|
D17 1958 (NFE), WD45 1954 (NFE), WD 1952 (NFE), WD 1950 (WFE), Allis F-40 forklift, Allis CA, Allis D14, Ford Jubilee, Many IH Cub Cadets, 32 Ford Dump, 65 Comet.
|
|
Sugarmaker
Orange Level
Joined: 12 Jul 2013
Location: Albion PA
Points: 8659
|
Post Options
Thanks(0)
Quote Reply
Posted: 04 Apr 2020 at 10:50pm |
SteveM, I wished I would have done the research on that more prior to getting this tower back on. I assume the notch in the lug can be re-positioned to allow for more engagement in the sliding collar in the tranny? Please add those details here too, if you have them. Regards, Chris
|
|
D17 1958 (NFE), WD45 1954 (NFE), WD 1952 (NFE), WD 1950 (WFE), Allis F-40 forklift, Allis CA, Allis D14, Ford Jubilee, Many IH Cub Cadets, 32 Ford Dump, 65 Comet.
|
|


 Topic Options


