This site is not affiliated with AGCO Inc., Duluth GA., Allis-Chalmers Co., Milwaukee, WI., or any surviving or related corporate entity. All trademarks remain the property of their respective owners. All information presented herein should be considered the result of an un-moderated public forum with no responsibility for its accuracy or usability assumed by the users and sponsors of this site or any corporate entity.
The Forum Parts and Services Unofficial Allis Store Tractor Shows Serial Numbers History
Forum Home Forum Home > Allis Chalmers > Farm Equipment
  New Posts New Posts
  FAQ FAQ  Forum Search   Events   Register Register  Login Login


Snap-coupler rehab

 Post Reply Post Reply
Author
Message
IBWD MIke View Drop Down
Orange Level
Orange Level
Avatar

Joined: 08 Apr 2012
Location: Newton Ia.
Points: 3984
Post Options Post Options   Thanks (0) Thanks(0)   Quote IBWD MIke Quote  Post ReplyReply Direct Link To This Post Topic: Snap-coupler rehab
    Posted: 11 Oct 2016 at 1:49pm
Another in the ongoing projects for my WD45's. This time I worked on fixing the sloppy snap-coupler system. Sometime in the past I found a very nice bell on e-bay that didn't cost a kings ransom. This shot shows the minimal wear, as opposed to the heavily worn one on the tractor.


The fork the bell mounts on.


More on this later, have to get ready for work.


Back to Top
Sponsored Links


Back to Top
HD6GTOM View Drop Down
Orange Level
Orange Level
Avatar

Joined: 30 Nov 2009
Location: MADISON CO IA
Points: 6627
Post Options Post Options   Thanks (0) Thanks(0)   Quote HD6GTOM Quote  Post ReplyReply Direct Link To This Post Posted: 11 Oct 2016 at 8:10pm
Mike for gosh sakes replace that double c spring while you have it apart. It could save your life. Good luck with her.
Back to Top
IBWD MIke View Drop Down
Orange Level
Orange Level
Avatar

Joined: 08 Apr 2012
Location: Newton Ia.
Points: 3984
Post Options Post Options   Thanks (0) Thanks(0)   Quote IBWD MIke Quote  Post ReplyReply Direct Link To This Post Posted: 12 Oct 2016 at 1:19am
Tom, I didn't have time to get to that part. Got a new spring from AGCO. That was an important part of the job to me.
Back to Top
Cernunnos View Drop Down
Silver Level
Silver Level
Avatar

Joined: 30 Jul 2014
Location: Ridgeland, WI
Points: 361
Post Options Post Options   Thanks (0) Thanks(0)   Quote Cernunnos Quote  Post ReplyReply Direct Link To This Post Posted: 12 Oct 2016 at 4:30am
Mike,
Would you be able to show some pictures of the worn out snap coupler bell for comparison?  I'd like to see what to look for if one needs replacing.
1951 CA, 1952 CA with cultivator, 20 Series 8' disc harrow, 2 bottom pick-up plow, forage blower, 2-row rear mounted drill corn planter, Allcrop grain drill, No. 80T sickle mower, MN No. 130 barge box
Back to Top
IBWD MIke View Drop Down
Orange Level
Orange Level
Avatar

Joined: 08 Apr 2012
Location: Newton Ia.
Points: 3984
Post Options Post Options   Thanks (0) Thanks(0)   Quote IBWD MIke Quote  Post ReplyReply Direct Link To This Post Posted: 12 Oct 2016 at 9:06am
[QUOTE=Cernunnos]Mike,
Would you be able to show some pictures of the worn out snap coupler bell for comparison?  I'd like to see what to look for if one needs replacing.
[/QUOT]
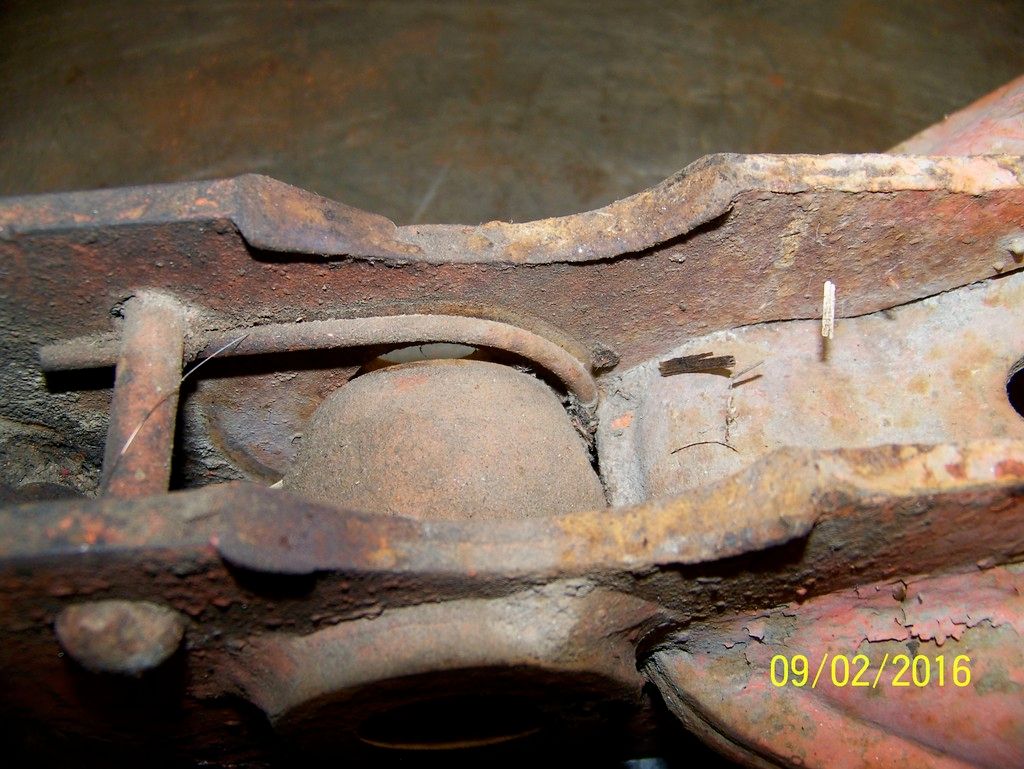
The bell itself doesn't show wear in most cases, it is the rails where it contacts the fork. In the first couple of pictures you can see the difference between the one I installed and the one I removed. Also the fork gets a deep grove worn in it, hard to see well in the pics but there was a huge difference in the one I took out and the one I installed.

In the future I intend to try welding one up and regrinding to fit.

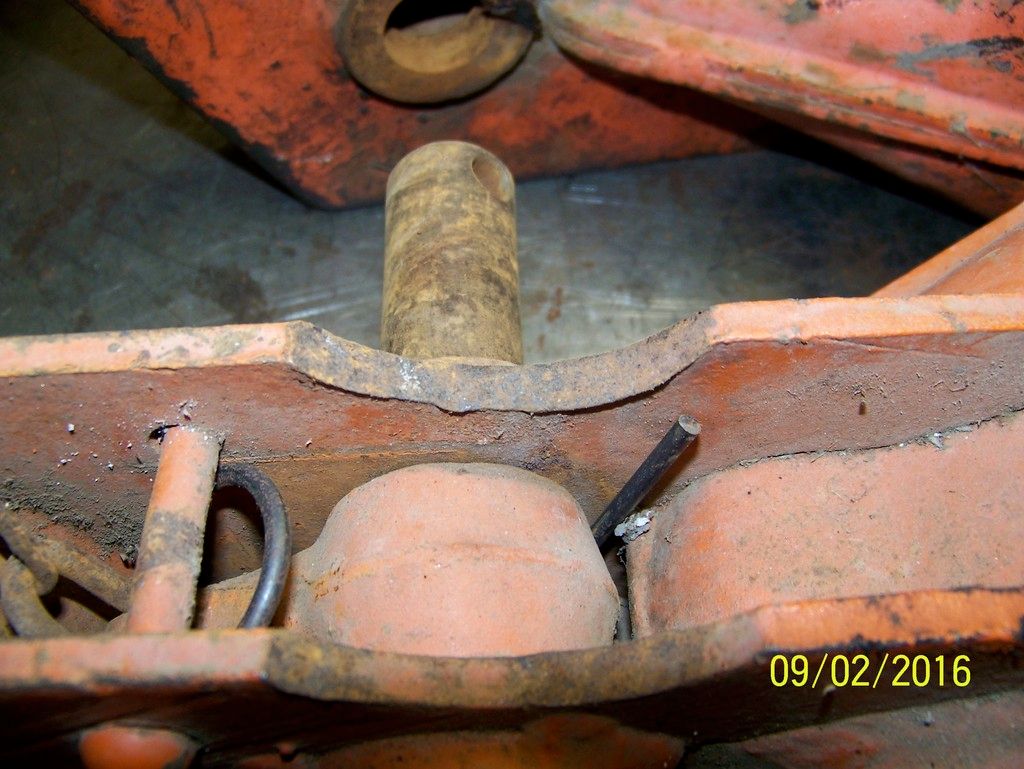
Maybe the side view shows the wear better.

Minimal wear on the one installed. I cleaned up the edges with a file before assembling. You can also see the new spring in this shot. Getting that spring in there correctly and then getting the pin through is harder than you would think.


Edited by IBWD MIke - 12 Oct 2016 at 9:31am
Back to Top
IBWD MIke View Drop Down
Orange Level
Orange Level
Avatar

Joined: 08 Apr 2012
Location: Newton Ia.
Points: 3984
Post Options Post Options   Thanks (0) Thanks(0)   Quote IBWD MIke Quote  Post ReplyReply Direct Link To This Post Posted: 12 Oct 2016 at 9:25am
One of the big problems I ran into doing this is getting things apart. Apparently 60 some years is enough time for pins to completely bond with other parts. Had to remove the whole drawbar support from the tractor and replace it. The one used here did not have the adjustable stop block on it. I think it came off an early WD. So I cut one off another piece and welded it on the one used. Of course I found this out after paint.

 
Not sure how important this is but wanted to have the option to adjust.
The finished assembly ready to install.

Back to Top
IBWD MIke View Drop Down
Orange Level
Orange Level
Avatar

Joined: 08 Apr 2012
Location: Newton Ia.
Points: 3984
Post Options Post Options   Thanks (0) Thanks(0)   Quote IBWD MIke Quote  Post ReplyReply Direct Link To This Post Posted: 12 Oct 2016 at 9:33am
Back together ready to plow.

This really tightened up the system. Now when you step on the drawbar to mount the tractor it only moves about half as much as it used to. It's good piece of mind.


Edited by IBWD MIke - 12 Oct 2016 at 9:46am
Back to Top
 Post Reply Post Reply
  Share Topic   

Forum Jump Forum Permissions View Drop Down

Forum Software by Web Wiz Forums® version 11.10
Copyright ©2001-2017 Web Wiz Ltd.

This page was generated in 0.141 seconds.


Help Support the
Unofficial Allis Forum