| Author |
 Topic Search Topic Search  Topic Options Topic Options
|
allischalmerguy 
Orange Level


Joined: 11 Sep 2009
Location: Deep River, IA
Points: 2893
|
 Post Options Post Options
") Thanks(0) Thanks(0)
 Quote Quote  Reply Reply
 Topic: Preparing a Tractor to paint what do you do? Topic: Preparing a Tractor to paint what do you do?
Posted: 31 Aug 2011 at 10:39pm |
|
I bought a Co-op E3 and am looking to paint it. I was wondering what you all do when you repaint a tractor?
Do you sand blast? If so, how to prepare so sand doesn't go in the wrong places?
Do you chemically strip?
Do you wire brush?
How do you prepare for paint when you get the old off? Do you wash the tractor with something?
Is it necessary to get all the old paint off, or can you paint over it after wet sanding?
I have not done this before so I am looking for help and ideas.
Thanks
Pastor Mike in Iowa
|
 |
|
Sponsored Links
|
|
|
AC WD45
Orange Level

Joined: 28 Sep 2009
Location: Mid Michigan
Points: 2060
|
Post Options
Thanks(0)
Quote Reply
Posted: 01 Sep 2011 at 12:10am |
|
aggressive Wire cup on a 4" angle grinder. just don't hold it in place for extended periods or it will leave scratches in the metal. start out with a mild onne then once you get the feel for it go to the aggressive one. I take it so mare metal. I reccomend you where thick pants/muck boots and gloves, aswell as eye protection and a long sleeve shirt though because when those wires fly off that cup at 12000 rpm they hurt like hell. your best bet is taking the sheetmetal to bare metal and the rest just gettig the loose stuff and like you siad with the wet sanding. spray a coat of primer on everything before you paint to give the paint something to grab to or it will peel right off.
|
|
German Shepherd dad
1957 Allis Chalmers WD45
#WD234847
1951 Allis Chalmers WD
#WD88193
|
|
scott
Orange Level Access
Joined: 12 Sep 2009
Location: michigan
Points: 2745
|
Post Options
Thanks(0)
Quote Reply
Posted: 01 Sep 2011 at 6:33am |
|
Get a needle scaler for the cast iron stuff.
|
|
Stan IL&TN
Orange Level

Joined: 13 Sep 2009
Location: Elvis Land
Points: 6730
|
Post Options
Thanks(0)
Quote Reply
Posted: 01 Sep 2011 at 6:58am |
For the sheetmetal I use a chemical stripper. Goop it on and let it sit overnight then scrape it off with a plastic scrapper. Final step is to use a scotch brite and scrub off the remainder using warm soapy water until bare metal. Sand any rusty spots and then wipe it down with denatured alcohol then hit it with primer. Sand the primer with 320-500 grit sand paper and wipe it down again with the alcohol then shoot the paint to it.
Edited by Stan IL&TN - 01 Sep 2011 at 7:12am
|
|
1957 WD45 dad's first AC
1968 one-seventy
1956 F40 Ferguson
|
|
jjwo
Silver Level

Joined: 12 Sep 2009
Location: Wapak, Ohio
Points: 85
|
Post Options
Thanks(0)
Quote Reply
Posted: 01 Sep 2011 at 6:59am |
|
When we had body shop I sure bought a lot of Dawn dish soap for them. They washed all metal wih it.
|
|
Brian Jasper co. Ia
Orange Level
Joined: 11 Sep 2009
Location: Prairie City Ia
Points: 10508
|
Post Options
Thanks(0)
Quote Reply
Posted: 01 Sep 2011 at 1:40pm |
|
Sand blasting works best. I pack grease and then wrap duct tape around seals or other entry points to keep the sand out. If you you use a wire brush on an angle grinder, make sure you wear a respirator to protect from the dust. Pretty much all implement enamels back then were lead based.
|
|
"Any man who thinks he can be happy and prosperous by letting the government take care of him better take a closer look at the American Indian." Henry Ford
|
|
nsula_country
Orange Level

Joined: 10 Mar 2011
Location: NW Louisiana
Points: 218
|
Post Options
Thanks(0)
Quote Reply
Posted: 01 Sep 2011 at 1:49pm |
Remove parts if possible before sand blasting. Sand has a tenacity to find itself into places you would never imagine (think the beach). Using a needle scaler on cast is a good idea too. I have recently started doing that. Harbor Freight has a mini scaler that works good for the application. I have had mixed results with a cup wheel. Works good on rust, tends to burn and melt paint. A DA sander (also HF) works good on sheet metal. Blasting sheet metal can be bad (warpping). Though heavily pits should be spot blasted.
CT
|
|
2014 LS P7010C, 1962 Farmall 504 Diesel (1st tractor) w/ 2008 Koyker 220 FEL, 1968 Allis Chalmers 180 Diesel, Komatsu PC38UU-2 Excavator, Various attachments for all!
|
|
MNLonnie
Orange Level
Joined: 11 Sep 2009
Location: Baxter MN
Points: 4791
|
Post Options
Thanks(0)
Quote Reply
Posted: 01 Sep 2011 at 2:49pm |
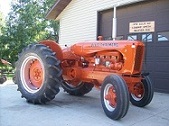
I tear it apart far enough to make it easier to handle and move parts around and then get it sandblasted. After that I tear it apart the rest of the way to do repairs and get the sand out of it. Here is a pic of my IB that hopefully will get blasted this Saturday. Using the engine stand and dollies I can roll everything outside pretty easy but still it's tore down enough to get the tight spots done.
|
|
Waukesha B, B, IB, G, styled WF, D15, 615 backhoe, 2-Oliver OC3's, 4 Ford Model T's, 3 Model A Fords, AV8 Coupe, AV8 Roadster, 1933 Ford Wrecker
|
|
CTuckerNWIL
Orange Level

Joined: 11 Sep 2009
Location: NW Illinois
Points: 22825
|
Post Options
Thanks(0)
Quote Reply
Posted: 01 Sep 2011 at 3:43pm |
I mostly used my battery charger and a 55 gal plastic barrel full of water. Electrolysis is the cheap, lazy, poor mans way of taking it to bare metal. I did everything from the engine block and smaller that way. I sand blasted the frame rails and differential housing after separating from the rest and then tore the differential down and cleaned it. Rust Removal by Electrolysis
|
|
|
|
waynem
Silver Level

Joined: 03 Aug 2011
Location: Milwaukee WI
Points: 70
|
Post Options
Thanks(0)
Quote Reply
Posted: 01 Sep 2011 at 3:49pm |
|
C Tucker great link thanks.
|
|
1939 Model B
|
|
TMiller/NC
Orange Level Access
Joined: 11 Sep 2009
Location: Lenoir, NC
Points: 1776
|
Post Options
Thanks(0)
Quote Reply
Posted: 01 Sep 2011 at 5:08pm |
|
A tip do not put radiator in the electrolysis tank. ($200.00 tip.) Tim
|
|
CTuckerNWIL
Orange Level
Joined: 11 Sep 2009
Location: NW Illinois
Points: 22825
|
Post Options
Thanks(0)
Quote Reply
Posted: 01 Sep 2011 at 8:00pm |
|
Good point Tim. No brass, bronze, copper or aluminum. Most of the info I read about electrolysis tells you that if you read it all.
Edited by CTuckerNWIL - 01 Sep 2011 at 8:02pm
|
|
|
|
j.w.freck
Orange Level

Joined: 16 Sep 2009
Location: karnack texas
Points: 1153
|
Post Options
Thanks(0)
Quote Reply
Posted: 01 Sep 2011 at 9:18pm |
|
AFTER SCRAPING OFF THE CAKED ON GREASE AND DIRT,I HAVE USED EASY OFF OVEN CLEANER.IT WILL TAKE MOST OF THE PAINT OFF DOWN TO THE BARE METAL.IT MIGHT TAKE MORE THAN ONE APPLICATION.ALSO THE PAINT STRIPPER IN THE GOLD CAN AT WALMART WORKS VERY WELL.ANOTHER VERY GOOD STRIPPER IS AIRCRAFT STRIPPER...
|
|
allischalmerguy
Orange Level
Joined: 11 Sep 2009
Location: Deep River, IA
Points: 2893
|
Post Options
Thanks(0)
Quote Reply
Posted: 01 Sep 2011 at 9:35pm |
|
To be honest...Sandblasting scares me. I am afraid of getting sand in the wrong places. But I have a friend who has done it and he might help me.
I sure appreciate all the ideas so far and any more ideas I hope others will share. Thanks for the good link on Electolosys Chuck. Thanks for all the ideas. I have never seen a needle scaler work before in person.
Another question...
After you get the paint and rust off, how do you treat it so you know the paint will stick good and stay?
And what kind of paint did you use?
Thanks alot friends,
Pastor Mike in Iowa
|
|
79fordblake
Orange Level
Joined: 01 Jul 2010
Location: West Kentucky
Points: 829
|
Post Options
Thanks(0)
Quote Reply
Posted: 01 Sep 2011 at 11:47pm |
|
I always start my projects by scraping off all the heavy grease then soak it in purple power and pressure wash.
|
|
Stan IL&TN
Orange Level
Joined: 13 Sep 2009
Location: Elvis Land
Points: 6730
|
Post Options
Thanks(0)
Quote Reply
Posted: 02 Sep 2011 at 7:22am |
|
To clean the bare metal you can use denatured alcohol or they sell a prep cleaner at the paint store but it's more expensive. Then you spray primer on the bare metal. The primer is made to stick to bare metal and give a good base for the paint to stick to. If you spray paint directly on bare metal then expect it to come off when you wash it.
|
|
1957 WD45 dad's first AC
1968 one-seventy
1956 F40 Ferguson
|
|
Butch(OH)
Orange Level
Joined: 11 Sep 2009
Location: Lucerne Ohio
Points: 3842
|
Post Options
Thanks(0)
Quote Reply
Posted: 02 Sep 2011 at 8:21am |
May I suggest that you pick a small assembly of some sort such as a starter, water pump or something on that order. Then sand blast it. Then blow if off, wipe it, shake it, wash it and even wave a vodo doll over it if you wish. Then dissasemble it. And YOU decide if you want to sand blast assemblies and trust that they are clean enough to install and put back into operation.
As you might guess I sand blast nothing that is not either completely apart, or is going to be part before put into use.
|
|
jjrosty
Bronze Level

Joined: 15 Sep 2009
Location: Broken Arrow OK
Points: 109
|
Post Options
Thanks(0)
Quote Reply
Posted: 02 Sep 2011 at 9:29am |
|
I use electrolysis on the parts I can get in my larger rubbermaid tub and oven cleaner ($1 a can at dollar General) on the bigger parts. if the old paint is realy tough to get off, scuff with light sand paper & prime over it. Nothing sticks like the old lead paint. NOTE: be sure to check your Primer. some have to be top coated with in 24-48 Hrs or top coat will not stick. this is especially true w/ automotive paints.
|
|
Brian Jasper co. Ia
Orange Level
Joined: 11 Sep 2009
Location: Prairie City Ia
Points: 10508
|
Post Options
Thanks(0)
Quote Reply
Posted: 02 Sep 2011 at 10:00am |
 jjrosty wrote: jjrosty wrote:
I use electrolysis on the parts I can get in my larger rubbermaid tub and oven cleaner ($1 a can at dollar General) on the bigger parts. if the old paint is realy tough to get off, scuff with light sand paper & prime over it. Nothing sticks like the old lead paint. NOTE: be sure to check your Primer. some have to be top coated with in 24-48 Hrs or top coat will not stick. this is especially true w/ automotive paints. |
This is the reason I like sandblasting. It takes some effort to seal stuff up, but the rust and old paint are history. Like on an axle seal, thats why I pack the area between the seal and the hub with wheel bearing grease then cover the grease tightly with duct tape. I do this on all areas where it could be possible for sand to get in. It then leaves a satin finish so the paint has something to hang on to. I've always understood primer to be like that, limited time to top coat.
|
|
"Any man who thinks he can be happy and prosperous by letting the government take care of him better take a closer look at the American Indian." Henry Ford
|
|
Unit3
Orange Level

Joined: 17 Oct 2009
Location: NC Iowa
Points: 5602
|
Post Options
Thanks(0)
Quote Reply
Posted: 02 Sep 2011 at 12:59pm |
AC WD45, reading your post made the hairs on the back ofmy neck stand up. Those wires do hurt! Allis Chalmers Guy, ware a dust mask as well as heavy clothes. Breathing in old paint and rust dust can't be good on the lungs. Ear protection is another good idea.
|
|
allischalmerguy
Orange Level
Joined: 11 Sep 2009
Location: Deep River, IA
Points: 2893
|
Post Options
Thanks(0)
Quote Reply
Posted: 03 Sep 2011 at 8:01am |
|
Everyone...thanks for all the suggestions! I learned a bunch!
Pastor Mike in Iowa
|
|
Thad in AR.
Orange Level Access

Joined: 12 Sep 2009
Location: Arkansas
Points: 9663
|
Post Options
Thanks(0)
Quote Reply
Posted: 03 Sep 2011 at 10:57am |
These are the steps I use . First pressure wash with a powerful washer even if you need to rent. Then I remove all the sheetmetal and scrape off all the dirt oil and grease then pressure wash for a couple of hours again. Then I use a wirebrush on a grinder and sand blast all the removed parts. I use stripper , grinder and some blasting on sheetmetal. When the wire brush starts to get wore and throw a lot of wires replace with a new one. I also use a wire brush on a small die grinder for tight places. My next tool will be a needle scaler. Old paint and rust gives me a very bad head ache. I use good masks and wash my face often.If your wife finds sharp pieces of wire brush in the carpet or her foot you're in trouble. Have fun.
|
|


