| Author |
 Topic Search Topic Search  Topic Options Topic Options
|
littlemarv 
Orange Level

Joined: 10 Jun 2013
Location: Wisconsin
Points: 1834
|
 Post Options Post Options
") Thanks(0) Thanks(0)
 Quote Quote  Reply Reply
 Posted: 05 Jan 2021 at 9:56pm Posted: 05 Jan 2021 at 9:56pm |
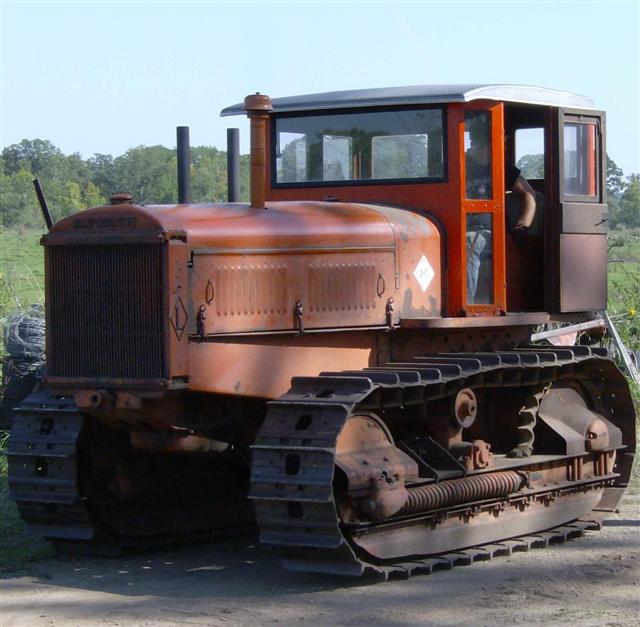
Bit the bullet and got some 3/16" sheet steel. I measured it pretty close, of course, neither hole was really square. I had it cut to fit and was pleased that I had to grind very little to get it to fit. This panel fit pretty good. Tacked them both in place, to try and keep warping to a minimum. Half a box of 6013s later. Seems to work pretty good to weld a rods length over here, then go over there, and jump around to keep stuff cool. Not sure if I can ever so gently tap that top panel straight with a sledgehammer or not. Now that I think on it a bit, I wonder if one or both ends of the bucket are bent upwards, that would cause the metal to bow up like that. I didn't check if the bottom was flat, I guess I thought it sat on the cement floor like it should. Its a little late now, the back is welded tight and there ain't no going back in that department. I may just slice that piece with a thin wheel, straighten it out as best as possible, and weld it back together. Next, weld all around on the inside, straighten out that top piece, and we should be sitting pretty good in the snow bucket department. One advantage of working on a 40 some year old, farmer fixed bucket is, there is nary a straight piece or square corner left on the dang thing anymore, so you can really only improve it, right? Thanks for looking.
|
|
The mechanic always wins.
B91131, WC23065, WD89101, CA29479, B1, Early B10, HB212, 416H
|
 |
|
Sponsored Links
|
|
|
littlemarv
Orange Level
Joined: 10 Jun 2013
Location: Wisconsin
Points: 1834
|
Post Options
Thanks(0)
Quote Reply
Posted: 05 Jan 2021 at 10:02pm |
Looking ahead to the tilt cylinders, does anyone know offhand what size is common for loader tilt cylinders? My brother measured his but I'm not sure if we were measuring the same things over the phone , and I'm thinking they are 2" by 20"???
|
|
The mechanic always wins.
B91131, WC23065, WD89101, CA29479, B1, Early B10, HB212, 416H
|
|
Wispitfiremike
Silver Level

Joined: 28 Mar 2017
Location: Milwaukee, WI
Points: 204
|
Post Options
Thanks(0)
Quote Reply
Posted: 05 Jan 2021 at 10:28pm |
|
I usually find what I am looking for after I bought another one.
|
|
littlemarv
Orange Level
Joined: 10 Jun 2013
Location: Wisconsin
Points: 1834
|
Post Options
Thanks(0)
Quote Reply
Posted: 09 Jan 2021 at 10:29pm |
I slit the top piece with a thin wheel, and the kerf of the wheel removed just enough material that I clamped it straight and welded it back together. Looks good. When you've got a lot of sl*g, a needle scaler is sure handy. Plus, its just handy for cleaning lots of things, when you mess with old farm equipment. One problem that I knew about before I started this project, was the angle on the rear of the bucket. Going to be hard to get the correct angle on the dangle for the tilt cylinders. I made a set of forks for my brothers D14, his loader looks pretty similar to this one, so I am using it for a pattern of sorts. When the bucket is sitting level on the ground, the bottom pin is 6" off the ground. The top pin is 8" higher, and 1" forward from the bottom pin. The tilt cylinder is extended just a bit, so you can curl the bucket back. Due to the back angle of my bucket, I had to make the side plates a little wider, to get the two pins far enough apart to get that same curl out of the bucket. Took some six inch wide pieces, and moved the top pin forward a couple inches. Measured and marked the where the loader arms should end up. Clamped some sockets that are 3" tall in there, to space them out, and put the pins in to keep everything in alignment, knocked it around with a hammer to get everything to lay down nice. Tacked it into place, Test fit it, looks good, weld them into place. Installed the bucket. I have a couple of 18" stroke cylinders on the way, so I raised the loader and checked how far the holes for the top pins moved, looks like about 9" of travel from flat on the ground to this point, so if I add a little for curling the bucket back, and a little more for dumping when the loader is up in the air, it should be about right. The extended forecast calls for a cold snap next weekend. Hopefully everything comes together and I can finish it up this week!
Edited by littlemarv - 09 Jan 2021 at 10:30pm
|
|
The mechanic always wins.
B91131, WC23065, WD89101, CA29479, B1, Early B10, HB212, 416H
|
|
littlemarv
Orange Level
Joined: 10 Jun 2013
Location: Wisconsin
Points: 1834
|
Post Options
Thanks(0)
Quote Reply
Posted: 09 Jan 2021 at 10:32pm |
How come when I type sl*g, it changes to an asterisk when I post?
|
|
The mechanic always wins.
B91131, WC23065, WD89101, CA29479, B1, Early B10, HB212, 416H
|
|
littlemarv
Orange Level
Joined: 10 Jun 2013
Location: Wisconsin
Points: 1834
|
Post Options
Thanks(0)
Quote Reply
Posted: 09 Jan 2021 at 10:33pm |
sl*g S l a g S L A G Welding sl*g
Edited by littlemarv - 09 Jan 2021 at 10:34pm
|
|
The mechanic always wins.
B91131, WC23065, WD89101, CA29479, B1, Early B10, HB212, 416H
|
|
Ted J
Orange Level

Joined: 05 Jul 2010
Location: La Crosse, WI
Points: 18943
|
Post Options
Thanks(0)
Quote Reply
Posted: 09 Jan 2021 at 11:00pm |
It's as bad as Sat**day, but I can understand the T U R D part. But what is so bad about s l a g?? Wonder if we can type slug....a u in there? You're doin good and I'll drop mine off for you to do when I'm heading up to Alexs' place. Probably in the spring some time, so make a copy of the plans otherwise you'll forget what you did by then.  But then, by that time, I will have forgotten I was gonna do it in the first place. 
I don't know what I'd do without the PS on my WD45!?! I used to have the loadeer on a different 45, but when I got the PS one, over it went and I've never looked back. The older ones have power steering by Armstrong.....and I'm not any more.
|
|
"Allis-Express"
19?? WC / 1941 C / 1952 CA / 1956 WD45 / 1957 WD45 / 1958 D-17
|
|
littlemarv
Orange Level
Joined: 10 Jun 2013
Location: Wisconsin
Points: 1834
|
Post Options
Thanks(0)
Quote Reply
Posted: 10 Jan 2021 at 9:20pm |
Made a couple brackets from angle iron and flat stock for the upper end of the tilt cylinders, and tacked them on. Then I removed the bucket and the loader arms, so I can flip it over and position it wherever so I have a good angle for welding, I haven't vertical or overhead welded in quite some time. Hold it here and weld a little bit, Of course, they were out of 6013s, so I picked up some 6011s. I don't think the welds look as clean, but who cares, as long as they hold. Flip it this way and weld a little, Flip it that way and weld a little, until everything is done! Put the loader and bucket back on. My homemade pins were cut out of 7/8" u bolt stock, which I think is probably pretty soft material. I ordered some 1" clevis pins for the main pivots, but I cant get them in. I'm sure something warped or is just a tiny bit crooked, preventing them from going in. Might be better off making some nicer homemade ones out of the same 7/8" material, that way the pins will wear rather than the bushings. Next part of the project, mounting the valve and running the hoses. With my big carcass on the WD, between my knee, the brake pedals, and the hand clutch, there isn't a lot of real estate on the right side for the valve. Figured my best option was to bring a bracket up from the right fender mount plate and have the valve mounted above where the hand clutch lever travels. Need to pick up a length of angle iron and mock it up. More to come...
|
|
The mechanic always wins.
B91131, WC23065, WD89101, CA29479, B1, Early B10, HB212, 416H
|
|
littlemarv
Orange Level
Joined: 10 Jun 2013
Location: Wisconsin
Points: 1834
|
Post Options
Thanks(0)
Quote Reply
Posted: 13 Jan 2021 at 9:28pm |
Well, I came up with this for the valve. Its horrible. Between the angle iron and the brake pedals and the hand clutch and my big feet, and having to reach around the steering wheel, no. Just no. Well, lets try this More gooder. Its right at your right hand, doesn't impede getting on and off, and the hoses can follow the fender down and head over by the hydraulic pump, where they all need to go anyways. My cylinders were supposed to arrive on the 26th. They showed up today. So, I can test fit and get the upper mounts located. Boy, this bucket is really kicking my backside. That angle on the rear of the bucket is just a pain to work around. Now that I have the cylinders, you can see the bucket is going to hit the lower fittings. Grrrrrr. Thought about reworking the mount plates and raise the bottom pins an inch or two, but I think I just may notch the bucket so there is clearance around the fitting area, and box it in inside the bucket. I think the main reason I want a full hydraulic loader is for working with forks, the bucket will not get used as much, but we will see. I can see the light at the end of the tunnel! Its a ways away, but I'm making progress. Got all my fittings and plugs on the way, need a filter and base yet too, run some hoses, make a set of forks, and we should be set. Hope the warm weather sticks around....
|
|
The mechanic always wins.
B91131, WC23065, WD89101, CA29479, B1, Early B10, HB212, 416H
|
|
Steve A
Silver Level

Joined: 12 Apr 2012
Location: NLP Mi
Points: 250
|
Post Options
Thanks(0)
Quote Reply
Posted: 14 Jan 2021 at 8:49am |
|
I had a similar thought process while converting two trip bucket Kelly loaders. I put my 3 spool valve on a platform located on the left side, 3 inch channel upright just ahead of the clutch pedal and a plate on the side toward the toolbox. My thinking was that I could work both that and the hand clutch at the same time if I needed to. Ended up putting a center cross member on the loader frame and one longer cylinder attached at the top center of the bucket to control it. Still don't have all the roll I'd like, but I get by with it. A lot of making plywood mock ups and finagling.
|
|
Gary
Orange Level Access
Joined: 13 Sep 2009
Location: Peterborough,On
Points: 5902
|
Post Options
Thanks(0)
Quote Reply
Posted: 14 Jan 2021 at 9:24am |
The 400 Series Loaders 445, 414, 415, 417 all have the Tilt Valve and Lift/Lower Control Valve mounted on the Left Side on the Loader Tractor Frame. On my D-15 with a 415 loader I found this the best set-up when easing in to a pile of dirt - snow etc. Your left hand is either tilting the bucket or raising the Boom while your right hand is operating the Hand Clutch or Power Director. Gary .................................................................... Should have mentioned - the Valve Body is mounted on the left frame upright, but the 2 levers are extended back to near the Steering Wheel. https://www.facebook.com/awtractorrepair/photos/pcb.1069577796771072/1069573980104787/
Edited by Gary - 14 Jan 2021 at 9:47am
|
|
Steve A
Silver Level
Joined: 12 Apr 2012
Location: NLP Mi
Points: 250
|
Post Options
Thanks(0)
Quote Reply
Posted: 14 Jan 2021 at 9:38am |
|
I think it may be easier to roll the bucket if the cylinders are mounted below the loader arms as they are in the 417. I hadn't thought of that at the time I did my conversion.
|
|
littlemarv
Orange Level
Joined: 10 Jun 2013
Location: Wisconsin
Points: 1834
|
Post Options
Thanks(0)
Quote Reply
Posted: 14 Jan 2021 at 3:41pm |
|
Yes, I thought about mounting it on the left side, so you can be working the hydraulics and the hand clutch at the same time, cause if you step on the foot clutch, the hydraulics will not work. But, I have a step on the left side which is nice for getting on and off with anything mounted on the back. We will see how it works, I can always make adjustments as needed...
|
|
The mechanic always wins.
B91131, WC23065, WD89101, CA29479, B1, Early B10, HB212, 416H
|
|
Ross D.
Silver Level

Joined: 02 Sep 2013
Location: Erin, Ont.
Points: 339
|
Post Options
Thanks(0)
Quote Reply
Posted: 15 Jan 2021 at 9:32am |
Hi. Just some suggestions/ideas. Ross D. 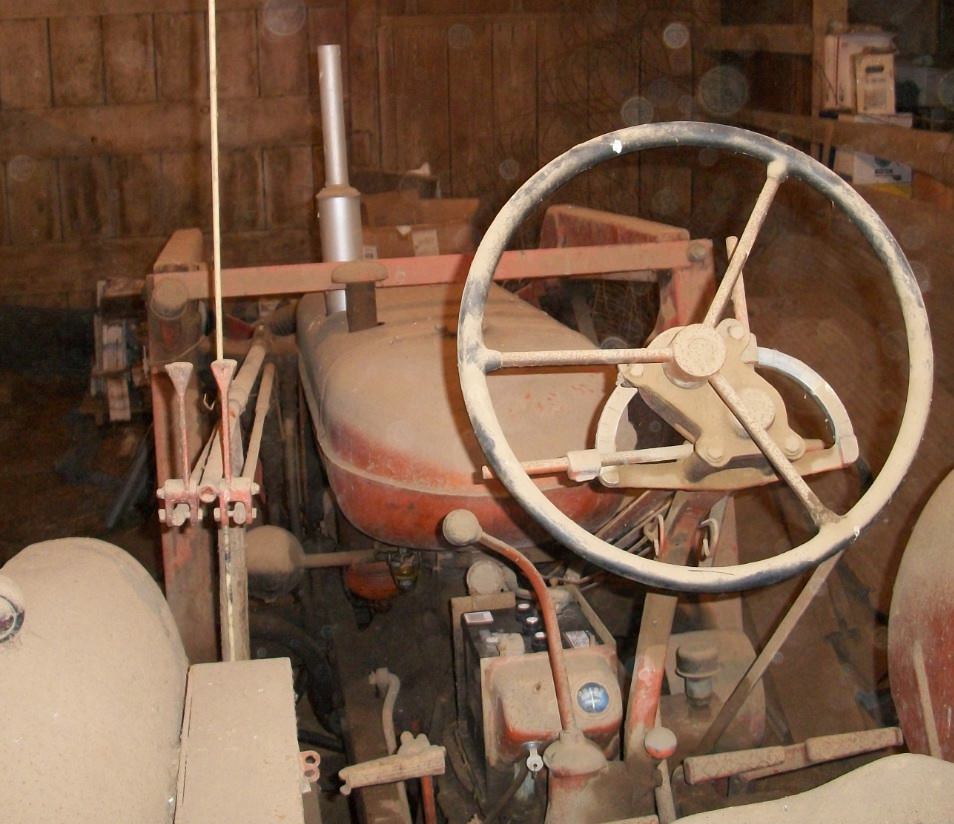 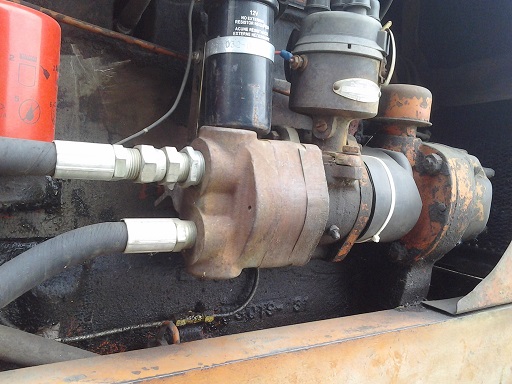
|
|
Ross D.
Silver Level
Joined: 02 Sep 2013
Location: Erin, Ont.
Points: 339
|
Post Options
Thanks(0)
Quote Reply
Posted: 15 Jan 2021 at 5:30pm |
Hi again. I just came in from the Shop, and took a couple pictures of my D Special Grader. The only option that I do not have on the grader is power steering. I have installed a hyd. pump to the 226 engine and will be installing the Behlen steering unit. Ross D. 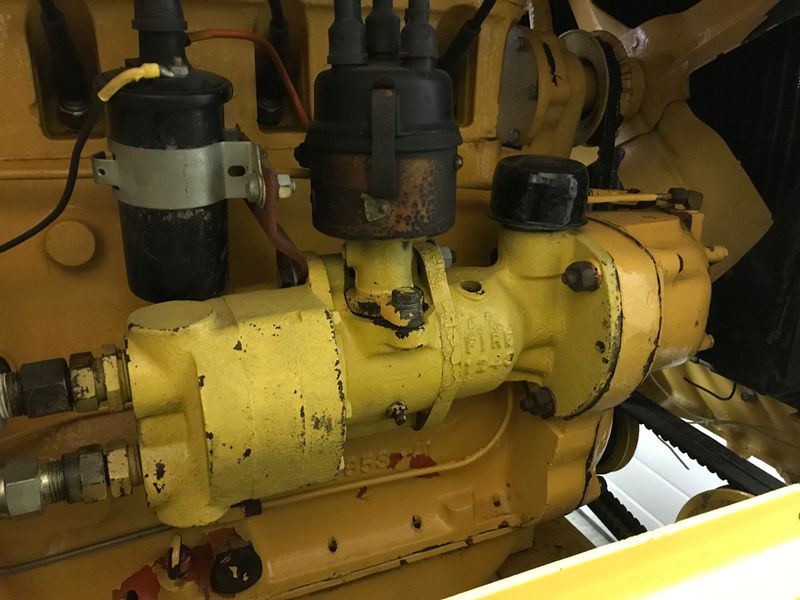 
|
|
dpower
Orange Level
Joined: 11 Sep 2009
Location: Madison Ne
Points: 1578
|
Post Options
Thanks(0)
Quote Reply
Posted: 16 Jan 2021 at 1:11pm |
|
did calvin take pics of our d grader with behlen power steering for you???? he toldus his friend was doing this to their d.
|
|
Ross D.
Silver Level
Joined: 02 Sep 2013
Location: Erin, Ont.
Points: 339
|
Post Options
Thanks(0)
Quote Reply
Posted: 20 Jan 2021 at 7:23am |
|
dpower. Jason. Not wanting to hijack this, I sent you a private message. Thanks. Ross D.
|
|
littlemarv
Orange Level
Joined: 10 Jun 2013
Location: Wisconsin
Points: 1834
|
Post Options
Thanks(0)
Quote Reply
Posted: 23 Jan 2021 at 4:22pm |
Thanks for the pictures on the hydraulic pump. I have a mag, so not sure if that's an option for me? Otherwise, someone has a thread about mounting a pump below the engine and running it with a jackshaft and some chains, that's another option. For now, I'm going to use the original pump. If this project all works out and is really handy, I may somehow switch it to live power. Anyways, got the cylinders mounted, and notched the bucket for clearance. Not a huge fan of how that worked out, but I can rework the upper part of the bucket this summer, we will see. My main plan for the use of the loader is forks for now. Picked up a hydraulic filter and base. Measured everything, and got 8 hoses made up. Started running them and seeing how they are all going to lay and run. For whatever reason, they only have yellow 1/2" return hose at work. Nice contrast, I guess. I'm going to weld some studs on the loader arm so I can clamp the hoses securely, just zip tied them to mock it up for now. I was going to put a street L in the bottom of the reservoir, but the PTO is too close. Got a pipe nipple and an elbow to drop it down to clear the PTO for hooking up the return line. I may have to build a guard for this, I don't like this big dingus hanging down. Need to make a couple changes on the hoses out on the tilt cylinders on Monday, then I can keep going. Thanks for looking.
|
|
The mechanic always wins.
B91131, WC23065, WD89101, CA29479, B1, Early B10, HB212, 416H
|
|
desertjoe
Orange Level Access

Joined: 23 Sep 2013
Location: New mexico
Points: 13729
|
Post Options
Thanks(0)
Quote Reply
Posted: 23 Jan 2021 at 5:09pm |
Nice job, littlemarv,,another day or two and you be ready to start on the forks,,,,  I kinda like where you placed the main valve on the fender,,,out of the way should you have to "Bail" some day,,,,,  Ever since I finished my D14 Industrial,,,I have NOT liked where Allis placed the main valve because it blocks any egress in or out on the right side. The valve is bolted to the beam where you hung your filter, which is also the reservoir and the valve points straight back,,,Blocking all that area,,,I've thougfht and thought bout fabricating an adapter angled towards the center of tractor that would allow in and out on the right and still have good operator access to the main valve,,,,,,,???? Maybe others can chime in with some pics of theirs,,,??
|
|
DiyDave
Orange Level Access

Joined: 11 Sep 2009
Location: Gambrills, MD
Points: 54291
|
Post Options
Thanks(0)
Quote Reply
Posted: 23 Jan 2021 at 5:33pm |
As to the word in question, check the Irish definition...
sl*g. Meaning: A verb used to make fun of someone in a nice way or else it has the same meaning as elsewhere, i.e., common prostitute.
|
|
Source: Babylon Bee. Sponsored by BRAWNDO, its got what you need!
|
|
Gary
Orange Level Access
Joined: 13 Sep 2009
Location: Peterborough,On
Points: 5902
|
Post Options
Thanks(0)
Quote Reply
Posted: 23 Jan 2021 at 6:20pm |
|
Hi Joe
I think Allis intended you to get ON and OFF D-14 and D-15 on the left hand side,
thus the Assist Handle on the left fender of D-15 Ser. II, away from Power Director.
G
|
|
Steve A
Silver Level
Joined: 12 Apr 2012
Location: NLP Mi
Points: 250
|
Post Options
Thanks(0)
Quote Reply
Posted: 24 Jan 2021 at 6:32am |
|
Nice job! There is a small soft plug on the top of the transmission housing, just forward of the gear shift. I removed that, drilled and tapped a pipe nipple to put in an upper return line on mine.
|
|
Steve A
Silver Level
Joined: 12 Apr 2012
Location: NLP Mi
Points: 250
|
Post Options
Thanks(0)
Quote Reply
Posted: 24 Jan 2021 at 6:42am |
|
too early, not enough coffee. Its on the torque housing, left side, behind inspection cover.
|
|
Strokendiesel002
Silver Level

Joined: 04 Apr 2019
Location: 53158
Points: 252
|
Post Options
Thanks(0)
Quote Reply
Posted: 24 Jan 2021 at 9:14am |
|
Looking good!
Maybe it's too late, maybe not... What about putting quick attach brackets on the loaders, yours and your brothers and whatever else. The brackets themselves are a little spendy, but the plates that go on the accessories are pretty inexpensive and then you can drop and swap without driving pins
|
|
littlemarv
Orange Level
Joined: 10 Jun 2013
Location: Wisconsin
Points: 1834
|
Post Options
Thanks(0)
Quote Reply
Posted: 25 Jan 2021 at 10:13pm |
Yes, I looked into the quick attach setup. The brackets on the attachment are cheap, but the one on the tractor is quite a bit. I don't plan on swapping attachments all too often, but we will see. After several trips back and forth getting hoses made, finally got them close enough to put together and try it out. After installing the hoses, tightening all the fittings, and dumping in more hydraulic oil than a WD should hold, got everything up and moving. I had to fill the reservoir, work the tilt till they stopped moving, fill and work, fill and work, to get the system filled. If you think about it, the tilt circuits will always be full, on both sides. So that is not a lot of oil going out of and into the reservoir. The lift arms and the loader arms, being one way cylinders, will take oil out of the reservoir and put it back in. I may have to overfill it, if I want to raise the loader and lift arms all the way at the same time. That's a test for up at Grandpa Marvins this spring. I installed some one way control valves in the lift arms years ago, to stop the rear mounted implements from crashing to earth. I suppose, with the new valve bank, I can remove those and just use the lever to control the lowering. So, the original hydraulic lever on the quadrant is now kind of an on/off lever, and I have the three functions on the fender, with one blank one reserved for "future use". Lord only knows what I will dream up next. The bucket has become my arch nemesis. It curls back, but not as much as I'd like. And, if you aren't paying attention and you tilt forward too far, you can hit the pistons of the cylinders on the loader arms. Won't take long to wreck them cylinders. And, when you curl back, the bucket is hitting the cylinders below the fittings. So, I could invest more time and make some stop blocks for both directions, but I wonder if I shouldn't wave the white flag if I can find a bucket that would fit better. That back of the bucket being slanted is the cause of all my problems. I thought about getting out my protractor, compass, and etch a skech, and see if I could cut the bucket apart and make the back straight and weld it back together, but I may be better off finding one that will work. If it wasn't for all the 3/16" steel I welded in the back, I'd turn it into a raised flower bed or something. Grrrrrrrr. That's to be dealt with this summer. Going to build the forks and get the tractor back up to the farm, we are remodeling the kitchen (gulp) and need the garage space. Now, to tie up the 50 loose ends or so that come up during my projects- "oh, I'll take care of that later" Well, its later. Mount the hoses and secure them all in place, fabricate my forks, line bore the main pivot pins somehow, and we should be in the home stretch. Plus ten other little things I have forgotten about along the way. Supposed to be near or above freezing this weekend, good weather to work outside yet! Thanks for looking.
|
|
The mechanic always wins.
B91131, WC23065, WD89101, CA29479, B1, Early B10, HB212, 416H
|
|
allischalmerguy
Orange Level

Joined: 11 Sep 2009
Location: Deep River, IA
Points: 2893
|
Post Options
Thanks(0)
Quote Reply
Posted: 26 Jan 2021 at 1:09am |
|
LittleMarv!
That is awesome what you are doing with that loader! Fantastic work! I wish I had the skill and talent!
Mike
|
|
It is great being a disciple of Jesus! 1950 WD, 1957 D17...retired in Iowa,
|
|
JC-WI
Orange Level Access
Joined: 11 Sep 2009
Location: wisconsin
Points: 34352
|
Post Options
Thanks(0)
Quote Reply
Posted: 26 Jan 2021 at 2:57am |
Little Marv, that is why some loaders had the tilt cylinders under the arms... And when you get into wet snow, watch so the wet snow does not build up in between the loader arms and cylinders and between arms and bucket and turn into ice and binds... and bends.
|
|
He who says there is no evil has already deceived himself
The truth is the truth, sugar coated or not. Trawler II says, "Remember that."
|
|
littlemarv
Orange Level
Joined: 10 Jun 2013
Location: Wisconsin
Points: 1834
|
Post Options
Thanks(0)
Quote Reply
Posted: 29 Jan 2021 at 10:09pm |
Tied up all the hoses. I may try wrapping the whole bundle, but I might put in some quick disconnects for the tilt cylinders, to ease loader removal. Welded some studs to the inside of the loader arm to hold the hoses. Not too thrilled with how this turned out, but after several trips back and forth to remake hoses, it will have to do. On to the forks. Picked up the raw materials needed, and laid them out. Find the flattest spot on the garage floor, and square everything up. Clamped some sockets in between the mounting plates to space them out correctly, and put the pins in to hold them in alignment. Measure everything again. Repeat for the other side, tack everything into place, measure thrice, then measure again, then weld once. I hate to do it, but I have to precision line bore with my die grinder to get the pins in. I just can't weld without some warping, it seems. I skip around and alternate sides, but it always seems to tweak a little. Oh well, I'm working on a 60 year old tractor. These forks are 48" long. While I do plan on lifting pallets with them, I'm mostly interested in handling logs for firewood in the near future. Good gravy, this thing measures about 17 feet long now. May wind up shortening up the forks? This would be 36". This set up should be the strongest when the forks are in line with the loader arms, so I plan on welding some flat stock across the back to keep it from bowing if I lift something with the forks set narrow. And making some stops to keep the forks from sliding off would probably be a good idea. More to come...
|
|
The mechanic always wins.
B91131, WC23065, WD89101, CA29479, B1, Early B10, HB212, 416H
|
|
MACK
Orange Level
Joined: 17 Nov 2009
Points: 7664
|
Post Options
Thanks(0)
Quote Reply
Posted: 30 Jan 2021 at 8:19am |
|
Don't shorten the forks!!!!. There never long enough . MACK
|
|
jaybmiller
Orange Level Access
Joined: 12 Sep 2009
Location: Greensville,Ont
Points: 24731
|
Post Options
Thanks(0)
Quote Reply
Posted: 30 Jan 2021 at 8:55am |
I made a similar 'forklift' unit for my D-14. Instead of flat plates, I used 4x4 angle iron (frame) and 3x3 angle( cyliner mounts). Neighbour drilled the mounting holes for me.
To 'cure' the warping after welding(BTDT)
1 ) securely clamp the pieces onto a workbench, get it OFF the floor....
2 ) weld, tack diagonal corners, then tack some more, then fill in the gaps
3) WALK AWAY for at least an hour ! or until steel is room temperature....
my bench is 4by8, toss a piece of thin tin onto it ,then C-clamp everything, square and tight, several places.... since I started doing this, every trailer has been dead straight and flat.
|
|
3 D-14s,A-C forklift, B-112
Kubota BX23S lil' TOOT( The Other Orange Tractor)
Never burn your bridges, unless you can walk on water
|
|


