| Author |
 Topic Search Topic Search  Topic Options Topic Options
|
Dave (NE) 
Orange Level

Joined: 12 Sep 2009
Location: Eagle Nebraska
Points: 2104
|
 Post Options Post Options
") Thanks(0) Thanks(0)
") Quote Quote  Reply Reply
 Topic: #77 Rake Operation Instructions Topic: #77 Rake Operation Instructions
Posted: 22 Oct 2011 at 7:47pm |
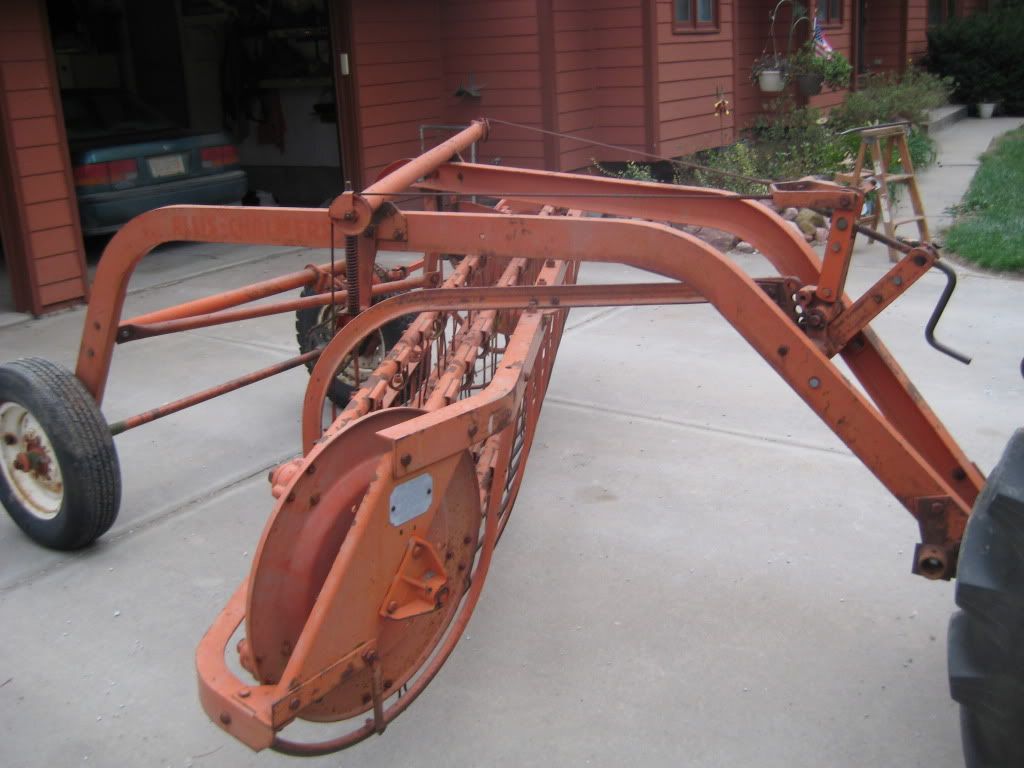
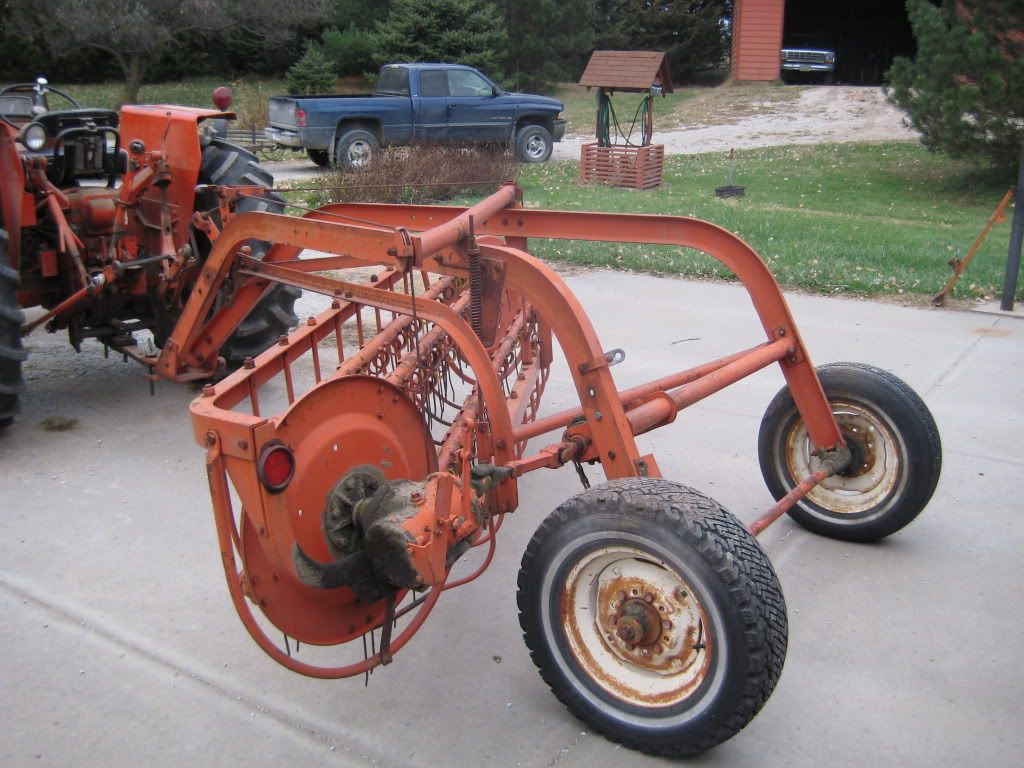
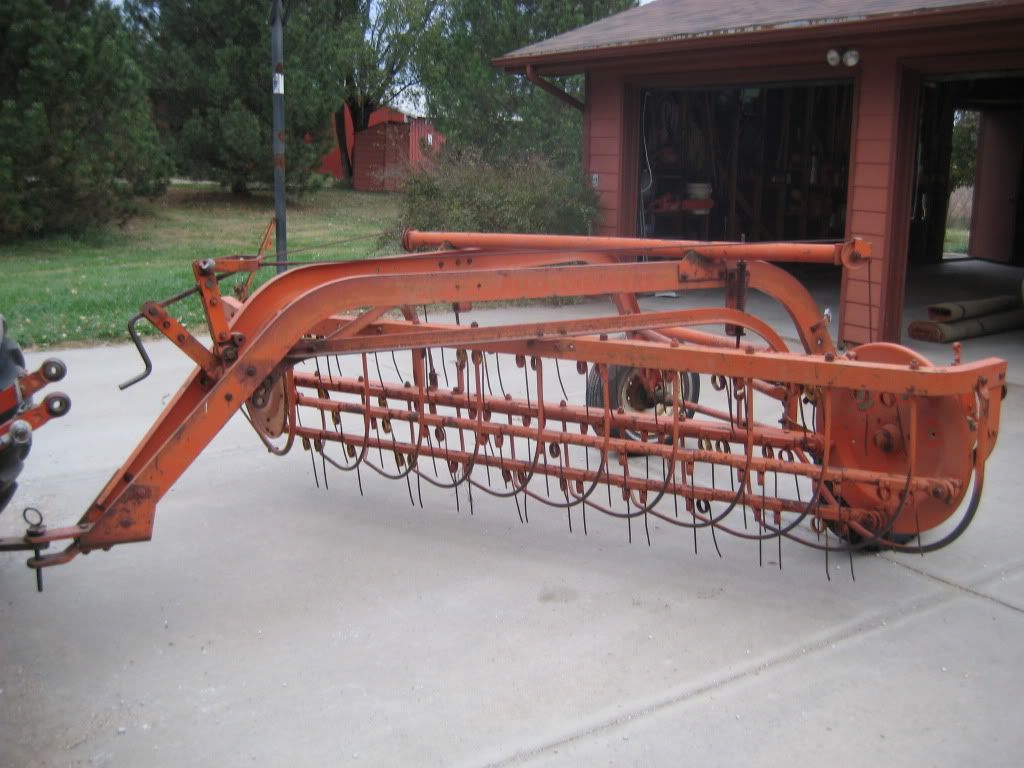
Acquired an Allis #77 side delivery rake today. Need some operation instructions. I've looked it over, and am unsure how to lower the carriage so that I can rake. What does the screw part in front control? I can pull the pin in front and raise and lower the main carriage part but that doesn't lower the bars for raking. Should there be a spring or something at the gear box to pull the engaging lever back? Lot of questions. If you can help, it would be appreciated.
|
 |
|
Sponsored Links
|
|
|
Matt (Jordan,MN)
Orange Level
Joined: 12 Sep 2009
Location: Jordan, MN
Points: 3756
|
Post Options
Thanks(0)
Quote Reply
Posted: 23 Oct 2011 at 1:39am |
I have operators and parts manuals for these model rakes that i will sell. Send me a PM or email me at mbscott881@hotmail.com Thanks Matt
|
|
SHAMELESS
Orange Level

Joined: 13 Sep 2009
Location: EAST NE
Points: 29486
|
Post Options
Thanks(0)
Quote Reply
Posted: 23 Oct 2011 at 2:48am |
|
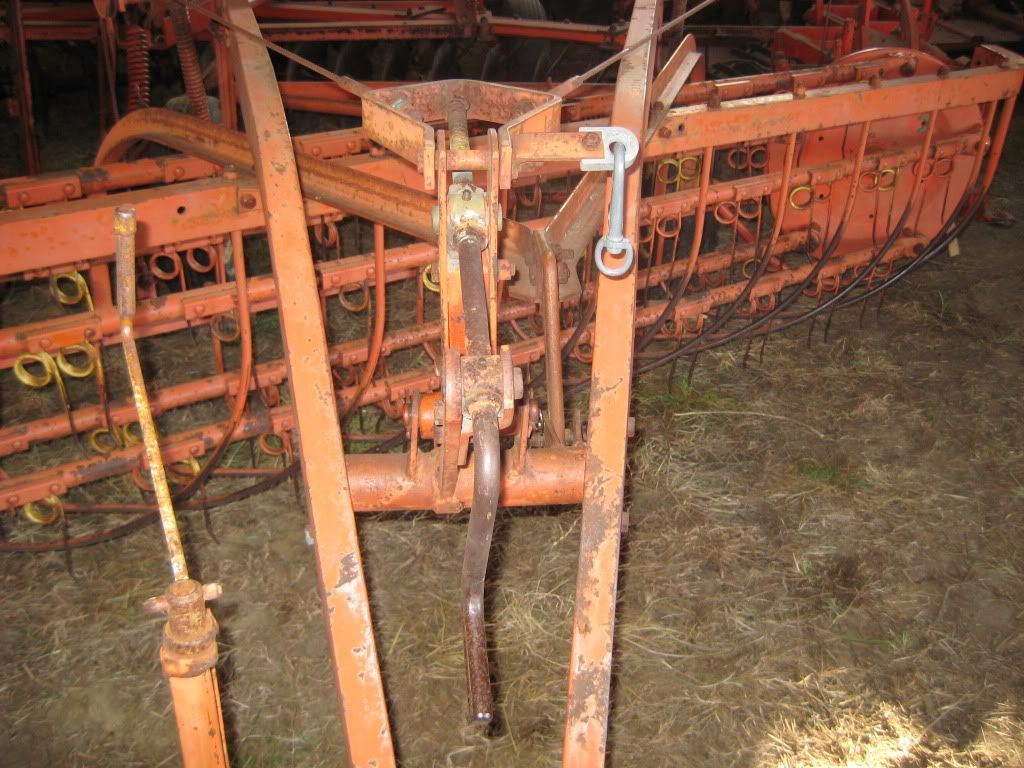
Dave, that crank on the front should raise/lower the rake, keep it oiled/greased good! there should be a cable attached to that lever on the back, running thru that hole in the bracket on the back of the frame, it ussually goes to a lever that sits on top of the frame in front, looks kike the lever is gone. but you should be able to jump on/off the tractor to engage/disengage the rake.
|
|
Dave (NE)
Orange Level
Joined: 12 Sep 2009
Location: Eagle Nebraska
Points: 2104
|
Post Options
Thanks(0)
Quote Reply
Posted: 23 Oct 2011 at 8:49am |
|
The crank in the front doesn't do anything for raising or lowering the rake. It's like the cables are already out as far as they can go, and they won't let the rake go down. Yes, I can manually engage the gear box, and there is the loops for where a rope goes through, put it appears that pulling the rope would only disengage the gear box, so thought maybe there was a spring assembly or something that is missing. The prior owner is suppose to mail me the manual, as it was at a different location from where I picked up the rake. Just wasn't patient enough to wait for that to try to figure out how to operate things.
|
|
H Clark
Silver Level

Joined: 11 Jul 2010
Location: West Virginia
Points: 398
|
Post Options
Thanks(0)
Quote Reply
Posted: 23 Oct 2011 at 8:50am |
|
That is a nice looking rake. I have one just like it and the crank on the front raises and lowers it . From what I understand they didn't make very many with the chain and gearbox drive before switching to belt drive.
|
|
1960 D-12,1948 WC, 1973 160, 1977 175, 1984 6060
|
|
Dave (NE)
Orange Level
Joined: 12 Sep 2009
Location: Eagle Nebraska
Points: 2104
|
Post Options
Thanks(0)
Quote Reply
Posted: 23 Oct 2011 at 8:56am |
|
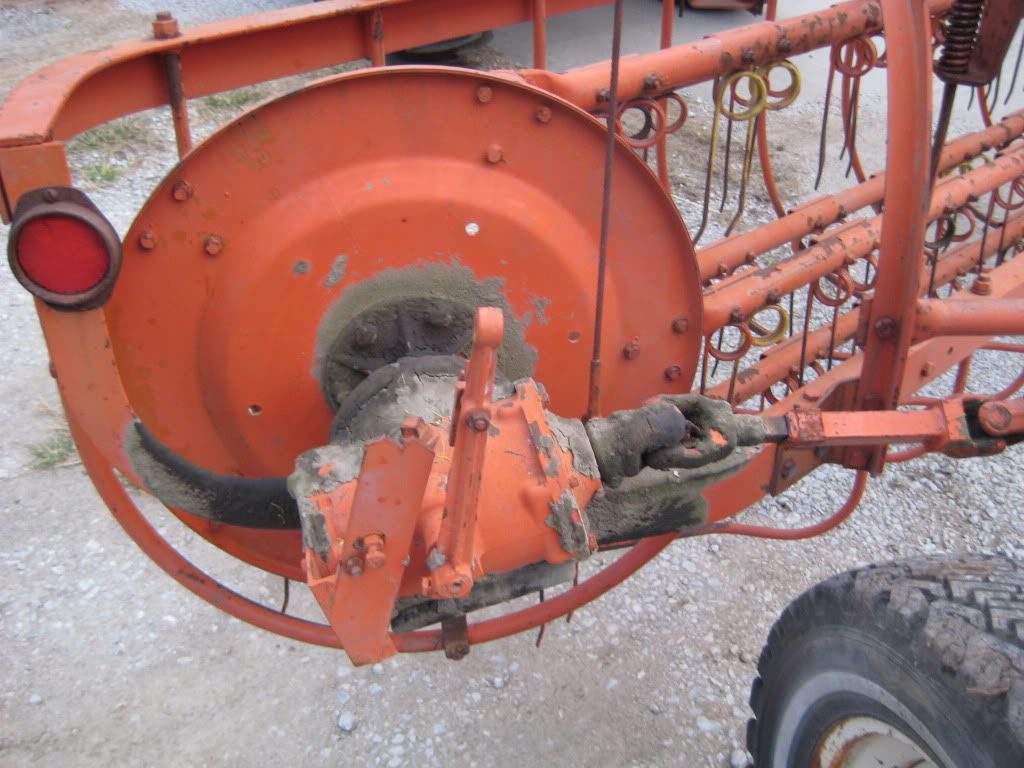
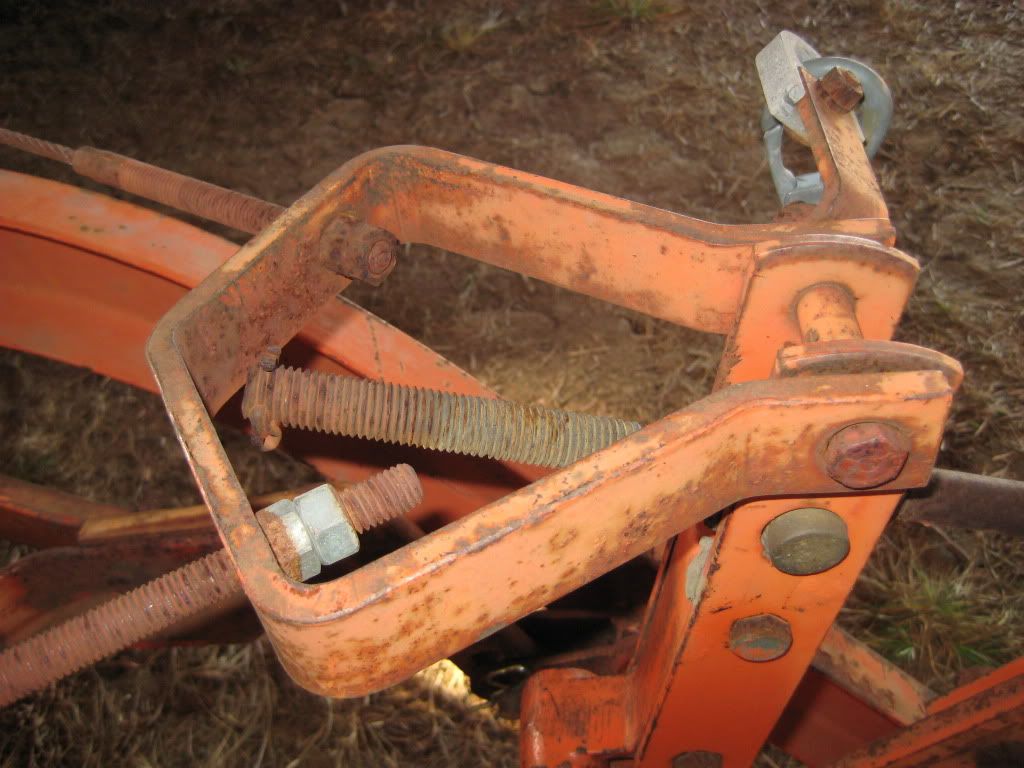
I'll have to take and post a better picture of the crank, but the end of it isn't touching anything and it is screwed all the way in, so it can't "push" anything to lower the rake. Perhaps there is an adjustment of where the crank mounts?
|
|
Dave (NE)
Orange Level
Joined: 12 Sep 2009
Location: Eagle Nebraska
Points: 2104
|
Post Options
Thanks(0)
Quote Reply
Posted: 23 Oct 2011 at 9:22am |
|
Also, I need eight or ten teeth for it. Where can they be got at?
|
|
Dave (NE)
Orange Level
Joined: 12 Sep 2009
Location: Eagle Nebraska
Points: 2104
|
Post Options
Thanks(0)
Quote Reply
Posted: 23 Oct 2011 at 10:07am |
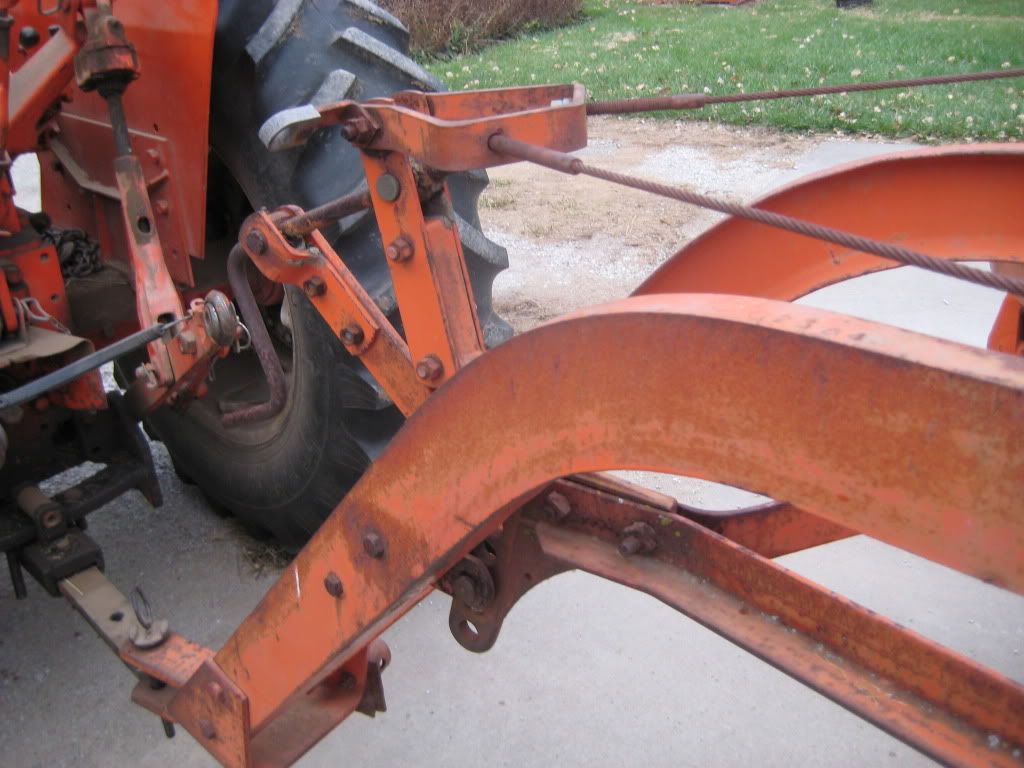
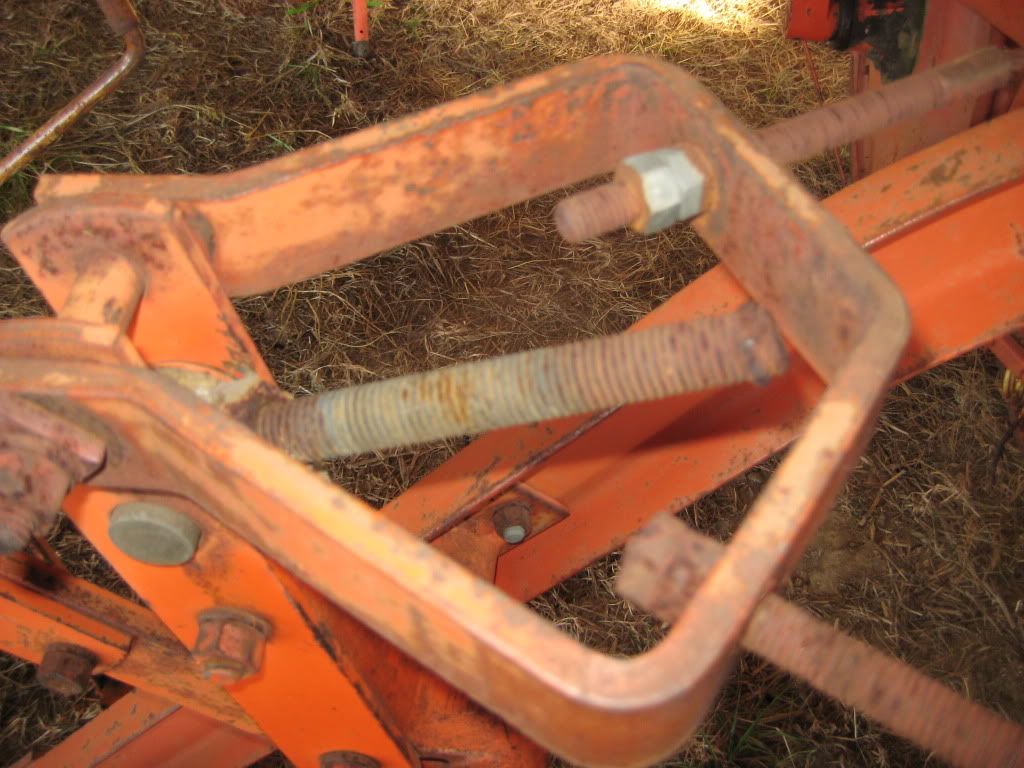
Here are some pictures of the adjusting crank that should control raising and lowering the rake. As it shows, the end of the crank is not touching anything, while it is screwed all the way in. Am I missing something here?
|
|
stray
Orange Level

Joined: 16 Aug 2011
Location: Tipton, Missour
Points: 323
|
Post Options
Thanks(0)
Quote Reply
Posted: 23 Oct 2011 at 10:57am |
|
It looks like something is frozen up, I would guess in the pivot right below the snap in the second pic. Does the crank turn freely for several turns or is it hard to turn? When you are turning it does it move in and out on the support nearest the handle? The way it looks to me is that it should stay still there and move the other lever closer for up (which is where it is now) and away when going down. If it is turning the crank has to be moving the rear lever or moving out the front support.
|
|
1969 190XT series 3
|
|
Dave (NE)
Orange Level
Joined: 12 Sep 2009
Location: Eagle Nebraska
Points: 2104
|
Post Options
Thanks(0)
Quote Reply
Posted: 23 Oct 2011 at 11:05am |
|
Yes, the crank does turn freely. In the picture, it is screwed all the way in. The rake is up now, and it seems that to go down the crank would need to turn in farther, which it cannot do. Oh, I think I understand what you're saying, I should be screwing it out in orser to lower the rake. I'll go try that. Thanks, Dave
|
|
TedBuiskerN.IL.
Orange Level

Joined: 11 Sep 2009
Location: Davis, IL.
Points: 1959
|
Post Options
Thanks(0)
Quote Reply
Posted: 23 Oct 2011 at 11:06am |
|
Turn the crank counterclockwise and it should lower the basket. Unless something is frozen up that prevents it. The hole used in the series of holes on the front there determines how fluffy the windrow will be. Use the botttom hole for a fluffy windrow, the top hole for a tighter windrow. Rake teeth are available from farm and Fleet, use the New Idea teeth, they work just fine. The universal rubber mounted teeth work too, but I prefer the other style. Hope this helped. Be sure the dog springs in the wheels are in good shape, so both wheels drive the basket, and you should be good to go.
|
|
Most problems can be solved with the proper application of high explosives.
|
|
Dave (NE)
Orange Level
Joined: 12 Sep 2009
Location: Eagle Nebraska
Points: 2104
|
Post Options
Thanks(0)
Quote Reply
Posted: 23 Oct 2011 at 11:17am |
|
Ok, thanks guys. Just understood how it was suppose to work after rereading Stray's comment and then Ted's. Went out and tried it. Yes, counterclockwise did it. And was wondering about the series of holes on the front. Thought maybe they were for leveling it. Now I'm pretty pleased with it. Have to just get the rope part and gear box lever figured out. Dave
|
|
Skyhighballoon(MO)
Orange Level

Joined: 11 Sep 2009
Location: Pilot Grove, MO
Points: 3115
|
Post Options
Thanks(0)
Quote Reply
Posted: 23 Oct 2011 at 11:18am |
|
On the teeth the Farm & Fleet store is more likely to have them labeled as New Holland. Used to be able to get them for as low as $0.99 each...now more like $1.69 each or more from what I've seen. They are same as teeth from ACGO - just MUCH cheaper if you don't mind the yellow paint. You can also still get the little metal channel brackets from AGCO too that go over the teeth on the bar...I think Dale Schaefer has some used ones too. Mike
|
|
1981 Gleaner F2 Corn Plus w 13' flex
1968 Gleaner EIII w 10' & 330
1969 180 gas
1965 D17 S-IV gas
1963 D17 S-III gas
1956 WD45 gas NF PS
1956 All-Crop 66 Big Bin
303 wire baler, 716H, 712H mowers
|
|