| Author |
 Topic Search Topic Search  Topic Options Topic Options
|
ForgivenCreation 
Bronze Level

Joined: 02 Apr 2024
Location: West Coast USA
Points: 45
|
 Post Options Post Options
") Thanks(0) Thanks(0)
 Quote Quote  Reply Reply
 Topic: 3 Point Hitch Fitting / Adapting for WD Topic: 3 Point Hitch Fitting / Adapting for WD
Posted: 12 Apr 2024 at 6:21pm |
|
|
 |
|
Sponsored Links
|
|
|
steve(ill)
Orange Level Access


Joined: 11 Sep 2009
Location: illinois
Points: 77840
|
Post Options
Thanks(0)
Quote Reply
Posted: 12 Apr 2024 at 6:36pm |
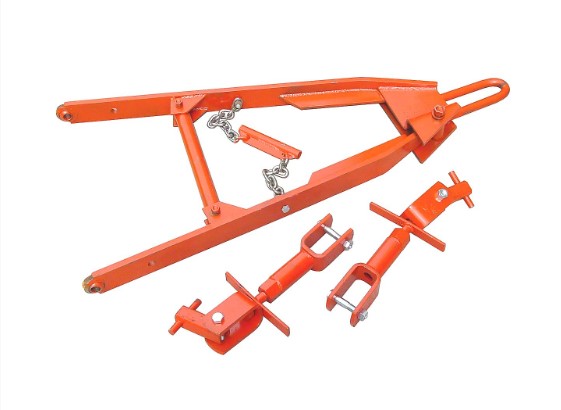
most of the aftermarket 3 points have and "adaptor" that bolts to the drawbar / under the tractor and the 3 point arms connect to that...
|
|
Like them all, but love the "B"s.
|
|
steve(ill)
Orange Level Access
Joined: 11 Sep 2009
Location: illinois
Points: 77840
|
Post Options
Thanks(0)
Quote Reply
Posted: 12 Apr 2024 at 6:39pm |
|
|
|
Like them all, but love the "B"s.
|
|
steve(ill)
Orange Level Access
Joined: 11 Sep 2009
Location: illinois
Points: 77840
|
Post Options
Thanks(0)
Quote Reply
Posted: 12 Apr 2024 at 6:52pm |
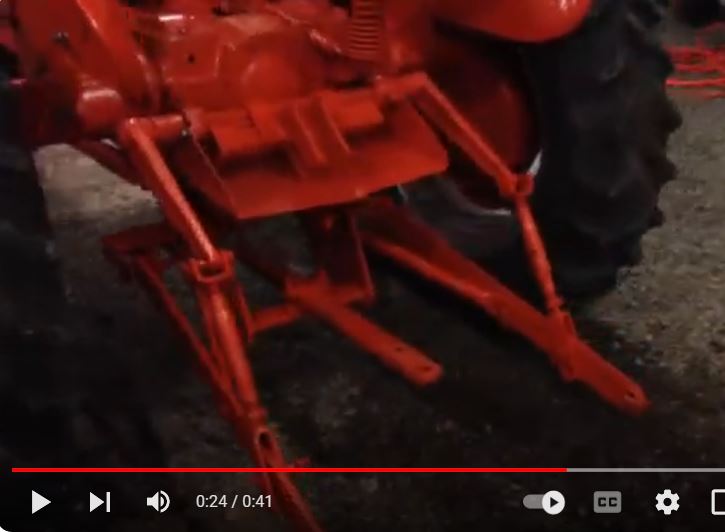
step by step with photos........
|
|
Like them all, but love the "B"s.
|
|
ForgivenCreation
Bronze Level
Joined: 02 Apr 2024
Location: West Coast USA
Points: 45
|
Post Options
Thanks(0)
Quote Reply
Posted: 12 Apr 2024 at 6:54pm |
|
Could this adapter be made? I think my main question/ concerns is how do I tell if they will be long enough to stick back for implament clearance on the tires?
|
|
steve(ill)
Orange Level Access
Joined: 11 Sep 2009
Location: illinois
Points: 77840
|
Post Options
Thanks(0)
Quote Reply
Posted: 12 Apr 2024 at 7:05pm |
you can make any adaptor if you have the tallent... I was just showing HOW it is suppose to look.. You can look at the photos and estimate the LENGTH of the lower arm relative to the other parts... It might be best to look at a couple tractors at a local dealer or Farm and see how far the arms stick back behind the tires.... "MOST" tractors will be about the same, does not have to be ALLIS or a WD45.
no dimensions given, but the LOWER ARM sticks out BEHIND the rear tire.. I think you will find it is 4-6 inches depending on what tractor you check..
Edited by steve(ill) - 12 Apr 2024 at 7:22pm
|
|
Like them all, but love the "B"s.
|
|
HudCo
Orange Level

Joined: 29 Jan 2013
Location: Plymouth Utah
Points: 3290
|
Post Options
Thanks(0)
Quote Reply
Posted: 12 Apr 2024 at 7:23pm |
|
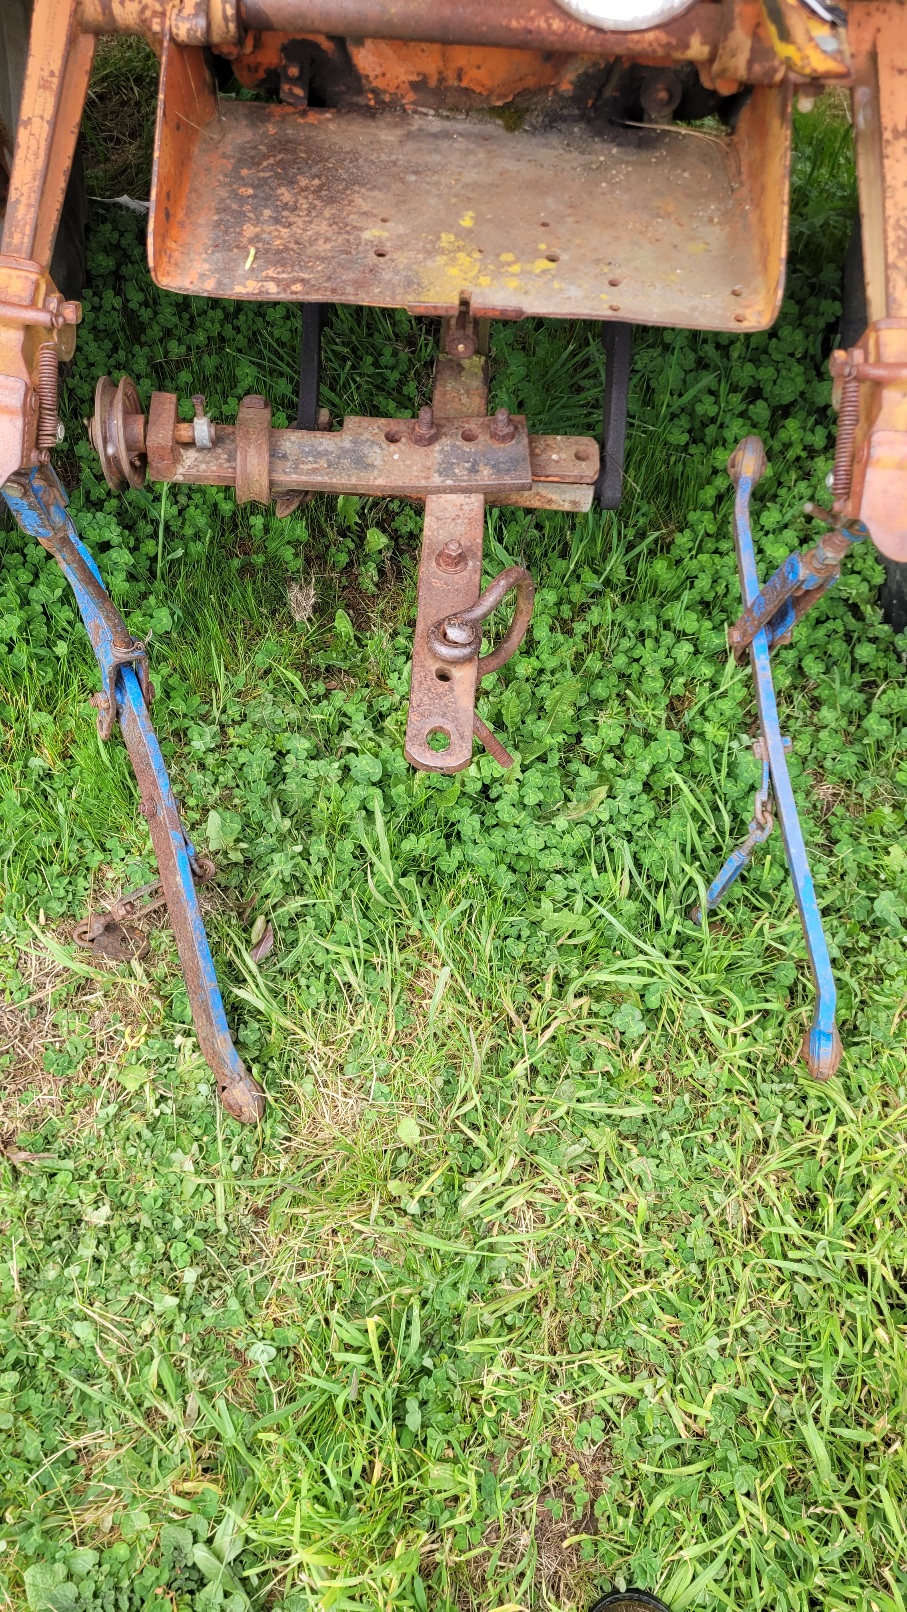
the arms in the picture are hanging backwards they canbe made to work they are a little light but still will work
|
|
DiyDave
Orange Level Access

Joined: 11 Sep 2009
Location: Gambrills, MD
Points: 50547
|
Post Options
Thanks(0)
Quote Reply
Posted: 12 Apr 2024 at 7:56pm |
Picture #2, see the hole in the drawbar bail? that is where I would start, as a mounting point, and as Hud said, arms are backwards, and you will have to remove that pulley and bracket, to start to mock it up. I'd start with a length of all thread, inserted through those 2 holes, and you might need spacers made of pipe, to space the arms firmly apart. once you have it mocked up, then see how it operates. I suspect those arms are a little short, and also you will need to rig up some sort of anti-sway chains... 
|
|
Source: Babylon Bee. Sponsored by BRAWNDO, its got what you need!
|
|
ForgivenCreation
Bronze Level
Joined: 02 Apr 2024
Location: West Coast USA
Points: 45
|
Post Options
Thanks(0)
Quote Reply
Posted: 12 Apr 2024 at 8:05pm |
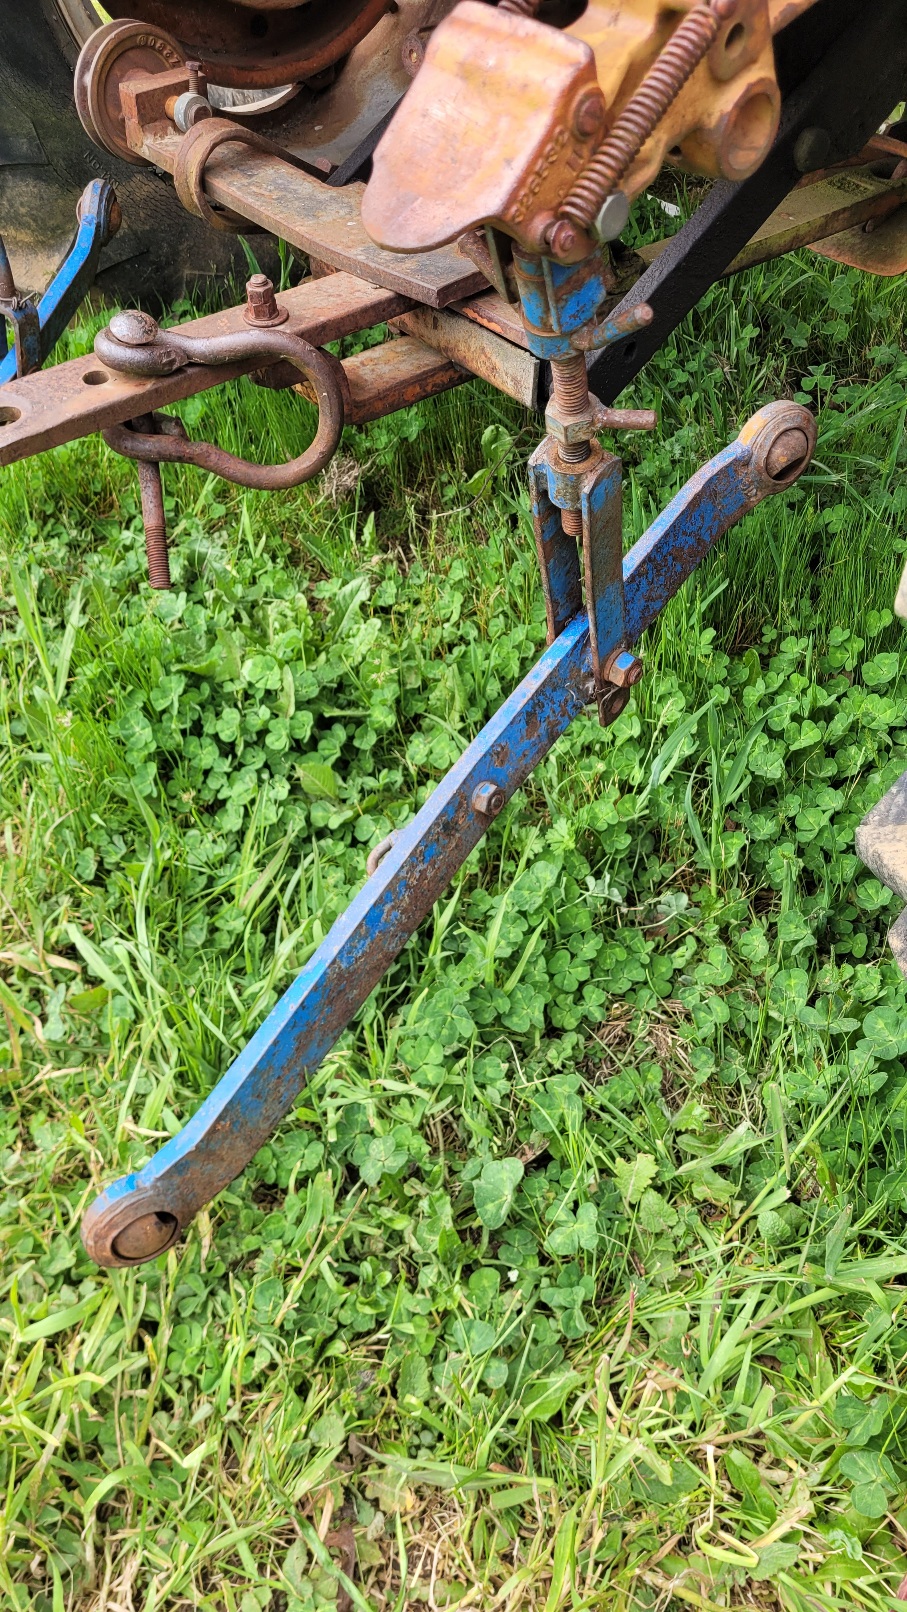
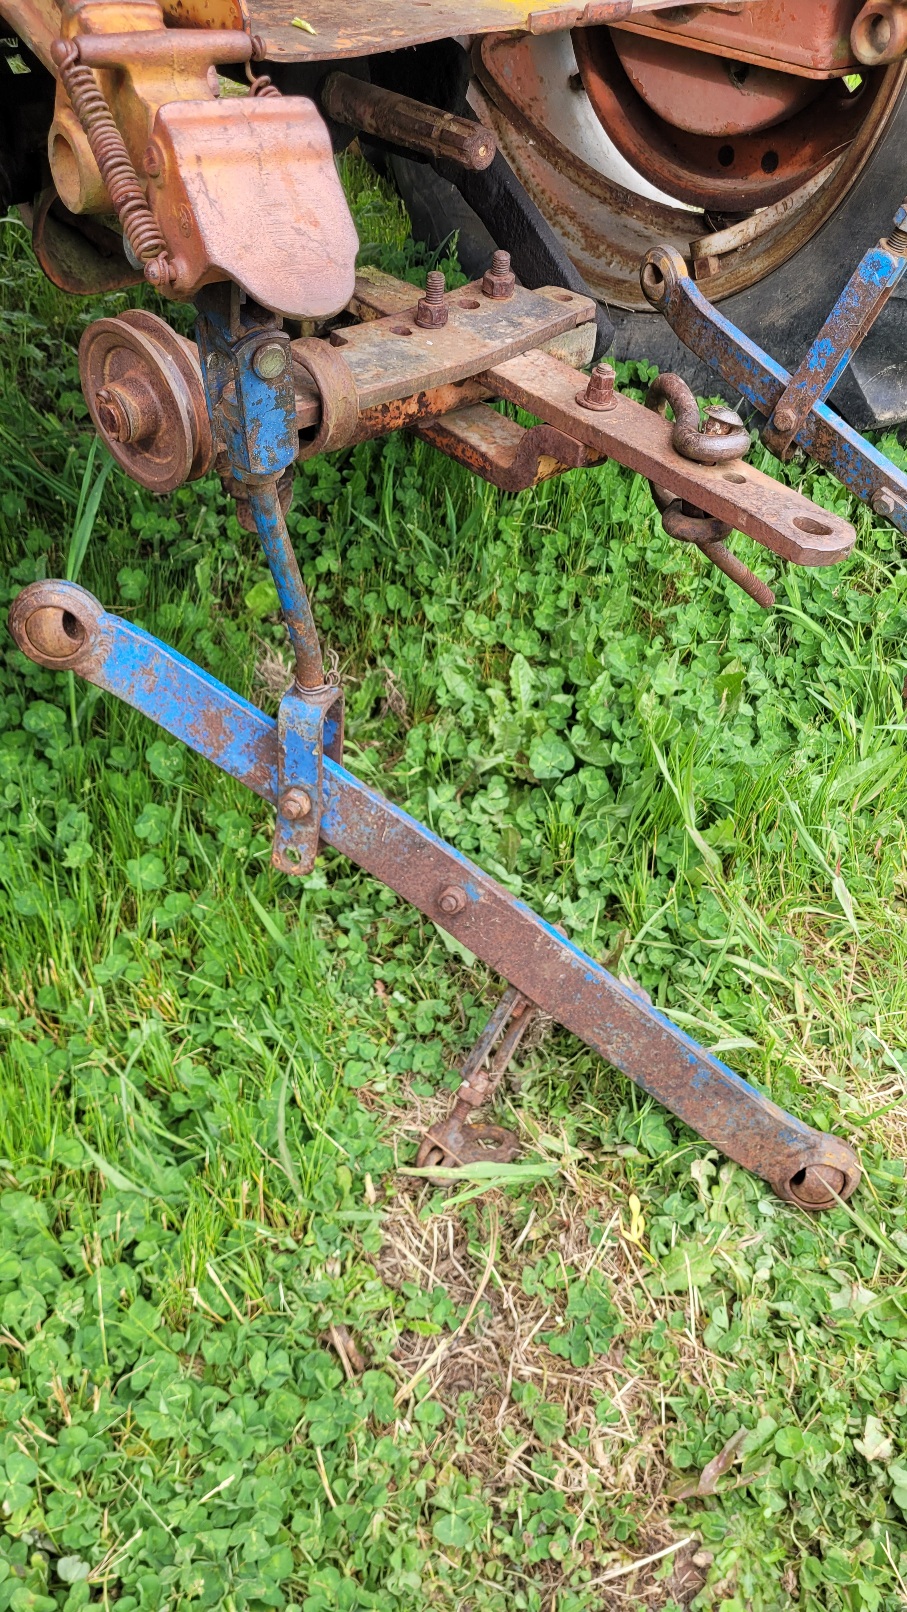
Got some more pictures here. Are the chain links suppose to face eachother in the first picture? Also one has adjustment and the other doesn't, is that normal or modified. 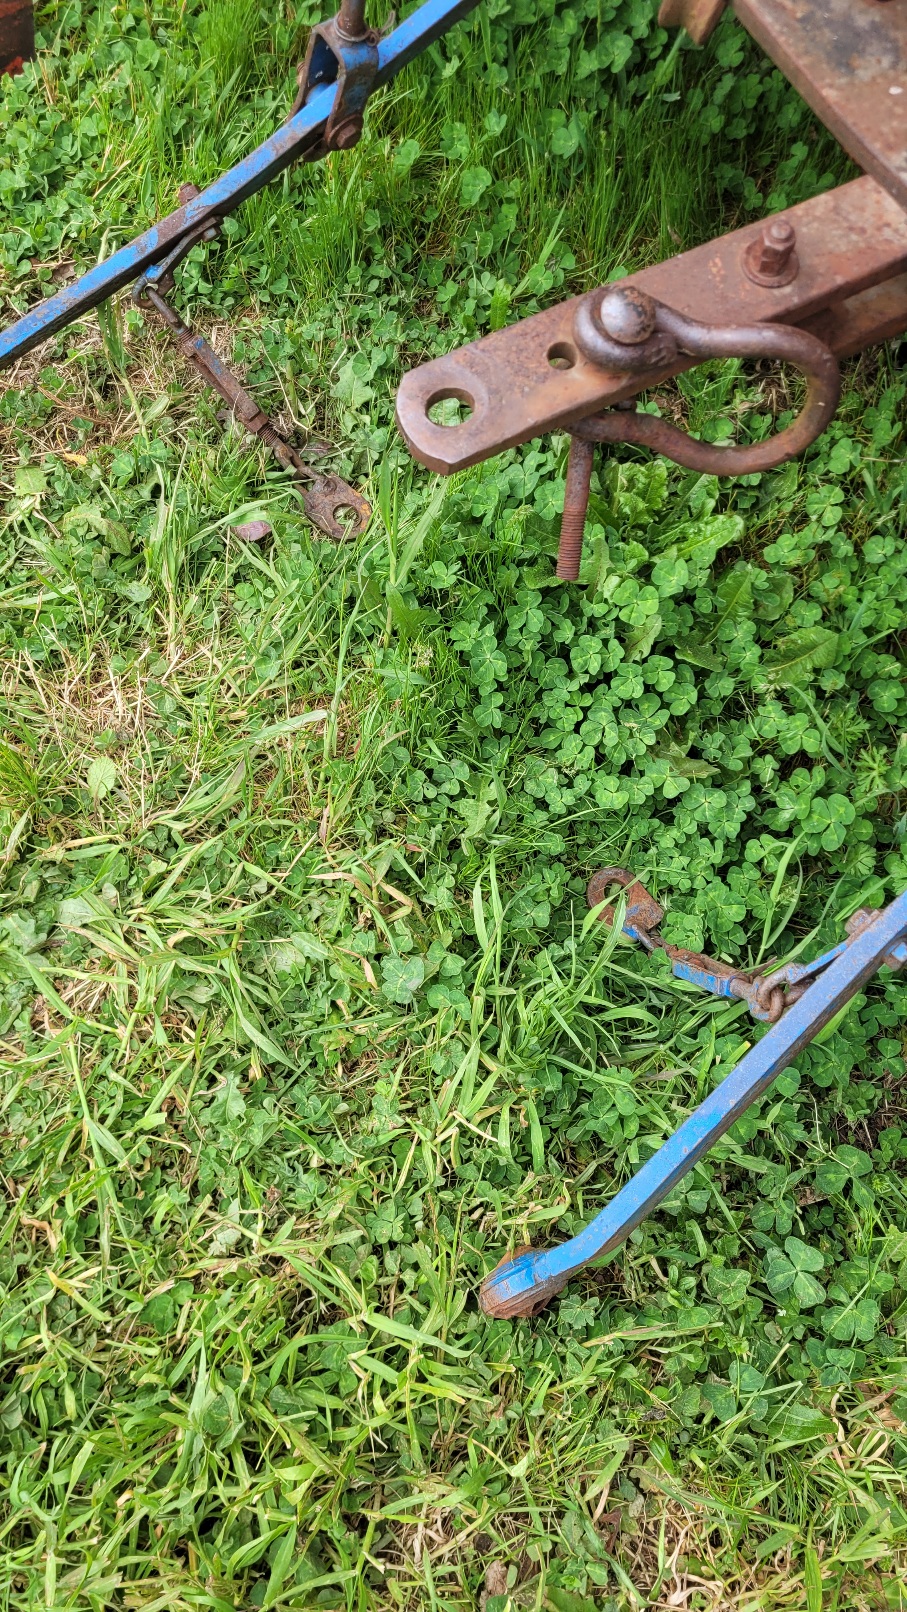 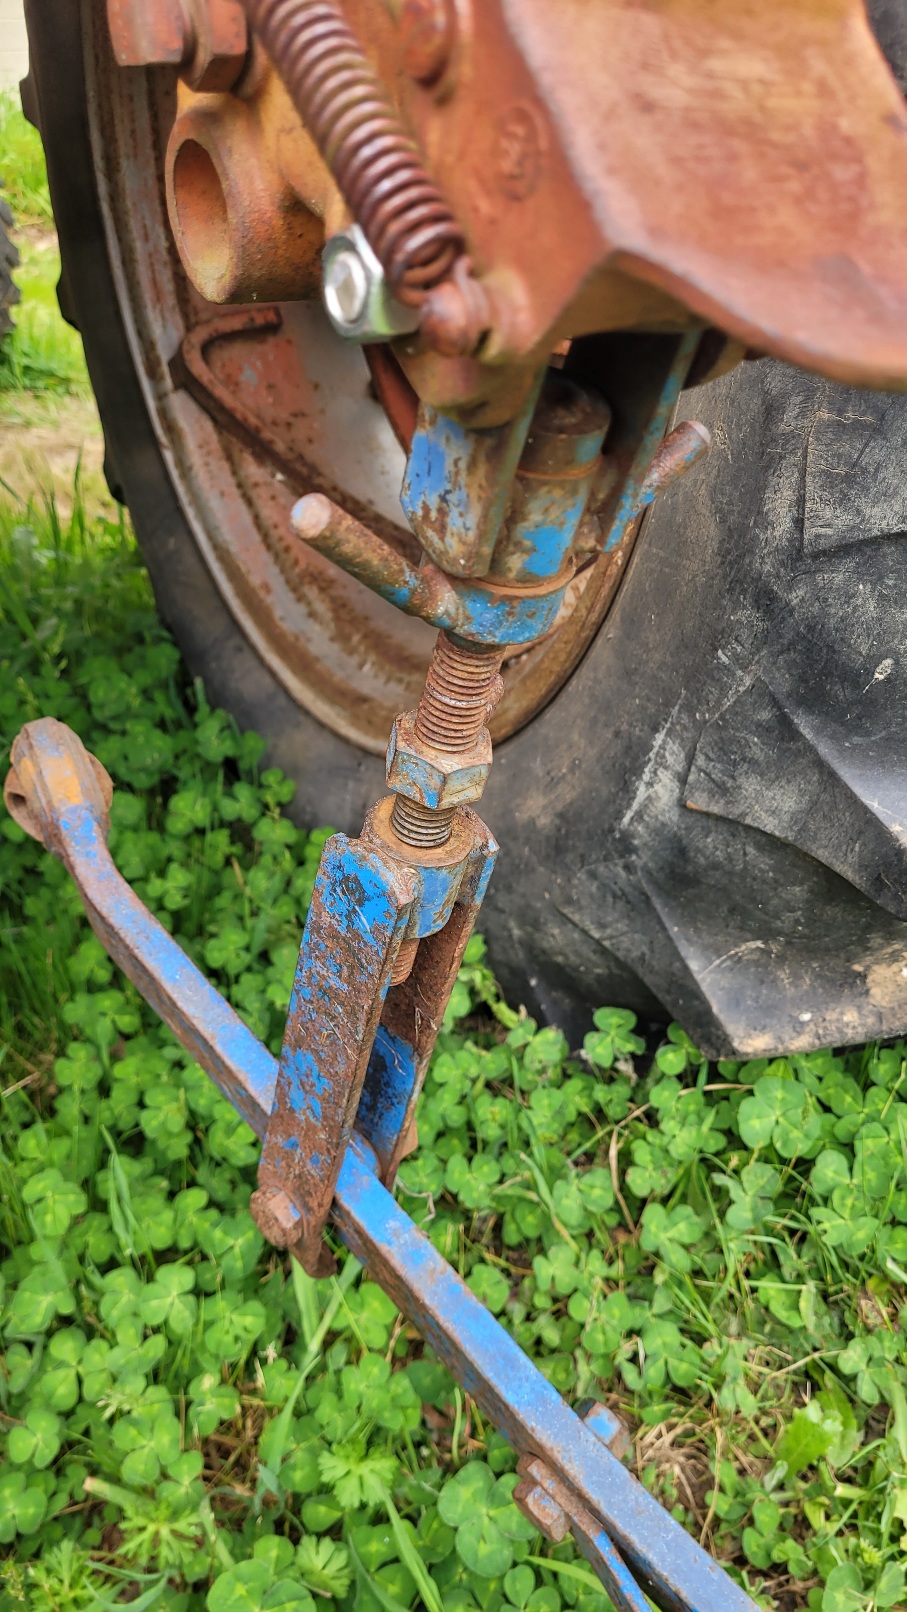 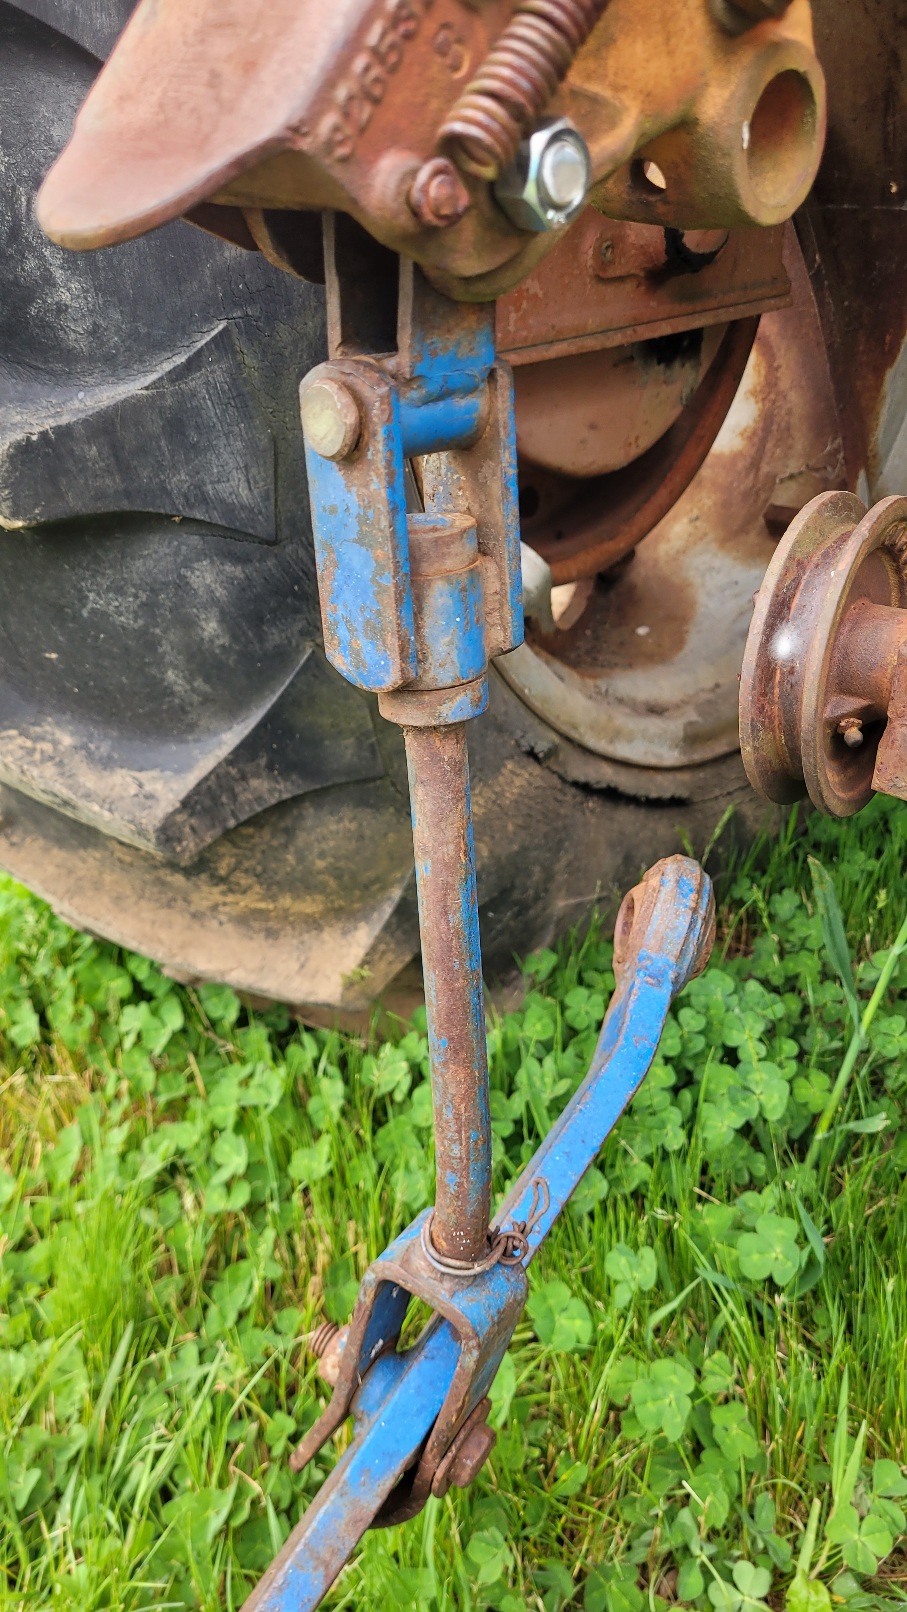
|
|
steve(ill)
Orange Level Access
Joined: 11 Sep 2009
Location: illinois
Points: 77840
|
Post Options
Thanks(0)
Quote Reply
Posted: 12 Apr 2024 at 8:44pm |
Chains on the inside is OK... Your arms need to be switched front to back...
|
|
Like them all, but love the "B"s.
|
|
steve(ill)
Orange Level Access
Joined: 11 Sep 2009
Location: illinois
Points: 77840
|
Post Options
Thanks(0)
Quote Reply
Posted: 12 Apr 2024 at 8:46pm |
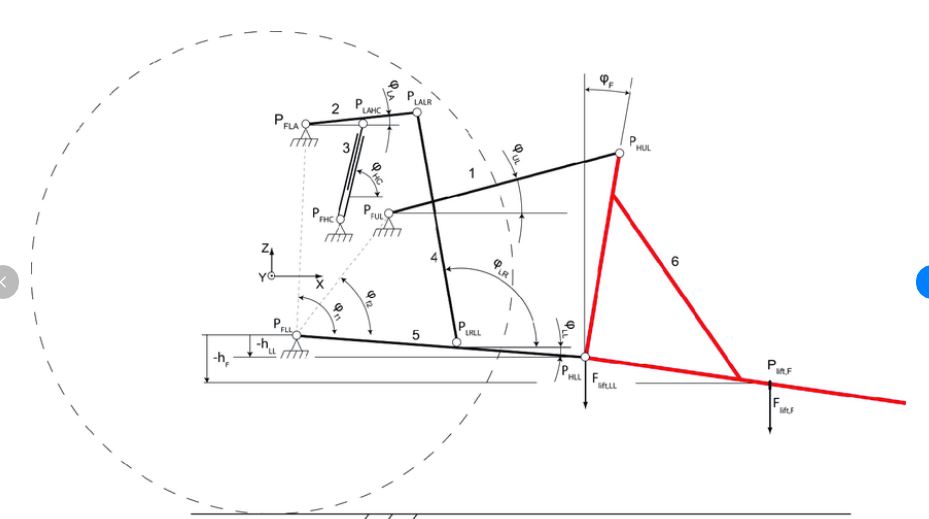
look at this drawing... your vertical arms should tip backward at the bottom... and be closer to the plow end of the arm... so more of the arm goes UNDER the tractor..
|
|
Like them all, but love the "B"s.
|
|
steve(ill)
Orange Level Access
Joined: 11 Sep 2009
Location: illinois
Points: 77840
|
Post Options
Thanks(0)
Quote Reply
Posted: 12 Apr 2024 at 8:54pm |
here is a photo of 3 pt on a WD45... Note the lower arms and where they attach to the vertical arms... Look at the angle of the vertical arms... you can also see the sway bar links ( your chains) on the inside of the arms.
|
|
Like them all, but love the "B"s.
|
|
AC WD45
Orange Level

Joined: 28 Sep 2009
Location: Mid Michigan
Points: 1993
|
Post Options
Thanks(0)
Quote Reply
Posted: 13 Apr 2024 at 7:45am |
A company called Saginaw built this 3pt conversion. There is a large 1/2" thick steel L channel with ears spaced out to pin the arms too. It bolts up to the draw bar bracketry with 4 3/4" bolts. 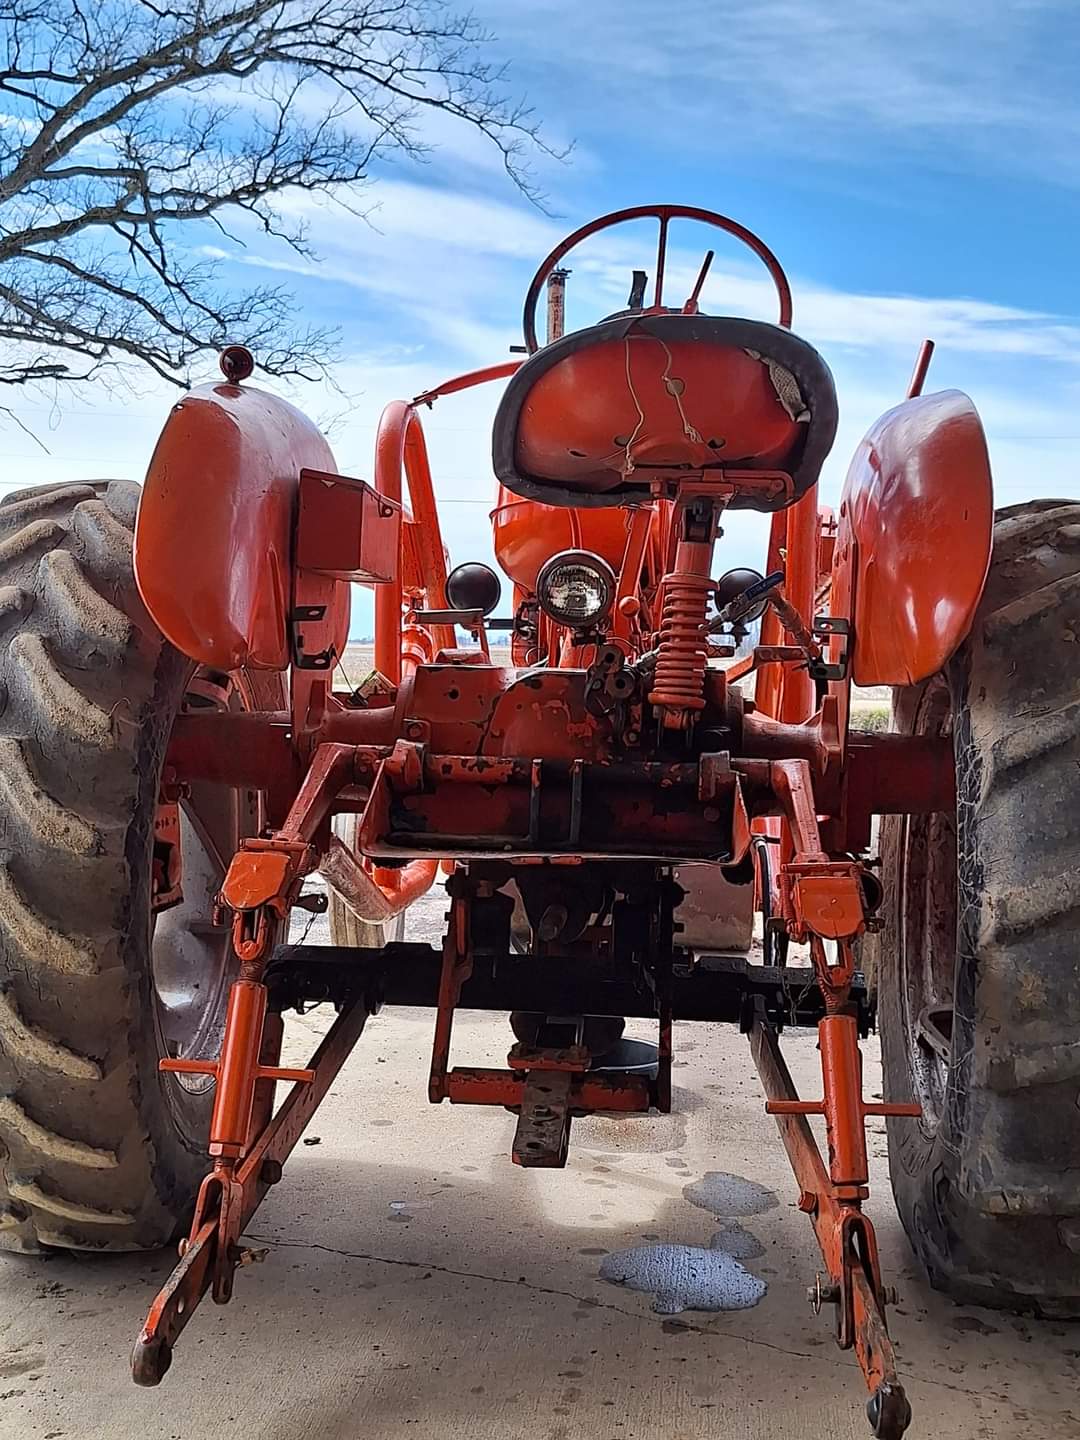
|
|
German Shepherd dad
1957 Allis Chalmers WD45
#WD234847
1951 Allis Chalmers WD
#WD88193
|
|
jvin248
Silver Level


Joined: 17 Jan 2022
Location: Detroit
Points: 268
|
Post Options
Thanks(0)
Quote Reply
Posted: 13 Apr 2024 at 6:03pm |
.
I did the conversion you are trying. Ford tractor lower arms. Spin yours around, actually swap right vs left you have and the chains are inside still.
Look at your draw bar. See the angled U bracket that supports it. Look under the tractor belly and that bracket bolts to two L beams with multiple holes. I got similar bolts long enough to go through a beam, add spacers/washers to space the Ford bar eye out one to two inches, another washer, and a nylon lock nut.
Check the swing for clearance, binding.
Then your links to the lift arms yours look ok. Verify carefully the lift and length of those links to not bind something.
Get or make a U bracket to go around the WD rocker arm and bolt your top link to it. Yesterday s tractor site and others sell that bracket.
Attach your sway chains/links to the hitch bar bracket.
.
|
|