| Author |
|
structures 
Silver Level

Joined: 28 Feb 2011
Location: Beggs, OK
Points: 331
|
 Post Options Post Options
") Thanks(0) Thanks(0)
 Quote Quote  Reply Reply
 Posted: 19 Apr 2015 at 9:08am Posted: 19 Apr 2015 at 9:08am |
 Tracy Martin TN wrote: Tracy Martin TN wrote:
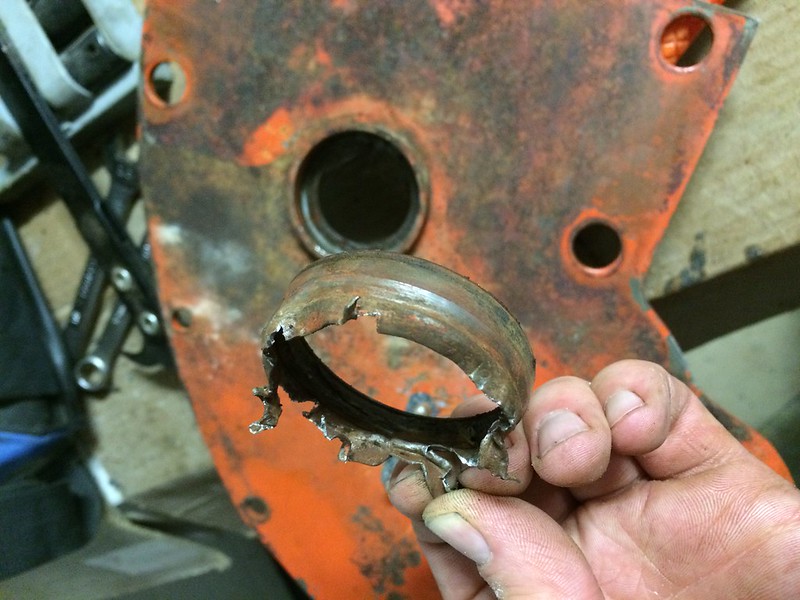
Not as bad as I would have thought. Plug the holes on your power steering pump.Pretty sure that is the original ceramic type clutch disc. They were very thin to start with. Rick Corder in Mo.can fix you up with the properly set clutch and pressure plate. Turn the flywheel with the minimum cleanup as possible. If you do this , you will have a clutch that works properly and pedal will stand up correctly. The new clutch disc are too thick, this forces the pressure plate fingers to be too low, won't have enough spring pressure on clutch disc, and won't release properly. HTH Tracy |
Thanks, I did have them plugged while washing. My Dad had this since new, and he's never been in the front. It should all be original. I was going to take the clutch into Tulsa Brake and Clutch.
TimNearFortWorth wrote:
Assuming those are a loader/blade mount on the side rails, you will def. want to be checking the "king pin" when you slide the front end out; that area can take a beating over time and get wallowed out. |
Dave H wrote:
I sure hope it looks better than mine did. Fortunately my bushing was not wore all the way thru. |
Yeah. That mount was for some kind of hay turner or something. I'll have to ask Dad again. Can't quite remember what he said.
VFDfireman wrote:
Fwiw I had a great deal of success cleaning my Wd45 block and crank that was in far worse condition by soaking the parts in a cow lick tub filled with a mix of purple power an water. I then removed the rust via electrolysis in a similar tub. |
Everything is cleaning up pretty good so far thanks.
|
|
|
 |
|
Sponsored Links
|
|
|
structures
Silver Level
Joined: 28 Feb 2011
Location: Beggs, OK
Points: 331
|
Post Options
Thanks(0)
Quote Reply
Posted: 19 Apr 2015 at 9:24am |
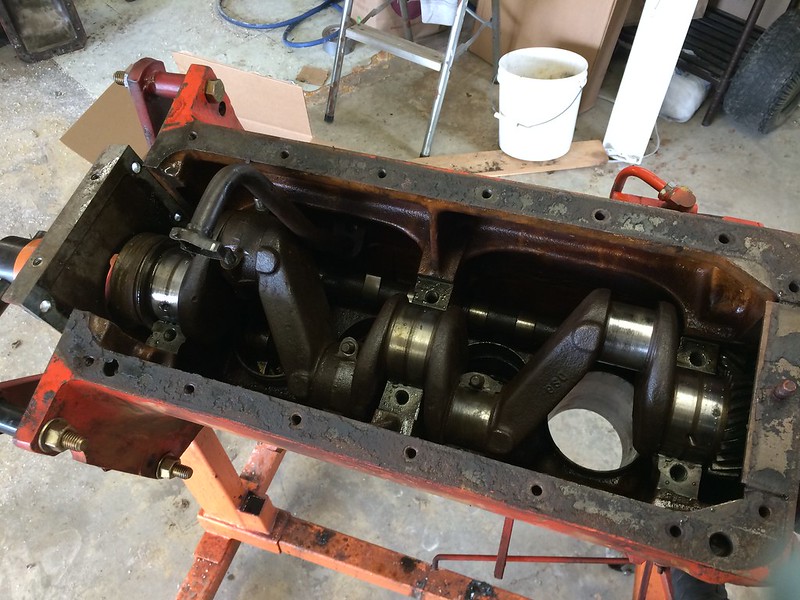
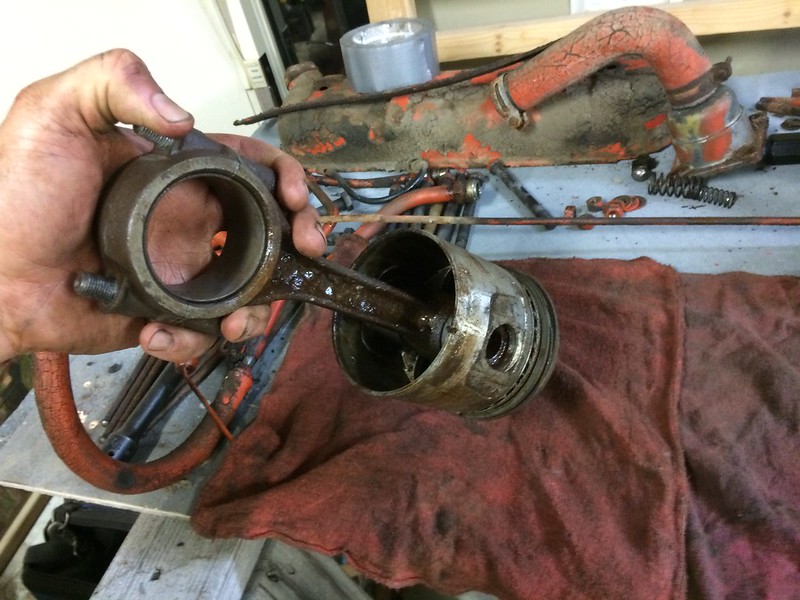
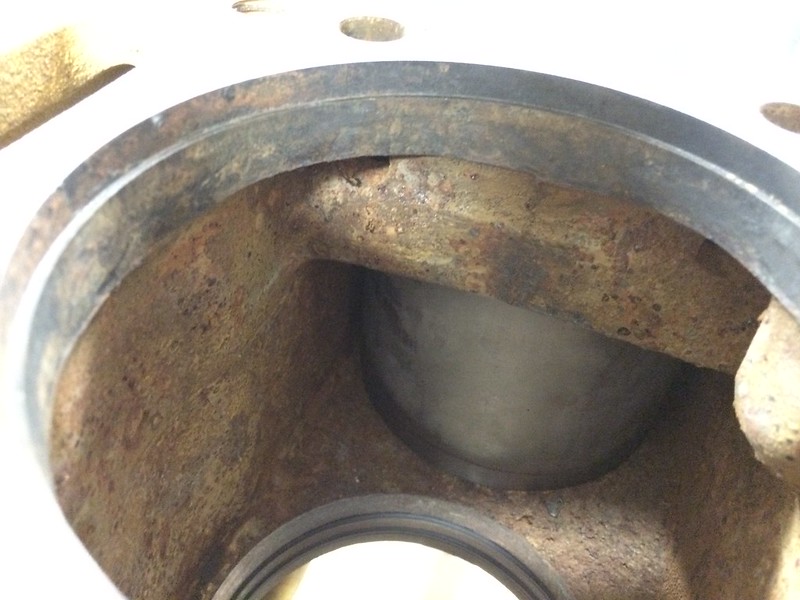
Still cleaning the engine up. Seems the wrist pins on the rod are what's rusted tight. This has made it nearly impossible to get the crank and pistons out but with some wood blocks and a mallet I was able to force it apart.
Seized piston on the wrist pin
After a lot of beating finally got it apart.
Here's a look at the crankshaft out.
I don't think it looks too bad.
Oil pan cleaned up real well, but there's pin holes in certain locations. I guess this is two pieces and it seems to have rusting in between the layers. I'm not for sure.
|
|
|
|
structures
Silver Level
Joined: 28 Feb 2011
Location: Beggs, OK
Points: 331
|
Post Options
Thanks(0)
Quote Reply
Posted: 20 Apr 2015 at 9:05am |
Good morning. Separated the pistons from the rods. That was nearly as bad as pushing the eccentric pins out. Broke many of the snap rings. Took a lot of force in the press to get the wrist pins out. To get the bearings out of the rod I used a hack saw to cut down the bearing and then a small chisel to knock them out.
|
|
|
|
structures
Silver Level
Joined: 28 Feb 2011
Location: Beggs, OK
Points: 331
|
Post Options
Thanks(0)
Quote Reply
Posted: 25 Apr 2015 at 9:22am |
Mornin'
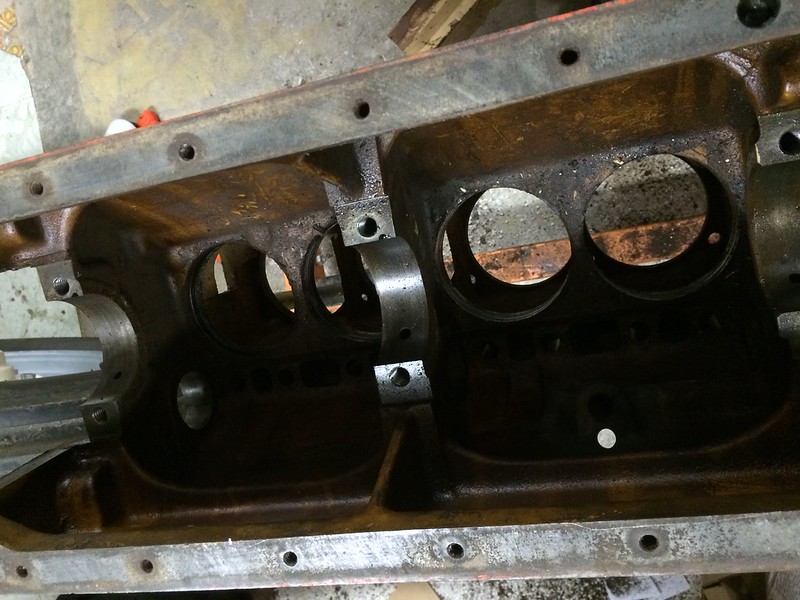
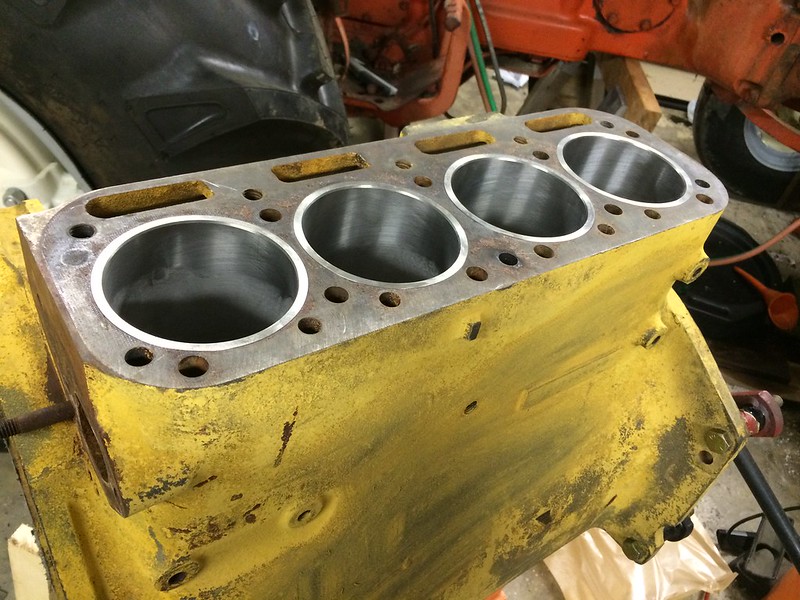
Got the sleeves and orings out.
Built this puck, 3.75" OD X 1" THK with a 3.6" DIA relief. Really 0.75" THK is best as you get too thick and it starts to interfere with the block.
Probably my press or a fixture with all thread would have been better, but I ended up using a 4x4 block and some love taps with a sledge hammer to drive these out. It really didn't take much with a big hammer.
Inside of the block
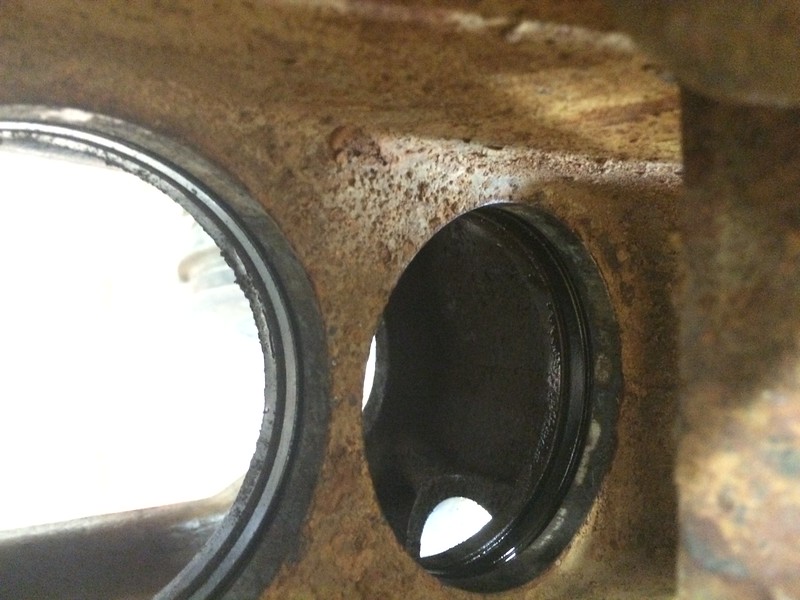
Took a little pick and got the upper and lower orings out.
Here's the orings.
Hopefully get this engine off to a shop today or monday. Have a good weekend.
|
|
|
|
Don(MO)
Orange Level

Joined: 12 Sep 2009
Location: Bates City MO.
Points: 6862
|
Post Options
Thanks(0)
Quote Reply
Posted: 25 Apr 2015 at 10:04am |
|
I'd send the rods to the shop and have them checked too. If you send them in send one of the new wrist pins with them and have new bushings installed and fitted at the same time.
|
|
3 WD45's with power steering,G,D15 fork lift,D19, W-Speed Patrol, "A" Gleaner with a 330 corn head,"66" combine,roto-baler, and lots of Snap Coupler implements to make them work for their keep.
|
|
JimIA
Orange Level
Joined: 12 Sep 2009
Location: Castalia Iowa
Points: 1979
|
Post Options
Thanks(0)
Quote Reply
Posted: 25 Apr 2015 at 9:17pm |
|
If any of the rods check out bad I do have two spares I would sell.
|
|
An open eye is much more observant than an open mouth
|
|
Hubnut
Orange Level

Joined: 30 Jul 2014
Location: Gainesville, FL
Points: 1812
|
Post Options
Thanks(0)
Quote Reply
Posted: 26 Apr 2015 at 5:14am |
|
Wow, and I thought my little C was tough. Nice work. I've enjoyed seeing your progress and posts. Keep them up!
|
|
structures
Silver Level
Joined: 28 Feb 2011
Location: Beggs, OK
Points: 331
|
Post Options
Thanks(0)
Quote Reply
Posted: 26 Apr 2015 at 9:24am |
Thanks guys.
Don, I'll be sure to have the rod's checked thanks. And Jim I'll keep you in mind, appreciate that.
I don't know Hubnut, that C build looks pretty involved to me.
|
|
|
|
structures
Silver Level
Joined: 28 Feb 2011
Location: Beggs, OK
Points: 331
|
Post Options
Thanks(0)
Quote Reply
Posted: 05 May 2015 at 8:10pm |
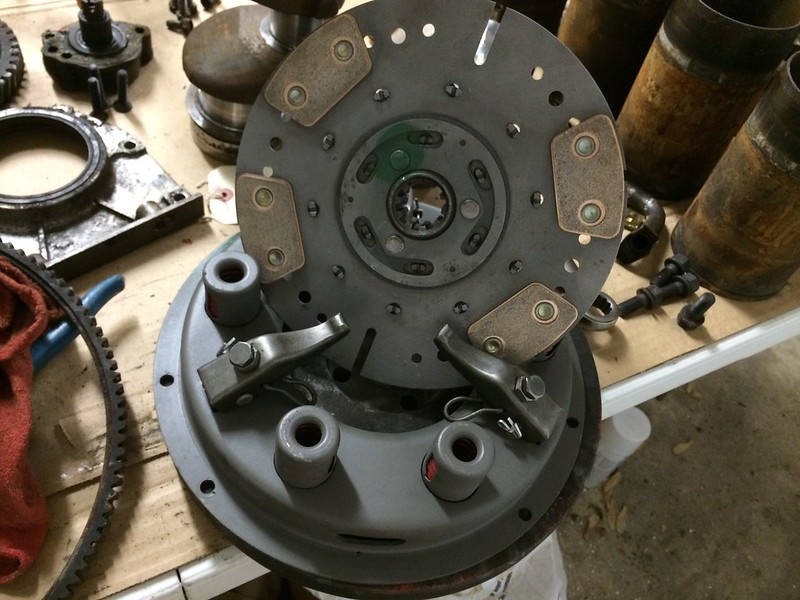
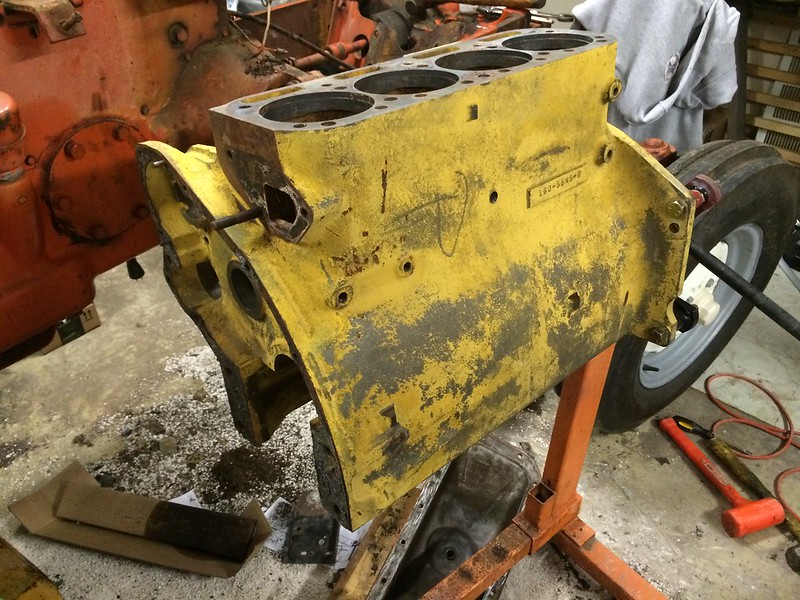
Evening folks. Got the block vatted and checked, no cracks. Also took your advice and sent the clutch to rick corder in MO. What a great guy. Loaded me up full of info answered my question, and had my clutch back to me pretty quick. Thanks
Here's the clutch and pressure plate now.
Rick also replaced my throwout bearing.
And the block. I need to clean off that yellow paint. It's pretty chalky.
|
|
|
|
Kansas99
Orange Level Access
Joined: 26 Feb 2015
Location: W Kansas
Points: 4807
|
Post Options
Thanks(0)
Quote Reply
Posted: 05 May 2015 at 10:07pm |
|
Looking great. Keep posting-love reading this thread.
|
|
Sugarmaker
Orange Level

Joined: 12 Jul 2013
Location: Albion PA
Points: 8168
|
Post Options
Thanks(0)
Quote Reply
Posted: 06 May 2015 at 7:28am |
|
Robert,
I still think your winning!
Hey Dads Tractor Right? Well your doing the right thing bringing this one back!
(I hear my air compressor calling from the attached garage:) )
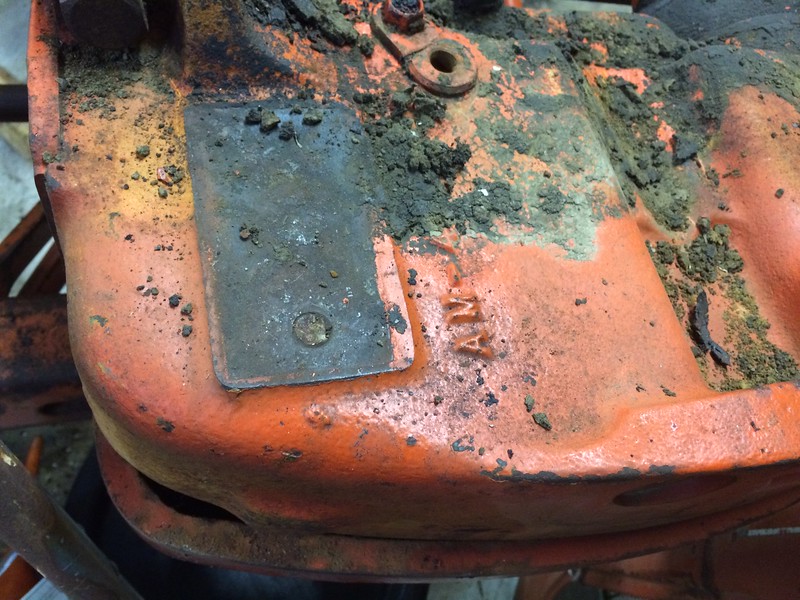
What is that yellow paint on the block? Is that the same block? Was factory primer? New block? I have read through our thread. You have some challenges ahead.
(I was gone for 2 months making syrup and playing with my Dads WD project lately.)
Your wheels, rims, and new tires came out nice! Its going to be a very nice tractor.
I like the plating work that you did!
Thanks for posting all the pictures!
Regards,
Chris
|
|
D17 1958 (NFE), WD45 1954 (NFE), WD 1952 (NFE), WD 1950 (WFE), Allis F-40 forklift, Allis CA, Allis D14, Ford Jubilee, Many IH Cub Cadets, 32 Ford Dump, 65 Comet.
|
|
GaryL
Orange Level
Joined: 18 Jan 2015
Location: Oklahoma
Points: 704
|
Post Options
Thanks(0)
Quote Reply
Posted: 06 May 2015 at 8:06am |
|
Very neat thread. I can't wait to see how it progresses.
|
|
TimNearFortWorth
Orange Level

Joined: 12 Dec 2009
Points: 2014
|
Post Options
Thanks(0)
Quote Reply
Posted: 06 May 2015 at 9:14am |
|
Yellow is factory applied primer.
|
|
structures
Silver Level
Joined: 28 Feb 2011
Location: Beggs, OK
Points: 331
|
Post Options
Thanks(0)
Quote Reply
Posted: 06 May 2015 at 12:04pm |
Thanks all.
Chris. Yeah same block. I was thinking that was the primer. Definitely have some work ahead of me!
|
|
|
|
structures
Silver Level
Joined: 28 Feb 2011
Location: Beggs, OK
Points: 331
|
Post Options
Thanks(0)
Quote Reply
Posted: 25 May 2015 at 9:45am |
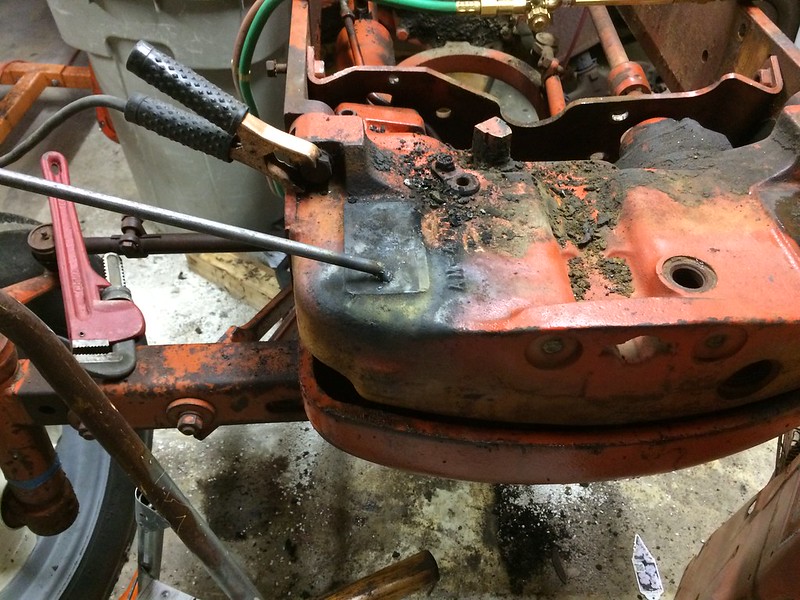
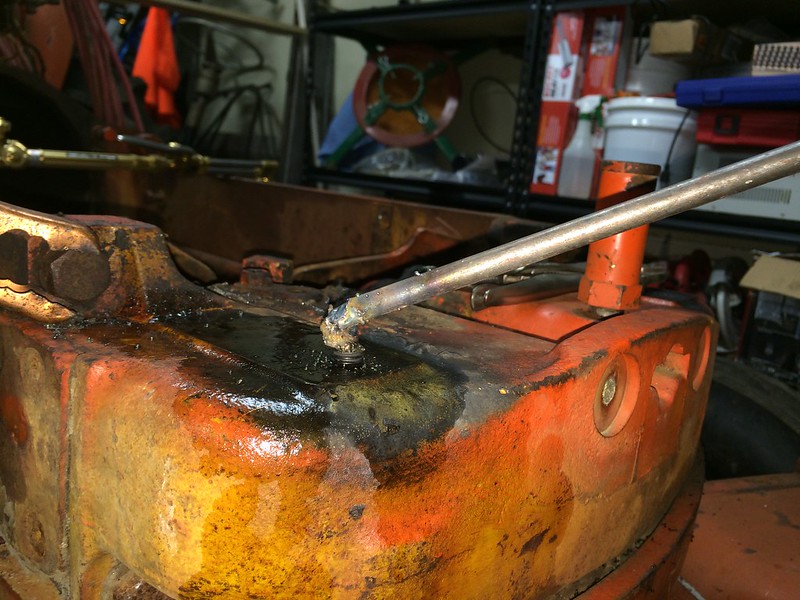
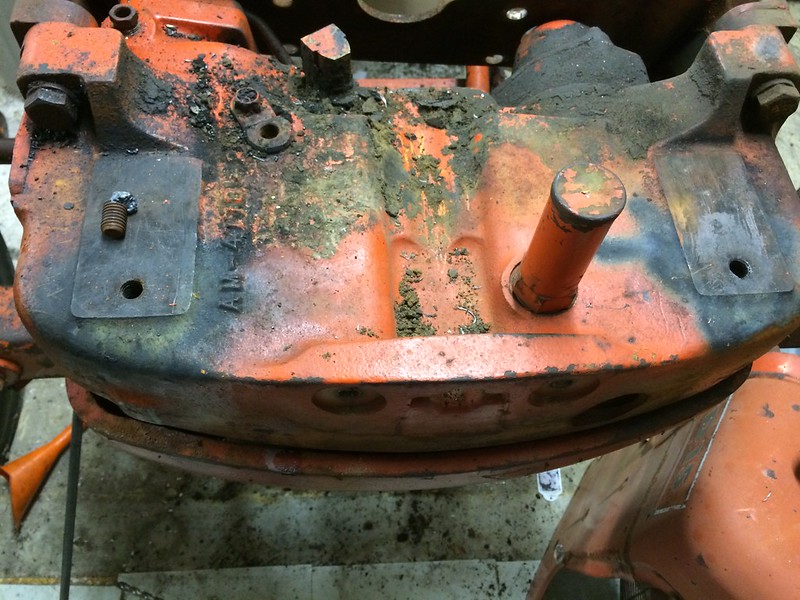
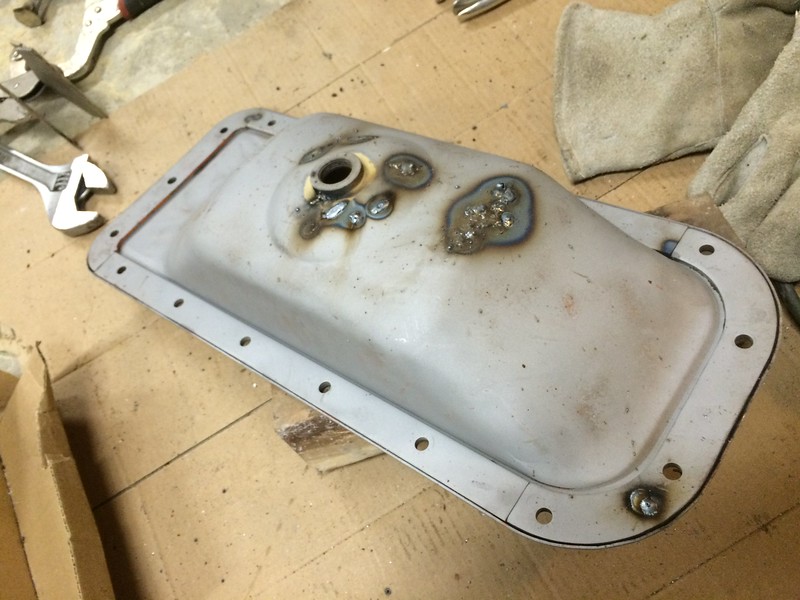
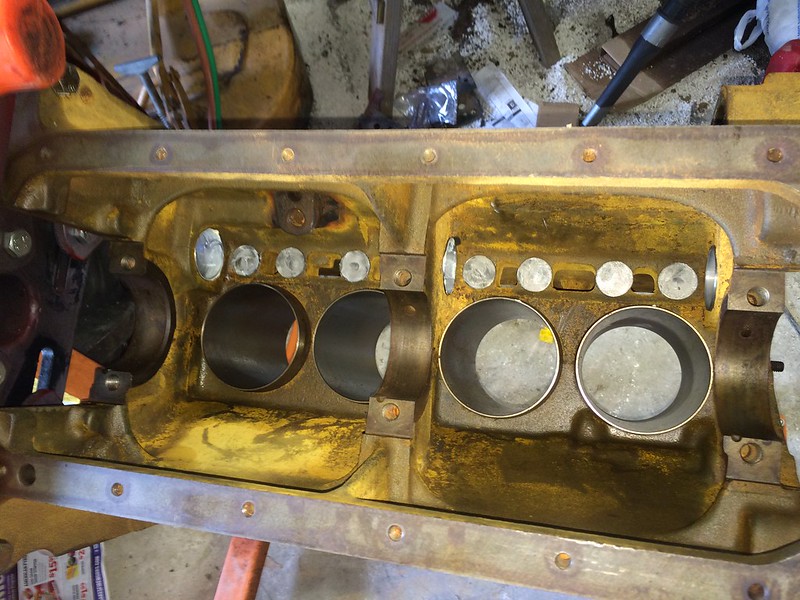
Good Morning. Not much going on, but thought I better post up some pics. I had some bolts twisted off that I got out, put the liners in the block, and have been working on repairing the oil pan.
I had various bolts that I broke off during disassembly. I have pretty good luck welding a length of rod to the broken threads and unthreading from there. A couple bolts that hold the radiator down in the power steering reservoir were really froze. A little patience and a lot of welding I was able to get them out.
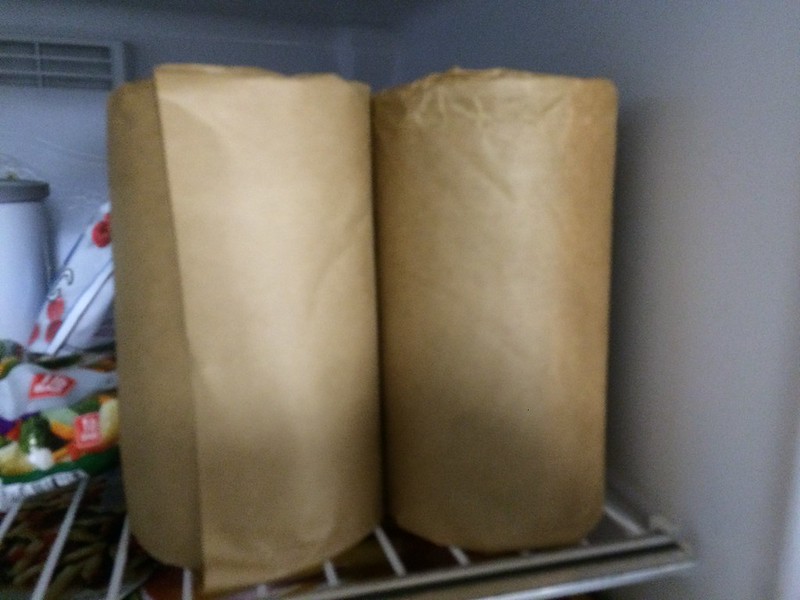
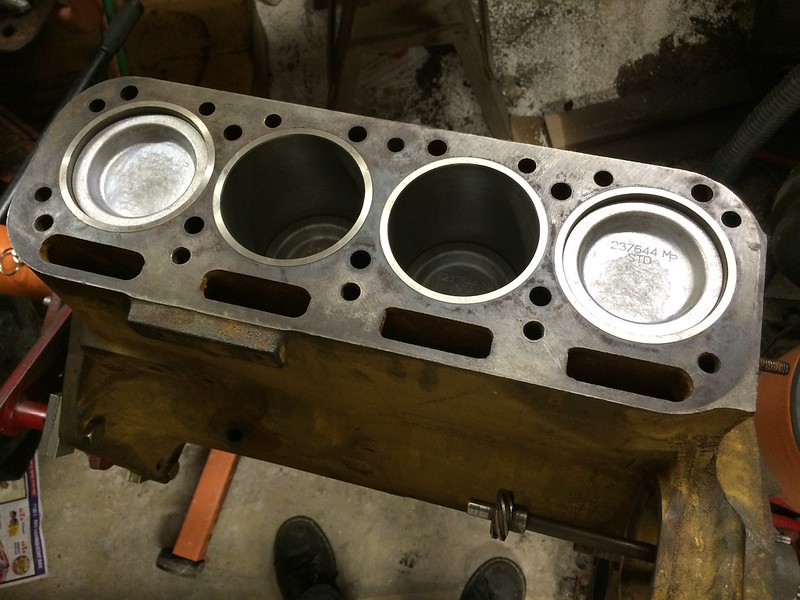
The cylinder liners I put in the freezer the night before. The next morning I put the o-rings in and used dawn dish soap with a little water on the o-rings as a lube. It worked perfect. The liners went in with ease.
I've been working on patching up the oil pan. Not finished on that yet.
|
|
|
|
LSilseth
Bronze Level

Joined: 29 Dec 2014
Location: NYA, MN
Points: 196
|
Post Options
Thanks(0)
Quote Reply
Posted: 25 May 2015 at 10:20am |
|
SWEEEEET!! Looks great.
|
|
MN FARM BOY
Luke
www.silsethfamilyfarm.com
|
|
Kansas99
Orange Level Access
Joined: 26 Feb 2015
Location: W Kansas
Points: 4807
|
Post Options
Thanks(0)
Quote Reply
Posted: 25 May 2015 at 10:34am |
|
Very nice indeed! Man that oil pan cleaned up well.
|
|
structures
Silver Level
Joined: 28 Feb 2011
Location: Beggs, OK
Points: 331
|
Post Options
Thanks(0)
Quote Reply
Posted: 15 Jun 2015 at 9:07am |
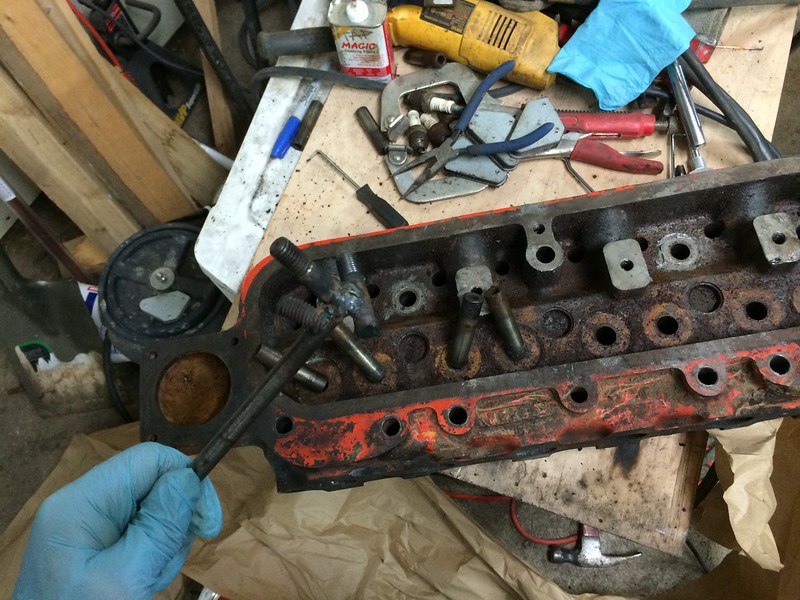
Small update. Worked on the head last night. Got all the broken studs out and pressed the valve guides out.
|
|
|
|
Richmar
Silver Level

Joined: 03 Aug 2010
Location: Ia
Points: 205
|
Post Options
Thanks(0)
Quote Reply
Posted: 15 Jun 2015 at 9:50am |
structure: Make sure that the crankshaft pully is for a 3/8 width belt rather than a 5/8 belt. Jim D. sent me the wrong one. So check it out. Richmar
|
|
Sugarmaker
Orange Level
Joined: 12 Jul 2013
Location: Albion PA
Points: 8168
|
Post Options
Thanks(0)
Quote Reply
Posted: 15 Jun 2015 at 11:04am |
|
Robert,
Good job getting the stuck bolts out! I will have to remember that one. I have welded washers and nuts to them before. The heat from welding helps free them up.
New sleeves look good too!
Your doing good!
Regards,
Chris
|
|
D17 1958 (NFE), WD45 1954 (NFE), WD 1952 (NFE), WD 1950 (WFE), Allis F-40 forklift, Allis CA, Allis D14, Ford Jubilee, Many IH Cub Cadets, 32 Ford Dump, 65 Comet.
|
|
Richmar
Silver Level
Joined: 03 Aug 2010
Location: Ia
Points: 205
|
Post Options
Thanks(0)
Quote Reply
Posted: 15 Jun 2015 at 11:31am |
Structures: Do not forget to install new cam bushings. ( Important} Richmar
|
|
structures
Silver Level
Joined: 28 Feb 2011
Location: Beggs, OK
Points: 331
|
Post Options
Thanks(0)
Quote Reply
Posted: 16 Jun 2015 at 9:04am |
Richmar wrote:
structure:Make sure that the crankshaft pully is for a 3/8 width belt rather than a 5/8 belt. Jim D. sent me the wrong one. So check it out. Richmar
|
I got the right one. Which was twice as much! As everything is on the D15II!  I was trying to get Jim to send me the 3/8 one half off. He wasn't budging. I was trying to get Jim to send me the 3/8 one half off. He wasn't budging. 
Sugarmaker wrote:
Robert,
Good job getting the stuck bolts out! I will have to remember that one. I have welded washers and nuts to them before. The heat from welding helps free them up.
New sleeves look good too!
Your doing good!
Regards,
Chris
|
Thanks! I enjoy your builds! Good motivation.
Richmar wrote:
Structures:Do not forget to install new cam bushings. ( Important} Richmar
|
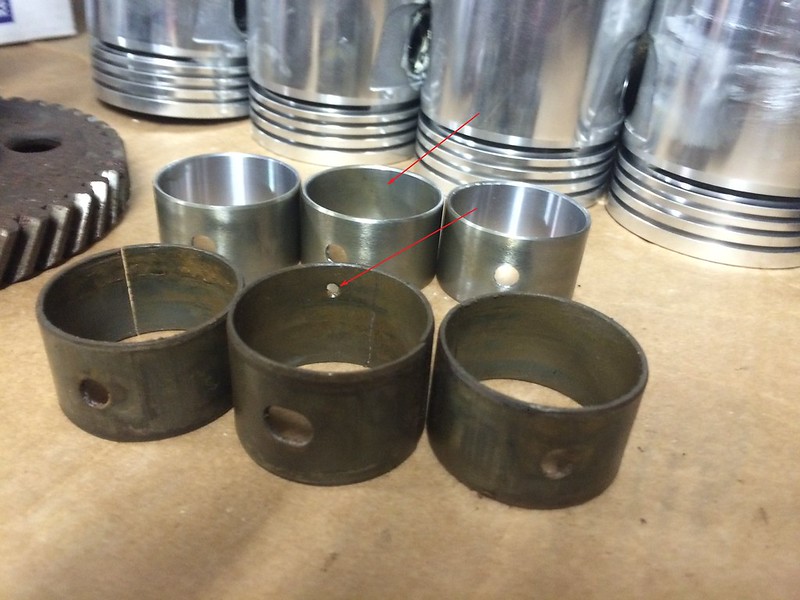
I am. The rebuild kit sort of let me down. I had to buy separately the wrist pin bushings, cam bearings, and governor bushing. Seems that would be included in an "overhaul kit." Some might include at least the wrist pin bushings. After all they have to be cut to match the new wrist pin.
|
|
|
|
structures
Silver Level
Joined: 28 Feb 2011
Location: Beggs, OK
Points: 331
|
Post Options
Thanks(0)
Quote Reply
Posted: 30 Jun 2015 at 10:31am |
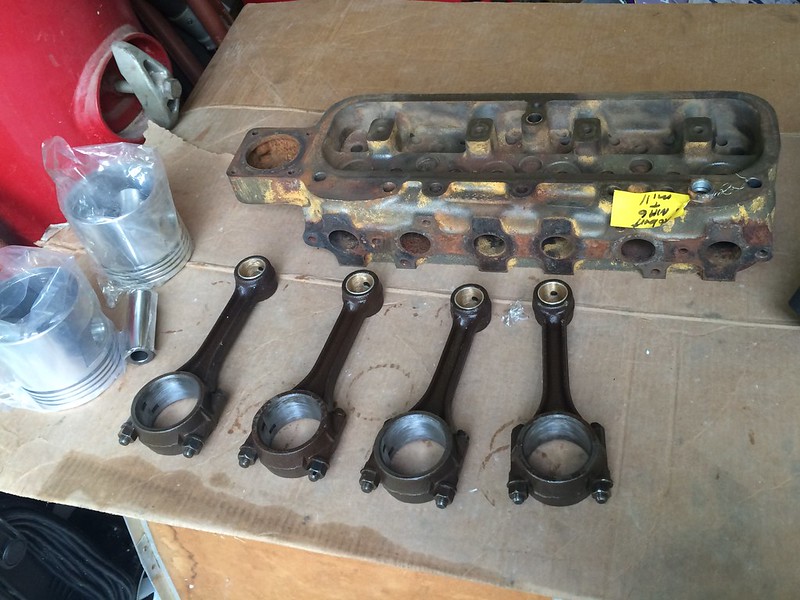
I think I've got enough parts to start putting this engine back together. Got the head, rods and pistons back from the shop yesterday. Just took some time to clean up the block a little more and install the pistons on the rods.
|
|
|
|
Sugarmaker
Orange Level
Joined: 12 Jul 2013
Location: Albion PA
Points: 8168
|
Post Options
Thanks(0)
Quote Reply
Posted: 03 Jul 2015 at 7:51am |
|
Looking good Robert!
Its coming together! Amazing the amount of time and dollars that goes into what your doing. Great satisfaction will come when you fire up your Dads tractor again.
Regards,
Chris
|
|
D17 1958 (NFE), WD45 1954 (NFE), WD 1952 (NFE), WD 1950 (WFE), Allis F-40 forklift, Allis CA, Allis D14, Ford Jubilee, Many IH Cub Cadets, 32 Ford Dump, 65 Comet.
|
|
structures
Silver Level
Joined: 28 Feb 2011
Location: Beggs, OK
Points: 331
|
Post Options
Thanks(0)
Quote Reply
Posted: 06 Jul 2015 at 10:31am |
Good Morning. Got some work done over the holiday weekend.
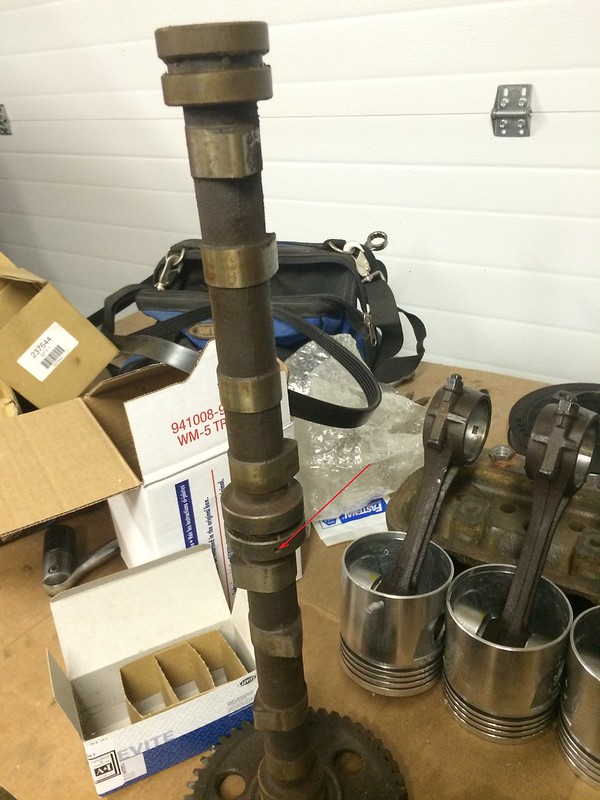
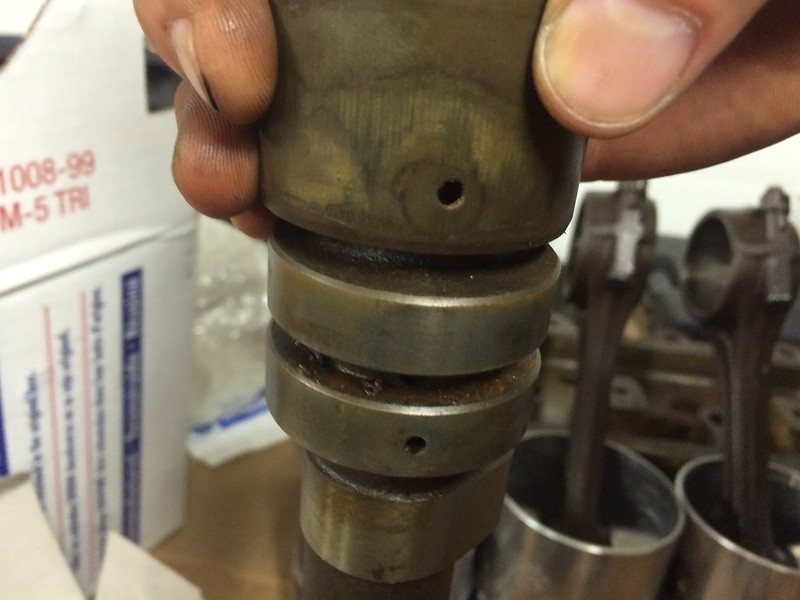
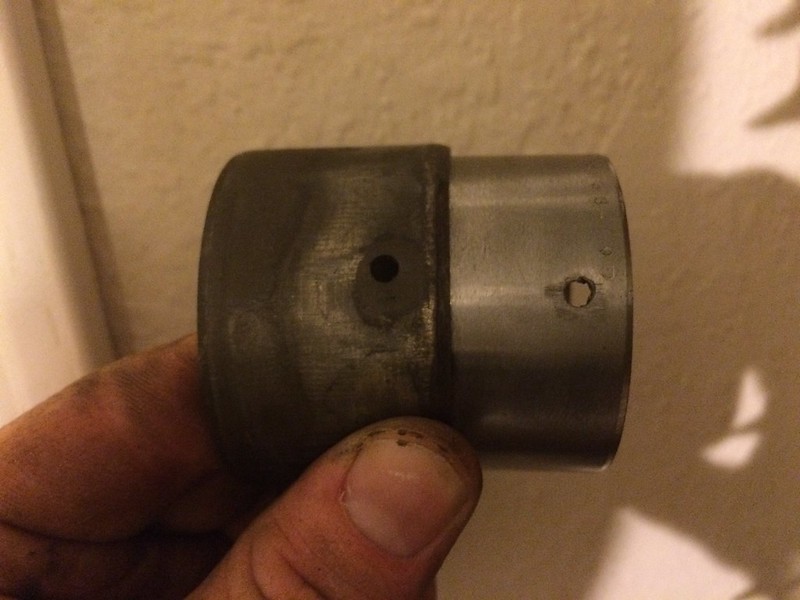
Put the cam bearings in. They were all three the same part, but the middle cam bearing needs an 1/8" hole drilled to pump oil up to the rockers and over to the governor.
That little hole feeds the head and governor.
I used the old cam bearing as a guide. I guess cam bearings are real hard on the outside and soft on the bearing layer. I pushed too hard, so I spent some time cleaning the hole up. If I did it again I'd drill the hole on the drill press and push real light and slow.
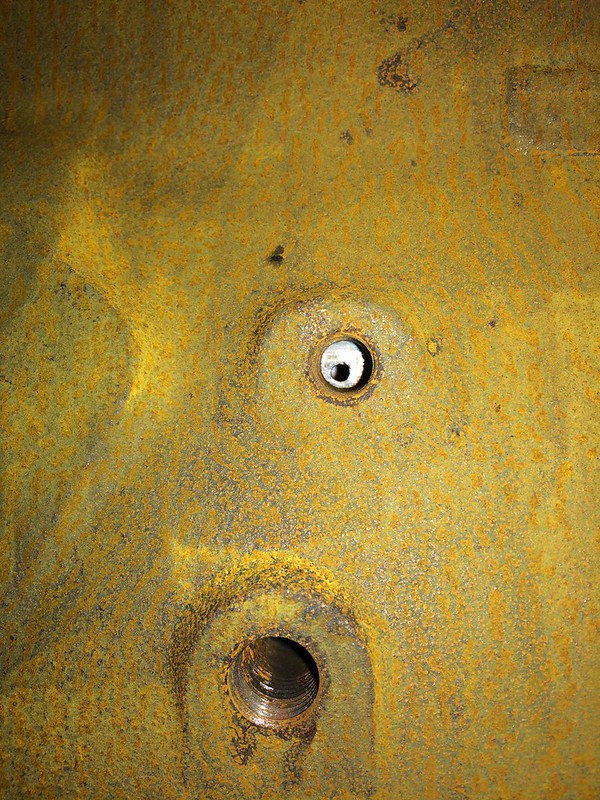
That's what it looks like on the outside of the block.
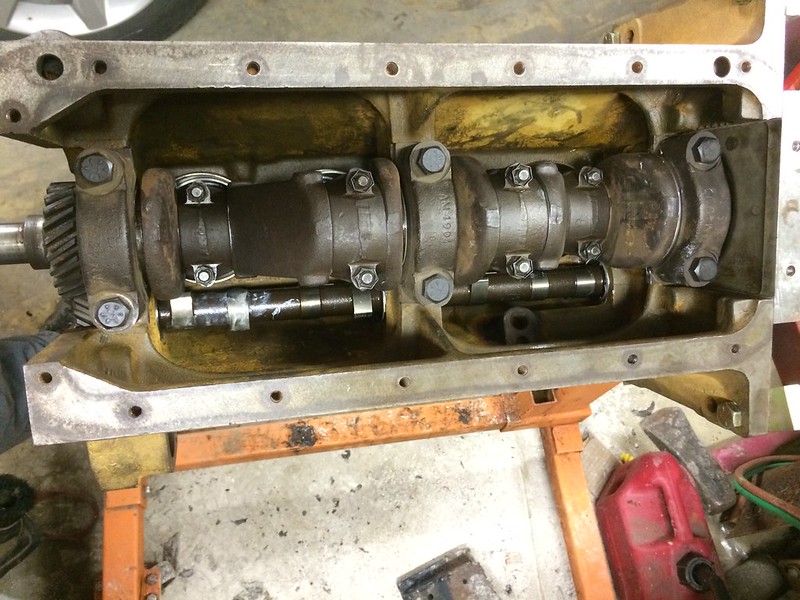
With the cam bearings in I put in the lifters.
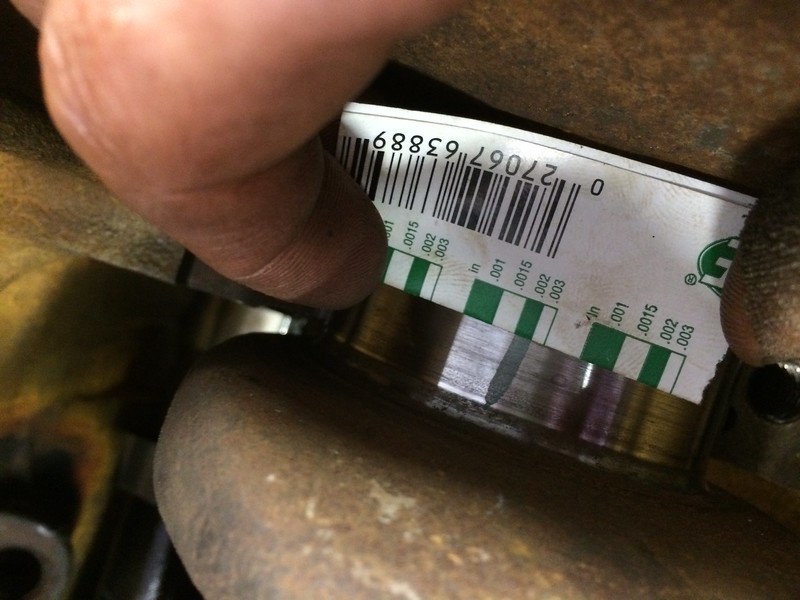
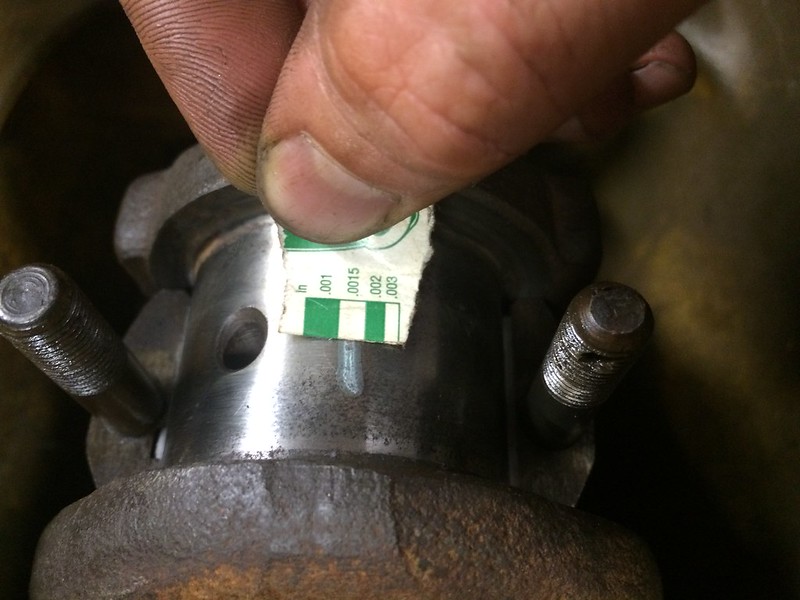
Slid the cam in and then dropped the crankshaft in. I use this plasti gauge to check the clearance. I was getting around 0.002 on each main. I believe the book was calling for 0.002 to 0.004.
Sugarmaker wrote:
Looking good Robert!Its coming together! Amazing the amount of time and dollars that goes into what your doing. Great satisfaction will come when you fire up your Dads tractor again.
Regards,
Chris
|
Thanks Chris.
|
|
|
|
structures
Silver Level
Joined: 28 Feb 2011
Location: Beggs, OK
Points: 331
|
Post Options
Thanks(0)
Quote Reply
Posted: 06 Jul 2015 at 10:45am |
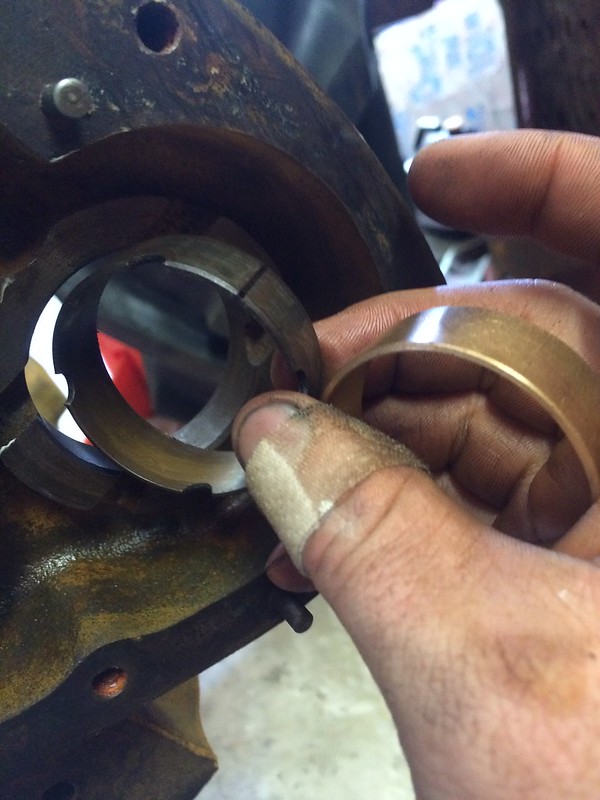
The governor bearing needed some reliefs cut into it. I just used a stone grinder and matched it close as possible.
This is what it ended up looking like.
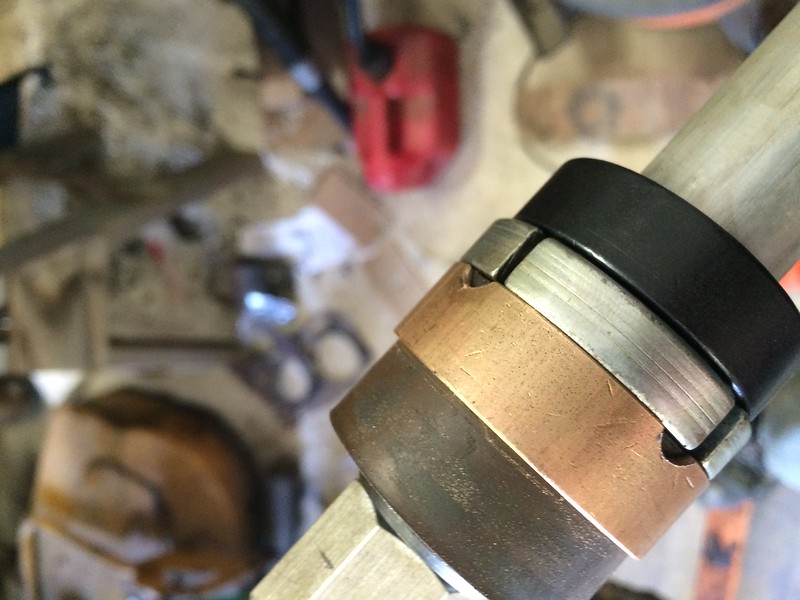
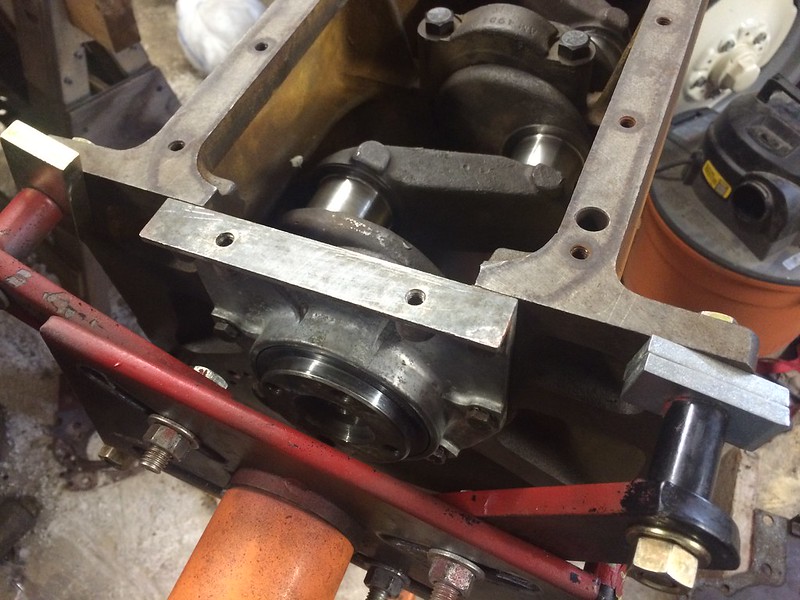
After the crank was bolted down I replaced the rear main oil seal and then slide the rear cover on. I temporarily installed the oil pan to try and get the rear cover as parallel with block as possible, then torqued the cover bolts down.
Actually spent a good portion of time scraping gasket material off cover plates and some that was still on the block. Also this front main seal was a pain. Destroyed it trying to drive it out.
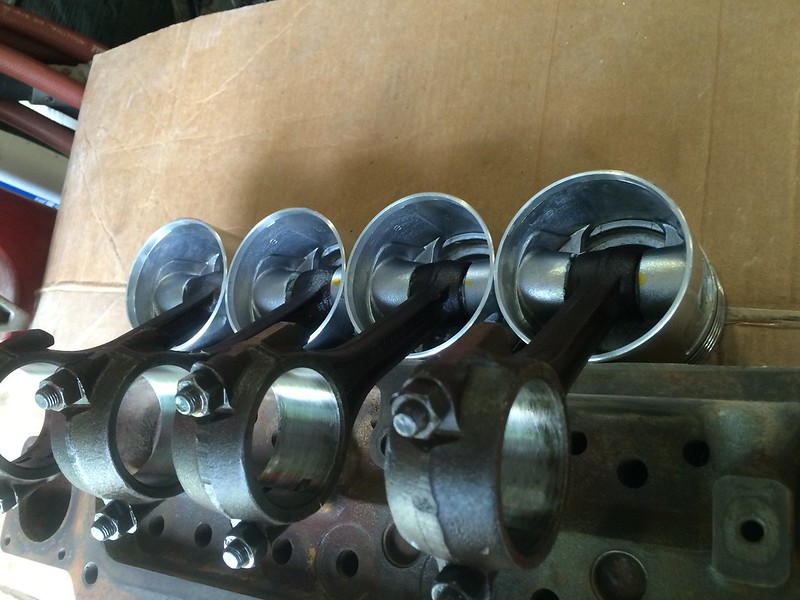
Got the pistons in. There wasn't much in the book for installing the top three rings so I just spaced each 180 degrees apart.
The rods were a little tighter clearance. In between 0.0015" and .002".
Got the pistons in.
|
|
|
|
Sugarmaker
Orange Level
Joined: 12 Jul 2013
Location: Albion PA
Points: 8168
|
Post Options
Thanks(0)
Quote Reply
Posted: 07 Jul 2015 at 2:56pm |
|
Robert,
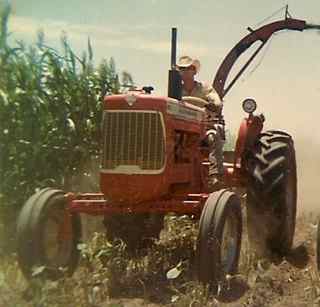
Your making good progress on your tractor engine! I remember that picture of the tractor setting in the field with the front wheel off. You have made a lot of moves since then. Good pictures and details. Surprised that the bearings needed that much work?
Regards,
Chris
|
|
D17 1958 (NFE), WD45 1954 (NFE), WD 1952 (NFE), WD 1950 (WFE), Allis F-40 forklift, Allis CA, Allis D14, Ford Jubilee, Many IH Cub Cadets, 32 Ford Dump, 65 Comet.
|
|
desertjoe
Orange Level Access

Joined: 23 Sep 2013
Location: New mexico
Points: 13360
|
Post Options
Thanks(0)
Quote Reply
Posted: 08 Jul 2015 at 10:15am |
Hey Structures,,,Looks like you got her goin your way,,,  I really like your method of welding that rod AT AN ANGLE to the broken bolt,,!! I had never thought bout doin it that way and I bet the success rate is almost 100%, huh? Great trick,,!! you're getting close to the "hump" where you will be doing all assembly,,,!
|
|
SHAMELESS
Orange Level

Joined: 13 Sep 2009
Location: EAST NE
Points: 29486
|
Post Options
Thanks(0)
Quote Reply
Posted: 08 Jul 2015 at 12:26pm |
|
i'd fergits where everything went together!
|
|
desertjoe
Orange Level Access
Joined: 23 Sep 2013
Location: New mexico
Points: 13360
|
Post Options
Thanks(0)
Quote Reply
Posted: 08 Jul 2015 at 11:16pm |
 and,,,,and,,,you think you the only one got that problem,,,,,??? Sometimes I get so dang frustrated when I can't find something I just laid down minutes before,,,,,
|
|


 Topic Options