| Author |
 Topic Search Topic Search  Topic Options Topic Options
|
1terrygladys 
Silver Level


Joined: 03 Oct 2013
Location: SW Iowa
Points: 261
|
 Post Options Post Options
") Thanks(0) Thanks(0)
 Quote Quote  Reply Reply
 Topic: Snap Coupler Plow Won't Go In the Ground Topic: Snap Coupler Plow Won't Go In the Ground
Posted: 09 Nov 2017 at 12:18pm |
I'm having a frustrating time getting my 3-bottom snap coupler plow to go in the ground. I've moved the crank to adjust front to back all over the place, and that was no help. I'm using the same plow I plowed with last fall with the same WD-45 pulling it. Only difference is that I brought the right wheels in to do a better job on the first bottom. I have also played with the hydraulic pump settings - with screw A moved in and screw B moved out, and vice-versa. No help.
I sharpened the rolling cutters. No help.
The plow is a high suck plow with the bottoms having long noses that turn down slightly.
One time, the plow stayed in the ground and did well for about 8 feet, then it jumped out of the ground, so I'm sure it's an hydraulic issue.
Any help or suggestions or experiences you could share will be greatly appreciated.
Thanks, Terry
|
|
WD-45, WD, Unstyled WC, SC Disk, JD 4430D, JD 4010D, JD B, Iowa pastor & disciple of Jesus Christ
|
 |
|
Sponsored Links
|
|
|
IBWD MIke
Orange Level


Joined: 08 Apr 2012
Location: Newton Ia.
Points: 4285
|
Post Options
Thanks(0)
Quote Reply
Posted: 09 Nov 2017 at 1:17pm |
|
Worn out shares might be the problem.
I could never get my No. 53 3-14 to go in the ground more than 6 inches. Got some new shares on it this spring and now plows 8 inches with adjustment left to go deeper.
|
|
GregLawlerMinn
Orange Level

Joined: 11 Sep 2009
Location: Lawler, Mn
Points: 1226
|
Post Options
Thanks(0)
Quote Reply
Posted: 09 Nov 2017 at 2:09pm |
|
Did you adjust the plow? I place the left rear tire on a 6-8" block and theen level the plow. Then I tilt it down so that the nose of the leading share is about 2-3" lower than the back of the share. Finally, the plow arms that attach to the lift arms should be "upside down" such that the pivot is under the shaft (I forgot this on a plow that worked great earlier and after a lot of messing around, I remembered and readjusted the plow and it worked great). The hyd adjustment is for the traction booster/hold and should be adjuster after you get the plow to work right.
|
|
What this country needs is more unemployed politicians-and lawyers.
Currently have: 1 D14 and a D15S2.
With new owners: 2Bs,9CAs,1WD,2 D12s,5D14s,3D15S2s, 2D17SIVs,D17D,1D19D;1 Unstyled WC
|
|
littlemarv
Orange Level
Joined: 10 Jun 2013
Location: Wisconsin
Points: 1834
|
Post Options
Thanks(0)
Quote Reply
Posted: 09 Nov 2017 at 6:24pm |
I put both front and rear tires up on blocks, you want the tractor to be sitting exactly as it will be in the furrow. Adjust so the plow it level front to back, and adjust so the landside is square to the ground. Took it for a spin, didn't have to make any adjustments, plowed pretty good.
|
|
The mechanic always wins.
B91131, WC23065, WD89101, CA29479, B1, Early B10, HB212, 416H
|
|
TramwayGuy
Orange Level Access
Joined: 19 Jan 2010
Location: Northern NY
Points: 11878
|
Post Options
Thanks(0)
Quote Reply
Posted: 09 Nov 2017 at 7:16pm |
|
Could be a broken Draft spring under the tractor. So the slightest pull causes the Traction booster to raise the plow? Or the adjustment of the linkage that goes to the pump?
|
|
1terrygladys
Silver Level
Joined: 03 Oct 2013
Location: SW Iowa
Points: 261
|
Post Options
Thanks(0)
Quote Reply
Posted: 09 Nov 2017 at 9:55pm |
Thank you all for your help. I'll try all your suggested adjustments/repairs. I just knew the members of this forum would be able to help me out. God bless you!! Terry
|
|
WD-45, WD, Unstyled WC, SC Disk, JD 4430D, JD 4010D, JD B, Iowa pastor & disciple of Jesus Christ
|
|
DiyDave
Orange Level Access

Joined: 11 Sep 2009
Location: Gambrills, MD
Points: 55340
|
Post Options
Thanks(1)
Quote Reply
Posted: 10 Nov 2017 at 4:49am |
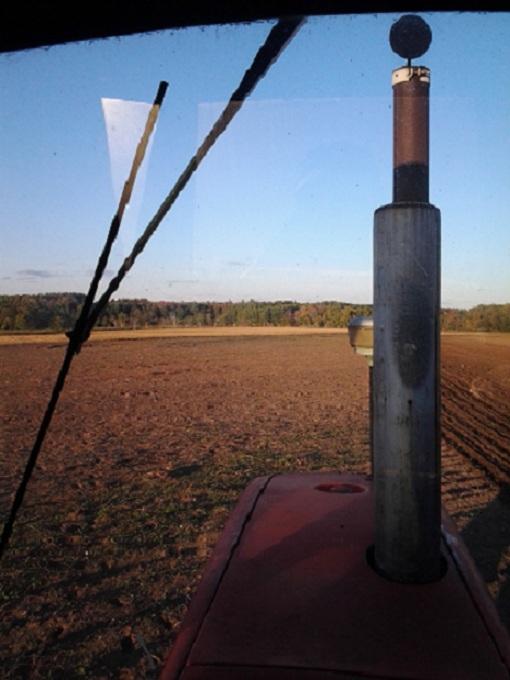
Also, make note of how the lower links look, in the pics. This is correct, but if they are turned around 180º, the plow just flops around... 
|
|
MACK
Orange Level
Joined: 17 Nov 2009
Points: 7664
|
Post Options
Thanks(0)
Quote Reply
Posted: 10 Nov 2017 at 7:31am |
|
On front of big traction booster spring, there are two 1/2 bolts with shim. Take some shim out and retighten bolts. MACK
|
|
Dusty MI
Orange Level

Joined: 13 Sep 2009
Location: Charlotte, Mi
Points: 5061
|
Post Options
Thanks(0)
Quote Reply
Posted: 10 Nov 2017 at 7:49am |
DiyDave
X-2
Dusty
Edited by Dusty MI - 10 Nov 2017 at 7:50am
|
|
917 H, '48 G, '65 D-10 series III "Allis Express"
|
|
HD6GTOM
Orange Level
Joined: 30 Nov 2009
Location: MADISON CO IA
Points: 6627
|
Post Options
Thanks(0)
Quote Reply
Posted: 10 Nov 2017 at 4:09pm |
|
What ever you do, make sure the small c shaped spring inside the snap coupler bell has been replaced in the last few years. I did not know there was 1 in there. Plow came unhooked from the snap coupler. Plow landed on my back over 20 years ago. I still suffer from extreme back pain.
|
|
polarbear
Silver Level
Joined: 05 Jul 2016
Location: addieville il
Points: 331
|
Post Options
Thanks(0)
Quote Reply
Posted: 10 Nov 2017 at 4:49pm |
|
be sure your hydro pump is set to traction booster and as you plow your trac tion booster gauge should be to the right of center and your hydro lever sets that
Edited by polarbear - 10 Nov 2017 at 4:51pm
|
|
TedBuiskerN.IL.
Orange Level

Joined: 11 Sep 2009
Location: Davis, IL.
Points: 1961
|
Post Options
Thanks(0)
Quote Reply
Posted: 13 Nov 2017 at 2:33pm |
|
To use the traction booster setting, you must have the screen door type spring from the hand clutch cover to the lower linkage. This spring keeps the slack out of the linkage. Without the spring the plow will "porpoise"up and down or in and out of the ground.
|
|
Most problems can be solved with the proper application of high explosives.
|
|
SGTJ
Bronze Level


Joined: 15 Apr 2019
Location: La Valle, WI
Points: 106
|
Post Options
Thanks(0)
Quote Reply
Posted: 22 Apr 2019 at 12:48pm |
 littlemarv wrote: littlemarv wrote:
I put both front and rear tires up on blocks, you want the tractor to be sitting exactly as it will be in the furrow. Adjust so the plow it level front to back, and adjust so the landside is square to the ground. Took it for a spin, didn't have to make any adjustments, plowed pretty good. |
I know I'm late to the show here ... but this literary saved me hours of tinkering around with my plow. Just wanted to say thanks !
|
|
WD , CA
|
|
littlemarv
Orange Level
Joined: 10 Jun 2013
Location: Wisconsin
Points: 1834
|
Post Options
Thanks(0)
Quote Reply
Posted: 22 Apr 2019 at 5:07pm |
|
If you REALLY want to get fussy, you can set all four tires up on blocks, and level and square the plow. That would be for the opening pass, when you don't have a furrow. Then, set the one side up and adjust it again for in the furrow. I just set it up for in the furrow, and by the time you get to the third pass, you have a deep furrow and it really starts working good.
You could set it up both ways, and count the cranks between the two, then you would always have both setups.....
I saw how to do this on a garden tractor site. Should work pretty good for any fully mounted plow.
And yes, before I found that method, I was wearing out the adjusting screws and wearing out the curse words.
I got all my shares reworked on all four of my plows. Man what a difference that makes.
|
|
The mechanic always wins.
B91131, WC23065, WD89101, CA29479, B1, Early B10, HB212, 416H
|
|
Allis dave
Orange Level
Joined: 10 May 2012
Location: Northern IN
Points: 3136
|
Post Options
Thanks(0)
Quote Reply
Posted: 23 Apr 2019 at 6:33am |
|
I always liked that first pass to be shallow. It helps keep from ridging so badly.
|
|
SGTJ
Bronze Level
Joined: 15 Apr 2019
Location: La Valle, WI
Points: 106
|
Post Options
Thanks(0)
Quote Reply
Posted: 23 Apr 2019 at 8:07am |
So I made the adjustments shown above, and its still not digging in. It also keeps getting clogged. Should I hand polish the moldboards again? I also heard that I should just run it in an empty field for awhile to let the ground do the polishing.
|
|
WD , CA
|
|
old farmer
Silver Level Access
Joined: 12 Oct 2011
Location: Sturgis, Mich
Points: 341
|
Post Options
Thanks(0)
Quote Reply
Posted: 23 Apr 2019 at 8:12am |
|
Sandy ground will help to scour the entire plow bottom
|
|
Tbone95
Orange Level Access
Joined: 31 Aug 2012
Location: Michigan
Points: 12431
|
Post Options
Thanks(0)
Quote Reply
Posted: 23 Apr 2019 at 8:17am |
SGTJ wrote:
So I made the adjustments shown above, and its still not digging in. It also keeps getting clogged. Should I hand polish the moldboards again? I also heard that I should just run it in an empty field for awhile to let the ground do the polishing. |
How about a nice close up of the plow share? Not sure what you mean "by hand", a 7 inch angle grinder with a flap wheel gives a heck of a start, and plowing some sand will finish it off.
|
|
1terrygladys
Silver Level
Joined: 03 Oct 2013
Location: SW Iowa
Points: 261
|
Post Options
Thanks(0)
Quote Reply
Posted: 23 Apr 2019 at 8:42am |
MACK's suggestion in this thread helped me the most. I took out some of those shims and my plow went in the ground. Be sure to try that one. And of course the soil will polish your bottoms. Terry
|
|
WD-45, WD, Unstyled WC, SC Disk, JD 4430D, JD 4010D, JD B, Iowa pastor & disciple of Jesus Christ
|
|
SGTJ
Bronze Level
Joined: 15 Apr 2019
Location: La Valle, WI
Points: 106
|
Post Options
Thanks(0)
Quote Reply
Posted: 23 Apr 2019 at 9:02am |
|
Please forgive my ignorance, but I have no idea what MACK was talking about.
|
|
WD , CA
|
|
DrAllis
Orange Level Access
Joined: 12 Sep 2009
Points: 22861
|
Post Options
Thanks(1)
Quote Reply
Posted: 23 Apr 2019 at 9:11am |
|
So, in reality, you had a Traction Booster/Hydraulic pump problem not letting the plow go in the ground.....not a plow issue.
|
|
1terrygladys
Silver Level
Joined: 03 Oct 2013
Location: SW Iowa
Points: 261
|
Post Options
Thanks(0)
Quote Reply
Posted: 23 Apr 2019 at 9:28am |
I guess so. All I know is that I took out about half of the shims next to the big spring under the tractor, and the plow went in the ground. 
|
|
WD-45, WD, Unstyled WC, SC Disk, JD 4430D, JD 4010D, JD B, Iowa pastor & disciple of Jesus Christ
|
|
TomYaz
Orange Level

Joined: 14 Sep 2009
Location: PA
Points: 10342
|
Post Options
Thanks(0)
Quote Reply
Posted: 24 Apr 2019 at 5:39am |
GregLawlerMinn wrote:
Did you adjust the plow? I place the left rear tire on a 6-8" block and theen level the plow. Then I tilt it down so that the nose of the leading share is about 2-3" lower than the back of the share. Finally, the plow arms that attach to the lift arms should be "upside down" such that the pivot is under the shaft (I forgot this on a plow that worked great earlier and after a lot of messing around, I remembered and readjusted the plow and it worked great). The hyd adjustment is for the traction booster/hold and should be adjuster after you get the plow to work right. |
Anal that I am, confused is the result..."could you elaborate on what you mean the lift arms should be upside down such that the pivot is under the shaft"?? And perhaps this question of mind is related, but when you lower the plow when on blocks as pictured, should not the tractor hydraulics lift/lower be at the end of their drop? In other words, if the plow was over a big hole instead of the concrete pad, would the plow be go lower if the hydraulic was all the way down? If so, is that relevant?
|
|
If its not an All-Crop, it all crap!
|
|
SGTJ
Bronze Level
Joined: 15 Apr 2019
Location: La Valle, WI
Points: 106
|
Post Options
Thanks(0)
Quote Reply
Posted: 24 Apr 2019 at 8:52am |
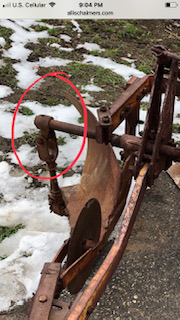  I believe this is what they're talking about when they say "lift Arms". Not the hydro arms on the tractor, but these extensions with the "U" shape pivots / couplers.
|
|
WD , CA
|
|
DrAllis
Orange Level Access
Joined: 12 Sep 2009
Points: 22861
|
Post Options
Thanks(0)
Quote Reply
Posted: 24 Apr 2019 at 9:06am |
|
Better described as "lifting links". The lift arms on the tractor cannot be lowered to the bottom for normal plowing depth because the ground rolls up and down. There would be times the plow wouldn't be in the ground if the front tires of the tractor went over a small hill.
Edited by DrAllis - 24 Apr 2019 at 9:07am
|
|
Tbone95
Orange Level Access
Joined: 31 Aug 2012
Location: Michigan
Points: 12431
|
Post Options
Thanks(0)
Quote Reply
Posted: 24 Apr 2019 at 10:15am |
OK, so I have a reeeeaaaallllly dumb question..... Never used a snap coupler, never plowed with any D- tractors or WD or anything..... Comment was made I think on the "tiller" thread, something about "hooking the lift arms to the draw bar for the traction booster to work". OK, that would not be the case at all for a 7000 series tractor, right?
|
|
DrAllis
Orange Level Access
Joined: 12 Sep 2009
Points: 22861
|
Post Options
Thanks(0)
Quote Reply
Posted: 24 Apr 2019 at 10:45am |
|
The beginning of Traction Booster with pull-type implements was the twisted chain and pulley on the tongue of early model 12 ft 200 series discs on a WD45. It worked, but you had to have the rear wheels set clear wide and they didn't turn very short as the disc was very close to the tractor. Then, they went with the Traction Booster "drawbar", which left the disc at a normal distance behind the tractor and allowed short turning. When 3-point hitches came out on the D19's I don't think they had created a Traction Booster drawbar yet, but by the 190XT's they definitely had a Traction Booster drawbar for a 3-point hitch. By the time the 7030-7050 came out the Traction Booster drawbar was discontinued to my knowledge.
|
|
Tbone95
Orange Level Access
Joined: 31 Aug 2012
Location: Michigan
Points: 12431
|
Post Options
Thanks(0)
Quote Reply
Posted: 24 Apr 2019 at 10:54am |
|
Thanks Doc, that was essentially my understanding, though I had no details such as you provided. Was thinking it all worked through the 3 point "now", but wanted to be sure I wasn't missing something really dumb.. . .
|
|


