| Author |
 Topic Search Topic Search  Topic Options Topic Options
|
littlemarv 
Orange Level

Joined: 10 Jun 2013
Location: Wisconsin
Points: 1826
|
 Post Options Post Options
") Thanks(0) Thanks(0)
 Quote Quote  Reply Reply
 Posted: 06 Aug 2017 at 9:43am Posted: 06 Aug 2017 at 9:43am |
|
My first thought was to bolt a new sheet onto the underside, or outside of the concave?
|
|
The mechanic always wins.
B91131, WC23065, WD89101, CA29479, B1, Early B10, HB212, 416H
|
 |
|
Sponsored Links
|
|
|
littlemarv
Orange Level
Joined: 10 Jun 2013
Location: Wisconsin
Points: 1826
|
Post Options
Thanks(0)
Quote Reply
Posted: 06 Aug 2017 at 9:12am |
|
So tell me more about an overlay. Is it just a sheet cut to size and rolled to correct shape? Do you put any extra bolts in, or just use the cylinder bar bolts? My initial thought is to have one made and powder coat it? How do you use the cylinder to hold it down? Once you remove the cylinder bars, isn't there like an inch or so of clearance?
|
|
The mechanic always wins.
B91131, WC23065, WD89101, CA29479, B1, Early B10, HB212, 416H
|
|
allischalmerguy
Orange Level

Joined: 11 Sep 2009
Location: Deep River, IA
Points: 2864
|
Post Options
Thanks(0)
Quote Reply
Posted: 04 Aug 2017 at 7:03pm |
|
Thanks for posting all of this Marv and guys. Very interesting...and what you guys can do is amazing.
|
|
It is great being a disciple of Jesus! 1950 WD, 1957 D17...retired in Iowa,
|
|
JoeO(CMO)
Orange Level

Joined: 11 Sep 2009
Location: Cent Missouri
Points: 2694
|
Post Options
Thanks(0)
Quote Reply
Posted: 03 Aug 2017 at 9:25pm |
 littlemarv wrote: littlemarv wrote:
Now that my story is trashed, thanks Photobucket, the only picture you can see is Crestons. What does F.O.B. mean? |
FOB -Freight on Board A very nice find!!! I would've gone for it too, and I have no need for one.
Edited by JoeO(CMO) - 03 Aug 2017 at 9:28pm
|
|
|
|
DennisA (IL)
Orange Level
Joined: 11 Sep 2009
Location: Ridott IL.
Points: 2064
|
Post Options
Thanks(0)
Quote Reply
Posted: 03 Aug 2017 at 5:00pm |
|
I've had to rebuild 4-5 of these. It's not hard just time consuming.
1) Remove the whole cylinder.
2) Unbolt the concave bars and ledger plate.
3) Measure the concave to make a new one. I know some of you will laugh, but I use a string and marker. Put the end of the string on the front edge of the old concave where the ledger bolts on. Now just let the string lay on the concave so it's running straight from front to back. Use the marker to mark where the bolt holes and each bend is as well as where the back of the concave ends. Now you have the layout for the replacement concave. Use a tape measure for the width of the concave and make sure to leave some wiggle room to aid in assy.
4) Find a sheet metal shop (not a fab shop) to do the bending. The time I had one bent last year for my 60 with the two row corn head. It cost me $20.00, very inexpensive.
5) Use the string to lay over the new concave and mark each line of bolt holes ( should only be three) on both ends.
6) Sit the concave bar on the new concave and line up the bolt hole center with the makers on the concave. Now go and mark all the bolt holes on the concave from the concave bars. You will have two rows of marks for the bars. Do the same for the ledger plate holes.
7) Drill all the holes where marked.
8) Slide the new concave in from the back and start bolting the concave bars in place.
9) Replace cylinder.
To replace the lagging on the ledger plate I use the belting for round balers.
I replace the rubber concaves with OEM parts from AGCO.
|
|
Thanks & God Bless
Dennis
|
|
CrestonM
Orange Level
Joined: 08 Sep 2014
Location: Oklahoma
Points: 8357
|
Post Options
Thanks(0)
Quote Reply
Posted: 03 Aug 2017 at 12:56pm |
Yep, you can get a tarp, just be sure it is waterproofed. You will most likely have to pull the concave bars to install an overlay. (They have carriage bolts as well) To tell if you could use an overlay, just knock on the bottom side of the concave. If it sounds pretty thin, it probably needs one. Also, installing an overlay isn't too terrible. Most people say to remove the cylinder, but I didn't. I just raised the cylinder a bit, then took my overlay and fed it in from the back while rotating the cylinder, thus using the cylinder to do the work of pulling it down and holding it in shape while I put the bolts through and tightened them up. Yes, the rubber on the shelling plate is easily replaceable, just don't lose the washers that hold it down. They are special washers, and while you can find them in certain places, it's easier to just keep track of yours. Chris will chime in and tell you what kind of rubber to use for that. That said, the rubber is gone on one of my combine's shelling plate and the rubber on all my combines' cylinder bars is shot. If you are doing a hard threshing crop like wheat or milo, you don't need good rubber, but if you do delicate crops you will need to get that replaced.
Also...as far as draining water from the concave...I park my combine with the right wheel about 4" higher than the left side, thus helping the water run out so it isn't left standing inside.
Edited by CrestonM - 03 Aug 2017 at 12:59pm
|
|
littlemarv
Orange Level
Joined: 10 Jun 2013
Location: Wisconsin
Points: 1826
|
Post Options
Thanks(0)
Quote Reply
Posted: 03 Aug 2017 at 12:08pm |
Opened the inspection port. I think I am going to remove both cylinder bars, for a couple reasons. To make it easier to clean out, and by removing the bottom one, there will be drain holes in the concave. I gotta get all that junk out of there, I suspect the concave is pretty thin in some places. My plan is to buy a large canvas tarp that covers the clean grain tank, the scour kleen, and the cylinder. Need to keep the water out of there.... I see this is called a "shelling plate" or "ledger plate". Looks like a strip of rubber that could be easily reproduced? There is a panel that can be removed behind the sickle. But, as usual, ONE carriage bolt spun. I will have to run an extension cord out there and grind the head off, but right now, we are halfway through the 1 1/2" of rain we are supposed to get today.
|
|
The mechanic always wins.
B91131, WC23065, WD89101, CA29479, B1, Early B10, HB212, 416H
|
|
Ted J
Orange Level

Joined: 05 Jul 2010
Location: La Crosse, WI
Points: 18727
|
Post Options
Thanks(0)
Quote Reply
Posted: 31 Jul 2017 at 5:33pm |
|
|
|
"Allis-Express"
19?? WC / 1941 C / 1952 CA / 1956 WD45 / 1957 WD45 / 1958 D-17
|
|
combinechris
Silver Level

Joined: 20 Jul 2015
Location: wittenberg,Wi.
Points: 422
|
Post Options
Thanks(0)
Quote Reply
Posted: 31 Jul 2017 at 3:09pm |
|
Yes Creston the headers are interchangeable. But on the 66 header there's a clean out door under the roller behind the sickle.
|
|
35 combines and 15 forage harvesters. mostly allis combines and equipment.WTB 2 row cornhead for a 90
|
|
combinechris
Silver Level
Joined: 20 Jul 2015
Location: wittenberg,Wi.
Points: 422
|
Post Options
Thanks(0)
Quote Reply
Posted: 31 Jul 2017 at 3:07pm |
CrestonM wrote:
combinechris wrote:
If your combine is going to sit outside. Open all the doors so water can get out , also open the clean out door along the bottom of the header so water doesn't sit in the header.
The header on a 60 or 66 will interchange . On the 66 header there is a door you can take off underneath the roller to clean out.
Hey Creston, he has a 66 not a 60. The header on a 66 has a door at the bottom you can take it off. |
Oh really? One of my 60A's has a 66 header on it (Yes, it's got the flares) and underneath it looks just like my other 60A with a 60A header. |
|
|
35 combines and 15 forage harvesters. mostly allis combines and equipment.WTB 2 row cornhead for a 90
|
|
CrestonM
Orange Level
Joined: 08 Sep 2014
Location: Oklahoma
Points: 8357
|
Post Options
Thanks(0)
Quote Reply
Posted: 31 Jul 2017 at 2:27pm |
combinechris wrote:
If your combine is going to sit outside. Open all the doors so water can get out , also open the clean out door along the bottom of the header so water doesn't sit in the header.
Hey Creston, he has a 66 not a 60. The header on a 66 has a door at the bottom you can take it off. |
Oh really? One of my 60A's has a 66 header on it (Yes, it's got the flares) and underneath it looks just like my other 60A with a 60A header.
|
|
combinechris
Silver Level
Joined: 20 Jul 2015
Location: wittenberg,Wi.
Points: 422
|
Post Options
Thanks(0)
Quote Reply
Posted: 31 Jul 2017 at 2:09pm |
|
If your combine is going to sit outside. Open all the doors so water can get out , also open the clean out door along the bottom of the header so water doesn't sit in the header.
Hey Creston, he has a 66 not a 60. The header on a 66 has a door at the bottom you can take it off.
|
|
35 combines and 15 forage harvesters. mostly allis combines and equipment.WTB 2 row cornhead for a 90
|
|
littlemarv
Orange Level
Joined: 10 Jun 2013
Location: Wisconsin
Points: 1826
|
Post Options
Thanks(0)
Quote Reply
Posted: 30 Jul 2017 at 9:36pm |
Well, got a few minutes to work on it again tonight.... Put the chain on the reel drive, got the belt on the reel drive as well. Got the belt on the back properly, I think. Heres the funny part. The belt was on the combine when I got it, but not on the pulleys. There are two slots for the tensioner pulley and the pulley was up toward the top of the upper slot. In order to get the belt on I had to move the pulley to the lower slot. Anything weird there I should know about, or is it just to allow for and inch or two either way in belt length? Anyways, I dumped a little waste oil on the sickle and used a long bar to turn the pto shaft several revolutions. Lots of squeaks and groans, but it went around a few times. Well, can I really be at the point already where I grease it up and hook it to a tractor? Granted, I haven't got the canvas situation figured out, but I can at least see if everything else works....
|
|
The mechanic always wins.
B91131, WC23065, WD89101, CA29479, B1, Early B10, HB212, 416H
|
|
Kyle(MN)
Silver Level
Joined: 03 Oct 2010
Location: Minnesota
Points: 60
|
Post Options
Thanks(0)
Quote Reply
Posted: 27 Jul 2017 at 12:16pm |
|
Very interesting- Thanks for posting!!!
|
|
CrestonM
Orange Level
Joined: 08 Sep 2014
Location: Oklahoma
Points: 8357
|
Post Options
Thanks(0)
Quote Reply
Posted: 26 Jul 2017 at 10:24pm |
You're right...it is kinda hard to clean out. I tried flushing mine out with a hose and the inspection port open, but that didn't work well. What DID work was using the combine! Running the straw through there cleaned it up nicely and got all the mud and junk out.
I think it could be removed...just have to take your time. Might make it easier to pull the cylinder out first.
|
|
DennisA (IL)
Orange Level
Joined: 11 Sep 2009
Location: Ridott IL.
Points: 2064
|
Post Options
Thanks(0)
Quote Reply
Posted: 26 Jul 2017 at 2:11pm |
|
The concave is not meant to be removed. It's riveted in place.
|
|
Thanks & God Bless
Dennis
|
|
littlemarv
Orange Level
Joined: 10 Jun 2013
Location: Wisconsin
Points: 1826
|
Post Options
Thanks(0)
Quote Reply
Posted: 26 Jul 2017 at 1:48pm |
Ripped the upper canvas out. Got my first look at the inside of the concave. Doesn't look very easy to clean out in there. How big of a job is it to just remove the concave? I might just do that, sandblast and paint it right away.
|
|
The mechanic always wins.
B91131, WC23065, WD89101, CA29479, B1, Early B10, HB212, 416H
|
|
littlemarv
Orange Level
Joined: 10 Jun 2013
Location: Wisconsin
Points: 1826
|
Post Options
Thanks(0)
Quote Reply
Posted: 26 Jul 2017 at 1:20pm |
To straighten out the pictures, I went to edit post. Right click on where the picture used to be, select "cut". That makes the old picture go away. So now I get my photos from my phone onto my computer, use "paint" to resize, upload to www.vgy.me, and then I can post them here. There has got to be an easier way, but this will work for now.
|
|
The mechanic always wins.
B91131, WC23065, WD89101, CA29479, B1, Early B10, HB212, 416H
|
|
littlemarv
Orange Level
Joined: 10 Jun 2013
Location: Wisconsin
Points: 1826
|
Post Options
Thanks(0)
Quote Reply
Posted: 26 Jul 2017 at 1:15pm |
Cut the damaged pipe and removed it from the shaft. Straightened them both out, cut about 1" off of the pipe and welded it back together. Heated the engagement rod and straightened that back out. Stopped over to combine chris's house one day en route to a soccer game, picked up an engagement lever and a reel chain drive sprocket. So, now the gearbox and unloading levers work. The lower section of the unloading auger was almost stuck. Greased all the zerks and wiggled it back and forth. Didn't take to long and it freed up. Greased the upper section, now you can spin the pulley for the unloading auger by hand. Put a rain cap on the auger. Cracked open the tailings elevator, not much gunk in there. Checked the clean grain elevator, as soon as I touched the bolt to undo the cover, water started dripping out. And it hasn't rained in a few days. Extra nasty. Here is why the doors rot out. Thanks for looking!
|
|
The mechanic always wins.
B91131, WC23065, WD89101, CA29479, B1, Early B10, HB212, 416H
|
|
Dakota Dave
Orange Level

Joined: 12 Sep 2009
Location: ND
Points: 3895
|
Post Options
Thanks(0)
Quote Reply
Posted: 26 Jul 2017 at 7:38am |
|
F.O.B. Free on board. It's the point that the shipping and liability belong to the buyer. F.O.B. Factory means that the buyer is responsible for all costs as soon as it rolls out the factory door.
|
|
CrestonM
Orange Level
Joined: 08 Sep 2014
Location: Oklahoma
Points: 8357
|
Post Options
Thanks(0)
Quote Reply
Posted: 25 Jul 2017 at 11:30pm |
|
Awesome! Care to say how you did it?
|
|
littlemarv
Orange Level
Joined: 10 Jun 2013
Location: Wisconsin
Points: 1826
|
Post Options
Thanks(0)
Quote Reply
Posted: 25 Jul 2017 at 10:08pm |
There, fixed the pictures in this post. More to come....
|
|
The mechanic always wins.
B91131, WC23065, WD89101, CA29479, B1, Early B10, HB212, 416H
|
|
CrestonM
Orange Level
Joined: 08 Sep 2014
Location: Oklahoma
Points: 8357
|
Post Options
Thanks(0)
Quote Reply
Posted: 06 Jul 2017 at 9:49pm |
|
No idea. I don't use photo bucket. I upload photos to the forum, so they will always show up until I use up all my room and have to delete them off my file manager. Then mine won't show up either. Maybe there's no "win" solution?
|
|
littlemarv
Orange Level
Joined: 10 Jun 2013
Location: Wisconsin
Points: 1826
|
Post Options
Thanks(0)
Quote Reply
Posted: 06 Jul 2017 at 9:35pm |
|
Now that my story is trashed, thanks Photobucket, the only picture you can see is Crestons. What does F.O.B. mean?
|
|
The mechanic always wins.
B91131, WC23065, WD89101, CA29479, B1, Early B10, HB212, 416H
|
|
FREEDGUY
Orange Level Access

Joined: 15 Apr 2017
Location: South West Mich
Points: 5391
|
Post Options
Thanks(0)
Quote Reply
Posted: 17 Jun 2017 at 8:44pm |
|
There were no WC's in our area. Were they similar in hp to a WD ?
|
|
CrestonM
Orange Level
Joined: 08 Sep 2014
Location: Oklahoma
Points: 8357
|
Post Options
Thanks(0)
Quote Reply
Posted: 17 Jun 2017 at 8:37pm |
FREEDGUY wrote:
Thanks for the info. I thought maybe it would take a WD at a minimum |
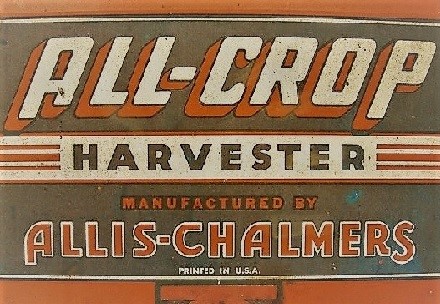
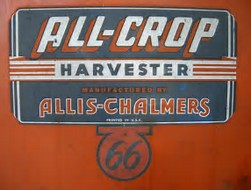
Remember when the first Allis combines (Then called "High Speed" combines instead of "All-Crop" combines) came out in 1935, the tractor of choice would have been a WC. The WC was dubbed a perfect match for the new 5' combines. Here's an old 1937 advertisement showcasing the pair.
|
|
FREEDGUY
Orange Level Access
Joined: 15 Apr 2017
Location: South West Mich
Points: 5391
|
Post Options
Thanks(0)
Quote Reply
Posted: 17 Jun 2017 at 8:31pm |
|
Thanks for the info. I thought maybe it would take a WD at a minimum
|
|
CrestonM
Orange Level
Joined: 08 Sep 2014
Location: Oklahoma
Points: 8357
|
Post Options
Thanks(0)
Quote Reply
Posted: 17 Jun 2017 at 8:19pm |
FREEDGUY wrote:
What size tractor is required to properly run that machine? I have never been around a pull-type but other than some dust while operating, it looks like it would be enjoyable. Please keep up the pics and mechanical progress  |
They really are fun to operate! Any full 2 plow tractor will handle them. The Ford N series do good, the Allis W series, as well as the CA work great, and a Deere A will walk with it like there's nothing back there. I have a Allis B that my friends and I dub the "Super B". It has a D14 carb, CA governor spring, and taller CA pistons. It puts out a lot more power than it did to start with, and it handles my 60A's well in good yielding milo. Only problem is when the 18 bushel bin on my machines get full, the tractor begins to lose traction on slopes. It really needs more weight in the rear, but it has the power to run it. I especially like the side discharge of the machine because if you have straw coming out, your tailings and clean grain elevators are working (most likely), as well as the grain drag. The side discharge provides an easy check, as it's more difficult to see with a straight through machine. The only bad thing is they are so wide, making hauling and backing more difficult, but neither are just terrible. I've never had any problem with dust until this year. It's never bothered me before, (Not even with the 100), and I've been in some pretty heavy dust without so much as a sneeze or two. This year something must have been different, because by the end of the day I was so eat up by allergies that I could barely breath or see. I got off the combine for a bit and took a few clean breaths, and waited a while for everything to calm down. For the rest of the day I only cut into the wind. 
Another thing I like about the pull types....since the header is as wide as the cylinder, the crop mat is thin and even, and therefore doesn't bottleneck or bunch in the cylinder. This allows you to generally travel faster (5 mph usually), and you don't have to worry about slugging the machine near as much as with a larger machine like a 100.
Oh....also, Marv....if you will keep the combine inside, you might disregard this, but if it will stay outside, my advice is to torch some bigger holes in the header bottom. The factory drain holes are small and plug super easy. I'm honestly surprised mine wasn't rusted out as many years as it sat out. (Never been under cover in its life). I was always dealing with water standing in the header, so I torched 4 holes about 1 1/2" wide and 3" long in the header bottom. Now nothing clogs it, and it is very easy to wash out. Best of all....no standing water or grain left in the bottom!
Edited by CrestonM - 17 Jun 2017 at 8:33pm
|
|
FREEDGUY
Orange Level Access
Joined: 15 Apr 2017
Location: South West Mich
Points: 5391
|
Post Options
Thanks(0)
Quote Reply
Posted: 17 Jun 2017 at 8:09pm |
What size tractor is required to properly run that machine? I have never been around a pull-type but other than some dust while operating, it looks like it would be enjoyable. Please keep up the pics and mechanical progress
|
|
allischalmerguy
Orange Level
Joined: 11 Sep 2009
Location: Deep River, IA
Points: 2864
|
Post Options
Thanks(0)
Quote Reply
Posted: 17 Jun 2017 at 7:39pm |
|
Marv,
It is always great to read your photo journal of a project!
You are talented in so many ways! I want to get a good AC pull
type combine someday, if the preacher wife will allow it..
;)
I am looking forward to following this project. Thanks for sharing!
Mike In Iowa
|
|
It is great being a disciple of Jesus! 1950 WD, 1957 D17...retired in Iowa,
|
|


