| Author |
 Topic Search Topic Search  Topic Options Topic Options
|
Redwood 
Orange Level

Joined: 16 Jan 2012
Location: Ontario
Points: 631
|
 Post Options Post Options
") Thanks(0) Thanks(0)
 Quote Quote  Reply Reply
 Topic: welding cast iron Topic: welding cast iron
Posted: 12 May 2012 at 9:03pm |
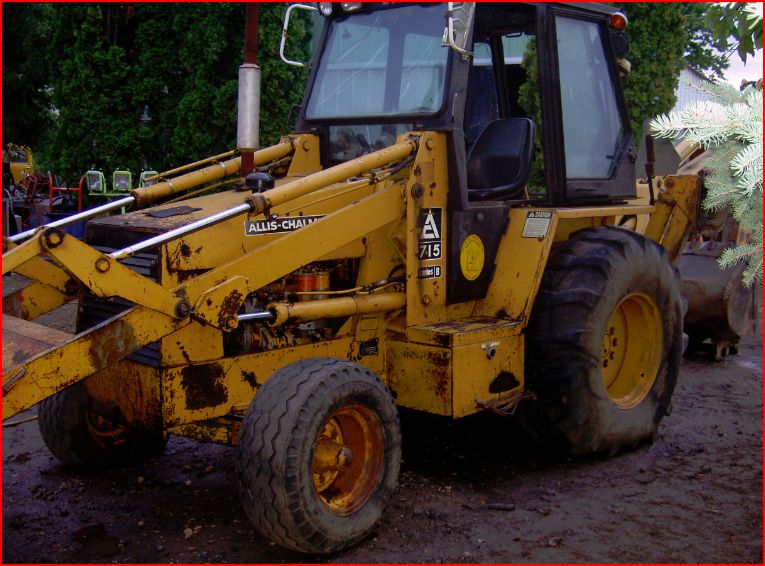
Does any one have experiance welding cast iron. I've come across the first damage piece on the WC. The cast housing on the PTO is cracked around the lever for engaging it. I understand the difficulties in welding cast but seeing the piece is trash and won't even hold oil at this point. I'm not out anything to try and fix it. Where it is located it should never see much stress. And would be easy enough to replace anytime if I'm wrong. we have a stick welded. any advice on proper rod and settings?
|
 |
|
Sponsored Links
|
|
|
wfmurray
Orange Level
Joined: 13 Sep 2009
Location: Bostic NC
Points: 1225
|
Post Options
Thanks(0)
Quote Reply
Posted: 12 May 2012 at 9:12pm |
|
Vee out and use nickel rod (ni rod). Make short welds and ping to stress relief .take it slow . Can be pre heated and brased or weld with bare cast rod using a torch.
|
|
Redwood
Orange Level
Joined: 16 Jan 2012
Location: Ontario
Points: 631
|
Post Options
Thanks(0)
Quote Reply
Posted: 12 May 2012 at 9:21pm |
Thanks I'll give the nickel rod at try. I haven't done brazing since high school and wasn't too good at it then. I'd be worried about over heating.
|
|
dscott
Silver Level

Joined: 05 May 2012
Points: 81
|
Post Options
Thanks(0)
Quote Reply
Posted: 12 May 2012 at 9:35pm |
|
Allow to cool very slowly. Also protect from cool blasts of air say from a door opening or what have you, sudden tempurture drop may cause your repair to crack.
|
|
ncrc5315
Silver Level
Joined: 10 Sep 2010
Location: Nebraska
Points: 68
|
Post Options
Thanks(0)
Quote Reply
Posted: 12 May 2012 at 11:32pm |
|
What I have done to weld cast, is to use a rosebud torch head, to heat the back side of the piece of cast I want to weld, till the front side glows cherry red. Weld a few inches with nickel rod, then reheat from back side, then weld a few inches. This has worked for me.
|
|
Tracy Martin TN
Orange Level Access

Joined: 11 Sep 2009
Location: Gallatin,TN
Points: 10771
|
Post Options
Thanks(0)
Quote Reply
Posted: 12 May 2012 at 11:51pm |
|
When you have it welded. Cover it with warm dry sand or lime. Slows cooling to prevent cracking. HTH Tracy Martin
|
|
No greater gift than healthy grandkids!
|
|
Redwood
Orange Level
Joined: 16 Jan 2012
Location: Ontario
Points: 631
|
Post Options
Thanks(0)
Quote Reply
Posted: 13 May 2012 at 5:55am |
Sounds like some experiance has been learned both good and bad. It all sounds like good advice. I will back heat it and cook some sand to cover it it when I'm done to leave it in. I figure its a good piece to learn on as if I can save it great if not. I'll track down a used housing. Thanks
|
|
B26240
Orange Level
Joined: 21 Nov 2009
Location: mn
Points: 3866
|
Post Options
Thanks(0)
Quote Reply
Posted: 13 May 2012 at 7:09am |
|
I like the old fashioned way -- brazing -- that said if you have a good welding supply shop in your area they can set you up with the right rod and temp stick to make shur you are pre- heating to the right temp. Also Tracy M has great advice on slow cooling As a young guy I once helped weld sprocket rims for a D-8 cat and my job was to pre heat and then cover the weld with floor dry so it would cool slowly.
|
|
dscott
Silver Level
Joined: 05 May 2012
Points: 81
|
Post Options
Thanks(0)
Quote Reply
Posted: 13 May 2012 at 9:24am |
Do you have an old exhuast manifold around? If you do, practice on that. An old ford manifold is what I tought myself on. A few tips, if your peices fit together nicely tack them good on the edges before you vee it out, and when strike your arc in the center of the vee'd area then quickly move to the desired starting point(this helps keep from making porous and unsightly starts and restarts). Welder setting vari by machine but a good place to start is 1 amp per thousanth of rod diameter.....IE... 1/8 inch is .125 so start at 125 amp reverse polarity, this formula works for most the electrodes I've used, 7018, Nirod, 680 Eutectic are just a few.
|
|
JW in MO
Orange Level

Joined: 16 Feb 2010
Location: South KC Area
Points: 2666
|
Post Options
Thanks(0)
Quote Reply
Posted: 13 May 2012 at 9:41am |
 dscott wrote: dscott wrote:
A few tips, if your peices fit together nicely tack them good on the edges before you vee it out, and when strike your arc in the center of the vee'd area then quickly move to the desired starting point(this helps keep from making porous and unsightly starts and restarts). Welder setting vari by machine but a good place to start is 1 amp per thousanth of rod diameter.....IE... 1/8 inch is .125 so start at 125 amp reverse polarity, this formula works for most the electrodes I've used, 7018, Nirod, 680 Eutectic are just a few. |
By reverse polarity do are you refering to a DC welder?
|
|
Maximum use of available resources!
|
|
dscott
Silver Level
Joined: 05 May 2012
Points: 81
|
Post Options
Thanks(0)
Quote Reply
Posted: 13 May 2012 at 10:01am |
|
Yes, positive to the ground clamp. If you read the package the electrodes come in most reccommend the polarity sum rod welds better @ staright polarity.
|
|
DrAllis
Orange Level Access
Joined: 12 Sep 2009
Points: 21885
|
Post Options
Thanks(0)
Quote Reply
Posted: 13 May 2012 at 10:07am |
|
Just find another PTO box.
|
|
dscott
Silver Level
Joined: 05 May 2012
Points: 81
|
Post Options
Thanks(0)
Quote Reply
Posted: 13 May 2012 at 10:08am |
|
Ac machines are not subject to reversing polarity as the ac(alternating current) alternates between positive and negitive as a matter of design.
|
|
Coke-in-MN
Orange Level Access
Joined: 12 Sep 2009
Location: Afton MN
Points: 41980
|
Post Options
Thanks(0)
Quote Reply
Posted: 13 May 2012 at 10:10am |
If it is a area that has a bore or seal then rather than welding i would look at brazing and flowing brass into crack. On other areas the welding with a SS rod or a selected cast iron rod would be the choice. I use Allstate #8 for most cast. Watch so you do not overheat rod with to high amp flow also. V out base material to allow good penetration , if welding from only one side it's real important the root pass is to almost out the non ground side , just short of melting through . You can use old fiberglass or rock wool insulation it protect from cooling to fast also . less cleanup than sand .
|
|
Life lesson: If you’re being chased by a lion, you’re on a horse, to the left of you is a giraffe and on the right is a unicorn, what do you do? You stop drinking and get off the carousel.
|
|
Alberta Phil
Orange Level

Joined: 13 Sep 2009
Location: Alberta, Canada
Points: 3919
|
Post Options
Thanks(0)
Quote Reply
Posted: 13 May 2012 at 11:03am |
|
When I weld cast iron I usually pre heat the casting to about 400 deg. in the oven (kitchen stove). After welding it goes back into the preheated oven and then let it cool in there. Slow cool and no drafts. (I can get away with this as I have no wife around to give me grief about it!!!LOL
|
|
Dick L
Orange Level
Joined: 12 Sep 2009
Location: Edon Ohio
Points: 5087
|
Post Options
Thanks(0)
Quote Reply
Posted: 13 May 2012 at 11:26am |
|
You can torch weld it using braising flux with old cast iron piston rings. You then end up with cast iron on cast iron.
Edited by Dick L - 13 May 2012 at 11:27am
|
|
Rawleigh
Orange Level

Joined: 14 Sep 2009
Location: White Stone, VA
Points: 421
|
Post Options
Thanks(0)
Quote Reply
Posted: 14 May 2012 at 11:41am |
|
A gas grill is also a preheat/postheat option.
|
|
Butch(OH)
Orange Level
Joined: 11 Sep 2009
Location: Lucerne Ohio
Points: 3842
|
Post Options
Thanks(0)
Quote Reply
Posted: 14 May 2012 at 11:54am |
|
Something I had read about for years and just recently tried is a MIG welder with ordinary mild steel wire. Worked better than any process I have ever tried in the past. Heated things up first and welded the part back together with short beads and no special cool down methods. In fairness to other methods I had tried an old timer recently told me to NEVER bevel or clean the broken parts with a grinding wheel, always use a carbide burr. Something to do with smearing something or other on the surface of the iron?
|
|
ironac
Silver Level
Joined: 06 Jan 2011
Location: Plainfield IA
Points: 283
|
Post Options
Thanks(0)
Quote Reply
Posted: 15 May 2012 at 3:49am |
|
I agree with Dr. Allis.
|
|
David Maddux
Orange Level
Joined: 13 Sep 2009
Points: 2535
|
Post Options
Thanks(0)
Quote Reply
Posted: 15 May 2012 at 5:45am |
|
I know this is not what you want to hear, but I had one like that. It is a freeze crack fro water setting. There is no structural strength needed in that spot if it was like mine. I just cleaned mine good and JB Welded it on both sides and is still holding to this day. Dave.
|
|
Redwood
Orange Level
Joined: 16 Jan 2012
Location: Ontario
Points: 631
|
Post Options
Thanks(0)
Quote Reply
Posted: 15 May 2012 at 8:02am |
Lots of responses and good ideas. I'm sure this is one of those things that has more then one way that works. Some of which has to do with the experience of the person doing the work.
As I'm most comfortable with arc welding this is how I'll tackle it, this week end. I could see how brazing might be better heat distribution wise but I'm not as good with getting a consistent and strong joint.
As for replacing since this is an easy to remove part I feel this is a good piece to learn this skill on (may need it some day for the working tractors). I'm resigned to needing to replace the part... but if this works so much the better.
the damage does not happen to be freeze damage as far as I can see. There is a radial fracture around the engage lever about 1" from the base about 40 degrees worth. It will need some level of strength. It appears to be that it was beat on or something heave was dropped on the level where the rod connects.
I'd put my odds of success at 75%
BTW I'm loving the JB weld to finish off the rods and levers, fills the pits I can't sand out and is strong enough to stay with the flex they will get.
|
|
CAL(KS)
Orange Level
Joined: 18 Sep 2009
Location: Chapman, KS
Points: 3804
|
Post Options
Thanks(0)
Quote Reply
Posted: 15 May 2012 at 11:44am |
some good reading here
i have had good luck with their cast rod also. built up main clutch bearing release housing on HD10W. machinist said was best cast weld he ever machined and im no pro
|
|
Me -C,U,UC,WC,WD45,190XT,TL-12,145T,HD6G,HD16,HD20
Dad- WD, D17D, D19D, RT100A, 7020, 7080,7580, 2-8550's, 2-S77, HD15
|
|
DREAM
Orange Level

Joined: 06 Jan 2010
Location: Elberton,GA
Points: 1828
|
Post Options
Thanks(0)
Quote Reply
Posted: 15 May 2012 at 8:34pm |
|
I'm with Butch on the grinder. DONT USE IT! The disc is put together with fiberglass and resin to hold the abrasive together, and it will contaminate the weld. Anyone who has taken an AWS certification test will tell you that. Go with the carbide "roto-file" or a wire wheel on a drill/grinder to remove metal or clean the weld area. Getting it clean goes a long way. Also +1 on the mig welder and short beads. Much less heat that way. It's all about expansion/contraction with cast. Less heat or even heat and cooling, and you're OK. If you're going to use the stick welder, I recommend cleaning well, preheating, then running short beads, with a good cleaning between beads. Less temp change that way. My .02.
|
|
I didn't do it! It was a short, fat, tall, skinny guy that looked like me!
|
|
Redwood
Orange Level
Joined: 16 Jan 2012
Location: Ontario
Points: 631
|
Post Options
Thanks(0)
Quote Reply
Posted: 19 May 2012 at 10:21pm |
So here's the results. I bought the cast rod along with other things. I realized after the fact it is $5 a rod. hmm $30 on a weld that might not work. So after figuring I'd buy a used part, I took standard 7014 for the heck of it. Welding 2" at a time no special measures and no special cool down (The cast rod instructions called for none, clearly labeled on the packaging). Though I would not recommend for a one of a kind piece my throw away piece is now restored with a little cosmetic work still required. I did use a grinder as any contamination would be miniscule and I'm not building a structural building to spec. most contamination is burned off in the arc. Stress test shows to be a solid weld(any higher pressure would break the cast itself).
|
|
Coke-in-MN
Orange Level Access
Joined: 12 Sep 2009
Location: Afton MN
Points: 41980
|
Post Options
Thanks(0)
Quote Reply
Posted: 20 May 2012 at 7:33am |
|
On a larger area one can weld the root pass with the cast iron rod, then weld edges of metal also with pass from cast iron rod, finish the weld with E-7018 or E-70S wire as they will alloy with the cast rod buttering and complete the fill in welded joint.
|
|
Life lesson: If you’re being chased by a lion, you’re on a horse, to the left of you is a giraffe and on the right is a unicorn, what do you do? You stop drinking and get off the carousel.
|
|


