| Author |
 Topic Search Topic Search  Topic Options Topic Options
|
meta53 
Bronze Level

Joined: 31 Aug 2015
Location: Connecticut
Points: 13
|
 Post Options Post Options
") Thanks(0) Thanks(0)
 Quote Quote  Reply Reply
 Topic: A-C 175 Lift Cylinder Removal Topic: A-C 175 Lift Cylinder Removal
Posted: 10 Oct 2015 at 5:21pm |
Hi everyone.
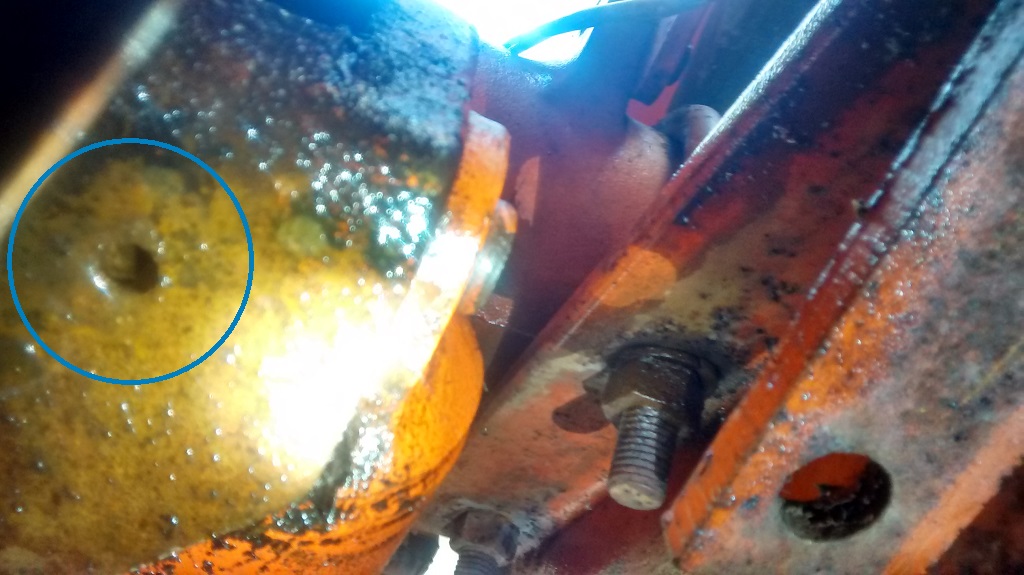
Well, as I mentioned in my last thread, I got the 175 up and running (remanned injector pump & injectors.) and actually used it for a weekend. That is until I noticed one of the rear lift cylinders had a pretty good leak around the rear seal. So I got a seal kit, and am trying to remove said cylinder... and finding that to be a problem. The rear was a simple spring clip on the clevis pin. However the front... well the front seems to be a hair pin through the clevis pin?
Also.. The loop of that hair pin is broken off. The pin itself seems to be all sorts of rusted in place. I was wondering what you all would suggest I do to push it out. I was thinking of heating the hell out of it and try to find a punch with that correct dimensions and pound it through?
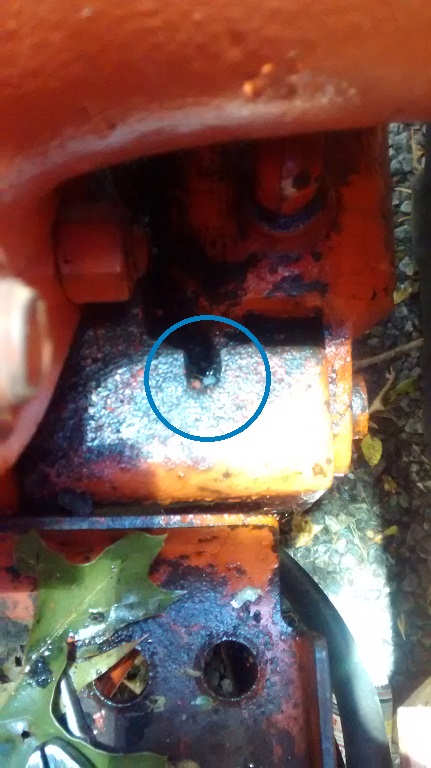
Is the hole on the bottom of the cast piece (see picture) where the pin would come out? Should I drive it from the top or the bottom?
Thanks again for looking at this post. You guys saved me some serious money with your advice about the injector pump (my labor is a lot cheaper than the local repair shops!)
-matt in CT
|
 |
|
Sponsored Links
|
|
|
NC Bruce
Silver Level


Joined: 15 Sep 2009
Location: Mill Spring, NC
Points: 226
|
Post Options
Thanks(0)
Quote Reply
Posted: 10 Oct 2015 at 5:40pm |
|
Matt
I always drove mine from bottom towards top. Usually had the complete pin to snap in from the top....
Be careful, Don't let it fall on you...
thanx,
Bruce
|
|
SHAMELESS
Orange Level


Joined: 13 Sep 2009
Location: EAST NE
Points: 29486
|
Post Options
Thanks(0)
Quote Reply
Posted: 11 Oct 2015 at 4:19am |
|
wonder if you could drill it out?
|
|
meta53
Bronze Level
Joined: 31 Aug 2015
Location: Connecticut
Points: 13
|
Post Options
Thanks(0)
Quote Reply
Posted: 11 Oct 2015 at 12:21pm |
Well spent a good portion of the day on this. THAT SOB is in there. Like really in the. Even with heat it was a no go. Not to mention from the top down the axle assembly is sort of in the way, and from the bottom the hydraulic return line is in the way. Yay.
I am just going to drill it out I think. I need a long metal bit to do so, so looking at Amazon now.
To get the tractor moving, I am probably just going to cap off that line, and ignore it until spring if drilling doesn't work!
|
|
Eldon (WA)
Orange Level

Joined: 11 Sep 2009
Location: Spokane, WA
Points: 7765
|
Post Options
Thanks(0)
Quote Reply
Posted: 11 Oct 2015 at 9:13pm |
|
Can you rotate the cylinder pin with a pair of vice grips? That is the first thing. I usually drive a chisel between the inside of the pin and the casting, then take a socket that fits over the pin and tap on the cylinder ears to drive the cylinder in. Don't get too aggressive with the pounding or you can break an ear off the cylinder. If you get the cylinder to slide on the pin, drive the chisel in to force the pin back out. Repeat until you can turn the pin. After you get the pin to turn, you can get a better angle to drive the broken pin out....rotate 180 degrees if needed. You might need to remove the hydraulic lines to get better access.
|
|
ALLIS EXPRESS!
This year:
|
|
MACK
Orange Level
Joined: 17 Nov 2009
Points: 7664
|
Post Options
Thanks(0)
Quote Reply
Posted: 11 Oct 2015 at 9:43pm |
|
Repair it in the tractor. MACK
|
|
clays37ac
Silver Level
Joined: 22 Nov 2012
Location: ohio
Points: 102
|
Post Options
Thanks(0)
Quote Reply
Posted: 11 Oct 2015 at 9:52pm |
|
I had to burn the pins out of my cylinders with a torch. I used Kimball Midwest cool gel spray. To keep the heat away from the rest of the cylinder. After you finish I recommend using anti sieze generously.
|
|
meta53
Bronze Level
Joined: 31 Aug 2015
Location: Connecticut
Points: 13
|
Post Options
Thanks(0)
Quote Reply
Posted: 12 Oct 2015 at 8:56am |
|
Mack, can't repair it in the tractor because their is a clip inside the cylinder holding the ram in, which you can only access through the inlet port, which, you seriously can't get to without removing the cylinder :(
|
|
clays37ac
Silver Level
Joined: 22 Nov 2012
Location: ohio
Points: 102
|
Post Options
Thanks(0)
Quote Reply
Posted: 12 Oct 2015 at 9:00am |
|
Yes the cylinder has to be on the workbench
|
|
meta53
Bronze Level
Joined: 31 Aug 2015
Location: Connecticut
Points: 13
|
Post Options
Thanks(0)
Quote Reply
Posted: 14 Oct 2015 at 11:43am |
Well, I can't get it drilled out, because it seems like the hair pin is hardened steel, inside the hardened steel clevis pin. I can't drive it out because it is behaving like it is welded.
Man I am ready to cut the whole business out with an oxy torch and scrap the damn tractor. So frustrated! Perhaps I can burn just the hairpin out?
|
|
Eldon (WA)
Orange Level
Joined: 11 Sep 2009
Location: Spokane, WA
Points: 7765
|
Post Options
Thanks(0)
Quote Reply
Posted: 14 Oct 2015 at 11:55am |
|
Like I said, first get the pin to rotate....then use a long punch to knock out the spring pin....if it is hard, it should break off fairly easy flush to the pin, which helps. If it doesn't want to come out one way, rotate the pin 180 and try the other side. If you want to torch off the bracket, I have a couple laying around here.
|
|
ALLIS EXPRESS!
This year:
|
|
meta53
Bronze Level
Joined: 31 Aug 2015
Location: Connecticut
Points: 13
|
Post Options
Thanks(0)
Quote Reply
Posted: 14 Oct 2015 at 2:07pm |
I need to buy better punches this evening/week and I will absolutely be doing what you just recommended.
I appreciate all the advice in this thread! :)
|
|
meta53
Bronze Level
Joined: 31 Aug 2015
Location: Connecticut
Points: 13
|
Post Options
Thanks(0)
Quote Reply
Posted: 20 Feb 2017 at 5:02pm |
So. I figured I would check back in and leave some progress notes in case anyone runs into this problem.
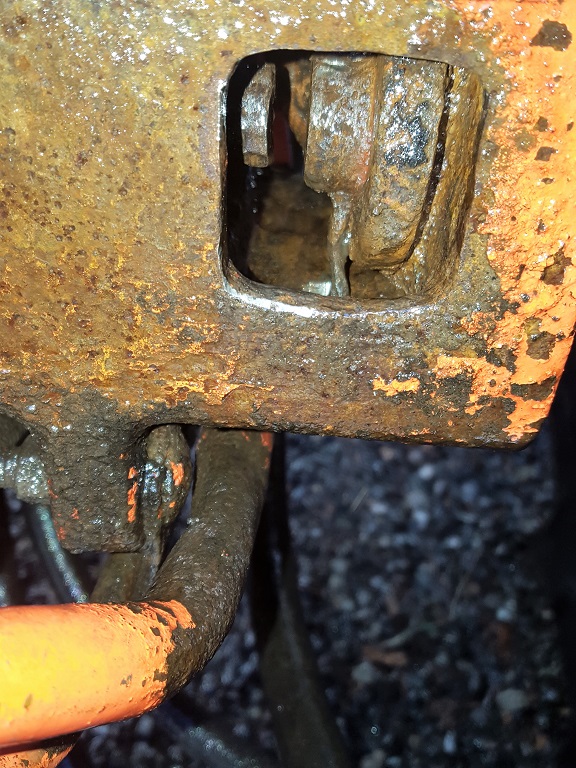
1. If you take off the foot rest you will find that the casting that the main pin resides in has a front window, where you can get a much better look at the main pin & hairpin.
2. If you drive a chisel back and forth be very careful not to break off a tab! Which, of course I did. I plan on bringing it to my local machinist/fab shop to get a new ear attached. 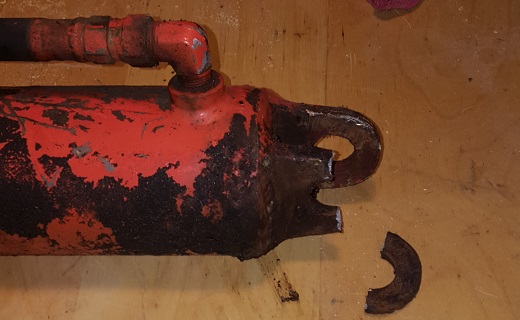
3. Once you get the cylinder off the retaining ring is easily accessible from the hydraulic inlet port. Use a probe/screwdriver to push ring into the low area next to it. And then you can slide the rod out easily.
4. There are 2 seals, the end wiper seal, and one immediately to the inside of that. On this cylinder the inner seal was crumbly and the cause of the failure.
|
|
DrAllis
Orange Level Access
Joined: 12 Sep 2009
Points: 22341
|
Post Options
Thanks(0)
Quote Reply
Posted: 22 Feb 2017 at 12:17pm |
|
Disassemble the cylinder in chassis. It does NOT need to be on a bench. It isn't easy, but it's easier than all the grief this one was. Work thru the oil hole after removing the elbow.....been there and dun that many times.
|
|