| Author |
 Topic Search Topic Search  Topic Options Topic Options
|
modirt 
Orange Level Access

Joined: 18 Jul 2018
Location: Missouri
Points: 8999
|
 Post Options Post Options
") Thanks(0) Thanks(0)
 Quote Quote  Reply Reply
 Topic: D15 II Front crankshaft oil seal Topic: D15 II Front crankshaft oil seal
Posted: 05 May 2021 at 8:03am |
Began putting engine back together yesterday and ran into issue of front oil seal for the crankshaft would not fit. Could not be forced on by hand or any tool we had handy. Too tight. Came with the rebuild kit from Reliance.
Is there a trick to putting those on or did they send the wrong seal? Metal rim, rubber with spring skirt and felt.
Larger seal for the rear slipped on no worries.
|
 |
|
Sponsored Links
|
|
|
Acdiesel
Orange Level
Joined: 15 Jun 2012
Location: Rochester Ohio
Points: 2584
|
Post Options
Thanks(0)
Quote Reply
Posted: 05 May 2021 at 10:42am |
It would not fit over the crankshaft or it will not fit into the bore/timing cover?
Dan
|
|
D19 Diesel,D17 Diesel SER.3
2-D14, 2-D15 SER.II WF/NF
D15 SER.2 DIESEL
D12 SER.I, D10 Ser.II
2-720'S D21 Ser. II
Gmc,caterpillar
I'm a pharmacist (farm assist) with a PHD (post hole digger)
|
|
Charlie175
Orange Level
Joined: 11 Sep 2009
Location: Shenandoah, VA
Points: 6369
|
Post Options
Thanks(0)
Quote Reply
Posted: 05 May 2021 at 11:00am |
|
ours was tight, it needs to go in after the cover is in place and aligned.
|
|
Charlie
'48 B, '51 CA, '56 WD45 '61 D17, '63 D12, '65 D10 , '68 One-Ninety XTD
|
|
modirt
Orange Level Access
Joined: 18 Jul 2018
Location: Missouri
Points: 8999
|
Post Options
Thanks(0)
Quote Reply
Posted: 05 May 2021 at 6:14pm |
Plot thickens. Service manual I have indicates there is a special 2 part tool.....known as K-M J-9243....."oil seal centering tool".....which is used in conjunction with the "oil seal expander"......that is used to install the seal.
Is there such a thing or an alternative?
|
|
modirt
Orange Level Access
Joined: 18 Jul 2018
Location: Missouri
Points: 8999
|
Post Options
Thanks(0)
Quote Reply
Posted: 05 May 2021 at 6:17pm |
 Acdiesel wrote: Acdiesel wrote:
It would not fit over the crankshaft or it will not fit into the bore/timing cover?
Dan |
Won't slip over the crankshaft. Can get one side on, but it stops dead there. I would normally use a socket of the right size and tap it on, but don't have a deep socket that large. Maybe a piece of steel pipe?
|
|
DrAllis
Orange Level Access
Joined: 12 Sep 2009
Points: 22307
|
Post Options
Thanks(0)
Quote Reply
Posted: 05 May 2021 at 6:23pm |
|
It's kind of a poor design. You should be able to start it on the snout of the crankshaft and then drive it into place, but the genius engineers made the crank about 1/4" too short to do that.
|
|
AC720Man
Orange Level

Joined: 10 Oct 2016
Location: Shenandoah, Va
Points: 5317
|
Post Options
Thanks(0)
Quote Reply
Posted: 05 May 2021 at 9:56pm |
|
Charlie is correct, that thing was a bear to get in. Doc is also correct, poor design. Actually the only issue we had with the entire rebuild.
|
|
1968 B-208, 1976 720 (2 of them)Danco brush hog, single bottom plow,52" snow thrower, belly mower,rear tine tiller, rear blade, front blade, 57"sickle bar,1983 917 hydro, 1968 7hp sno-bee, 1968 190XTD
|
|
modirt
Orange Level Access
Joined: 18 Jul 2018
Location: Missouri
Points: 8999
|
Post Options
Thanks(0)
Quote Reply
Posted: 05 May 2021 at 11:57pm |
The two part tool shown in the service manual looks like it would help. Part 1 is a cone shaped "expander", which is about the same diameter as the crankshaft end on one end, and about 1/4" diameter less on the cone end. Fit the seal on the smaller end, then the larger end butts up against the end of the shaft. The other part.....the oil seal centering tool....is then used to drive (tap gently?) the seal onto the end of the cone shaped tool so it then slides on the crankshaft....with even pressure on all sides of the metal cup.
Looks like it would work.....but where you gonna find these tools? Make em?
|
|
jaybmiller
Orange Level Access
Joined: 12 Sep 2009
Location: Greensville,Ont
Points: 24889
|
Post Options
Thanks(0)
Quote Reply
Posted: 06 May 2021 at 5:40am |
hmmm, my D-14 been leaking since day one...sounds like a 'fun' job I don't need to do..
for the expander, could you cut down/trim a plastic funnel.OK, maybe two, 1st one is a 'test'..... for the 'installer', can you use a section of ABS or PVC or plastic EMT,with a cap on the 'hitting' end ?
|
|
3 D-14s,A-C forklift, B-112
Kubota BX23S lil' TOOT( The Other Orange Tractor)
Never burn your bridges, unless you can walk on water
|
|
Charlie175
Orange Level
Joined: 11 Sep 2009
Location: Shenandoah, VA
Points: 6369
|
Post Options
Thanks(0)
Quote Reply
Posted: 06 May 2021 at 5:56am |
I used a beer can. I cut open and folded the edges so there wasn't a sharp edge. Rolled it in a tube and slide that on the crank shaft and added some oil to it. Then I put the seal over this and used a PVC tube that matched the right size and drove it in.
Any super thin metal should work. Has to be thin as there is not much room.
|
|
Charlie
'48 B, '51 CA, '56 WD45 '61 D17, '63 D12, '65 D10 , '68 One-Ninety XTD
|
|
modirt
Orange Level Access
Joined: 18 Jul 2018
Location: Missouri
Points: 8999
|
Post Options
Thanks(0)
Quote Reply
Posted: 06 May 2021 at 7:53am |
Wonder where a guy could get an empty beer can? Hmmmmm.
Picture is coming into focus. Can see doing something similar with a thin, slick plastic like a water bottle. Had already thought of the PVC pipe for the driver and have small lengths of several sizes. A 1 1/4" ID might mate up to metal dust cup.
BTW, a secondary purpose (or was it primary????) of the centering tool.......is to center the end cover over the crankshaft. The mounting studs help with alignment, as would a few bolts, but the centering tool was to be used to get the seal cup in the end cover perfectly centered over the crankshaft before you torque it down.
it also appears the little spring skirt is important to keep intact if you want this seal to keep working in the long run. Part doesn't look like much, but seems there is a lot to it to get it working the way it was intended. Finding out there is a lot of that that goes on inside an engine.
Edited by modirt - 06 May 2021 at 7:59am
|
|
Charlie175
Orange Level
Joined: 11 Sep 2009
Location: Shenandoah, VA
Points: 6369
|
Post Options
Thanks(0)
Quote Reply
Posted: 06 May 2021 at 8:33am |
|
Yes the centering tool would do that, I used measuring calipers to even it up around the shaft before bolting down.
|
|
Charlie
'48 B, '51 CA, '56 WD45 '61 D17, '63 D12, '65 D10 , '68 One-Ninety XTD
|
|
modirt
Orange Level Access
Joined: 18 Jul 2018
Location: Missouri
Points: 8999
|
Post Options
Thanks(0)
Quote Reply
Posted: 06 May 2021 at 4:42pm |
End cover is on, but front seal is not.
We used a different, smaller oil seal to align end cover before bolting it in place. Same ID and OD, so aligned cover to that.
But rest of engine coming back together nicely. Internals are all in and engine is back in frame.
|
|
DonDittmar
Orange Level

Joined: 15 Sep 2009
Location: MIllersburg, MI
Points: 2516
|
Post Options
Thanks(0)
Quote Reply
Posted: 07 May 2021 at 6:28am |
|
Remember these covers had no dowel pins, so I think part of the installer tool described in the manual was to help center the cover over the crank
|
|
Experience is a fancy name for past mistakes. "Great moments are born from great opportunity"
1968 D15D,1962 D19D
Also 1965 Cub Loboy and 1958 JD 720 Diesel Pony Start
|
|
modirt
Orange Level Access
Joined: 18 Jul 2018
Location: Missouri
Points: 8999
|
Post Options
Thanks(0)
Quote Reply
Posted: 07 May 2021 at 8:40am |
Apparently the K-M tool mentioned in the service manual is Kent-Moore.
They make (or at least made......don't know if they are still around or not) a whole family of tools like this used in automotive shops. Looked for pictures of these and found some similars.......but still having trouble seeing how these would help. At least the one's I've seen so far. Getting the edge of that flexible rubber skirt to slip over the sharp edge of the shaft it rotates on.....when it is such a tight fit.....is the problem.
What is needed is some kind of cone shaped flange (expander) that slips over the smaller diameter crankshaft, butts up against the larger shaft step the seal is supposed to slide over, then have something to tap it on with. Instead of a sharp edged shoulder, it needs gradual cone to slide up on. Haven't figured that one out yet.
|
|
DonDittmar
Orange Level
Joined: 15 Sep 2009
Location: MIllersburg, MI
Points: 2516
|
Post Options
Thanks(0)
Quote Reply
Posted: 07 May 2021 at 8:49am |
modirt wrote:
Apparently the K-M tool mentioned in the service manual is Kent-Moore.
They make (or at least made......don't know if they are still around or not) a whole family of tools like this used in automotive shops. Looked for pictures of these and found some similars.......but still having trouble seeing how these would help. At least the one's I've seen so far. Getting the edge of that flexible rubber skirt to slip over the sharp edge of the shaft it rotates on.....when it is such a tight fit.....is the problem.
What is needed is some kind of cone shaped flange (expander) that slips over the smaller diameter crankshaft, butts up against the larger shaft step the seal is supposed to slide over, then have something to tap it on with. Instead of a sharp edged shoulder, it needs gradual cone to slide up on. Haven't figured that one out yet.
|
The tool I spoke of was cone shaped, or at least tapered. The one I have in mind I think I saw in the FACTORY service manual for the D14
|
|
Experience is a fancy name for past mistakes. "Great moments are born from great opportunity"
1968 D15D,1962 D19D
Also 1965 Cub Loboy and 1958 JD 720 Diesel Pony Start
|
|
modirt
Orange Level Access
Joined: 18 Jul 2018
Location: Missouri
Points: 8999
|
Post Options
Thanks(0)
Quote Reply
Posted: 07 May 2021 at 8:55am |
I think we are talking about the same tool.
Problem being it only exists in the service manual (and a fuzzy, sketchy picture at that). Nobody seems to have ever seen one in real life. 
Since we can't seem to lay our hands on the actual tool, trying to come up with something that will duplicate the function. Made harder to do when you can't get a clear picture of how it actually works or looks like.
|
|
Kevingweq
Bronze Level

Joined: 03 Sep 2019
Location: Massachusetts
Points: 37
|
Post Options
Thanks(0)
Quote Reply
Posted: 08 May 2021 at 7:49am |
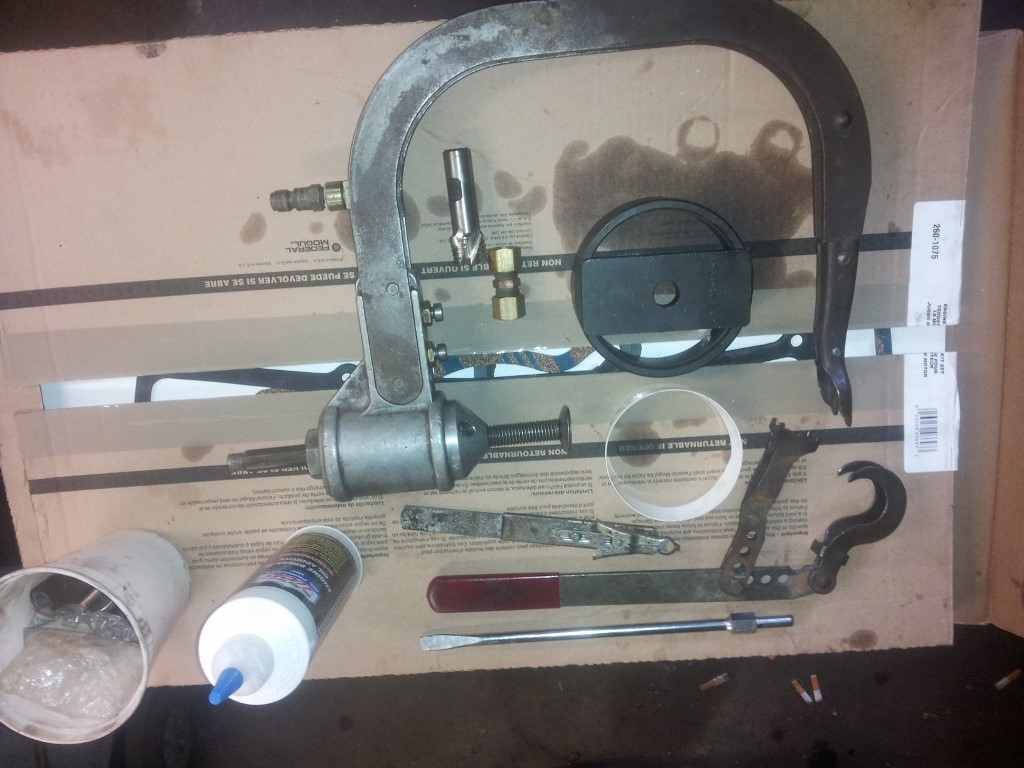
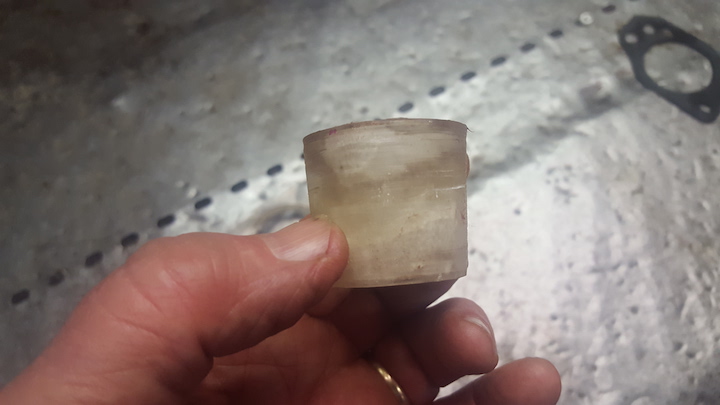
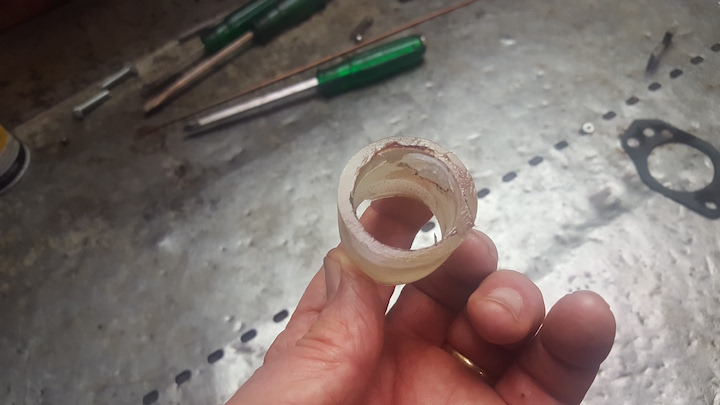
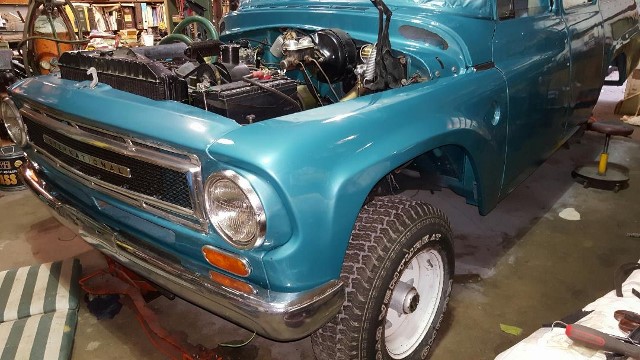
When I refreshed a SV345 IH Engine , The rear main seal was installed using
a plastic cup (nicely tapered ) trimmed cup with a razor , I happened to have a Cat seal installer that worked for driving the seal (although a pvc pipe could of been used ) Picture shows the trimmed cup and an intact one
|
|
structures
Silver Level

Joined: 28 Feb 2011
Location: Beggs, OK
Points: 336
|
Post Options
Thanks(0)
Quote Reply
Posted: 09 May 2021 at 10:40am |
|
When I installed that seal I pressed the seal in the plate first. Had the crank bolted into its home. Gently slipped the seal over the crankshaft and used a oring pick to prevent the oil seal spring from popping off (the backside of the seal). If that even makes sense. Once the seal was on I used that to locate and bolt down the cover plate. It doesn't leak so I guess it turned out alright.
Edited by structures - 09 May 2021 at 10:41am
|
|
|
|
modirt
Orange Level Access
Joined: 18 Jul 2018
Location: Missouri
Points: 8999
|
Post Options
Thanks(0)
Quote Reply
Posted: 18 May 2021 at 4:06pm |
Update.......despite all the good alternatives, I went about it the hard way. I made my own expander tool.
This was made by mixing up some two part marine epoxy and letting it kick off in the mixing up. Then used a 1 5/8" hole saw to cut the OD. That left me with the plug, which had a 1 1/2" OD, same as the inside of the oil seal and outside of the crankshaft flange it has to slide on. Then chucked the plug up in a drill and machined in a taper on the outboard end......down to about 1 3/8". Enough of a taper the seal would slide on and center.
Then drilled inside hole out with a 1 1/8" hole saw using same pilot hole as the original. Was left with plug as you see it. ID of my plug and OD of crankshaft were the same. Hole saw left a snug fit that went on easy, but no play in it.
Because the plug was still a bit under 1 1/2", then made a plastic shim (about 10 thousands thick) from a piece of clear, slick clam shell bubble package from something I had bought. Ended up being slightly larger than 1 1/2". (In retrospect, to avoid needing the shim, next time I'd use a 1 3/4" hole saw for first cut, and then mill it down to about 15 to 20 thousands over 1 1/2" to create the oversized step for oil seal to slide off of....to easily slip over the sharp edge of the flange shoulder.)
Oil seal then slipped over tapered edge and was pushed to the bottom. Expander was then slipped over crankshaft end, until it butted up against the larger step the oil seal sits on. Used a piece of 1 1/2" PVC pipe.....tapped it a bit and it slipped right on....since it was sitting on a slightly larger expander, sliding off onto a smaller step. Was then able to tap it home.
Sorry.....no pictures of the shaft of my piece all mounted up.
Considering this is just a hard piece of plastic, and considering the difficulty in getting that seal on the crankshaft, method calling for a special tool, seems like it would also be a good idea to make such an expander tool out of hard, slick plastic, and include that in the rebuild kit too.
A 30 second job with right tool, way harder job than it ought to be without it.
Edited by modirt - 18 May 2021 at 4:59pm
|
|
JTOOL
Silver Level Access
Joined: 28 Feb 2021
Location: 64720
Points: 346
|
Post Options
Thanks(0)
Quote Reply
Posted: 18 May 2021 at 7:30pm |
|
That's what an old man I knew of called "Redneck R&D". Brilliant idea. I hope it works out for you.
|
|
structures
Silver Level
Joined: 28 Feb 2011
Location: Beggs, OK
Points: 336
|
Post Options
Thanks(0)
Quote Reply
Posted: 18 May 2021 at 9:22pm |
|
awesome
|
|
|
|