| Author |
 Topic Search Topic Search  Topic Options Topic Options
|
dfwallis 
Orange Level

Joined: 09 Mar 2023
Location: DFW
Points: 936
|
 Post Options Post Options
") Thanks(1) Thanks(1)
 Quote Quote  Reply Reply
 Topic: CA Project Pics Topic: CA Project Pics
Posted: 16 Mar 2023 at 9:08pm |
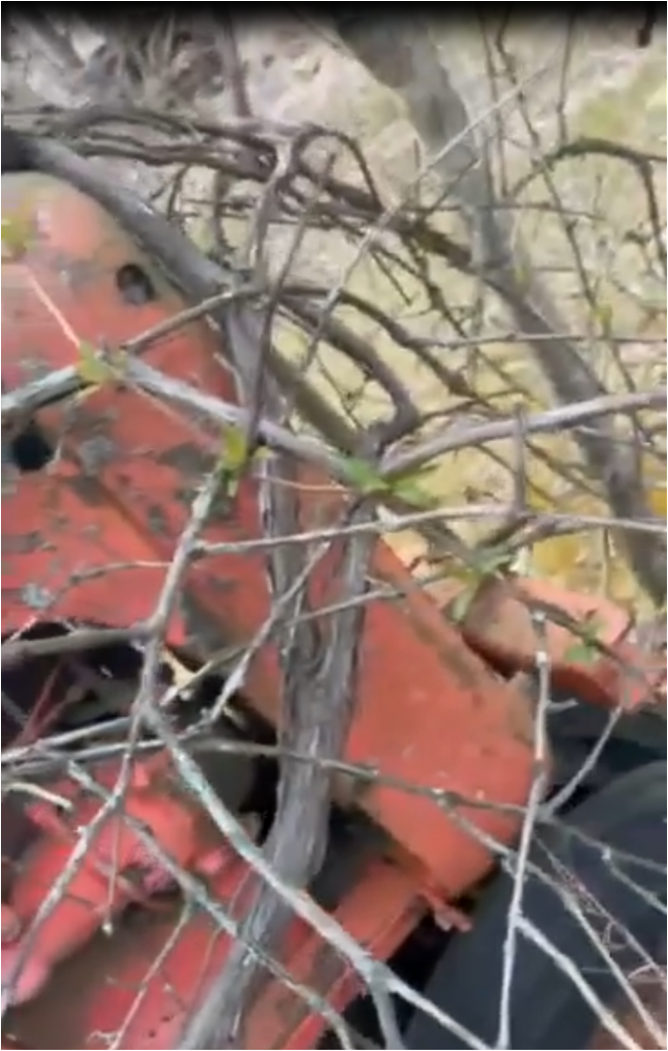
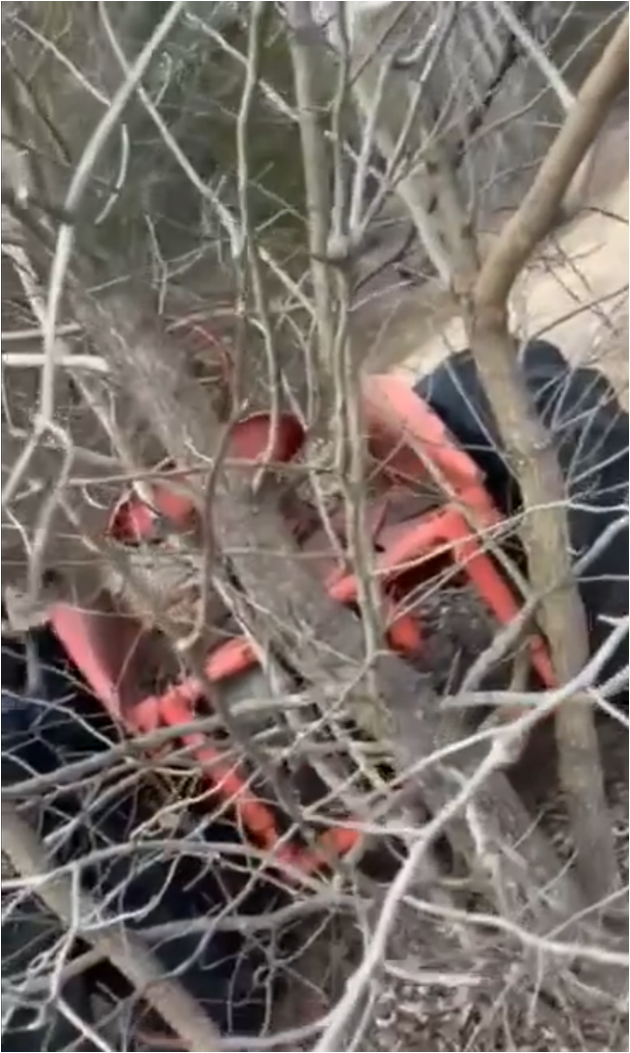
I'm sure nobody really cares, but here's a couple of starting pics...small tree and grapevine encrusted.
Edited by dfwallis - 18 Mar 2023 at 9:22am
|
 |
|
Sponsored Links
|
|
|
dfwallis
Orange Level
Joined: 09 Mar 2023
Location: DFW
Points: 936
|
Post Options
Thanks(0)
Quote Reply
Posted: 16 Mar 2023 at 9:09pm |
|
Sorry about the formatting :( ...there, found the edit option, fixed.
Edited by dfwallis - 18 Mar 2023 at 9:24am
|
|
steve(ill)
Orange Level Access

Joined: 11 Sep 2009
Location: illinois
Points: 90793
|
Post Options
Thanks(0)
Quote Reply
Posted: 16 Mar 2023 at 9:22pm |
|
looks like it has been there a while !
|
|
Like them all, but love the "B"s.
|
|
plummerscarin
Orange Level Access
Joined: 22 Jun 2015
Location: ia
Points: 4176
|
Post Options
Thanks(1)
Quote Reply
Posted: 16 Mar 2023 at 9:26pm |
|
The B I drug home started like that. Looking forward to watching your progress
|
|
dfwallis
Orange Level
Joined: 09 Mar 2023
Location: DFW
Points: 936
|
Post Options
Thanks(0)
Quote Reply
Posted: 16 Mar 2023 at 9:30pm |
") steve(ill) wrote: steve(ill) wrote:
looks like it has been there a while ! |
Yes, not really sure how long. But it WILL LIVE AGAIN IF I HAVE TO WITHDRAW EVERY LAST PENNY FROM MY 401K! (but hopefully not :), although today's spending was a good start on that).
|
|
KMAG
Orange Level Access
Joined: 26 May 2020
Location: Elizabethtown,
Points: 690
|
Post Options
Thanks(0)
Quote Reply
Posted: 16 Mar 2023 at 9:50pm |
|
We should do as found and fixed up post for inspiration.
|
|
tractorboy
Silver Level

Joined: 03 Oct 2009
Location: southern Va
Points: 480
|
Post Options
Thanks(0)
Quote Reply
Posted: 17 Mar 2023 at 1:13am |
|
Wow ,nice pictures! Safe to say she's been sitting a while! Keep us posted. keith so.va.
|
|
rilenz
Bronze Level


Joined: 23 Dec 2022
Location: WI
Points: 87
|
Post Options
Thanks(0)
Quote Reply
Posted: 17 Mar 2023 at 7:14am |
|
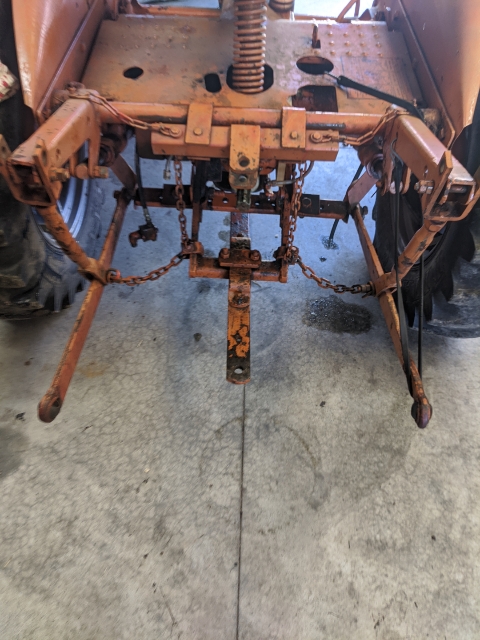
am I looking at that right looks like it has a three point on the rear you sure that is'nt a ca
|
|
steve(ill)
Orange Level Access
Joined: 11 Sep 2009
Location: illinois
Points: 90793
|
Post Options
Thanks(0)
Quote Reply
Posted: 17 Mar 2023 at 8:14am |
it WILL LIVE AGAIN IF I HAVE TO WITHDRAW EVERY LAST PENNY
Joint the CLUB... to be a MEMBER, you have to spend TWICE a much on the tractor as it will be worth in the end !! ............. Its not about the money !
|
|
Like them all, but love the "B"s.
|
|
dfwallis
Orange Level
Joined: 09 Mar 2023
Location: DFW
Points: 936
|
Post Options
Thanks(0)
Quote Reply
Posted: 17 Mar 2023 at 9:10am |
rilenz wrote:
am I looking at that right looks like it has a three point on the rear you sure that is'nt a ca |
It is a 1952 CA. Positive. It has no 3-point hitch, just the normal 1952 pin hitch. In the picture, the drawbar is installed. The lift arms are fully down and the drawbar attaches to the lift arms and fits inside the U shaped arms. I was looking for a ready made 3-point kit for it but didn't find any. I see a kit that mounts on a drawbar, although not the pin hitch drawbar. I was thinking I could adapt the pin hitch drawbar to attach via split bearings to the rockshaft and thus my other post asking about the dimensions of the rockshaft.
|
|
dfwallis
Orange Level
Joined: 09 Mar 2023
Location: DFW
Points: 936
|
Post Options
Thanks(0)
Quote Reply
Posted: 17 Mar 2023 at 9:12am |
steve(ill) wrote:
it WILL LIVE AGAIN IF I HAVE TO WITHDRAW EVERY LAST PENNY
Joint the CLUB... to be a MEMBER, you have to spend TWICE a much on the tractor as it will be worth in the end !! ............. Its not about the money ! |
I'm already well above that amount :(
|
|
Trinity45
Orange Level Access

Joined: 17 Mar 2014
Location: Kentucky
Points: 2151
|
Post Options
Thanks(0)
Quote Reply
Posted: 17 Mar 2023 at 9:20am |
rilenz wrote:
am I looking at that right looks like it has a three point on the rear you sure that is'nt a ca |
Older CA, the lift arms run down like that, but you can put a 3ph on one, I have two CA's and I put a 3ph on one to use a finish mower on.
|
|
steve(ill)
Orange Level Access
Joined: 11 Sep 2009
Location: illinois
Points: 90793
|
Post Options
Thanks(0)
Quote Reply
Posted: 17 Mar 2023 at 9:26am |
look at the photo in the second post below...
|
|
Like them all, but love the "B"s.
|
|
steve(ill)
Orange Level Access
Joined: 11 Sep 2009
Location: illinois
Points: 90793
|
Post Options
Thanks(0)
Quote Reply
Posted: 17 Mar 2023 at 9:29am |
you cqn also rig up something like this
|
|
Like them all, but love the "B"s.
|
|
dfwallis
Orange Level
Joined: 09 Mar 2023
Location: DFW
Points: 936
|
Post Options
Thanks(0)
Quote Reply
Posted: 17 Mar 2023 at 9:31am |
steve(ill) wrote:
look at the photo in the second post below...
|
That's the snap coupler draw bar. The pin hitch drawbar attaches to the lift arms, so I either have to first convert to snap coupler or I have to figure out a way to detach the pin hitch drawbar from the lift arms and attach to the rockshaft via split bearings or other custom mount.
|
|
steve(ill)
Orange Level Access
Joined: 11 Sep 2009
Location: illinois
Points: 90793
|
Post Options
Thanks(0)
Quote Reply
Posted: 17 Mar 2023 at 9:32am |
if you want to "make your own"..... the bar under the rear axle looks like a standard drawbar you can buy at TSC... and the two lower arms are just aftermarket arms, also available at TSC ........ then just add a couple stabalizers.
|
|
Like them all, but love the "B"s.
|
|
dfwallis
Orange Level
Joined: 09 Mar 2023
Location: DFW
Points: 936
|
Post Options
Thanks(0)
Quote Reply
Posted: 17 Mar 2023 at 9:34am |
Trinity45 wrote:
rilenz wrote:
am I looking at that right looks like it has a three point on the rear you sure that is'nt a ca |
Older CA, the lift arms run down like that, but you can put a 3ph on one, I have two CA's and I put a 3ph on one to use a finish mower on. |
I searched Steiner and several other places and they all said there was nothing specific to the CA (and probably more so the pre 1954 CA). If you know otherwise, I'd like to know where to get it or what mods are needed. I think I have a suitable mod in mind, if there is enough clearance behind the rockshaft.
|
|
steve(ill)
Orange Level Access
Joined: 11 Sep 2009
Location: illinois
Points: 90793
|
Post Options
Thanks(0)
Quote Reply
Posted: 17 Mar 2023 at 9:40am |
|
Gary... you got to look at what you have and what you want... Presently your upper arms are DOWN and the drawbar is connected between them..... for a 3 point, you need to anchor "something" under the axle to pin the lower arms to it.... The "anchor" is normally the bail area, or modified pin in that area..... You can also buy 3 points that attach to a crossbar between the final drive cases... like a C or B maybe ?
|
|
Like them all, but love the "B"s.
|
|
dfwallis
Orange Level
Joined: 09 Mar 2023
Location: DFW
Points: 936
|
Post Options
Thanks(0)
Quote Reply
Posted: 17 Mar 2023 at 9:41am |
steve(ill) wrote:
Gary... you got to look at what you have and what you want... Presently your upper arms are DOWN and the drawbar is connected between them..... for a 3 point, you need to anchor "something" under the axle to pin the lower arms to it.... The "anchor" is normally the bail area, or modified pin in that area..... You can also buy 3 points that attach to a crossbar between the final drive cases... like a C or B maybe ? |
yes
|
|
steve(ill)
Orange Level Access
Joined: 11 Sep 2009
Location: illinois
Points: 90793
|
Post Options
Thanks(0)
Quote Reply
Posted: 17 Mar 2023 at 9:44am |
couple more photos..... several ways to get there from here... just need to decide..some designs are STRONGER than other.. some are for a bushog and others stiff enough to pull a 10 ft disc..
|
|
Like them all, but love the "B"s.
|
|
dfwallis
Orange Level
Joined: 09 Mar 2023
Location: DFW
Points: 936
|
Post Options
Thanks(0)
Quote Reply
Posted: 18 Mar 2023 at 9:03am |
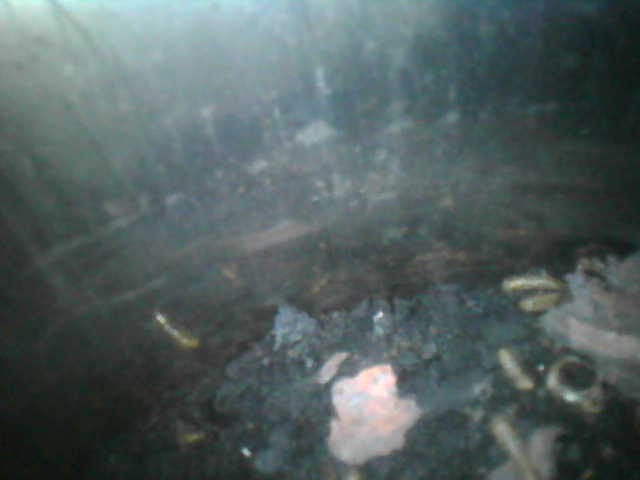
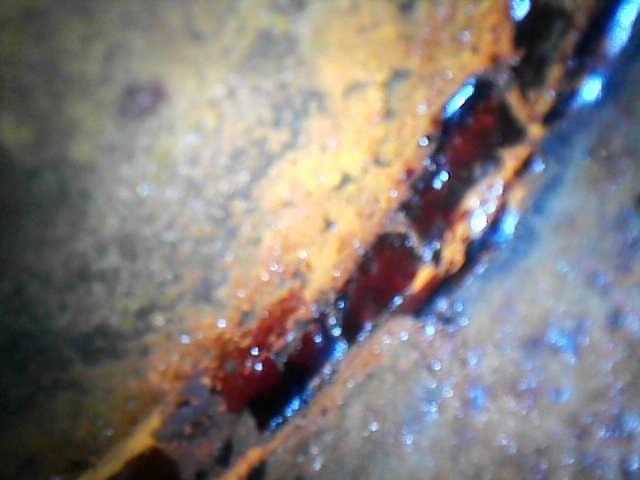
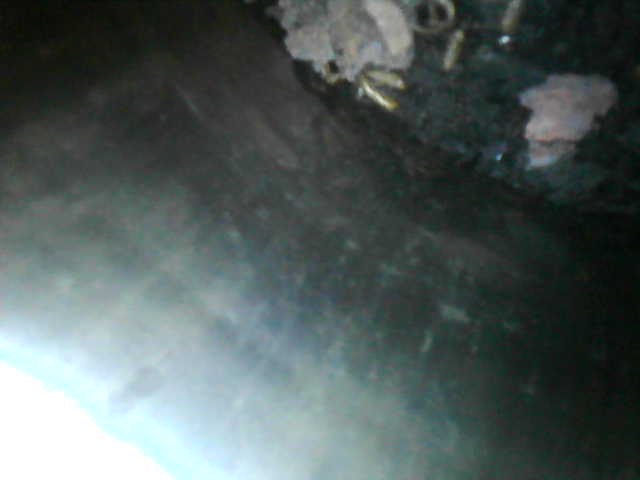
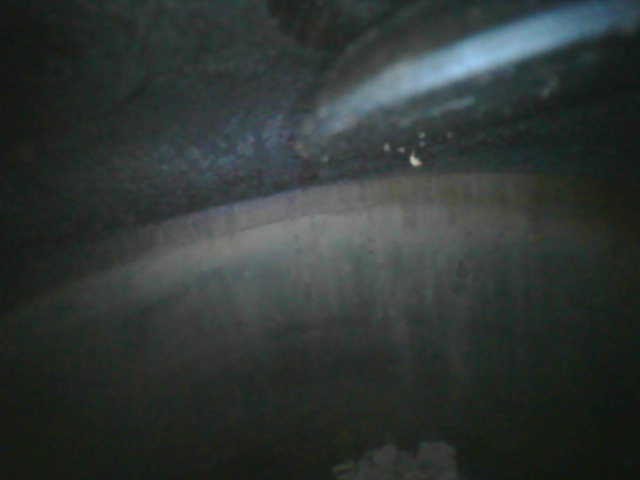
Borescope pics, some ok, some not so ok. Not the best image resolution.
|
|
dfwallis
Orange Level
Joined: 09 Mar 2023
Location: DFW
Points: 936
|
Post Options
Thanks(0)
Quote Reply
Posted: 18 Mar 2023 at 9:04am |
|
Looks like he sent some duplicates or near duplicates.
|
|
steve(ill)
Orange Level Access
Joined: 11 Sep 2009
Location: illinois
Points: 90793
|
Post Options
Thanks(0)
Quote Reply
Posted: 18 Mar 2023 at 9:37am |
|
does the engine bar over ? what was in the oil pan ? are you going to rebuild , pull head and clean, or just fill jugs and let them soak to loosen things up ?
|
|
Like them all, but love the "B"s.
|
|
dfwallis
Orange Level
Joined: 09 Mar 2023
Location: DFW
Points: 936
|
Post Options
Thanks(0)
Quote Reply
Posted: 18 Mar 2023 at 9:50am |
steve(ill) wrote:
does the engine bar over ? what was in the oil pan ? are you going to rebuild , pull head and clean, or just fill jugs and let them soak to loosen things up ? |
Engine is locked. Brother has not decided yet. He was the last one to put new sleeves in it, so he's familiar with its issues. He's researching and thinking it over. He originally thought he would soak it for awhile, may still do that.
|
|
TomC
Orange Level Access

Joined: 24 Nov 2017
Location: Hillsboro, MO
Points: 1549
|
Post Options
Thanks(0)
Quote Reply
Posted: 18 Mar 2023 at 2:33pm |
|
I have a 52 CA it has a Cross Manufacturing 3 point on it, it hooks right to the snap coupler on the tractor, the top link hook up is two metal pieces welded to the rock shaft.Cross is out of Mindenmine Missouri,not sure I spelled that town right,
|
|
dfwallis
Orange Level
Joined: 09 Mar 2023
Location: DFW
Points: 936
|
Post Options
Thanks(0)
Quote Reply
Posted: 18 Mar 2023 at 4:25pm |
TomC wrote:
I have a 52 CA it has a Cross Manufacturing 3 point on it, it hooks right to the snap coupler on the tractor, the top link hook up is two metal pieces welded to the rock shaft.Cross is out of Mindenmine Missouri,not sure I spelled that town right, |
Yes, but the 1952 did not come with a snap coupler. After 1954 it was available as an add-on. Since we have no snap coupler implements, only those that came with the original pin hitch and lift mechanism, I wasn't planning on converting to snap coupler at this time. I was wanting to make do with the original drawbar, but because the cross member goes all the way across between the lift arms, the 3 point lift arms would probably hit it on the lower end unless I mount the front pivot up quite high (to get the 3 point down to the recommended 7-8 inches from the ground).
|
|
dfwallis
Orange Level
Joined: 09 Mar 2023
Location: DFW
Points: 936
|
Post Options
Thanks(0)
Quote Reply
Posted: 18 Mar 2023 at 8:11pm |
dfwallis wrote:
TomC wrote:
I have a 52 CA it has a Cross Manufacturing 3 point on it, it hooks right to the snap coupler on the tractor, the top link hook up is two metal pieces welded to the rock shaft.Cross is out of Mindenmine Missouri,not sure I spelled that town right, |
Yes, but the 1952 did not come with a snap coupler. After 1954 it was available as an add-on. Since we have no snap coupler implements, only those that came with the original pin hitch and lift mechanism, I wasn't planning on converting to snap coupler at this time. I was wanting to make do with the original drawbar, but because the cross member goes all the way across between the lift arms, the 3 point lift arms would probably hit it on the lower end unless I mount the front pivot up quite high (to get the 3 point down to the recommended 7-8 inches from the ground). |
Sorry, I've looked at that one many times but missed the tiny inset image showing a second version with the snap coupler loop having a tiny pin receiver welded on top. The images on the OKT site are mostly too small for me to read without a magnifying glass. But I also may have not looked too hard because it says "light duty" and does not look to me to be well designed/made. "light duty" would mean category 0 to me. It's hard for me to tell without dimensions, but it appears to have very narrow spacing of the cat 0 version. It does say cat 1 on the OKT site. Another thing is the arms appear to be fixed width. They're supposed to swing a little (maybe one swings and one doesnt). I'm no expert in 3 point design, but at this point, I'm not liking that one. Maybe I could be talked into it.
Edited by dfwallis - 18 Mar 2023 at 8:20pm
|
|
TomC
Orange Level Access
Joined: 24 Nov 2017
Location: Hillsboro, MO
Points: 1549
|
Post Options
Thanks(0)
Quote Reply
Posted: 18 Mar 2023 at 9:04pm |
|
I think what your looking at and what I have are two entirely different 3 point hitches,both my lower arms swing and are adjustable,it works fine with all the 3 point implements I have here and is very stoutly built.Good luck with it.
|
|
steve(ill)
Orange Level Access
Joined: 11 Sep 2009
Location: illinois
Points: 90793
|
Post Options
Thanks(0)
Quote Reply
Posted: 18 Mar 2023 at 9:26pm |
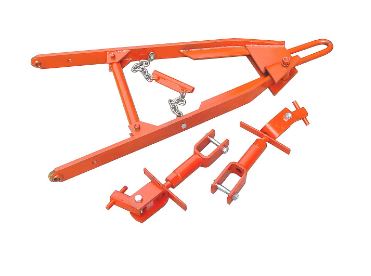
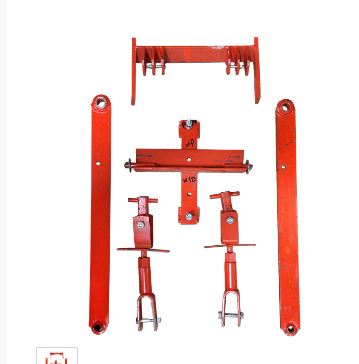
there are basically two different types of AFTERMARKET 3 points you can buy... This one you must remove your drawbar from the snap coupler ( or pin hitch)... and install this in its place ... The two arms are adjustable on width and one is pinned and swings outward. .......... this is made for the snap coupler, but could be MODIFIED to the pin hitch.
the second design is one that you bolt a cross bar to your drawbar, under the axle.. then mount the two lower 3 point arms to it.... There are other ways to do a 3 point, but the only AFTERMARKET are one of these two designs... You can do it different, but it will be "home made".
Edited by steve(ill) - 18 Mar 2023 at 9:30pm
|
|
Like them all, but love the "B"s.
|
|
dfwallis
Orange Level
Joined: 09 Mar 2023
Location: DFW
Points: 936
|
Post Options
Thanks(0)
Quote Reply
Posted: 18 Mar 2023 at 9:27pm |
TomC wrote:
I think what your looking at and what I have are two entirely different 3 point hitches,both my lower arms swing and are adjustable,it works fine with all the 3 point implements I have here and is very stoutly built.Good luck with it. |
I went to the Cross website itself and found no hitches at all.
|
|