| Author |
 Topic Search Topic Search  Topic Options Topic Options
|
Ken(MI) 
Orange Level


Joined: 14 Sep 2009
Location: Lansing, MI
Points: 619
|
 Post Options Post Options
") Thanks(0) Thanks(0)
") Quote Quote  Reply Reply
 Posted: 08 Sep 2020 at 6:02pm Posted: 08 Sep 2020 at 6:02pm |
|
Couple things here, if that bolt is a grade 8, it needs minimum of 1 1/2 to 2 times the diameter of full thread engagement in cast iron for it to realize it's full potential, the factory didn't drill the hole that deep for enjoyment. No epoxy will hold that sway chain load, think of a 500 lb. brush hog swinging on the end of the arms, even a couple inches of travel and it's a 500 lb. hammer swinging on the end of the arms. There are several options for an effective repair as mentioned above, threaded inserts, Heli-Coil inserts, or drilling and tapping oversize. One other point to consider is that fine threads are stronger than coarse threads and fine thread taps twist in a whole lot easier. As mentioned above, to keep the hole straight and centered, I would grind a drill with a pilot at least an inch long, go as deep as possible and finish with a non piloted drill to full depth, and probably do the same with the tap at least to get it started, but I have a machine shop and a cutter grinder to make short work of the tools required, not to discourage you, but this could go bad fast if you're not entirely sure of your abilities and could run into bigger money to get it right if you make a Boo Boo. I wish you the best of luck with your decision and the repair, that 7700 is a fine tractor, even if it is blue.
|
 |
|
Sponsored Links
|
|
|
Tbone95
Orange Level Access
Joined: 31 Aug 2012
Location: Michigan
Points: 12421
|
Post Options
Thanks(0)
Quote Reply
Posted: 08 Sep 2020 at 7:40pm |
|
I’m not familiar with that specific tractor, I admit. However, I don’t think I can think of a tractor where the chain keeps something from swinging out too far. The ones I’ve seen, when hitched to a brush hog or plow or whatever, the lift arms are sucked in and keep from swaying by the insides of the arms coming into contact with the rear end housing and usually a plate of some sort. The chains limit movement when free and unhitched.
|
|
CaseyCreek
Silver Level

Joined: 03 Apr 2011
Location: L.A.
Points: 332
|
Post Options
Thanks(0)
Quote Reply
Posted: 08 Sep 2020 at 8:02pm |
") tadams(OH) wrote: tadams(OH) wrote:
Was the bolt 3" long that went in it ? If the hole is 3" deep and the bolt was there is probably good threads still in there that if a guy ran a tap in and cleaned up you could put a longer bolt in and not have to redrill. |
Been there, done that. When I bought the tractor in 2015, someone had already put the current bolts in. My belief is that they had been slipping out before I bought the tractor. I kept torquing the bolts down (no Loctite, I'm going to fix that this time) and they kept loosening up. This time when they loosened up there wasn't anything left to grab on to.
What I haven't made clear enough is that these bolts take a beating. I use this on a loader tractor. I keep an 1,100 lb stump grinder on the back to keep by back wheels on the ground. Oh, and I work on hillsides. What ends up happening is that the stump grinder is always working back and forth.
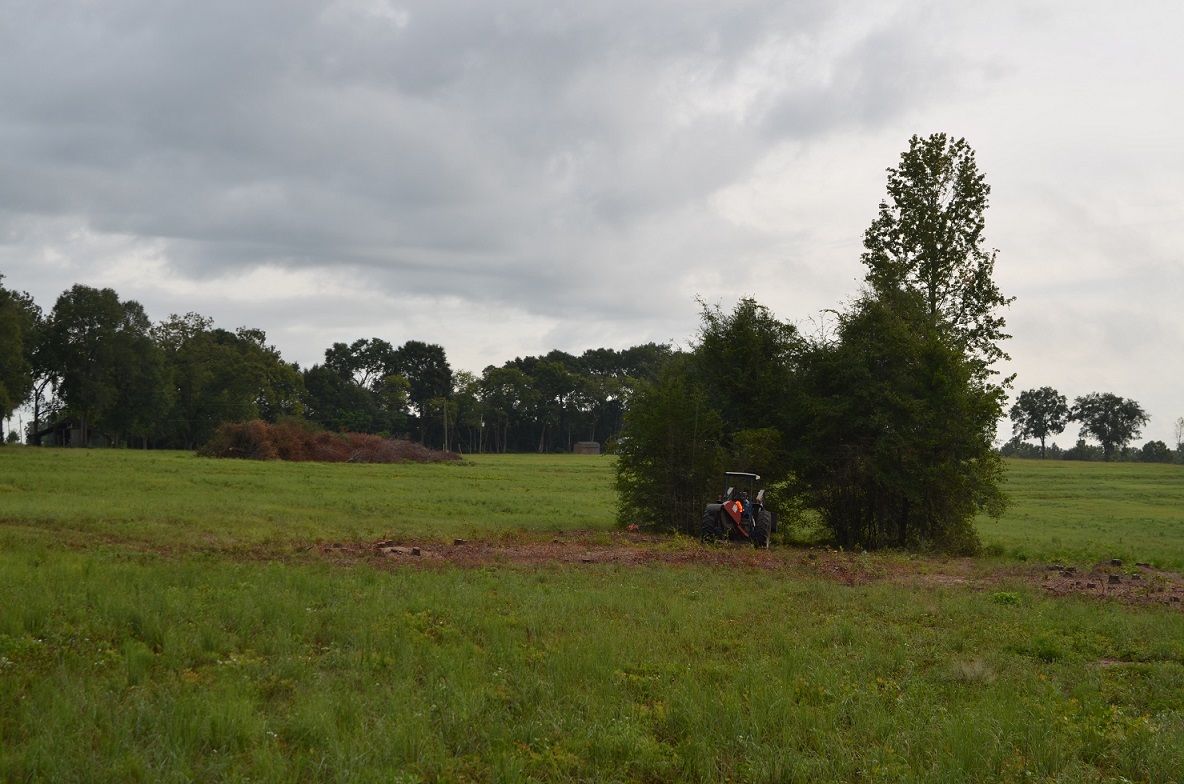
The picture is of the last treetop that I cleared this season. I have been clearing trees of this field for almost ten years. I still have about three to go. There are over 3,000 stump holes that I periodically drive over in this field. It pays to go slowly. The whole field is terraced so I am constantly swinging everything back and forth.
Probably a lot more detail than you wanted, but I am sure that a lot of people are wondering why I couldn't have just done what you suggested. I really appreciate the help offered on this forum. I was completely out of my element on this one.
|
|
D17 Series III,D17 Series IV, 185
|
|
steve(ill)
Orange Level Access

Joined: 11 Sep 2009
Location: illinois
Points: 90835
|
Post Options
Thanks(0)
Quote Reply
Posted: 08 Sep 2020 at 8:36pm |
and NOW FOR THE REST OF THE STORY.... that explains a lot.. NICE TRACTOR.. drilling it round and retap to 1 inch seems like your easiest, best bet... 
|
|
Like them all, but love the "B"s.
|
|
CaseyCreek
Silver Level
Joined: 03 Apr 2011
Location: L.A.
Points: 332
|
Post Options
Thanks(0)
Quote Reply
Posted: 08 Sep 2020 at 8:38pm |
Tbone95 wrote:
However, I don’t think I can think of a tractor where the chain keeps something from swinging out too far. The ones I’ve seen, when hitched to a brush hog or plow or whatever, the lift arms are sucked in and keep from swaying by the insides of the arms coming into contact with the rear end housing and usually a plate of some sort. The chains limit movement when free and unhitched.
|
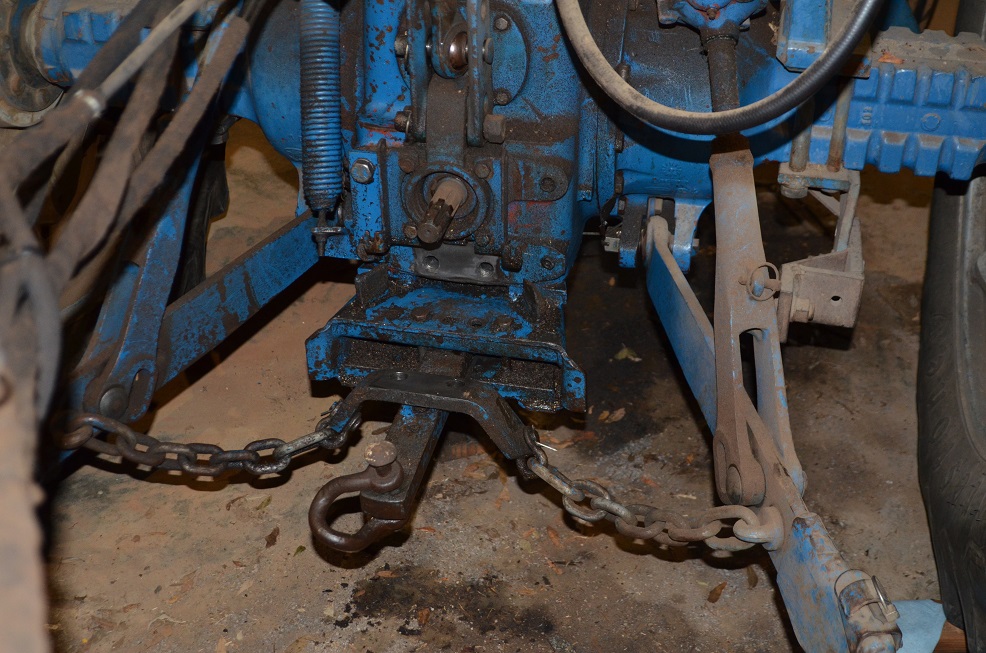
Tbone, on an Allis, I would have sway blocks. Here is the way Ford did it.
So, my drill size is 7/8" and I only have one (cobalt). If I understand what I have been reading, I need to get a cheaper drill and reduce the size of the to fit inside the hole, then make a pilot hole before drilling the hole which will hold the threads? To do fine threads, I need a 59/64 drill?
|
|
D17 Series III,D17 Series IV, 185
|
|
Jim.ME
Orange Level
Joined: 19 Nov 2016
Location: Maine
Points: 973
|
Post Options
Thanks(0)
Quote Reply
Posted: 08 Sep 2020 at 9:17pm |
Yes, a 59/64 bit is required for 1"-12 NF threads.
If the fine threads would be stronger in the cast housing I would think the manufacturer would have used fine. Coarse is usually found in cast materials from what I've seen.
If the bolts were 7/8"-9 NC originally I would use 1"-8 NC. Clean, degrease, and use the primer for the thread locker on the threads (tapped holes and the capscrews) after tapping. Use red thread locker.
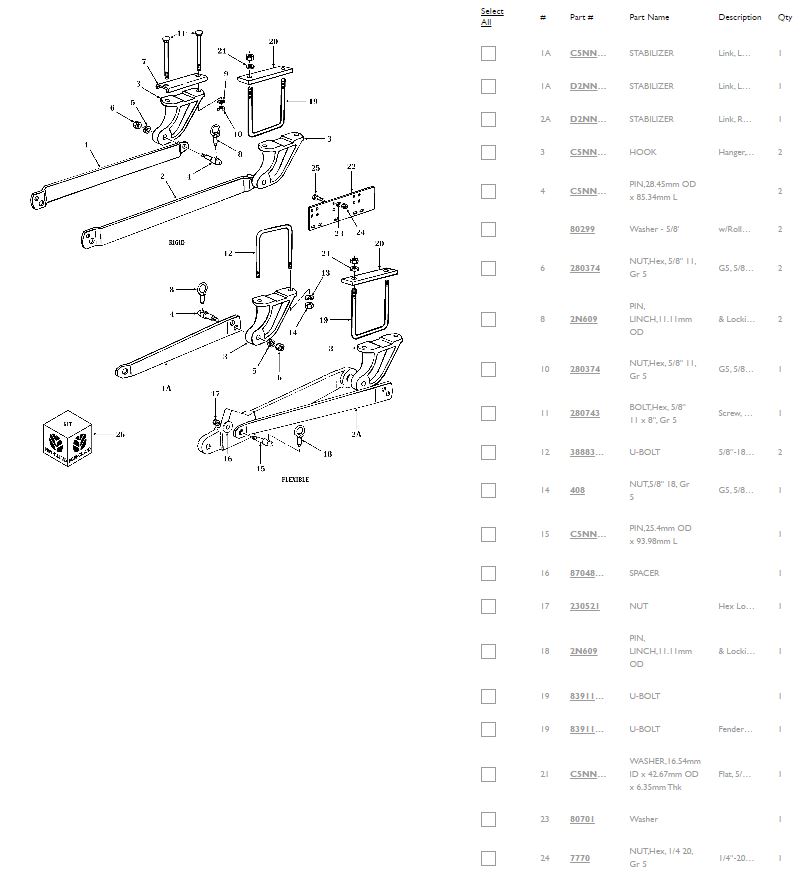
I believe Ken (MI) was suggesting grinding about 1 inch of the end of the drill smaller in diameter to act as a pilot in your existing stripped out hole.
Edited by Jim.ME - 08 Sep 2020 at 9:20pm
|
|
Ken(MI)
Orange Level
Joined: 14 Sep 2009
Location: Lansing, MI
Points: 619
|
Post Options
Thanks(0)
Quote Reply
Posted: 09 Sep 2020 at 6:54am |
|
I forgot an important item, when drilling and tapping cast iron, ALWAYS machine it dry, any kind of lubricant will do nothing but cause it to work harden and you won't be drilling it with any tool known to mankind, especially using hand tools. Cast iron is full of free carbon also known as graphite, so it has it's own built in lubricant. As for the debate on fine versus course threads, fine threads are always stronger, but not always practical, especially in a production setting, a 1" hole isn't that hard to hand tap, but a fine thread tap is much easier to twist in, I think either course or fine would be suitable for your application, properly torqued with lubricant, loc-tite shouldn't be required, but if you choose to go that way stay away from the red stuff, blue or green with everything clean and using the proper primer, they aren't going anywhere.
|
|
Tbone95
Orange Level Access
Joined: 31 Aug 2012
Location: Michigan
Points: 12421
|
Post Options
Thanks(0)
Quote Reply
Posted: 09 Sep 2020 at 7:11am |
CaseyCreek wrote:
Tbone95 wrote:
However, I don’t think I can think of a tractor where the chain keeps something from swinging out too far. The ones I’ve seen, when hitched to a brush hog or plow or whatever, the lift arms are sucked in and keep from swaying by the insides of the arms coming into contact with the rear end housing and usually a plate of some sort. The chains limit movement when free and unhitched.
|
Tbone, on an Allis, I would have sway blocks. Here is the way Ford did it.
So, my drill size is 7/8" and I only have one (cobalt). If I understand what I have been reading, I need to get a cheaper drill and reduce the size of the to fit inside the hole, then make a pilot hole before drilling the hole which will hold the threads? To do fine threads, I need a 59/64 drill?
|
On an Allis, on a Deere, on the Massey I had, on the Ford 6000 I had....but I digress!  Between this and your post about what you've been up to, yeah, whole bunch to the rest of the story! So these bolts bolt that plate the chains are attached to HORIZONTALLY into the rear end just under the PTO? And the lift arms don't ever come into contact near the drawbar side mounts? Interesting. But yeah, drill and tap for 1 inch UNC. Good luck. I don't see why you would need a pilot on the end of the drill. With the bolt hole already there, the drill is going to follow that unless you try really hard to screw it up.
|
|
Tbone95
Orange Level Access
Joined: 31 Aug 2012
Location: Michigan
Points: 12421
|
Post Options
Thanks(0)
Quote Reply
Posted: 09 Sep 2020 at 7:14am |
|
I remember our Massey, it had brace bars that attached farther out the axle to limit sway for certain jobs. Just kind of odd that it would rely on jerking a chain like that.....but it is what it is.
|
|
Jim.ME
Orange Level
Joined: 19 Nov 2016
Location: Maine
Points: 973
|
Post Options
Thanks(0)
Quote Reply
Posted: 09 Sep 2020 at 7:50am |
You are right Ken, I may have been a bit aggressive saying use red thread locker, the blue will be fine.
Another point about cast iron to go with Ken's point on no cutting oil needed for drilling. When doing work on old Allis Chalmers Hydro Turbines, Voith (holds the rights to most of them now) said not to use anti-seize or other lube on fasteners threaded into cast iron for the same reason, the carbon/graphite in it provides its own lubricant. Thread lockers do provide some lubrication so don't over torque.
You know this but you only have check chains to stop the arms from hitting the tires. The sway/ stabilizer set up Tbone95 mentioned was an option, there were no blocks on the sides of the case for the arms to hit limiting sway.
|
|
Tbone95
Orange Level Access
Joined: 31 Aug 2012
Location: Michigan
Points: 12421
|
Post Options
Thanks(0)
Quote Reply
Posted: 09 Sep 2020 at 8:02am |
|
I would be looking into what Jim just posted. Makes a whole lot more sense than jerking a chain bolted into your cast rear end with all that weight and momentum!
|
|
ocharry
Silver Level
Joined: 26 Jun 2016
Location: missouri
Points: 288
|
Post Options
Thanks(0)
Quote Reply
Posted: 09 Sep 2020 at 10:34am |
you know i was sitting here reading this,,,and i mentioned earlier to use crisko or tap-ezz or other specialty tapping solutions,,,,,
but Ken and Jim brought up a good point about this being cast iron,,,,duuuuuhhh,,,never even thought about it being cast iron,,,,(was thinking cast steel)but if it is,,,skip all the stuff i said about using a lube,,,,you wont need it
and it will tap WAY easier than steel,,,,not that it will be easy,,,,but a tap will cut easier in the cast iron,,,and if it is,, it is more than likely a good cast
also,, if it is cast iron,,, thats probably why the hole is 3" deep,,,cast isnt as strong as steel so it needs a little more purchase ,,,hence more thread contact
also Ken's idea about a piloted drill is a good idea,,,it will help keep the drill from jumping around,,,kinda like the drill in a hole saw,,,,ever try using a hole saw without the drill to keep it centered
anyway,,,,go slow and careful and you can do it
ocharry
|
|
CaseyCreek
Silver Level
Joined: 03 Apr 2011
Location: L.A.
Points: 332
|
Post Options
Thanks(0)
Quote Reply
Posted: 27 Sep 2020 at 5:04pm |
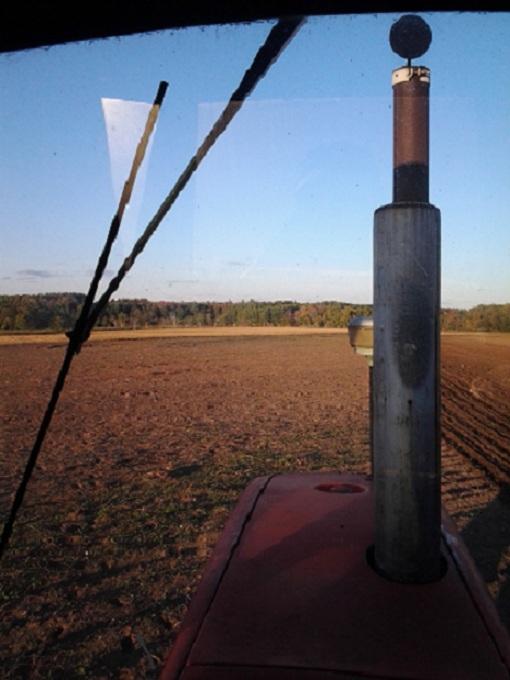
Given the amount of help I received on this topic, I wanted to post some pictures of how things turned out. I went ahead and tapped both holes to 1" (7/8" drill bit) so that they would match. Then, I used blue Loctite when I put the bolts back in. I had a local machine shop drill out the holes in the steel plate to 1 1/16". The twenty dollars they charged was less than the cost of a new drill bit of that size. I thought things turned out pretty well.

This was actually working well, but I kept thinking about the parts diagram from Jim.ME which seemed to show a stabilizer. So, I started looking online for one of those. What I found out surprised me quite a bit. The Ford 7710 which replaced the 7700 used a very slick adjustable part on the outside of the lift arms. Even better, the 7700 was fully drilled and ready for the system on the 7710. So, I ordered two of those stabilizers and wound up with the situation you see below. I had to order knock-offs because I couldn't find any original Ford parts in the salvage yards I contacted. That being said, it works really well and I don't worry about the bolts getting pulled out again.
|
|
D17 Series III,D17 Series IV, 185
|
|
DougG
Orange Level
Joined: 20 Sep 2009
Location: Mo
Points: 8429
|
Post Options
Thanks(0)
Quote Reply
Posted: 27 Sep 2020 at 5:31pm |
|
Good job , thanks for the final pics
|
|
DMiller
Orange Level Access
Joined: 14 Sep 2009
Location: Hermann, Mo
Points: 35690
|
Post Options
Thanks(0)
Quote Reply
Posted: 27 Sep 2020 at 5:47pm |
|
Perfect!
|
|
Tbone95
Orange Level Access
Joined: 31 Aug 2012
Location: Michigan
Points: 12421
|
Post Options
Thanks(0)
Quote Reply
Posted: 28 Sep 2020 at 6:57am |
|
There you go! Yeah, that makes a WHOLE LOT more sense. Good luck in your future endeavors.
|
|
Ken(MI)
Orange Level
Joined: 14 Sep 2009
Location: Lansing, MI
Points: 619
|
Post Options
Thanks(0)
Quote Reply
Posted: 28 Sep 2020 at 7:54am |
|
Nicely done!
|
|
Ted J
Orange Level

Joined: 05 Jul 2010
Location: La Crosse, WI
Points: 18967
|
Post Options
Thanks(0)
Quote Reply
Posted: 28 Sep 2020 at 2:44pm |
|
|
|
"Allis-Express"
19?? WC / 1941 C / 1952 CA / 1956 WD45 / 1957 WD45 / 1958 D-17
|
|