| Author |
 Topic Search Topic Search  Topic Options Topic Options
|
cdsloop 
Bronze Level


Joined: 09 May 2017
Location: North Carolina
Points: 20
|
 Post Options Post Options
") Thanks(0) Thanks(0)
 Quote Quote  Reply Reply
 Topic: B rear wheel question Topic: B rear wheel question
Posted: 05 Feb 2020 at 1:00pm |
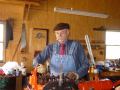
This is my first post to this forum, and I am confident that the knowledge base here can help me. I was recently gifted a 1950 Allis B (serial# B110560). This tractor has been in my family for as long as my father can remember. It belonged to my great-uncle, and was passed down to his oldest grandson(my cousin). His grandson was who gave it to me a couple months ago. My father remembers plowing with it when he was young, and I used it on the farm to rake hay as a teenager, so it has a lot of family history and sentimental value. I brought the B home just before Christmas, and have been working to get it mechanically sound again. My plans for it is to get it mechanically sound, and then decide if it is worth a full restoration down the road a bit. Currently it will run, but I have the gas tank off to remove the rust and the carburetor needs to be rebuilt. I have ordered some parts, and am currently waiting on some wheel wedges to arrive to replace two on the left wheel. My current question is with the cast rear hub on the right side. I am pretty sure that the splines are worn in the hub, since I can hold the brakes and the cast hub will rotate some on the final axle shaft. I have looked at countless pictures on this forum and the internet, but I am not sure how to remove this cast hub from the axle. Do I have to remove the axle from the final drive housing, or is there something else holding the hub on that I am not seeing? Many pictures show a nut in the center, but this one does not have one. Please point me in the right direction. Thanks in advance for your help.   
|
 |
|
Sponsored Links
|
|
|
Dakota Dave
Orange Level


Joined: 12 Sep 2009
Location: ND
Points: 3971
|
Post Options
Thanks(0)
Quote Reply
Posted: 05 Feb 2020 at 1:36pm |
|
That big round thing with three holes is a nut takes a spanner wrench to remove it. Probably need to heat it to get it off.you can make a wrench just cut it out of some 1/4" steel and weld three pins to it . Use a piece of cardboard for a templet. Get the pins in the correct spots and the hole for the axle stub to stick Thur. Weld a long pipe on for a handle.
Edited by Dakota Dave - 05 Feb 2020 at 1:39pm
|
|
Dick L
Orange Level
Joined: 12 Sep 2009
Location: Edon Ohio
Points: 5087
|
Post Options
Thanks(0)
Quote Reply
Posted: 05 Feb 2020 at 2:44pm |
|
One that I removed that looked that I used a 48 inch pipe wrench with a pipe on the handle with heat and still pulled the threads on the axle. If I would have been able to do it over I would have cut the nut with a skinny wheel next to just above the threads so hitting the flat edge of the nut would have opened the threads of the nut.
|
|
DiyDave
Orange Level Access

Joined: 11 Sep 2009
Location: Gambrills, MD
Points: 54280
|
Post Options
Thanks(0)
Quote Reply
Posted: 05 Feb 2020 at 6:50pm |
Rock the tractor, side to side, at the rear wheels, and see what moves... 
|
|
Source: Babylon Bee. Sponsored by BRAWNDO, its got what you need!
|
|
CTuckerNWIL
Orange Level

Joined: 11 Sep 2009
Location: NW Illinois
Points: 22825
|
Post Options
Thanks(0)
Quote Reply
Posted: 05 Feb 2020 at 10:54pm |
|
I think I would find a new nut, and do like Dick suggests, with splitting the nut.
|
|
|
|
Lon(MN)
Orange Level
Joined: 11 Sep 2009
Location: Merrill Wi
Points: 2037
|
Post Options
Thanks(0)
Quote Reply
Posted: 06 Feb 2020 at 7:17am |
|
I have that nut and the sprocket that bolts to it, if you are interested.
|
|
CTuckerNWIL
Orange Level
Joined: 11 Sep 2009
Location: NW Illinois
Points: 22825
|
Post Options
Thanks(0)
Quote Reply
Posted: 06 Feb 2020 at 8:05am |
 Dakota Dave wrote: Dakota Dave wrote:
That big round thing with three holes is a nut takes a spanner wrench to remove it. Probably need to heat it to get it off.you can make a wrench just cut it out of some 1/4" steel and weld three pins to it . Use a piece of cardboard for a templet. Get the pins in the correct spots and the hole for the axle stub to stick Thur. Weld a long pipe on for a handle. |
Those 3 holes are tapped for mounting a sprocket on the wheel. No need to make a spanner wrench. If the nut isn't frozen on the shaft, you could just chase the threads and put a couple bolts in, with a locking nut, and stick a bar between the bolts.
|
|
|
|
steve(ill)
Orange Level Access

Joined: 11 Sep 2009
Location: illinois
Points: 88197
|
Post Options
Thanks(0)
Quote Reply
Posted: 06 Feb 2020 at 8:06am |
Maybe heat the nut up good and soak with penetrant, then smack it with a hammer a dozen times.. uses the two bolts and arm to see if it will move at all... if not, then.. Start at one of the three holes and drill 4-5 more 1/4 inch holes in a line toward the axle shaft threads. You should be able to split the nut then by driving a chisel into one of the holes. Throw it away and get a normal nut.. It is not uncommon to have a little play in the splines over time.. Then the hub starts moving more and more and the splines wear more an more... Take it off and clean, then reinstall and tighten and it should move inwards slightly and take up the clearance.
Edited by steve(ill) - 06 Feb 2020 at 8:09am
|
|
Like them all, but love the "B"s.
|
|
cdsloop
Bronze Level
Joined: 09 May 2017
Location: North Carolina
Points: 20
|
Post Options
Thanks(0)
Quote Reply
Posted: 06 Feb 2020 at 9:04am |
|
Thanks for the advice. It was pretty obvious that the shaft was threaded after I knocked the rust off with a wire brush. I was able to chase the threads in the three holes last night, and threaded two longer bolts into the holes. I was able to easily remove the nut with a pry bar between the bolts. I was not thrilled with what I found with the hub removed. Both the cast hub and the splines on the axle shaft are worn from years of running loose. Knowing that this tractor will probably be on parade duty and not worked hard (we have other larger tractors on the farm), I am going to remove the final from the tractor so that I can work on it in the vertical orientation, and try repairing it using Devcon Plastic Steel Liquid. I read of guys using it to repair crawler and skidder final drive splines, and the repair holds in that harsh environment. I think my chances are good on a 17 hp tractor. Anyone used this or a similar product?
|
|
Alberta Phil
Orange Level
Joined: 13 Sep 2009
Location: Alberta, Canada
Points: 3930
|
Post Options
Thanks(0)
Quote Reply
Posted: 06 Feb 2020 at 9:43am |
|
Shouldn't be too hard to find a good used hub and shaft to replace the damaged set. If you were closer, I have those here, but shipping would be more than the tractor!
|
|
steve(ill)
Orange Level Access
Joined: 11 Sep 2009
Location: illinois
Points: 88197
|
Post Options
Thanks(0)
Quote Reply
Posted: 06 Feb 2020 at 9:58am |
First tighten up the nut as much as you can and push the hub inward. It should get tight on the splines. If it bottoms out and not tight, then look at the back of the hub. There is a ridge about 1/4 inch high that might be hitting the case. I have ground 1/8 inch off that ridge to let the hub slide on further to the threads. What we use to do with crawler tractors in the field was clean all the parts real good.. Smear Belzone ( JB weld - liquid steel)... onto the shaft about 1/16 inch thick.. Then tighten the nut and pull the hub into position. If the threads are good, the nut should hold 500 ft pounds of torque... a 3 ft pipe wrench with you leaning on the end of it is about right.. Let it set and dry... I did that on a B mower tractor and it worked for years. Have seen it on 500 HP tractors also.. How much wear do you actually have ? 90% of the teeth still there = OK... 50% still there, your going to have problems.
Edited by steve(ill) - 06 Feb 2020 at 10:00am
|
|
Like them all, but love the "B"s.
|
|
steve(ill)
Orange Level Access
Joined: 11 Sep 2009
Location: illinois
Points: 88197
|
Post Options
Thanks(0)
Quote Reply
Posted: 06 Feb 2020 at 10:03am |
|
You can push the B hub on as far as you want, as long as you have clearance so it don't touch the case... ON the Dozers, they had to be a specific depth so we tighten the nut by hand so it was still 1/16 inch from location.......... let it dry overnight...... then torque the nut down and deform the Belzona between the steel faces of the splines to the correct dept..... that stays TIGHT.
|
|
Like them all, but love the "B"s.
|
|
CTuckerNWIL
Orange Level
Joined: 11 Sep 2009
Location: NW Illinois
Points: 22825
|
Post Options
Thanks(0)
Quote Reply
Posted: 06 Feb 2020 at 10:10am |
cdsloop wrote:
I am going to remove the final from the tractor so that I can work on it in the vertical orientation, and try repairing it using Devcon Plastic Steel Liquid. I read of guys using it to repair crawler and skidder final drive splines, and the repair holds in that harsh environment. I think my chances are good on a 17 hp tractor. Anyone used this or a similar product? |
I have used a Moglice product on a 2500 ton forge press, to keep the flywheel in place. I cut some wedges to drive in between the shaft and the flywheel bore so I could get the face and OD run-out to a minimum. Then I bolted a plate I made, to the face of the gear and just pumped the gap full thru 1/4 NPT holes I had drilled to match the 'gap'. Let it set up for a day, and the thing ran 24-7 for 6 months and was still stuck in place.
|
|
|
|
Sugarmaker
Orange Level

Joined: 12 Jul 2013
Location: Albion PA
Points: 8534
|
Post Options
Thanks(0)
Quote Reply
Posted: 06 Feb 2020 at 10:23am |
cdsloop, First Welcome and congratulations on the family tractor! And you raked hay with it too. Awesome tractor for that job and they just loved it! Do not ever tell this little tractor its little. It thinks its a big tractor!:) Pulling a real load it will open up the governors, snort and did the rear tires in and raise the front wheels of the ground! Good job getting what looked like a stubborn rusted wheel nut off! I have never tried the material you have mentioned to repair the splines. But as a parade tractor yo may be able to get away with that fix just fine. And if they are using it on heavy equipment it may be very good repair too. Keep us informed/ Pictures of the tractor are good too. Regards Chris
Edited by Sugarmaker - 06 Feb 2020 at 10:23am
|
|
D17 1958 (NFE), WD45 1954 (NFE), WD 1952 (NFE), WD 1950 (WFE), Allis F-40 forklift, Allis CA, Allis D14, Ford Jubilee, Many IH Cub Cadets, 32 Ford Dump, 65 Comet.
|
|
DiyDave
Orange Level Access
Joined: 11 Sep 2009
Location: Gambrills, MD
Points: 54280
|
Post Options
Thanks(0)
Quote Reply
Posted: 06 Feb 2020 at 5:47pm |
Looks like there are 2 washers, that have been added, under the nut, in the pics. I think somebody has been in there, sometime in the past. Don't think they are factory...
|
|
Source: Babylon Bee. Sponsored by BRAWNDO, its got what you need!
|
|
cdsloop
Bronze Level
Joined: 09 May 2017
Location: North Carolina
Points: 20
|
Post Options
Thanks(0)
Quote Reply
Posted: 07 Feb 2020 at 2:34pm |
|
|
|
Sugarmaker
Orange Level
Joined: 12 Jul 2013
Location: Albion PA
Points: 8534
|
Post Options
Thanks(0)
Quote Reply
Posted: 07 Feb 2020 at 2:55pm |
cds, I know nothing about these. But I can see that it is a very worn spline on that axle. I think I would have a plan to shop for a replacement axle and hub. I have no idea how big of a job this is? Do you have a shop manual? Regards, Chris
|
|
D17 1958 (NFE), WD45 1954 (NFE), WD 1952 (NFE), WD 1950 (WFE), Allis F-40 forklift, Allis CA, Allis D14, Ford Jubilee, Many IH Cub Cadets, 32 Ford Dump, 65 Comet.
|
|
steve(ill)
Orange Level Access
Joined: 11 Sep 2009
Location: illinois
Points: 88197
|
Post Options
Thanks(0)
Quote Reply
Posted: 07 Feb 2020 at 3:13pm |
I have seen a lot worse splines.. I had one that the hub would rotate 360 degrees on the splines.. I removed, welded up and recut with a die grinder.. When finished, i probably had about what you have now... After you clean everything, push the hub back onto the shaft untill it is snug... then try to rotate... if you have bottomed out against the case, you will need to trim that lip so you have extra clearance to push on a little further.
You can also smear the DEVCON on 1/8 inch thick and push the hub on till it is just past the threads....might need a brace under the hub to keep it setting vertical... After it dries for a couple days, then torque down the nut.......... should not go on near as far as it does right now....
If you go way past the threads, then you do need to make a STEP WASHER that will set against the HUB and over the first 1/8 inch of the splines so you can tighten up the nut without bottoming out against the thread to spline face.
|
|
Like them all, but love the "B"s.
|
|
CTuckerNWIL
Orange Level
Joined: 11 Sep 2009
Location: NW Illinois
Points: 22825
|
Post Options
Thanks(0)
Quote Reply
Posted: 07 Feb 2020 at 8:51pm |
|
I would fit the wheel center on the shaft after it is all cleaned up to see how far it will go. Make sure if it bottoms out on the shoulder, that it won't rock around or rotate at all. Then I would dress the shoulder back as needed for a bit of clearance. Then I might consider making 3 small shims that are just a bit thicker than the gap between the wheel and the shoulder when fit dry. Fill any wore spots with the mixture and snug everything up on the 3 equally spaced shims behind the wheel. Let it set up, remove the shims and tighten the nut.
|
|
|
|
Lon(MN)
Orange Level
Joined: 11 Sep 2009
Location: Merrill Wi
Points: 2037
|
Post Options
Thanks(0)
Quote Reply
Posted: 08 Feb 2020 at 6:52am |
|
With so many good parts available, I would fix it right and replace the worn out parts.
|
|
tadams(OH)
Orange Level Access

Joined: 17 Sep 2009
Location: Jeromesville, O
Points: 10955
|
Post Options
Thanks(0)
Quote Reply
Posted: 08 Feb 2020 at 11:55am |
|
I would also replace the axle seal while it apart.
|
|
ac fleet
Orange Level
Joined: 12 Jan 2014
Location: Arrowsmith, ILL
Points: 2337
|
Post Options
Thanks(0)
Quote Reply
Posted: 08 Feb 2020 at 4:30pm |
I would lean towards the replace idea myself, BUT it's your tractor so do whatever seams right to you.
As far as the axle splines, weld up, grind down carefully and that will take up a lot of slack just doing them. Like TD said new seals while you are in there, also check bearings!
|
|
http://machinebuildersnetwork.com/
|
|
steve(ill)
Orange Level Access
Joined: 11 Sep 2009
Location: illinois
Points: 88197
|
Post Options
Thanks(0)
Quote Reply
Posted: 08 Feb 2020 at 8:43pm |
My plans for it is to get it mechanically sound, and then decide if it is worth a full restoration down the road a bit. Currently it will run, but I have the gas tank off to remove the rust and the carburetor needs to be rebuilt. I have ordered some parts, and am currently waiting on some wheel wedges to arrive to replace two on the left wheel. My current question
there is plenty of time DOWN THE ROAD to do a replacement if your doing a complete overhaul.... if your goal is to GET IT RUNNING and see how things go for a couple years, then the DEVCON is a good short time repair.
|
|
Like them all, but love the "B"s.
|
|


