| Author |
|
Michael (WI) 
Orange Level

Joined: 12 Sep 2009
Location: Larrabee, WI
Points: 815
|
 Post Options Post Options
") Thanks(1) Thanks(1)
") Quote Quote  Reply Reply
 Topic: 782 Chopper Rebuild Topic: 782 Chopper Rebuild
Posted: 03 Feb 2012 at 9:20pm |
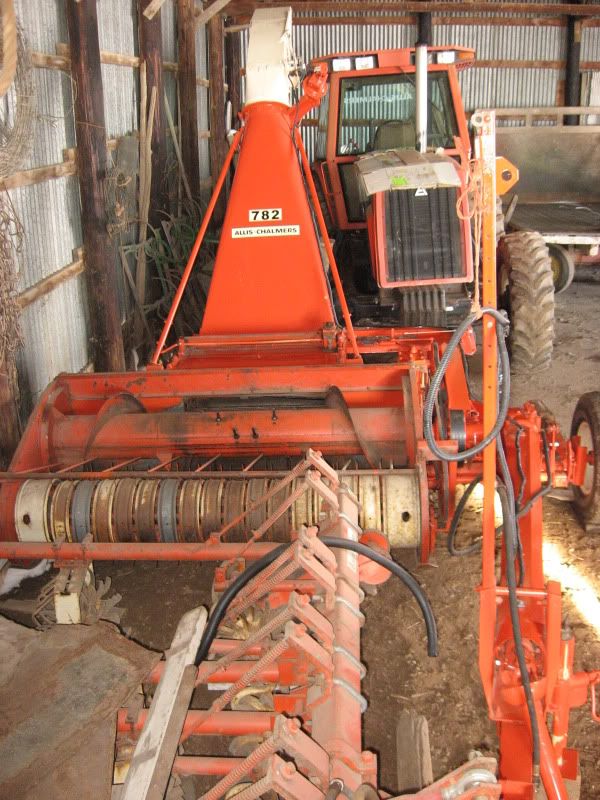
For those who may or may not know I recently completed a full rebuild on a 782 chopper base unit. It all started fall of 2009, as I was hooking on a wagon I noticed oil dripping off the chopper and traced it to the feed roll gear box. I grabbed the upper shaft on the gear box and it just flopped around. Because I was only a few loads away from filling the silo and I work weekdays I kept refilling it and finished up. That fall I pulled the gearbox off to take into the machine shop, took the wheels off to get them blasted and painted since they were extremely rusted and took the hubs off since I knew the bearings were in tough shape. I thought that would be the extent of my project but as I was waiting for the parts to come back I started looking closer at the machine. That is where the landslide started, all because the last owner did not seem to know how important a grease gun was.
With the gearbox pulled I grabbed a lower feed roll shaft and found it extremely sloppy. Further inspection determined the roller bearings were long ago seized and the shaft wore well into the bearing taking out at least half a bearing roller as well as wearing the hardened feed roll shaft. I then started wondering about the bearings on the jack shafts under the feed roll gearbox. When I pulled one of those shafts out a pile of needles fell out of the bearing. I could go on and on but the short story is the more I looked the more I found wrong.
Without knowing the feed roll shafts are splined and removable from the feed rollers it seemed I had to take the entire side of the chopper off to get the feed rolls out. This also meant pulling the cylinder and as long as I was doing that I should look into the drive line over-running clutch. The main PTO gearbox was leaking from the front seal so I should probably have that fixed...oh and as long as I am this far I should probably look at the PTO shaft U-joints. It also seemed a shame to take that much apart without doing some "minor" painting. I think you can see how things progressed. So after much deliberation with the machine half torn down I decided to do a full restoration. How hard could it be right? It is only a chopper and not as complicated as a tractor?
The first hick-up was sometime spring of 2010 when I tried to get the cutter cylinder out. The right side had a spacer on the shaft outside the bearing which was rusted to the shaft and had no way to get a puller on. Well, that side plate has a removable inner piece so I just unbolted it and left the hub/bearing assembly on the cylinder. Then I turned my attention to the left side of the cylinder. I pulled the input shaft, over-running clutch and other parts off. I tried gently persuading the shaft with a deadblow hammer and it would not budge. I then sprayed the shaft with PB blaster for several days hoping it would free. I was stuck there for several weeks before I asked the mechanic at work what to do. He said you need to drive it out with a pneumatic hammer. He came out and we made a driver for a hand held pneumatic chipping hammer by taking a wore out chisel and welding a piece of pipe on the end. The pipe had the right ID to clear the threads on the end of the shaft and long enough to bear on the shoulder at the base of the threads. We then hooked this hammer which usually runs on a 1" air line to my small mobile compressor and after a few seconds the cylinder started moving...a success. With the cylinder out I could now pull the right side plate and get the feed rollers out. After doing so I found out the shafts themselves were splined and removable from the outer roller. This meant I could have freed the shafts (with lots of heat and hope I did not start a grease and chaff fire) in the machine, pulled the shafts out the side plates and taking the rollers out the front of the feed housing. I chalked that one up to the school of hard knocks, and convinced myself I needed to pull the side plate anyway for painting.
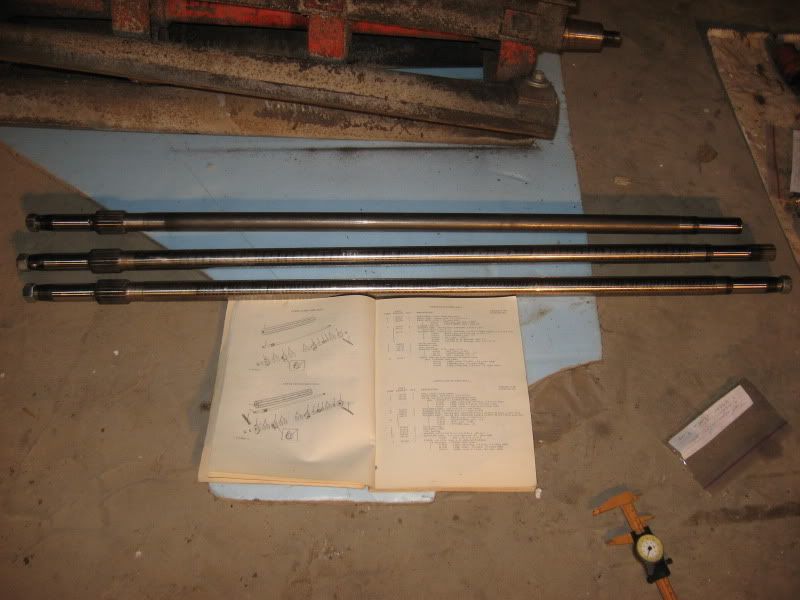
The next of several hick-ups is when I found out that the feed roll drive shafts were discontinued. So I took them to the local machine shop which does a lot of specialty items. They once machined several sets of custom run Duesenberg heads that were privately commissioned, some of which ended up on Jay Leno's car, but that is another story for a different time. Anyway after looking the shafts over the owner Scott decided to take the project on, I think if nothing else for the challenge. I had hoped the bearing journals could be spray welded or built up by chrome spraying and turned but the weld would develop hairline cracks every time it cooled. Scott tried several times trying different cool down cycles but always with the same results. Since the splines which engage the outer roller were so badly rusted he said the best way to fix these is start over. It involved starting with oversized blank shafts since the ID on the feed rollers were so wollowed out, turn the roller bearing journals, induction heat treat the bearing journals, cut the tapers on the ends for the gears, buy generic spline stock, bore it to fit the shaft and weld it on the shafts. They did take a bit of tweaking as some of the bearing journals needed to be cut further down the shafts to allow clearance inside the rollers so the shafts could freely float sided to side in the roller allowing the assembly to center in the feeder housing. Eventually we had a very nice finished product.
Originally I thought I would take the major pieces off the machine, put the wheels back on and pull the carcass to the blaster/painter, but before I knew it I had it stripped down to the bare frame. Did you know you can fit an entire chopper in the back of an 8' pickup truck bed when it is in pieces?
My biggest reassembly problem was setting the preload on the cylinder bearings. These bearings were unusual in that they were barreled, tapered roller bearings. These were discontinued of course but I managed to find two NOS sets through dealer stock locators. My machine shop also tried to find some and checked several bearing warehouses and nobody carried these anymore. I was so worried I had our mechanic come out from work to help me set the preload. Since they were so rare I did not want to ruin these. We set the preload and I found through measurements that the exposed threads at the preload nut to be within a 1/16". I found this acceptable because when I painted the machine it was all in pieces unlike at the factory which was painted in a sub assembly. Because of this the housing in theory was a hair wider due to a few layers of paint being in between some parts now. When I finally got the machine running weeks later in the summer of 2011 everything seemed fine except the cylinder bearings were running what I thought to be too hot. I think I even put a post on the AC page back then looking for help/info. I measured the bearings with a heat gun and they were pushing 190 degrees. I finally in desperation had the owner of the machine shop come out and check it. We reset the preload and they still ran just as hot. Scott said run them....I am happy to say they made it through corn harvest this fall ok. I guess they always ran that hot but I never noticed it before apparently.
My biggest word of advice to anyone thinking of tackling a project like this is documentation. If you remember when I started the project I thought I was only working on three items so I did not take any disassembly notes. Once I knew I was in a full blown restoration I of course started, but when I was putting it back together over a year later that mistake would rear its head a few times. All I can say is measure, take pictures, measure some more and take pictures yet again and if you are lucky you might have taken enough info. I measured simple things like how far a hub sat in from the end of a drive shaft, it seemed minor but proved to be enormously helpful down the line when diagnosing problems as I could rule out what wasn't wrong to find out why something was misaligned. More often than naught the problem traced back to a custom part which then needed minor tweaking. I think I also used a box of ziplock bags trying to keep all the nuts and bolts separated by parts, even though I replaced them all with new I still needed to know what size went were. The parts manuals were invaluable in determining how things went together where I had no notes as well.
Perhaps the most naive part is when I picked up all the parts from the painter fall of 2010. I took off of work Thursday afternoon figuring I should be able to get the machine put together by Saturday morning and start chopping. Yeah.....lets just say custom parts means lots of adjustment when assembling. I got as far as trying to install the custom feed roll shafts and finding they needed some tweaking. Since I did not make my deadline by Saturday I took a more leisurely pace assembling the rest of the machine and did other work I was going to postpone until after chopping that fall. Things like putting electric controls on the spout. Then it got too cold in the shed around December to keep painting nuts and bolts as I was assembling and I had to wait until March to resume assembly. In the end I did not get the machine running until summer of 2011.
I know for sure I could not have finished this project without Manitowoc Motor Machine and Schuette Manufacturing. The machine shop of course made and fixed all the obsolete moving parts I mentioned and more. Schuette re-fabbed so many rusted sheet metal remains like the upper cylinder housing/tool box, they made a large patch for the discharge chute which had a compound corner. They did the patch all with just a sheet metal break and taking lots of small bites, its amazing you can’t even tell until you have your face right on top of it. A local decal shop also helped reproduce all the necessary decals. A big thank you goes to Brenda at Sandy Lake Implement for helping track all those discontinued parts through dealer inventories. Also, thank you to friends at home and friends on here for answers and help.
As you will see in all the pictures, I lack a nice cozy heated shop. I have concrete on both sides of the machine for vehicle parking, but worked on ground most of the time. My overhead hoist was two 4x4's laid across the trusses with a rope block and tackle hung from that. My auxiliary material handling device was a engine hoist with planks spread out on the dirt so I could muscle it around. I guess you just make do with what you have. Some day my dream is to have a nice heated shop though with concrete floors throughout.
Enough of the novel, now for some pictures. I will not do a step by step but here are some of the highlights.
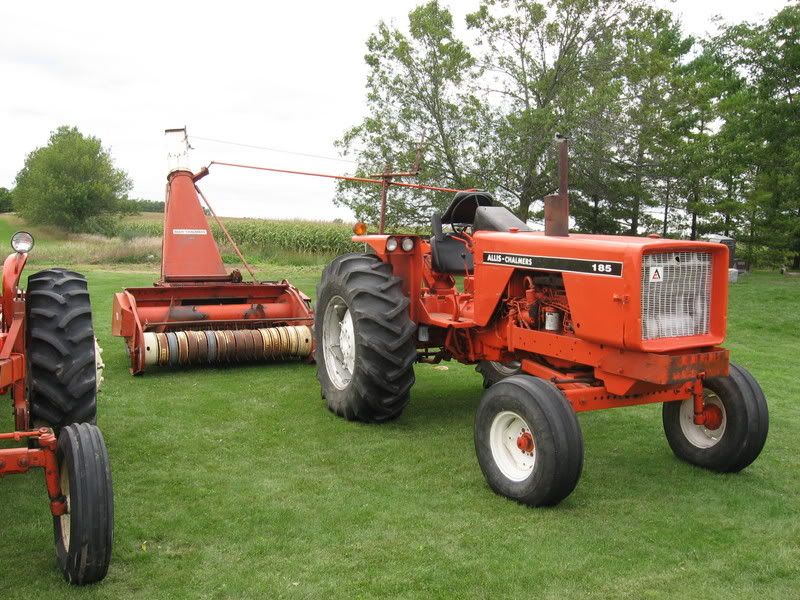
Here is a before from 2007, not a good closeup unfortunately.
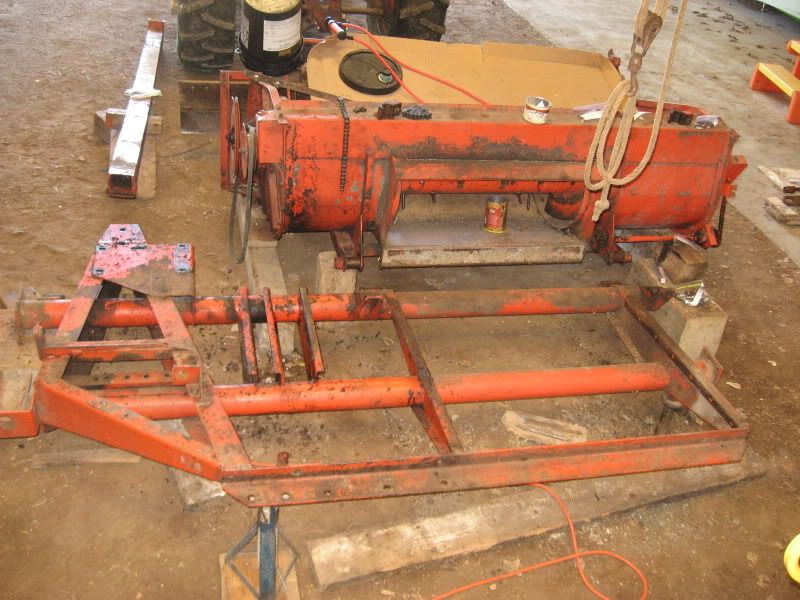
Early disassembly with the feed roll gearbox and jack shafts gone.
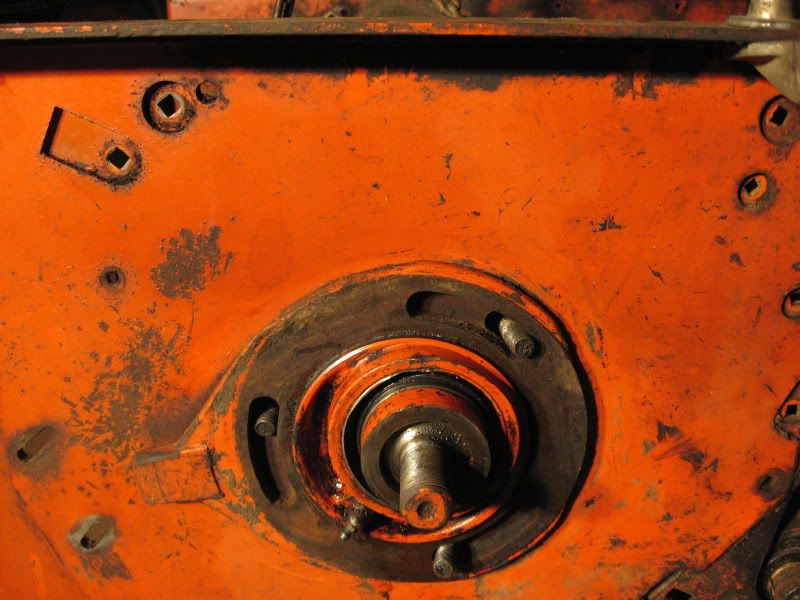
Cutter cylinder shaft with stuck spacer.
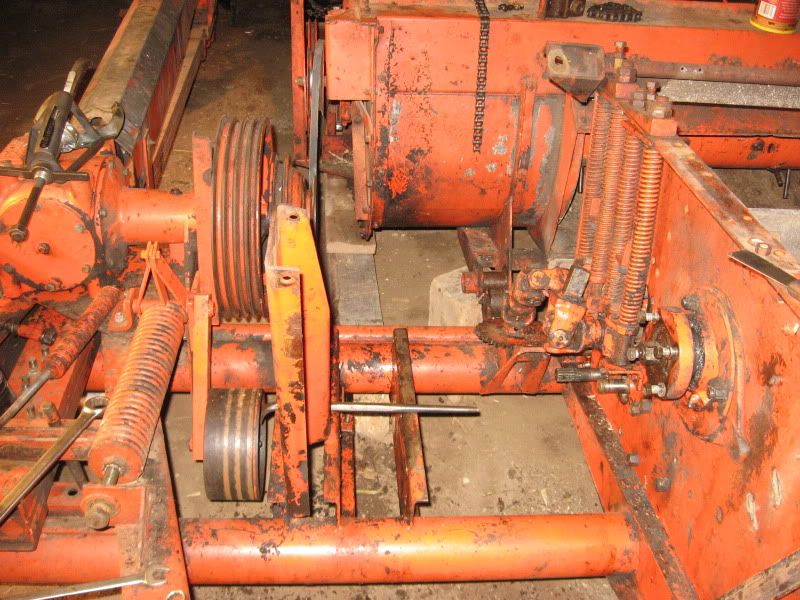
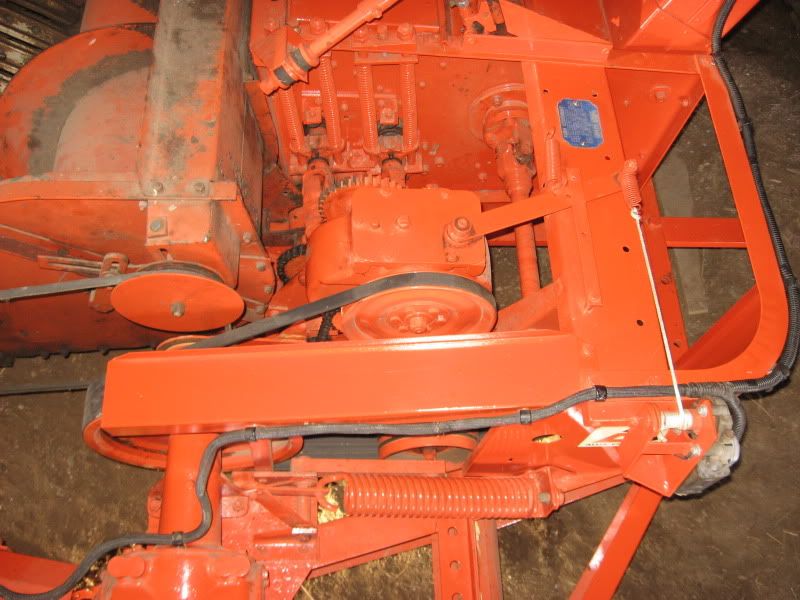
Upper feed roll tension springs with rebuilt gearbox in upper left corner.
Left side of machine with refreshed and repainted hubs installed as I still thought I was going to pull the machine in for painting.
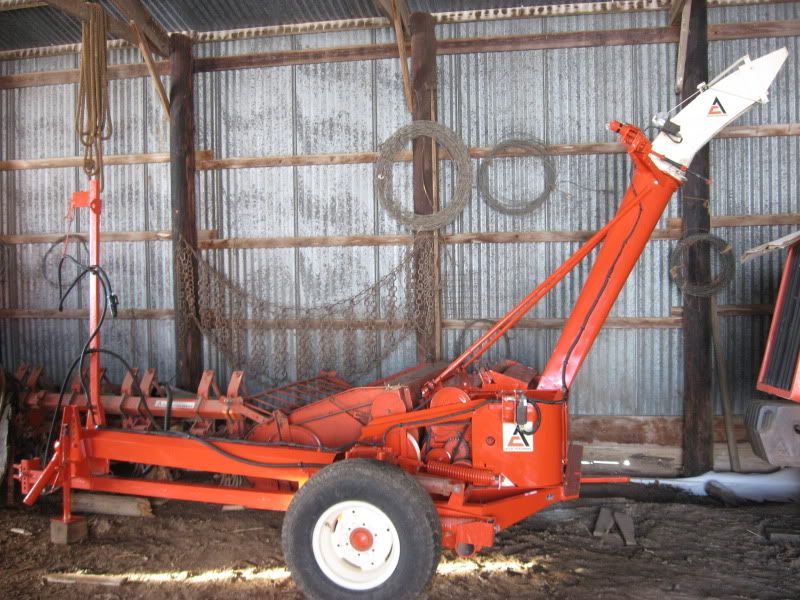
I have numerous other disassembly pictures but here is the end product.
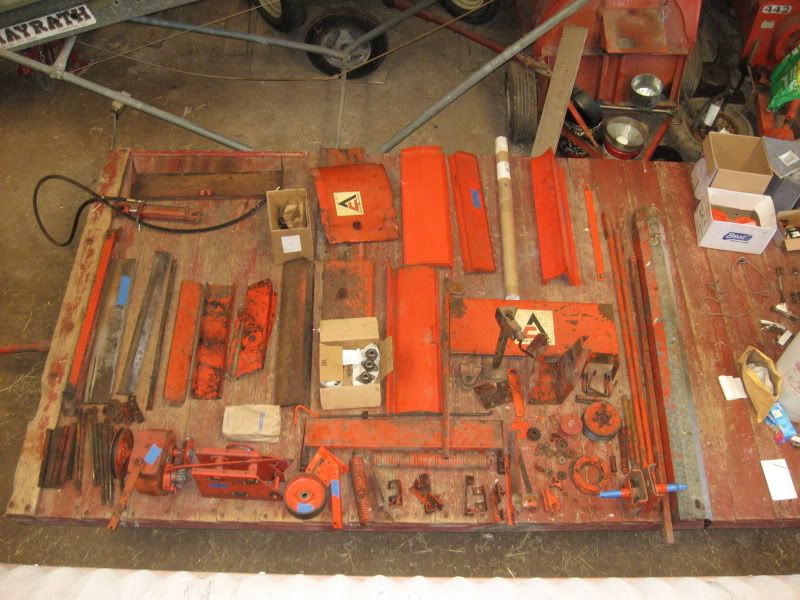
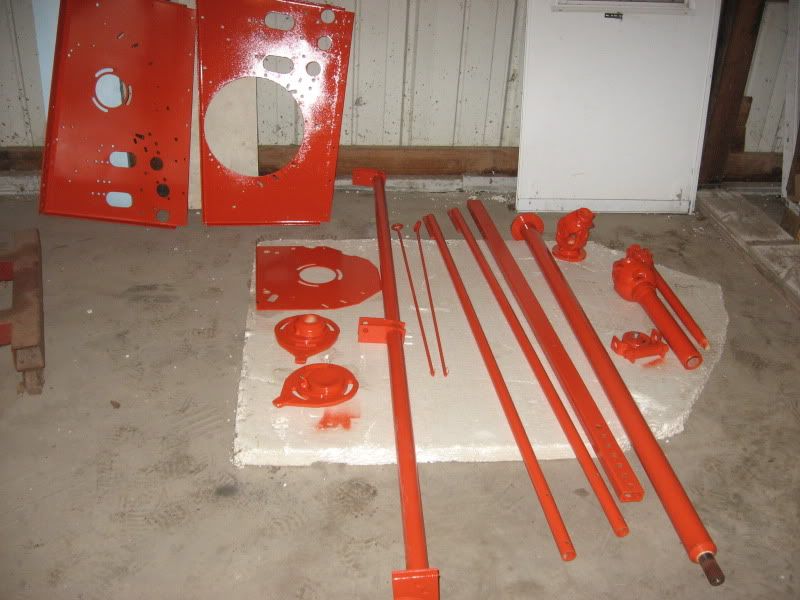
Here is the rest of the machine. Blue tape meant do not blast, just repaint.
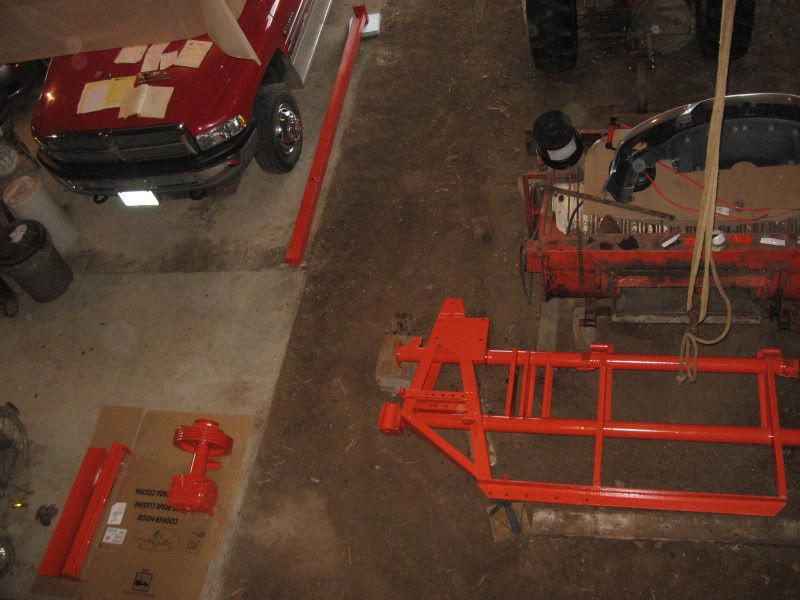
Starting point of re-assembly, notice manuals spread out on the truck hood.
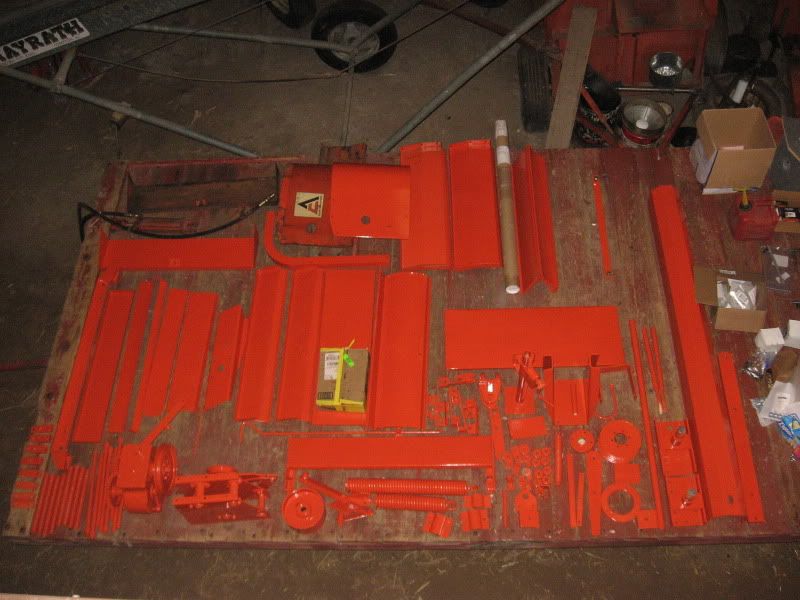
Like new parts.
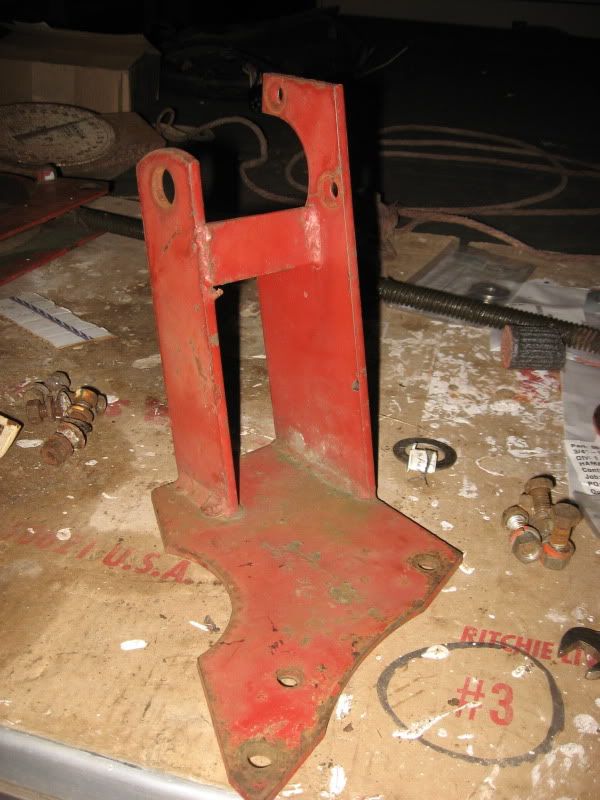
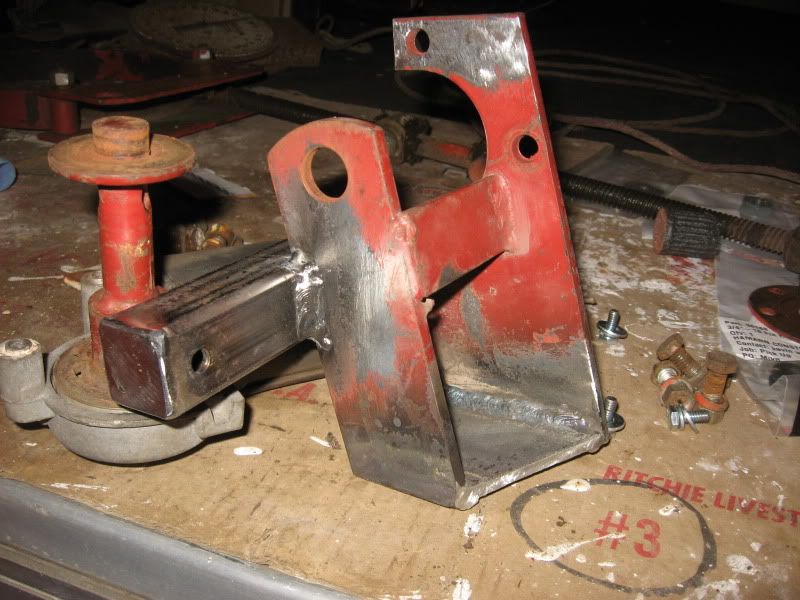
I noticed several parts were a bit tweaked when I tried to reassemble them. I suppose some of them warped from blasting, or were bent to start with. I found a good use for the John Deere as dead weight to anchor this bracket down to bend it back in place with long pieces of steel clamped to the sides as I have no large presses.
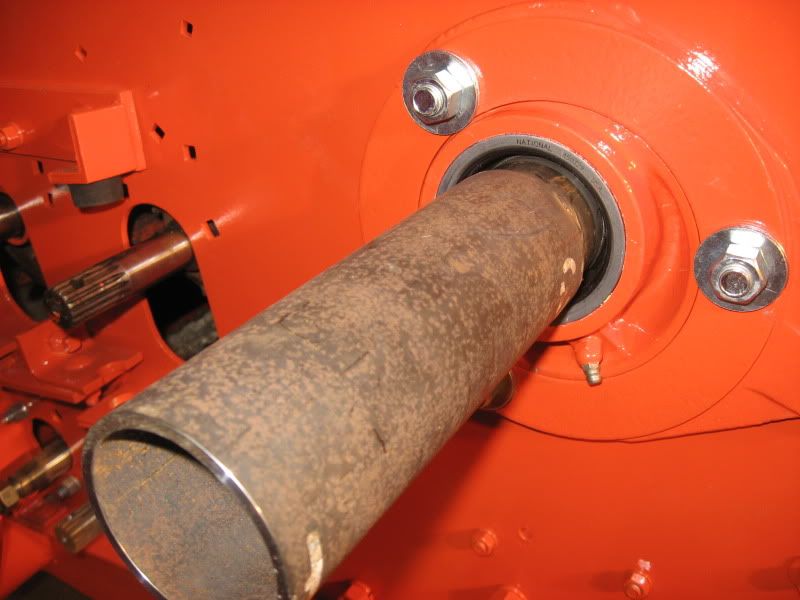
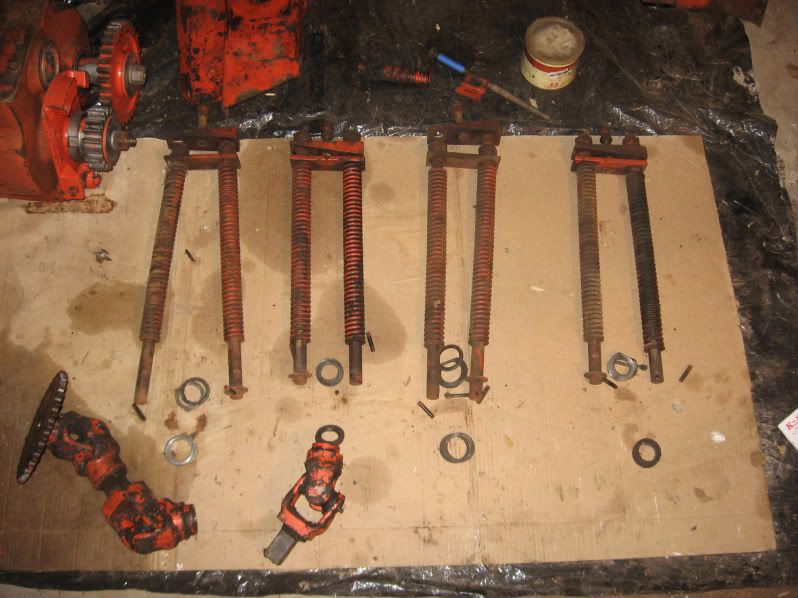
Custom made feed roller shafts
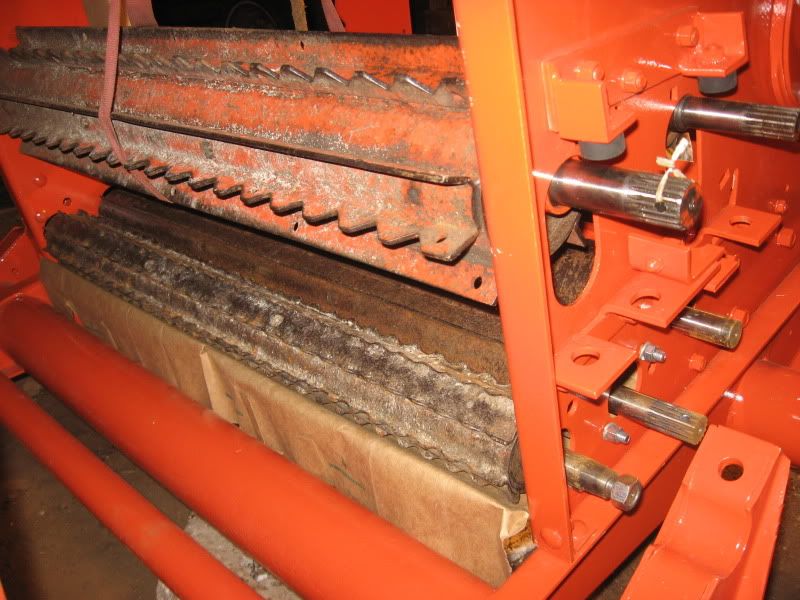
Installing the shafts took at least four tries between pulling them for modifications or pulling the gears off the end to change the number of machinery bushings to get the right free play on the shafts.
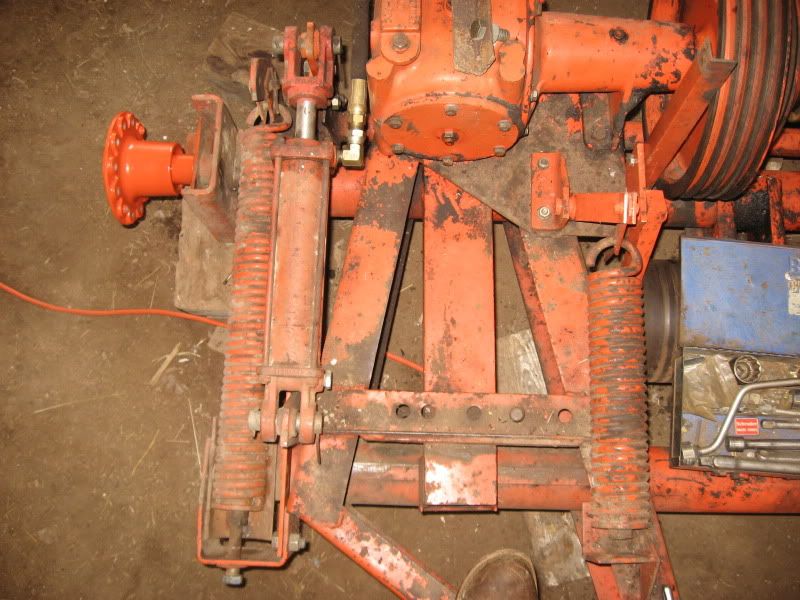
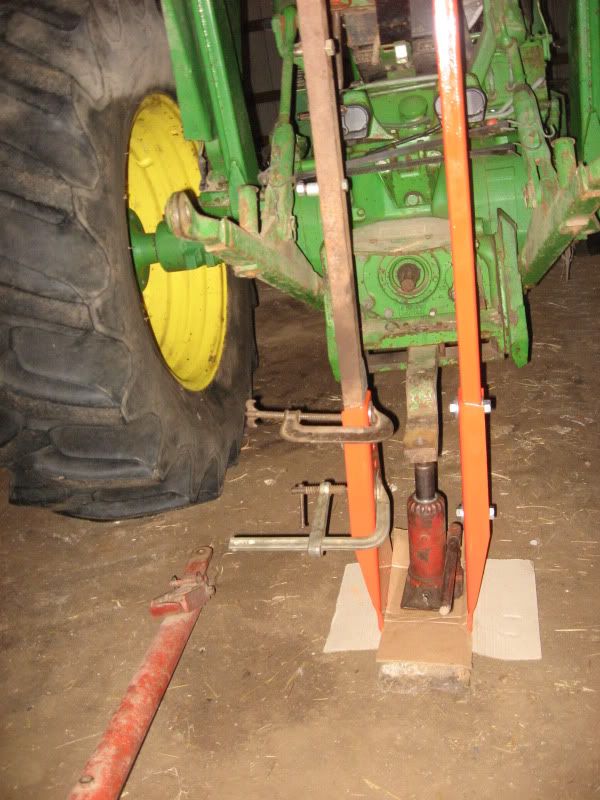
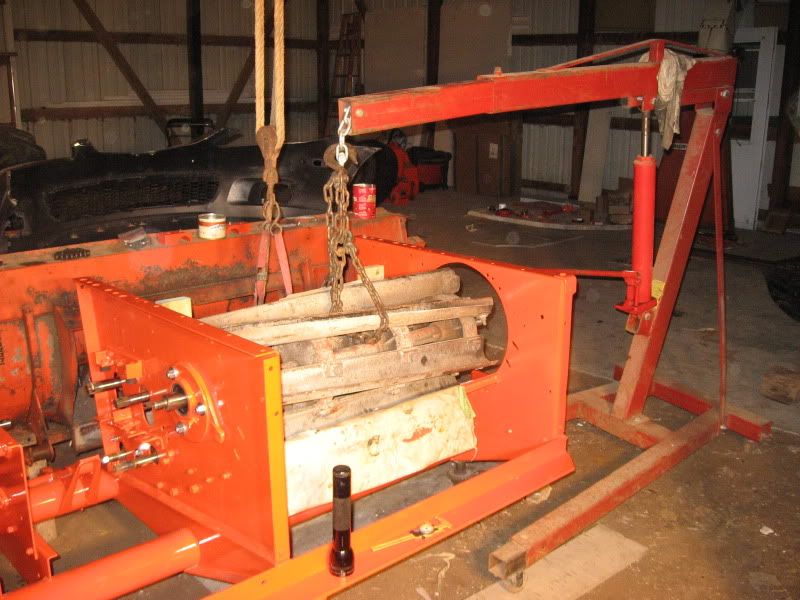
Installing the cylinder.
Custom made driver to push special bearings on the shaft.
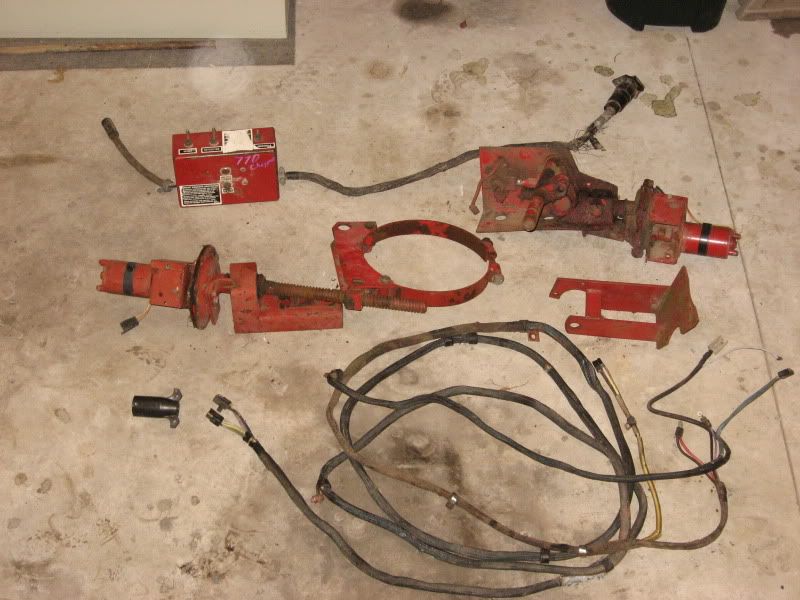
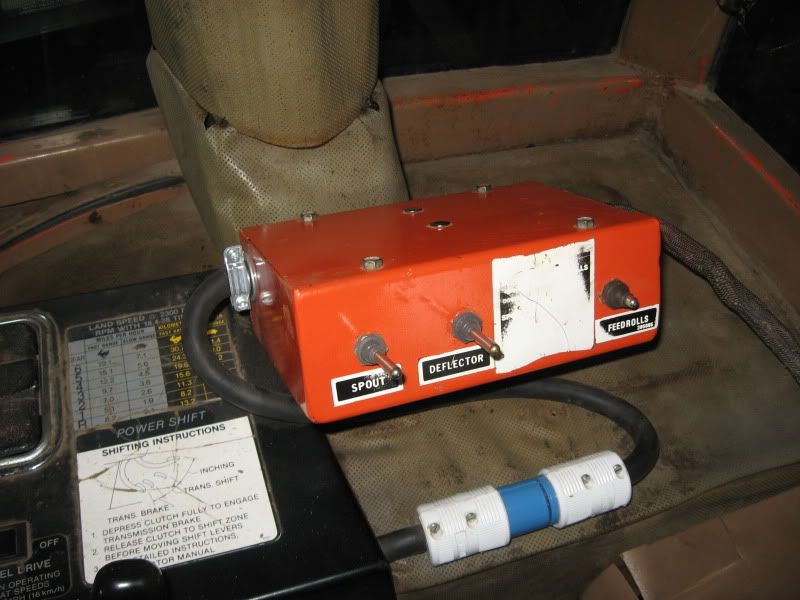
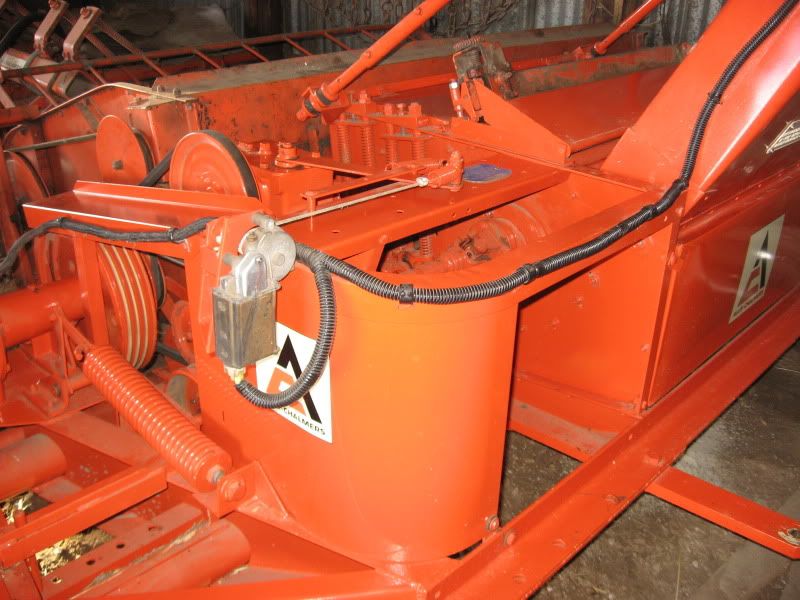
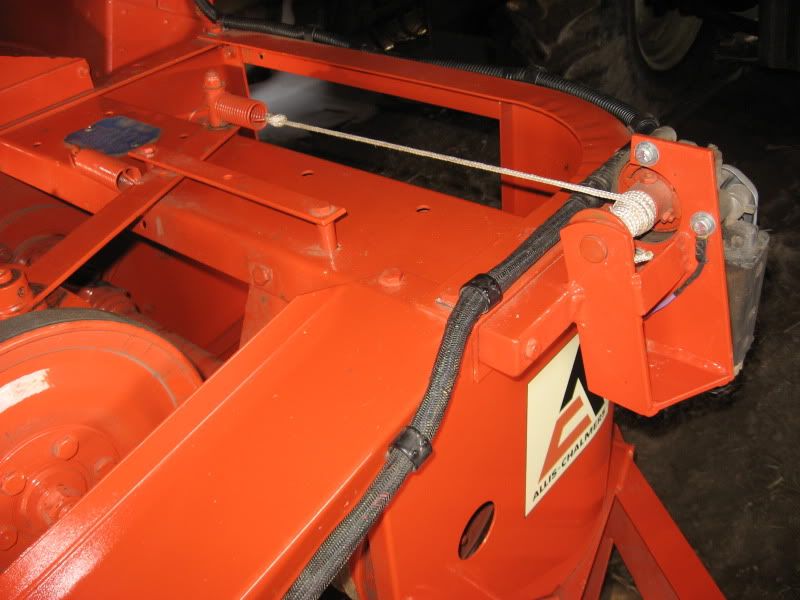
As I mentioned above I had dreamed of adding electric controls to this chopper for several years. Our land is so uneven that I had to set the manual controls so far back so they do not smash the cab going through a ditch that I have to lean out the back of the cab just to reach them. Also running without the back window meant lost of dust in dry years and the noise from kernels bouncing up the discharge chute was deafening. At a spring consignment auction in 2010 I noticed New Holland controls from a 770 would make an almost perfect swap. I found a used set for a few hundred dollars and got to work.
I needed to make new brackets or modify brackets on all motors, here I am fabbing up a new bracket for the spout rotating motor.
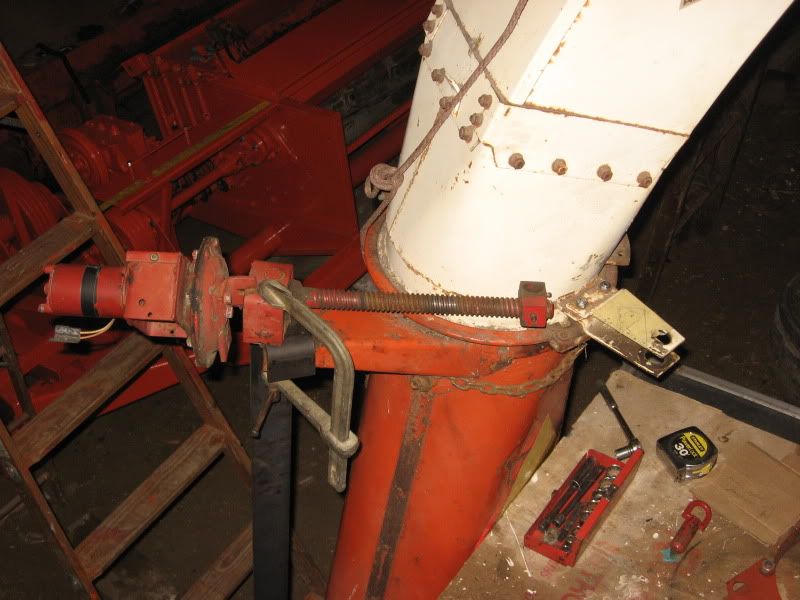
The machine shop also had to extend the screw rod as this one was too short for this spout. They ended up buying a new piece of double pitch acme threaded rod and welding it to the motor drive shaft.
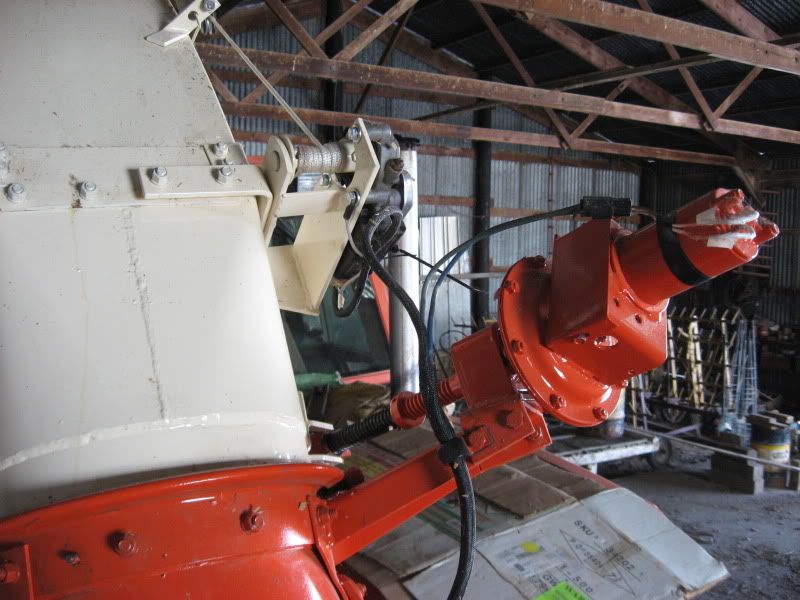
New Holland mounted their spout deflector motor at the base of the spout which meant turning the spout would also move the deflector so I mounted mine right on the spout.
To run the feed roll gear box I ended up getting a second spout deflector motor as it proved to be a much easier application than the New Holland screw motor with several limiting switches built in. I could just not find a simple way to mount and hook it up to the gear box. Below is the before and after.
Because I omitted one type of motor and used two of the other I had to rewire the inside of the control box a bit. Thankfully there was a wiring diagram printed on the inside of the cover so I could figure out how it was wired. Then using knowledge imparted to me from my late father I was able to make the simple internal modifications. I even adjusted the wiring diagram per my changes so somebody down the road will know what happened. Dad was an electrical engineer who in his younger days worked for AC one year in the 60's. He took a year off from college in order to make enough money so he could finish his degree at Madison. He died just before I started this project and I still miss today. Below is the box installed in the 8030 with a fresh coat of orange paint.
The wiring harness of course was too short and the motor whips were in the wrong places so I had to open the harness and move the whips and add a bout 10' of overall length. It took a few rolls of color coded wires but I got it done. Then I had to mount it to the chopper and try and make it look "original."
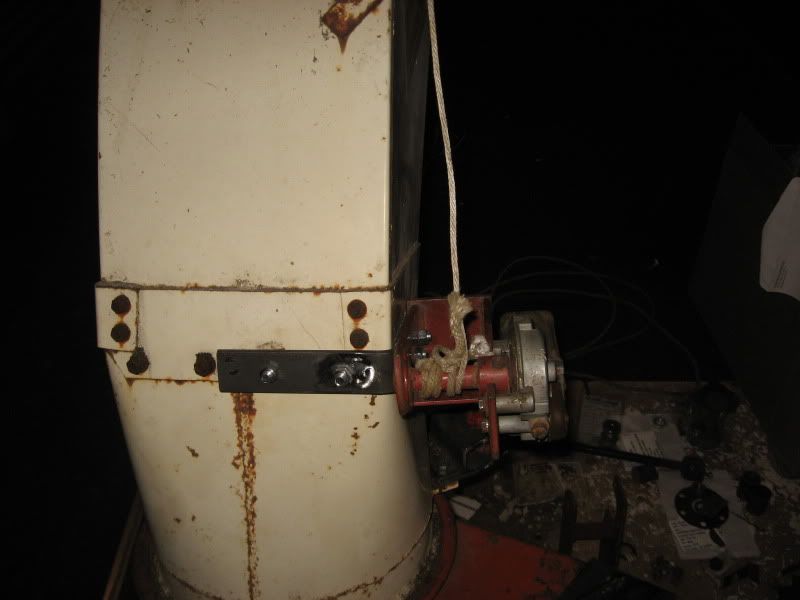
When hooking the extra deflector motor up to the feed roll gear box since it had no limit switches I needed to come up with something to protect against overload and burning the motor out. I came up with the pedestal mounted on top of the gear box arm with a spring mounted to an outer pivoting sleeve for protection.
After picture of the spout and deflector motors.
Des anyone have a clear picture of the warning decal that is supposed to be on the main drive belt shield?
Thank you for all those who took the time to read this long winded post and helped to answer questions along the way during this project. Below is a link to my album if you want to see all the pictures. Mike
Edited by Michael (WI) - 04 Feb 2012 at 11:53am
|
 |
|
Sponsored Links
|
|
|
Skyhighballoon(MO)
Orange Level

Joined: 11 Sep 2009
Location: Pilot Grove, MO
Points: 3115
|
Post Options
Thanks(0)
Quote Reply
Posted: 03 Feb 2012 at 9:29pm |
|
Wow Michael - what a great story and job you did. Thanks for taking all the pics and taking time to explain all the mods and fixes during your rebuild. So great to see a machine like that get a whole new lease on life. Mike
|
|
1981 Gleaner F2 Corn Plus w 13' flex
1968 Gleaner EIII w 10' & 330
1969 180 gas
1965 D17 S-IV gas
1963 D17 S-III gas
1956 WD45 gas NF PS
1956 All-Crop 66 Big Bin
303 wire baler, 716H, 712H mowers
|
|
Tracy Martin TN
Orange Level Access

Joined: 11 Sep 2009
Location: Gallatin,TN
Points: 10938
|
Post Options
Thanks(0)
Quote Reply
Posted: 03 Feb 2012 at 10:18pm |
|
Wow! Tracy Martin
|
|
No greater gift than healthy grandkids!
|
|
GBACBFan
Orange Level
Joined: 11 Sep 2009
Location: Green Bay WI
Points: 2662
|
Post Options
Thanks(0)
Quote Reply
Posted: 03 Feb 2012 at 11:04pm |
|
Very impressive. Quite the project to tackle, and a great end result. Thanks for the well documented pics and description.
|
|
"The trouble with quotes on the Internet is that you can never know if they
are genuine." - Mark Twain
|
|
Nathan (SD)
Orange Level
Joined: 11 Sep 2009
Location: Day County SD
Points: 1304
|
Post Options
Thanks(0)
Quote Reply
Posted: 04 Feb 2012 at 2:36am |
True passion. Takes a special kind of commitment to spend all that time and money.
Just doing all that typing would be a big job for me.
Sad part. That chopper would still hardly bring $1000 at a auction.
Hopefully it works for you and your family for many years to come because of the energy you put forth to do a complete job.
|
|
ChuckLuedtkeSEWI
Orange Level
Joined: 11 Sep 2009
Location: Jackson, WI
Points: 1826
|
Post Options
Thanks(0)
Quote Reply
Posted: 04 Feb 2012 at 6:56am |
Excellent job Micheal. If you keep up the greasing this time, it will most likely outlast you before it needs that kind of work again.
Nathan, you have to think of it a different way. It may not bring much if sold at an auction, but what would it cost to go out and buy a new one? I'm sure the time and money invested in this repair doesn't come close to what a new unit would cost. And the knowledge base that Micheal learned on this unit after tearing it down so far and doing all the repairs is something you can't get without tackling a project like this.
|
|
1955 WD45 diesel 203322 was my dad's tractor, 1966 D15 23530, 1961 HD3 Crawler 1918, 1966 D17 IV 83495, 1937 WC 41255, 1962 D19 6221
|
|
Orange Blood
Orange Level
Joined: 29 Nov 2010
Location: ColoradoSprings
Points: 4053
|
Post Options
Thanks(0)
Quote Reply
Posted: 04 Feb 2012 at 8:04am |
Are you related to Tom Yaz??? :)
Very nice rebuild, great improvements also!
|
|
Still in use:
HD7 WC C CA WD 2-WD45 WD45LP WD45D D14 3-D17 D17LP 2-D19D D19LP 190XTD 190XTLP 720 D21 220 7020 7030 7040 7045 3-7060
Projects: 3-U UC 2-G 2-B 2-C CA 7-WC RC WDLP WF D14 D21 210 7045 N7
|
|
Kurzy
Orange Level
Joined: 02 Nov 2009
Location: WSS, Montana
Points: 808
|
Post Options
Thanks(0)
Quote Reply
Posted: 04 Feb 2012 at 8:29am |
Howdy Michael, Thats the way to do a job, thats just great. I could of saved you all that fun. I have my 782 for sale for $600.00 field ready. Kurzy  |
|
Michael (WI)
Orange Level
Joined: 12 Sep 2009
Location: Larrabee, WI
Points: 815
|
Post Options
Thanks(0)
Quote Reply
Posted: 04 Feb 2012 at 11:55am |
|
Kurzy, that wouldn't happen to be a 30" head would it?
|
|
Bolivar Boy
Orange Level
Joined: 27 Dec 2011
Location: wooster, ohio
Points: 641
|
Post Options
Thanks(0)
Quote Reply
Posted: 04 Feb 2012 at 12:09pm |
|
michael. am really impressed. you now have probably the best performing 782 chopper in america ! that shaft bearing thing could become an issue but as long as the grease doesnt run out, it may perform very well for decades. good approach, good documentation and a great finished product. tp studer. wooster ohio.
|
|
Kurzy
Orange Level
Joined: 02 Nov 2009
Location: WSS, Montana
Points: 808
|
Post Options
Thanks(0)
Quote Reply
Posted: 04 Feb 2012 at 1:42pm |
Howdy Michael, Yes it measures 30 inch, from where the knifes cut.Just so were on the same page. Kurzy
|
|
Byron WC in SW Wi
Orange Level

Joined: 11 Sep 2009
Location: Wisconsin
Points: 1635
|
Post Options
Thanks(0)
Quote Reply
Posted: 04 Feb 2012 at 7:40pm |
|
Very NICE! I love the implements being restored.
|
|
TomYaz
Orange Level

Joined: 14 Sep 2009
Location: PA
Points: 10341
|
Post Options
Thanks(0)
Quote Reply
Posted: 04 Feb 2012 at 10:32pm |
Nice Job Mike!
Looking at all those torn down parts is giving me PTSD!, excpet Im not thru with my intial Traumatic Stress yet, so could you hold off a bit! LOL!
|
|
If its not an All-Crop, it all crap!
|
|
Nathan (SD)
Orange Level
Joined: 11 Sep 2009
Location: Day County SD
Points: 1304
|
Post Options
Thanks(0)
Quote Reply
Posted: 05 Feb 2012 at 4:11pm |
I hope my first post doesn't come across as negative. I commented because I myself spend a great amount of time turning old equipment into useable pieces. I just don't have the dedication Michael does to do such a complete job. When I fill out my financial statement every year, I wish they would have a column where I could write a value for what the stuff is worth to me. For a WD with loader I put down $1500 cuz thats what it would sell for if I had a auction. I have many custom touches added that make it worth $5000 to me but would mean nothing to someone else. I rebuilt a IH 100 sickle mower. Converted it to a 2pt mount for the rear of the WD. If I took it to a auction it would probably bring $400. To me it is worth $1200. Thats what I spent getting it in shape and I intend to keep using it till it pays me back.
|
|
Michael (WI)
Orange Level
Joined: 12 Sep 2009
Location: Larrabee, WI
Points: 815
|
Post Options
Thanks(0)
Quote Reply
Posted: 06 Feb 2012 at 7:44am |
Nathan, don't worry. Unfortunately that is proabably an accurate statement. For what I have tied up in that machine I could have bought a very clean late model chopper with serivceable parts and that is not counting the hundreds of hours of labor I invested. I worry that one mistake or parts failure could take that machine out of service forever do to lack of replacement parts. In 2005 I did a mini rebuild just to get the machine running again and put in the last known full set of NOS knives on dealer inventory. One bad stone and I am sunk. I guess I will just enjoy the machine while I can. It was quite the project and a real eye opener as to what it takes to do this kind of thing.
|
|
JC-WI
Orange Level Access
Joined: 11 Sep 2009
Location: wisconsin
Points: 34640
|
Post Options
Thanks(0)
Quote Reply
Posted: 06 Feb 2012 at 10:36am |
Mike, That is one very intensive rebuild you did there.
I bought a n 890 that i use for less than what you paid to have one roll shaft made. That really sounds sick don't it. ... and If I hadn't bought the chopper, the scrap man would have had it. That thought is even sicker... And to think these choppers are all heading down the road to the scrap yards every day. Cuz the small farms are dying out...don't feed cattle or they hire custom chopper to pull in and chop it all in a few hours instead of days.
I can see lot of hours there, And I think, you will never tear her down again in this life....Hopefully.
Thanks for sharing, Best part was you made ol Tom Drool at the work you did. LOL
Sorry Tom...LOL
|
|
Dave in il
Orange Level

Joined: 22 Sep 2009
Location: Manville Il
Points: 1748
|
Post Options
Thanks(0)
Quote Reply
Posted: 06 Feb 2012 at 11:36am |
|
That is a fantastic job. I tend to fix things when I should trade up and I know what you mean about when parts become obsolete. It's one thing to fix up something you're going to retire and take to shows, it's different to put the work and money into something you plan on using to farm. Good luck! I hope it runs for a long long time.
|
|
AGCO My Allis Gleaner Company
|
|
ac-mike
Silver Level

Joined: 14 Sep 2009
Location: Kentucky
Points: 290
|
Post Options
Thanks(0)
Quote Reply
Posted: 07 Feb 2012 at 7:52am |
Mike you have done a great job on this restoration. I know how much work it was having rebuilt one after it threw a knife. I was wondering why no one had posted about their past experiences with this machine?  I have had many but won't get into that now. Good luck with your machine.
|
|
Michael (WI)
Orange Level
Joined: 12 Sep 2009
Location: Larrabee, WI
Points: 815
|
Post Options
Thanks(0)
Quote Reply
Posted: 07 Feb 2012 at 9:58pm |
|
I forgot to add, if anybody knows of a two row narrow corn head for this machine I would be very interested.
|
|
Noel Brown
Bronze Level

Joined: 05 May 2020
Location: Somerset
Points: 19
|
Post Options
Thanks(0)
Quote Reply
Posted: 09 Oct 2020 at 7:49am |
|
Hello I'm wondering if you might have any advice how to get bearing for cylinder on 782
|
|
Alex09(WI)
Orange Level

Joined: 15 Mar 2012
Location: CECIL WI
Points: 1778
|
Post Options
Thanks(0)
Quote Reply
Posted: 09 Oct 2020 at 9:57am |
 Noel Brown wrote: Noel Brown wrote:
Hello I'm wondering if you might have any advice how to get bearing for cylinder on 782 |
We have the cylinder bearings available
|
|
www.awtractor.com
A&W TRACTOR 920-598-1287
KEEPING ALLIS-CHALMERS IN THE FIELDS THROUGH THE 21ST CENTURY
|
|
rw
Silver Level
Joined: 28 Oct 2009
Location: United States
Points: 388
|
Post Options
Thanks(1)
Quote Reply
Posted: 09 Oct 2020 at 7:02pm |
|
Nothing works harder than Combines and forage harvesting machinery. Sweet when it is working right and will last if maintained and kept in adjustment. Otherwise big trouble. rw
|
|
Noel Brown
Bronze Level
Joined: 05 May 2020
Location: Somerset
Points: 19
|
Post Options
Thanks(0)
Quote Reply
Posted: 10 Oct 2020 at 8:15am |
|
Hello I'm wondering if you might have any advice on shafts and feedrollers for 782 chopper
|
|
Alex09(WI)
Orange Level
Joined: 15 Mar 2012
Location: CECIL WI
Points: 1778
|
Post Options
Thanks(0)
Quote Reply
Posted: 10 Oct 2020 at 1:01pm |
Noel Brown wrote:
Hello I'm wondering if you might have any advice on shafts and feedrollers for 782 chopper |
Might want to start a new thread with any questions you might have instead of piggybacking this old thread.
|
|
www.awtractor.com
A&W TRACTOR 920-598-1287
KEEPING ALLIS-CHALMERS IN THE FIELDS THROUGH THE 21ST CENTURY
|
|


 Topic Options