This site is not affiliated with AGCO Inc., Duluth GA., Allis-Chalmers Co., Milwaukee, WI., or any surviving or related corporate entity. All trademarks remain the property of their respective owners. All information presented herein should be considered the result of an un-moderated public forum with no responsibility for its accuracy or usability assumed by the users and sponsors of this site or any corporate entity.
The Forum Parts and Services Unofficial Allis Store Tractor Shows Serial Numbers History
Forum Home Forum Home > Allis Chalmers > Farm Equipment
  New Posts New Posts
  FAQ FAQ  Forum Search   Events   Register Register  Login Login


7020 pto leaking

 Post Reply Post Reply
Author
Message
youngorange2000 View Drop Down
Silver Level
Silver Level


Joined: 27 Mar 2019
Location: eastcentral MN
Points: 305
Post Options Post Options   Thanks (0) Thanks(0)   Quote youngorange2000 Quote  Post ReplyReply Direct Link To This Post Topic: 7020 pto leaking
    Posted: 25 Aug 2020 at 10:14pm
my 7020 has developed a leak at the bottom of the pto shaft I dont see a way to get at the seal it has the reversible 540/1000 and it looks like its all internal?  
Back to Top
Sponsored Links


Back to Top
Rusty Allis View Drop Down
Bronze Level Access
Bronze Level Access


Joined: 16 Jul 2020
Location: Rhode Island
Points: 150
Post Options Post Options   Thanks (0) Thanks(0)   Quote Rusty Allis Quote  Post ReplyReply Direct Link To This Post Posted: 25 Aug 2020 at 11:16pm
Back to Top
Ron(AB) View Drop Down
Orange Level
Orange Level
Avatar

Joined: 27 Dec 2009
Location: Alberta
Points: 943
Post Options Post Options   Thanks (0) Thanks(0)   Quote Ron(AB) Quote  Post ReplyReply Direct Link To This Post Posted: 26 Aug 2020 at 12:25pm
I'm still tracking down parts for mine.

The seals you can get anywhere.

The cone bearings are cheaper at the dealer.

And if you need the internal shaft (it could be bent?)...go to a wrecker.

Also make sure the pto stub shaft on the outside is not bent or twisted too!


Back to Top
bigal121892 View Drop Down
Orange Level
Orange Level


Joined: 05 Jan 2010
Location: Nebraska
Points: 738
Post Options Post Options   Thanks (0) Thanks(0)   Quote bigal121892 Quote  Post ReplyReply Direct Link To This Post Posted: 26 Aug 2020 at 6:01pm
I put new seals in one of our 7010's a number of years ago, follow the manual, not really a big deal. I would drain the oil and remove the bottom cover the night before, allows it to drip overnight.
Back to Top
Lynn Marshall View Drop Down
Orange Level Access
Orange Level Access
Avatar

Joined: 13 Sep 2009
Location: Dana, Iowa
Points: 2141
Post Options Post Options   Thanks (0) Thanks(0)   Quote Lynn Marshall Quote  Post ReplyReply Direct Link To This Post Posted: 27 Aug 2020 at 9:21pm
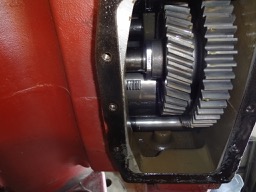
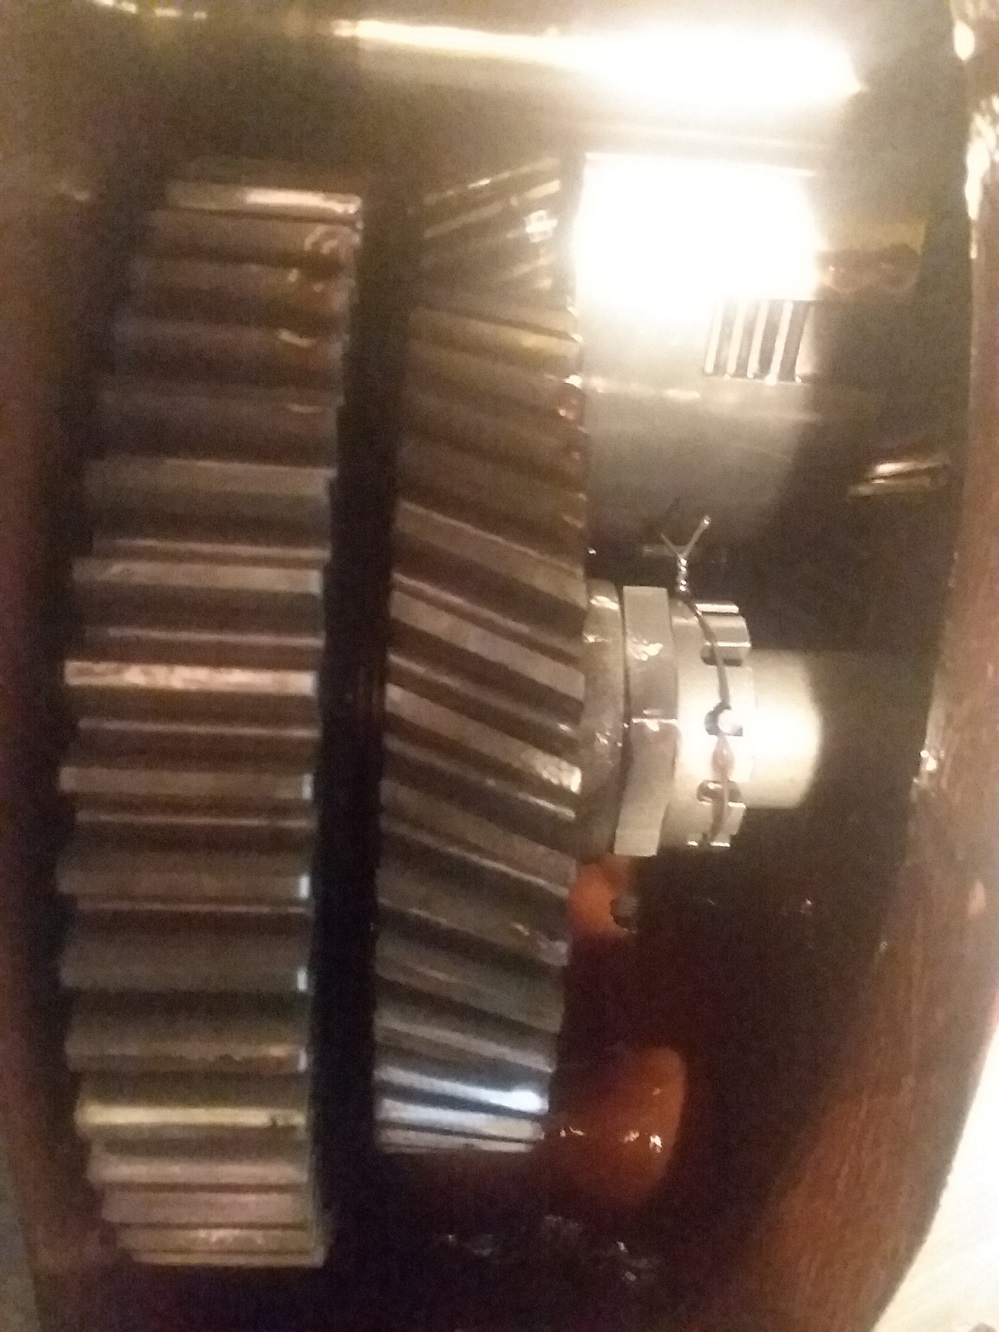
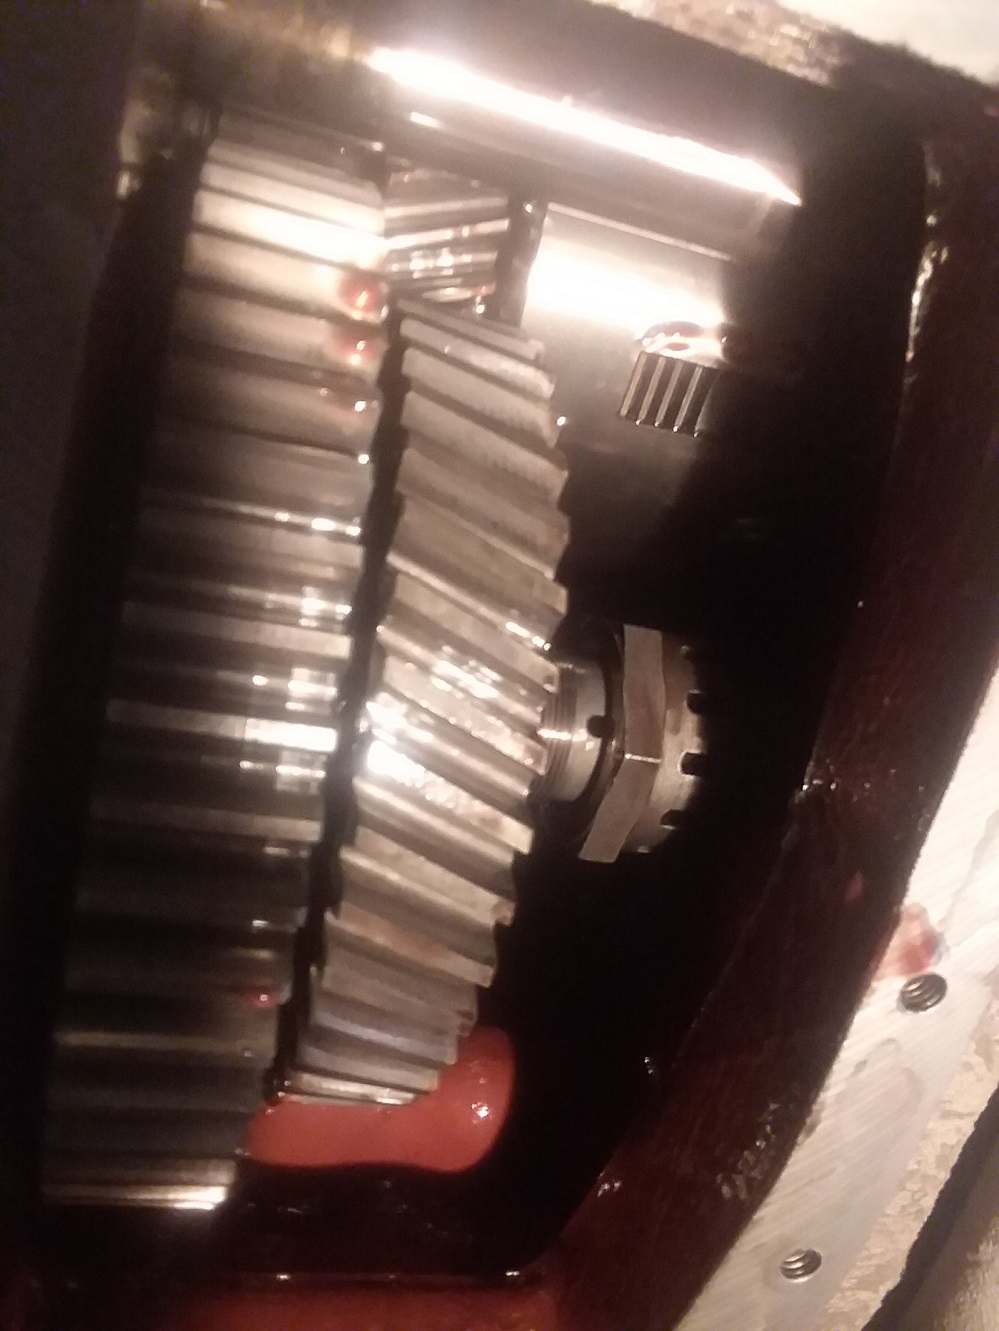
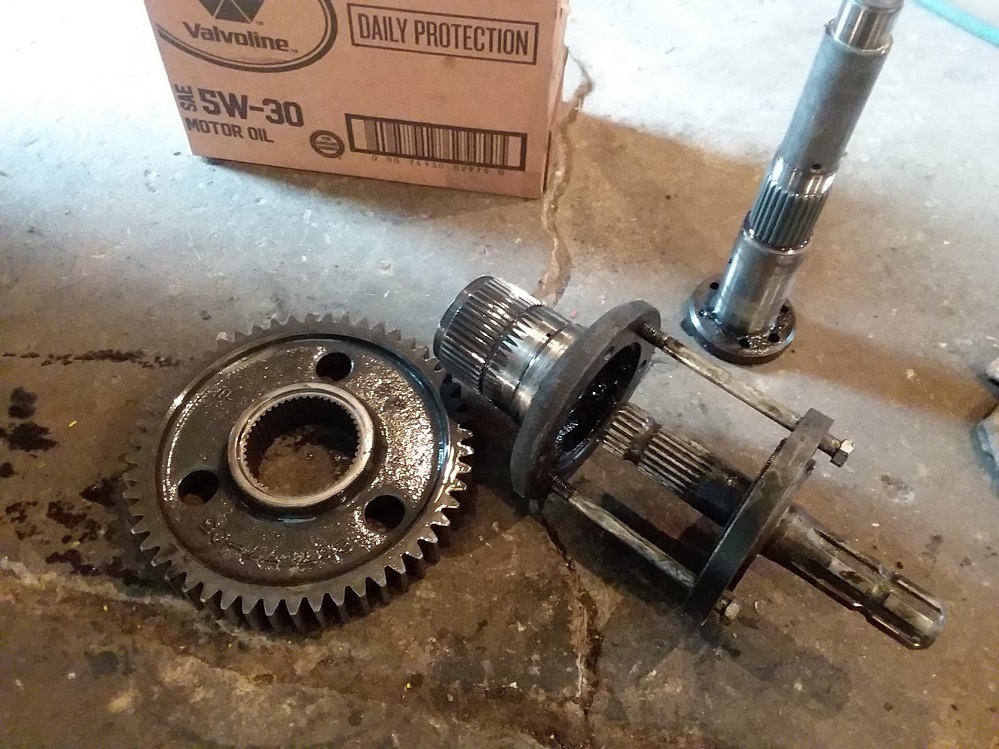
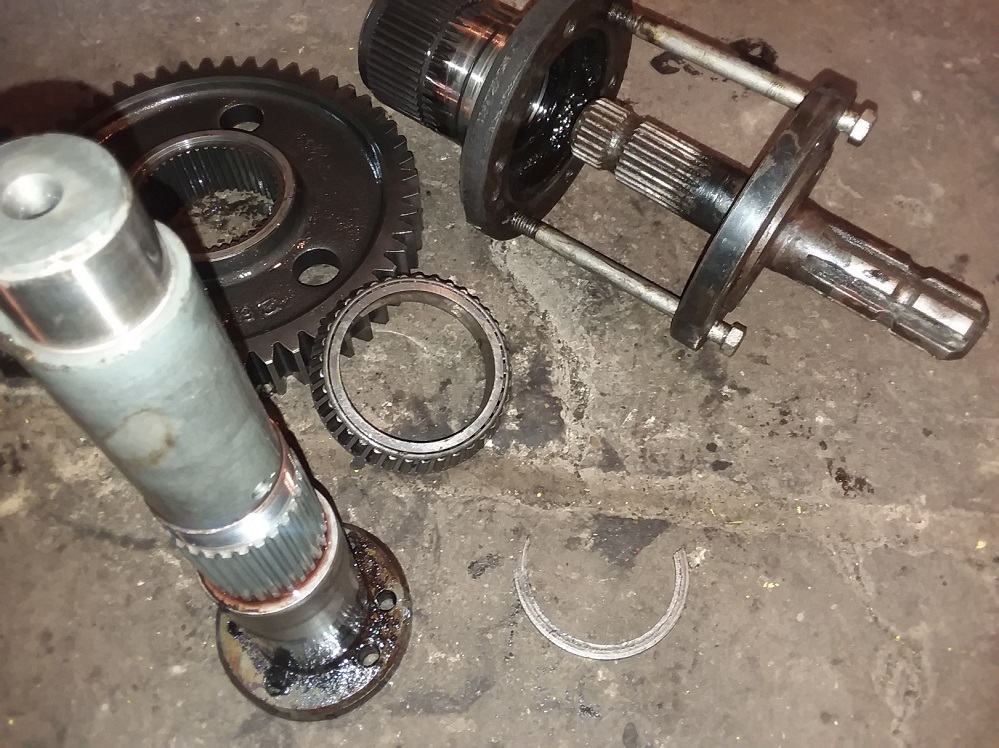
I did one on a 7010 this week. The pictures show having the oil out, the drawbar off, PTO shield off, and the bottom plated removed. The lock wire and pin are then removed followed by loosening the castle nut.  I use some long 7/16 bolts and the 
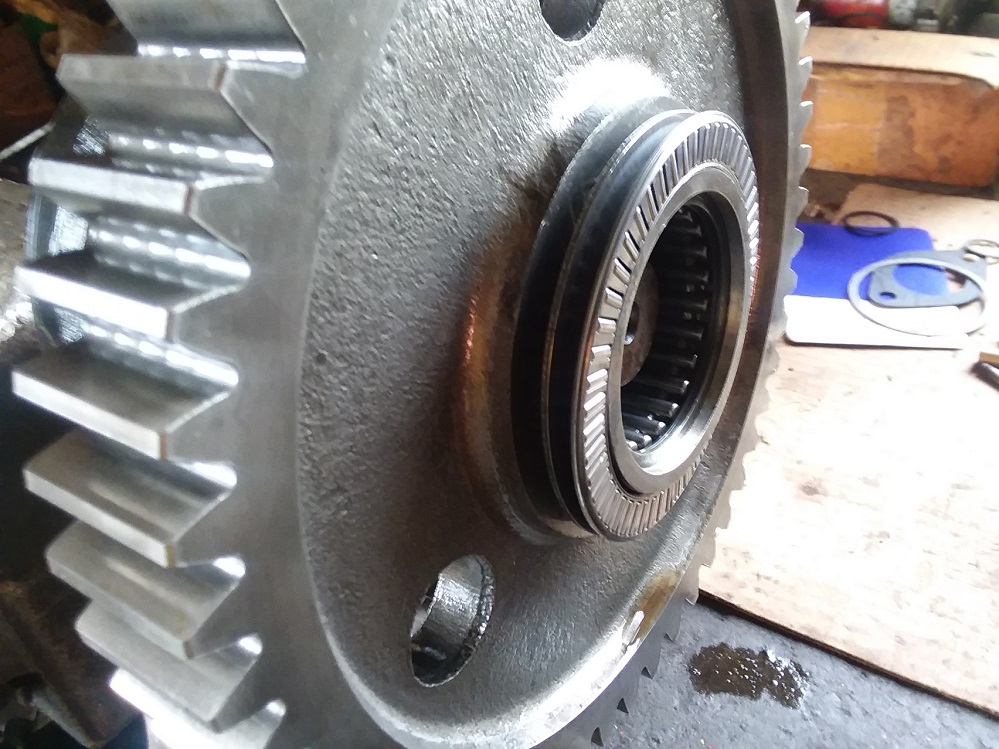
PTO shaft as a slide hammer to remove the 1000 rpm shaft. Let the gear drop onto something soft. I then reach up into the housing with a long screwdriver and pop the snap ring (clip) out of its groove. Remove the thrust bearing and washer off of the front face of the 540 gear so that it doesn't get damaged. Use the long bolts and reversible 
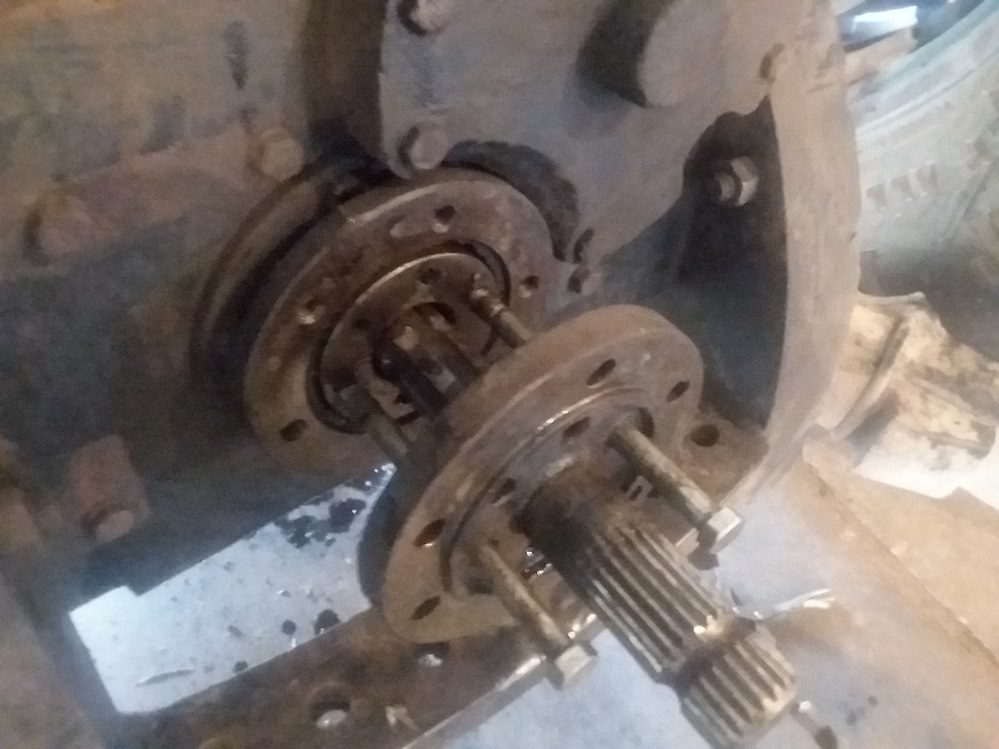
PTO shaft again to pull the 540 hollow shaft out. Clean everything up. Refresh the o-ring and 
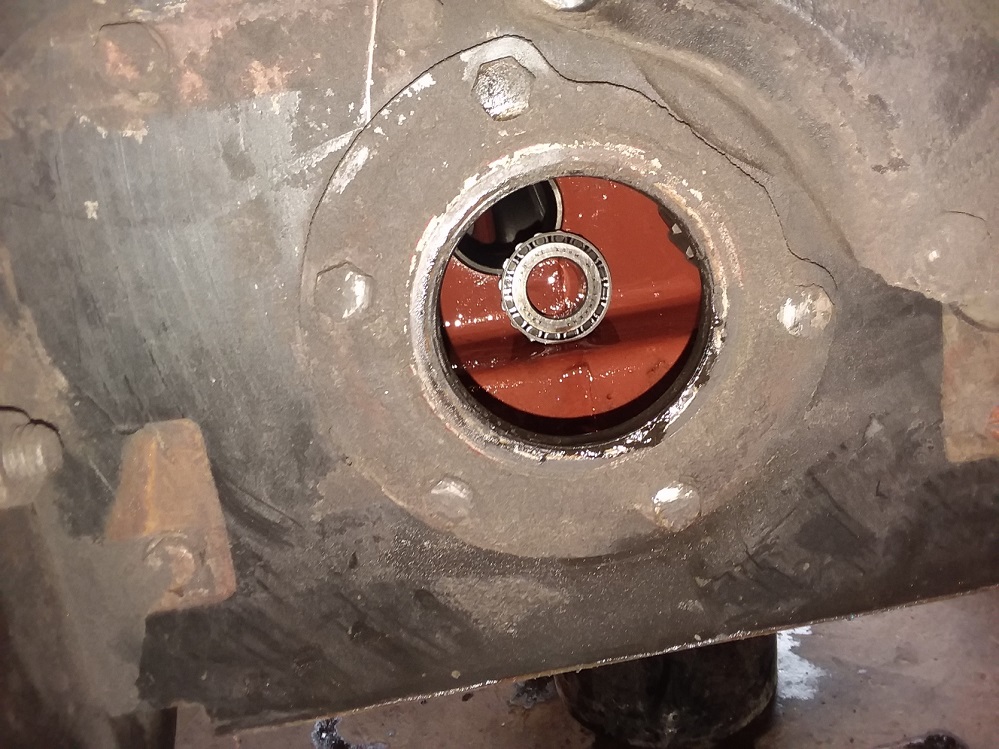
seal in the retainer plate . Put in a new seal for the solid shaft to ride on. I hold the 540 gear and bearing in place up in the housing while I drive the hollow shaft, with the 
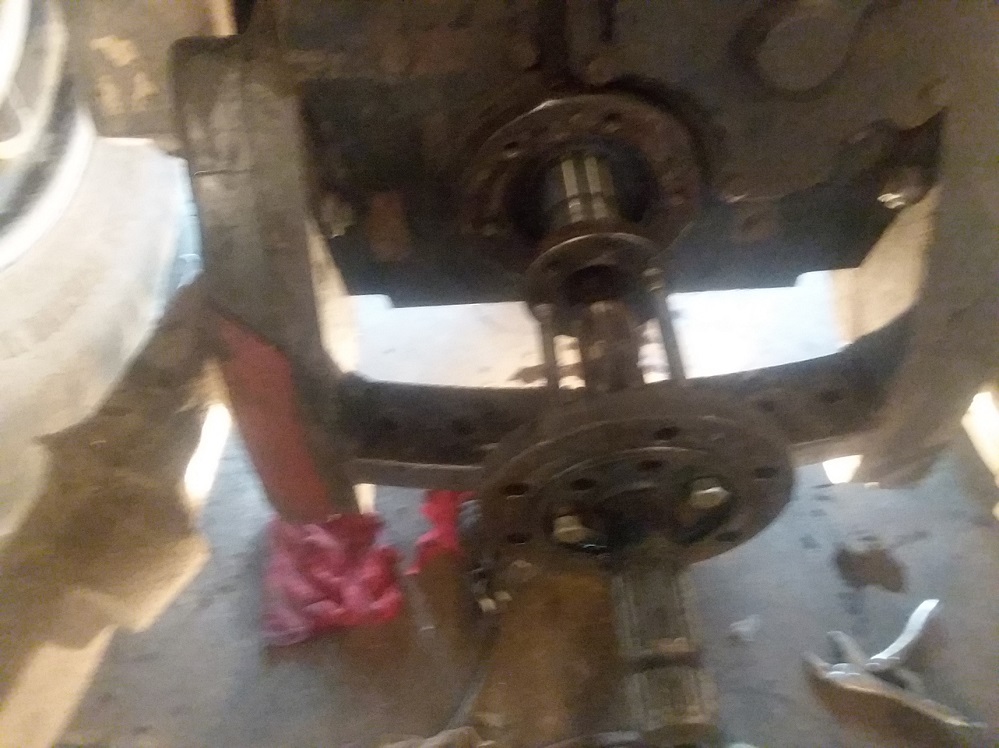
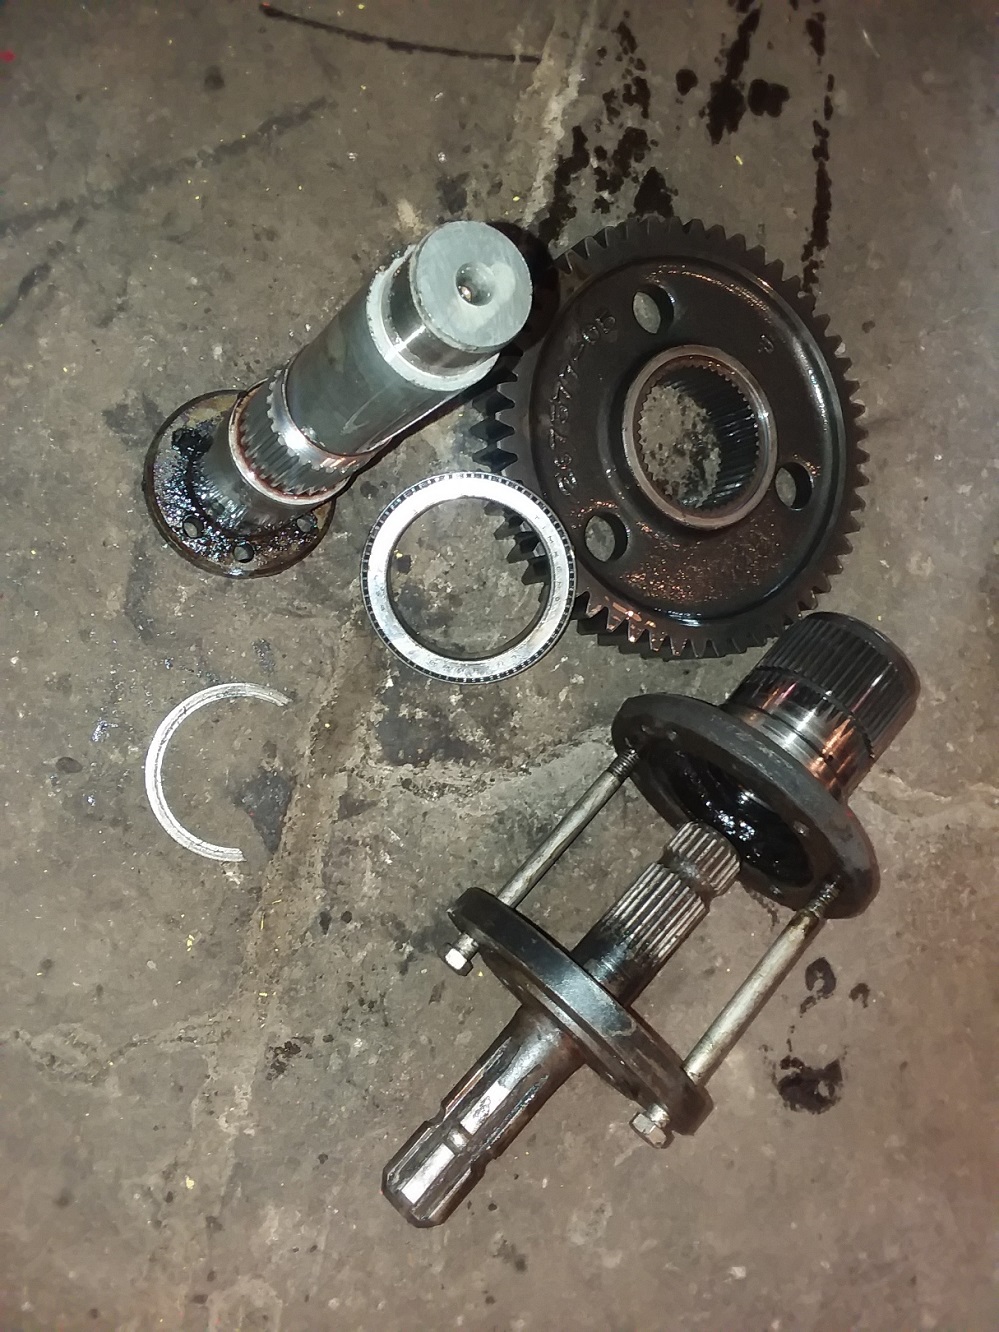
PTO shaft bolted to it , through the bearing and gear. Keep pressure rearward on the gear so that the large bearing stays seated in its cup while driving the shaft in. It doesn't go all that hard and I've never damaged a seal doing it this way. Once it stops , reach up inside and get the snap ring (clip) back in place. It's a little tricky,but a long screwdriver works for me. Thrust washer and thrust bearing are next. Hold the 1000 gear up inside and then slide the 1000 shaft through the hollow shaft and both gears.  Slide the nut on the shaft and then drive it home into the front bearing. Tighten the nut while jarring the 1000 end of the PTO shaft with a sledge to back seat the bearings. Don't get super aggressive tightening the nut, but it does take a firm grip and effort to turn the shaft. Pin it, lock wire it, and then silicone the plate. Draw bar,shield, and oil.  Next!!
Back to Top
DrAllis View Drop Down
Orange Level Access
Orange Level Access


Joined: 12 Sep 2009
Points: 19477
Post Options Post Options   Thanks (0) Thanks(0)   Quote DrAllis Quote  Post ReplyReply Direct Link To This Post Posted: 29 Aug 2020 at 11:41pm
BACK TO THE TOP FOR RANDY WITH THE 8050 LEAKING PTO.
Back to Top
randy View Drop Down
Orange Level
Orange Level


Joined: 12 Sep 2009
Location: Illinois
Points: 1177
Post Options Post Options   Thanks (0) Thanks(0)   Quote randy Quote  Post ReplyReply Direct Link To This Post Posted: 05 Sep 2020 at 3:21pm
Thanks to Lynn Marshall for the pictures of the pto. Got mine apart, the pics and instructions really helped!
Thanks again, Randy
CA WD WD45 D17 D17 Diesel 7060 8050 8070
Back to Top
MACK View Drop Down
Orange Level
Orange Level


Joined: 17 Nov 2009
Points: 7664
Post Options Post Options   Thanks (0) Thanks(0)   Quote MACK Quote  Post ReplyReply Direct Link To This Post Posted: 05 Sep 2020 at 8:51pm
I like your slide hammer.           MACK
Back to Top
randy View Drop Down
Orange Level
Orange Level


Joined: 12 Sep 2009
Location: Illinois
Points: 1177
Post Options Post Options   Thanks (0) Thanks(0)   Quote randy Quote  Post ReplyReply Direct Link To This Post Posted: 20 Sep 2020 at 7:05am
For OTIS
CA WD WD45 D17 D17 Diesel 7060 8050 8070
Back to Top
 Post Reply Post Reply
  Share Topic   

Forum Jump Forum Permissions View Drop Down

Forum Software by Web Wiz Forums® version 11.10
Copyright ©2001-2017 Web Wiz Ltd.

This page was generated in 0.125 seconds.


Help Support the
Unofficial Allis Forum