| Author |
 Topic Search Topic Search  Topic Options Topic Options
|
IBWD MIke 
Orange Level


Joined: 08 Apr 2012
Location: Newton Ia.
Points: 4203
|
 Post Options Post Options
") Thanks(0) Thanks(0)
 Quote Quote  Reply Reply
 Topic: Todays project. Topic: Todays project.
Posted: 15 Oct 2016 at 8:28pm |
I would like to be combining beans or be done with them and do corn. But since central Iowa has turned into lower Unkton, (any Married With Children fans), had to work on other things. This is one of my 'long term projects'. I bought a pair of 15x28" rim 'blanks' last spring. I have lots of junk rims with good rails and two good pairs of 16.9x28 Firestone Field and road tires. One pair on JD (titan) rims, the other on very narrow (10"?) spin out rims. The blanks.  Today's work. The rails cut out of a junk rim. 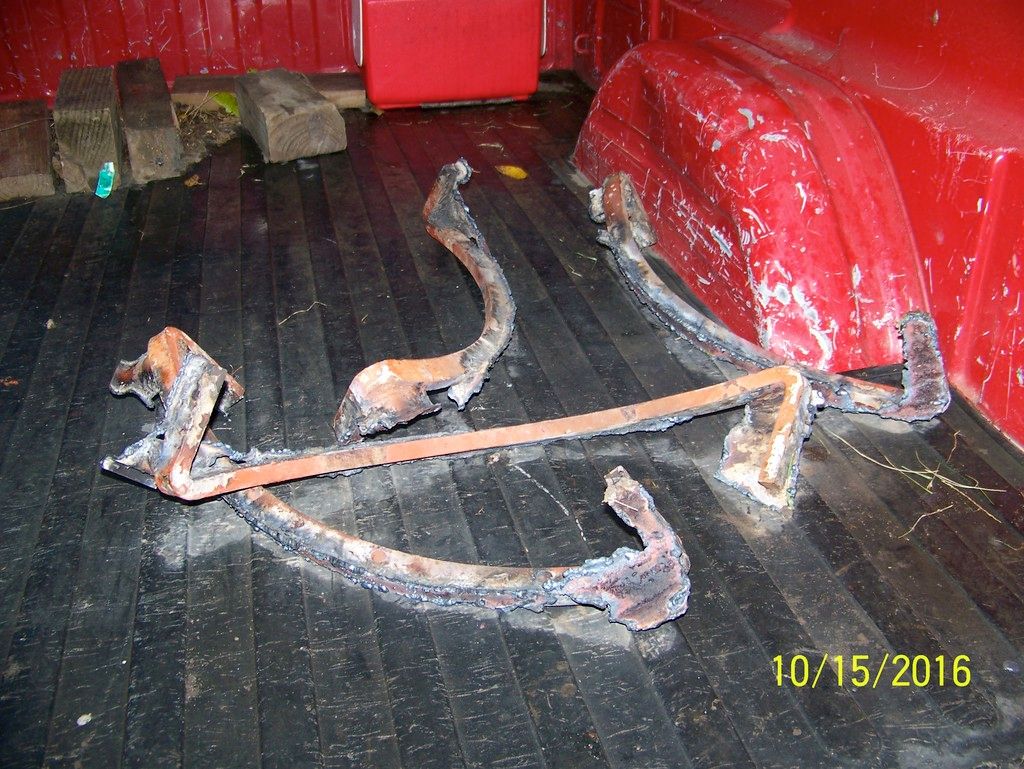 The plan is to get the rails cleaned up and welded in the blanks. Would be nice to get them galvanized.
|
 |
|
Sponsored Links
|
|
|
Allis dave
Orange Level
Joined: 10 May 2012
Location: Northern IN
Points: 3095
|
Post Options
Thanks(0)
Quote Reply
Posted: 17 Oct 2016 at 7:08am |
|
Looks like a good project. I'd be know I'd screw up the alignment or welding of the rails if I tried that. I bet you've got it covered though. Looks like a good way to reuse some steel and save a little money.
|
|
IBWD MIke
Orange Level
Joined: 08 Apr 2012
Location: Newton Ia.
Points: 4203
|
Post Options
Thanks(0)
Quote Reply
Posted: 17 Oct 2016 at 8:42am |
|
|
|
Hockeygoon
Orange Level

Joined: 13 Sep 2016
Location: Manhattan, KS
Points: 1210
|
Post Options
Thanks(0)
Quote Reply
Posted: 17 Oct 2016 at 9:25am |
|
That actually looked like it was a pretty good rim.
I just "resectioned" a rusty rim. I cut out a chunk 10" wide and 44" long and then cut the same section out of a donor from a Ford NAA (with its own rusted out valve stem hole) and after much grinding mated and welded the two sections.
Its mate needs a section 49" long cut out of it - not enough left of the donor rim to fix it too. Back to advertising on Craigs list.
Can you use those rails from a narrower rim on a wider rim?
Edited by Hockeygoon - 17 Oct 2016 at 9:28am
|
|
IBWD MIke
Orange Level
Joined: 08 Apr 2012
Location: Newton Ia.
Points: 4203
|
Post Options
Thanks(0)
Quote Reply
Posted: 17 Oct 2016 at 1:27pm |
|
This rim was better than the first one but still very rusty. That's why it didn't bother me to cut it up and save what I could.
I'm pretty sure the rails will work in the wider rims but will do some more research before proceeding.
|
|
IBWD MIke
Orange Level
Joined: 08 Apr 2012
Location: Newton Ia.
Points: 4203
|
Post Options
Thanks(0)
Quote Reply
Posted: 24 Dec 2016 at 10:29am |
Slowly making progress on this. I cleaned up 4 of the rails Friday, off work until January 3, will see how far I get. One thing I did find out is that the rails are specific to rim width. The ones I have came out of 11" rims, they will work, just won't be able to spin in or out 2". I'm leaning toward centering them in the blanks, could offset to one side. If anyone has a compelling argument for one or the other let's hear it. 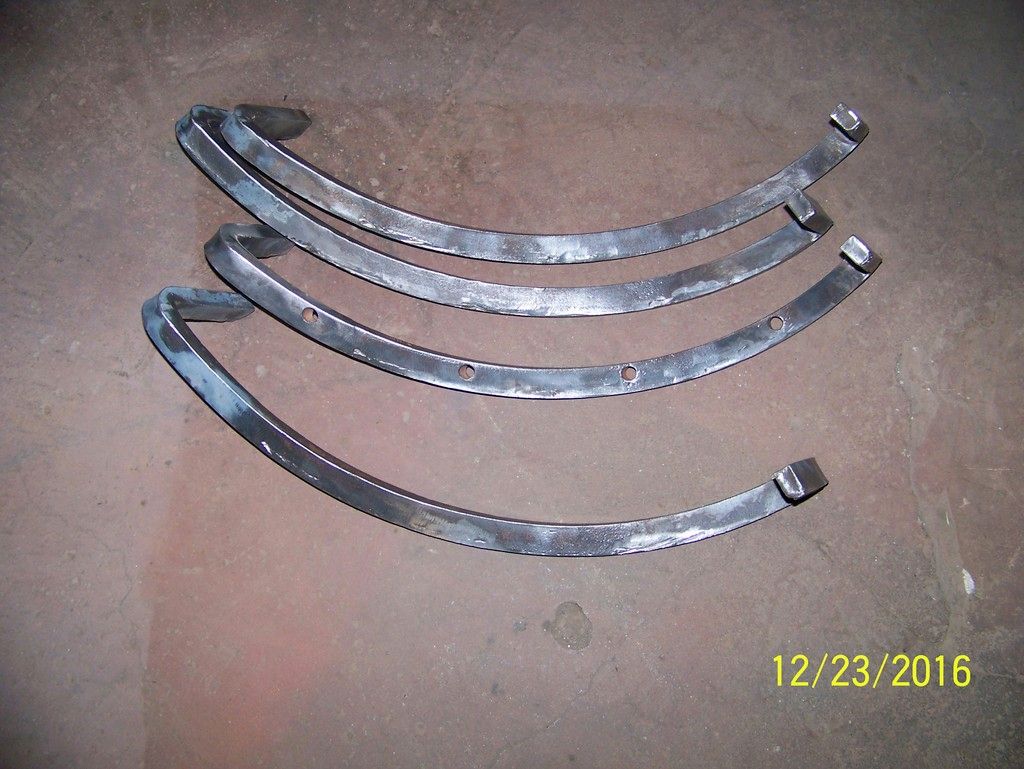 I want to get these galvanized when done but if that doesn't happen being ready for paint will be a good thing.
|
|
DSeries4
Orange Level

Joined: 12 Sep 2009
Location: Ontario, Canada
Points: 7579
|
Post Options
Thanks(0)
Quote Reply
Posted: 24 Dec 2016 at 10:38am |
|
That is a nice indoor project for the holidays! Wish I had more time off for things like that. Hope to do a bit of work on the 190XT today and tomorrow.
|
|
'49 G, '54 WD45, '55 CA, '56 WD45D, '57 WD45, '58 D14, '59 D14, '60 D14, '63 D15D, '66 D15II, '66 D21II, '67 D17IV, '67 D17IVD, '67 190XTD, '73 620, '76 185, '77 175, '84 8030, '85 6080
|
|
IBWD MIke
Orange Level
Joined: 08 Apr 2012
Location: Newton Ia.
Points: 4203
|
Post Options
Thanks(0)
Quote Reply
Posted: 27 Dec 2016 at 5:51pm |
Off work this week and too warm to hunt deer so making some headway on this. I did quite a bit of math trying to figure out the spacing on the rails and apparently my math skills aren't what they used to be. So I had to go to a time honored method, trial and error. Rails tacked in place. 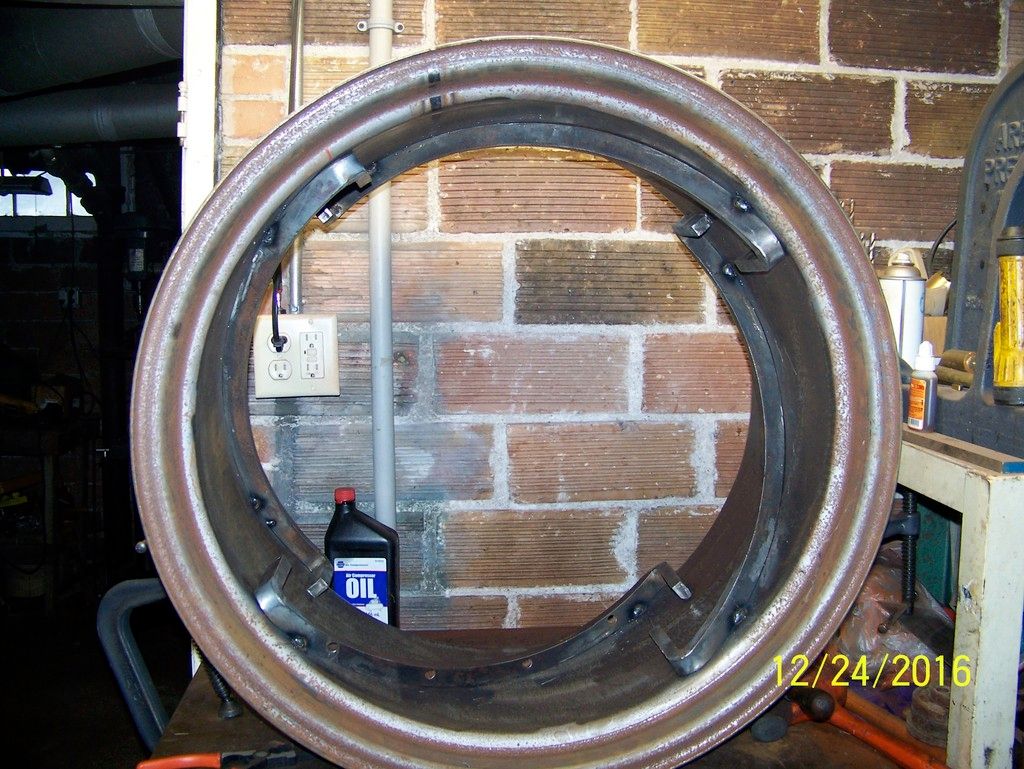 I cut the center out of a wheel center for this job, it worked well. Lots lighter and being able to reach through easily helped a bunch. The center part that bolts to the axle will be used for a puller project in the future hopefully. 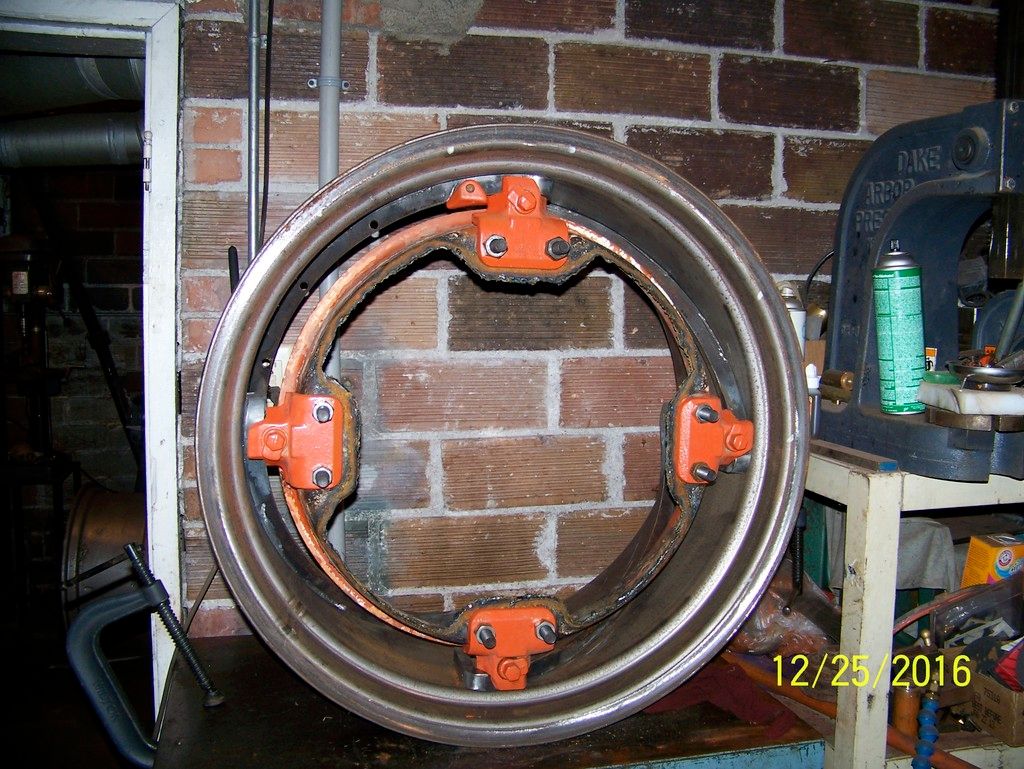 This is the fancy gauge I made to lay out the rails. A piece of tig-welding rod cut to length. That's where the trial and error came in. 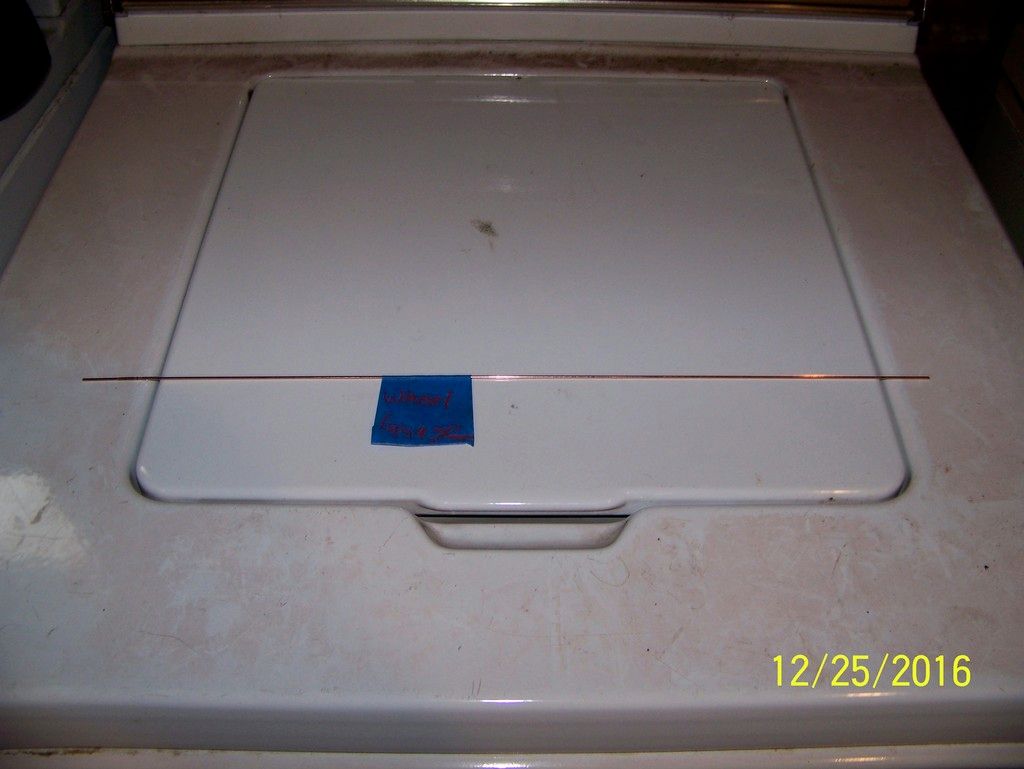 Today I welded the ends of the rails but did not work on the middles, need a pair of deep-throat vice-grip welding clamp pliers. After that they should be ready for galvanizing.
|
|
Ted J
Orange Level

Joined: 05 Jul 2010
Location: La Crosse, WI
Points: 18943
|
Post Options
Thanks(0)
Quote Reply
Posted: 27 Dec 2016 at 7:14pm |
|
Boy that's a lot of work Mike. But it looks like you've got it all figured out and in hand. Amazing how much you lose through the years.........and geometry was one of my BEST classes. I've retained a lot, but it's because I still use it a lot. It's the lesser things that we forget.
As far as where they should go.........I'd go with having them be able to go OUT as far as possible, not centered. Stability is everything. BUT, if you had to go with rows, distance, etal...... then who knows. What if you cut them apart and added a piece in so it would go the whole rim width? Cut each beam so the added piece is in a different spot so there wouldn't be any real serious stress problems? Just an idea.........
Looks like a good COLD winter project though......... have fun with it and stay warm and safe and see what you can do...........
|
|
"Allis-Express"
19?? WC / 1941 C / 1952 CA / 1956 WD45 / 1957 WD45 / 1958 D-17
|
|
jaybmiller
Orange Level Access
Joined: 12 Sep 2009
Location: Greensville,Ont
Points: 24901
|
Post Options
Thanks(0)
Quote Reply
Posted: 27 Dec 2016 at 8:02pm |
|
Man you have a LOT of patience and skill ! A 'tip of the hat' to you !!
When I was cleaning up a combine rim for the D-14 , I built a silly, simple jig to spin the rim.
Think of two 12" long rollers about 1 foot apart , mounted in some wood pieces. The rim spins on the rollers making it easy to clean and paint the rim..
Jay
|
|
3 D-14s,A-C forklift, B-112
Kubota BX23S lil' TOOT( The Other Orange Tractor)
Never burn your bridges, unless you can walk on water
|
|
SteveM C/IL
Orange Level Access
Joined: 12 Sep 2009
Location: Shelbyville IL
Points: 8762
|
Post Options
Thanks(0)
Quote Reply
Posted: 27 Dec 2016 at 8:18pm |
|
WD-D17 were three different widths....same rails just positioned "centered".For that wide of rim,you probably need to keep them close to the one edge and let the excess hang out.That way you can suck em all the way in.
|
|
IBWD MIke
Orange Level
Joined: 08 Apr 2012
Location: Newton Ia.
Points: 4203
|
Post Options
Thanks(0)
Quote Reply
Posted: 28 Dec 2016 at 10:12am |
|
Ted, while I don't use math nearly as much as I used to I think getting accurate measurements may have been the problem. The math wasn't that complicated and I have a great calculator.
Jay, that's a great idea on the roller setup.
Steve, I decided to center the rails, gave serious thought to moving them to one side. With them centered it will make the narrowest setting 4" wider.
This has been a fun and interesting project. Like many of the things I start it turned into more work than expected. Would I do this again? Not sure, the 15" blanks were not to expensive and new 15" spin-outs aren't cheap, so maybe. Thanks for all the comments, Mike.
|
|
DON G
Silver Level Access


Joined: 14 Feb 2014
Location: Lowpoint, IL
Points: 419
|
Post Options
Thanks(0)
Quote Reply
Posted: 28 Dec 2016 at 7:05pm |
 I didn't use any math at all, just laid then and used wheel to get proper spacing, tightened them up and welded first end , shifted wheel in ,welded other end and did same for middles. no clamps needed.
|
|
IBWD MIke
Orange Level
Joined: 08 Apr 2012
Location: Newton Ia.
Points: 4203
|
Post Options
Thanks(0)
Quote Reply
Posted: 28 Dec 2016 at 7:10pm |
|
That's a good idea Don. Setting the center in the middle of the rails and tightening the locks will do a better job than the welding clamp would.
|
|
IBWD MIke
Orange Level
Joined: 08 Apr 2012
Location: Newton Ia.
Points: 4203
|
Post Options
Thanks(0)
Quote Reply
Posted: 15 Apr 2017 at 8:27am |
|
I'm bringing this back to the top as I have finished welding the rails in and have applied a coat of primer on the wheels. Decided not to galvanize. hopefully get some paint on them soon. Will try to post some pics soon.
|
|
IBWD MIke
Orange Level
Joined: 08 Apr 2012
Location: Newton Ia.
Points: 4203
|
Post Options
Thanks(0)
Quote Reply
Posted: 30 Apr 2017 at 9:43am |
I was making good progress on this but planting season got here and I've slowed back to a snails pace. The current weather isn't helping either. I have got some primer and paint on them, wanted to galvanize but went the simple route. 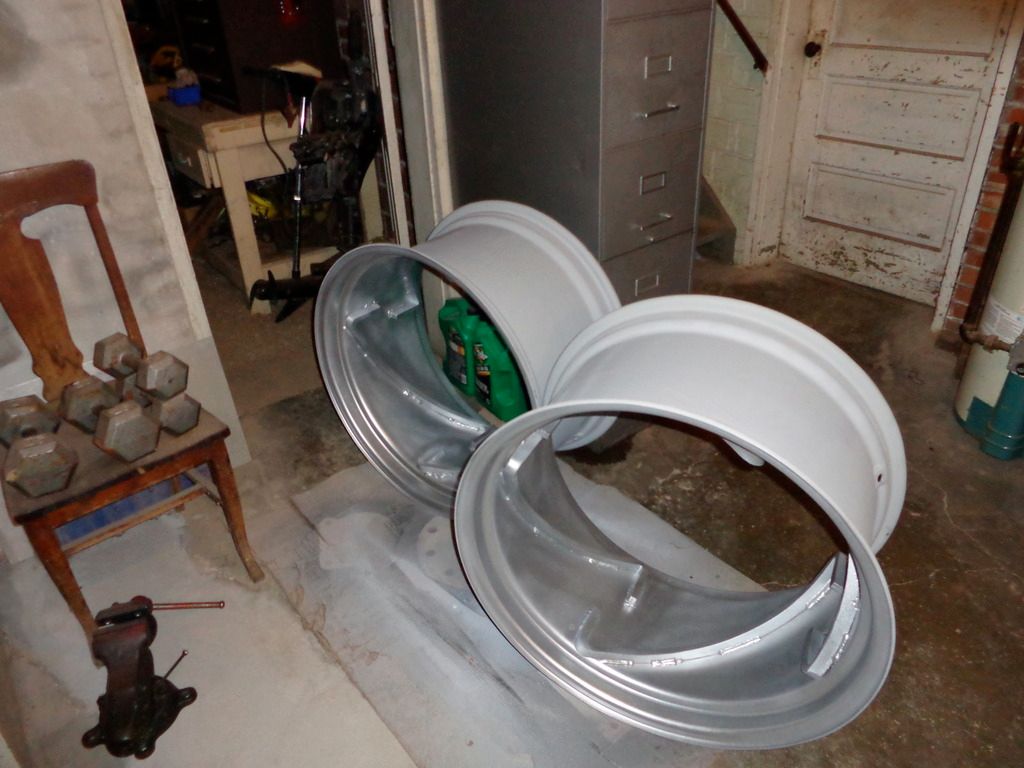 I did get started wire brushing one wheel center but probably won't get them painted until after the beans are in the ground. Since I just bought a different planter it is hogging all my free time.
|
|
IBWD MIke
Orange Level
Joined: 08 Apr 2012
Location: Newton Ia.
Points: 4203
|
Post Options
Thanks(0)
Quote Reply
Posted: 25 Jun 2017 at 9:16am |
Not sure who posted the tip about using a handy-man jack for a bead breaker, but it worked like a charm. At the current rate I'm making progress I should have these tires on the tractor by 2025. 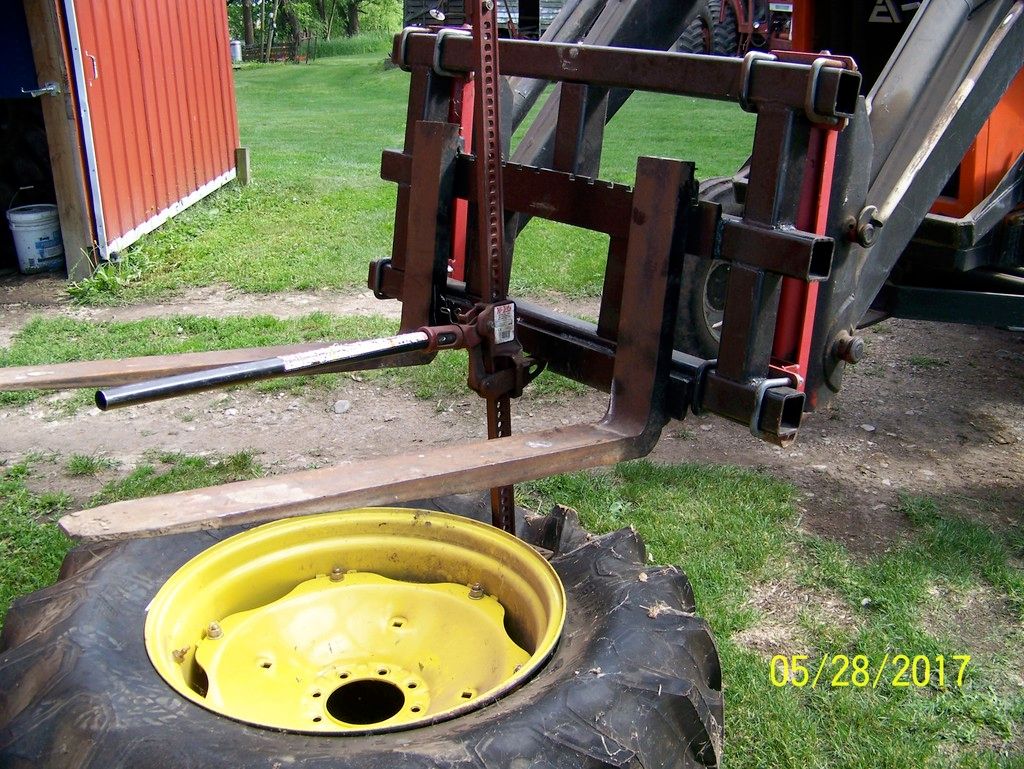
|
|
Stan R
Orange Level Access
Joined: 03 Dec 2009
Location: MA
Points: 996
|
Post Options
Thanks(0)
Quote Reply
Posted: 25 Jun 2017 at 9:25am |
|
You do high quality work. Kudos to you!
|
|
IBWD MIke
Orange Level
Joined: 08 Apr 2012
Location: Newton Ia.
Points: 4203
|
Post Options
Thanks(0)
Quote Reply
Posted: 25 Jun 2017 at 9:34am |
|
Thanks Stan. I intended to post a few more pics but photobucket is not cooperating right now. Maybe later tonight.
|
|
IBWD MIke
Orange Level
Joined: 08 Apr 2012
Location: Newton Ia.
Points: 4203
|
Post Options
Thanks(0)
Quote Reply
Posted: 25 Jun 2017 at 9:49am |
|
|
|
REEDE
Silver Level
Joined: 24 Apr 2010
Points: 287
|
Post Options
Thanks(0)
Quote Reply
Posted: 26 Jun 2017 at 6:49am |
|
Looking good.
|
|
wbecker
Orange Level
Joined: 29 Oct 2009
Location: STL
Points: 837
|
Post Options
Thanks(0)
Quote Reply
Posted: 26 Jun 2017 at 10:15am |
|
Wow, nice work!!
|
|
Allis B, IB, Low B, G, D10, JD M, 8KCAB, C152
|
|
IBWD MIke
Orange Level
Joined: 08 Apr 2012
Location: Newton Ia.
Points: 4203
|
Post Options
Thanks(0)
Quote Reply
Posted: 26 Jun 2017 at 1:09pm |
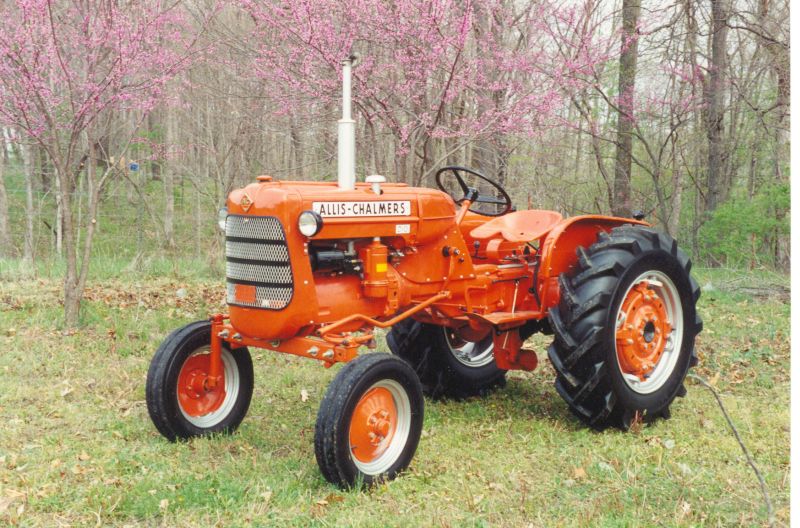
This was a good weekend foe 'today's project'. It really turned into my ongoing project. Got the second tire dismounted from the yellow rim and mounted both on the new spin-outs. This was a warm fuzzy feeling, bought the tires about 4 years ago. 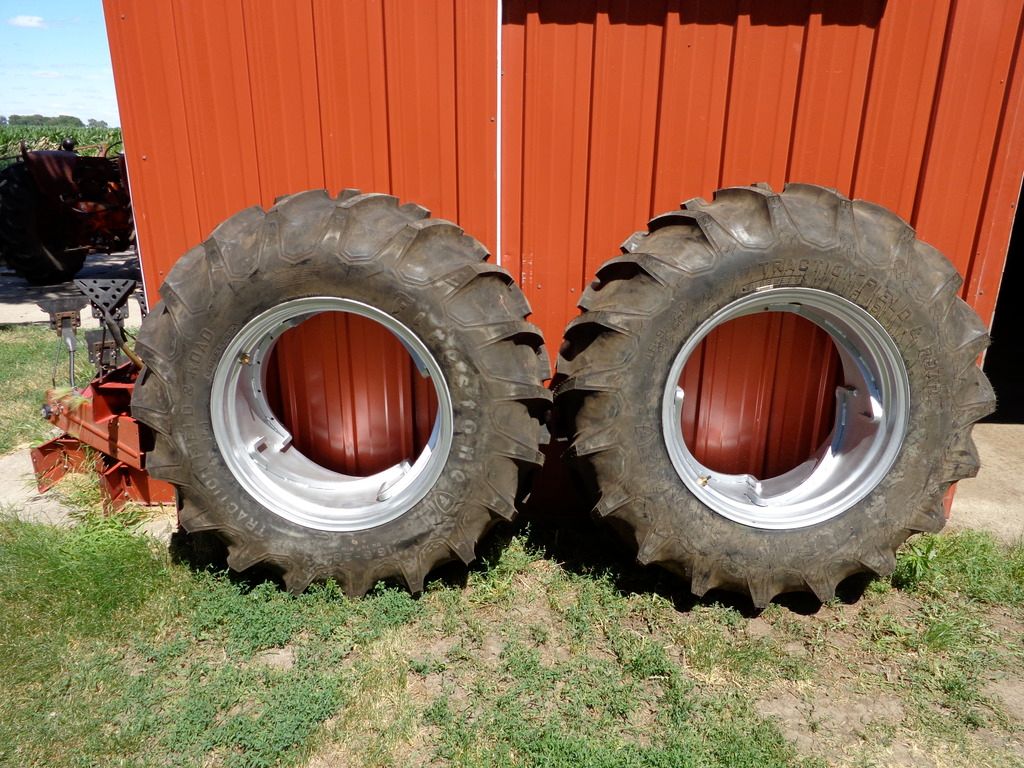 Took a few shots for size comparison. These are 16.8x28's on 15" rims compared to 14.9x28 on 12" rims. 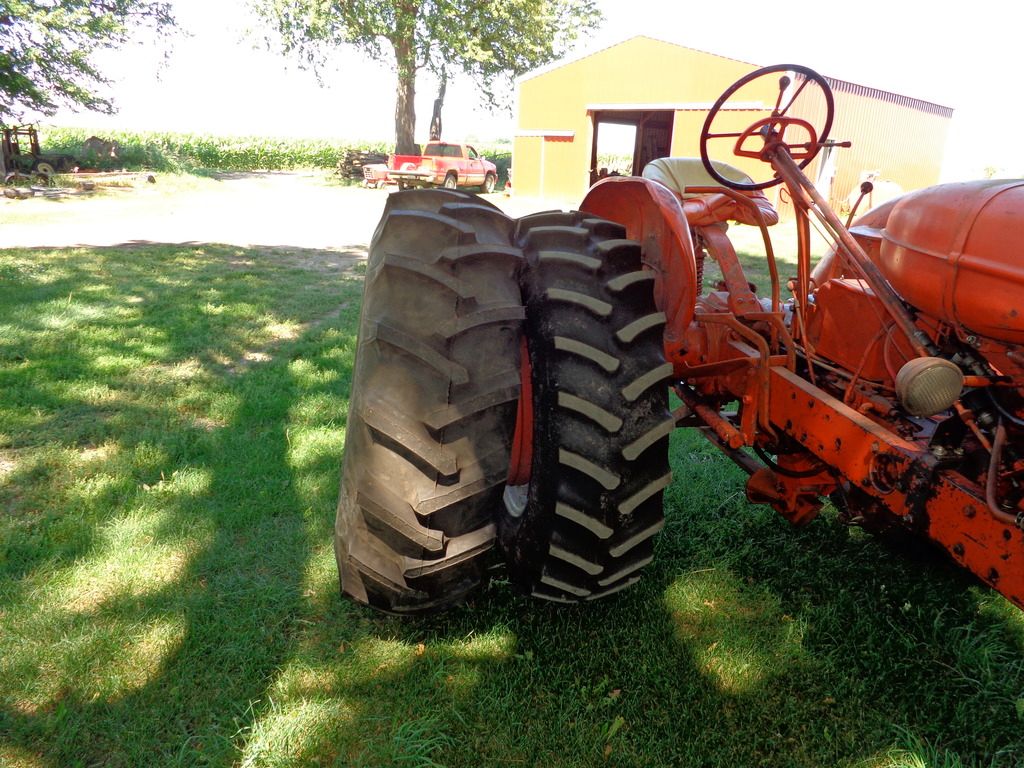 13.6x28 on 10" or 11" rim. 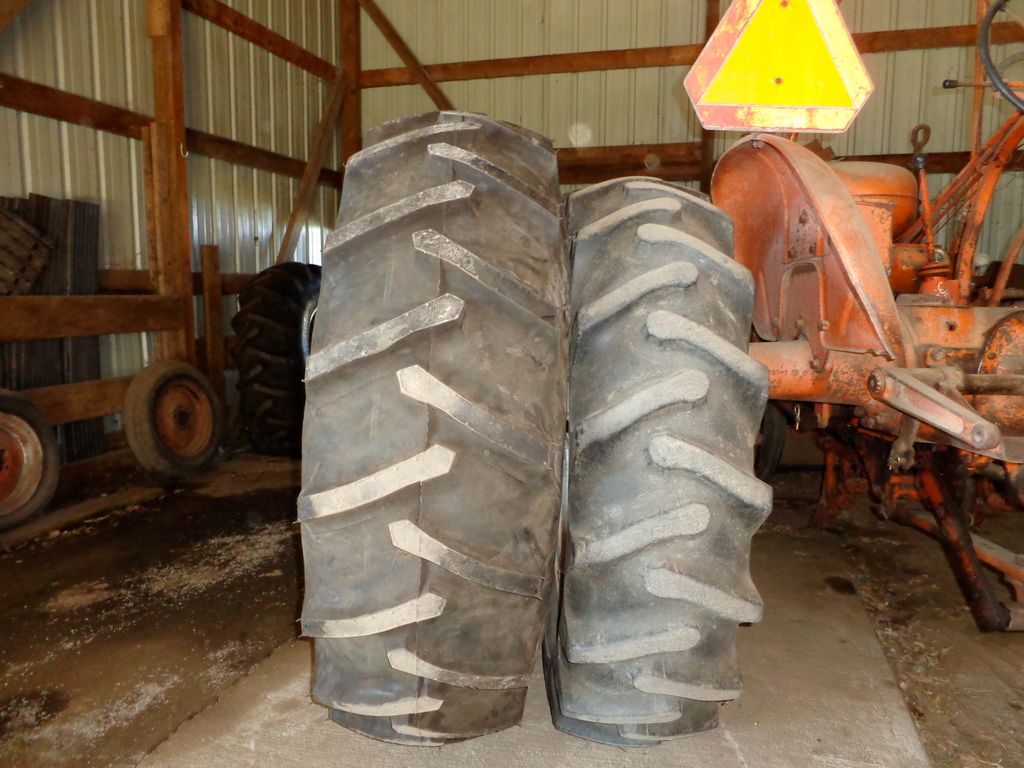 These are 16.9x28's on 13" rims, look almost the same height to me. 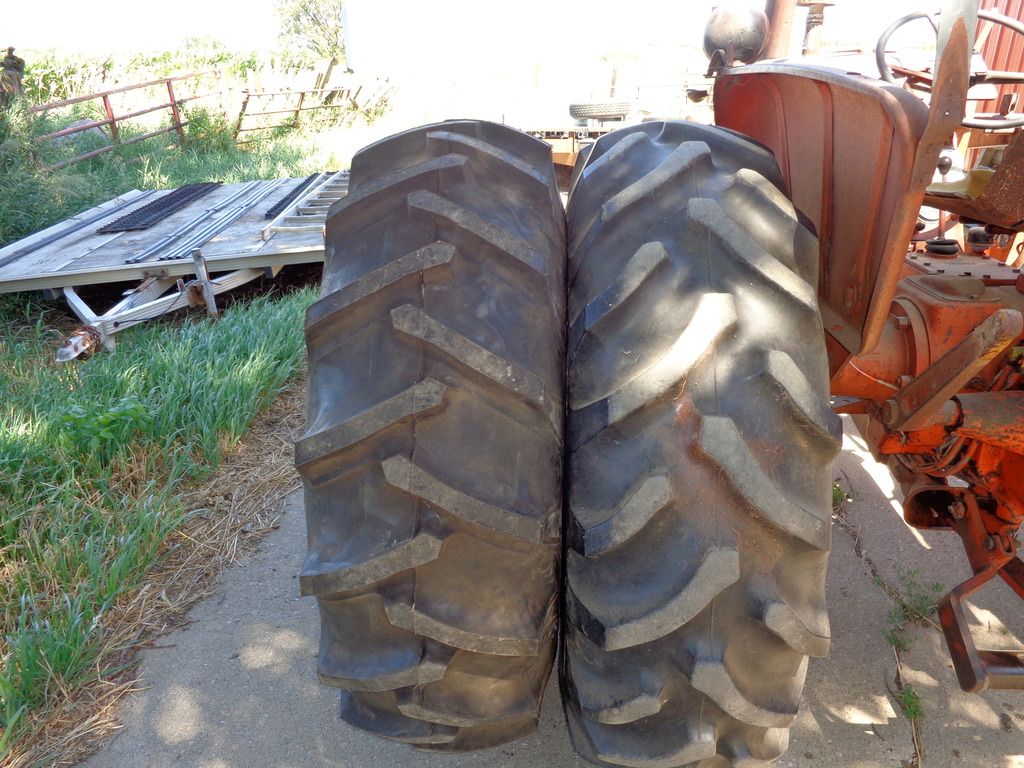 And finally the tractor these tires are going on, these are 15x26 same as 18.4, they are good tires but non spin-out rims and no provision for wheel weights. 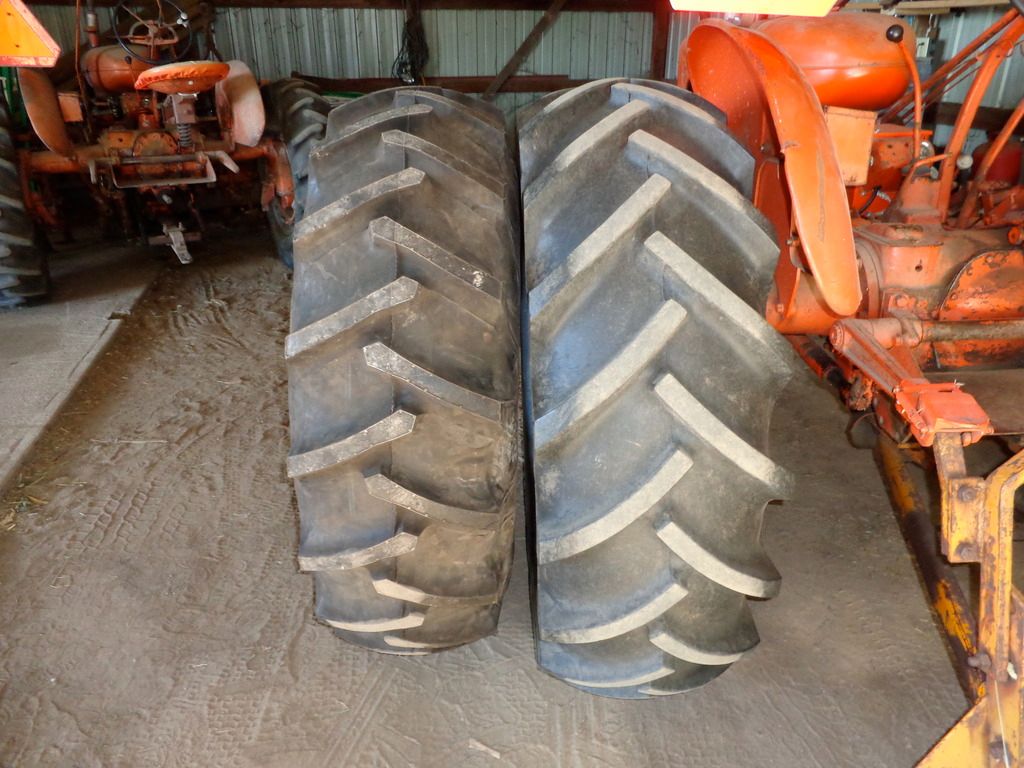 Speaking of wheel weights, I've had this pair of Oxnard weights for a couple of years now. When I get them cleaned up and painted they are going on. Then it will be time to start working on the front of the tractor. 
|
|
IBWD MIke
Orange Level
Joined: 08 Apr 2012
Location: Newton Ia.
Points: 4203
|
Post Options
Thanks(0)
Quote Reply
Posted: 03 Jul 2017 at 10:36am |
|
Well it seems photobucket has ruined my thread and I assume all the others I've posted along with a lot of others.
I got the centers assembled and mounted on the tractor yesterday, have pics, haven't figured out how to post them yet.
|
|


