| Author |
 Topic Search Topic Search  Topic Options Topic Options
|
tadams(OH) 
Orange Level Access


Joined: 17 Sep 2009
Location: Jeromesville, O
Points: 9680
|
 Post Options Post Options
") Thanks(1) Thanks(1)
") Quote Quote  Reply Reply
 Posted: 15 Apr 2024 at 3:07pm Posted: 15 Apr 2024 at 3:07pm |
|
Looking good, body work is time consumming and sometime you just need to walk away for a bit.
|
 |
|
Sponsored Links
|
|
|
DMiller
Orange Level Access
Joined: 14 Sep 2009
Location: Hermann, Mo
Points: 29653
|
Post Options
Thanks(0)
Quote Reply
Posted: 17 Apr 2024 at 6:35pm |
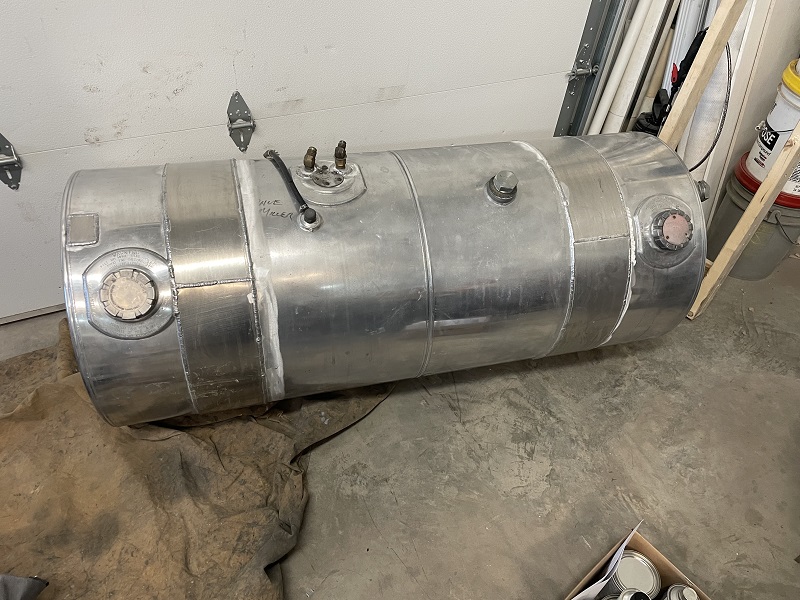
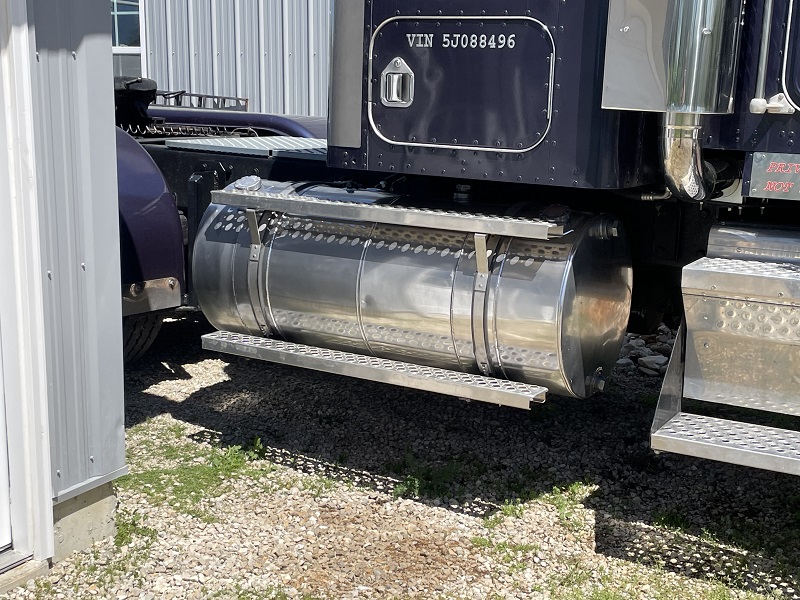
Day off Today, back to work tomorrow. Did get the seeping fuel tank off and to a weld/Fab shop for Strapping and small patches to repair it. $650 to fix, or $1200 to replace the tank with Like Kind or $900+ to install just a Fuel Tank, this one is split 50/50 Fuel/Hydraulic. Still have a PTO on the truck, just lacks a Pump and piping. Sanded the Grinding work and dings Grits: 180, 320, 600, 1000 then ran over the entire tank with a Buffer. All back Installed.
Edited by DMiller - 17 Apr 2024 at 6:37pm
|
|
DMiller
Orange Level Access
Joined: 14 Sep 2009
Location: Hermann, Mo
Points: 29653
|
Post Options
Thanks(0)
Quote Reply
Posted: 04 May 2024 at 4:27am |
|
Getting down to masking sanding and priming stage. Get a day off as to rains or associated issues unable to work at yard and is a considered Part Time gig so catch up days show up as did yesterday.
Hope to be ready to prime it out tomorrow.
|
|
DMiller
Orange Level Access
Joined: 14 Sep 2009
Location: Hermann, Mo
Points: 29653
|
Post Options
Thanks(0)
Quote Reply
Posted: 04 May 2024 at 6:06pm |
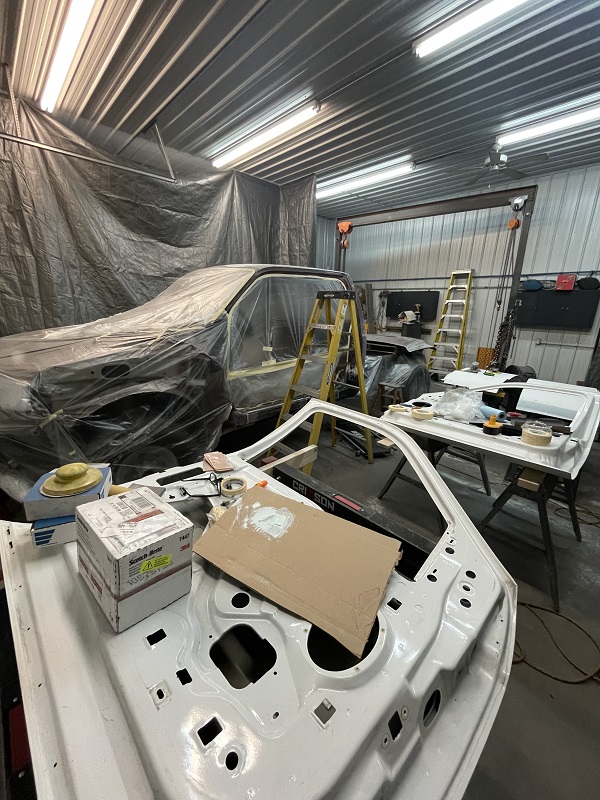
Today's results, cab is Masked, the inner rocker attachment welds have been ground down, bottom of cab floor scraped off where will be applying Epoxy Primer tomorrow. Have my over spray curtains back up, have some sanding on doors, the fenders and 'Shiny' spots on cab to where can apply self etch primer on those. Providing all looks good after priming, will be ordering paint, returning to the original JM Code Toreador Red Metallic, no gray under panel this time.
Edited by DMiller - 04 May 2024 at 6:08pm
|
|
DMiller
Orange Level Access
Joined: 14 Sep 2009
Location: Hermann, Mo
Points: 29653
|
Post Options
Thanks(0)
Quote Reply
Posted: 09 May 2024 at 4:28am |
|
Perhaps I am just becoming more cynical. May end up closing this post out due to that cynicism,
Was looking thru my old history, small
Photo albums with next to no photos in them in comparison to some events we document these days. Built dirt track racing cars in the 70s have three photos, have at most one or two pics of vehicles once had. Family memorabilia albums are photos in dozens for years not hundreds where can honestly state I feel I impress too much of our life here onto others that can likely care less.
Old truck is in prime now, paint is ordered and should be here next week. Closing on completion.
Edited by DMiller - 09 May 2024 at 4:29am
|
|
jaybmiller
Orange Level Access
Joined: 12 Sep 2009
Location: Greensville,Ont
Points: 21550
|
Post Options
Thanks(1)
Quote Reply
Posted: 09 May 2024 at 6:43am |
interesting about the 50/50 tank ! I wonder if anyone's ever put the wrong juice in the wrong side of the tank ??? Or worse... the 'baffle' between the two sides leaks a bit ?
|
|
3 D-14s,A-C forklift, B-112
Kubota BX23S lil' TOOT( The Other Orange Tractor)
Never burn your bridges, unless you can walk on water
|
|
DMiller
Orange Level Access
Joined: 14 Sep 2009
Location: Hermann, Mo
Points: 29653
|
Post Options
Thanks(0)
Quote Reply
Posted: 09 May 2024 at 10:07am |
|
Fill cap is Red, marked Hydraulic only and is Under the bunk while fuel fill is exposed. This style tank has been around a long time where not ever seen one cross leak but is possible.
|
|
plummerscarin
Orange Level Access
Joined: 22 Jun 2015
Location: ia
Points: 3156
|
Post Options
Thanks(1)
Quote Reply
Posted: 09 May 2024 at 12:17pm |
|
I for one enjoy the photos and updates. Sometimes I’ll see something that I can use for my own projects. Keep up the good
|
|
AllisFreak MN
Orange Level Access
Joined: 07 Dec 2009
Location: Minnesota
Points: 1505
|
Post Options
Thanks(0)
Quote Reply
Posted: 09 May 2024 at 8:05pm |
|
You can't quit this thread now, we want to see it through! I've been watching it from the start and find it interesting.
|
|
'49 A-C WD, '51 A-C WD, '63 A-C D17 Series III, 1968 A-C One-Seventy, '82 A-C 6060, '75 A-C 7040, A-C #3 sickle mower, 2 A-C 701 wagons, '78 Gleaner M2
|
|
DMiller
Orange Level Access
Joined: 14 Sep 2009
Location: Hermann, Mo
Points: 29653
|
Post Options
Thanks(0)
Quote Reply
Posted: 10 May 2024 at 6:28am |
Alright then, You ALL asked for it!!
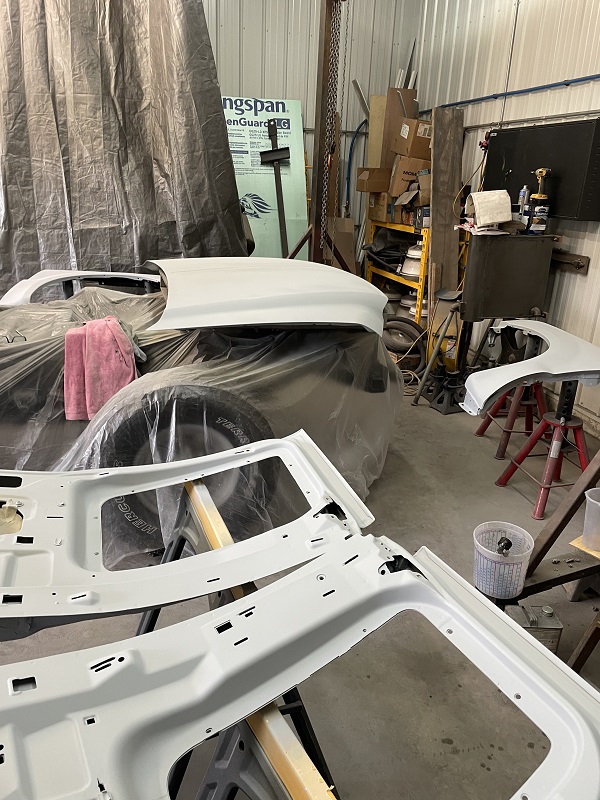
Underside and lower region of cab were sprayed with Epoxy Primer to seal the weld areas and to protect the already surface corroding floor pan. On the roof, all four doors the hood and fenders was recommended I use a Self Etching primer undercoat as the original finish had corrupted so deep and so badly had to nearly strip to bare metal, especially the hood. Once that had contact dried(about 20 minutes) sprayed a second primer coat of what Shop Line (PPG) calls 2K Heavy Build as it presents a Heavier applied finish for a final sand. Requires a Sanding prior to paint overlay. So next step is W/D 500 gr on general areas, a quick dry sand on those areas as Hood and Roof where the material spattered on spray then back to 500 W/D. ALL these primers are urethane Epoxy two part and a Bear to get applied before starts setting up. I was only mixing 18-20oz and shooting from a 24oz DeKups system on my HVLP gun.
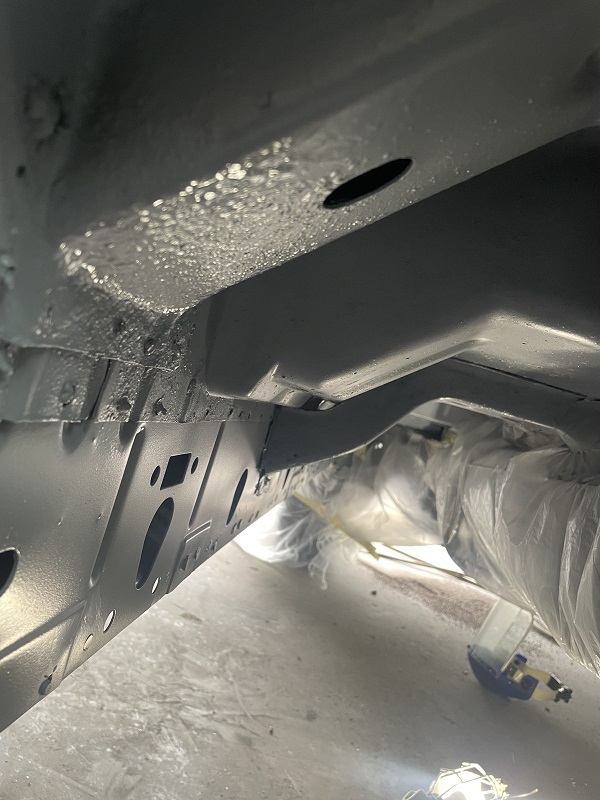 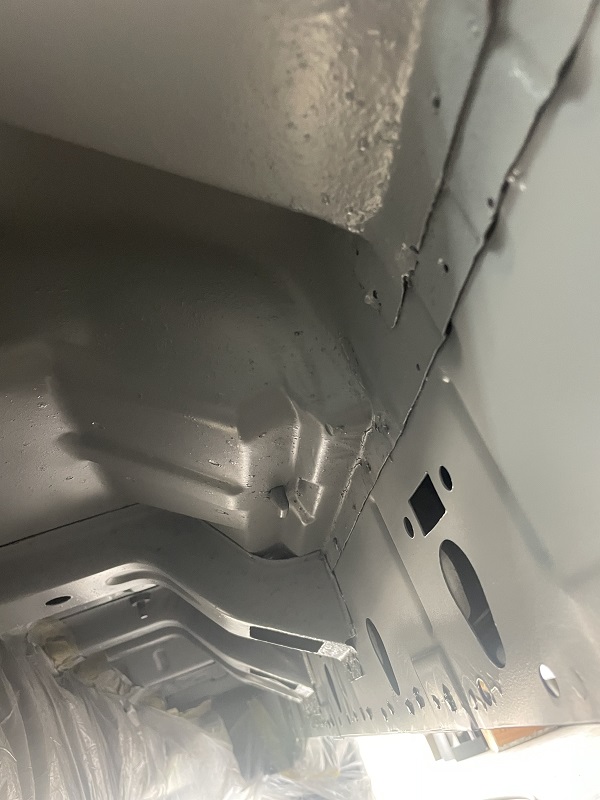
In places on the Floor pan to Cab Pillar rocker and outer rocker with cross members are four panels welded into the assembly.
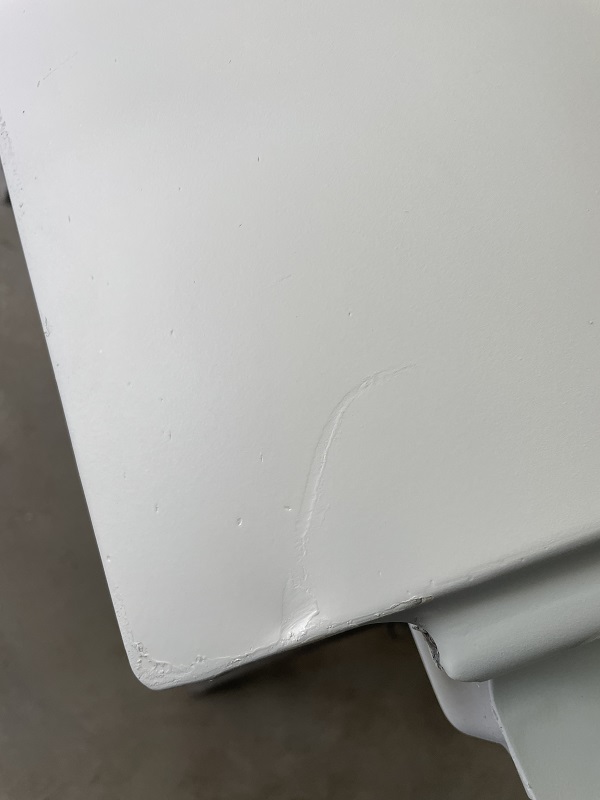
Fenders are like handling tinfoil, the doors are clumsy and tough to deal with on horses but was only choice for me. One damn rear door slipped on the horses and hit the floor with a corner where had to stop, straighten that corner up and yesterday sanded then filled that spot, made me so very unhappy!!! When ordered paint also ordered additional 2K primer so can touch up that and a few other 'Spots'. ALL the panels on the truck seem 'Soft' and 'tender' as to slight impact dent-able.
|
|
DMiller
Orange Level Access
Joined: 14 Sep 2009
Location: Hermann, Mo
Points: 29653
|
Post Options
Thanks(0)
Quote Reply
Posted: 10 May 2024 at 6:33am |
Soon as painted, and sealed then assembled will be building 3.25" thick Standoffs for the new bed to reside on. That dimension is based on the thickness of the Filler tubing for the fuel tank and the OE distance from Frame to Floor of original bed as to Clearance should ever need to remove that tank again. 3" square heavy wall pipe with 1/4" spacers welded to them to rest on the frame, will have aligning pins to seat in the already present frame holes.
On the masking, is a reason not too obvious why a wide tape zone in door ways. Upper is attached to the door seal lip, Lower zone is actually ballooned into the cab so could primer the floor pan to rocker panels areas inside as well out.
Edited by DMiller - 10 May 2024 at 6:36am
|
|