| Author |
|
michaelwis 
Orange Level


Joined: 12 Sep 2009
Location: Wi
Points: 8765
|
 Post Options Post Options
") Thanks(0) Thanks(0)
 Quote Quote  Reply Reply
 Posted: 08 Mar 2015 at 8:15pm Posted: 08 Mar 2015 at 8:15pm |
|
Being the proud owner of D15 series 2 my DAD purchased new , I agree with all the above , ours has 6000 plus hours , but has never left the farm
Priceless, now if I could find our 190 XT, and 7040.......
|
|
WD WD45 DIESEL D 14 D-15 SERIES 2 190XT TERRA TIGER ac allcrop 60 GLEANER F 6060 7040.and attachments for all Proud to be an active farmer
|
 |
|
Sponsored Links
|
|
|
structures
Silver Level


Joined: 28 Feb 2011
Location: Beggs, OK
Points: 331
|
Post Options
Thanks(0)
Quote Reply
Posted: 09 Mar 2015 at 7:53am |
Thanks guys appreciate it.
Chris the process is zinc. I bought most of the stuff from Caswell Inc. I did have to buy other stuff (like heaters, rectifier). I thought it was worth it to me as I have a lot of old hardware I want to restore.
|
|
|
|
wfmurray
Orange Level
Joined: 13 Sep 2009
Location: Bostic NC
Points: 1225
|
Post Options
Thanks(0)
Quote Reply
Posted: 09 Mar 2015 at 11:38am |
|
Got my dads D/14 and don,t see but one reason to not restore it is that you cannot afford it. Then sell to some one that wants to restore it and you can see it off and on.
|
|
structures
Silver Level
Joined: 28 Feb 2011
Location: Beggs, OK
Points: 331
|
Post Options
Thanks(0)
Quote Reply
Posted: 19 Mar 2015 at 11:03am |
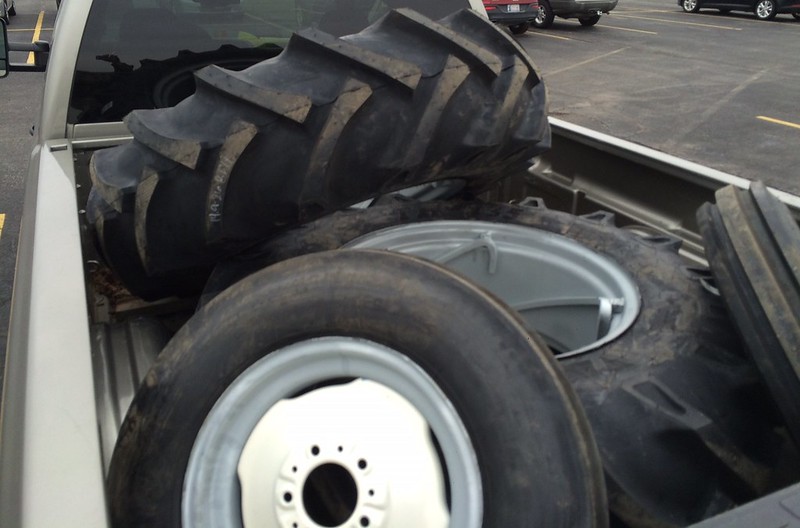
Good morning. I'm getting closer to getting the 15 rolling again. May be a bit before it's under its own power though.
These are 14.9-26 BKT TR-135 on the rear and 6.50-16 deestone on the front. Nothing fancy (well they were expensive though...). We'll see how they do.
 wfmurray wrote: wfmurray wrote:
Got my dads D/14 and don,t see but one reason to not restore it is that you cannot afford it. Then sell to some one that wants to restore it and you can see it off and on. |
My plan is to put the D15 to work. I had been looking to get a tractor and my dad offered this one up so I jumped on it. I just figured that I was going to put money into a newer tractor why not put that into something I already have. Plus I just enjoy fixing stuff.
|
|
|
|
structures
Silver Level
Joined: 28 Feb 2011
Location: Beggs, OK
Points: 331
|
Post Options
Thanks(0)
Quote Reply
Posted: 23 Mar 2015 at 8:01am |
Still trying out this zinc plating. I've been toying with parts that I plan on painting over mostly so they don't look the best, but the protection is there.
|
|
|
|
structures
Silver Level
Joined: 28 Feb 2011
Location: Beggs, OK
Points: 331
|
Post Options
Thanks(0)
Quote Reply
Posted: 30 Mar 2015 at 8:18am |
Got a little painting done this weekend.
|
|
|
|
Gary
Orange Level Access
Joined: 13 Sep 2009
Location: Peterborough,On
Points: 5179
|
Post Options
Thanks(0)
Quote Reply
Posted: 30 Mar 2015 at 8:32am |
|
Oh no, not black !!
Power Shift lock assm. should be all Cream.
See attached Allis Brochure.
Gary
http://www.ebay.ca/itm/original-ALLIS-CHALMERS-D15-D-15-Tractor-sales-Brochure-Catalog-24-pages-/361173245765?pt=LH_DefaultDomain_0&hash=item54179a5f45
|
|
structures
Silver Level
Joined: 28 Feb 2011
Location: Beggs, OK
Points: 331
|
Post Options
Thanks(0)
Quote Reply
Posted: 30 Mar 2015 at 8:44am |
|
That's primer bud. See 2nd pic for cream. By the way I have that brochure. Refer to it all the time. Thanks!
Edited by structures - 30 Mar 2015 at 8:45am
|
|
|
|
Kansas99
Orange Level Access
Joined: 26 Feb 2015
Location: W Kansas
Points: 4810
|
Post Options
Thanks(0)
Quote Reply
Posted: 30 Mar 2015 at 9:04am |
Looking good. 
|
|
aras
Orange Level
Joined: 28 Jul 2011
Location: Weston, WI
Points: 665
|
Post Options
Thanks(0)
Quote Reply
Posted: 30 Mar 2015 at 9:59am |
|
What do you think is the secret to a good plating finish? I assume the first pic is the parts after a plating attempt?
|
|
structures
Silver Level
Joined: 28 Feb 2011
Location: Beggs, OK
Points: 331
|
Post Options
Thanks(0)
Quote Reply
Posted: 30 Mar 2015 at 10:27am |
aras wrote:
What do you think is the secret to a good plating finish? I assume the first pic is the parts after a plating attempt? |
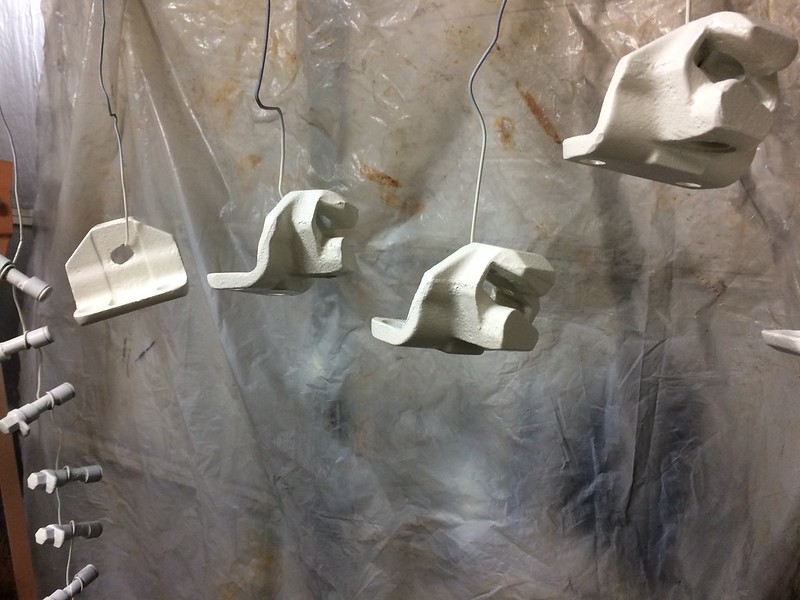
I'm still learning, but my first mistake was sandblasting these parts. It leaves a very matte finish. I should have followed up with a wire wheel treatment to smooth it out.
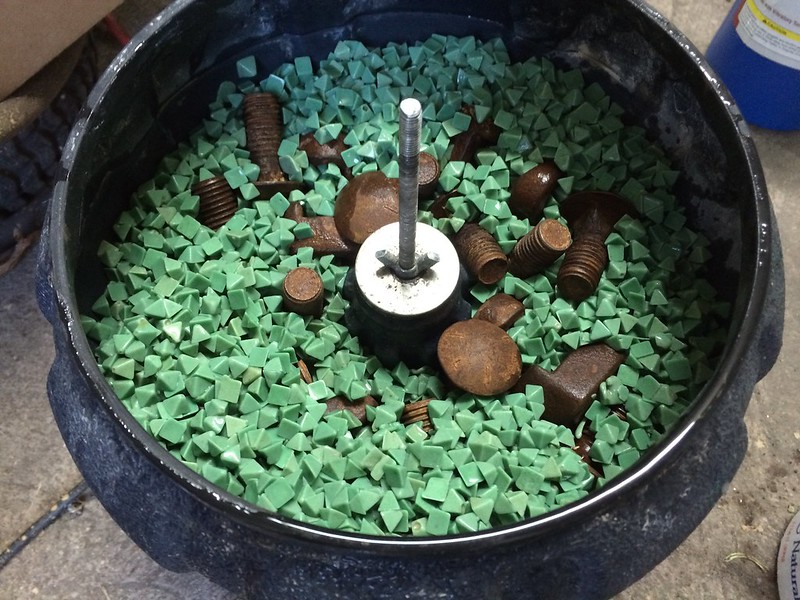
The rest of the hardware I'm wiring brushing the rust off and last night I put half of it in the tumbler with some resin media and simple green. I'm eager to see how it turns out. If all goes well I'll try some walnut shells to smooth them out before plating.
|
|
|
|
structures
Silver Level
Joined: 28 Feb 2011
Location: Beggs, OK
Points: 331
|
Post Options
Thanks(0)
Quote Reply
Posted: 04 Apr 2015 at 10:22am |
Got some work done recently. Better get some pics posted. Plated a lot more hardware.
First tried the vibratory tumbler with simple green. That works pretty good. I run about 5 lbs of parts overnight
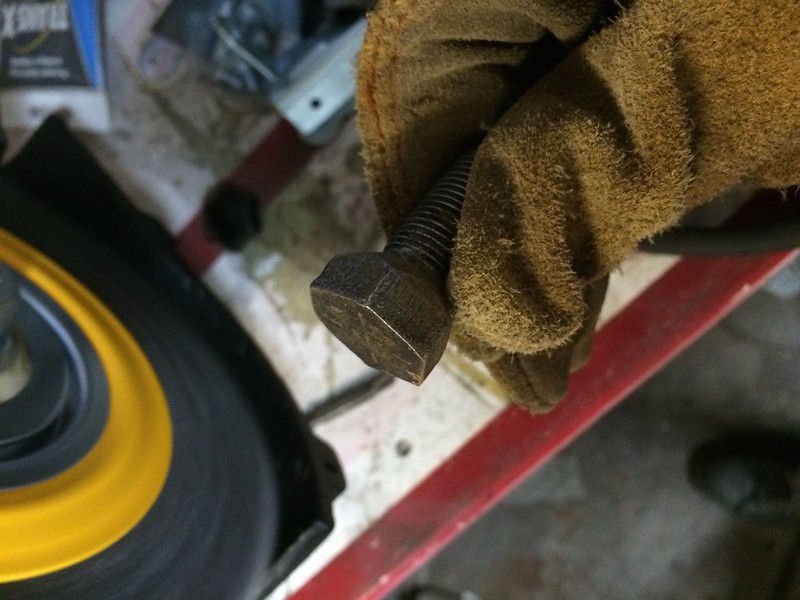
I think the wire wheel works good too. But honestly with the heavily rusted parts they need to be blasted. However I did not blast any threaded hardware.
Then I ran them in the tumbler with walnut shells overnight. Not for sure how much good that did. Actually I used fine shells and I'm thinking I needed a coarser grit.
Then off to plating. First a bath in the degreaser. (The blocks I had to blast. They had some pretty heavy rust that the wire wheel could not cut through.)
Then the plating bath
Then dip in the blue chromate for 45 seconds
Then hang and blow dry with a hair dryer.
|
|
|
|
structures
Silver Level
Joined: 28 Feb 2011
Location: Beggs, OK
Points: 331
|
Post Options
Thanks(0)
Quote Reply
Posted: 04 Apr 2015 at 10:37am |
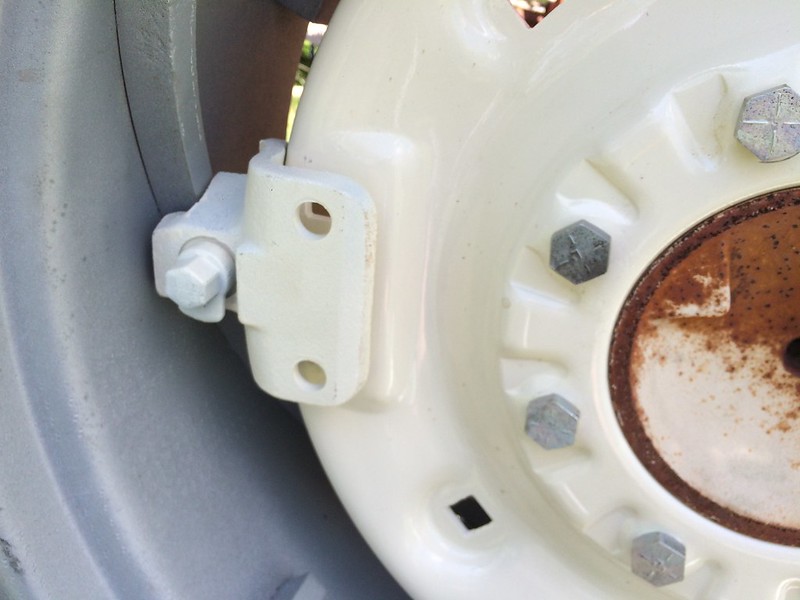
Also got the wheels on. New bearings/races and seals on the hubs and packed with grease.
Got all the housings and pins installed. I didn't have any anti-sieze on me so I just used grease for the eccentric pin.
To get the eccentrics on I worked the rim best I could to the wheel center and with the blocks in I slid the whole assembly on the rim rail.
Must have got grease on the camera lens, but the 15 is on 4 rolling wheels now. Hopefully tomorrow I'll get her moved to the garage and start working on getting that engine free.
|
|
|
|
structures
Silver Level
Joined: 28 Feb 2011
Location: Beggs, OK
Points: 331
|
Post Options
Thanks(0)
Quote Reply
Posted: 13 Apr 2015 at 9:20am |
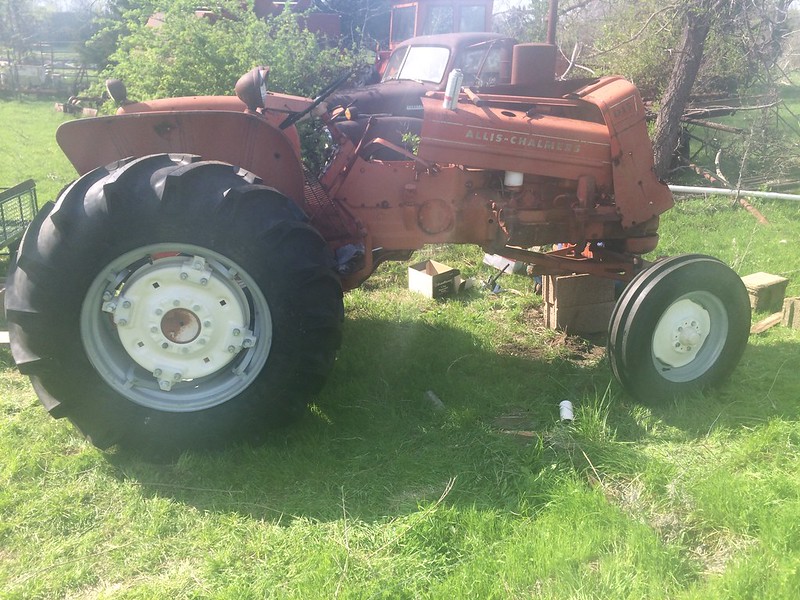
Got the 15 moved from the farm over to my garage. Just barely cleared my 7' door.
Took the valve cover off and the exhaust manifold to clean and inspect.
Unfortunately as I was jolting the crankshaft around trying to get it to turn, a little rust hole popped open in the oil pan. It was a little pinhole until I put my finger through it. I was able to push a bigger hole into it. Looks like this engine is going on the stand! :)
|
|
|
|
JimD
Orange Level
Joined: 11 Sep 2009
Location: Mounds, OK
Points: 2098
|
Post Options
Thanks(0)
Quote Reply
Posted: 13 Apr 2015 at 2:27pm |
|
I would put that engine on the stand and go over it very well anyway. You have been so detailed on everything up to this point, so logic in short cutting now. If you want to come over and drive a D15 II just to keep inspired, give a holler!
|
Owner of OKtractor.com PM for an instant response on parts. Open M-F 9-6 Central. We have new and used parts. 877-378-6543
|
|
structures
Silver Level
Joined: 28 Feb 2011
Location: Beggs, OK
Points: 331
|
Post Options
Thanks(0)
Quote Reply
Posted: 13 Apr 2015 at 2:37pm |
|
Haha. Thanks Jim. I'm sure I'll be seeing you shortly!
|
|
|
|
JimD
Orange Level
Joined: 11 Sep 2009
Location: Mounds, OK
Points: 2098
|
Post Options
Thanks(0)
Quote Reply
Posted: 13 Apr 2015 at 2:48pm |
|
Just get it done before June 27th so you can have it in our town parade. I have to be out of town again, so I'll miss it. And I'm on the board of directors!
|
Owner of OKtractor.com PM for an instant response on parts. Open M-F 9-6 Central. We have new and used parts. 877-378-6543
|
|
Bill Long
Orange Level
Joined: 12 Sep 2009
Location: Bel Air, MD
Points: 4556
|
Post Options
Thanks(0)
Quote Reply
Posted: 13 Apr 2015 at 6:18pm |
|
I fully agree with the "Father's Tractor" theory. I once touched the first flat top WC my father sold. Made me mad because it was painted BLUE. Thought about it and went back to buy it. Too Late.
I think of that every so often. Yes, you only have one Dad. Wish I could talk to him now.
Good Luck!
Bill Long
ps: Let us know how it goes.
|
|
structures
Silver Level
Joined: 28 Feb 2011
Location: Beggs, OK
Points: 331
|
Post Options
Thanks(0)
Quote Reply
Posted: 14 Apr 2015 at 9:39am |
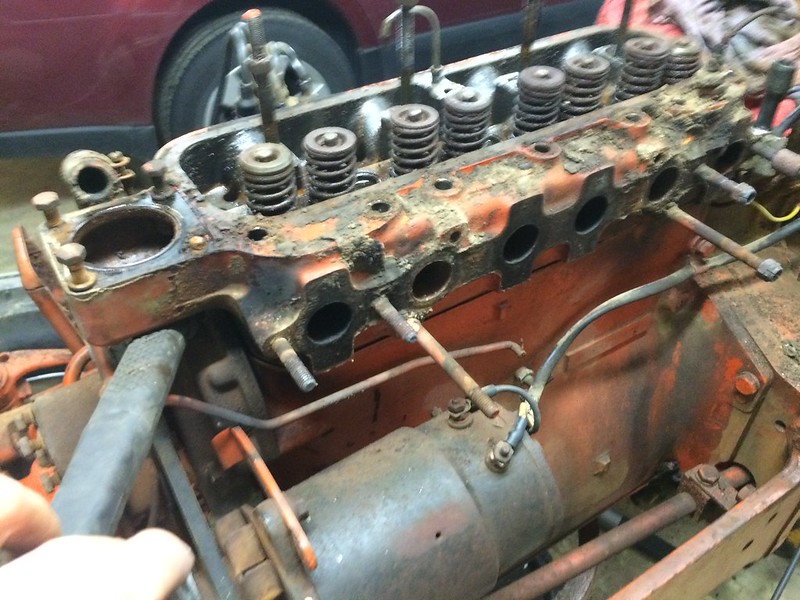
Thanks Bill. Good Morning all. Got a little work done last night. Pulled the rocker arms and found a bent push rod. And pulled the head.
Bent pushrod on the 2nd valve in from the forward end.
Not for sure if this was a good idea to get the head off, but I did a little persuasive prying under the thermostat casting flange... Not too aggressive...
Two cylinders were full of everything I've been dumping down the spark plug holes for a year. The other two were not.
After I pumped the fluid out I wiped down the cylinders. This is what I'm looking at. Not the best picture. The cylinder walls have rust spots all over.
|
|
|
|
JimD
Orange Level
Joined: 11 Sep 2009
Location: Mounds, OK
Points: 2098
|
Post Options
Thanks(0)
Quote Reply
Posted: 14 Apr 2015 at 9:53am |
|
The series II is my favorite tractor. I have 2, and 1 series I here. BUT, the 160 engine is a buggar to get parts for. They are out there, just priced well above the others. I spent a lot of time chasing Richland for sleeve source.
|
Owner of OKtractor.com PM for an instant response on parts. Open M-F 9-6 Central. We have new and used parts. 877-378-6543
|
|
JimD
Orange Level
Joined: 11 Sep 2009
Location: Mounds, OK
Points: 2098
|
Post Options
Thanks(0)
Quote Reply
Posted: 14 Apr 2015 at 9:55am |
|
I do have OEM available on the sleaves.
|
Owner of OKtractor.com PM for an instant response on parts. Open M-F 9-6 Central. We have new and used parts. 877-378-6543
|
|
structures
Silver Level
Joined: 28 Feb 2011
Location: Beggs, OK
Points: 331
|
Post Options
Thanks(0)
Quote Reply
Posted: 16 Apr 2015 at 8:13am |
Good to hear Jim. I'll be bugging you shortly I'm sure.
Last night was kind of a late one. I thought I could get this engine out pretty easily. I disconnected everything and slid the front mount plate as far forward as I could, but since the whole clutch assembly came out with the engine I put the crankshaft pulley in a bind and broke it... If only I had pulled the pulley...
|
|
|
|
DSeries4
Orange Level

Joined: 12 Sep 2009
Location: Ontario, Canada
Points: 7205
|
Post Options
Thanks(0)
Quote Reply
Posted: 16 Apr 2015 at 9:17am |
|
It's a lot easier to get the engine out by pulling the front axle and removing the frame rails. Fortunately, new crank pulleys are available aftermarket.
|
|
'49 G, '54 WD45, '55 CA, '56 WD45D, '57 WD45, '58 D14, '59 D14, '60 D14, '61 D15D, '66 D15II, '66 D21II, '67 D17IV, '67 D17IVD, '67 190XTD, '73 620, '76 185, '77 175, '84 8030, '85 6080
|
|
JimD
Orange Level
Joined: 11 Sep 2009
Location: Mounds, OK
Points: 2098
|
Post Options
Thanks(0)
Quote Reply
Posted: 16 Apr 2015 at 9:32am |
|
|
Owner of OKtractor.com PM for an instant response on parts. Open M-F 9-6 Central. We have new and used parts. 877-378-6543
|
|
structures
Silver Level
Joined: 28 Feb 2011
Location: Beggs, OK
Points: 331
|
Post Options
Thanks(0)
Quote Reply
Posted: 16 Apr 2015 at 12:25pm |
DSeries4 wrote:
It's a lot easier to get the engine out by pulling the front axle and removing the frame rails. Fortunately, new crank pulleys are available aftermarket.
|
Yeah thanks. Lesson learned (again). Follow the shop manual!  I'll be splitting the front when it goes back together.
|
|
|
|
structures
Silver Level
Joined: 28 Feb 2011
Location: Beggs, OK
Points: 331
|
Post Options
Thanks(0)
Quote Reply
Posted: 16 Apr 2015 at 9:44pm |
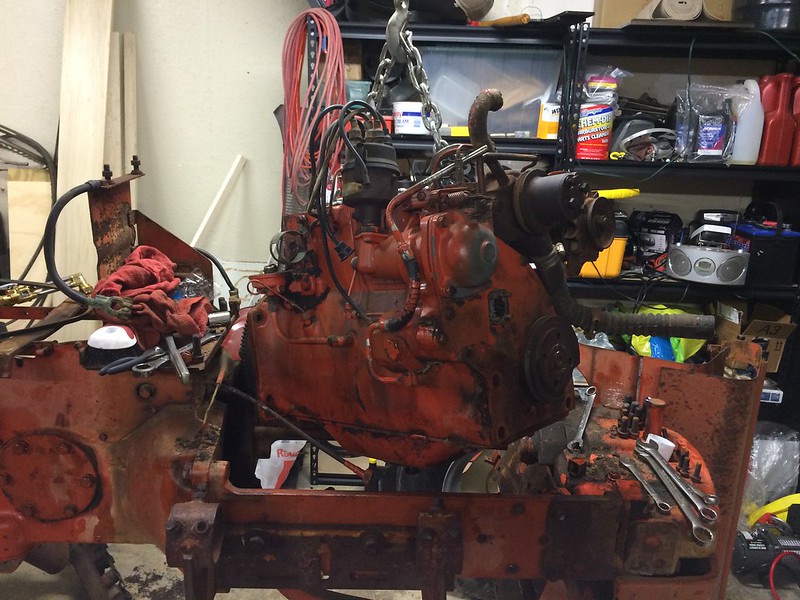
Put the engine on the stand tonight, pressure washed it, and also pulled the pan. Pretty rough inside. While I was pressure washing the pan I blew some more holes into the oil pan.
Here's a look at the clutch and flywheel.
Engine on the stand.
Inside of oil pan.
Inside the block
|
|
|
|
Tracy Martin TN
Orange Level Access

Joined: 11 Sep 2009
Location: Gallatin,TN
Points: 10564
|
Post Options
Thanks(0)
Quote Reply
Posted: 16 Apr 2015 at 10:13pm |
|
Not as bad as I would have thought. Plug the holes on your power steering pump.Pretty sure that is the original ceramic type clutch disc. They were very thin to start with. Rick Corder in Mo.can fix you up with the properly set clutch and pressure plate. Turn the flywheel with the minimum cleanup as possible. If you do this , you will have a clutch that works properly and pedal will stand up correctly. The new clutch disc are too thick, this forces the pressure plate fingers to be too low, won't have enough spring pressure on clutch disc, and won't release properly. HTH Tracy
|
|
No greater gift than healthy grandkids!
|
|
TimNearFortWorth
Orange Level
Joined: 12 Dec 2009
Points: 2014
|
Post Options
Thanks(0)
Quote Reply
Posted: 18 Apr 2015 at 6:31am |
|
Assuming those are a loader/blade mount on the side rails, you will def. want to be checking the "king pin" when you slide the front end out; that area can take a beating over time and get wallowed out.
|
|
Dave H
Orange Level

Joined: 11 Sep 2009
Location: Central IL
Points: 3485
|
Post Options
Thanks(0)
Quote Reply
Posted: 18 Apr 2015 at 7:24am |
TimNearFortWorth wrote:
Assuming those are a loader/blade mount on the side rails, you will def. want to be checking the "king pin" when you slide the front end out; that area can take a beating over time and get wallowed out. |
I sure hope it looks better than mine did. Fortunately my bushing was not wore all the way thru.
|
|
VFDfireman
Silver Level

Joined: 11 Jan 2013
Location: South Dakota
Points: 414
|
Post Options
Thanks(0)
Quote Reply
Posted: 18 Apr 2015 at 9:29am |
structures wrote:
Put the engine on the stand tonight, pressure washed it, and also pulled the pan. Pretty rough inside. While I was pressure washing the pan I blew some more holes into the oil pan.
Here's a look at the clutch and flywheel. <span style="line-height: 1.5;">  </span> <span style="line-height: 1.5;">
  </span> <span style="line-height: 1.5;">
Engine on the stand.</span> <span style="line-height: 1.5;"> 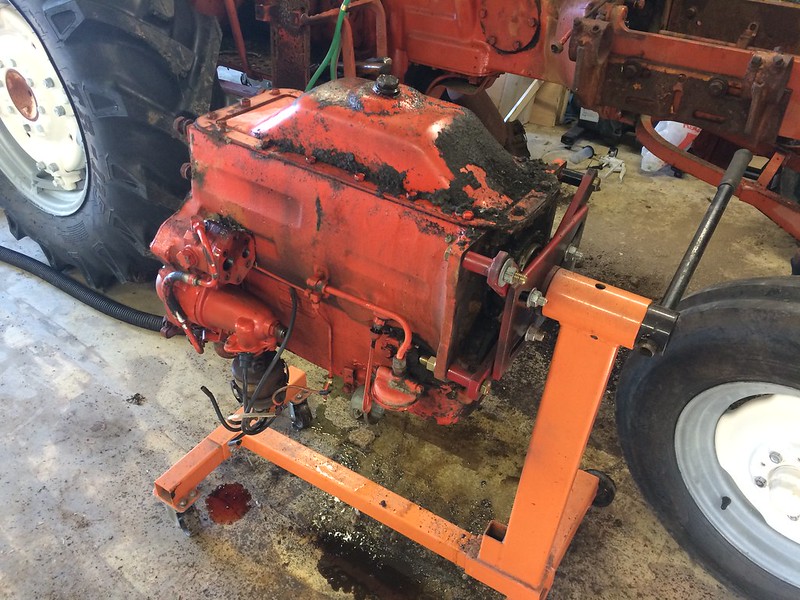 </span> <span style="line-height: 1.5;">
</span> Inside of oil pan. <span style="line-height: 1.5;">  </span> <span style="line-height: 1.5;">
Inside the block</span> <span style="line-height: 1.5;">  </span> <span style="line-height: 1.5;">
  </span> |
Fwiw I had a great deal of success cleaning my Wd45 block and crank that was in far worse condition by soaking the parts in a cow lick tub filled with a mix of purple power an water. I then removed the rust via electrolysis in a similar tub.
|
|


 Topic Options