Any update?
I see what appears to be new head bolts, but I don't see any notes of what else you may have done so far, so please consider that when reading what follows...
Flatheads have another
peculiarity that'll cause this kind of thing... carbon soot buildup on
the valve stems... it cakes up, and as the engine warms, the stems bind
in the guides, causing them to not close fast enough, not seal up
tight... which causes manifold vacuum to drop, and makes the engine seem
like it's running lean, starving for fuel. Let it sit for a half hour,
the stems cool, valves relax to the seats, and it'll start right up.
The
giveaway? When it stalls, turn it over by hand, and listen at the
throat of the carb and exhaust. As you come to TDC on every cylinder,
listen for a hiss... that means you've got a valve leaking. If it
doesn't build much compression (or any) while you're hearing that,
you've got sticky valve guides.
This isn't a 'difficult' fix, but it takes patience, at least, for the first engine you do.
Shut
off fuel, Drain coolant, disconnect fuel and throttle/choke linkages,
spray the head/manifold bolts with penetrant. Take off the upper
coolant hose, and... if you're NOT ABSOLUTELY CERTAIN there's no head
valve under the thermostat, pull the upper neck and thermostat.
Unbolt the manifolds, swing the exhaust out of the way.
If
there's a distributor coming out the top, you'll need to pop the cap
off, loosen the retainer, and lift out the distributor... HOPEFULLY
enough wire on the ignition that you don't have to disconnect it.
Unbolt
the head... pay attention to bolt lengths, if they're not all
identical, MARK the sizes for their respective holes, and WRITE IT DOWN!
Put
on a mask and goggles, and scrub the cylinder head CLEAN. Remember-
this engine has been around a while, there's probably been some leaded
gasoline through it, so the carbon soot you're breathing, will be an
excellent way to get a little lead in you, so treat it with caution.
Put a good straightedge on the mating face of the head, see if it's flat
and true. If not, take it to a machine shop and have 'em touch it up.
Put a straightedge on the top of the block, and look for anything
serious. With the head flat, the block can be a little off and still
seal up good with a factory copper gasket.
Remove the side covers (valves).
Take
a sheet of aluminum foil, and wad up pieces to make plugs for the drain
holes in the side covers. This will keep STUFF from falling into the
bottom of the oilpan...
Apply a spring
compressor, and remove the valve spring keepers (a magnet and a pair of
larger hemostatis is handy for this... if you drop one into the oilpan,
you'll be angry that you didn't wad up some aluminum foil...
Now fold a piece of foil and place it as a cover over top of all the tappets... keep 'em crud-free for the next few steps.
Look closely at each keeper and spring. If you see anything that is unlike the others, act on it accordingly.
Lift out one valve, and remove it's spring. Place them in order as you do it.
Wire
brush the valve stem, neck, and head.... I chuck 'em a cordless drill,
and use a motor-mounted wire wheel to clean them up. Once brushed
clean, WRITE the cylinder and position on the head of the valve, then
continue to next.
Once all done, place all
springs on flat surface, look for oddities. Short springs need
replaced. If you have a friend with a valve spring tester, have 'em all
checked for tension.
Take scrapers, and a Dremel with wire wheel, and scrub the crud out of all the ports.
Use
a valve stem 'cleaning reamer' (its a springy blade thing) and some
penetrating oil to clean crud from the inside of each valve stem. Check
each guide with it's respective valve... it should fit well, and not be
all sloppy, and not bind up. If you have a bind, run the reamer a
little more, testing frequently. If you have big slop, pulling out a
guide, dropping in a new one, and recutting the valve seats is a wise
solution. Seems serious, but it's not.
Get
out your lapstick and lapping compound... put a little of the gritty
paste on a valve's sealing surface, smack the lapstick to it, and spin
it between your hands. Feel the grit- it'll start out feeling roughish,
and after a couple cycles, it'll start to smooth out. Once it's
feeling smooth, pull up the valve, wipe it, and the seat off, and look-
you SHOULD see a nice shiny track where the valve polished itself into
fitment. Call it good and move to the next.
Once all done,
loosen the tappet adjusters (two small wrenches), then install the valve
springs with compressor and retainers. Retainers won't WANT to just
'stay' where you put them while you fiddle, so put a dab of axle grease
on 'em to help 'glue' them in place for the process.
Once
all are in, you'll need to get feeler gauges and put a socket wrench on
the crank to rotate... reset your valve clearances (should be in the
engine's maintenance specs, usually 0.020-0.030" lash or so. If you
don't leave enough lash, the valves won't seat and seal... and when the
engine is hot, the stems will expand enough such that the valves won't
seat, right?
Don't forget to take out your aluminum foil before closing up the side covers.
IF you're going through this process, another thing that's good to do:
Pull
out the head gasket. If it's copper, it's PROBABLY re-usable, so try
not to damage it... examine it closely for signs of leak-throughs.
Pull
the block drain plugs, water pump, and any covers open to coolant.
Flush the block, and poke into all the water jackets with rods, brushes,
porcupine quills, your wife's knitting needles, house wire, an old pair
of crutches, a ski pole, Uncle Leo's fishing pole, chopsticks...
whatever you can get. Flush crud out 'till you can't get any more crud
to come out. Drain the radiator, flush it out... mebbie take it to a
radiator shop and have 'em boil and pressure test it. Consider
rebuilding the water pump. Look at the front crank seal, if it's leaky,
pull that front sheave and get a new seal in it. Sediment accumulates
over time in these things, I have no idea why, but I've never found one
that'd been closed up for 50yrs and didn't need a rinsing-out...
sometimes, I had to chip chunks out... but ALL of them ran much better
after I did.
Wire
brush all the bolts clean, chase all the threads with a tap to clean
them, Put it all back together. On the head bolts that go through to
water, I apply pipe paste sealant, as I've found that it solves LOTS of
problems. Torque the head using proper pattern!
Make
sure you've got good seal on the exhaust and intake manifold faces,
give the carbeurator a bath in the ultrasonic cleaner... (note that the
fuel inlet fitting on many carbs has a little catch-screen IN it, and
people don't know about it... so when it gets plugged, she'll starve.
With this freshening, even a worn flathead will wake up considerably.



 Topic Options


 Post Options
 Thanks(0)



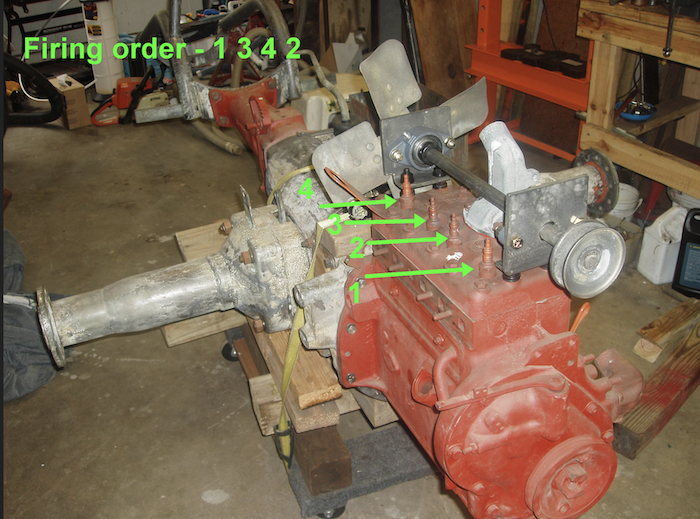 end) timing mark is on the bottom pulley (#1TDC is straight down 6 o’clock)