| Author |
 Topic Search Topic Search  Topic Options Topic Options
|
WM5377 
Bronze Level

Joined: 03 Jan 2024
Location: Az
Points: 49
|
 Post Options Post Options
") Thanks(0) Thanks(0)
 Quote Quote  Reply Reply
 Topic: Allis "M" radiator rebuild/ rust electrolysis Topic: Allis "M" radiator rebuild/ rust electrolysis
Posted: 05 Jan 2024 at 4:04pm |
Currently rebuilding a 1937 wm crawler radiator and using electrolysis to remove rust from the supports, tanks, ect. To start the tanks bolts were so rusted a decent amount broke. The water outlets bolts snapped off and was seized with rust, took hours of fighting to get it off. After that the bolts came out easy with some heat and kroil. Also thinking about rebuilding the water pump but the flat head screws are frozen in place. This is making me hope i can get away with leaving it as is. Even using a impact driver only loosen 1 of the 4 screws and bent the bit/ screw heads. I figure if people are interested ill post more about this and more pics as i go along.
|
 |
|
Sponsored Links
|
|
|
WM5377
Bronze Level
Joined: 03 Jan 2024
Location: Az
Points: 49
|
Post Options
Thanks(0)
Quote Reply
Posted: 05 Jan 2024 at 4:13pm |
|
|
|
WM5377
Bronze Level
Joined: 03 Jan 2024
Location: Az
Points: 49
|
Post Options
Thanks(0)
Quote Reply
Posted: 05 Jan 2024 at 4:16pm |
Edited by WM5377 - 05 Jan 2024 at 4:19pm
|
|
steve(ill)
Orange Level Access

Joined: 11 Sep 2009
Location: illinois
Points: 89925
|
Post Options
Thanks(1)
Quote Reply
Posted: 05 Jan 2024 at 7:35pm |
|
everybody likes to set back in the evening and READ A STORY... and the PHOTOS helps a lot.....Keep posting about your overhaul !!
|
|
Like them all, but love the "B"s.
|
|
Ray54
Orange Level Access
Joined: 22 Nov 2009
Location: Paso Robles, Ca
Points: 4835
|
Post Options
Thanks(1)
Quote Reply
Posted: 06 Jan 2024 at 11:56am |
Great work you are doing. Hopefully the core is not to far gone. But they used better stuff back in the day.
Anything to soften the rust in the tubes would be a big help. I have done a number of Cat radiators of that design. Some I literally pounded brass weldall welding rods down the tube. Then with first rod still in tube push a 2nd and 3rd rod thru. Then finish a strip of aluminum material.
I have had better results removing broken bolts in the cast iron tanks by welding a nut on the broken piece. Some I have welded 6 or 8 times but so very easy to do compared to drilling. And I have never screwed up the threads. As the weld doesn't stick to the cast so even broke a 1/4 inch down start welding. Get it flush, clean weld add a flat washer, weld and clean again, then weld nut on. Let it sit until you can hold you hand on it, longer is better. Then use impact at a low setting to rattle and vibrate. Something with the arc focuses the heat in the broken piece, I believe increasing the shrink and swell factor to loosen the rust. |
|
WM5377
Bronze Level
Joined: 03 Jan 2024
Location: Az
Points: 49
|
Post Options
Thanks(0)
Quote Reply
Posted: 06 Jan 2024 at 1:24pm |
Thanks for all the info and suggestions! I ended up using a random long skinny rod, kroil, av gas, and air. after i got most of the tubes cleared enough I roughed up the coating of the rod and put it in my drill, running it back in forth while adding kroil. Now they are all clean and clear and hoping theirs no leaks. Not gonna lie might end up using stop leak if it does, since repair would probably cause more damage. As for the bolts the worst was the lower outlet. I babied them when attempting to remove them gently rocking back and forth. I fought with getting it removed for hours. I couldnt use much heat because the soldier ect. I tried using a soldiering iron and propane torch, heating it a few times. Also used a super thin hack saw to slice through the gaskets (which were like the hardest epoxy or something. All so i could get drift between it and the radiator and help loosen everything. Ended up losing the battle that night but the next day my stepdad took a endmill to it and between a little beating, prying and wiggling back in forth it came off. VICTORY!!
Edited by WM5377 - 01 Feb 2024 at 1:31pm
|
|
WM5377
Bronze Level
Joined: 03 Jan 2024
Location: Az
Points: 49
|
Post Options
Thanks(0)
Quote Reply
Posted: 08 Jan 2024 at 12:14pm |
|
|
|
steve(ill)
Orange Level Access
Joined: 11 Sep 2009
Location: illinois
Points: 89925
|
Post Options
Thanks(1)
Quote Reply
Posted: 08 Jan 2024 at 12:23pm |
|
LOOKING GOOD !! .... Its a battle on some of these old tractors !
|
|
Like them all, but love the "B"s.
|
|
WM5377
Bronze Level
Joined: 03 Jan 2024
Location: Az
Points: 49
|
Post Options
Thanks(0)
Quote Reply
Posted: 08 Jan 2024 at 12:24pm |
|
Just to be clear i didn't use electrolysis on the radiator core. Just good old wire brushing and elbow grease. also as mentioned above cleaned all the clogged and dirty tubes out.
|
|
WM5377
Bronze Level
Joined: 03 Jan 2024
Location: Az
Points: 49
|
Post Options
Thanks(0)
Quote Reply
Posted: 08 Jan 2024 at 12:28pm |
") steve(ill) wrote: steve(ill) wrote:
LOOKING GOOD !! .... Its a battle on some of these old tractors ! |
Thanks, it sure is! Even in the desert after 80 yrs, rust is one heck of an opponent. Im really not looking forward to working on the steering clutches if they don't free up.
Edited by WM5377 - 08 Jan 2024 at 12:28pm
|
|
Les Kerf
Orange Level
Joined: 08 May 2020
Location: Idaho
Points: 1556
|
Post Options
Thanks(1)
Quote Reply
Posted: 08 Jan 2024 at 6:05pm |
Impressive! 
|
|
WM5377
Bronze Level
Joined: 03 Jan 2024
Location: Az
Points: 49
|
Post Options
Thanks(0)
Quote Reply
Posted: 08 Jan 2024 at 7:16pm |
|
|
|
Alberta Phil
Orange Level

Joined: 13 Sep 2009
Location: Alberta, Canada
Points: 3968
|
Post Options
Thanks(1)
Quote Reply
Posted: 12 Jan 2024 at 9:11am |
|
The 'M' waterpump is the same as the "U" tractor as it's the same engine. Mark Pfouts at Pfouts Family Farm has parts (330) 569-7037 or (440) 570-3653.
|
|
DMiller
Orange Level Access
Joined: 14 Sep 2009
Location: Hermann, Mo
Points: 35259
|
Post Options
Thanks(1)
Quote Reply
Posted: 12 Jan 2024 at 12:06pm |
|
On the Radiator Core, if there is considerable Corrosion on the Between Tubes Copper fins it will not adequately exchange heat. That was a Issue on a few of my older machines over the years. If they crumble when touched they will not accept heat from the tube.
|
|
WM5377
Bronze Level
Joined: 03 Jan 2024
Location: Az
Points: 49
|
Post Options
Thanks(0)
Quote Reply
Posted: 12 Jan 2024 at 7:21pm |
Alberta Phil wrote:
The 'M' waterpump is the same as the "U" tractor as it's the same engine. Mark Pfouts at Pfouts Family Farm has parts (330) 569-7037 or (440) 570-3653.
|
Thanks I've been in contact with mark. Think were just gonna run the pump. We got the plunger and spring cleaned and freed up. The shaft and bushings are in decent shape and have a tight fit. It seems like whoever had it last had replaced the bushings but unfortunately they didnt line up the front oil hole. The thrust washer leaves alot to be desired but the sealing face is still there and appears to still be able to seal. Were just thinking about putting a couple washers between the spring and plunger to add a little extra push. We figure we might as we'll run it till it leaks to much ect then we'll buy a reman when that hill comes. I wish were made of money but were not. We have to pick and chose our battles frugally and save for the rainy days. I kinda expect we'll have to replace some of the steering clutches and who knows what else.
|
|
WM5377
Bronze Level
Joined: 03 Jan 2024
Location: Az
Points: 49
|
Post Options
Thanks(0)
Quote Reply
Posted: 12 Jan 2024 at 7:30pm |
DMiller wrote:
On the Radiator Core, if there is considerable Corrosion on the Between Tubes Copper fins it will not adequately exchange heat. That was a Issue on a few of my older machines over the years. If they crumble when touched they will not accept heat from the tube. |
Thanks for the advice I'll make sure to keep a eye on the temps. The fins seem ok, just green from the years. They are thin, but I think it will still work for what were using it for. (going to the yearly tractor show and maybe to pull something) It will probably get run a handful of times a year just to keep things moving ect.
|
|
WM5377
Bronze Level
Joined: 03 Jan 2024
Location: Az
Points: 49
|
Post Options
Thanks(0)
Quote Reply
Posted: 31 Jan 2024 at 2:14pm |
Sorry its been awhile my health hasn't been the best. Ive gotten a few things done. Got the water pump cleaned out and pulled the front bushing out. Found out the oil port hole was drilled in the wrong location. So I drilled it out in the right spot and dremeled a channel to the old hole so both side get lubed. I also chamfered both holes. 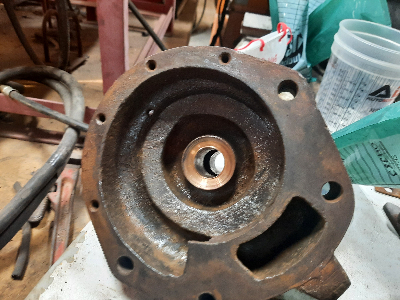
|
|
WM5377
Bronze Level
Joined: 03 Jan 2024
Location: Az
Points: 49
|
Post Options
Thanks(0)
Quote Reply
Posted: 31 Jan 2024 at 2:37pm |
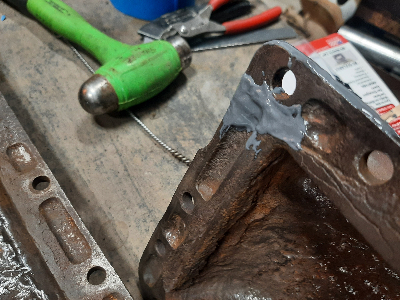
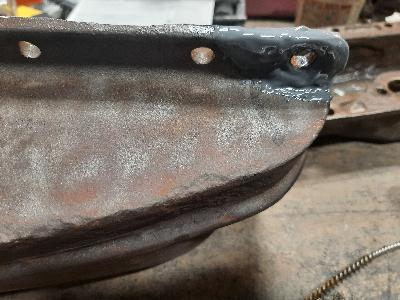
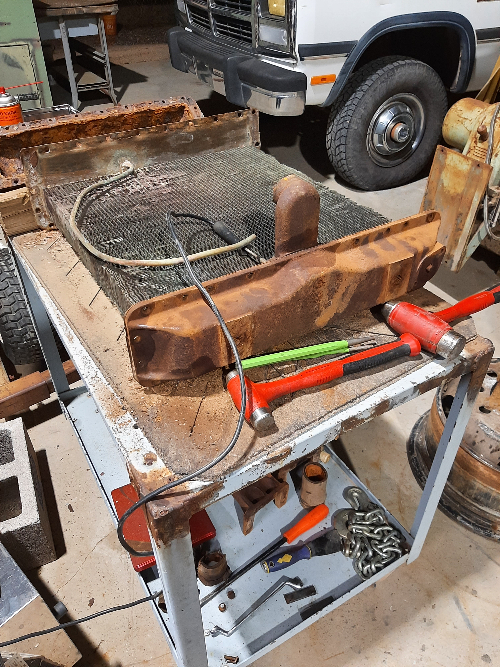
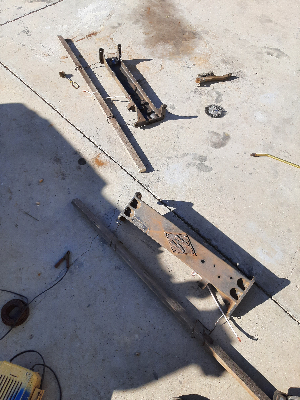
I made some new brackets. It was fun since the old ones were stretched and the bolts dont all line up on the same plane. Then i took a burr to the rust and clean as much as i could without messing with the sealling surface. Still to scared to remove that since it might take to much of the sealing surface away. I also used a large square of sand paper and a flat piece of particle board to get the sealing surface as flat and even as possible on the tanks. Its probably gonna take a decent bead of rtv to seal everything. Glad the systems not under pressure. Still debating if we should try to use rust converter and red kote or another sealer. Or if we should just do the rust converter or nothing and run it as is. With how bad the tanks are rotted its hard to put money into them vrs maybe trying to find different tanks. 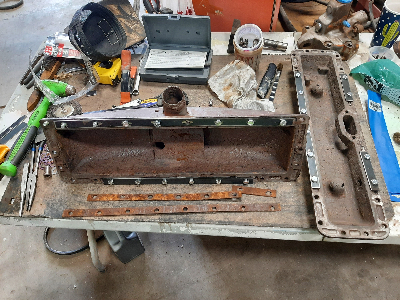 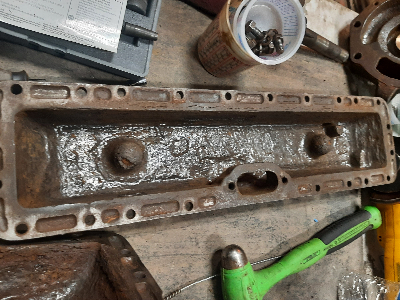 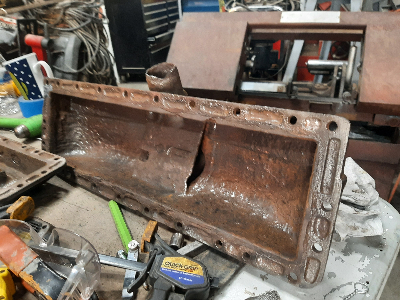 I also jb welded a piece that had broken of the corner of the top tank. We were going to braze it but since its so old and rusty we didnt want to risk it. Also cast iron is supposedly one of the hardest things to weld/braze and we dont have any experience doing it. So steel jb weld it is.
Edited by WM5377 - 31 Jan 2024 at 3:31pm
|
|
WM5377
Bronze Level
Joined: 03 Jan 2024
Location: Az
Points: 49
|
Post Options
Thanks(1)
Quote Reply
Posted: 31 Jan 2024 at 2:42pm |
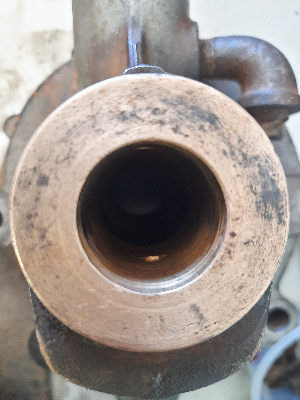
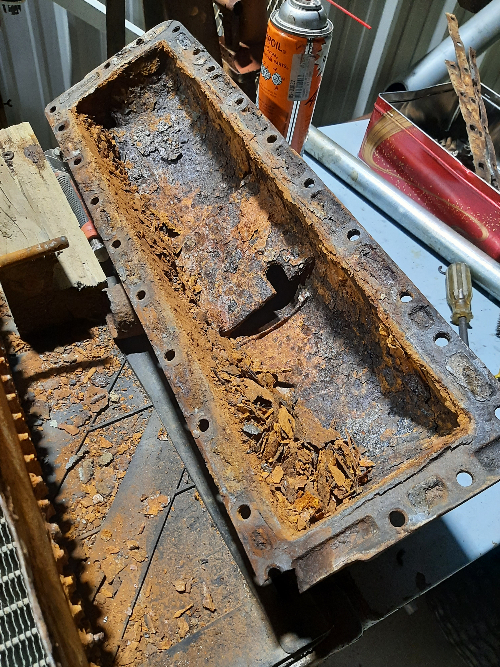
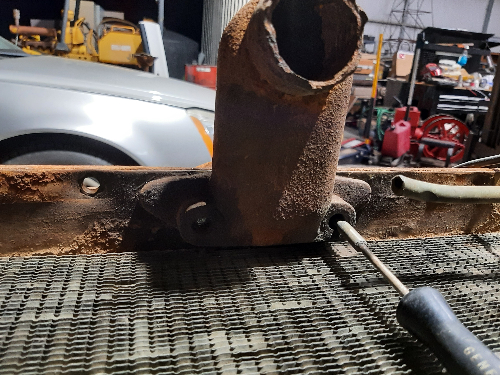
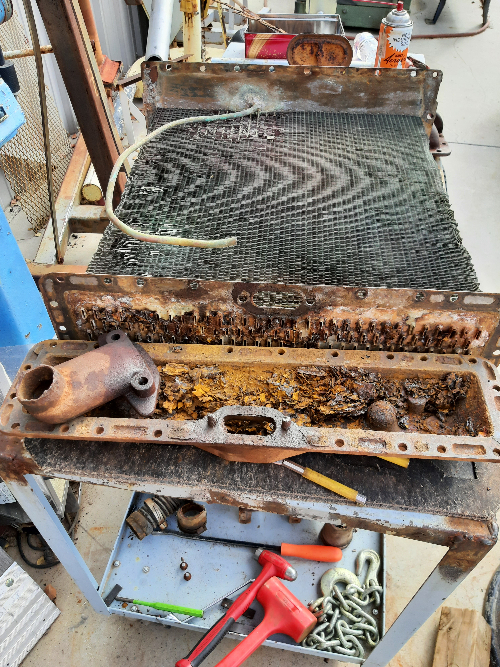
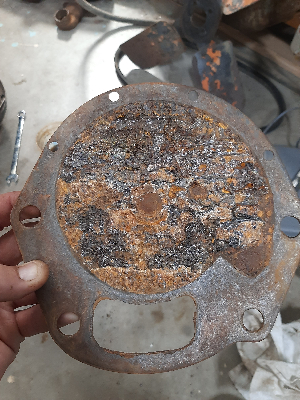
I also started to clean out the coolant chamber in the head. This was after putting a shop vac and shop air to clean it. Then removing the outlet and finding this under it. I cleaned all this rust out to but HOLY COW they dont lie when they say "Rust Never Rests". The thing was solidly clogged with rust. Kinda scared to run evapo rust through it now because i feel like its possible that rust is whats holding things together.  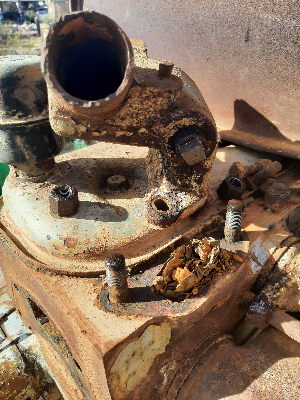
Edited by WM5377 - 31 Jan 2024 at 3:35pm
|
|
WM5377
Bronze Level
Joined: 03 Jan 2024
Location: Az
Points: 49
|
Post Options
Thanks(0)
Quote Reply
Posted: 01 Feb 2024 at 1:18pm |
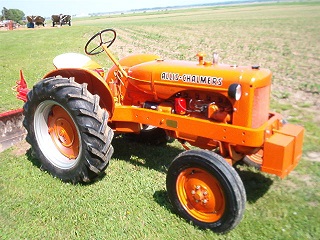
Ive also forgot to mention that the track bushing are cracked, have chunks missing, or all together gone with just the pin left. Somehow theyre still holding together which is seeming to be a constant theme of this old gal. I had initially intended on doing right by it and do a full restore but its starting to be more of a basket case than its worth. My dad who im doing this for has just said "we will run it as is." Since its just going to go to our local tractor show maybe once a year.
Also hears a pic of it with the hood and fenders off. Ive posted elsewhere but figure I should put one up. 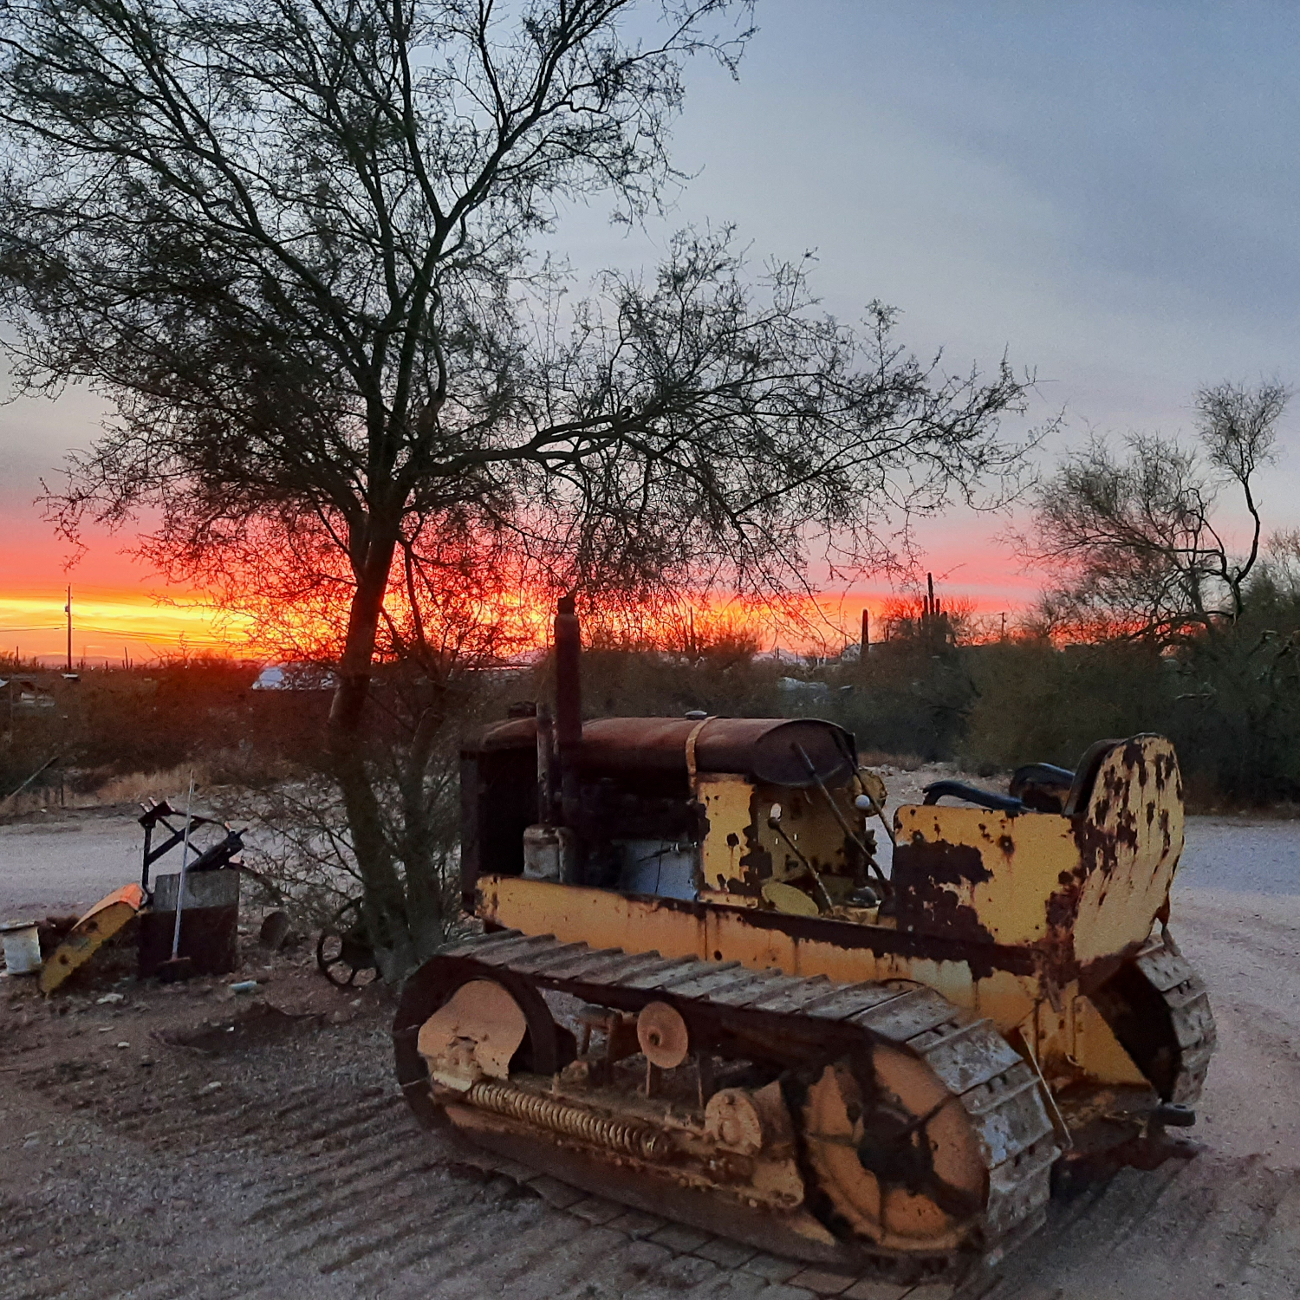
Edited by WM5377 - 01 Feb 2024 at 1:20pm
|
|
steve(ill)
Orange Level Access
Joined: 11 Sep 2009
Location: illinois
Points: 89925
|
Post Options
Thanks(1)
Quote Reply
Posted: 01 Feb 2024 at 10:57pm |
OH the JOYS of working on a 90 year old Fence Row Tractor !!!
Dont give up... YOUR WINNING !!  |
|
Like them all, but love the "B"s.
|
|
Les Kerf
Orange Level
Joined: 08 May 2020
Location: Idaho
Points: 1556
|
Post Options
Thanks(1)
Quote Reply
Posted: 02 Feb 2024 at 5:20pm |
steve(ill) wrote:
OH the JOYS of working on a 90 year old Fence Row Tractor !!!
Dont give up... YOUR WINNING !! |
Yup!
I just love seeing this type of documentation on a project (I need to do better on mine)
|
|
wjohn
Orange Level

Joined: 19 Jan 2010
Location: KS
Points: 2336
|
Post Options
Thanks(1)
Quote Reply
Posted: 02 Feb 2024 at 8:16pm |
|
I know nothing about these old crawlers but enjoy watching your progress. If you get it running and driving you can always keep your eye out for a parts tractor with slightly better undercarriage, if you so desire.
|
|
1939 B, 1940 B, 1941 WC, 1951 WD, 1952 CA, 1956 WD-45
|
|
WM5377
Bronze Level
Joined: 03 Jan 2024
Location: Az
Points: 49
|
Post Options
Thanks(0)
Quote Reply
Posted: 06 Feb 2024 at 1:04am |
Thanks everyone for the encouragement. As for running I dont know if it ever will, but it does crawl back in forth lol  The steering clutches are stuck though so no left or right. The engine starts right up and the trans is solid in all gears.
Yeah, Im keeping a eye and ear out for possible parts tractor but honestly im working on a shoestring budget. So i doubt i can afford a parts tractor unless it was close to free. Also most likely were going to have to buy new steering clutch plates ect and that will probably take most of my budget for this project. Im just trying to get this thing going for my father so he has something to take to the yearly tractor show.
Im thinking about making the track bushings. I requested a quote for the cost of steel dom tube thats 1 7/8 od X 1 1/4 id. I found a company that sells it. According to the manual thats the od of the bushing(1 7/8) and the od of the pin(1 1/4). I figure the pins are probably worn a bit so i dont have to worry about the id of the bushing being so close to the od of the pin. If my logics flawed, im wrong, or anyone knows more about this please lemme know.
|
|
WM5377
Bronze Level
Joined: 03 Jan 2024
Location: Az
Points: 49
|
Post Options
Thanks(0)
Quote Reply
Posted: 22 Mar 2024 at 8:08pm |
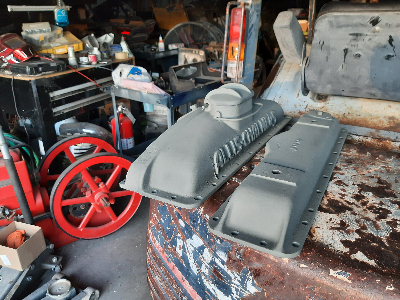
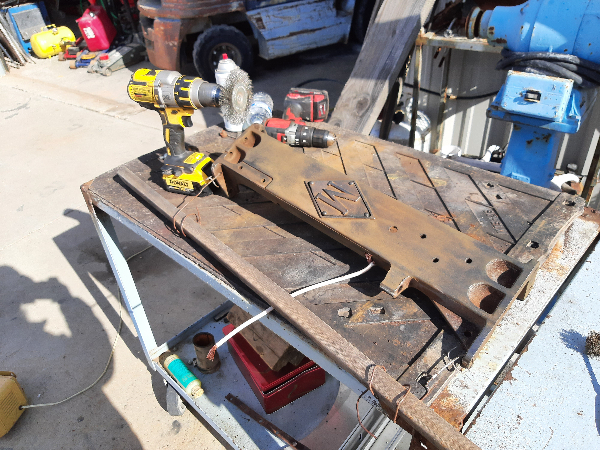
Sorry its been awhile. Recently used rustoleum rust reformer and self etch primer on the radiator tanks, and supports. Heres some pics, I thought I had taken pics of the rust reformer coat but guess it didnt save or im miss remembering.  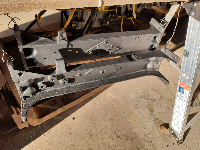 I dont know why the first pic is super grainy sorry.
|
|
Wildwoods6996
Bronze Level

Joined: 03 Apr 2024
Location: Boston
Points: 2
|
Post Options
Thanks(0)
Quote Reply
Posted: 03 Apr 2024 at 10:02am |
|
Did you ever get to freeing up your steering?
|
|
WM5377
Bronze Level
Joined: 03 Jan 2024
Location: Az
Points: 49
|
Post Options
Thanks(0)
Quote Reply
Posted: 28 Jan 2025 at 2:31pm |
|
No ended up putting the tractor on the back burner. I just started working on it again. If ya have any tips towards freeing them up lemme know.
|
|


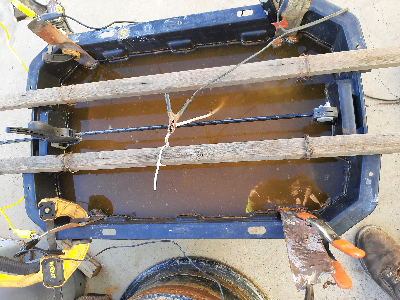 After two days.
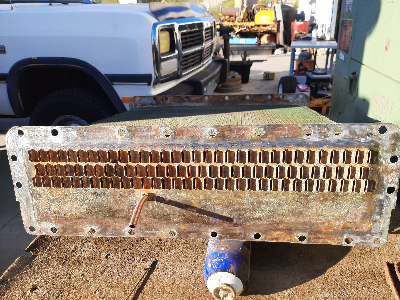
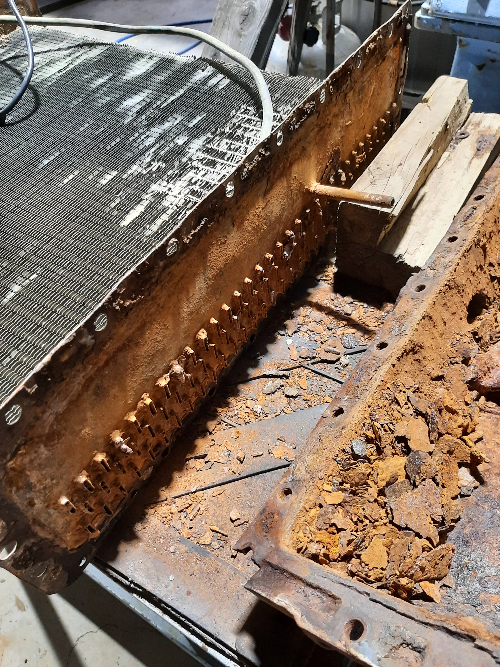
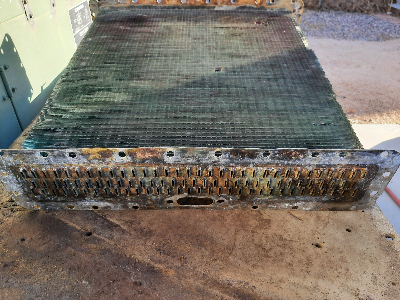 The radiator core after cleaning all the cork and corrosion off. Theres more to come, been working on the water pump and the fan hub/belt tensioner also. Then gonna have to clean the block out. Hope everyones doing well having fun with their projects.
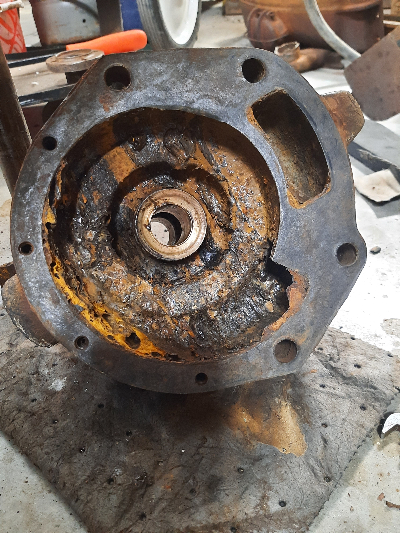

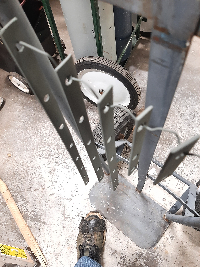
 looks like the plunger/ spring are rusted pretty solid to the shaft. Probably gonna have to replace it or the whole pump.