| Author |
 Topic Search Topic Search  Topic Options Topic Options
|
littlemarv 
Orange Level

Joined: 10 Jun 2013
Location: Wisconsin
Points: 1826
|
 Post Options Post Options
") Thanks(0) Thanks(0)
 Quote Quote  Reply Reply
 Posted: 26 Jul 2017 at 1:48pm Posted: 26 Jul 2017 at 1:48pm |
Ripped the upper canvas out. Got my first look at the inside of the concave. Doesn't look very easy to clean out in there. How big of a job is it to just remove the concave? I might just do that, sandblast and paint it right away.
|
|
The mechanic always wins.
B91131, WC23065, WD89101, CA29479, B1, Early B10, HB212, 416H
|
 |
|
Sponsored Links
|
|
|
DennisA (IL)
Orange Level
Joined: 11 Sep 2009
Location: Ridott IL.
Points: 2064
|
Post Options
Thanks(0)
Quote Reply
Posted: 26 Jul 2017 at 2:11pm |
|
The concave is not meant to be removed. It's riveted in place.
|
|
Thanks & God Bless
Dennis
|
|
CrestonM
Orange Level
Joined: 08 Sep 2014
Location: Oklahoma
Points: 8357
|
Post Options
Thanks(0)
Quote Reply
Posted: 26 Jul 2017 at 10:24pm |
You're right...it is kinda hard to clean out. I tried flushing mine out with a hose and the inspection port open, but that didn't work well. What DID work was using the combine! Running the straw through there cleaned it up nicely and got all the mud and junk out.
I think it could be removed...just have to take your time. Might make it easier to pull the cylinder out first.
|
|
Kyle(MN)
Silver Level

Joined: 03 Oct 2010
Location: Minnesota
Points: 60
|
Post Options
Thanks(0)
Quote Reply
Posted: 27 Jul 2017 at 12:16pm |
|
Very interesting- Thanks for posting!!!
|
|
littlemarv
Orange Level
Joined: 10 Jun 2013
Location: Wisconsin
Points: 1826
|
Post Options
Thanks(0)
Quote Reply
Posted: 30 Jul 2017 at 9:36pm |
Well, got a few minutes to work on it again tonight.... Put the chain on the reel drive, got the belt on the reel drive as well. Got the belt on the back properly, I think. Heres the funny part. The belt was on the combine when I got it, but not on the pulleys. There are two slots for the tensioner pulley and the pulley was up toward the top of the upper slot. In order to get the belt on I had to move the pulley to the lower slot. Anything weird there I should know about, or is it just to allow for and inch or two either way in belt length? Anyways, I dumped a little waste oil on the sickle and used a long bar to turn the pto shaft several revolutions. Lots of squeaks and groans, but it went around a few times. Well, can I really be at the point already where I grease it up and hook it to a tractor? Granted, I haven't got the canvas situation figured out, but I can at least see if everything else works....
|
|
The mechanic always wins.
B91131, WC23065, WD89101, CA29479, B1, Early B10, HB212, 416H
|
|
combinechris
Silver Level
Joined: 20 Jul 2015
Location: wittenberg,Wi.
Points: 422
|
Post Options
Thanks(0)
Quote Reply
Posted: 31 Jul 2017 at 2:09pm |
|
If your combine is going to sit outside. Open all the doors so water can get out , also open the clean out door along the bottom of the header so water doesn't sit in the header.
Hey Creston, he has a 66 not a 60. The header on a 66 has a door at the bottom you can take it off.
|
|
35 combines and 15 forage harvesters. mostly allis combines and equipment.WTB 2 row cornhead for a 90
|
|
CrestonM
Orange Level
Joined: 08 Sep 2014
Location: Oklahoma
Points: 8357
|
Post Options
Thanks(0)
Quote Reply
Posted: 31 Jul 2017 at 2:27pm |
 combinechris wrote: combinechris wrote:
If your combine is going to sit outside. Open all the doors so water can get out , also open the clean out door along the bottom of the header so water doesn't sit in the header.
Hey Creston, he has a 66 not a 60. The header on a 66 has a door at the bottom you can take it off. |
Oh really? One of my 60A's has a 66 header on it (Yes, it's got the flares) and underneath it looks just like my other 60A with a 60A header.
|
|
combinechris
Silver Level
Joined: 20 Jul 2015
Location: wittenberg,Wi.
Points: 422
|
Post Options
Thanks(0)
Quote Reply
Posted: 31 Jul 2017 at 3:07pm |
CrestonM wrote:
combinechris wrote:
If your combine is going to sit outside. Open all the doors so water can get out , also open the clean out door along the bottom of the header so water doesn't sit in the header.
The header on a 60 or 66 will interchange . On the 66 header there is a door you can take off underneath the roller to clean out.
Hey Creston, he has a 66 not a 60. The header on a 66 has a door at the bottom you can take it off. |
Oh really? One of my 60A's has a 66 header on it (Yes, it's got the flares) and underneath it looks just like my other 60A with a 60A header. |
|
|
35 combines and 15 forage harvesters. mostly allis combines and equipment.WTB 2 row cornhead for a 90
|
|
combinechris
Silver Level
Joined: 20 Jul 2015
Location: wittenberg,Wi.
Points: 422
|
Post Options
Thanks(0)
Quote Reply
Posted: 31 Jul 2017 at 3:09pm |
|
Yes Creston the headers are interchangeable. But on the 66 header there's a clean out door under the roller behind the sickle.
|
|
35 combines and 15 forage harvesters. mostly allis combines and equipment.WTB 2 row cornhead for a 90
|
|
Ted J
Orange Level

Joined: 05 Jul 2010
Location: La Crosse, WI
Points: 18699
|
Post Options
Thanks(0)
Quote Reply
Posted: 31 Jul 2017 at 5:33pm |
|
|
|
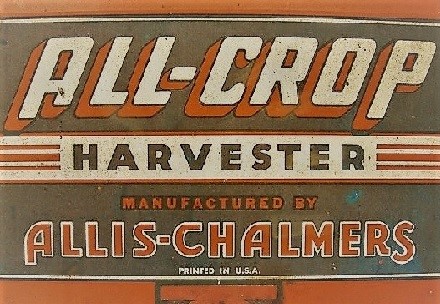
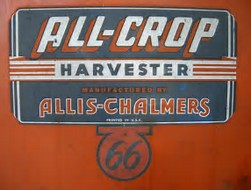
"Allis-Express"
19?? WC / 1941 C / 1952 CA / 1956 WD45 / 1957 WD45 / 1958 D-17
|
|
littlemarv
Orange Level
Joined: 10 Jun 2013
Location: Wisconsin
Points: 1826
|
Post Options
Thanks(0)
Quote Reply
Posted: 03 Aug 2017 at 12:08pm |
Opened the inspection port. I think I am going to remove both cylinder bars, for a couple reasons. To make it easier to clean out, and by removing the bottom one, there will be drain holes in the concave. I gotta get all that junk out of there, I suspect the concave is pretty thin in some places. My plan is to buy a large canvas tarp that covers the clean grain tank, the scour kleen, and the cylinder. Need to keep the water out of there.... I see this is called a "shelling plate" or "ledger plate". Looks like a strip of rubber that could be easily reproduced? There is a panel that can be removed behind the sickle. But, as usual, ONE carriage bolt spun. I will have to run an extension cord out there and grind the head off, but right now, we are halfway through the 1 1/2" of rain we are supposed to get today.
|
|
The mechanic always wins.
B91131, WC23065, WD89101, CA29479, B1, Early B10, HB212, 416H
|
|
CrestonM
Orange Level
Joined: 08 Sep 2014
Location: Oklahoma
Points: 8357
|
Post Options
Thanks(0)
Quote Reply
Posted: 03 Aug 2017 at 12:56pm |
Yep, you can get a tarp, just be sure it is waterproofed. You will most likely have to pull the concave bars to install an overlay. (They have carriage bolts as well) To tell if you could use an overlay, just knock on the bottom side of the concave. If it sounds pretty thin, it probably needs one. Also, installing an overlay isn't too terrible. Most people say to remove the cylinder, but I didn't. I just raised the cylinder a bit, then took my overlay and fed it in from the back while rotating the cylinder, thus using the cylinder to do the work of pulling it down and holding it in shape while I put the bolts through and tightened them up. Yes, the rubber on the shelling plate is easily replaceable, just don't lose the washers that hold it down. They are special washers, and while you can find them in certain places, it's easier to just keep track of yours. Chris will chime in and tell you what kind of rubber to use for that. That said, the rubber is gone on one of my combine's shelling plate and the rubber on all my combines' cylinder bars is shot. If you are doing a hard threshing crop like wheat or milo, you don't need good rubber, but if you do delicate crops you will need to get that replaced.
Also...as far as draining water from the concave...I park my combine with the right wheel about 4" higher than the left side, thus helping the water run out so it isn't left standing inside.
Edited by CrestonM - 03 Aug 2017 at 12:59pm
|
|
DennisA (IL)
Orange Level
Joined: 11 Sep 2009
Location: Ridott IL.
Points: 2064
|
Post Options
Thanks(0)
Quote Reply
Posted: 03 Aug 2017 at 5:00pm |
|
I've had to rebuild 4-5 of these. It's not hard just time consuming.
1) Remove the whole cylinder.
2) Unbolt the concave bars and ledger plate.
3) Measure the concave to make a new one. I know some of you will laugh, but I use a string and marker. Put the end of the string on the front edge of the old concave where the ledger bolts on. Now just let the string lay on the concave so it's running straight from front to back. Use the marker to mark where the bolt holes and each bend is as well as where the back of the concave ends. Now you have the layout for the replacement concave. Use a tape measure for the width of the concave and make sure to leave some wiggle room to aid in assy.
4) Find a sheet metal shop (not a fab shop) to do the bending. The time I had one bent last year for my 60 with the two row corn head. It cost me $20.00, very inexpensive.
5) Use the string to lay over the new concave and mark each line of bolt holes ( should only be three) on both ends.
6) Sit the concave bar on the new concave and line up the bolt hole center with the makers on the concave. Now go and mark all the bolt holes on the concave from the concave bars. You will have two rows of marks for the bars. Do the same for the ledger plate holes.
7) Drill all the holes where marked.
8) Slide the new concave in from the back and start bolting the concave bars in place.
9) Replace cylinder.
To replace the lagging on the ledger plate I use the belting for round balers.
I replace the rubber concaves with OEM parts from AGCO.
|
|
Thanks & God Bless
Dennis
|
|
JoeO(CMO)
Orange Level

Joined: 11 Sep 2009
Location: Cent Missouri
Points: 2694
|
Post Options
Thanks(0)
Quote Reply
Posted: 03 Aug 2017 at 9:25pm |
littlemarv wrote:
Now that my story is trashed, thanks Photobucket, the only picture you can see is Crestons. What does F.O.B. mean? |
FOB -Freight on Board A very nice find!!! I would've gone for it too, and I have no need for one.
Edited by JoeO(CMO) - 03 Aug 2017 at 9:28pm
|
|
|
|
allischalmerguy
Orange Level

Joined: 11 Sep 2009
Location: Deep River, IA
Points: 2864
|
Post Options
Thanks(0)
Quote Reply
Posted: 04 Aug 2017 at 7:03pm |
|
Thanks for posting all of this Marv and guys. Very interesting...and what you guys can do is amazing.
|
|
It is great being a disciple of Jesus! 1950 WD, 1957 D17...retired in Iowa,
|
|
littlemarv
Orange Level
Joined: 10 Jun 2013
Location: Wisconsin
Points: 1826
|
Post Options
Thanks(0)
Quote Reply
Posted: 06 Aug 2017 at 9:12am |
|
So tell me more about an overlay. Is it just a sheet cut to size and rolled to correct shape? Do you put any extra bolts in, or just use the cylinder bar bolts? My initial thought is to have one made and powder coat it? How do you use the cylinder to hold it down? Once you remove the cylinder bars, isn't there like an inch or so of clearance?
|
|
The mechanic always wins.
B91131, WC23065, WD89101, CA29479, B1, Early B10, HB212, 416H
|
|
littlemarv
Orange Level
Joined: 10 Jun 2013
Location: Wisconsin
Points: 1826
|
Post Options
Thanks(0)
Quote Reply
Posted: 06 Aug 2017 at 9:43am |
|
My first thought was to bolt a new sheet onto the underside, or outside of the concave?
|
|
The mechanic always wins.
B91131, WC23065, WD89101, CA29479, B1, Early B10, HB212, 416H
|
|
DennisA (IL)
Orange Level
Joined: 11 Sep 2009
Location: Ridott IL.
Points: 2064
|
Post Options
Thanks(0)
Quote Reply
Posted: 06 Aug 2017 at 1:42pm |
Is it just a sheet cut to size and rolled to correct shape? YES Do you put any extra bolts in? NO Just use the cylinder bar bolts? YES My initial thought is to have one made and powder coat it? Don't power coat as it will just get worn off anyway. I had mine made out of stainless. How do you use the cylinder to hold it down? The bars hold it down in place, not the cylinder. Once you remove the cylinder bars, isn't there like an inch or so of clearance? YES, but the new liner will only take up about .0625". Below is a few pictures of the OEM replacement concave. The only place where it is held in place is at the ledger plate and the two concave bars. It does have clearance holes for the rivet heads and a hook on the back by the walker.    
Edited by DennisA (IL) - 06 Aug 2017 at 2:05pm
|
|
Thanks & God Bless
Dennis
|
|
littlemarv
Orange Level
Joined: 10 Jun 2013
Location: Wisconsin
Points: 1826
|
Post Options
Thanks(0)
Quote Reply
Posted: 06 Aug 2017 at 7:19pm |
|
I misread what was said above about the cylinder holding it down. He said to hold it's shape. Stainless is an excellent idea.
|
|
The mechanic always wins.
B91131, WC23065, WD89101, CA29479, B1, Early B10, HB212, 416H
|
|
Mikes5785
Bronze Level


Joined: 25 Jul 2017
Location: SE Iowa
Points: 28
|
Post Options
Thanks(0)
Quote Reply
Posted: 08 Aug 2017 at 11:21pm |
|
What would be an equivalent in a red tractor? IH
Thanks
Mike
Edited by Mikes5785 - 03 Aug 2018 at 3:18am
|
|
DennisA (IL)
Orange Level
Joined: 11 Sep 2009
Location: Ridott IL.
Points: 2064
|
Post Options
Thanks(0)
Quote Reply
Posted: 09 Aug 2017 at 9:57am |
|
IH made the #60 that had a 60" between dividers. The next model up was the #80 had an 7' cut.
|
|
Thanks & God Bless
Dennis
|
|
Mikes5785
Bronze Level
Joined: 25 Jul 2017
Location: SE Iowa
Points: 28
|
Post Options
Thanks(0)
Quote Reply
Posted: 09 Aug 2017 at 10:02am |
|
I was trying to following up on what would be an appropriate comparable size tractor to pull a #66
Mike
|
|
DennisA (IL)
Orange Level
Joined: 11 Sep 2009
Location: Ridott IL.
Points: 2064
|
Post Options
Thanks(0)
Quote Reply
Posted: 09 Aug 2017 at 10:46am |
Mikes5785 wrote:
I was trying to following up on what would be an appropriate comparable size tractor to pull a #66
Mike |
Any 2 plow tractor. I used my CA for many years to operate a #60 & #90 all-crop. My CA is around 29hp so it don't take much power to run an All-Crop.
|
|
Thanks & God Bless
Dennis
|
|
combinechris
Silver Level
Joined: 20 Jul 2015
Location: wittenberg,Wi.
Points: 422
|
Post Options
Thanks(0)
Quote Reply
Posted: 09 Aug 2017 at 11:37am |
|
What 60 did IH make Dennis?
Edited by combinechris - 09 Aug 2017 at 11:38am
|
|
35 combines and 15 forage harvesters. mostly allis combines and equipment.WTB 2 row cornhead for a 90
|
|
DennisA (IL)
Orange Level
Joined: 11 Sep 2009
Location: Ridott IL.
Points: 2064
|
Post Options
Thanks(0)
Quote Reply
Posted: 09 Aug 2017 at 12:17pm |
combinechris wrote:
What 60 did IH make Dennis? |
For pull type combines McCormick/International made the following models. 40,41,42,51,52,60,61,62,76,80,82,122,140,402 & 914. This is not a complete listing as they made a lot of different models.
|
|
Thanks & God Bless
Dennis
|
|
DennisA (IL)
Orange Level
Joined: 11 Sep 2009
Location: Ridott IL.
Points: 2064
|
Post Options
Thanks(0)
Quote Reply
Posted: 09 Aug 2017 at 11:06pm |
Here are a few pictures I have found on the internet of the International pull type combine.  No.42  No.52R  No.62
|
|
Thanks & God Bless
Dennis
|
|
CrestonM
Orange Level
Joined: 08 Sep 2014
Location: Oklahoma
Points: 8357
|
Post Options
Thanks(0)
Quote Reply
Posted: 09 Aug 2017 at 11:33pm |
Mikes5785 wrote:
I was trying to following up on what would be an appropriate comparable size tractor to pull a #66
Mike |
I'd say an H or M. Super H would probably walk with it very well. An M or Super M wouldn't even know the combine was behind it. Personally I'd rather have a Super H or an M instead of an Allis W series...I just have trouble getting used to my left leg needing to be longer than my right. Also, the hand clutch always bangs my knee cap. I like the platform on the Farmalls much better.
Edited by CrestonM - 09 Aug 2017 at 11:34pm
|
|
littlemarv
Orange Level
Joined: 10 Jun 2013
Location: Wisconsin
Points: 1826
|
Post Options
Thanks(0)
Quote Reply
Posted: 20 Aug 2017 at 10:33pm |
Freed up the lever for lifting the header today, also put a rope on the reel and got that moving up and down. Removed the panel under the sickle. Removed the lower concave bar. It occurred to me AFTER I smashed a finger in the cylinder, that it would be much easier if I raised the cylinder! At any rate, it looks like the concave bars just clamp the rubber down? I see its two separate pieces in the parts book. Were the rubber pieces square when new, and this is how they wear? I ran out of daylight today. I'll be raisin the cylinder before I go stickin any more digits in there trying to fish the other concave bar out, and clean out the sludge, to see what condition the concave is in.
|
|
The mechanic always wins.
B91131, WC23065, WD89101, CA29479, B1, Early B10, HB212, 416H
|
|
CrestonM
Orange Level
Joined: 08 Sep 2014
Location: Oklahoma
Points: 8357
|
Post Options
Thanks(0)
Quote Reply
Posted: 20 Aug 2017 at 10:58pm |
You are correct....the metal bars just hold the rubber down. As far as to what shape the new rubber bars were, I couldn't tell you. All the bars on my 3 combines are shot, but they still do a perfect job in wheat and milo. Also...if the combine is going to be kept outside, I would remove the rope for the reel lift when not in use. Speaking from experience, the rope will get brittle if left out, then snap on you sometime when you try adjusting it in the field.
|
|
littlemarv
Orange Level
Joined: 10 Jun 2013
Location: Wisconsin
Points: 1826
|
Post Options
Thanks(0)
Quote Reply
Posted: 16 Mar 2018 at 8:13pm |
Well, its above freezing, and will soon be too sloppy for any more logging, time to think combines! Anything special I need to know about pulling the cylinder? The left side is pretty obvious, but what all needs to be done on the pulley end? Does the pulley have to come off? Supposed to be warm this weekend and I am stuck in town on call, so I will probably wade out to the old girl and pull the cylinder. I hope to put in a concave liner and rebuild the cylinder bars, as long as I'm in there.
|
|
The mechanic always wins.
B91131, WC23065, WD89101, CA29479, B1, Early B10, HB212, 416H
|
|


