My First Tractor! D17... But which series?
Printed From: Unofficial Allis
Category: Allis Chalmers
Forum Name: Farm Equipment
Forum Description: everything about Allis-Chalmers farm equipment
URL: https://www.allischalmers.com/forum/forum_posts.asp?TID=159658
Printed Date: 31 Mar 2026 at 5:58pm
Software Version: Web Wiz Forums 11.10 - http://www.webwizforums.com
Topic: My First Tractor! D17... But which series?
Posted By: Strokendiesel002
Subject: My First Tractor! D17... But which series?
Date Posted: 04 Apr 2019 at 9:41pm
|
Hi all! I just purchased my first tractor! Stamped on the left side, just after of the engine is D17 4394... I've been reading and searching for 2 days, but for the life of me can't get a solid decision on which series it is. It's at my uncle's, so I don't have ready access to it yet. It has 1 hydraulics c port and the quick snap system. It does have the lever on the right side which I believe is high/low? It hasn't run in quite a few years, as the gas tank needed to be cleaned out and he never got around to it. I'm fairly competent with mechanics, so whatever I need to fix/replace... It is what it is. Once my boys are a little older I want to do a full resto on it with them for fun, but in the meantime want to get her up and running for bush hogging and rides ! Help with I'd?/ |
Replies:
Posted By: Mikez
Date Posted: 04 Apr 2019 at 9:55pm
| That number says it's a 1958. Series 1. Great tractor you have, try to show pictures |
Posted By: Strokendiesel002
Date Posted: 04 Apr 2019 at 10:10pm
|
Thank you sir! I will most definitely be posting more pictures, but all I have at the moment are over the size limit, and just of the serial number, rear and the gear selector. I will take smaller sized pictures on Saturday and post here to follow up! I'm really excited for this. Bush hogging and wagon rides will be her primary use, but I'm a glutton for punishment, so I intend to set it up with 3 point and am researching hydraulic upgrades. Any and all pointers are welcome! |
Posted By: AaronSEIA
Date Posted: 05 Apr 2019 at 5:49am
|
Best hyd upgrade is a front mounted pump. Then you can mount a 4 or 5 gallon reservoir and run a Prince or Cross valve. AaronSEIA
|
Posted By: Strokendiesel002
Date Posted: 05 Apr 2019 at 7:52am
|
Thank you Aaron! I came across Dave's project last night and read the his thread, awesome info in there... My next search was going to be valve suggestions- so Prince and Cross is a great jumpstart! Any other thread suggestions? Seems like many that I've found ask how to add a remote for dual control and rather than suggesting a front pump and referencing a thread like Dave's (only one I've read to date; I'm sure there are more), it gets bogged down with how slow it's going to operate and the like. Thank you! |
Posted By: Allis dave
Date Posted: 05 Apr 2019 at 7:57am
|
For most things the original hydraulics are fine. It depends on what you plan to do with it. For picture resizing... If you have a picture saved on your computer, Right click the picture and choose "Edit" The picture will open in old Microsoft Paint program. There a button at the top that says resize. Select about 600 pixels for the horizontal width and the height will adjust automatically. 600 is a good display size. |
Posted By: Strokendiesel002
Date Posted: 05 Apr 2019 at 8:32am
|
Thanks AD! Pics are in my phone though, I'll just change the settings and snap some new ones tomorrow. I'd like to be able to put a loader up front if I come across a good deal(I'll probably start feverishly searching for this soon), along with a splitter. The loader function with be primarily for snow with bucket/ blade and forks for putting toys away when not in season |
Posted By: AaronSEIA
Date Posted: 05 Apr 2019 at 8:40am
|
I've got a front pump on my series 2 for a loader. Works very well. Over in the Knowledge Base you'll find a thread of mine with info for a cheap front hub drive. I got my pump from Surplus Center for just over $200. They would also have the valves, hoses, reservoir, and everything else you'd need. You'd probably need a machine shop to fab the pump mount, but thats not a big deal. AaronSEIA
|
Posted By: Brian G. NY
Date Posted: 05 Apr 2019 at 9:51am
|
Here's how the complete front pump setup looks like.....from the A-C Manual. 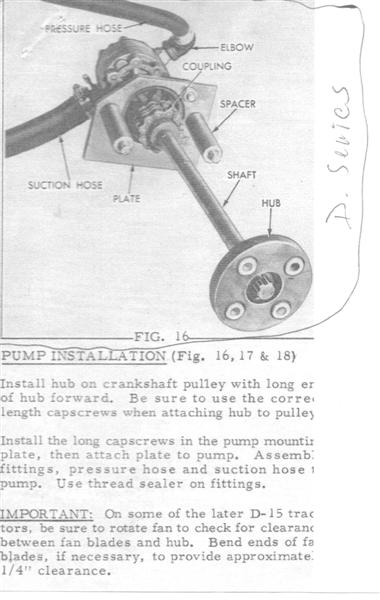 I also bought a Ford Adaptor and shaft from ebay......which bolts right up to the front pulley just like Aaron's. 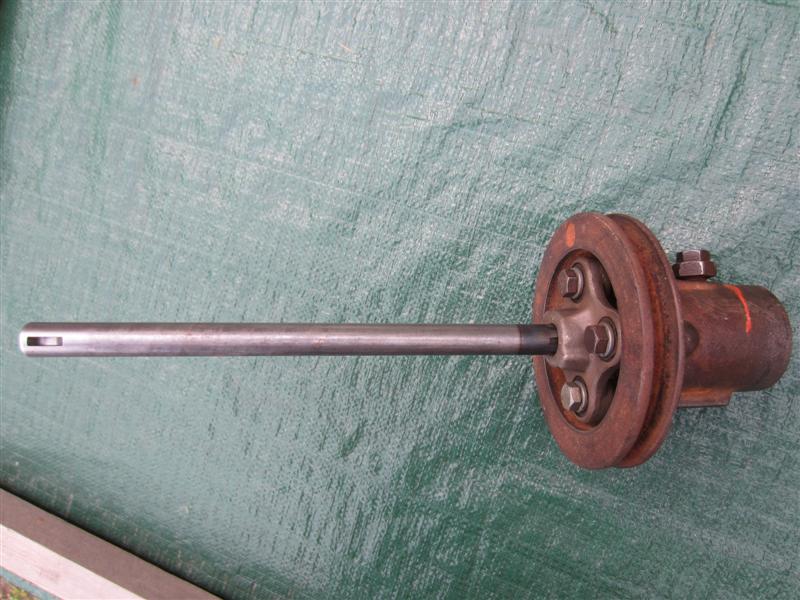 |
Posted By: Strokendiesel002
Date Posted: 05 Apr 2019 at 10:40am
|
Awesome! Aaron - I'll be reading up on that shortly! Brian - Thank you!!! I believe I read somewhere that Ford had a 3/4" and 1" option... do you recall which you chose?
|
Posted By: AaronSEIA
Date Posted: 05 Apr 2019 at 11:07am
|
The AC uses 3/4". Not sure it matters if you are starting from scratch. I think the hole in the pedestal would take a 1" shaft. As long as the hub adapter bolts up. The holes are 2 3/4" on center. AaronSEIA AaronSEIA
|
Posted By: Brian G. NY
Date Posted: 05 Apr 2019 at 12:48pm
| 3/4" |
Posted By: exSW
Date Posted: 05 Apr 2019 at 1:05pm
| Easiest way to resize pictures on your phone. Text it to yourself. Comes back sized. |
Posted By: Ted J
Date Posted: 05 Apr 2019 at 1:24pm
|
This is the place to go look up if you want something about these tractors. It's a big help MOST of the time. Gives a wealth of knowledge about all makes of tractors. http://www.tractordata.com/farm-tractors/000/0/1/18-allis-chalmers-d17.html" rel="nofollow - http://www.tractordata.com/farm-tractors/000/0/1/18-allis-chalmers-d17.html Lower left corner gives the serial numbers and years made and shows each series. HTHs ------------- "Allis-Express" 19?? WC / 1941 C / 1952 CA / 1956 WD45 / 1957 WD45 / 1958 D-17 |
Posted By: Ted J
Date Posted: 05 Apr 2019 at 1:24pm
|
Oh yeah, WELCOME TO THE FORUM!!! ------------- "Allis-Express" 19?? WC / 1941 C / 1952 CA / 1956 WD45 / 1957 WD45 / 1958 D-17 |
Posted By: Joe(TX)
Date Posted: 05 Apr 2019 at 6:32pm
|
This drive adapter http://www.waltstractors.com/acatalog/UF83780----Ford-Tractors--1953-1964---Adaptor-Hub---Replaces-54C2055-120070.html#SID=18215" rel="nofollow - http://www.waltstractors.com/acatalog/UF83780----Ford-Tractors--1953-1964---Adaptor-Hub---Replaces-54C2055-120070.html#SID=18215 This shaft should work http://www.waltstractors.com/acatalog/UF83880----Drive-Shaft--13--Long--Replaces-194354-120080.html#SID=18215" rel="nofollow - http://www.waltstractors.com/acatalog/UF83880----Drive-Shaft--13--Long--Replaces-194354-120080.html#SID=18215 ------------- 1970 190XT, 1973 200, 1962 D-19 Diesel, 1979 7010, 1957 WD45, 1950 WD, 1961 D17, Speed Patrol, D14, All crop 66 big bin, 180 diesel, 1970 170 diesel, FP80 forklift. Gleaner A |
Posted By: Strokendiesel002
Date Posted: 05 Apr 2019 at 7:28pm
|
Thank you guys! Plan for tomorrow I to change all fluids and see if she wants to come back to life! I'll be sure to take pictures and report back! |
Posted By: Strokendiesel002
Date Posted: 05 Apr 2019 at 8:17pm
|
Well, my uncle just pulled the plugs and there cylinder 4 is full of coolant... Hopefully just head gasket? Also drained the oil and there was probably an additional gallon of fluid in there that shouldn't have been Anyone know of a place near Pleasant Prairie WI that may have some parts laying on a shelf? Haha... But seriously, I'll drive a ways tomorrow morning lol  
|
Posted By: Strokendiesel002
Date Posted: 06 Apr 2019 at 8:21pm
Pictures as promised!   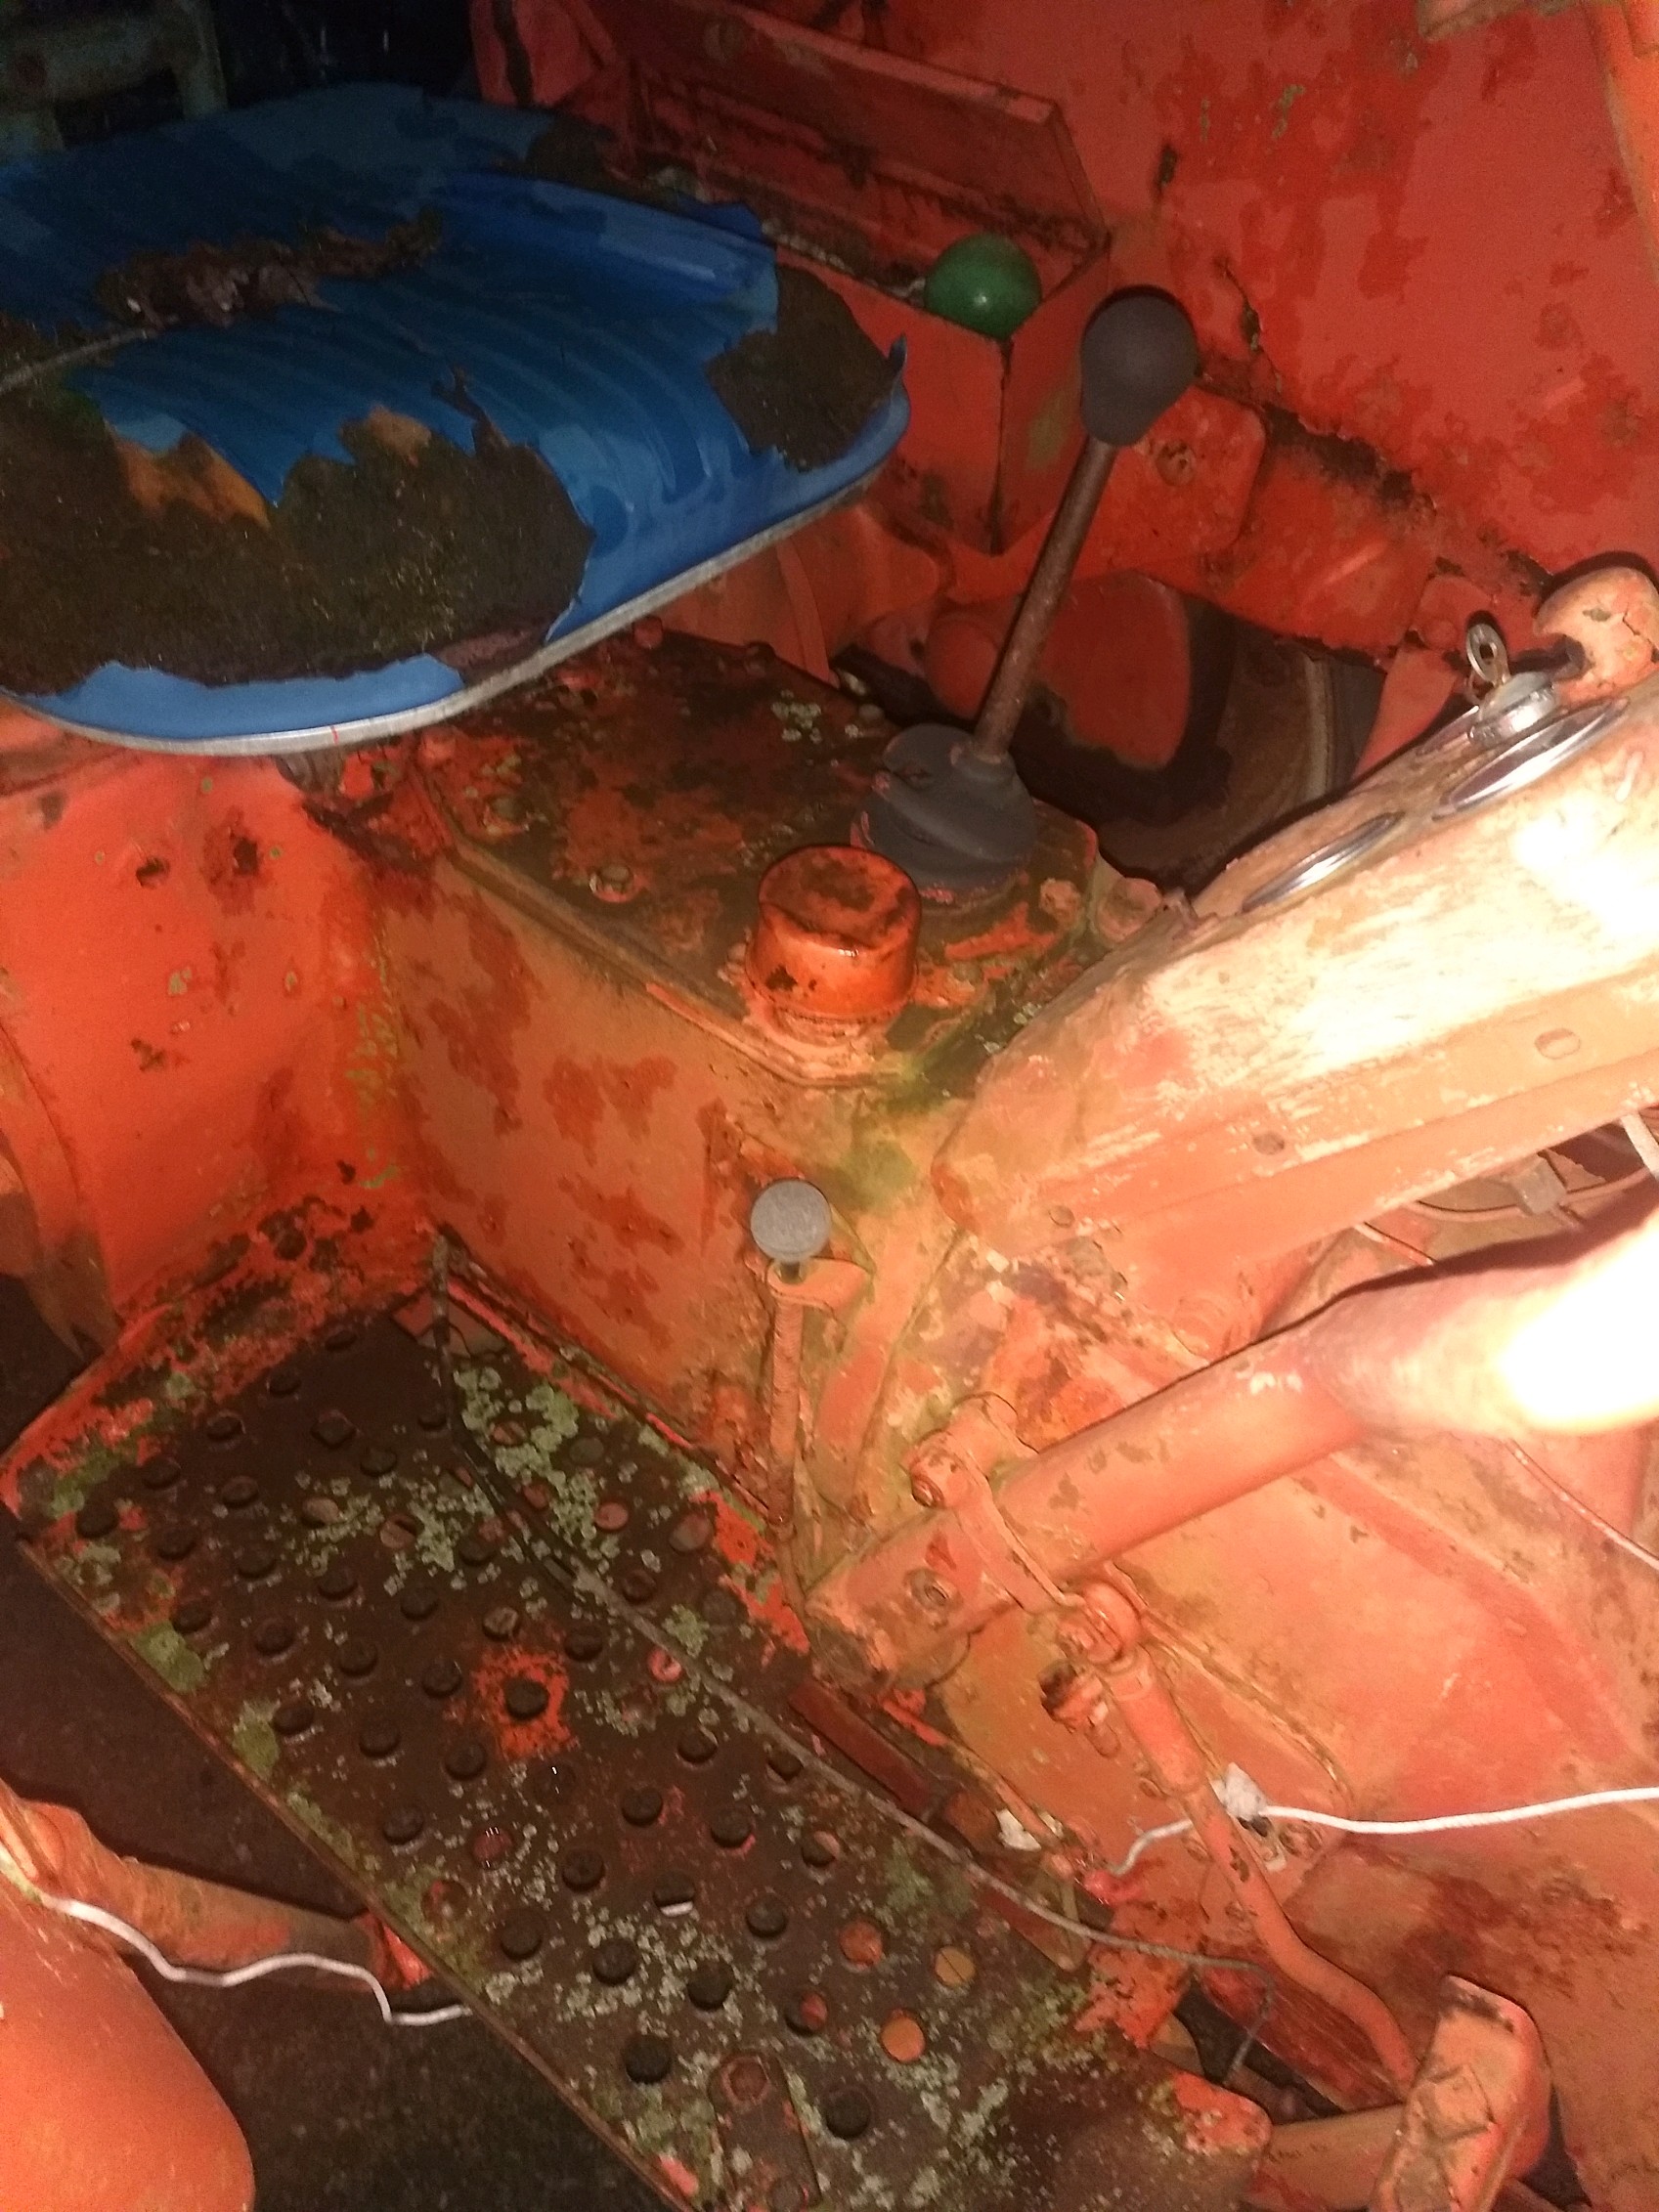 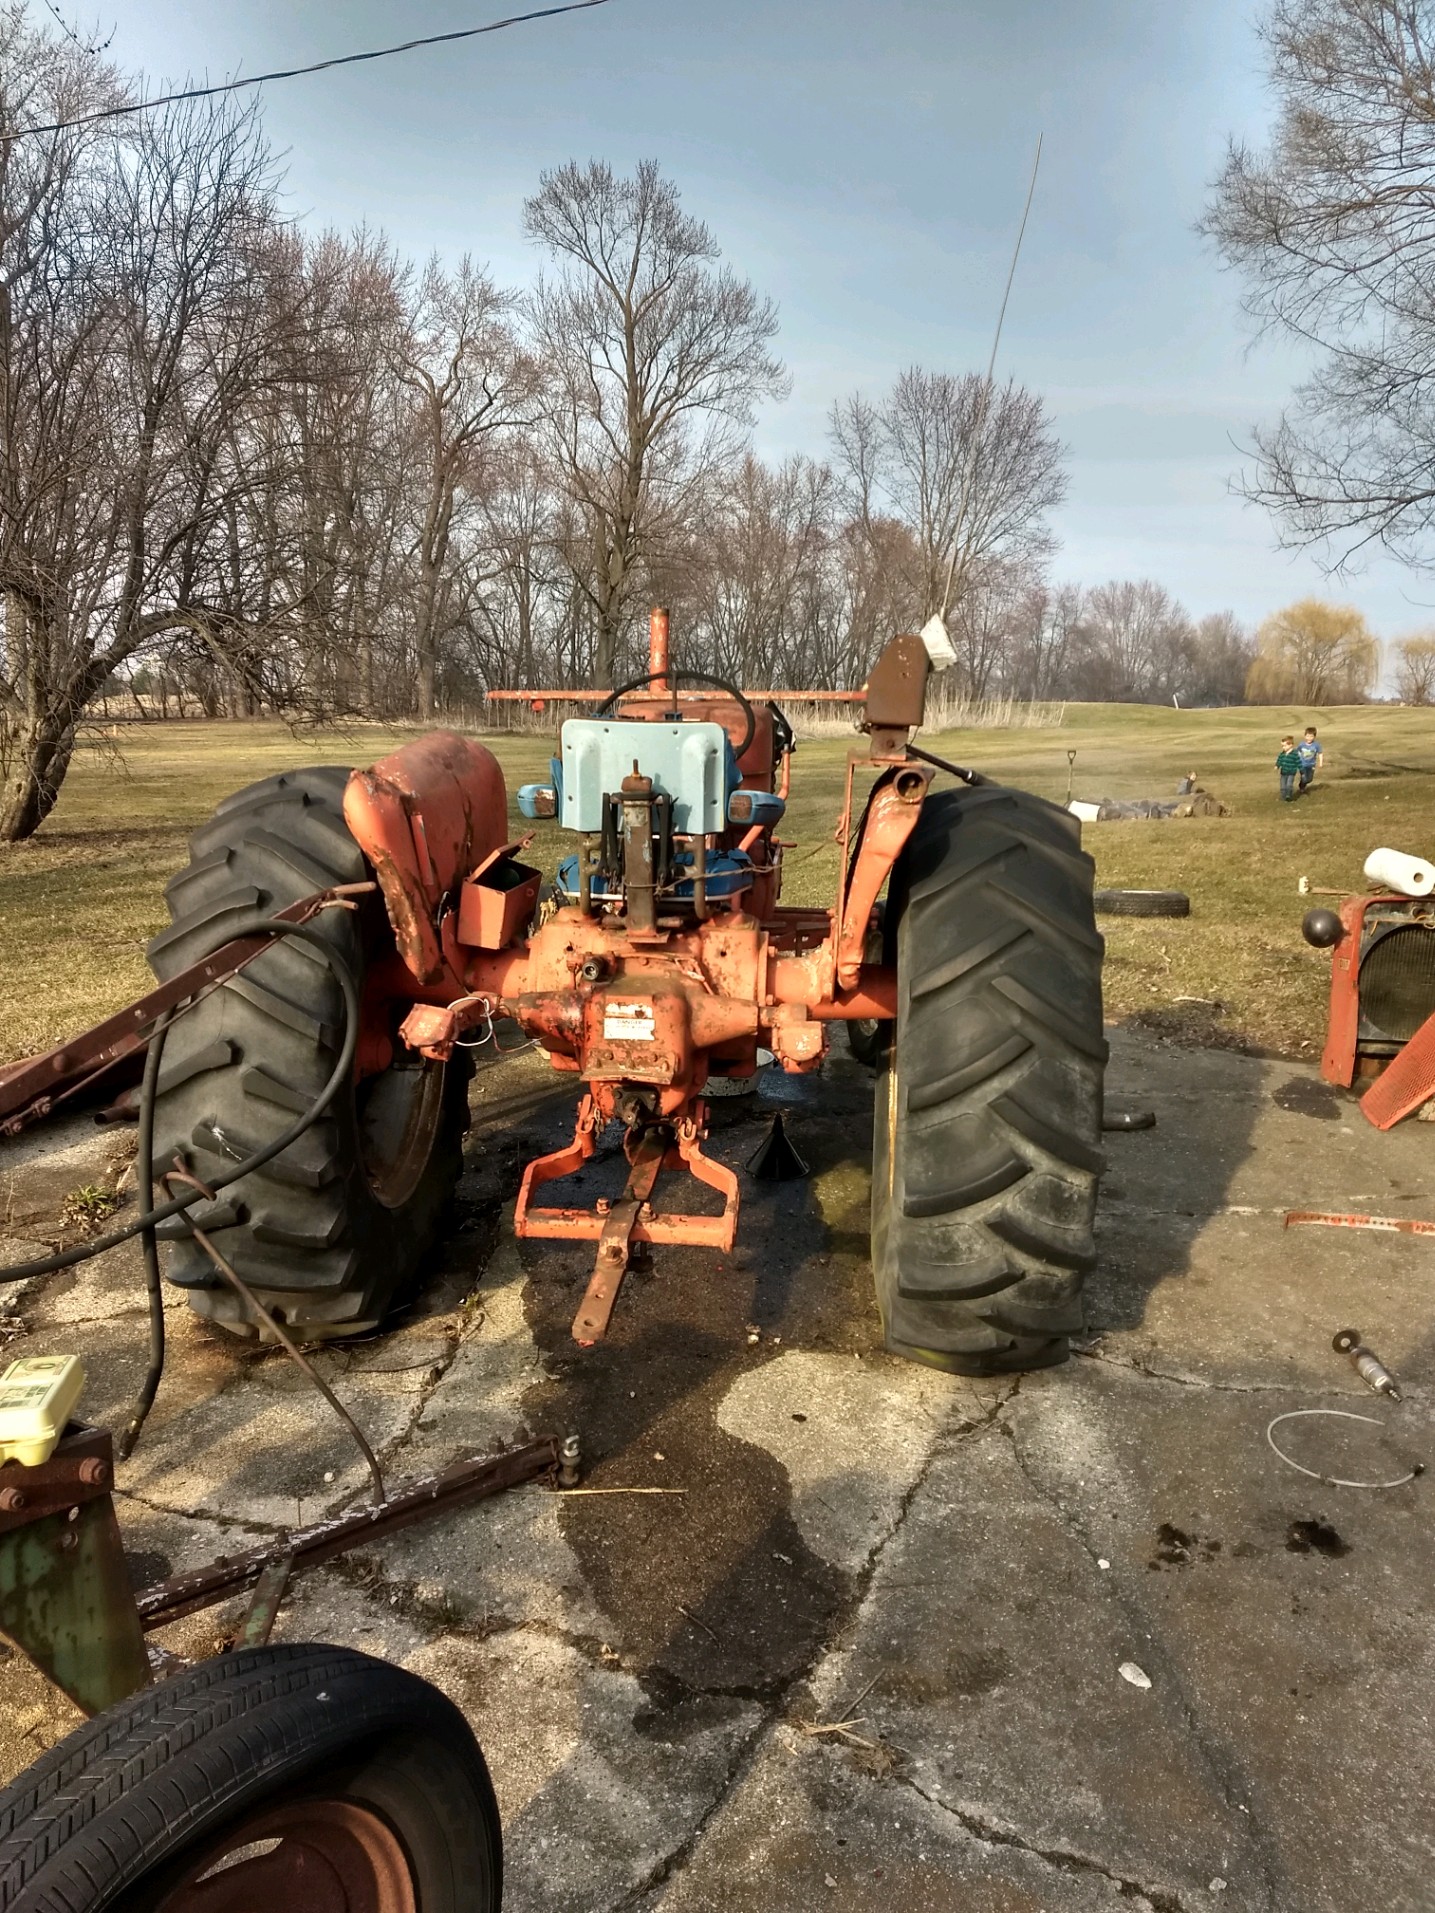 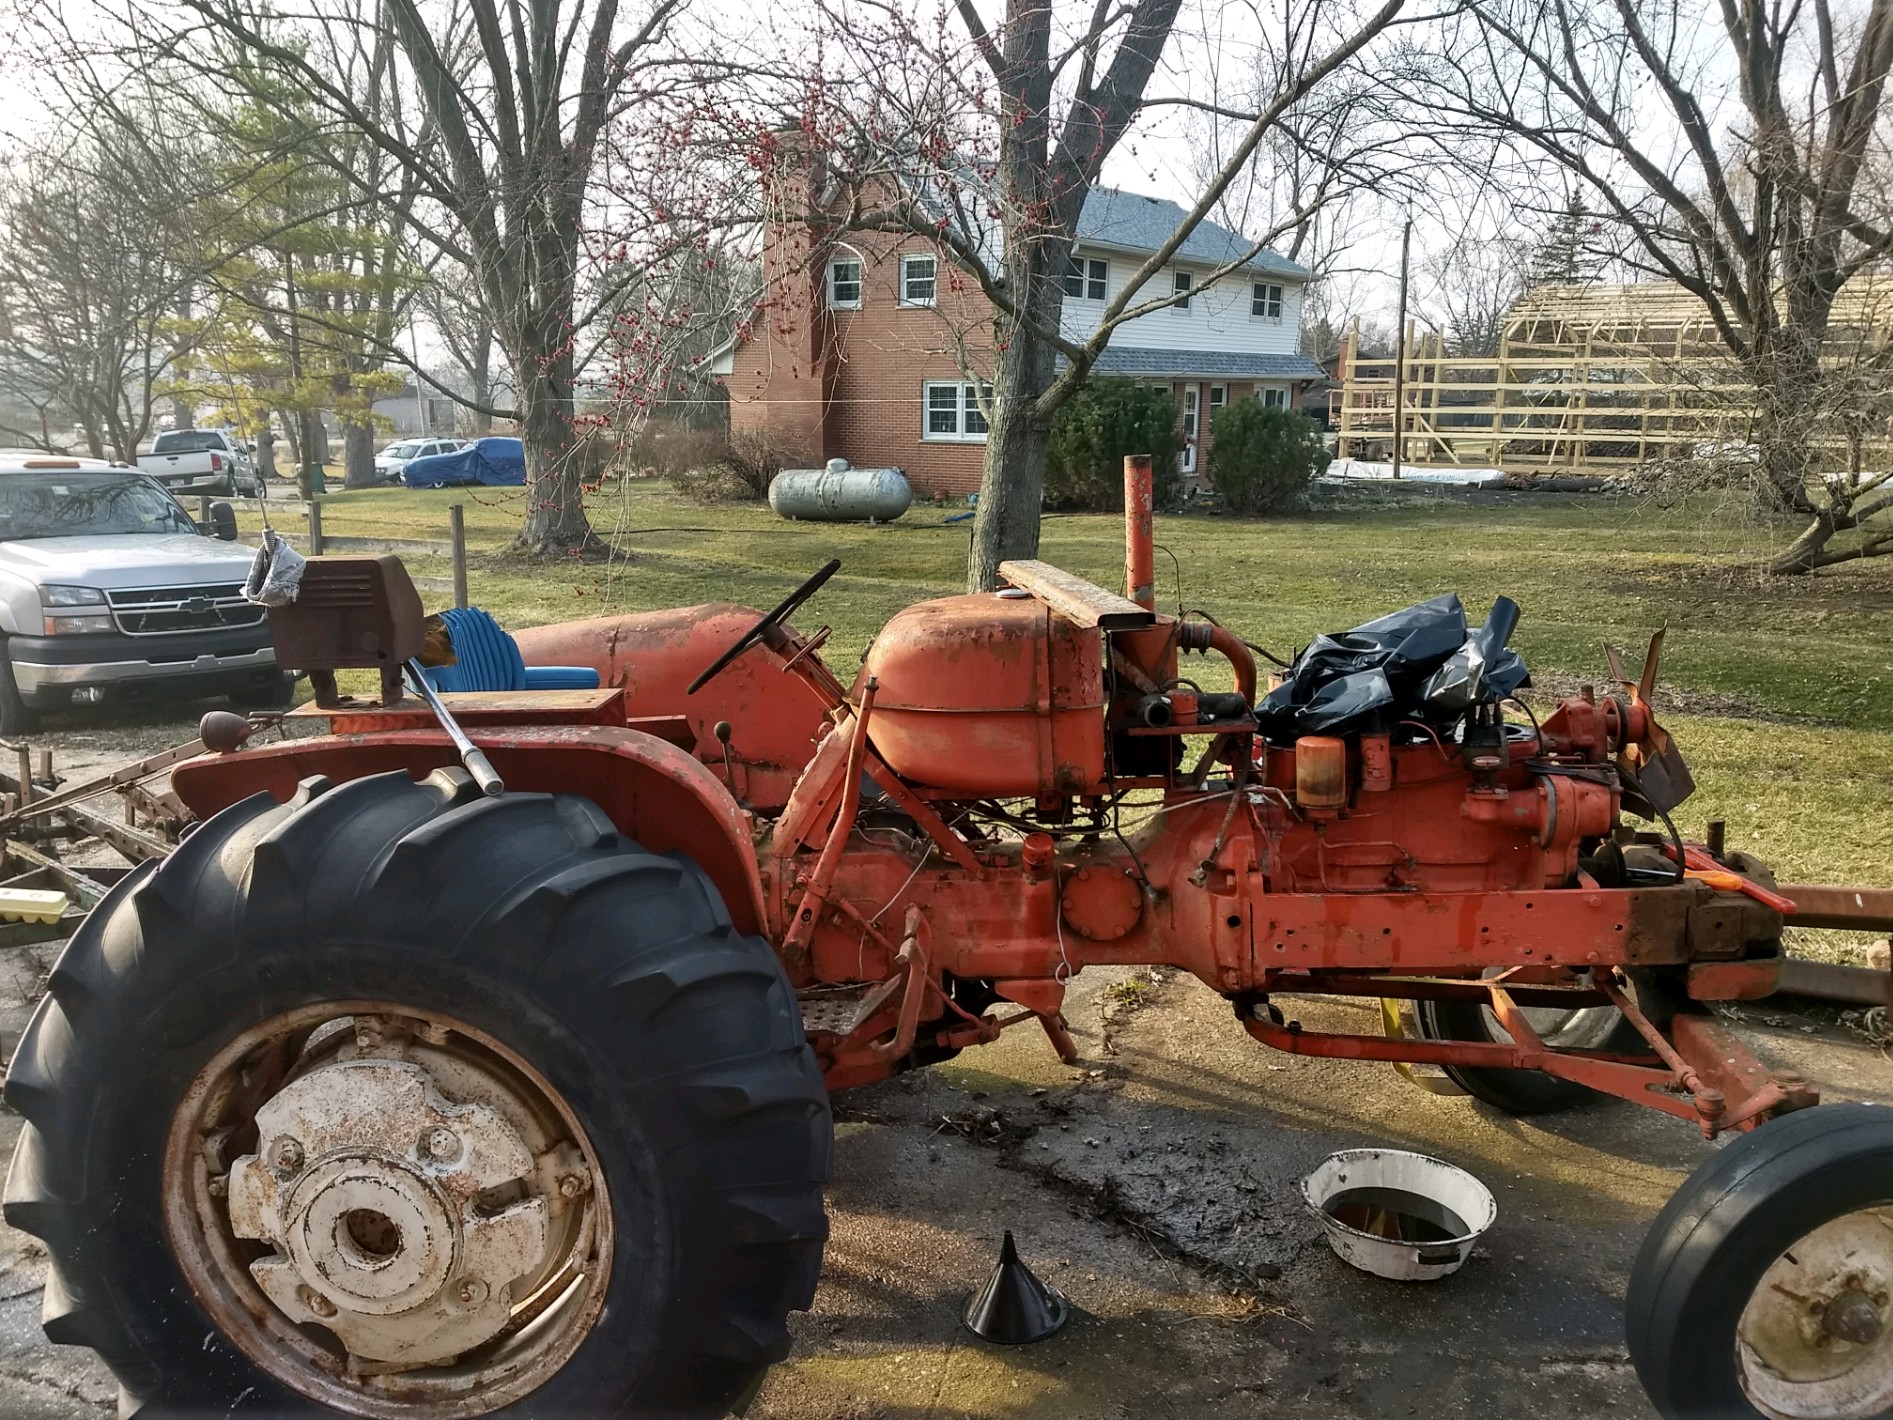 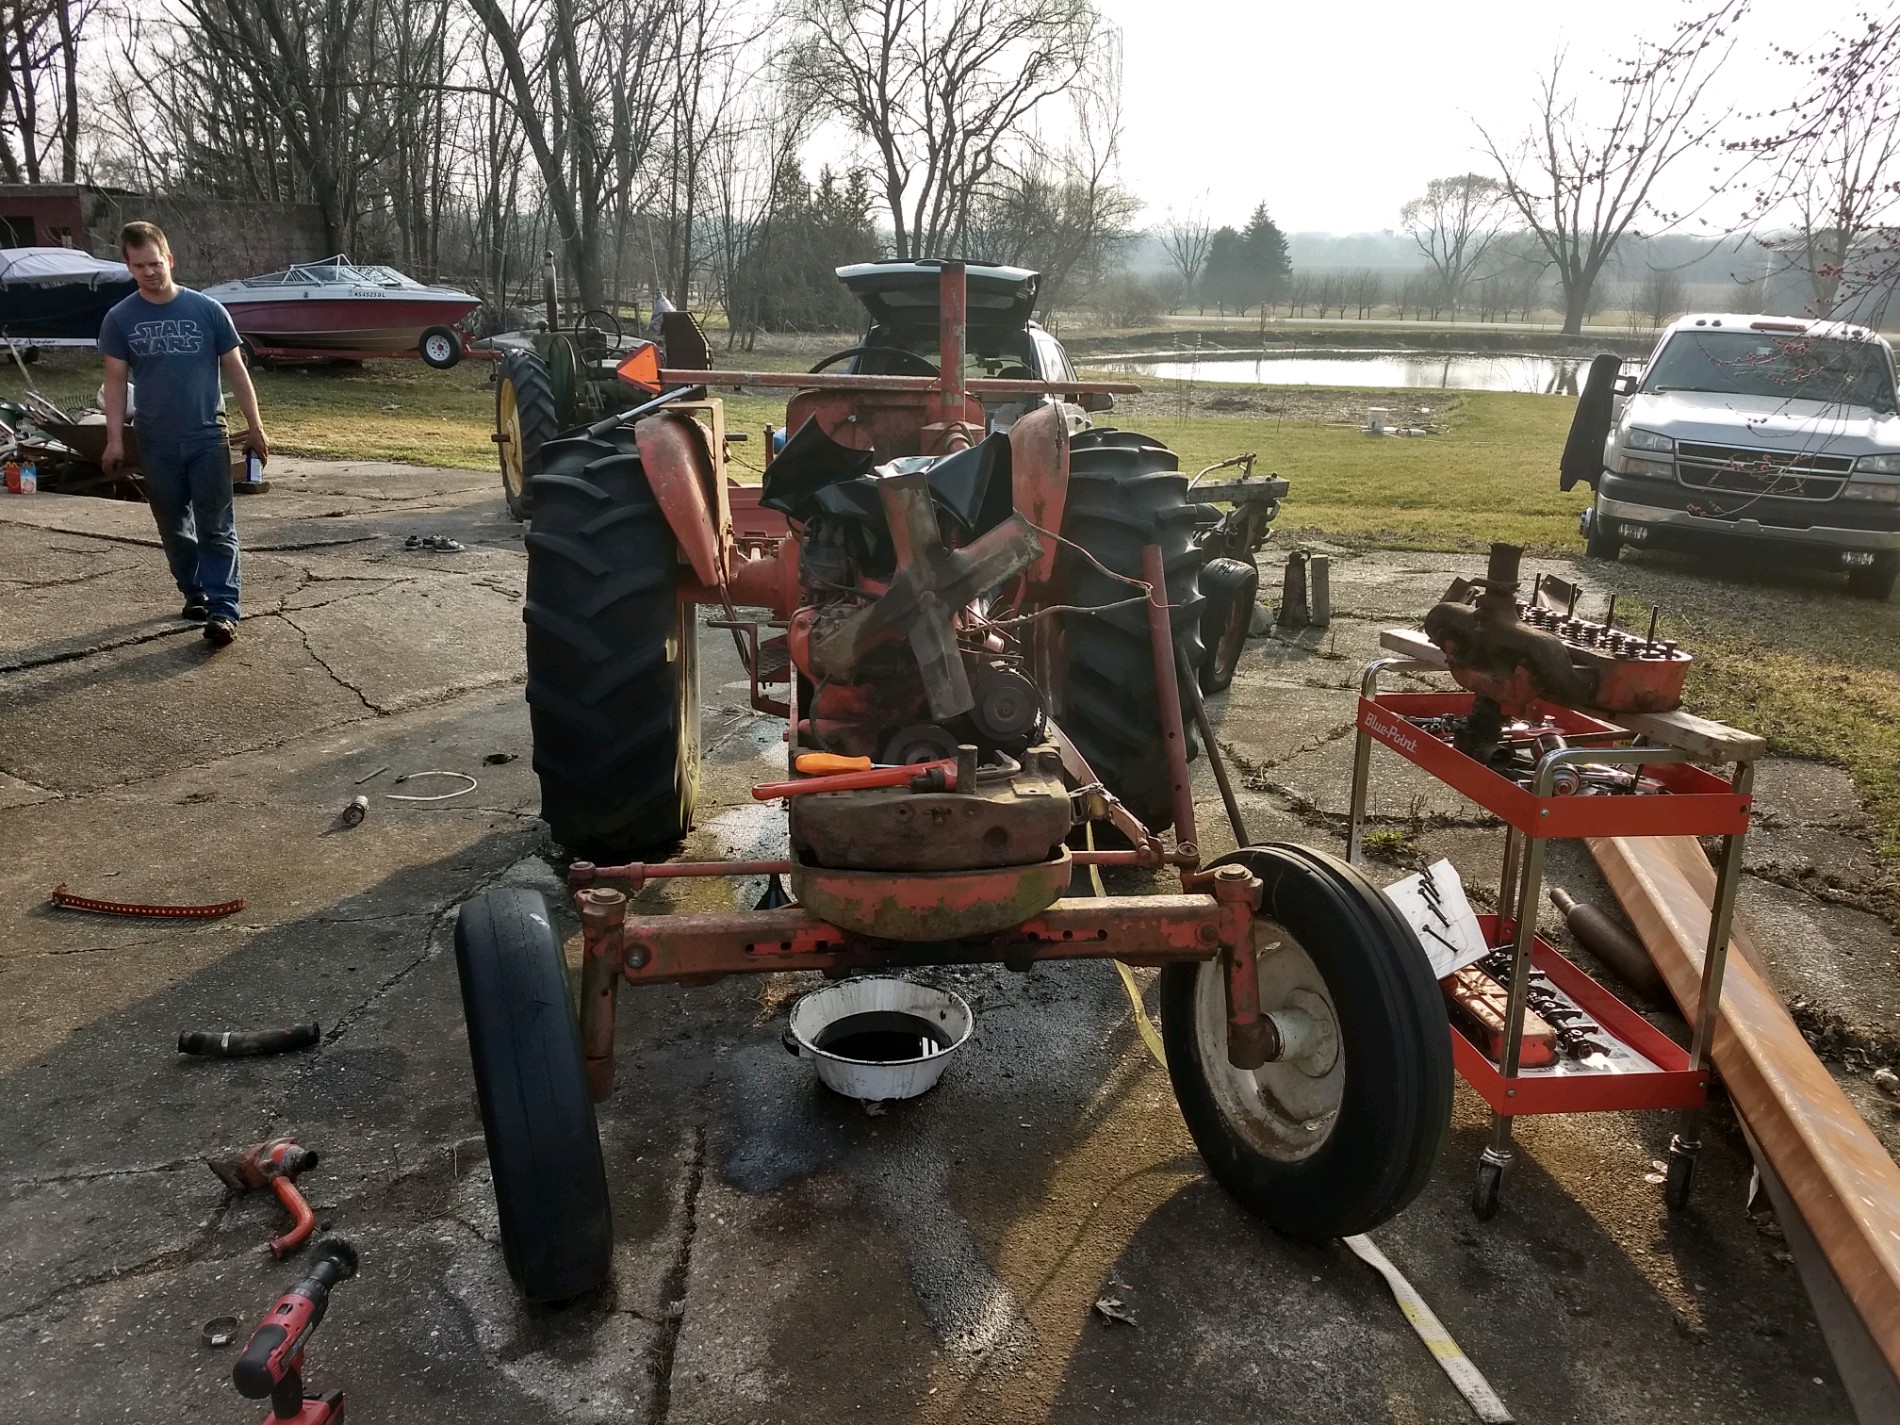  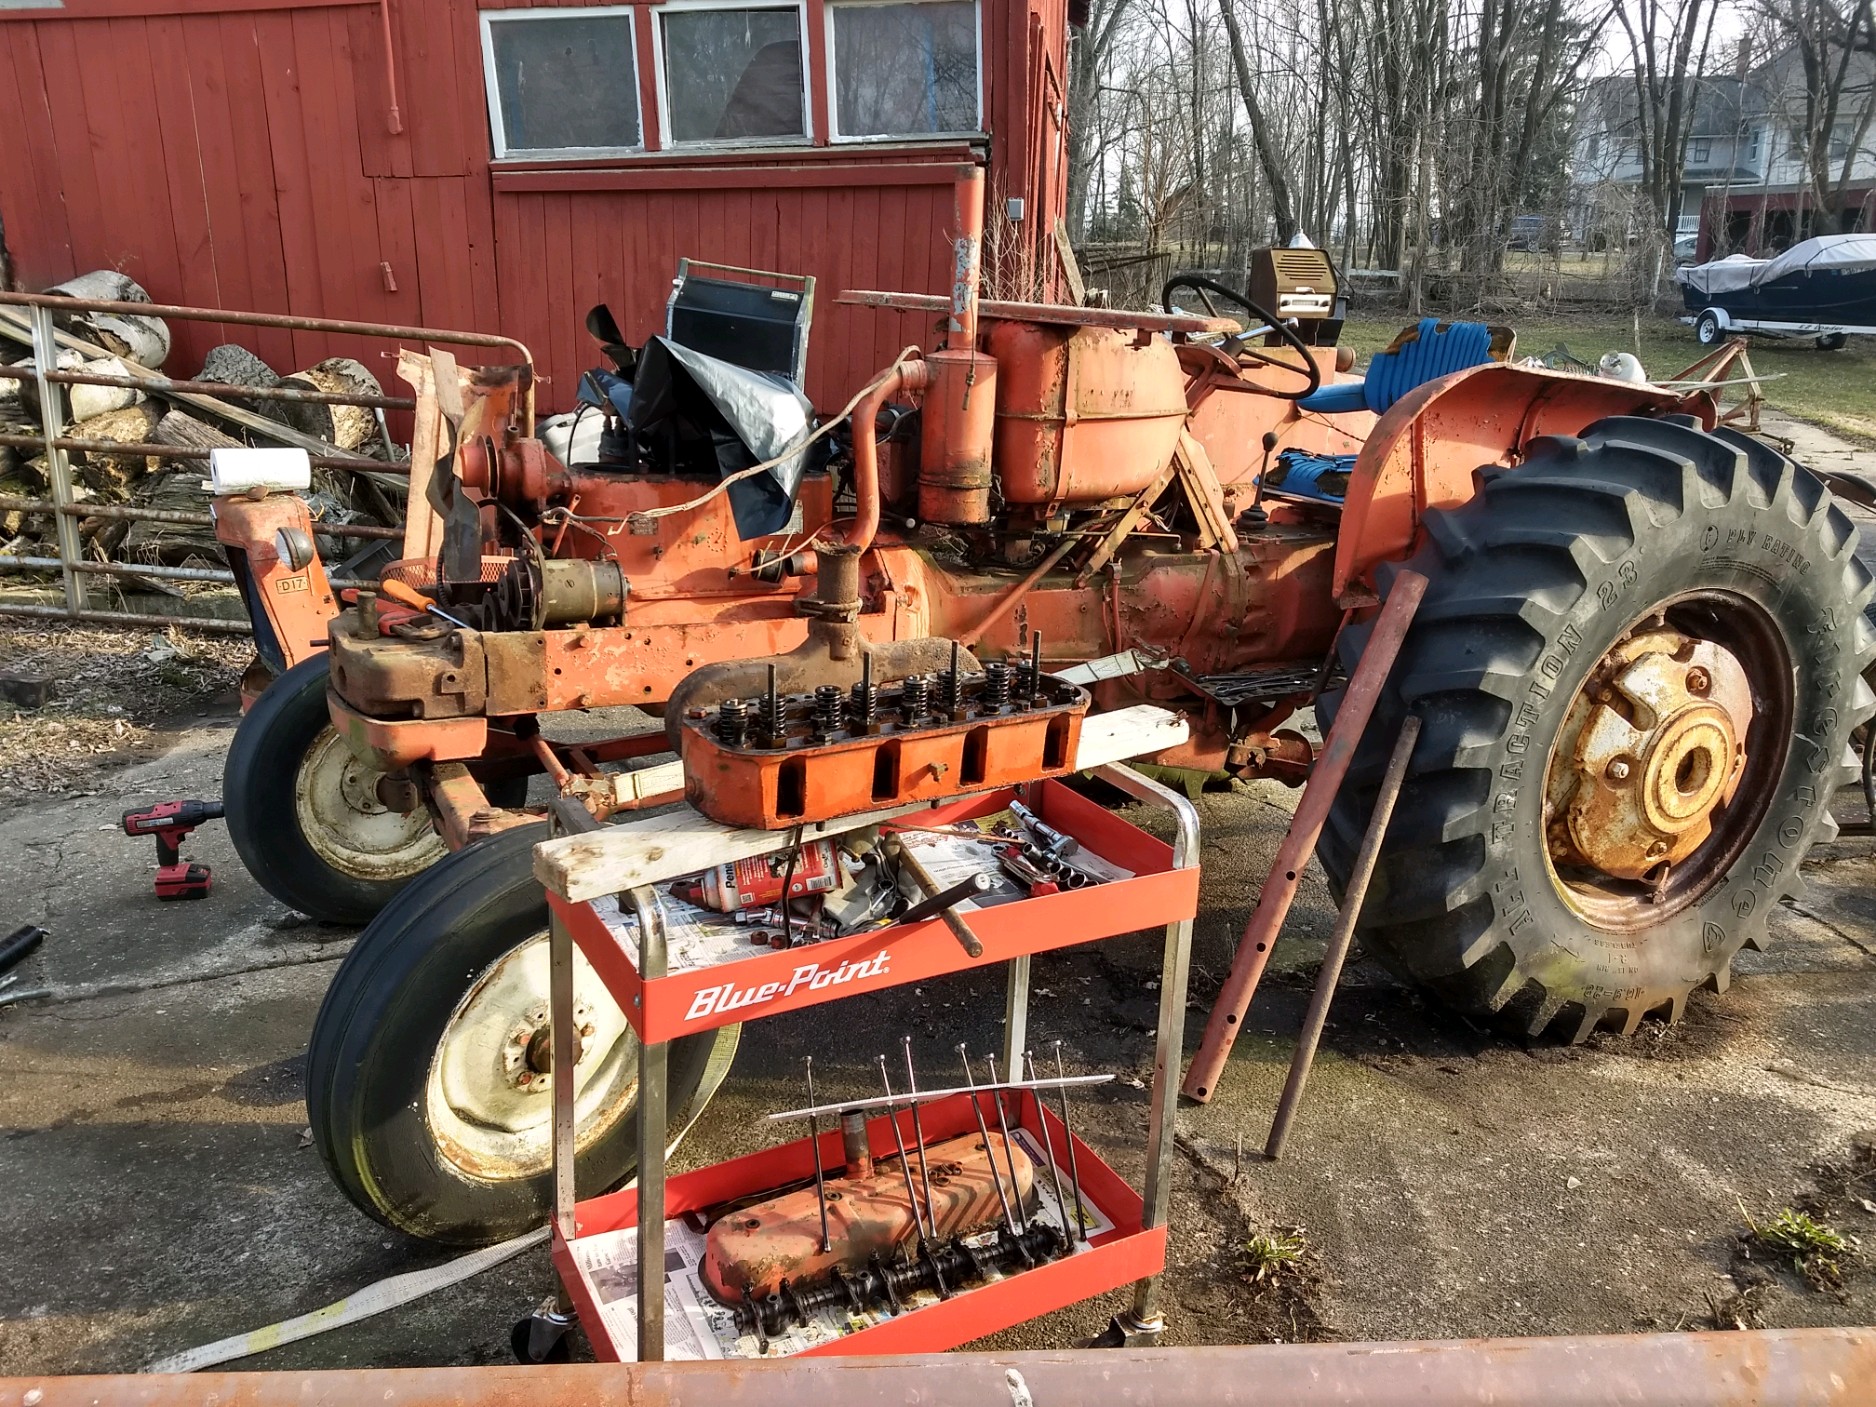 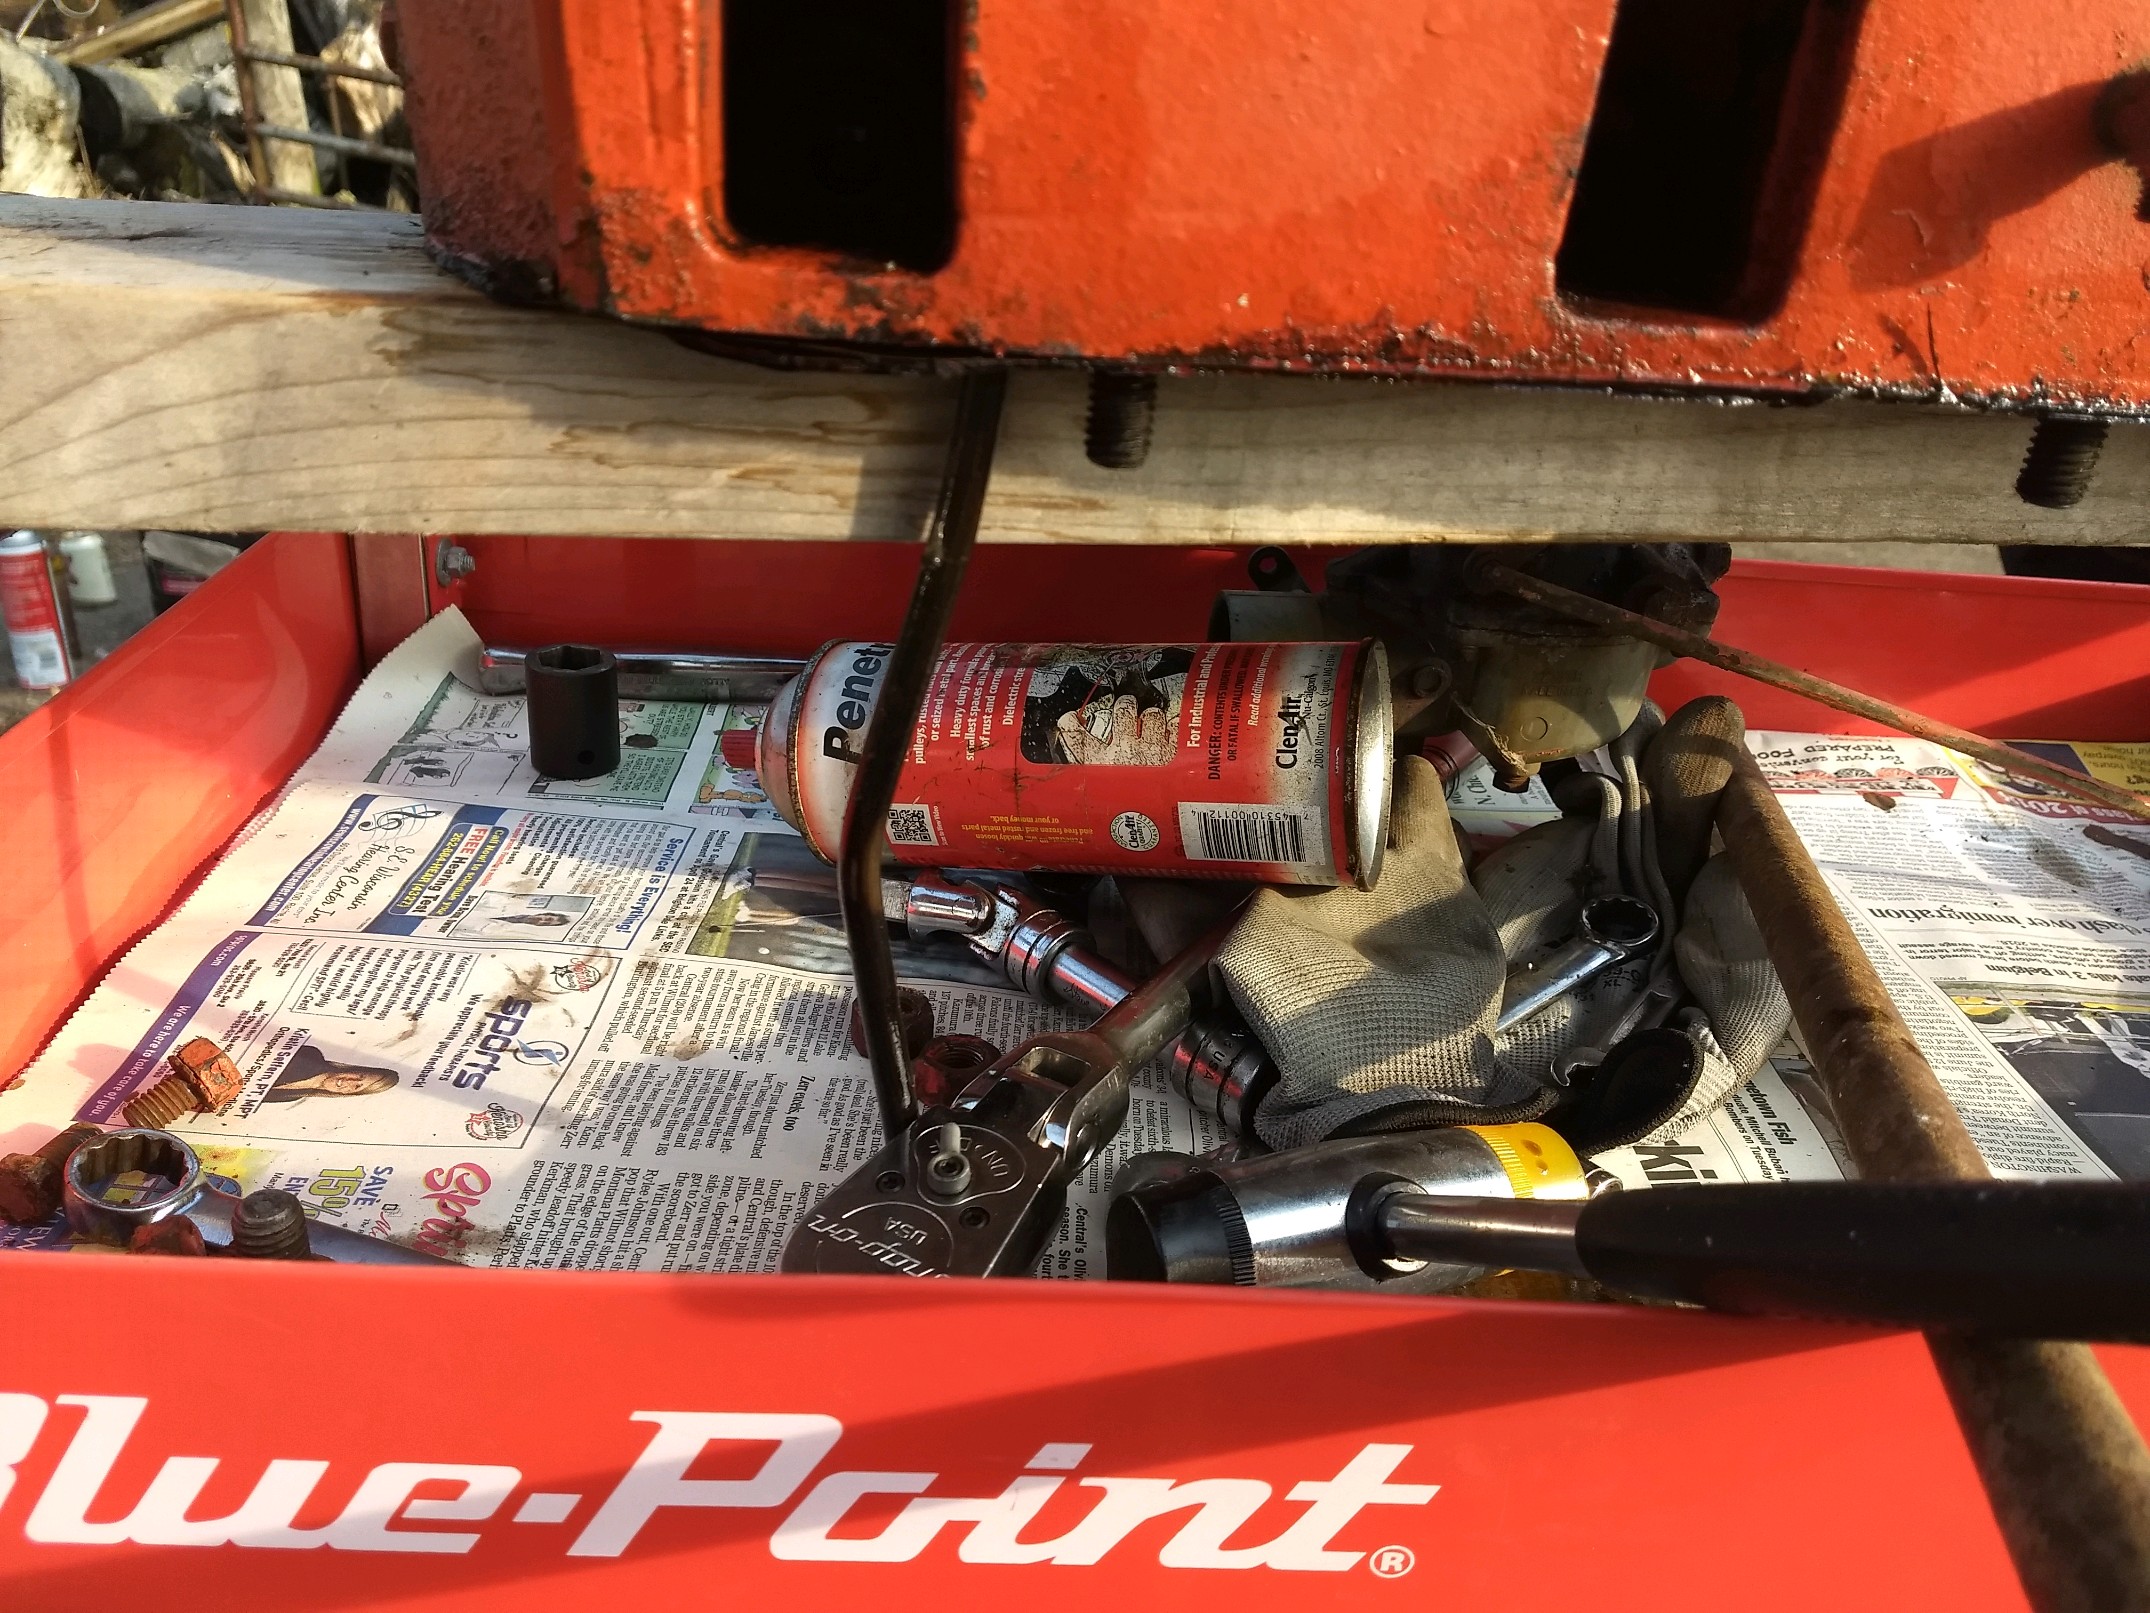
|
Posted By: DrAllis
Date Posted: 06 Apr 2019 at 8:27pm
| That seat assembly makes me laugh !! So, instead of overhauling and repairing the excellent and original suspension, we graft on a piece-o-crap setup like that !! Whoo Hoo !! |
Posted By: Strokendiesel002
Date Posted: 06 Apr 2019 at 8:31pm
| Well, Cylinder 4 forward pushrod is bent and even with the head removed, she ain't turning by hand. Gonna take the head to the shop for a fresh up. May try to put it into gear and move it back and forth a bit to see if it'll budge. Otherwise I'll be dropping the pan, unbolting the rods and trying to work them out for a honing... Unless anyone has a better suggestion? |
Posted By: Strokendiesel002
Date Posted: 06 Apr 2019 at 8:34pm
| Dr - yeah, I noticed that it doesn't look like most of the D17's I've seen... Gonna be working on that after I get her up and running |
Posted By: BillinAlberta
Date Posted: 06 Apr 2019 at 8:38pm
Be very careful.Many connecting rods have been bent this way.
|
 Strokendiesel002 wrote:
Posted By: Strokendiesel002
Date Posted: 06 Apr 2019 at 8:48pm
| Thank you BA, I most certainly will be gentle, picking back and forth by hand, unless there's a better way? |
Posted By: DanD
Date Posted: 06 Apr 2019 at 11:21pm
| You could push a sleeve up out of the block turning the crank with stuck pistons and no head on but it's probably what you'll be doing anyway. |
Posted By: Strokendiesel002
Date Posted: 07 Apr 2019 at 12:44am
|
I suppose that's better than bending a connecting rod :) I normally wouldn't hesitate to tear something all the way apart, but I was hoping it could wait a few years until my boys are old enough to do a complete resto with me. We'll find out what happens next weekend. I don't think I'm getting to it tomorrow... Later today and this week is pretty well jammed with work. I suppose it's time to stop shopping for parts and go to sleep. Thank you everyone for following along and sharing your thoughts/ knowledge! |
Posted By: AaronSEIA
Date Posted: 07 Apr 2019 at 7:25am
|
Put a 50/50 mix of acetone and atf in the cylinders and wait a long time. Might get lucky and have them loosen up. AaronSEIA
|
Posted By: tractorboy
Date Posted: 07 Apr 2019 at 8:16am
| Just got my 58 d-17 going after a complete rebuild, Like Aaron says 50/50 mix of acetone & ATF willbreah it loose. It worked for me on a CA that sat outside 25yrs !! Congrats on your new tractor !!! keith so, va, |
Posted By: Strokendiesel002
Date Posted: 07 Apr 2019 at 9:27am
|
Thank you guys! I'm going to try and get over to it to fill it up today! Maybe I'll give her a go next weekend then. Would you fill the crank with this mix or kerosene to try and clean it/ break free? |
Posted By: DrAllis
Date Posted: 07 Apr 2019 at 10:54am
| On top of each piston. That's where it is "stuck". |
Posted By: Strokendiesel002
Date Posted: 07 Apr 2019 at 11:08am
|
Yes, but as there was also water in the case, I was thinking it may be beneficial to try and give the bearings a little soak. I wasn't concerned with the bottom part of the sleeve as the water pushed the oil up :) Thank you for ensuring I understood. I should have been more clear in my question. |
Posted By: Strokendiesel002
Date Posted: 07 Apr 2019 at 6:43pm
|
Well... I made it over today to fill the cylinders with ATF and Acetone. Cylinders 1,2&4 looked better than yesterday, 3 is near the top and was strangely cruddy, thought I had found the guilty party and rejoiced! Soaked up the oil we dumped in yesterday before leaving, 12&3 were easy to dry out, but I just couldn't get #4 dry, and I could've swore we got all the coolant out yesterday... Turns out, we thought we had, but the hairline fracture in the middle of the sleeve previously hidden by crud is helping to ensure a constant supply of coolant right back in. So, I'm thinking that I figured out how the pushrod got bent- fuel gummed up carb and tractor got parked. Some time a winter or few later it was determined that the tractor was parked in an inconvenient spot and during the first attempt to turn her over, hydro lock on cylinder 4 with a bending of the pushrod. Determine that it's not really in the way and we'll mess with it later. Decade goes by and here we are! Looks like it's getting an overhaul! On the plus side, I checked the hydraulics c fluid level and it was not only in the hash marks, but looked pretty decent! Hopefully there won't be any surprises when we spool that side up :) |
Posted By: Strokendiesel002
Date Posted: 07 Apr 2019 at 9:36pm
Separated the manifold from the head... Yeesh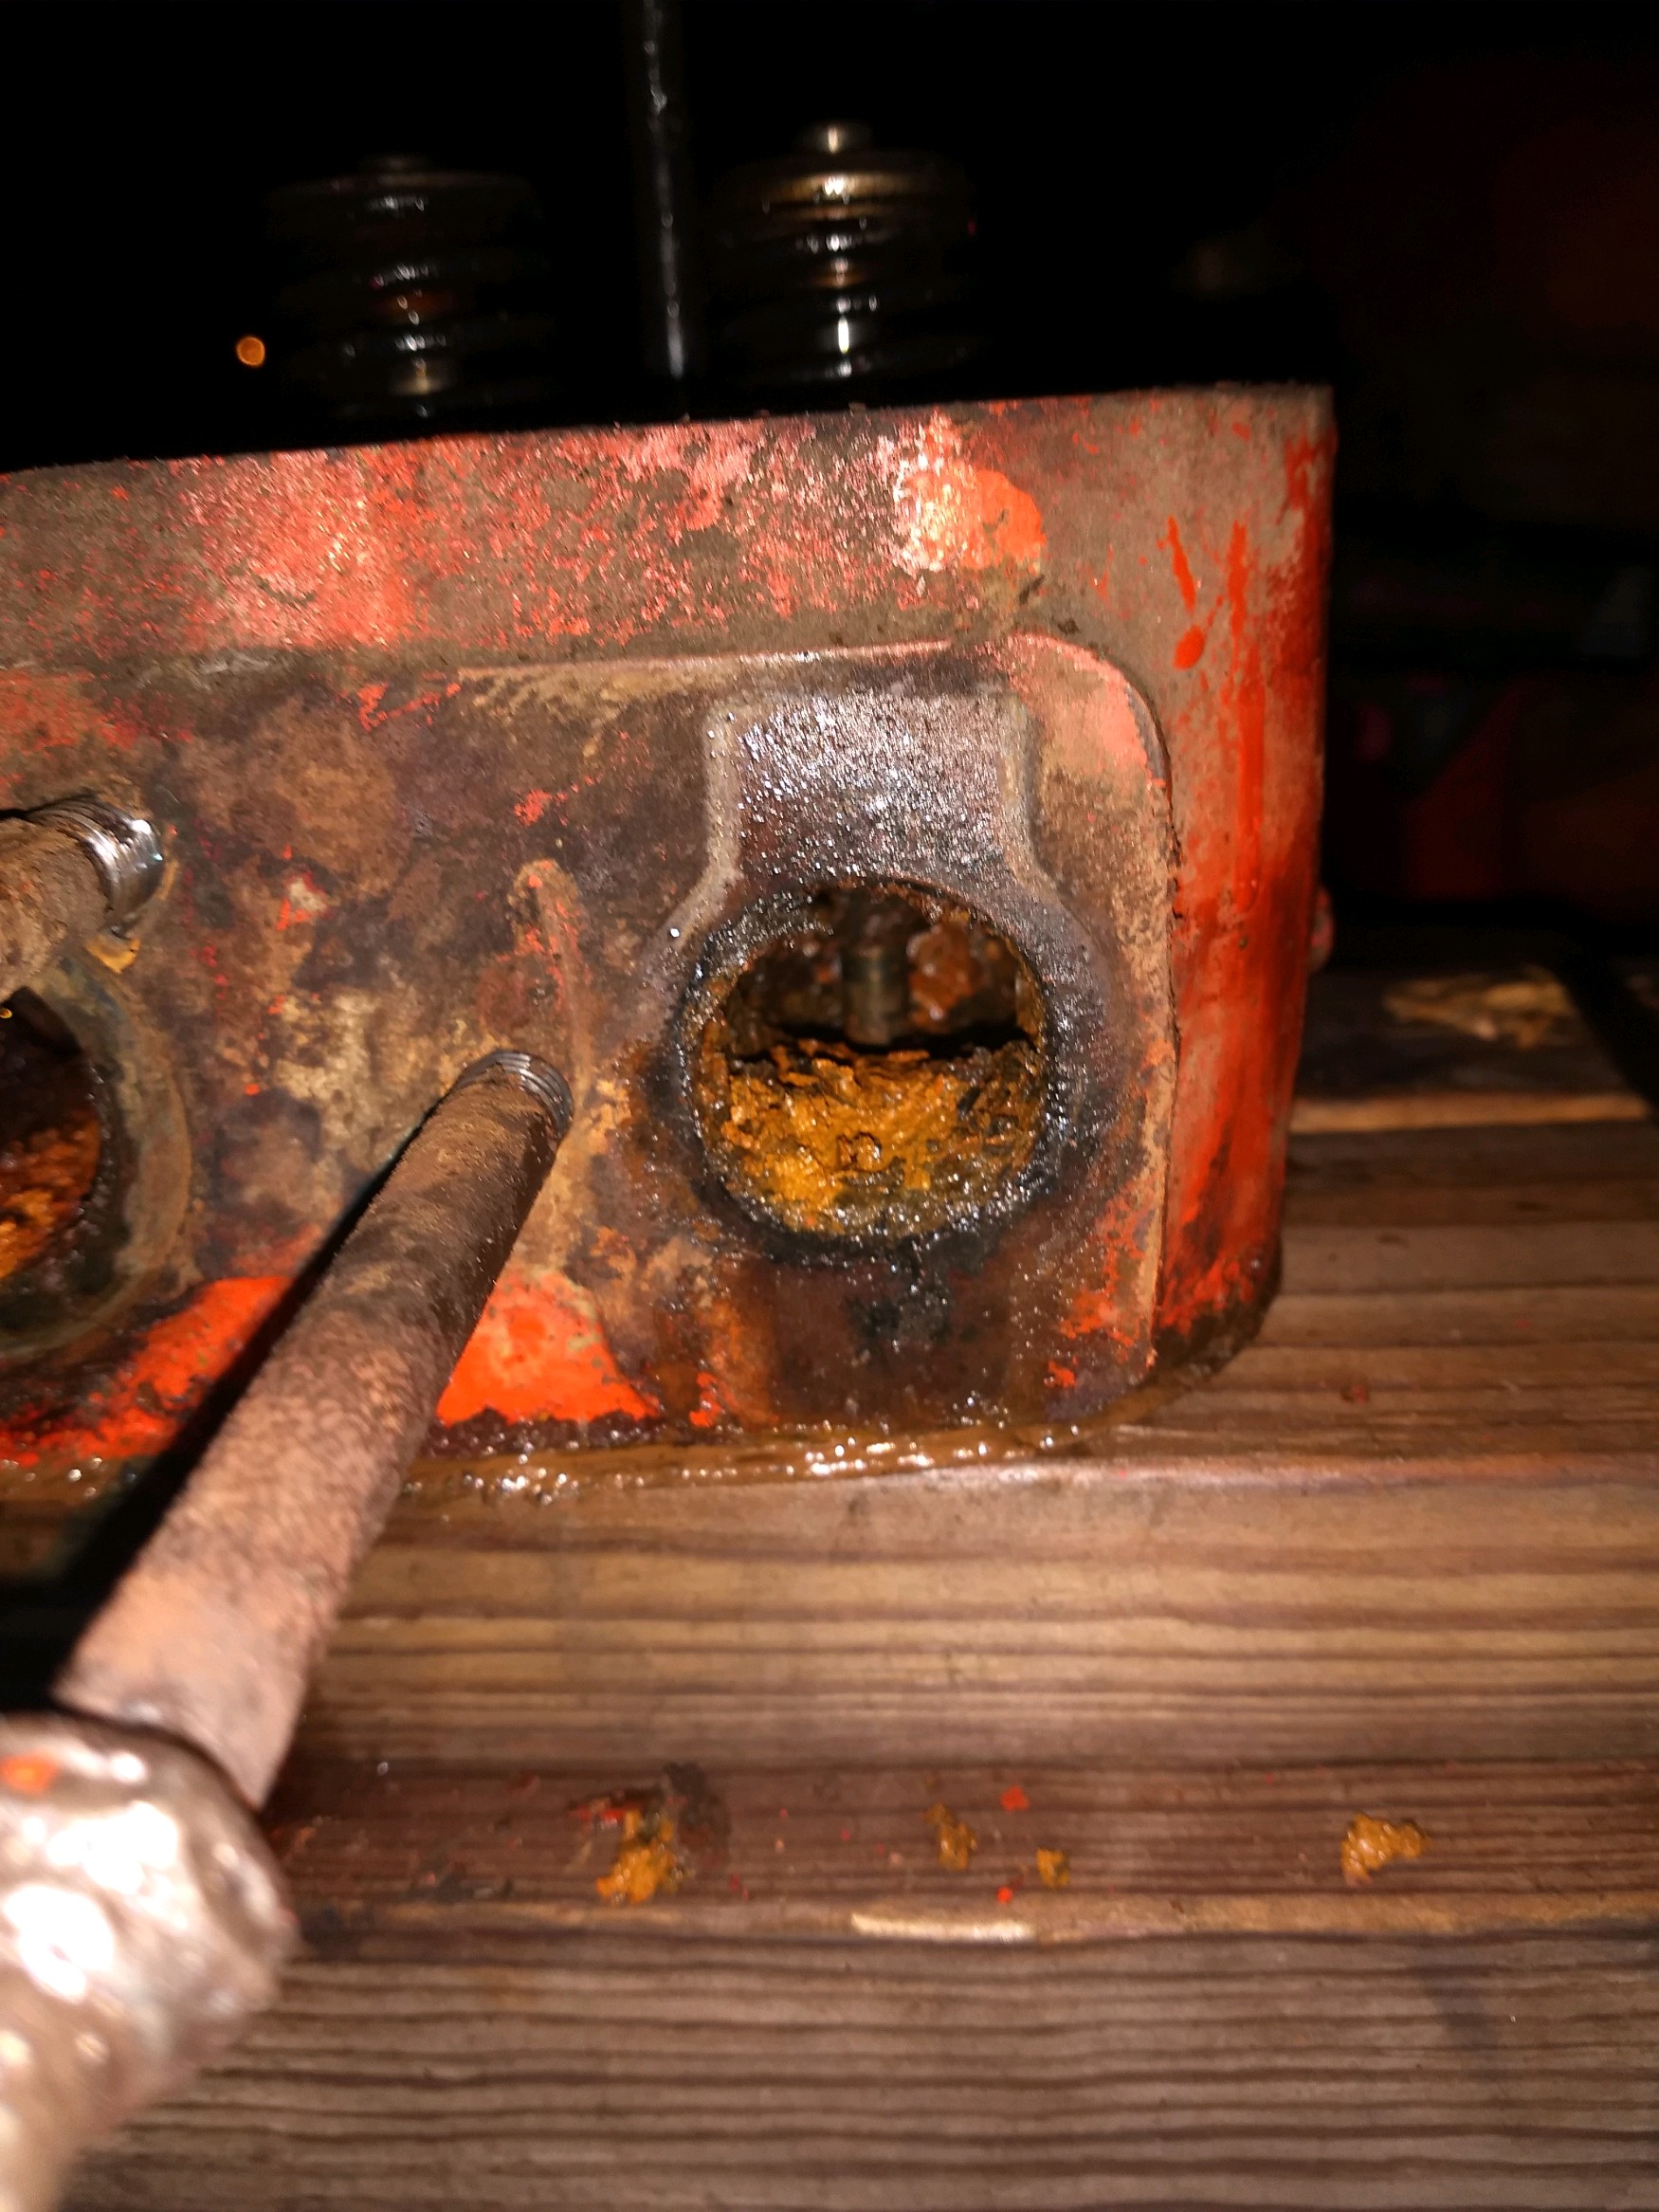 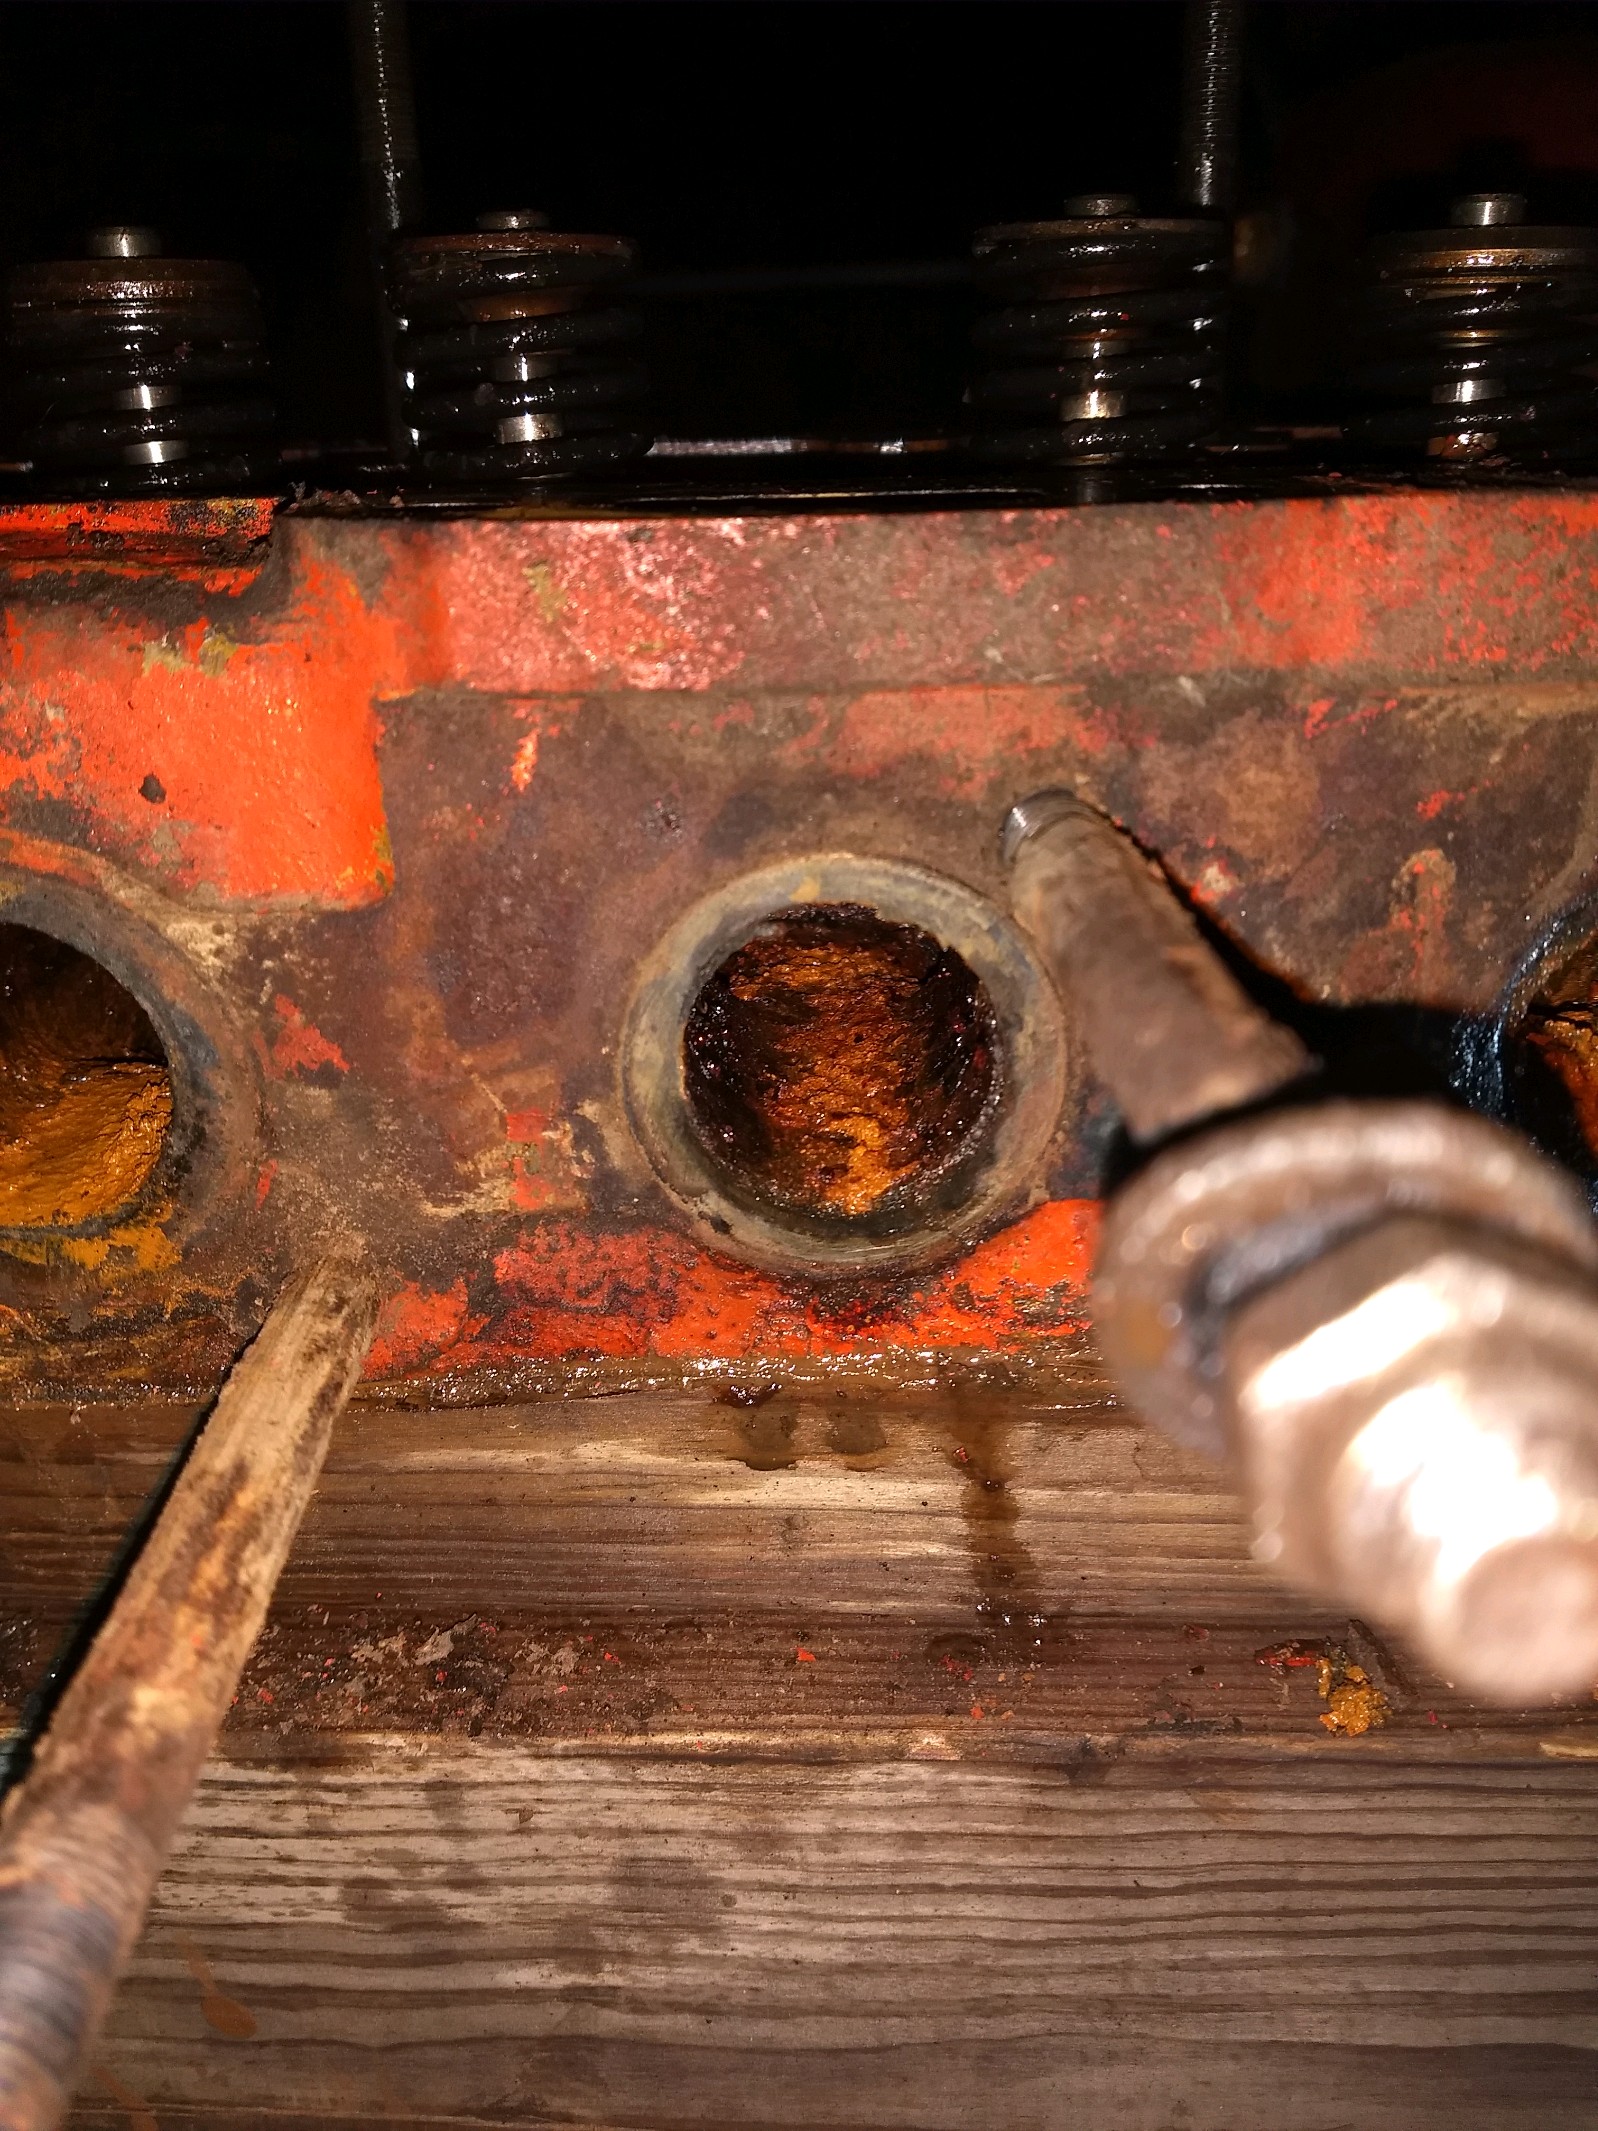  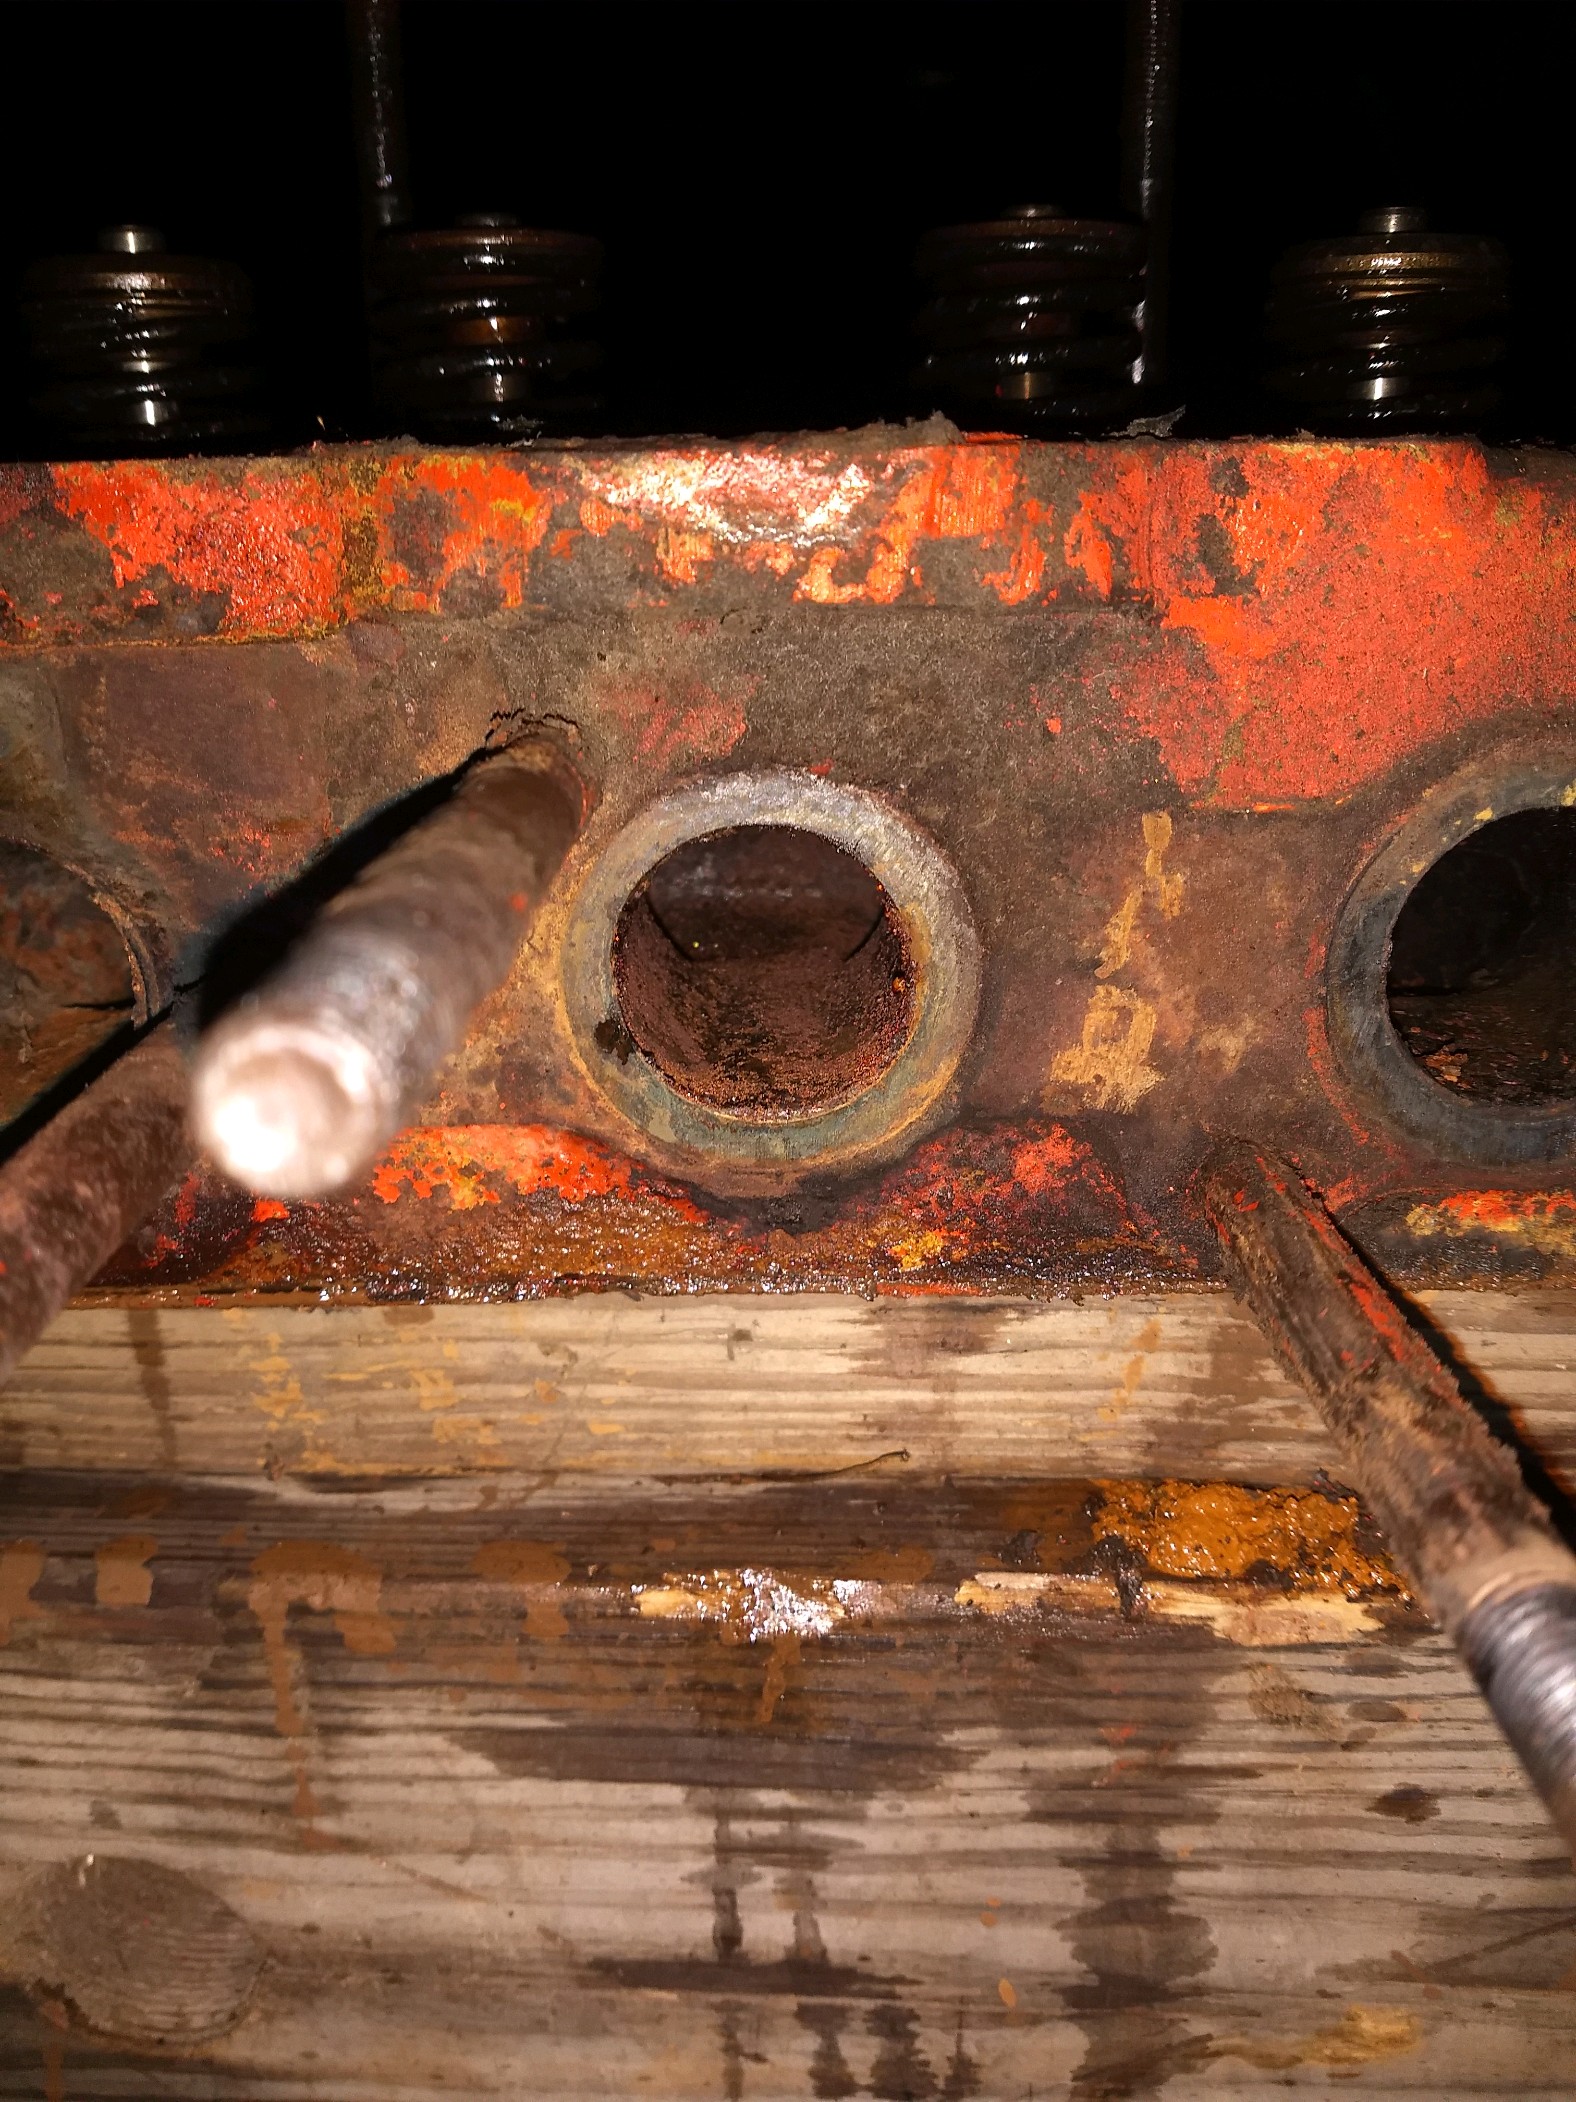  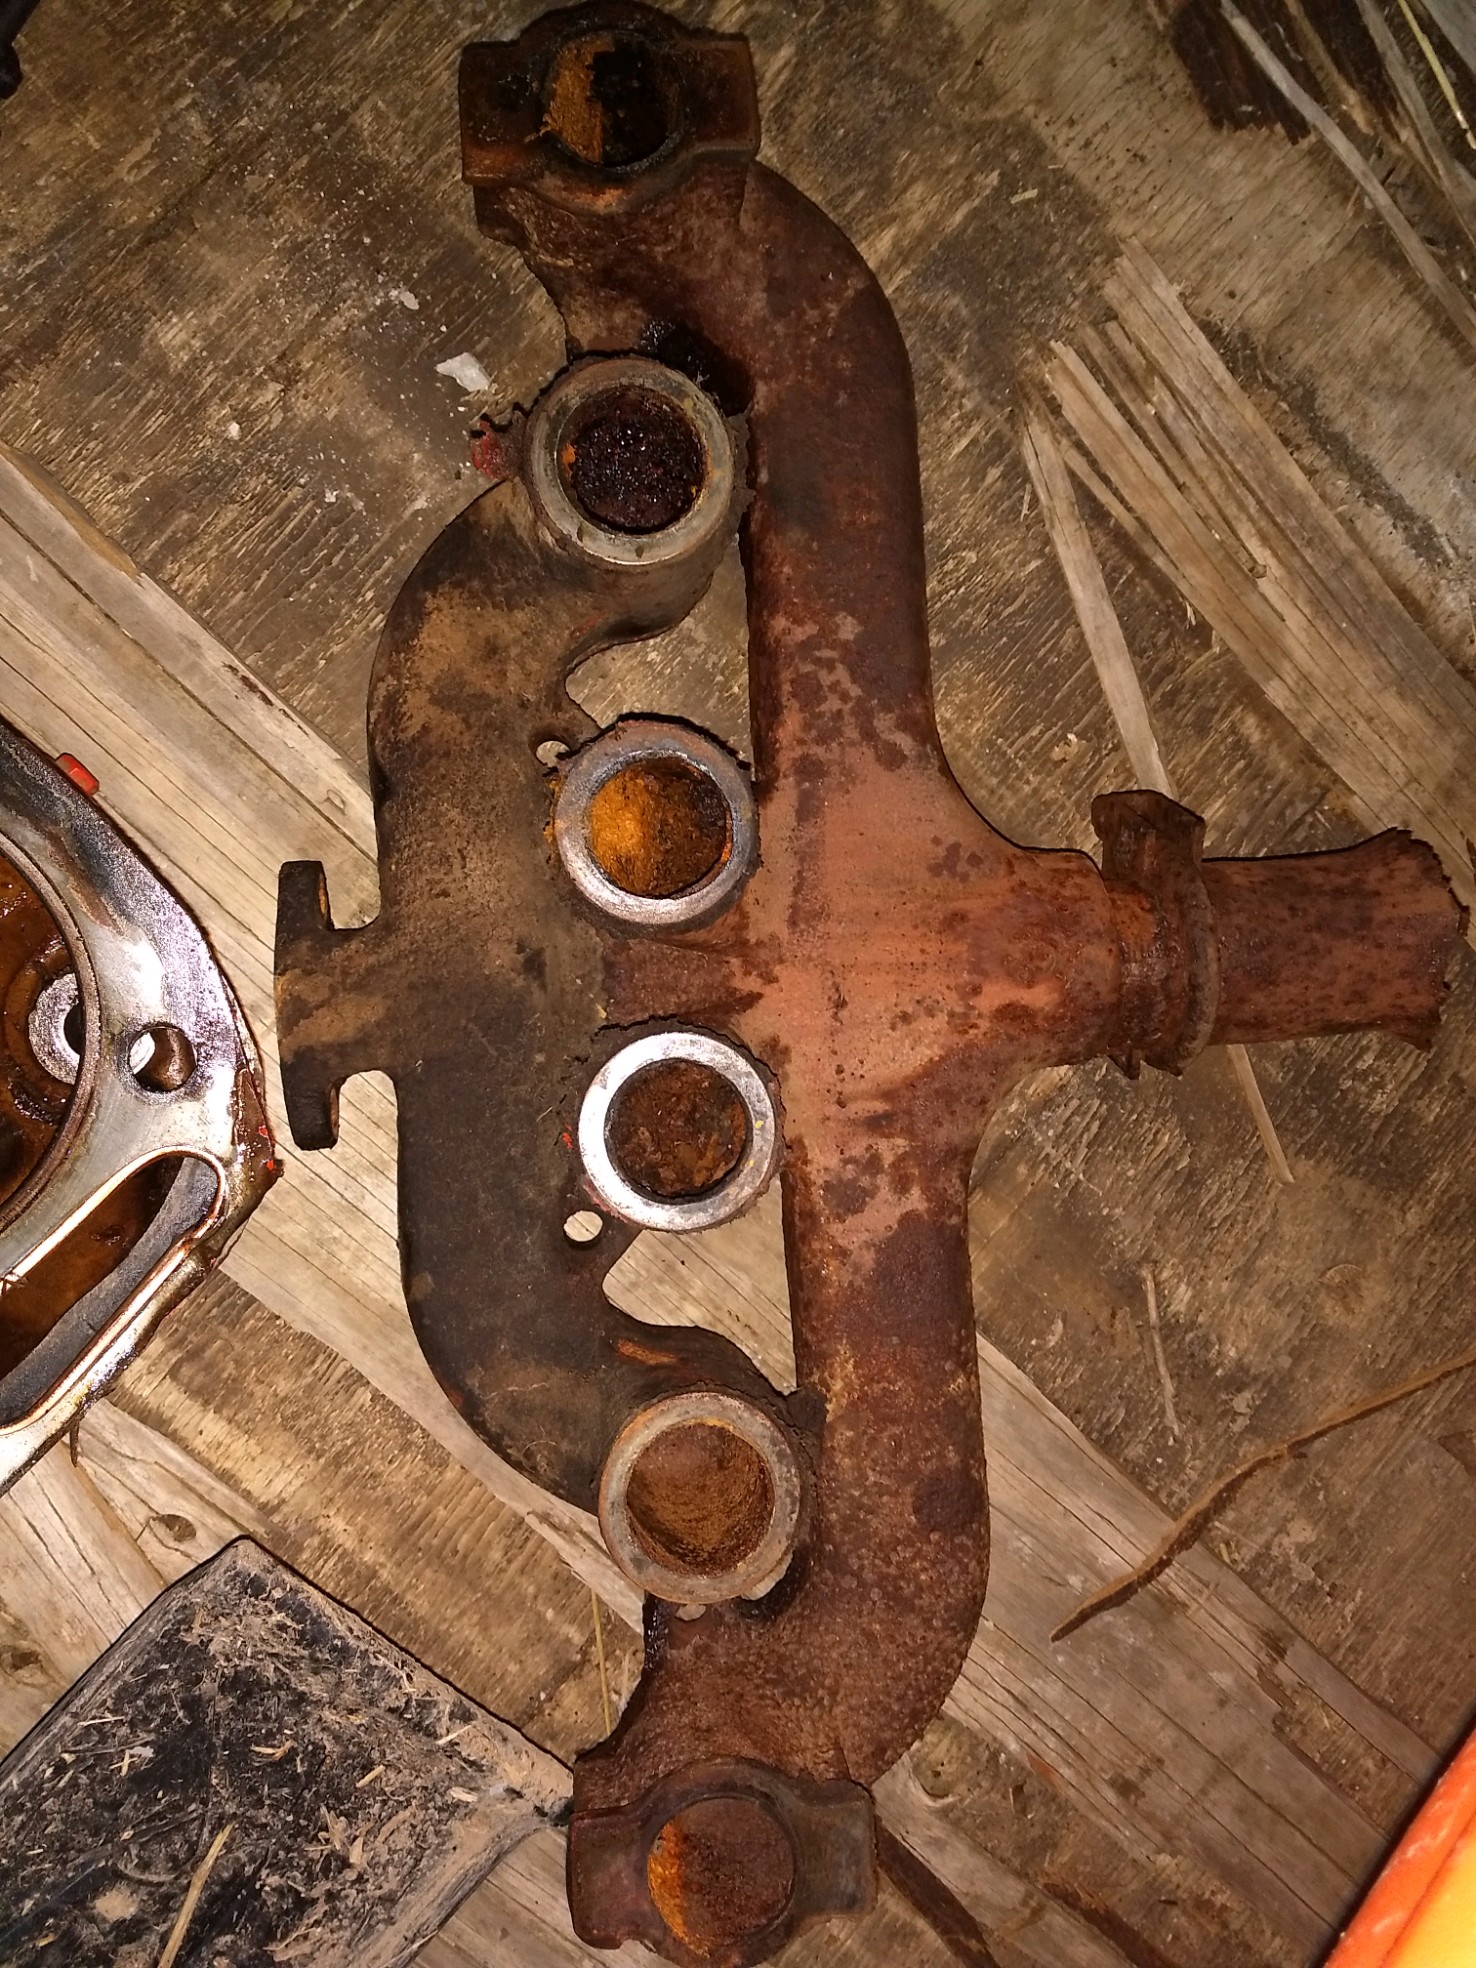
|
Posted By: Strokendiesel002
Date Posted: 15 Apr 2019 at 8:34pm
| Alright, I split her in two, pulled the blue color and then bolted her back together in case my uncle needs to move her. Need to buy a memory card for my phone and then I can text myself the pictures and upload them. Just wanted to give an update that this project isn't dead. Should I ask for a re-title or start a new thread? |
Posted By: Allis dave
Date Posted: 16 Apr 2019 at 7:13am
|
I'd say keep this one alive, you've already got a good story going. Good luck on your rebuild.
|
Posted By: Strokendiesel002
Date Posted: 16 Apr 2019 at 10:02am
| Thanks AD, will do! |
Posted By: Strokendiesel002
Date Posted: 21 Apr 2019 at 9:24pm
|
Update! Head and flywheel were dropped off at machine shop and full sleeve and gasket kit was ordered. Hoping to get said parts by Thursday for reassembly! Wife and kids are out of town, so I'm really pushing to have engine read for install by Saturday morning, as they're coming back Saturday night! I really want to replace the main bearings, since I've got it this far apart, but I'm deathly afraid of cracking the crank pulley... Any tips? My cheap puller was kind of stripped (pressure bolt) from an outboard project and is now completely stripped. So if I gotta buy something, I want to buy the right thing. Pics!  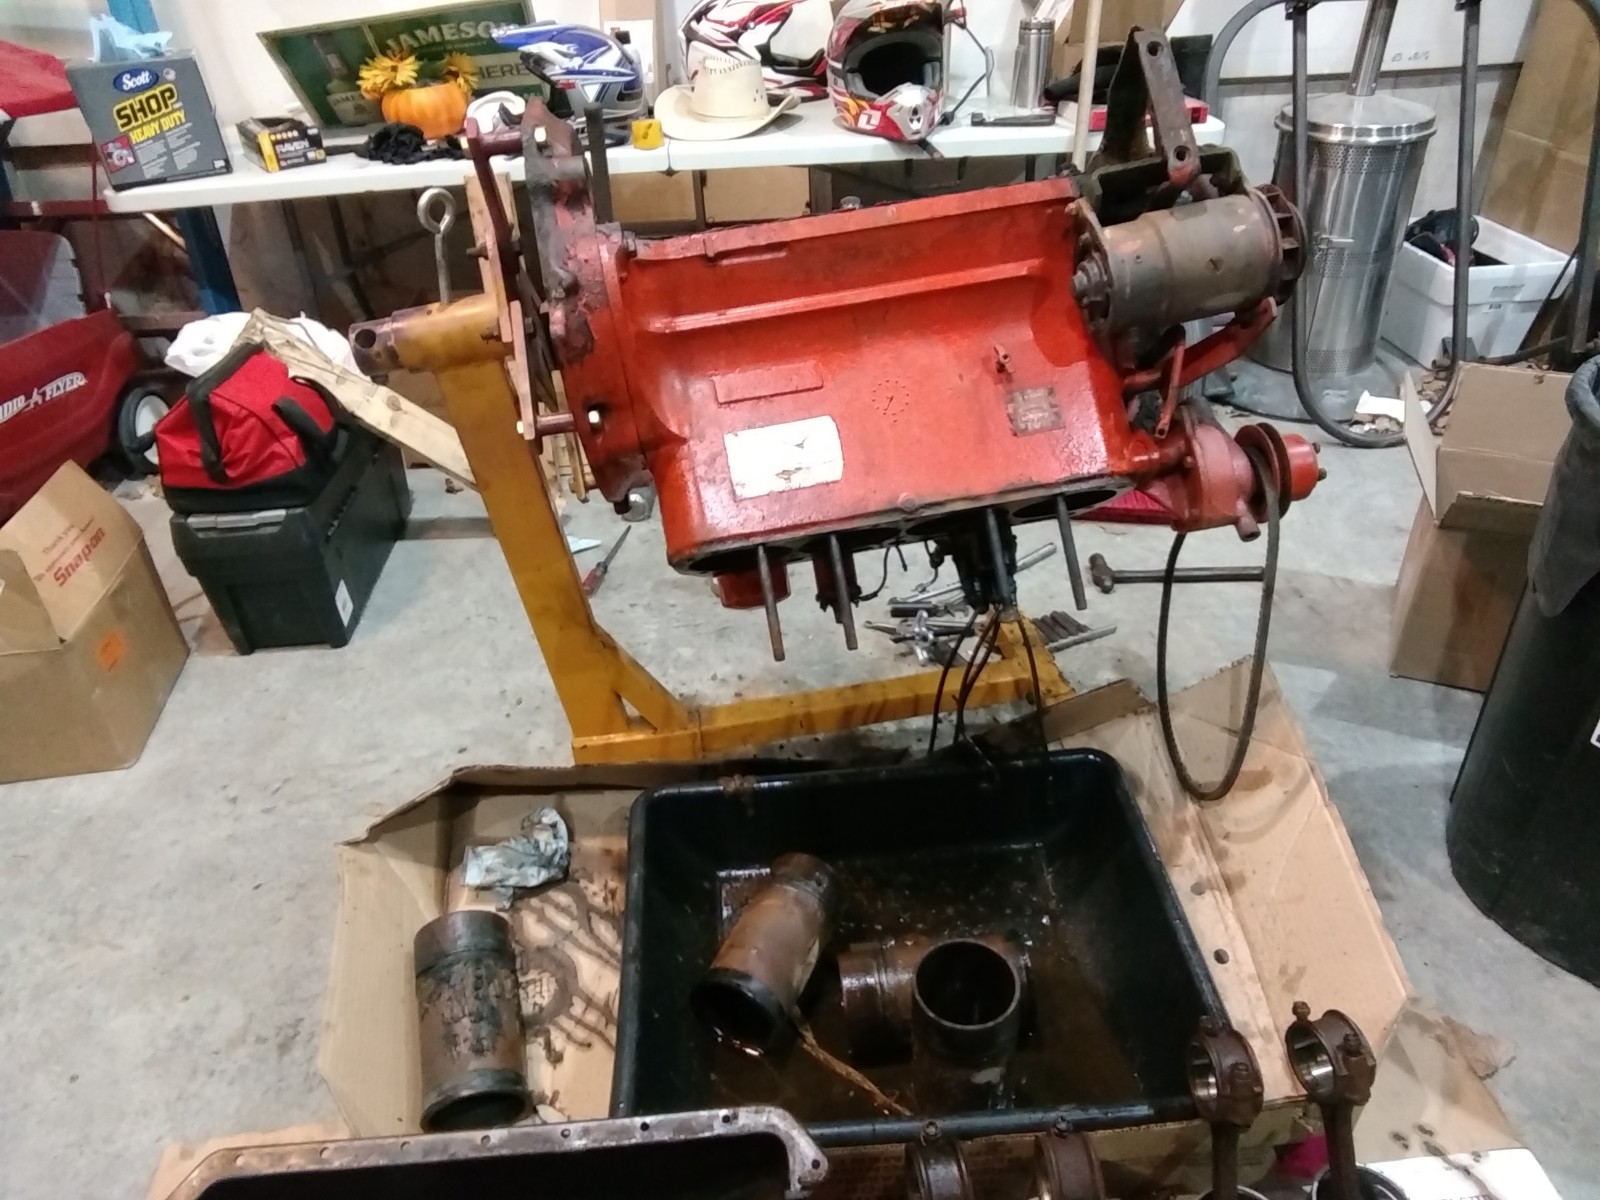 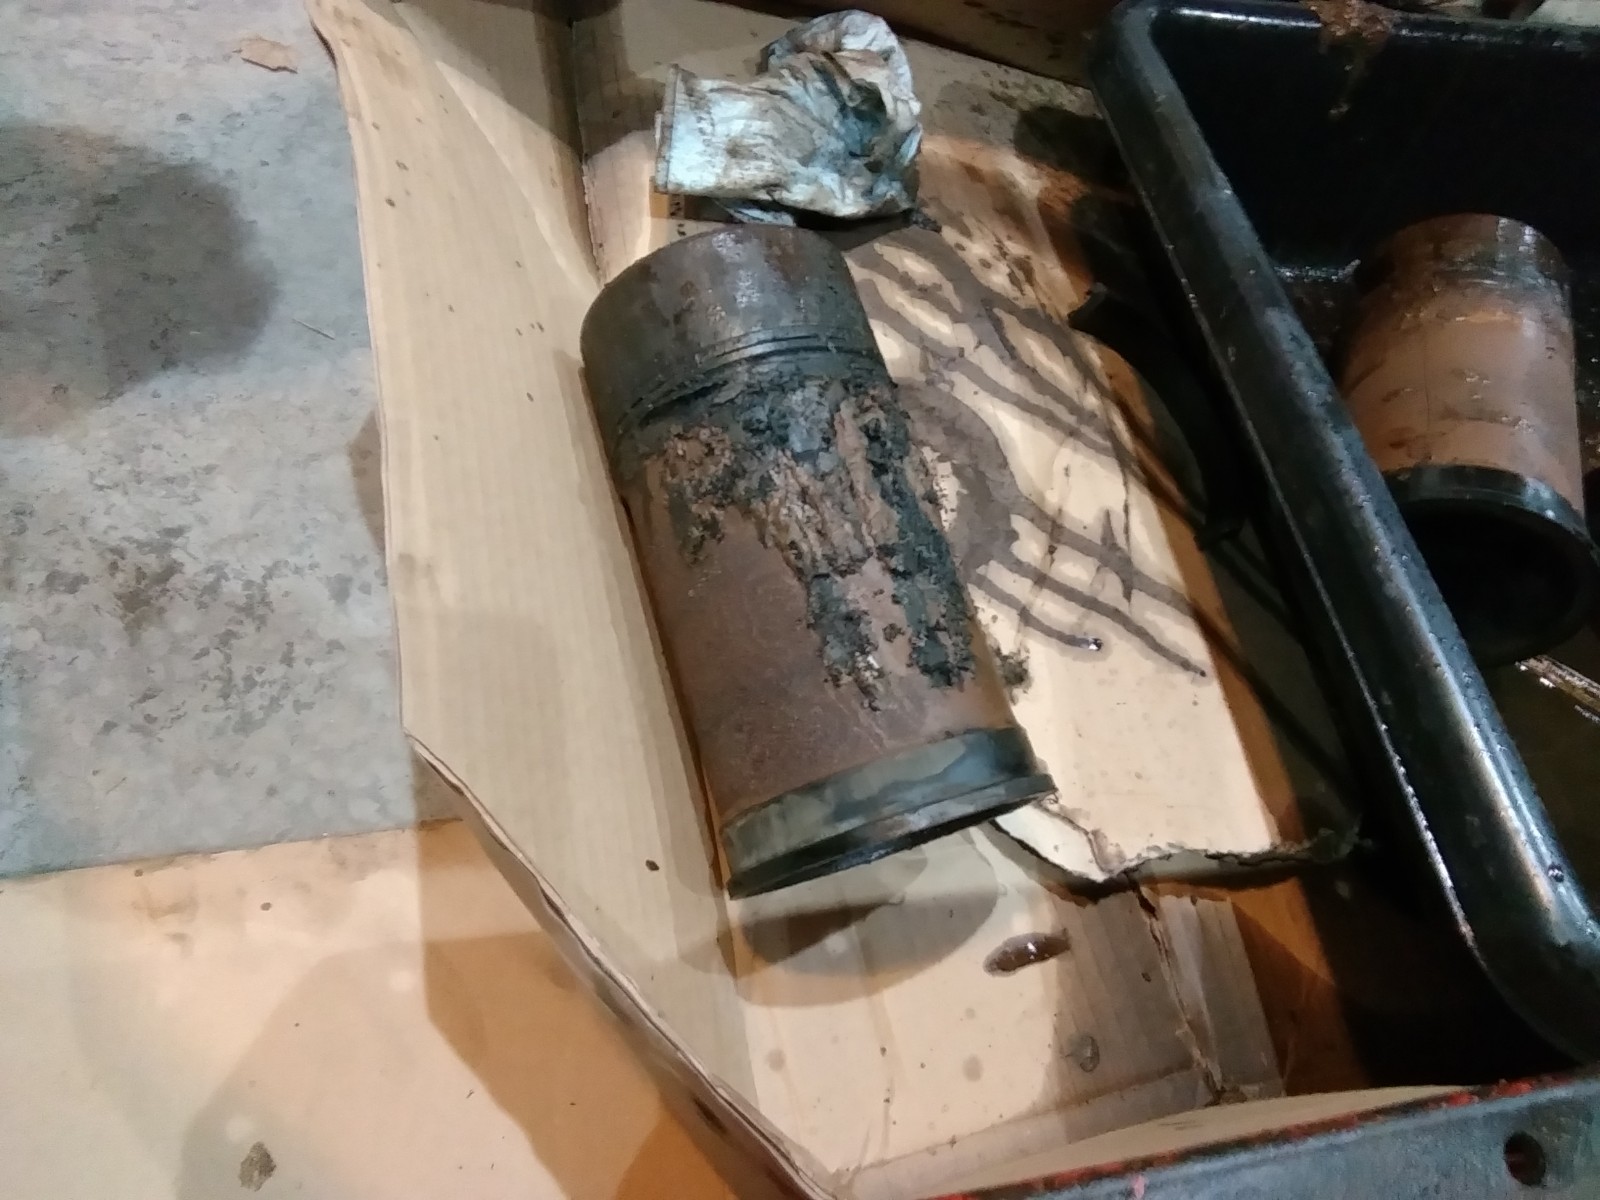 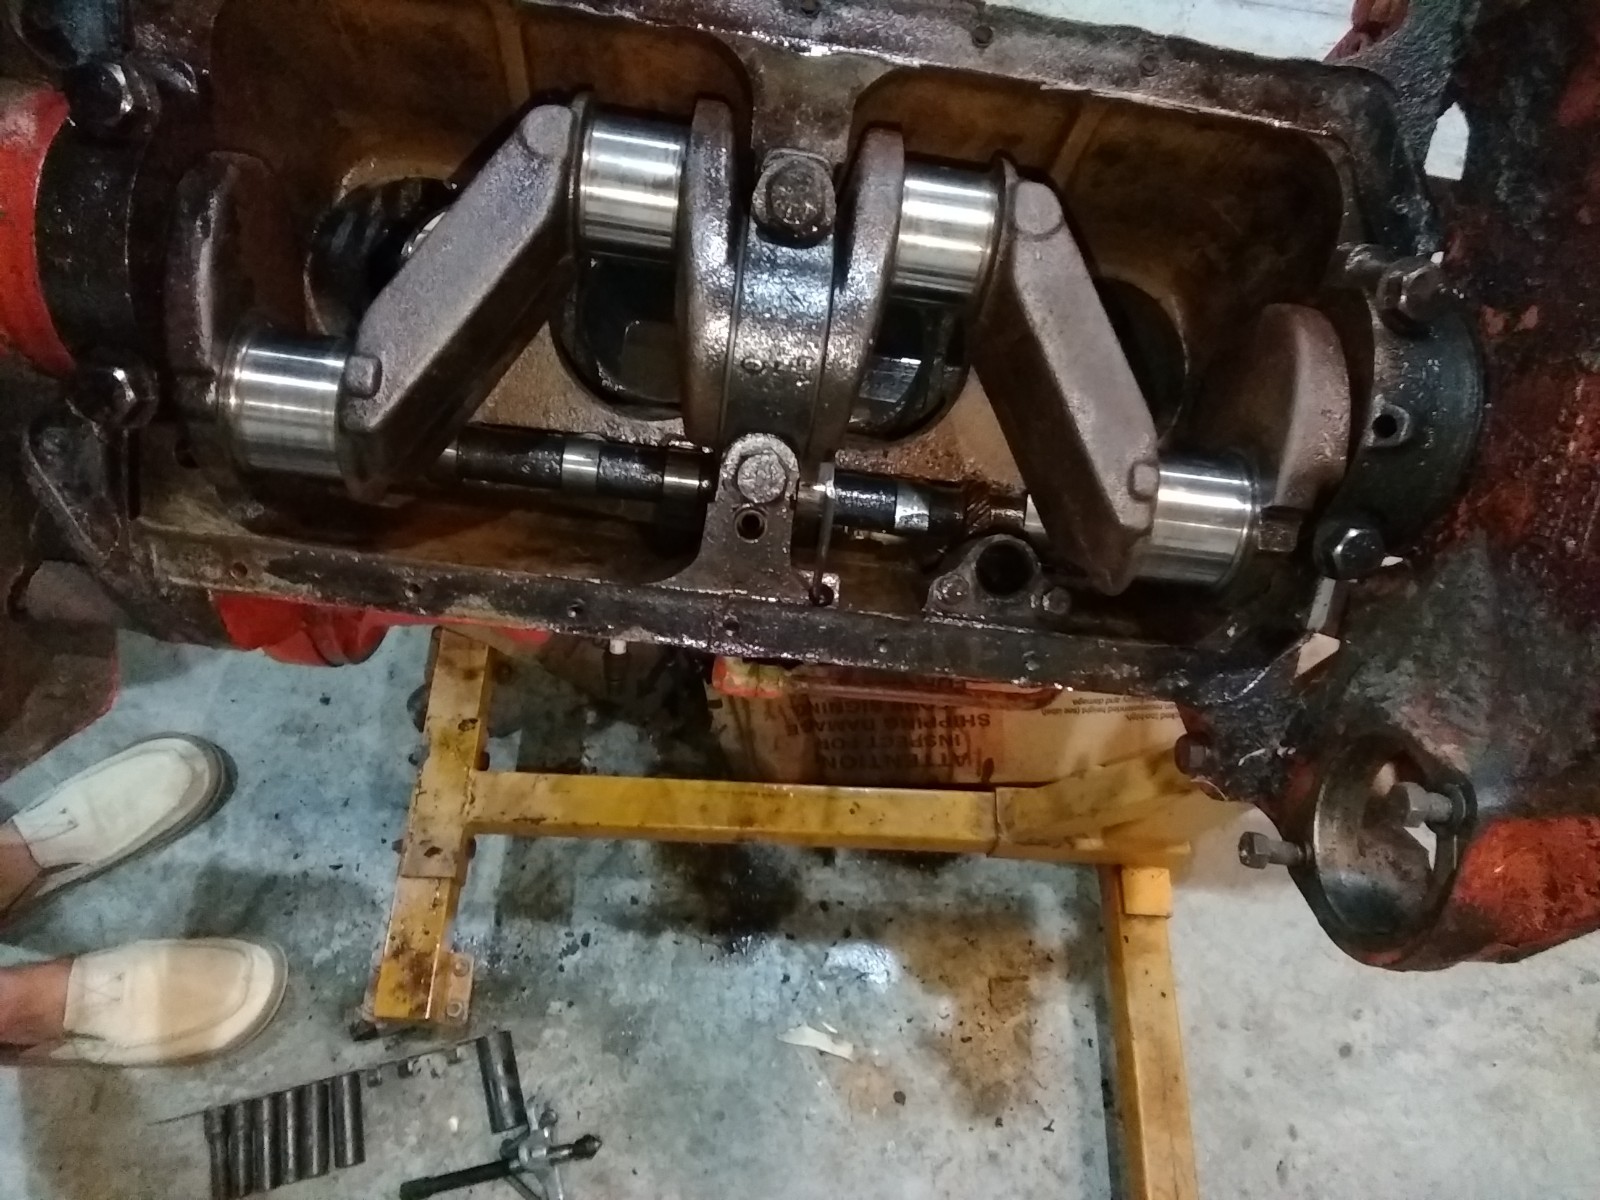 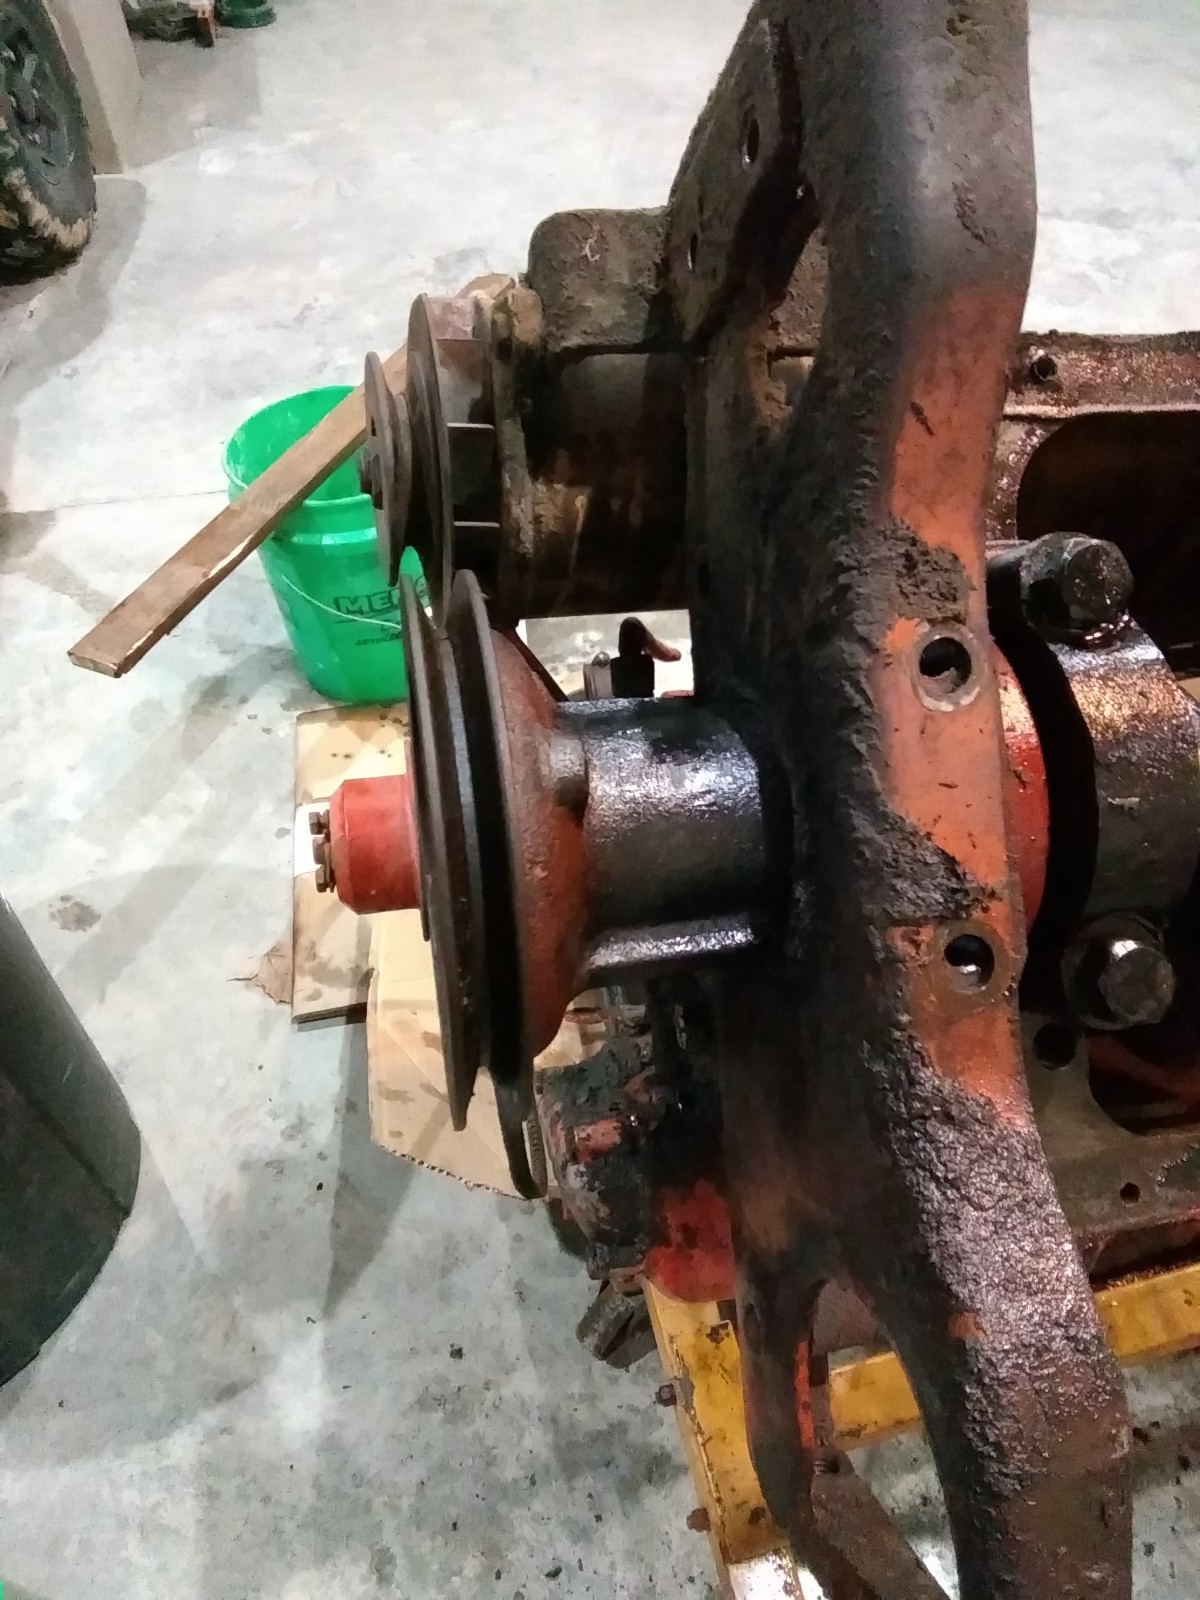
|
Posted By: Sugarmaker
Date Posted: 22 Apr 2019 at 8:16am
|
Looks like you have a project! I will be watching! Congrats on the D17 joining the family. It sounds like it needs lots of love and attention too. Mine is setting in my sons garage (lean to). Regards, Chris ------------- D17 1958 (NFE), WD45 1954 (NFE), WD 1952 (NFE), WD 1950 (WFE), Allis F-40 forklift, Allis CA, Allis D14, Ford Jubilee, Many IH Cub Cadets, 32 Ford Dump, 65 Comet, 66 F100. |
Posted By: Strokendiesel002
Date Posted: 22 Apr 2019 at 11:06pm
|
Thanks Sugarmaker! Pretty excited to put around the property and mow stuff down! More progress tonight... Successfully removed the crank pulley without breaking it!!! Got a puller squared up and put a fair amount of pressure, then heated as evenly as possible with a smallish rosebud torch. Popped 1/8" and repeat, used a 2x4 to hold the crank steady when applying pressure. It certainly wasn't a fast process, but it worked! 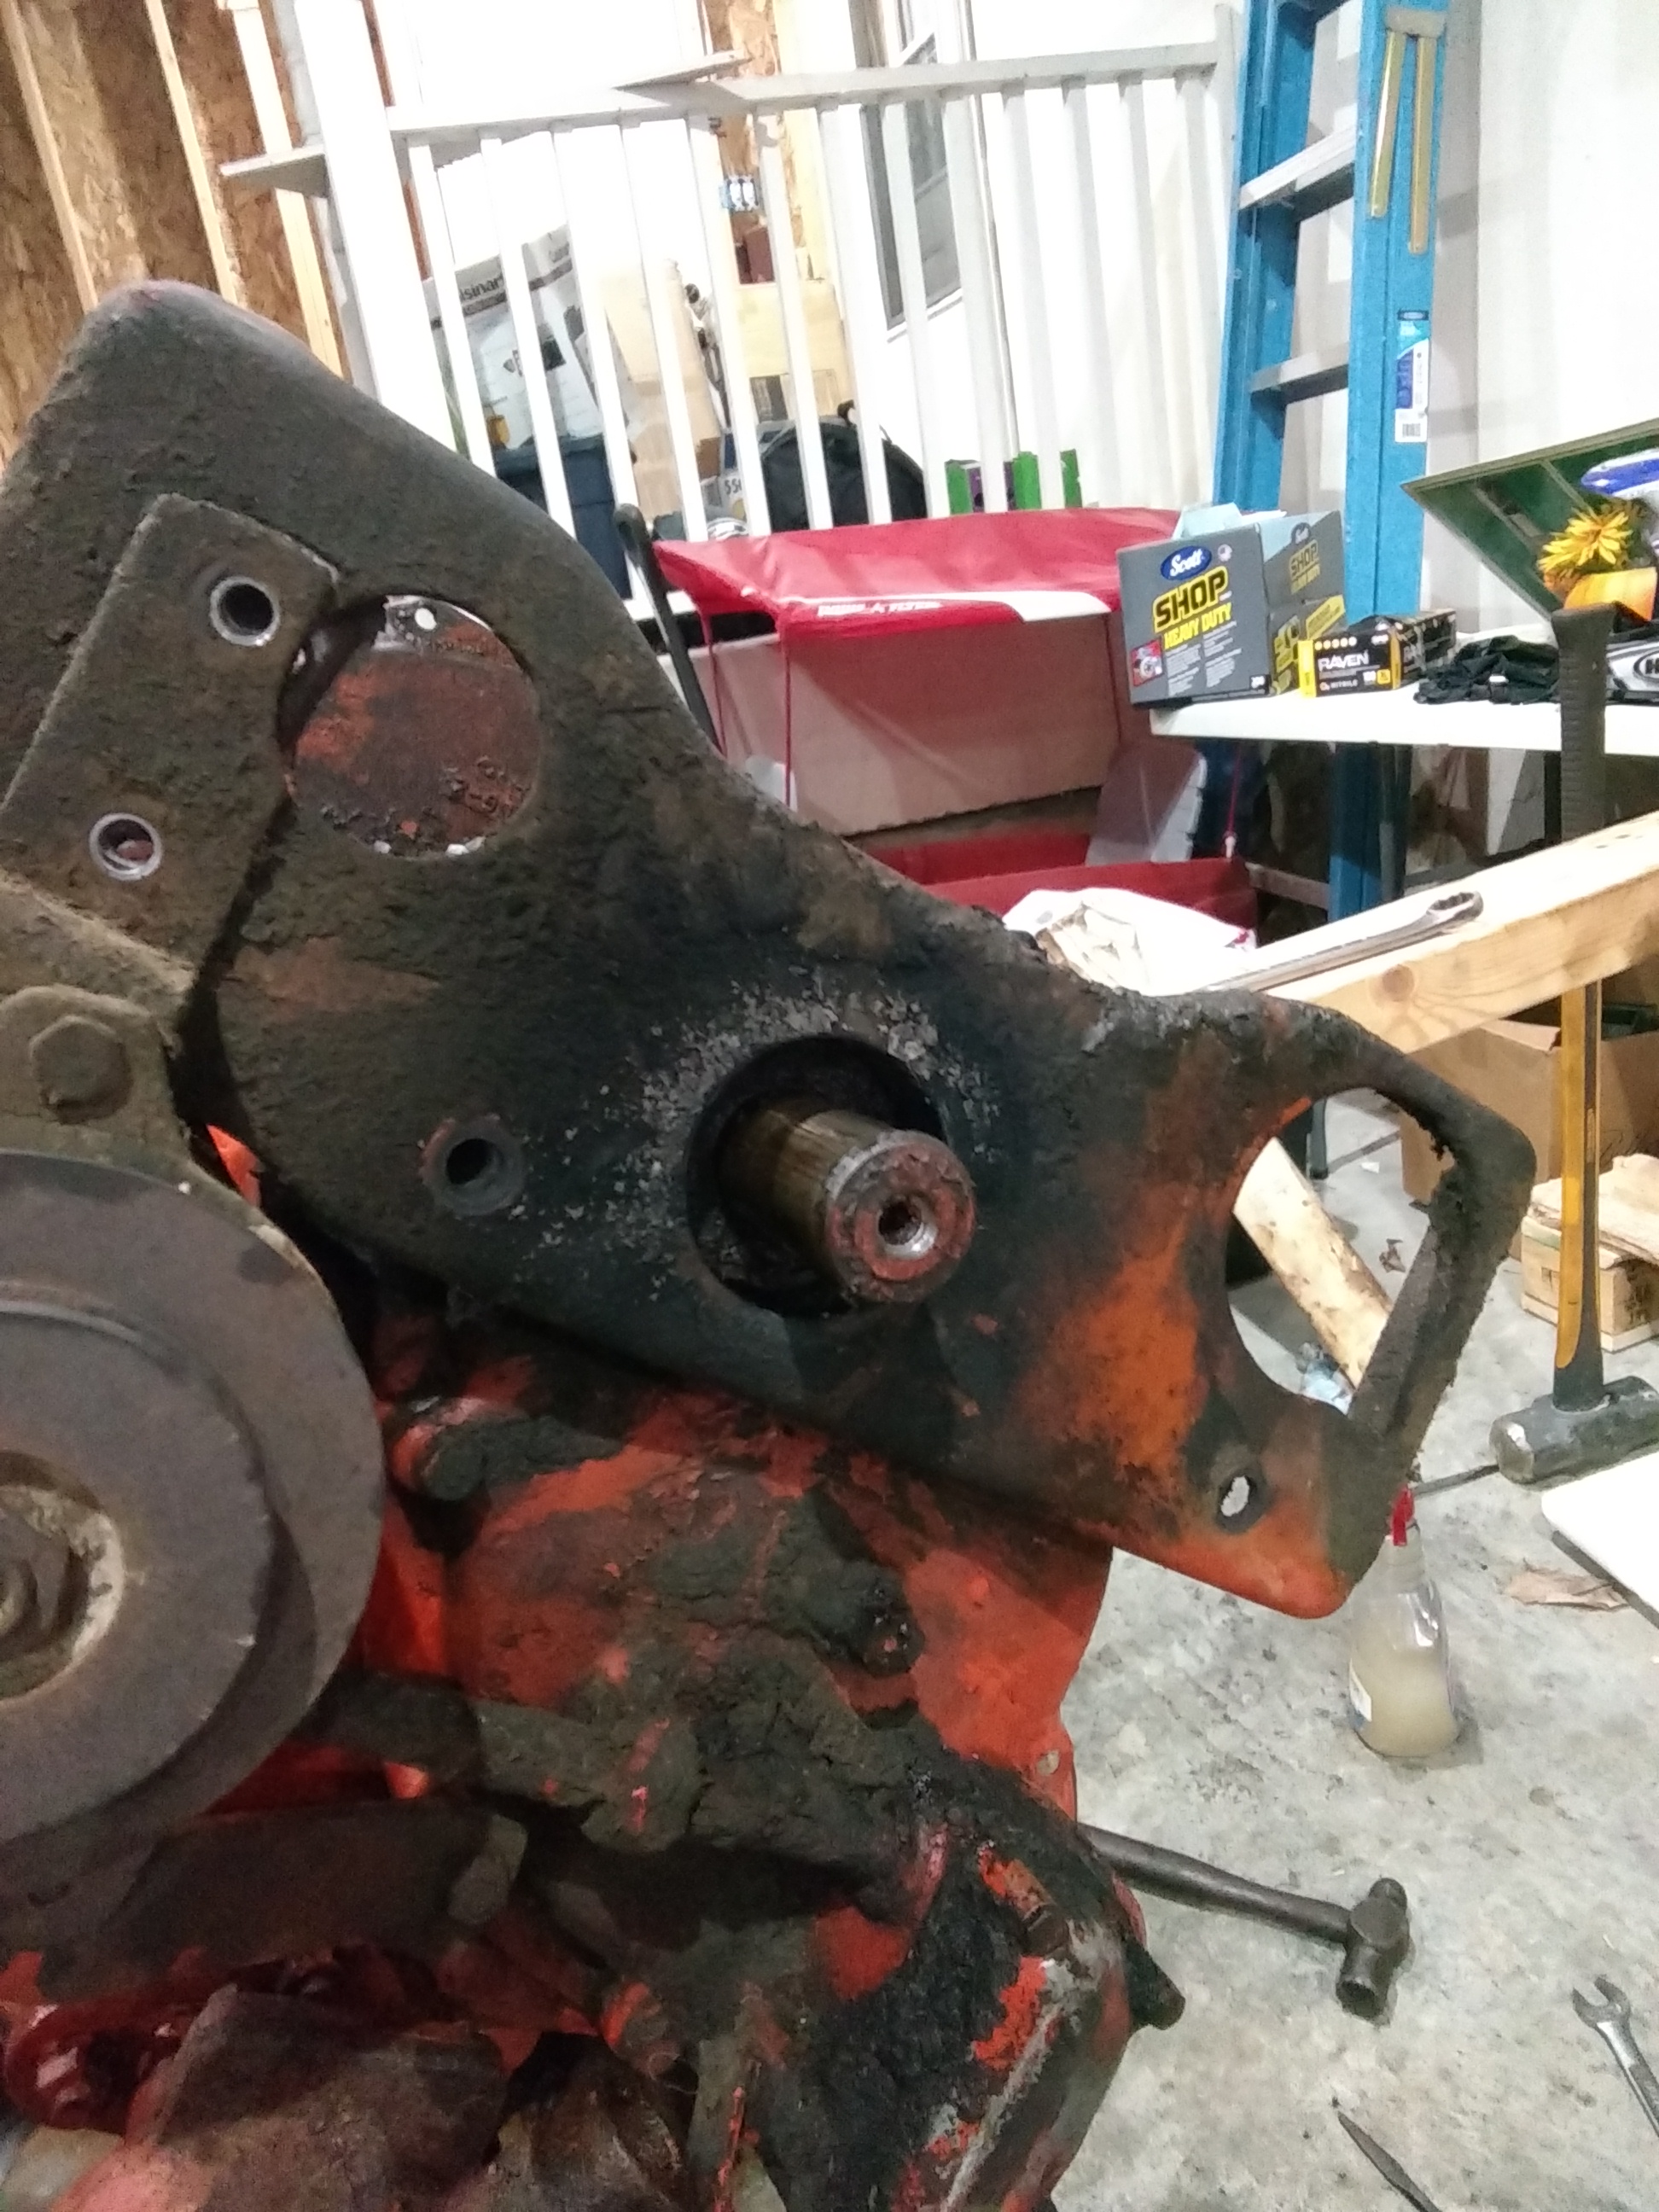 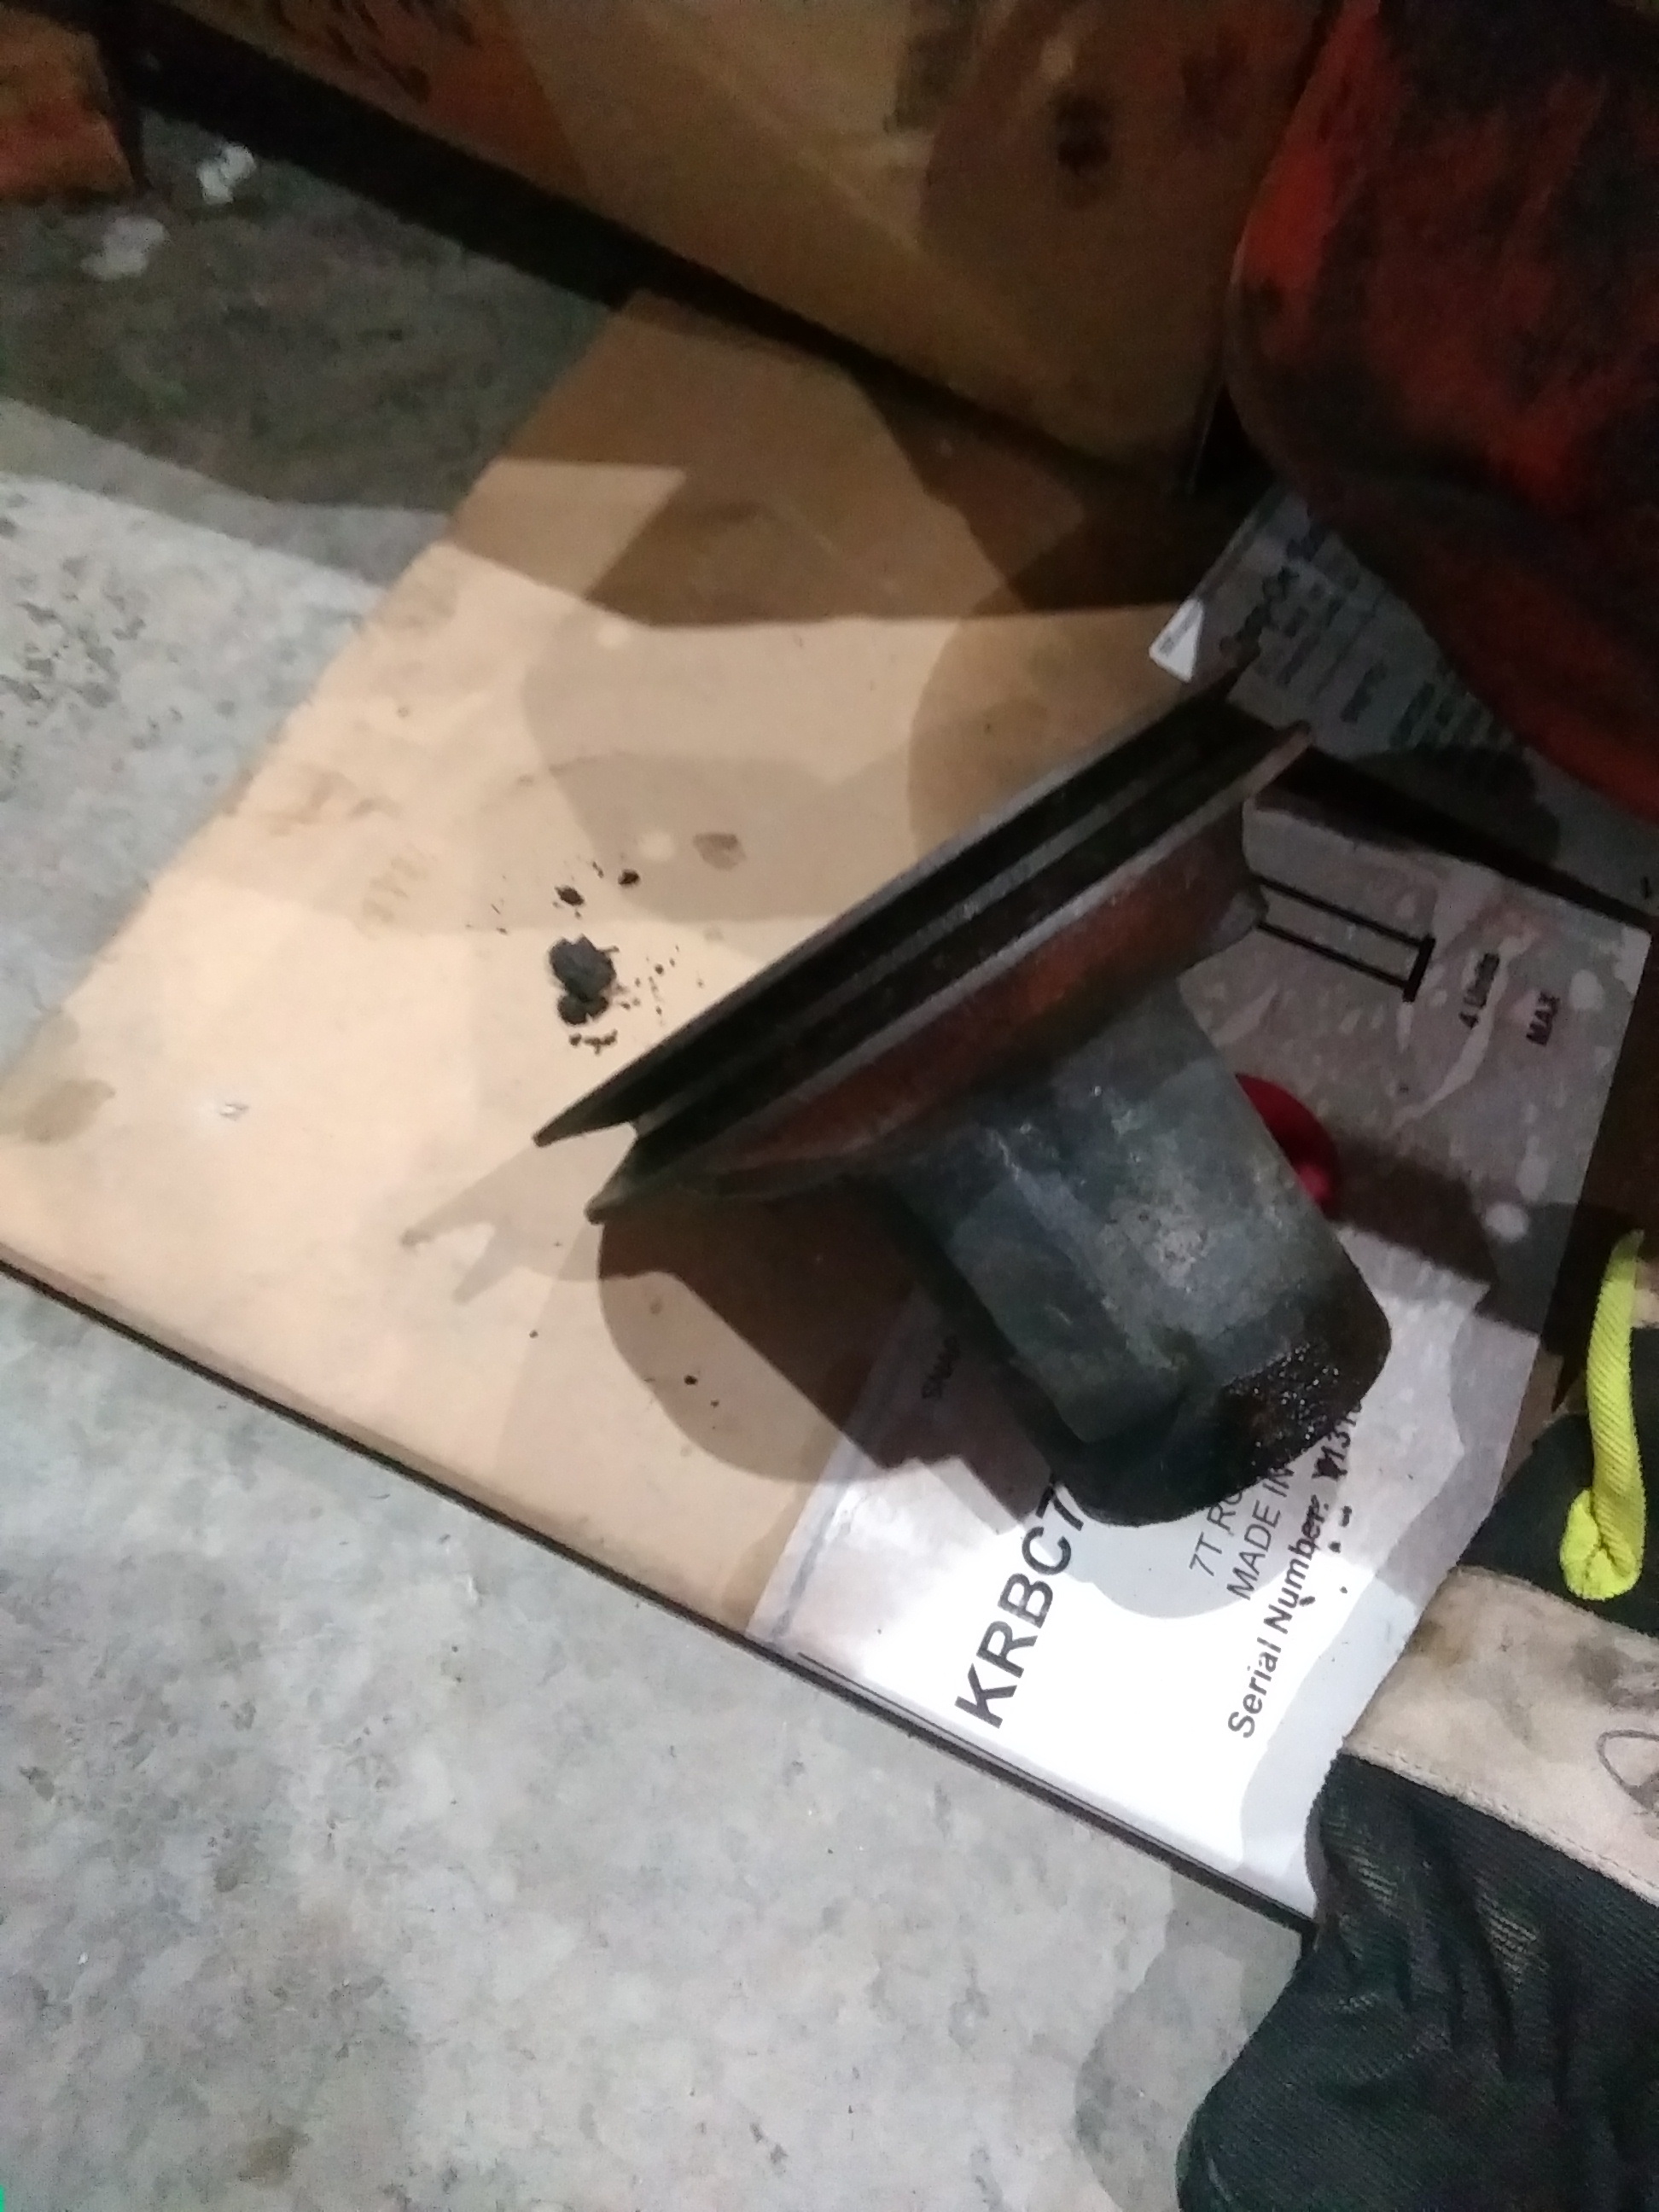
|
Posted By: Strokendiesel002
Date Posted: 24 Apr 2019 at 11:53pm
|
Progress tonight. Pressure washed and removed timing cover and main cap bolts. Have to pick it off the stand to remove rear cap and crankshaft. Also disassembled pressure plate so machine shop can turn that down too, since I sent them the flywheel. Sleeve and gasket kit came in so I'm hoping to start reassembling it tomorrow! 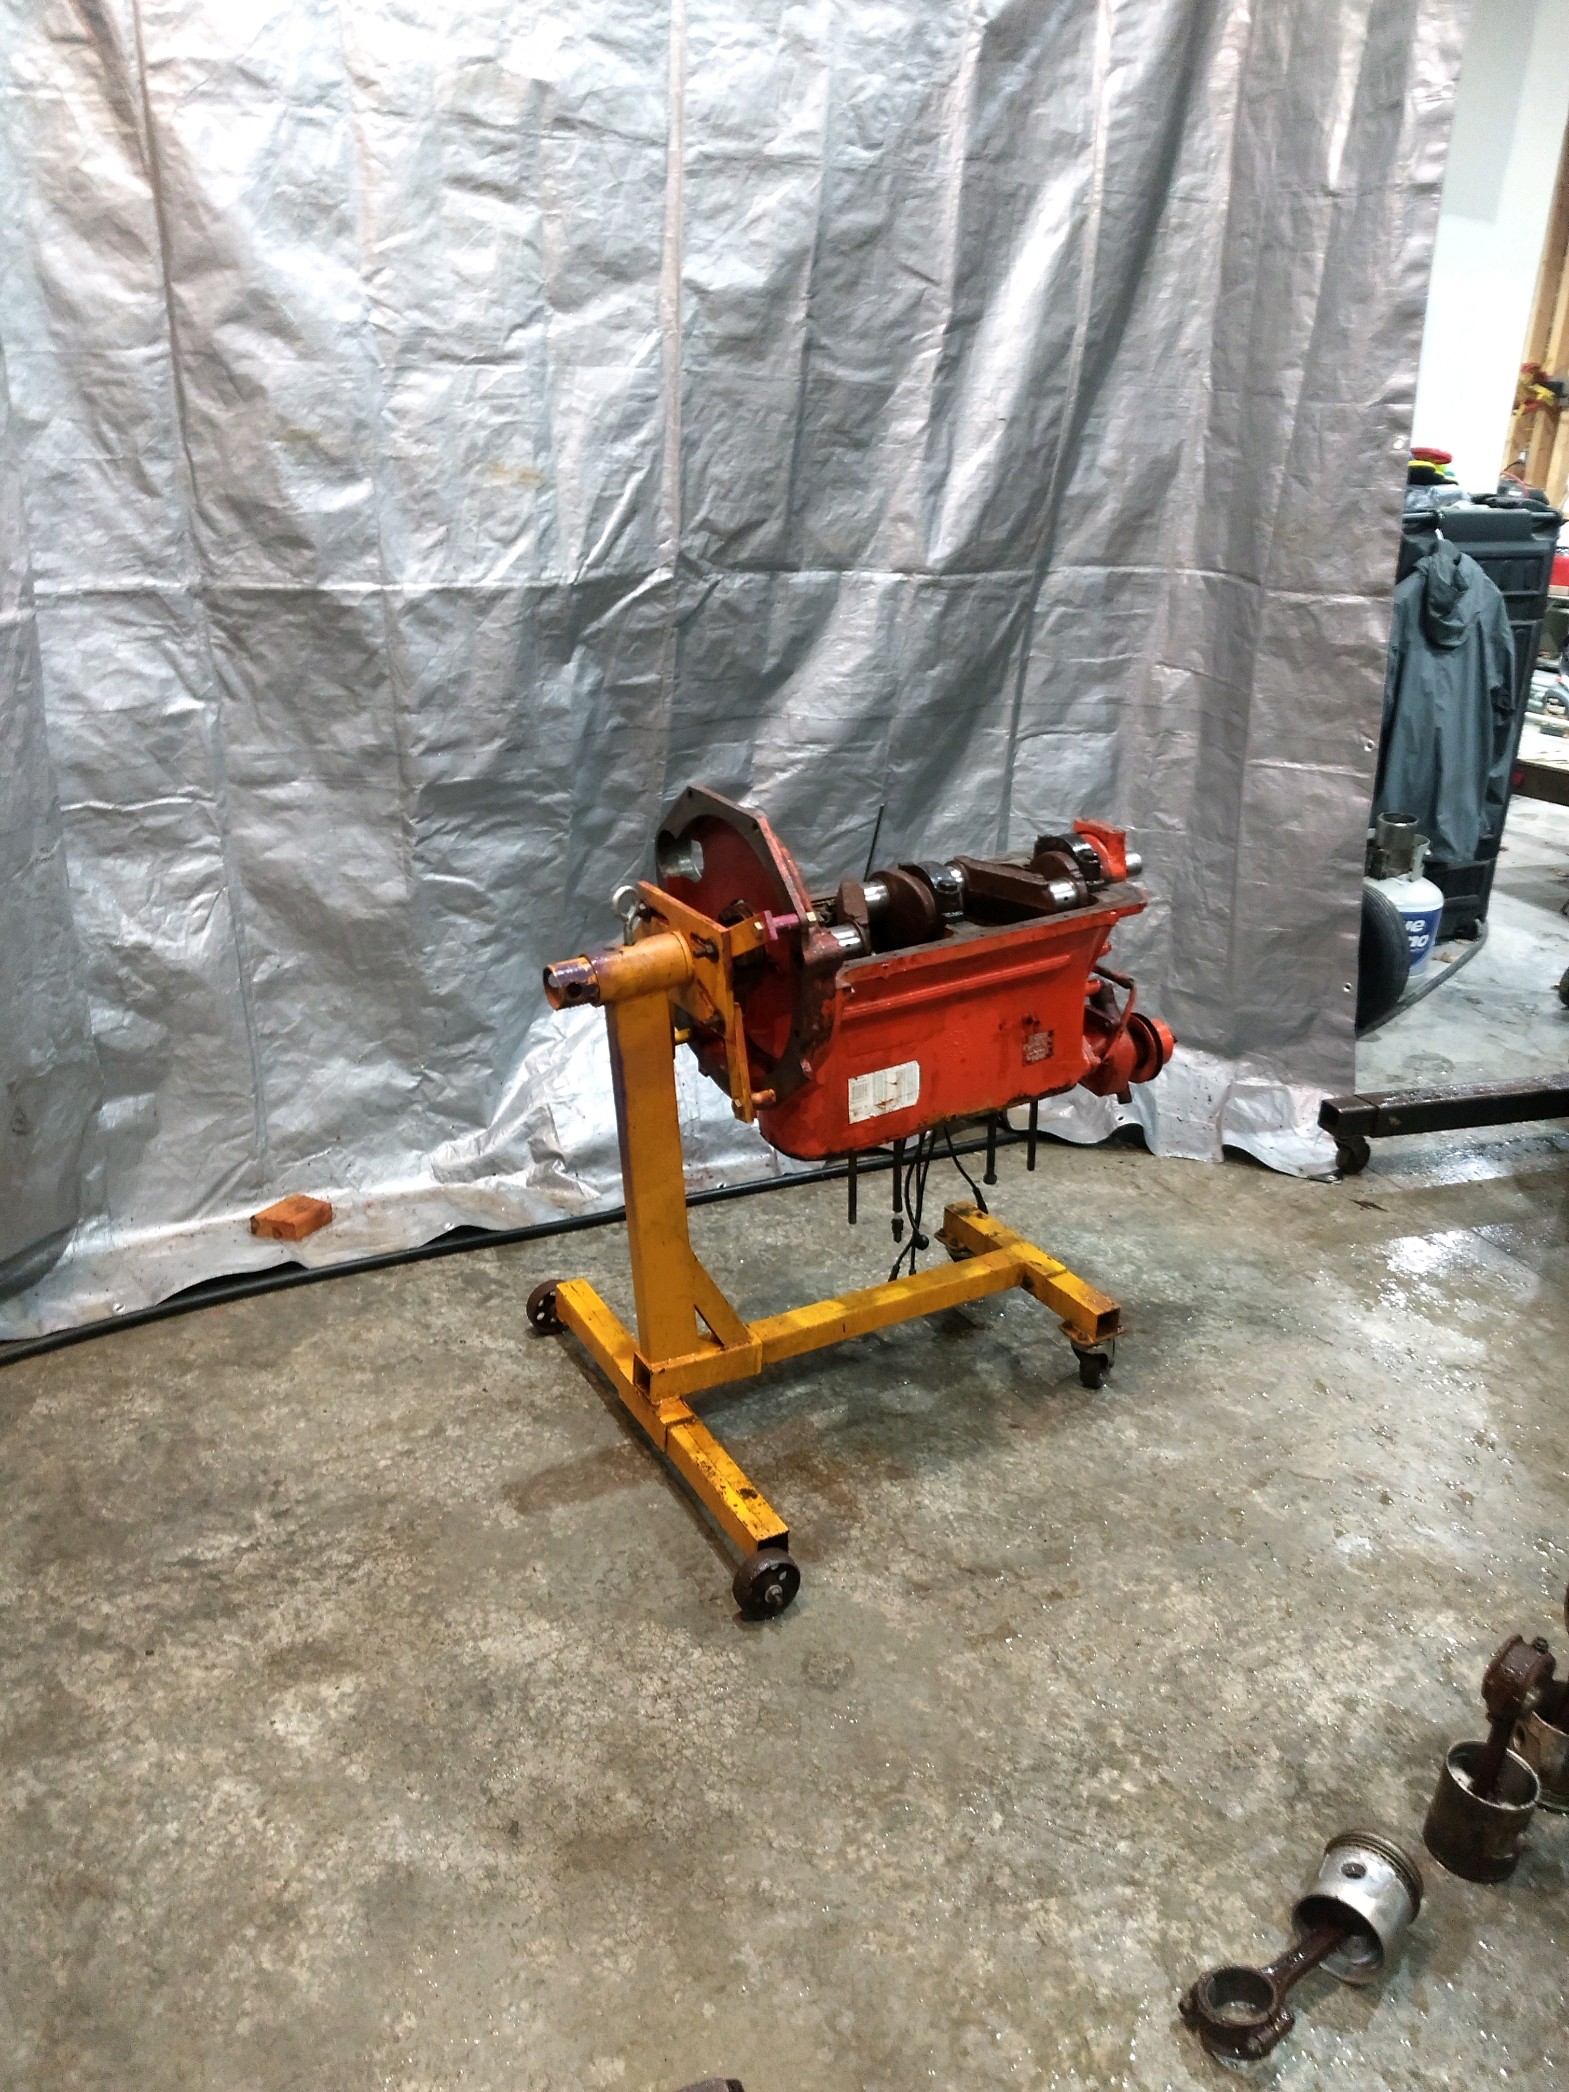 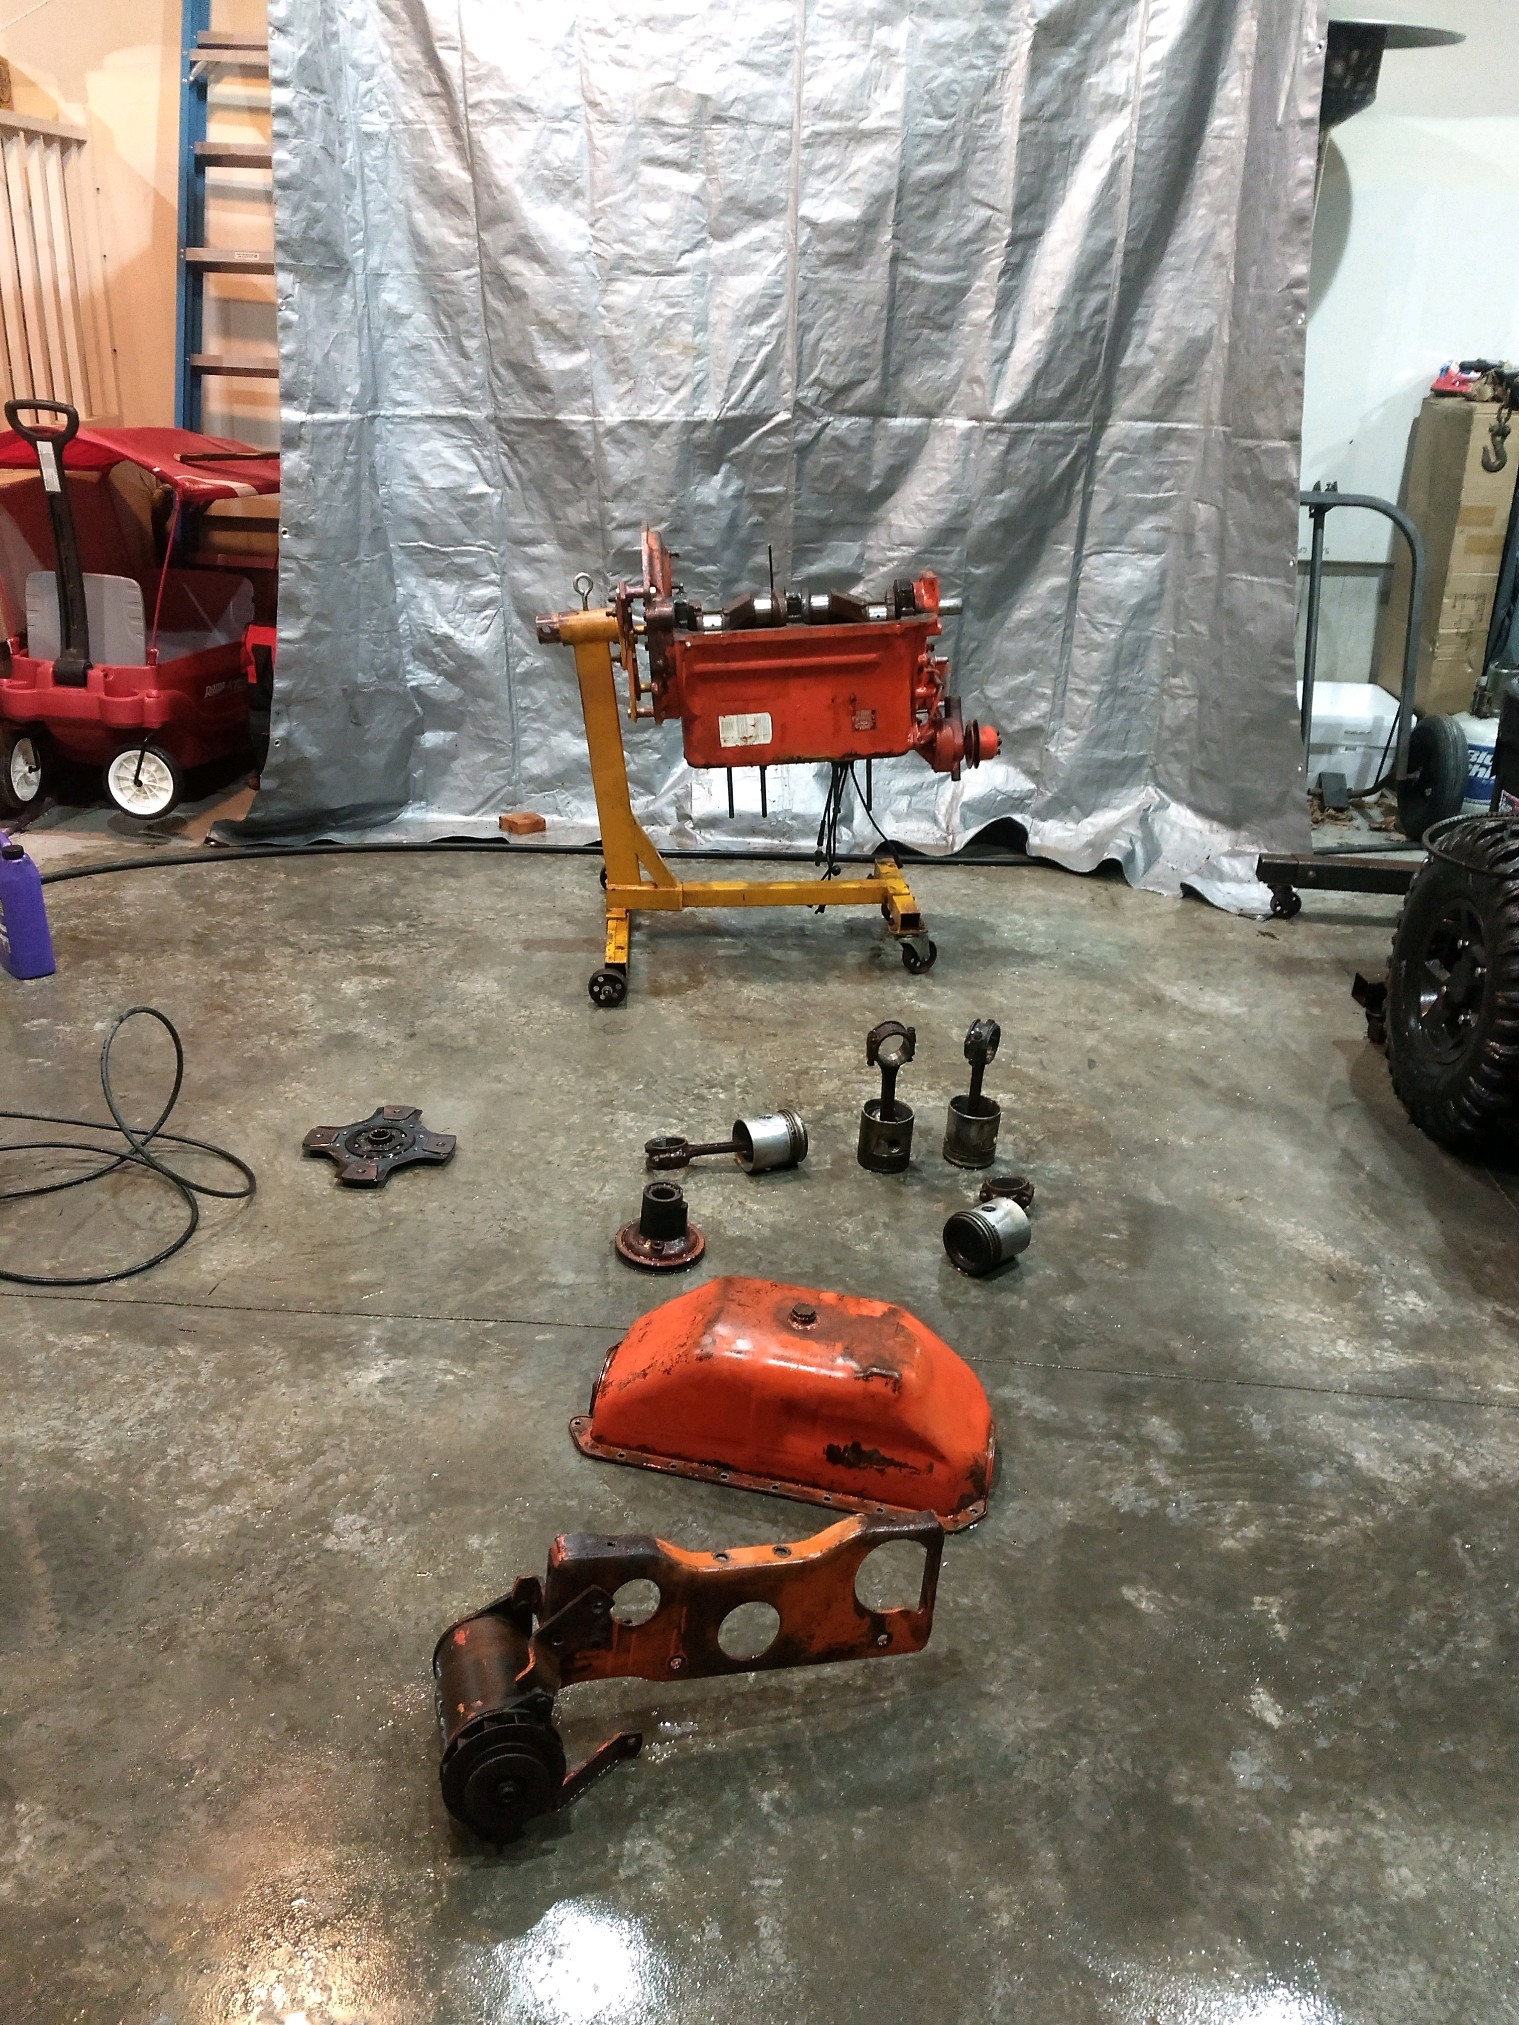 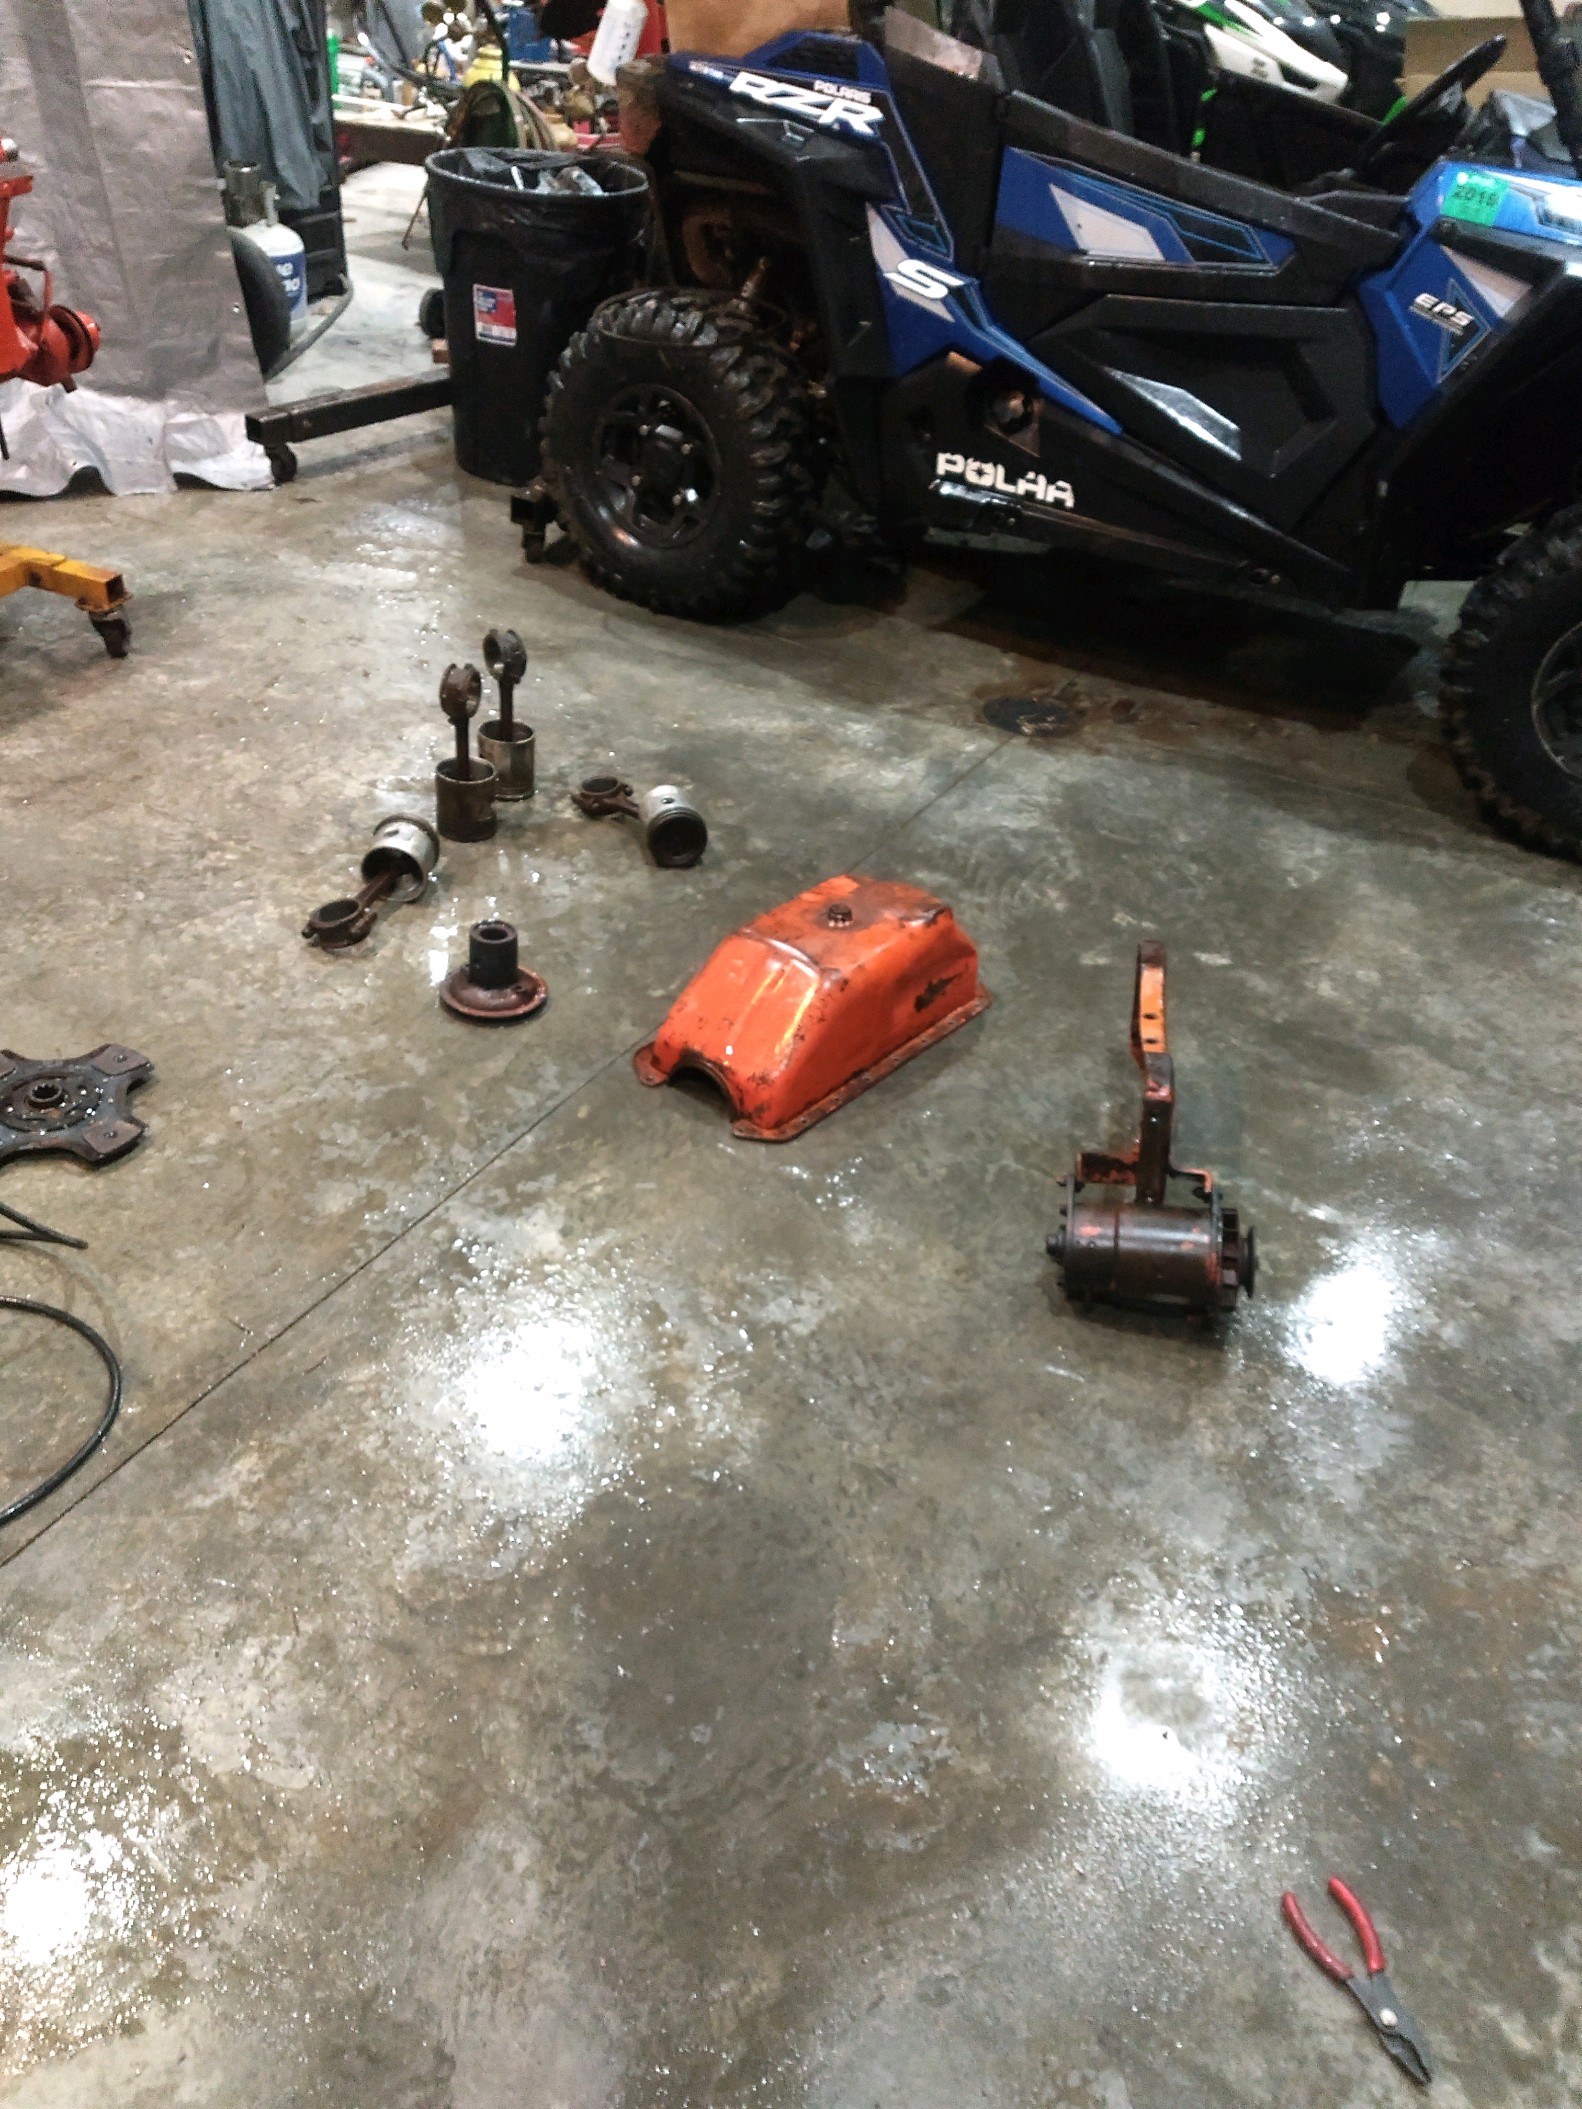 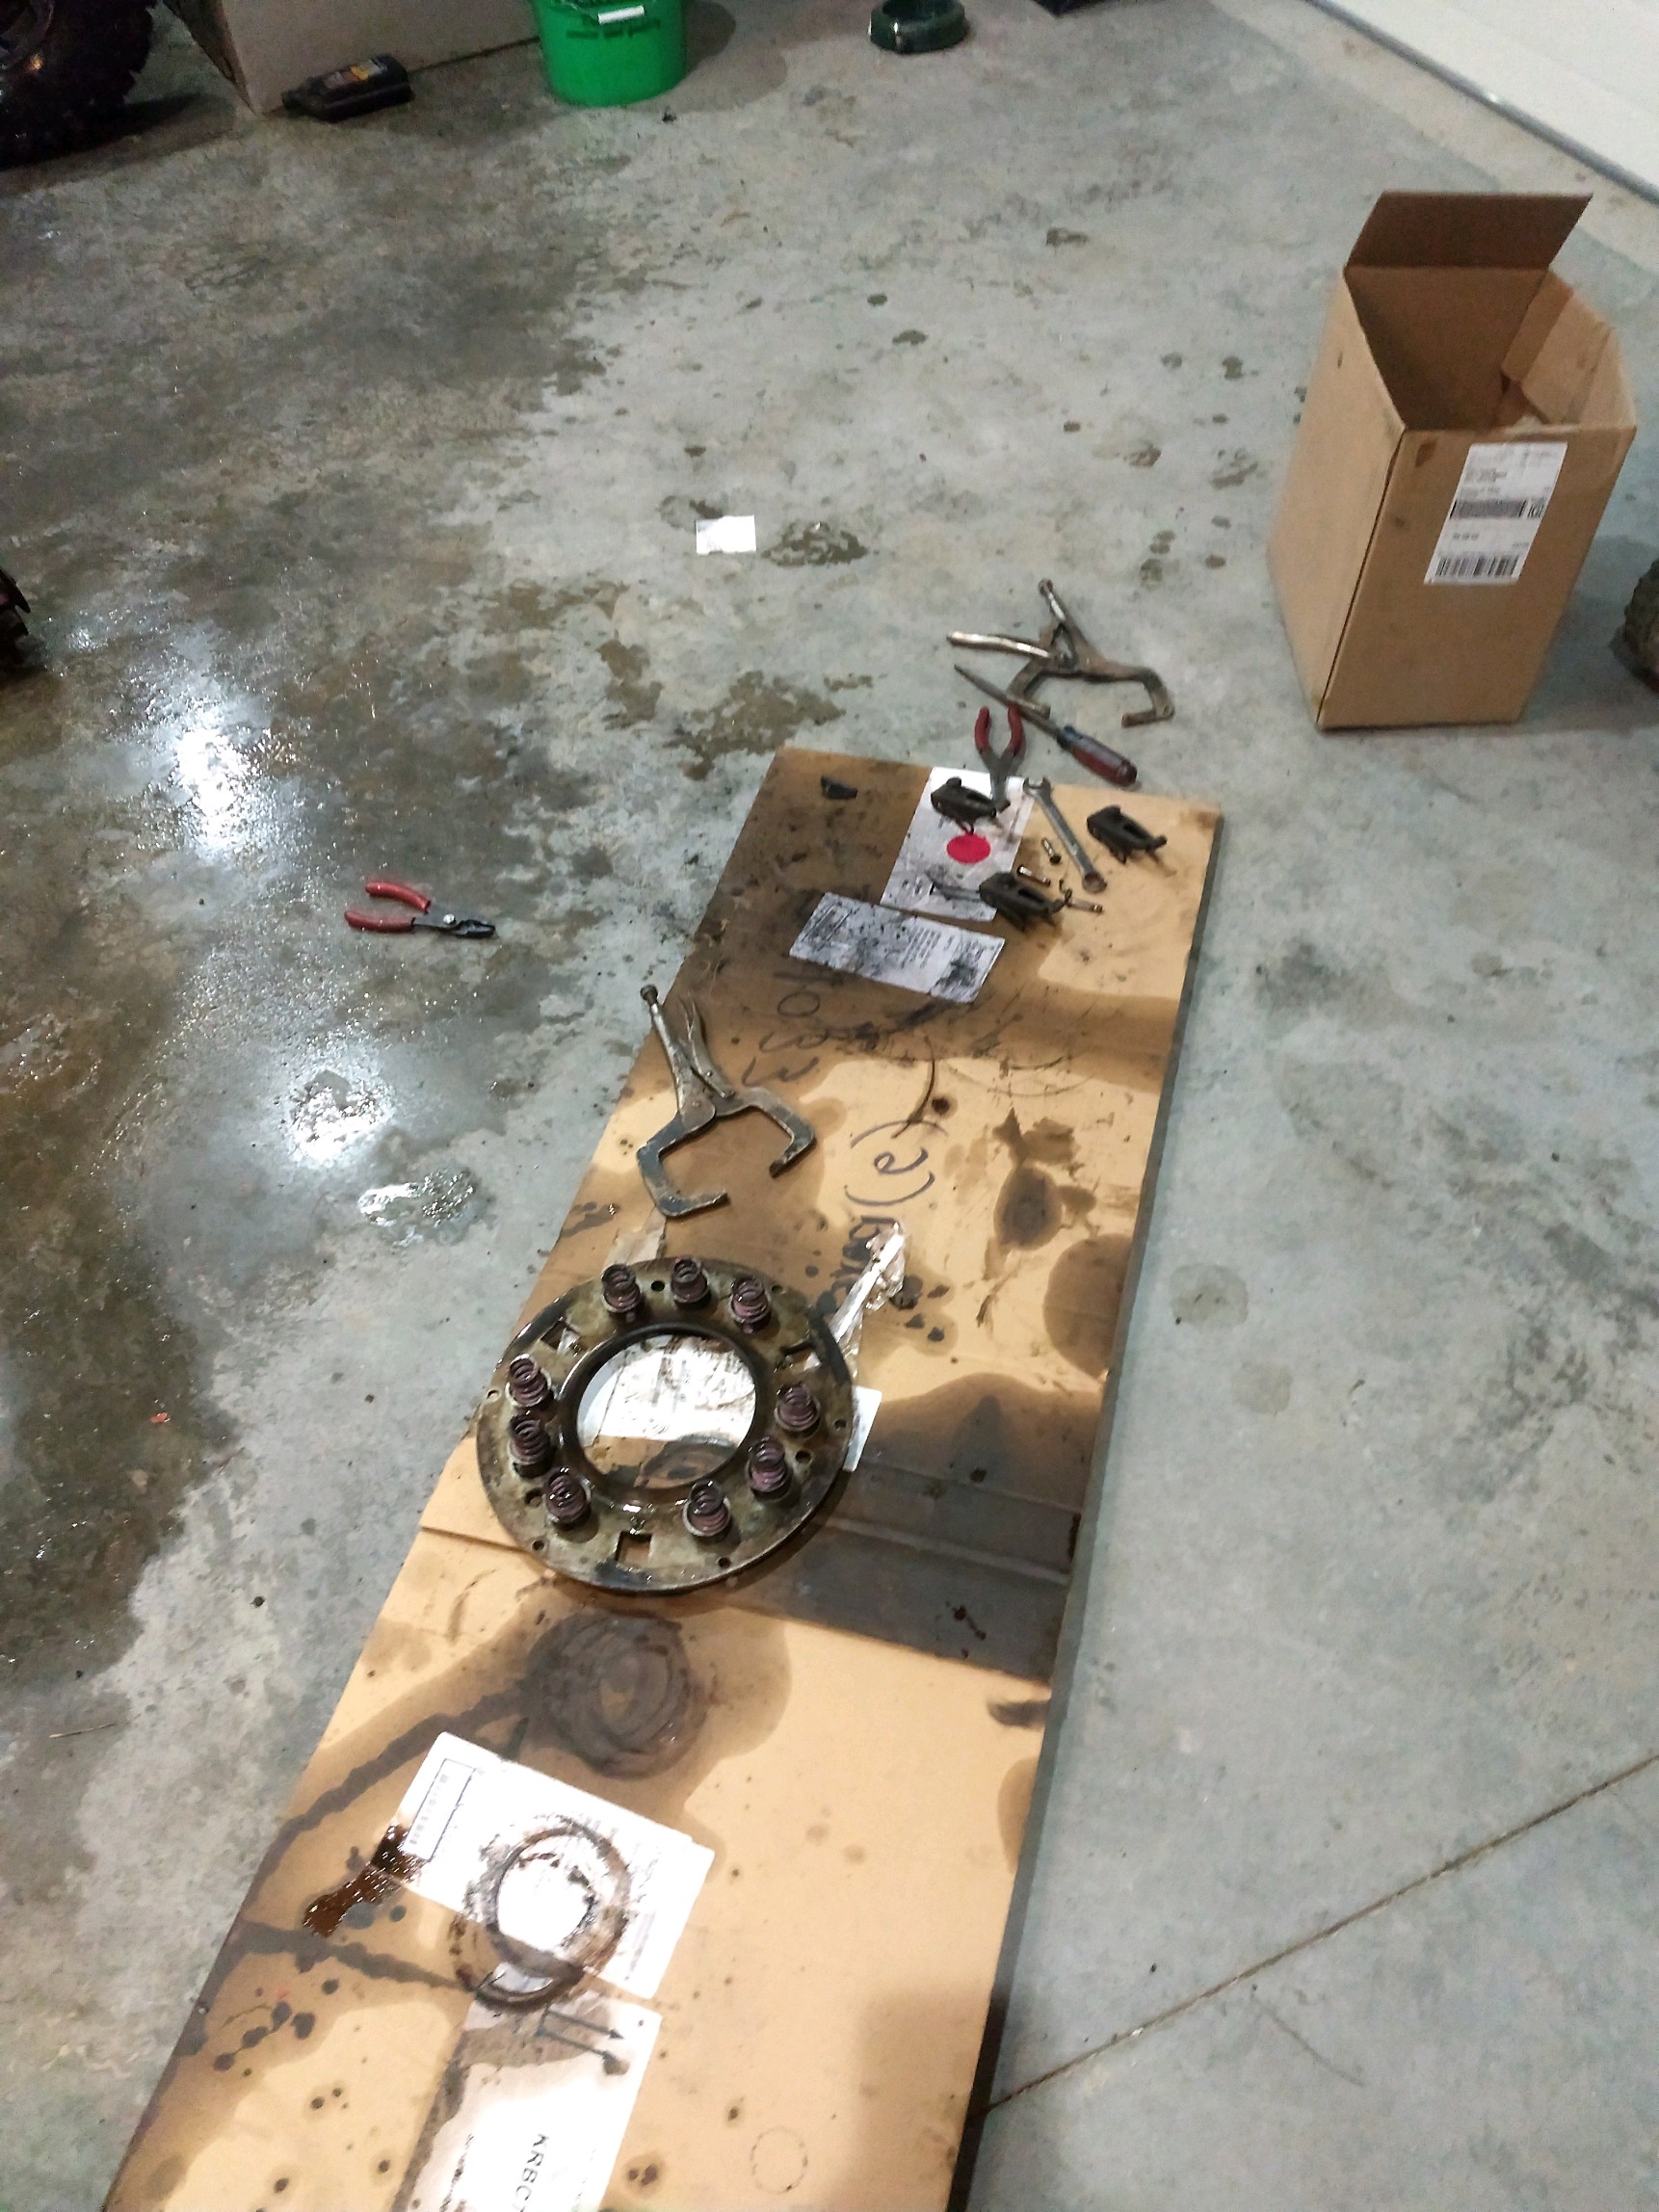
|
Posted By: bradley6874
Date Posted: 25 Apr 2019 at 2:39pm
|
Put couple bolts with flat washers in place of the head bolts to hold the sleeves down cuz if you do break one of them loose and you've moved the sleeve a little bit you'll be back in for a water leak nevermind I didn't see page 2 ------------- You can wash the dirt off the body but you can’t wash the farmer out of the heart and soul |
Posted By: Strokendiesel002
Date Posted: 25 Apr 2019 at 3:41pm
|
Hey Bradley thanks for taking the time to read and for the tip I really appreciate it! somebody down the line May read that and it will help save them from the potential heartache that you were trying to help save me from :) |
Posted By: Strokendiesel002
Date Posted: 29 Apr 2019 at 10:08am
|
Well between Friday and Sunday I got the new sleeves Pistons rebuilt head and 7 of the 8 pushrods installed. my uncle came over to help with prepping the crank is that it was his specialty for many years, well machining them was actually his specialty. Mama and the boys got home Saturday afternoon but Sunday afternoon we loaded up the almost completed engine and brought it back over to my uncle's which is where the tractor is. I'm hoping to finish it up on this coming Saturday! 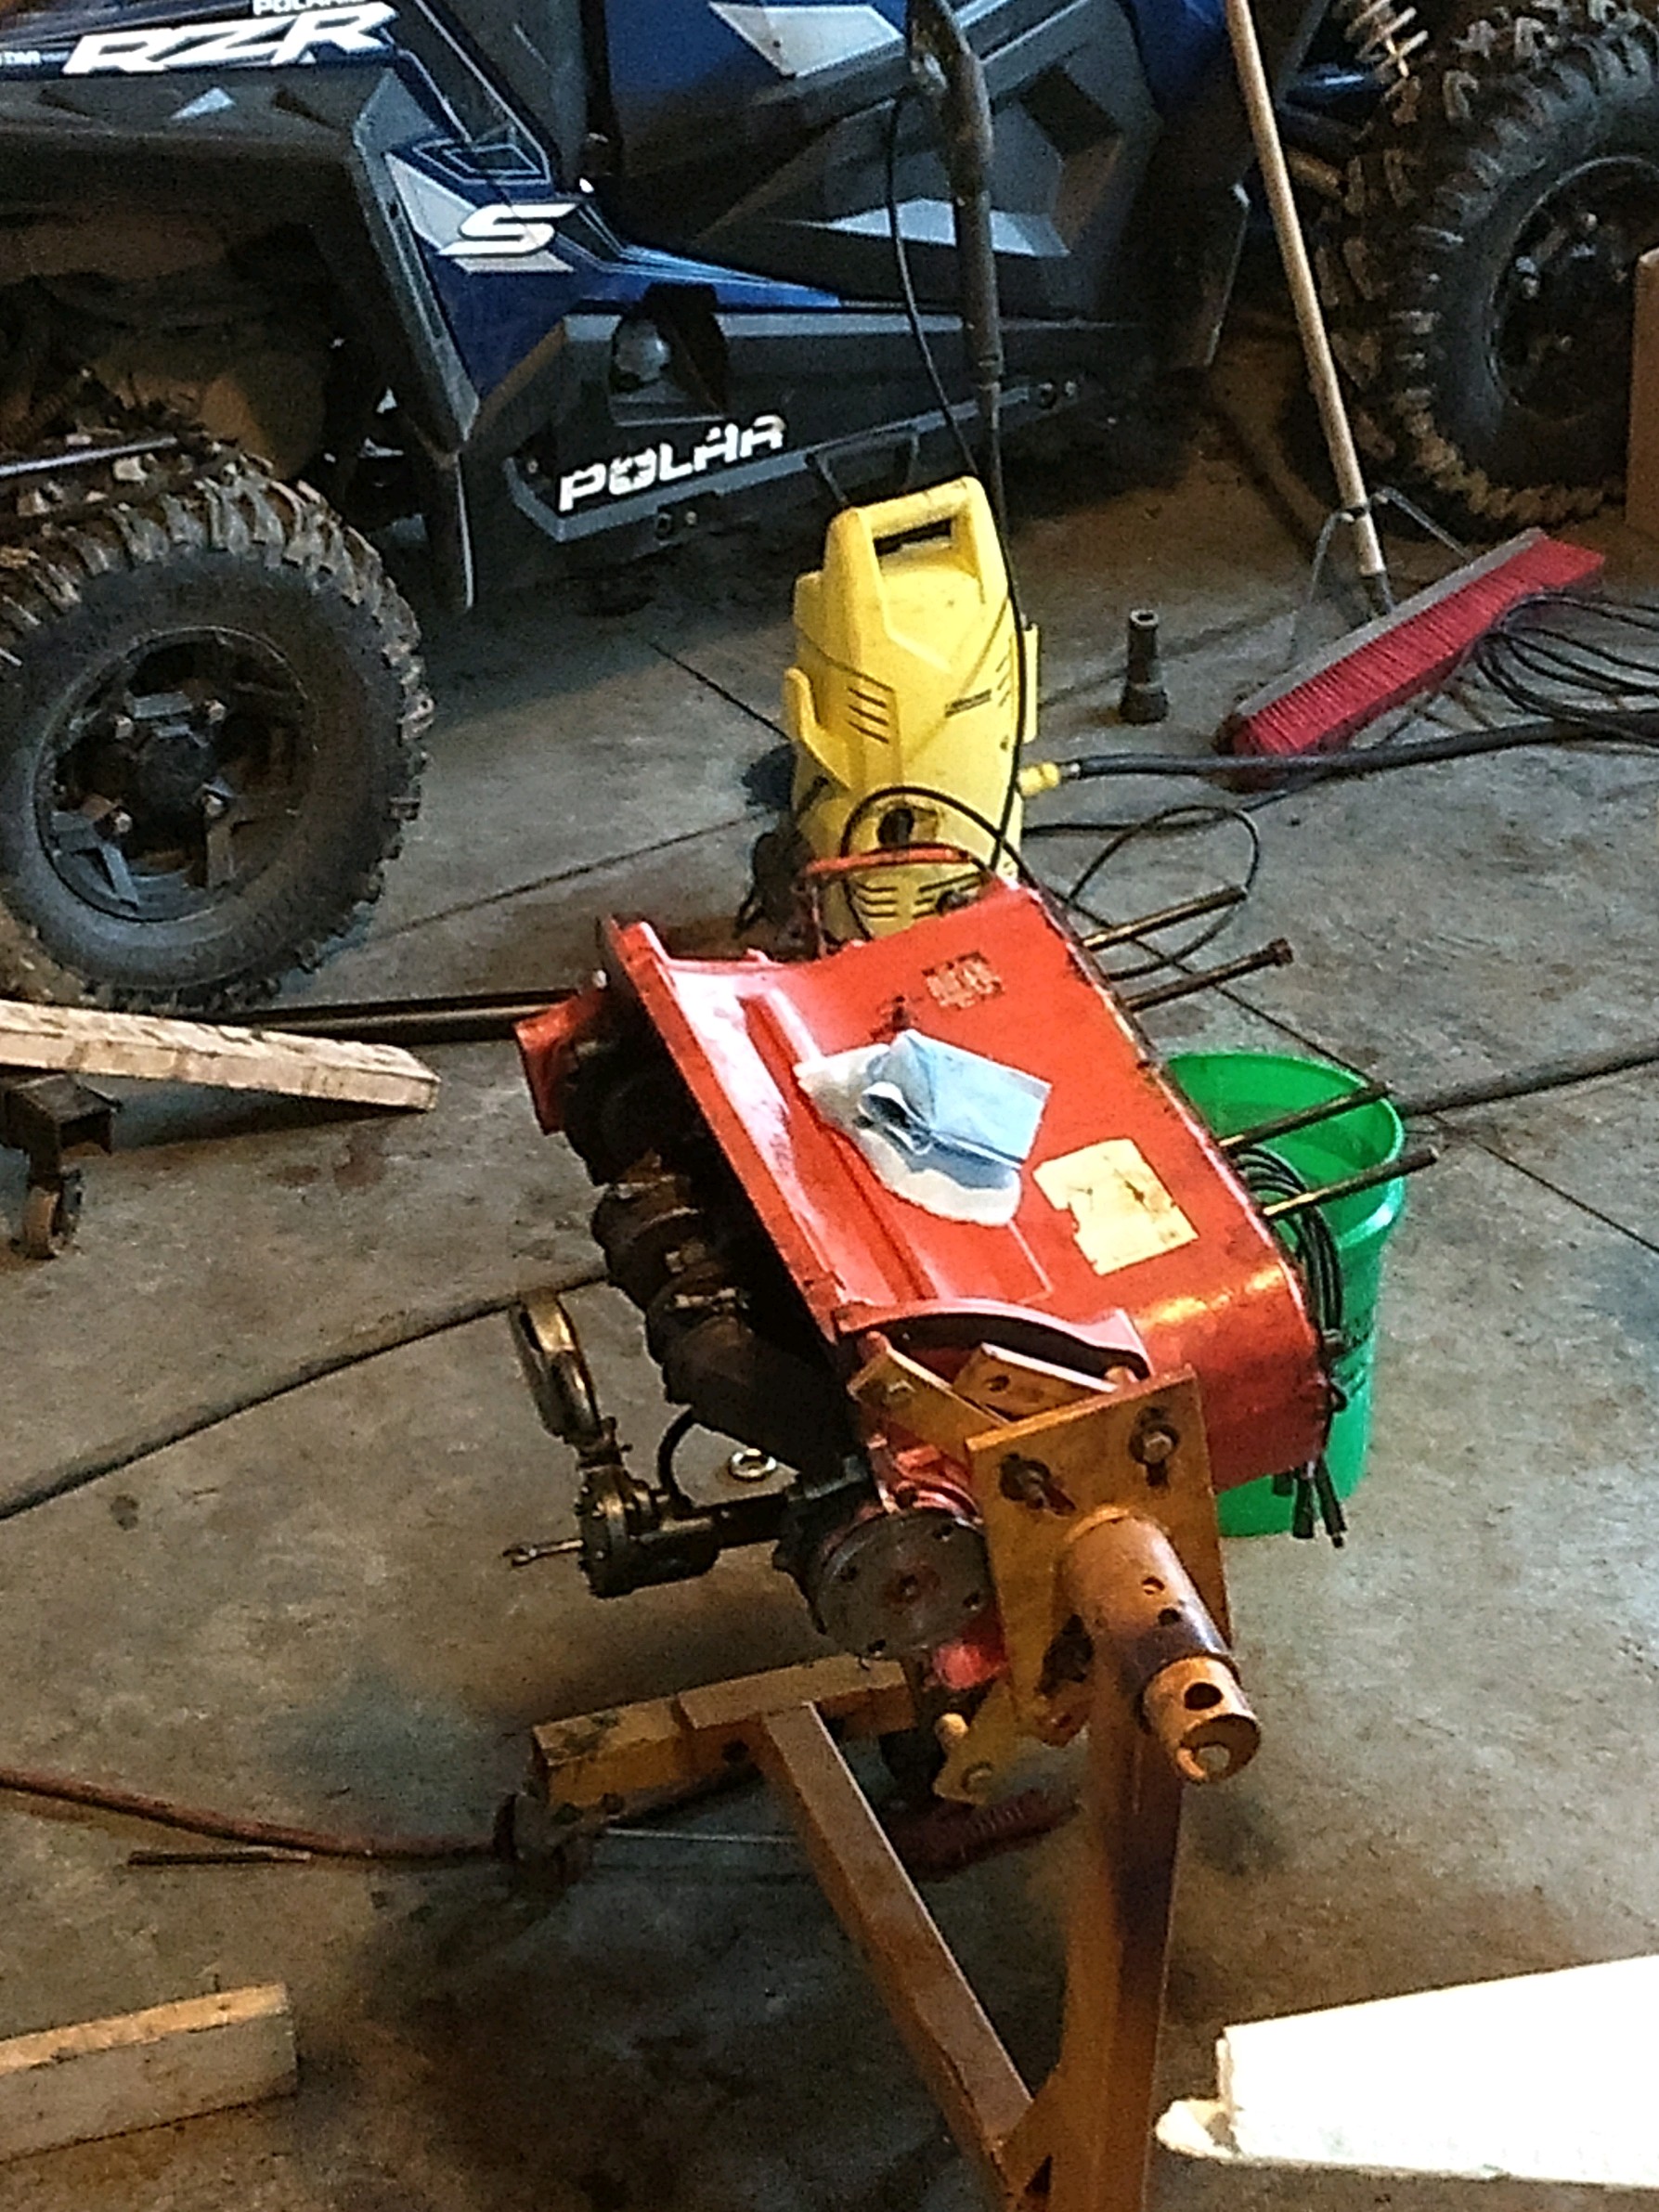 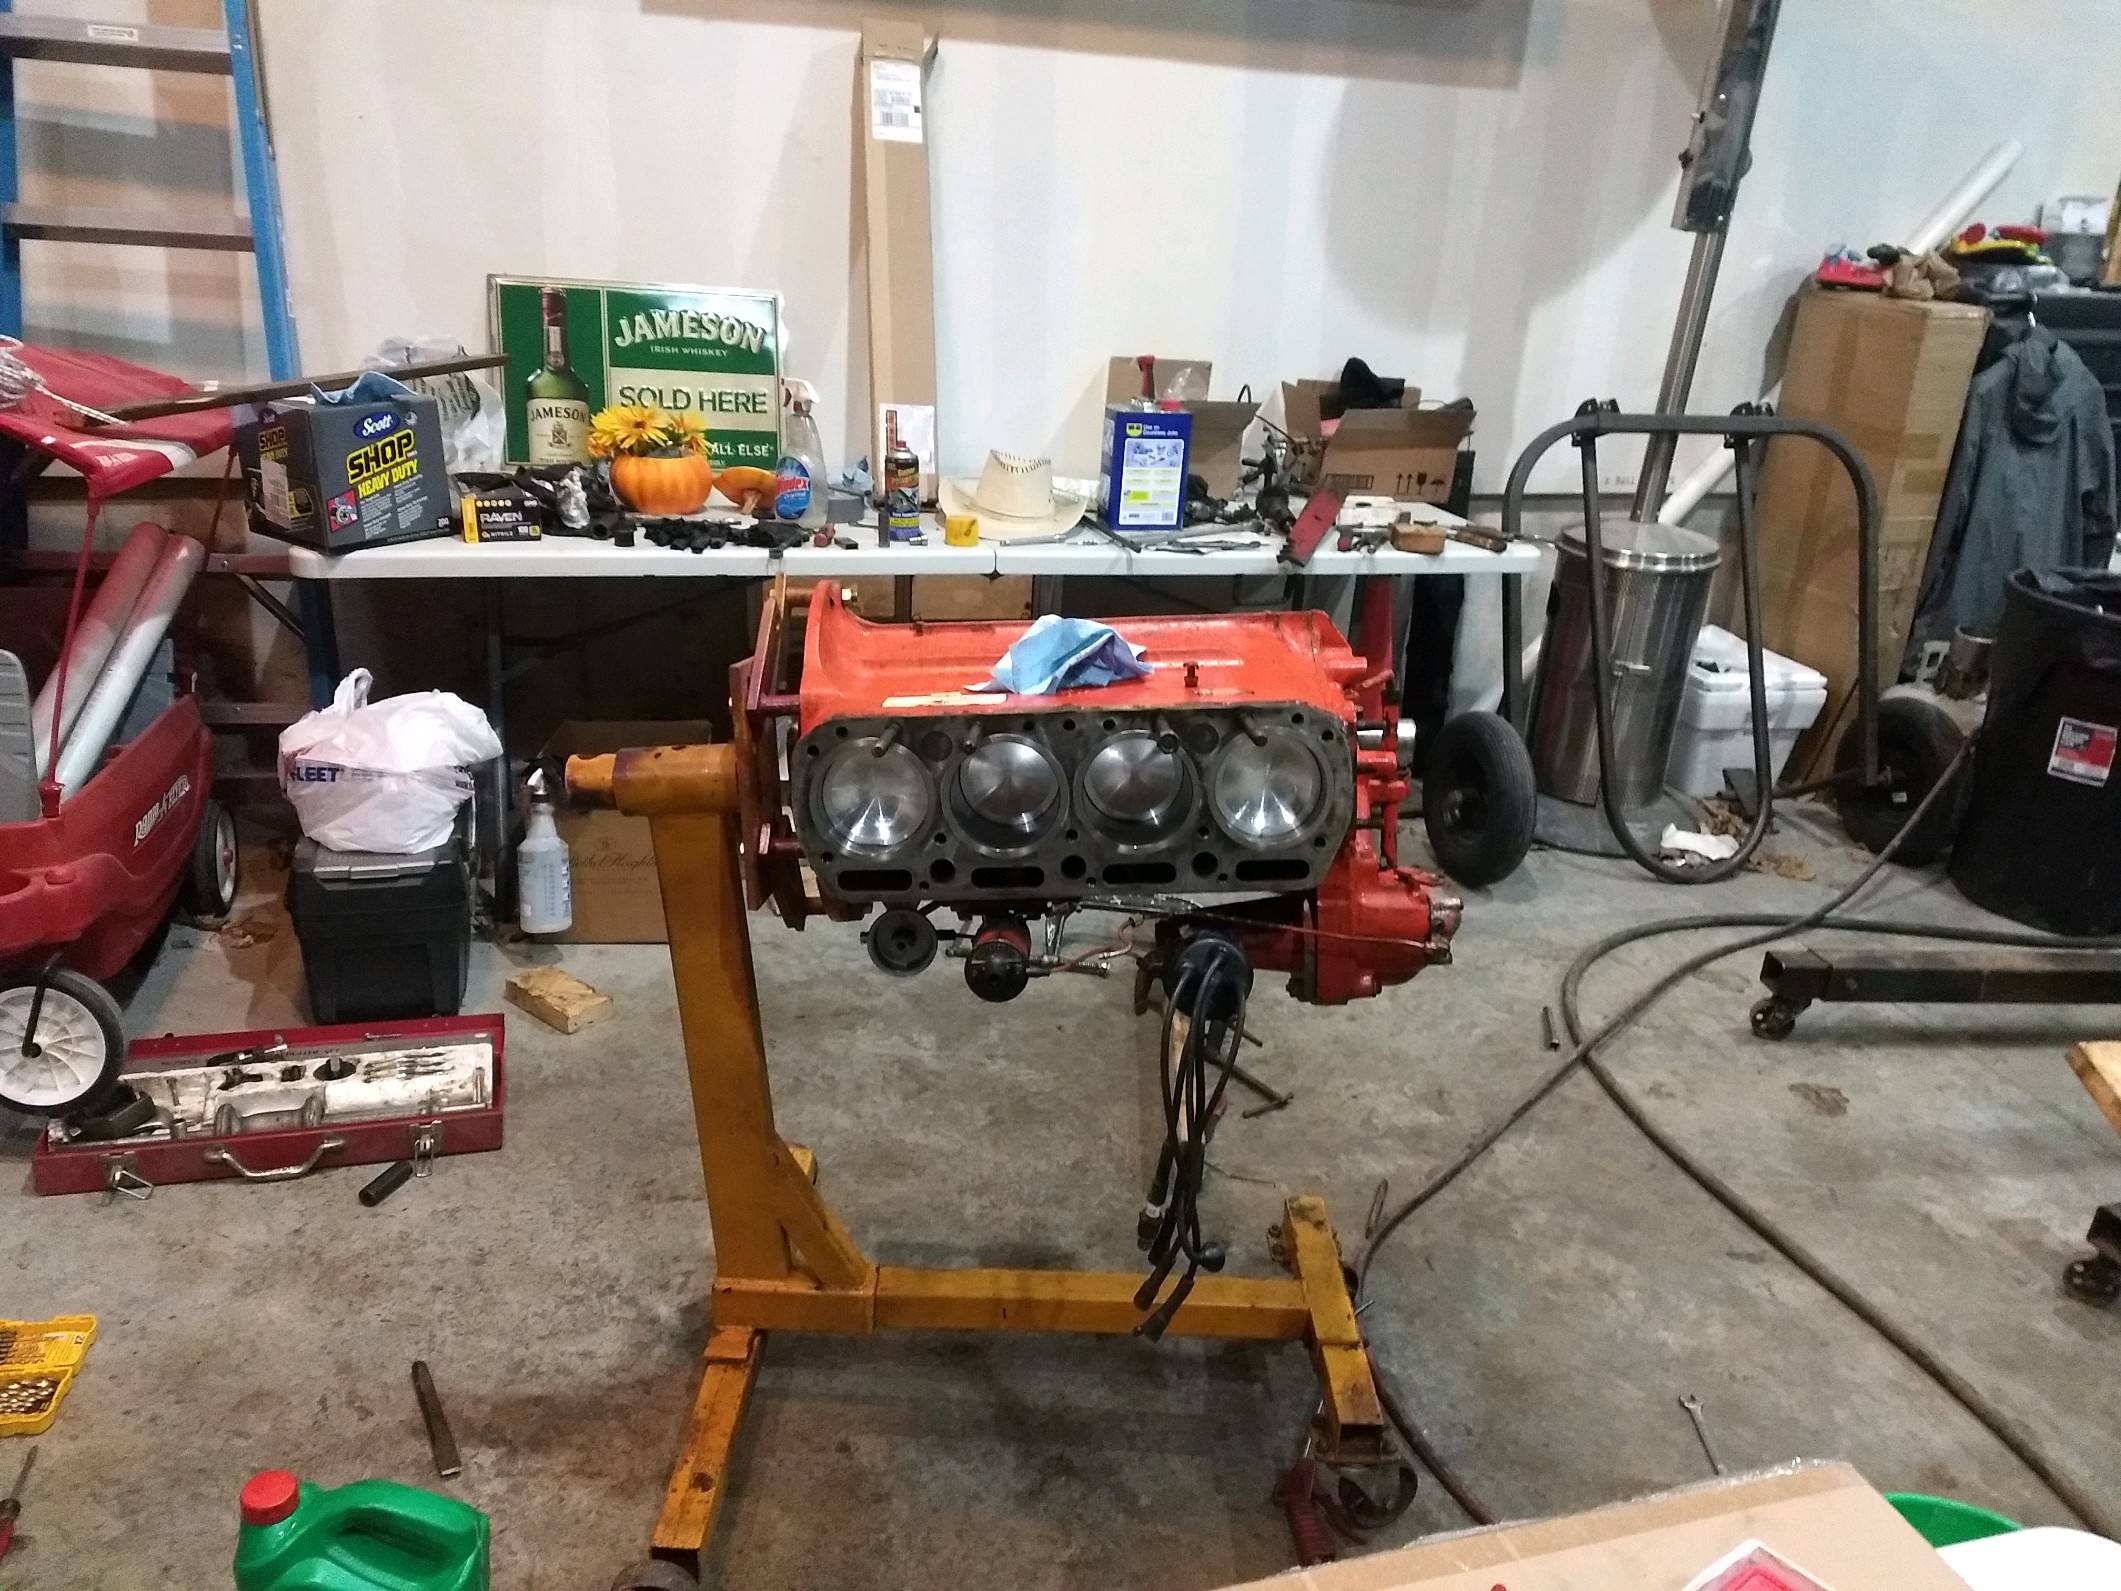 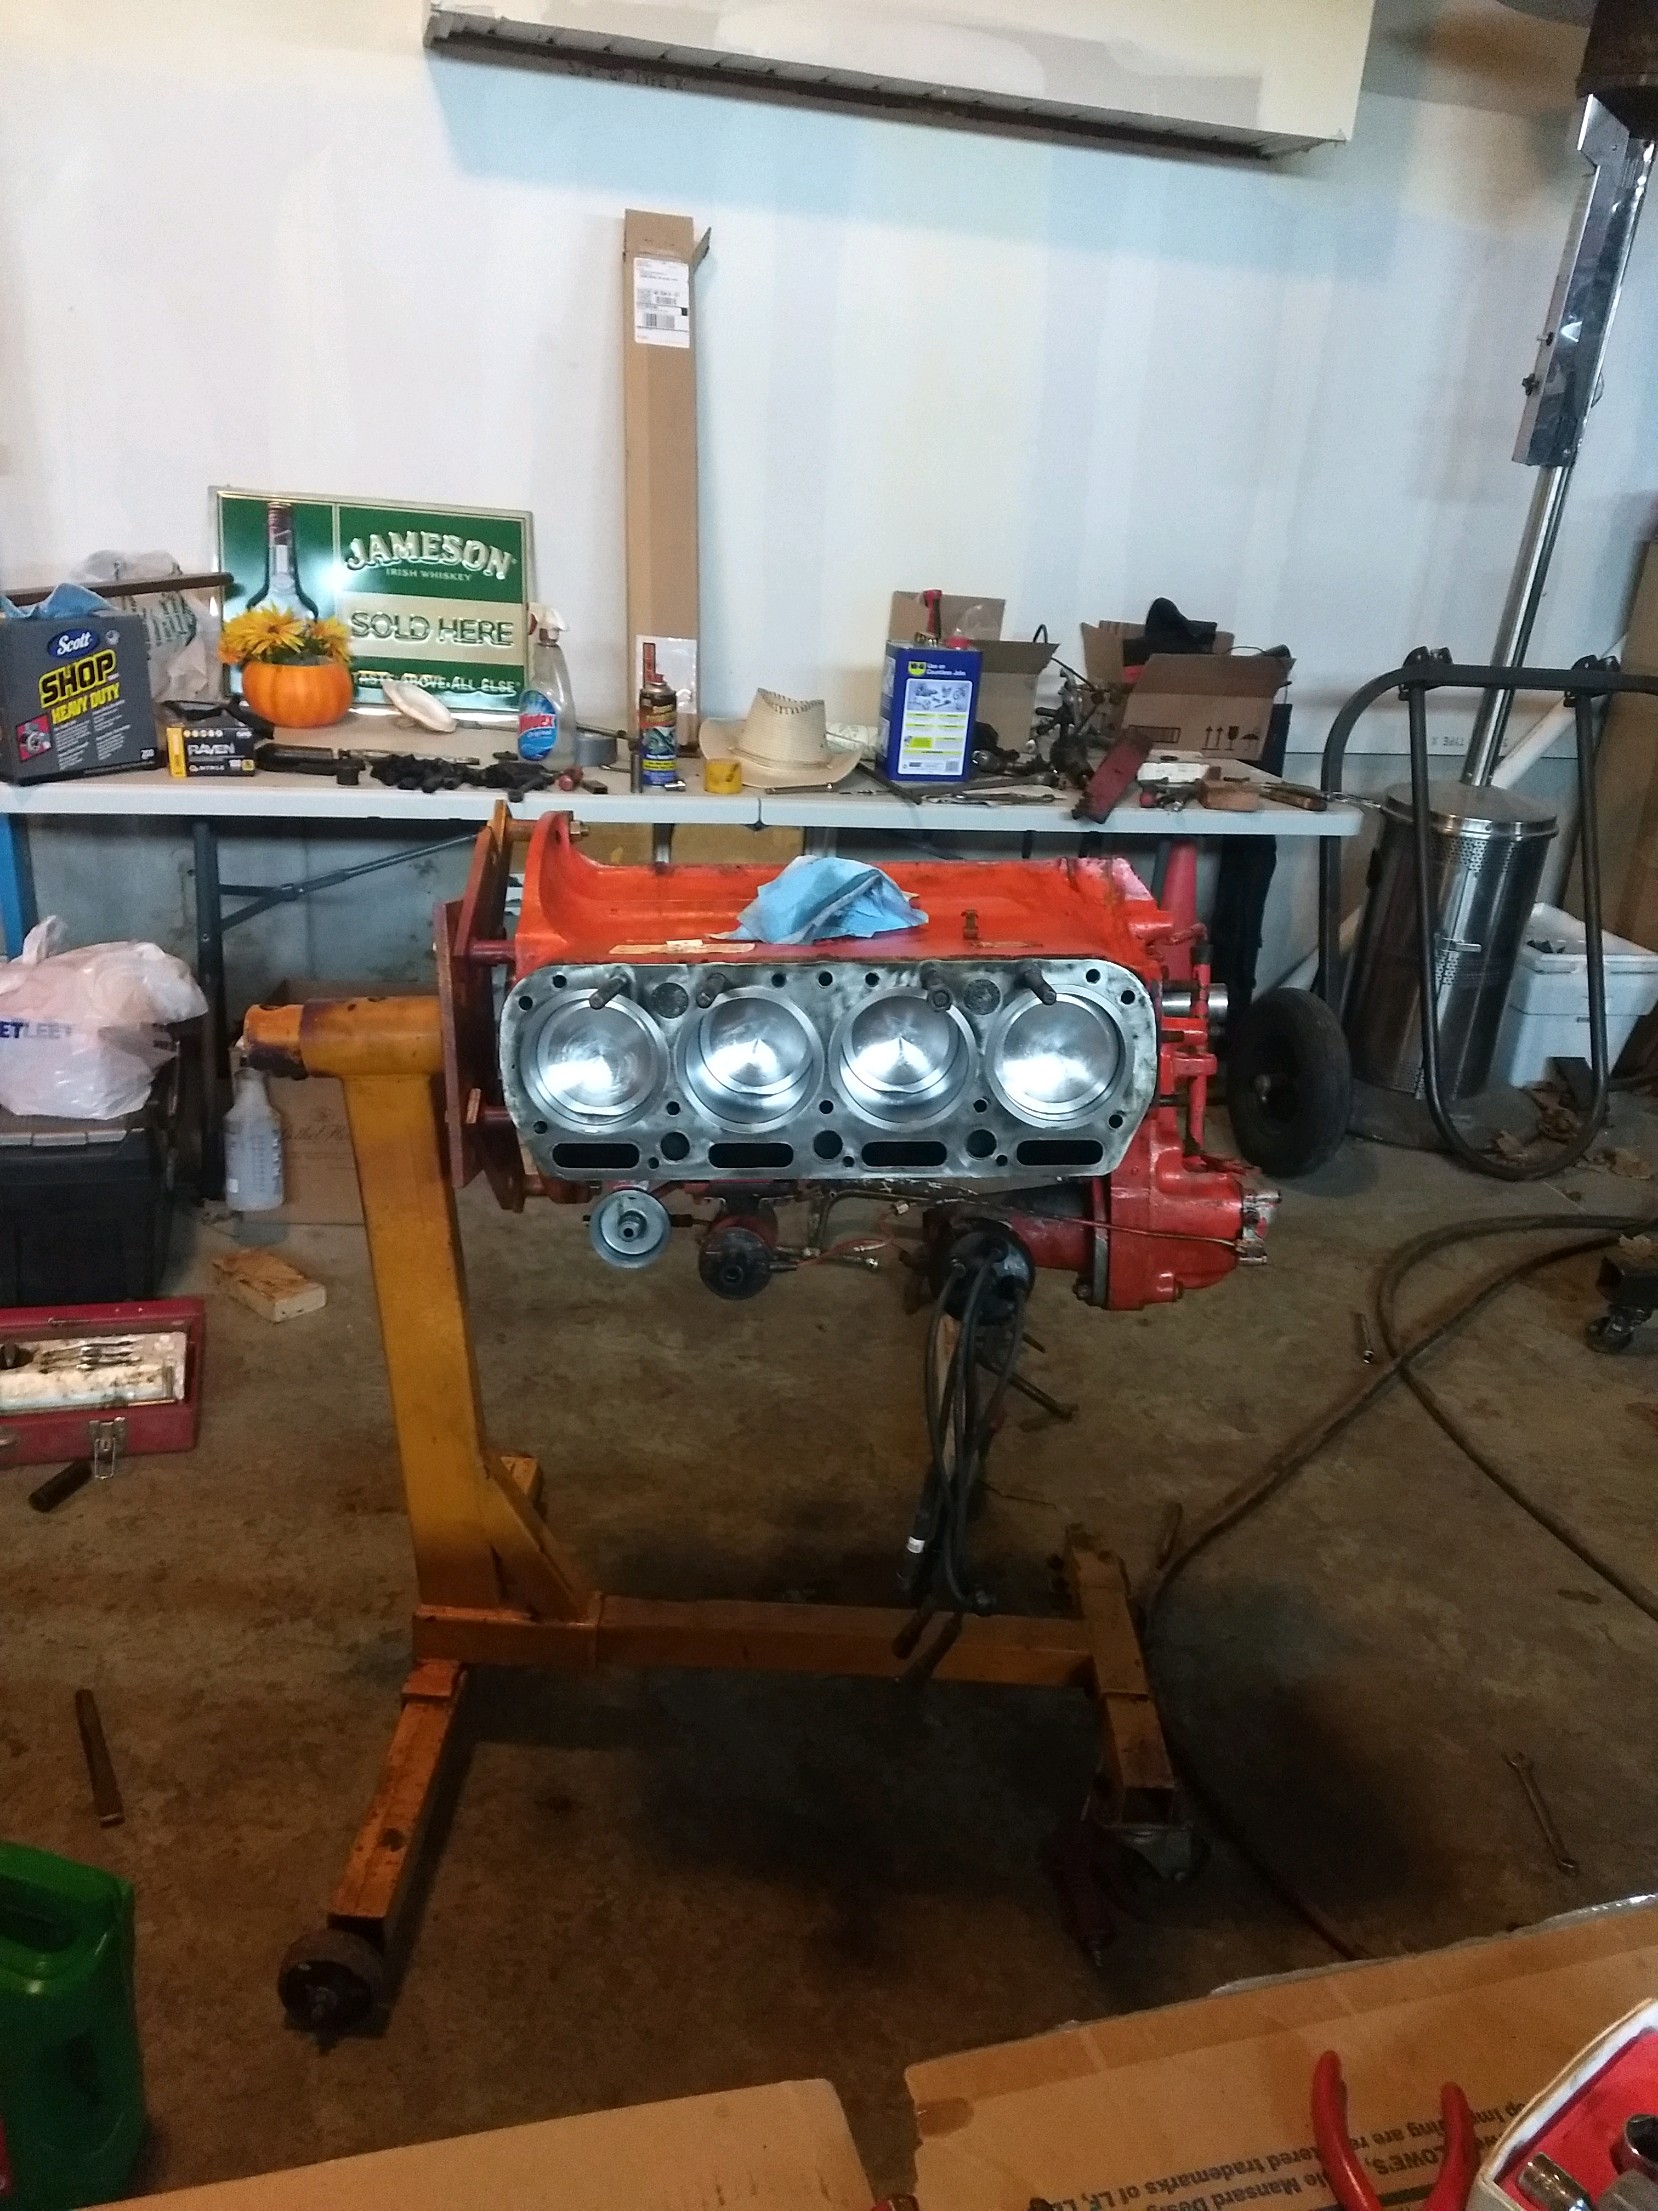
|
Posted By: Strokendiesel002
Date Posted: 02 May 2019 at 10:52pm
Carb is assembled with new gaskets, pressure plate is picked up, manifolds are cleaned about as good as it's gonna get without a blast cabinet. I ran my die grinder with a smaller forward facing brush in and out of every port and then let it sit for about 30 minutes in a 50/50 mix of muriatic acid and water that I drained out of the fuel tank after it's 3rd treatment. It's looking really good... Except for the 3 holes :( I'm nervous to use the liners, as I've read so many bad experiences thanks to all the fuel additives. May wind up attempting to weld it. Going to use air craft stripper to clean the outside to bare metal then give it a full acid bath, rather than just trying to fill it. Unless anyone has a solid tank they're willing to part with or a better idea :) 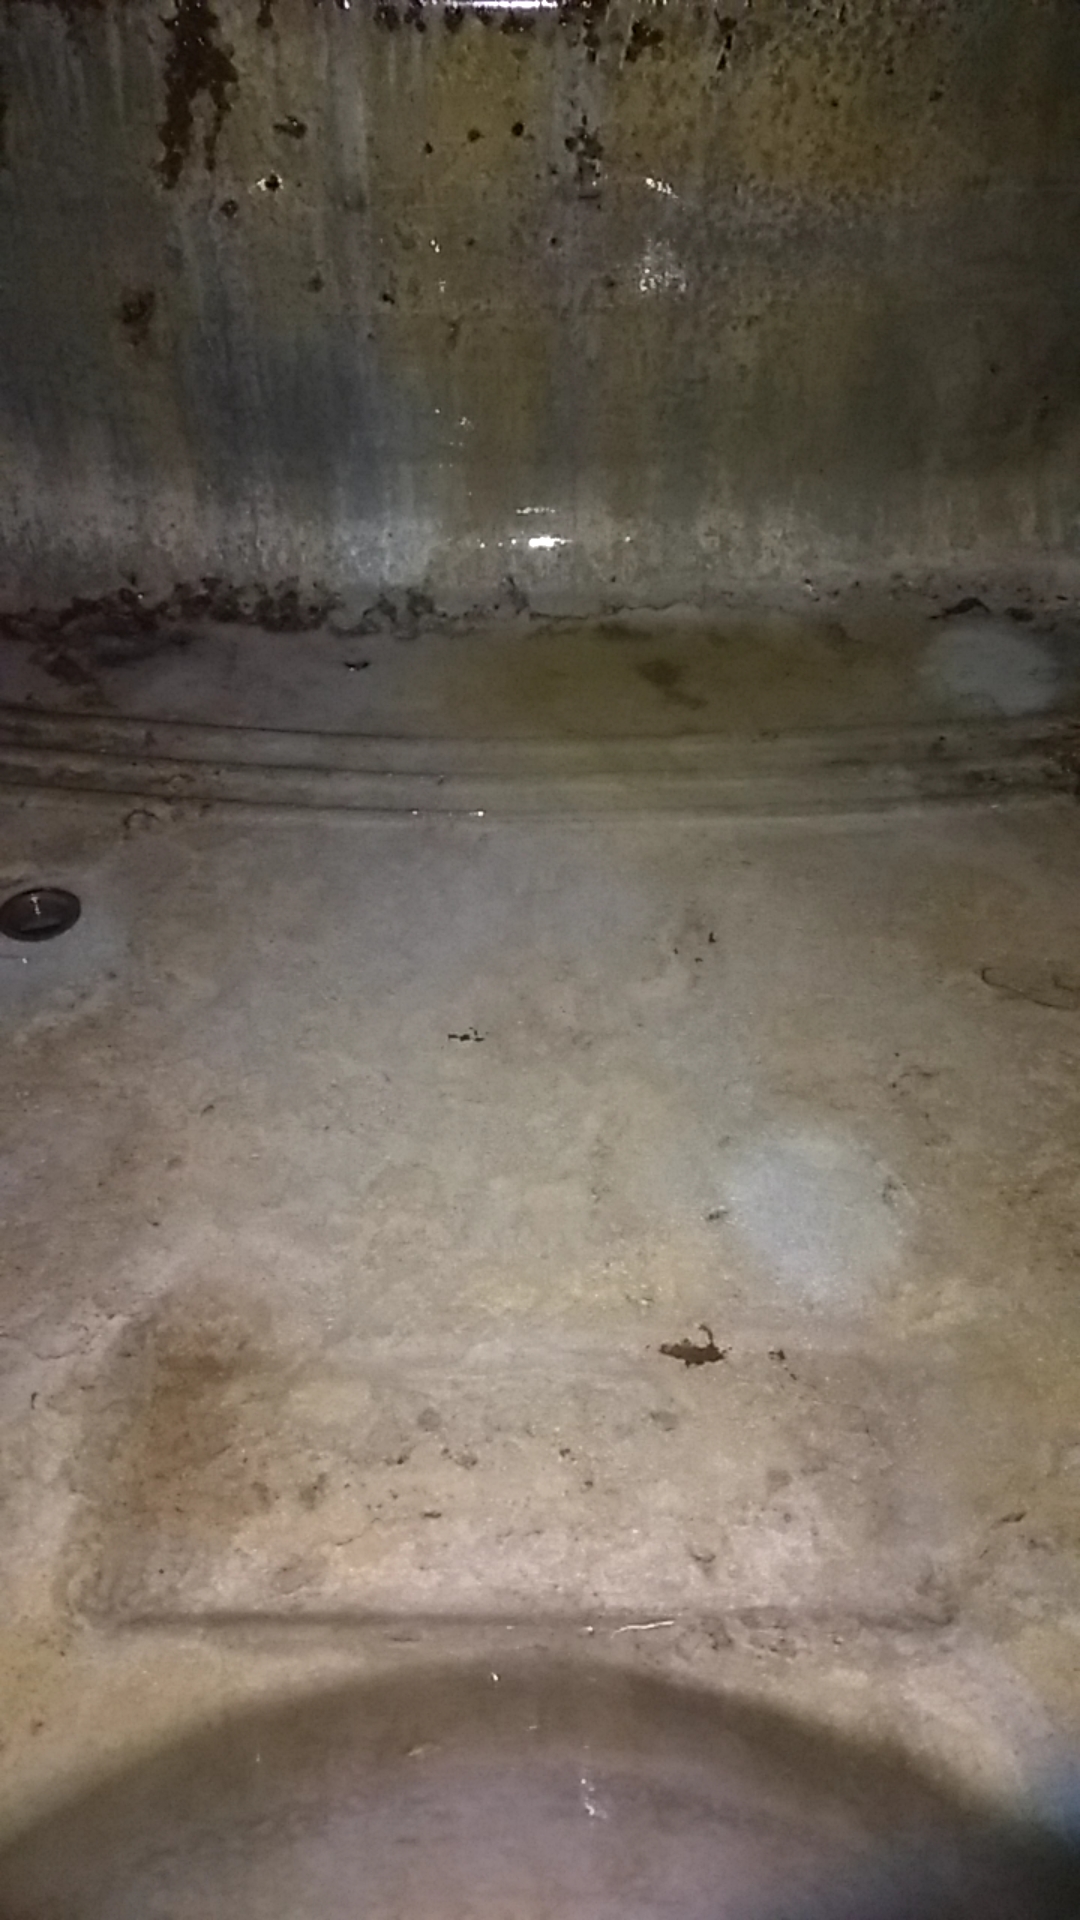
|
Posted By: Strokendiesel002
Date Posted: 01 Aug 2019 at 3:18pm
|
She's Alive! I wound up welding the tank after a sorry attempt to solder it. Took about 3 hours chasing holes. Not the prettiest work I've ever done, but it's no leaking! I actually put the engine back in on May 5th, and went back a week or two later to finish it, but she wouldn't start. Summer came in full swing at that point, and I just let it be. I'd been theorizing over what was wrong and came to the realization that I never truly clocked the rotor. After reading the manual and many threads, I went back out and within 20 minutes she was alive! I set the radiator in place, filled with water and put on the 3 good hose clamps I had (need 1 new one). I was planning on changing all the hydraulic fluid out before driving it, but I couldn't help myself. I had to know if it would even remotely operate, and it actually did pretty good! I wasn't quite aggressive enough with the P.D. and thought it was slipping out of "hi" and "low" when I pushed a little further and she snapped into place! So I then pulled a little further where she again snapped into low! What an awesome feeling! I do need to figure out the clutch spring- there wasn't one so I ordered one up. There were 2 washers and a cotter key on the shaft. I am assuming that I need to order a special piece that goes to the housing. Will check parts diagram, but suggestions welcome! https://youtu.be/eApCezdn4i4" rel="nofollow - first start! https://youtu.be/l-icXFHpoKs" rel="nofollow - first drive! 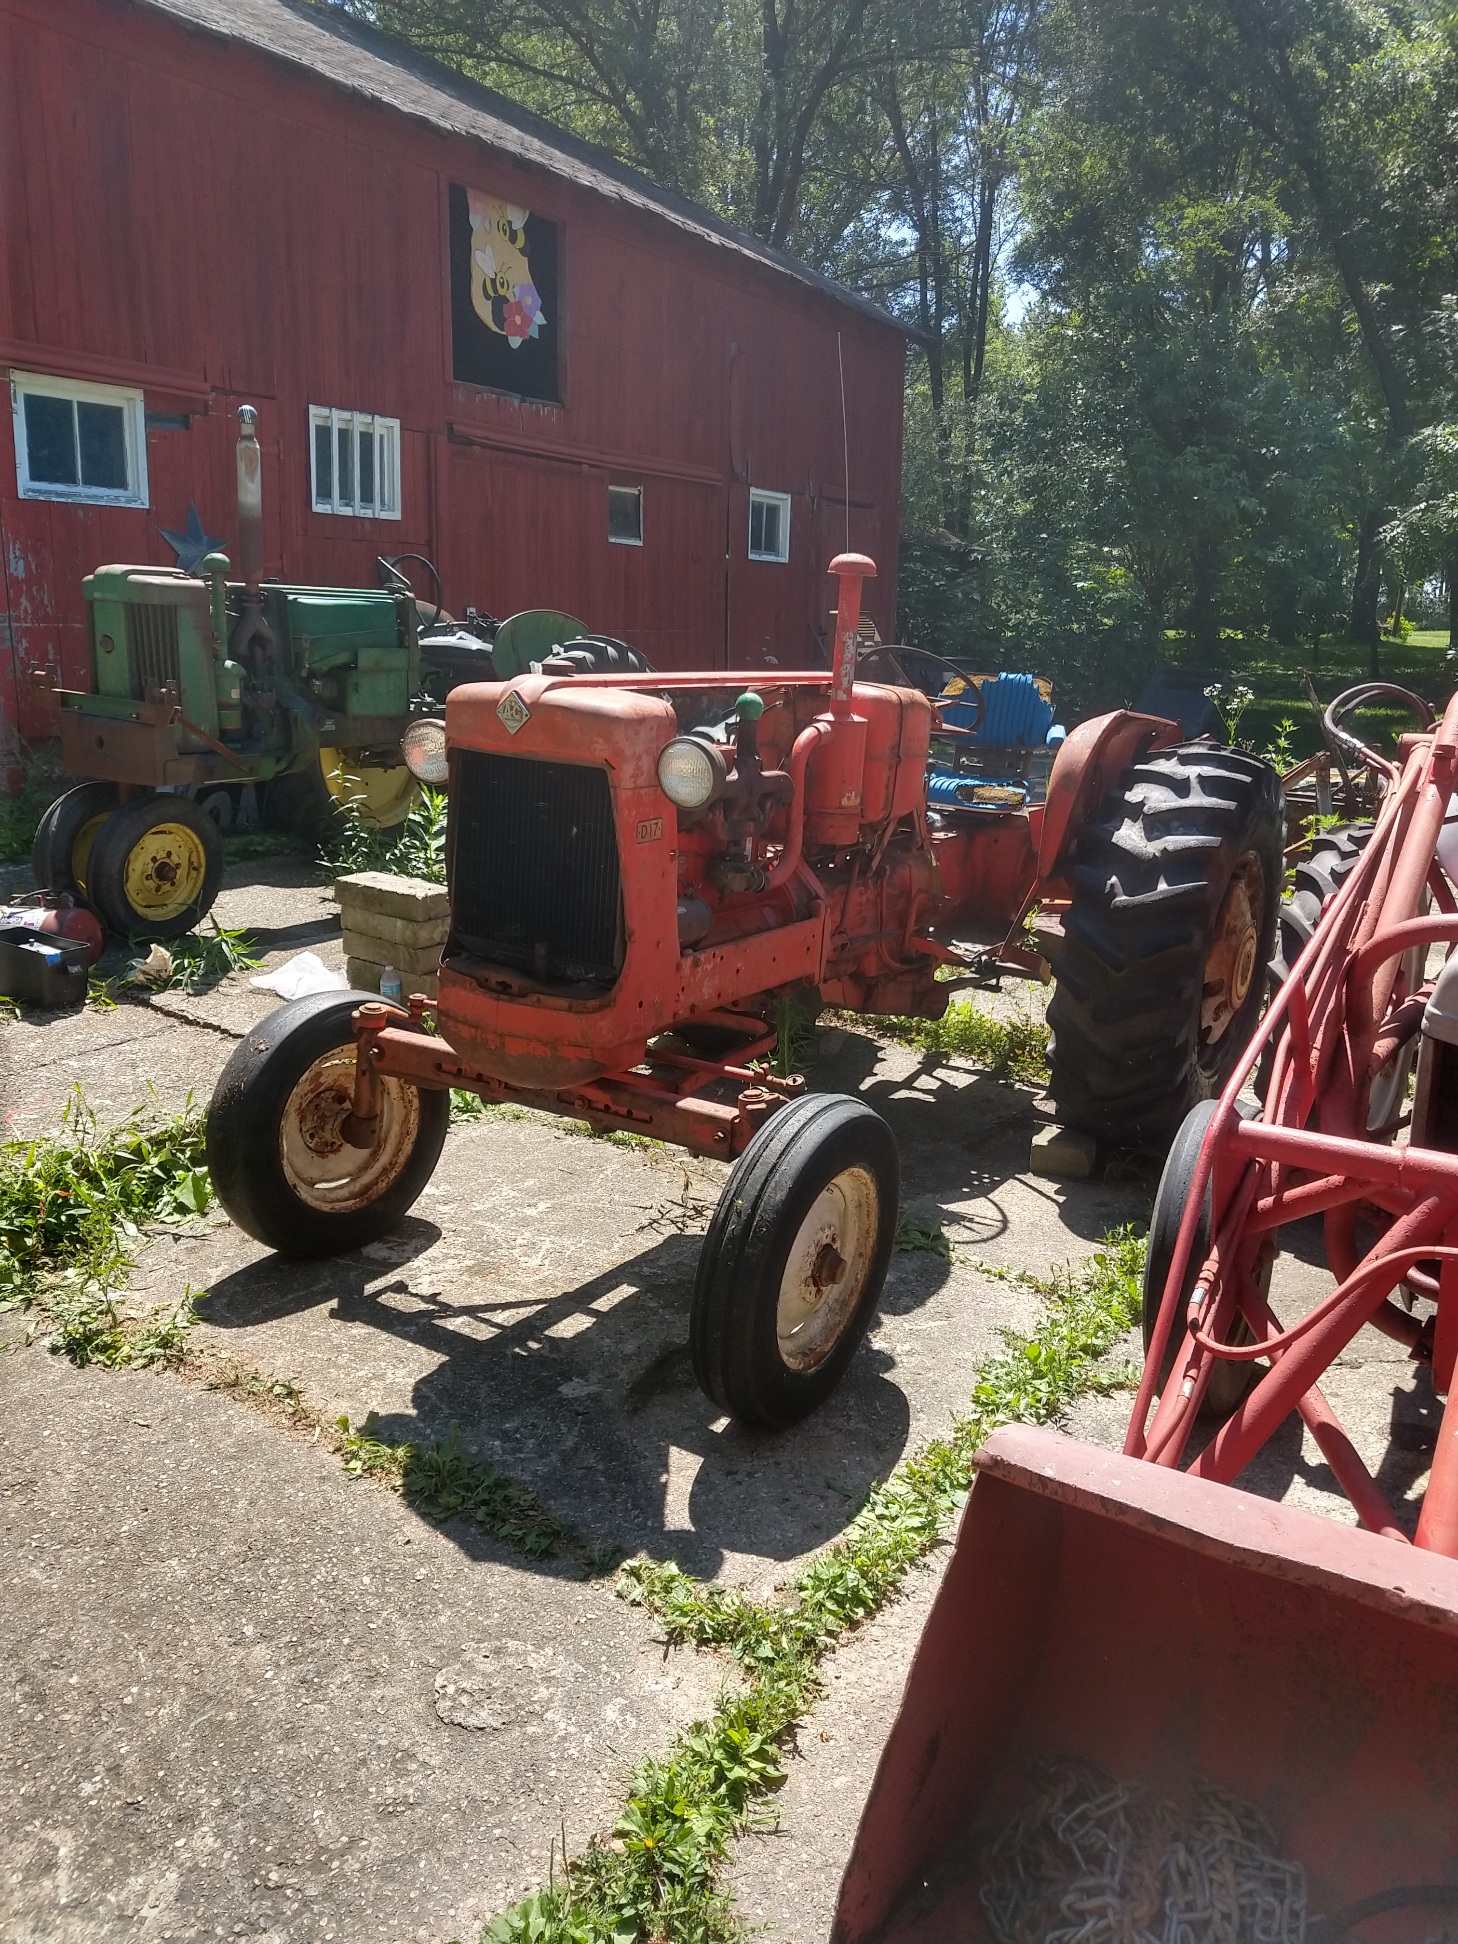 |
Posted By: Strokendiesel002
Date Posted: 01 Aug 2019 at 3:31pm
Here's what has me on the struggle bus regarding the clutch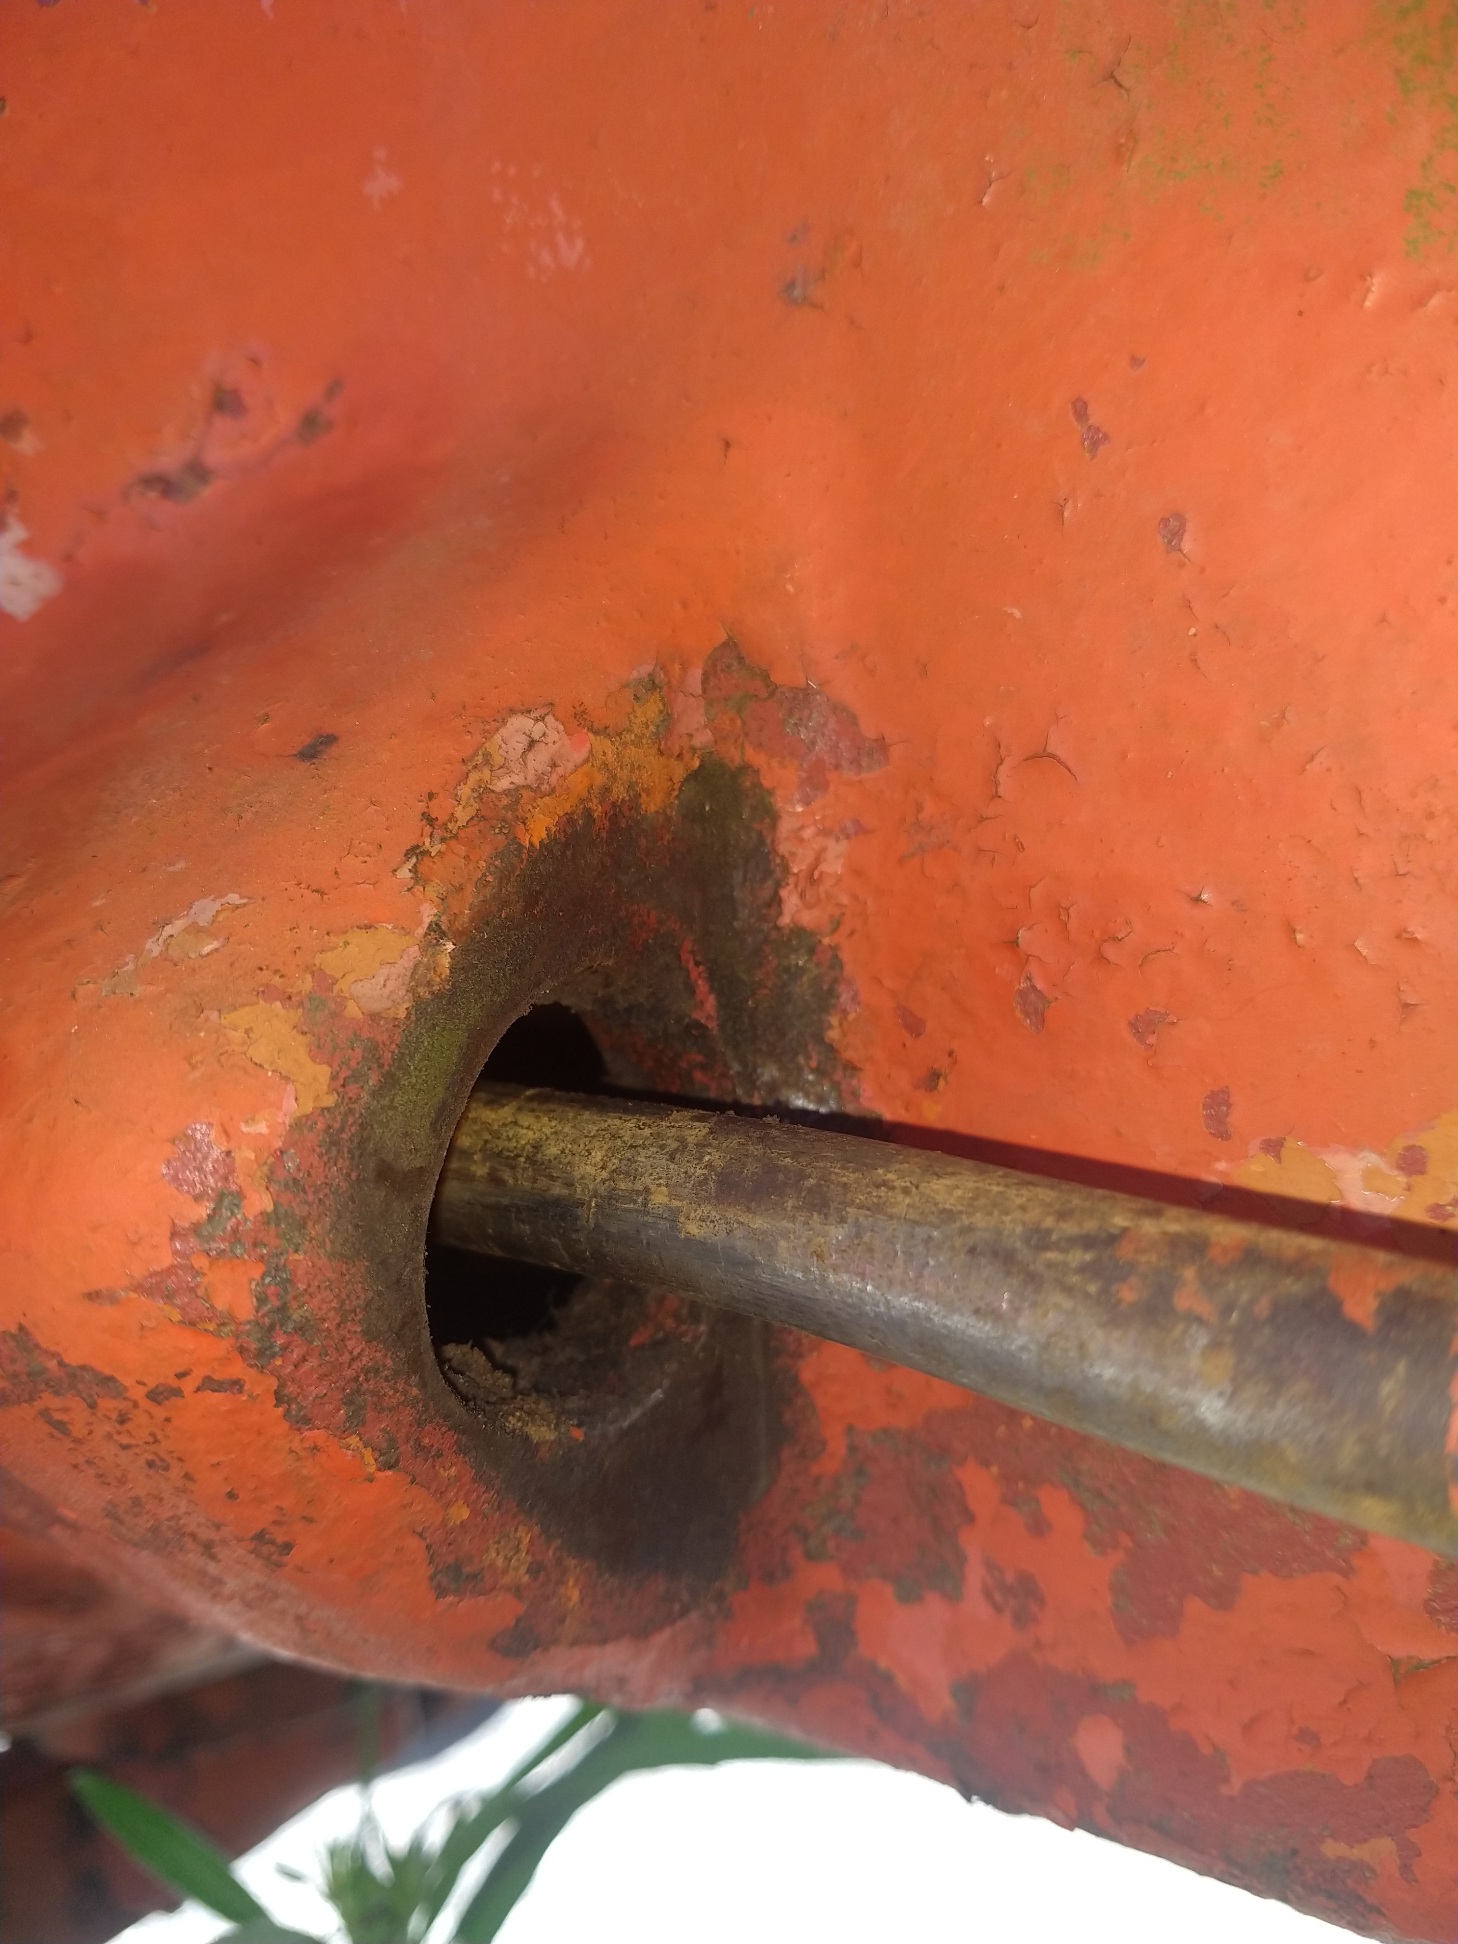 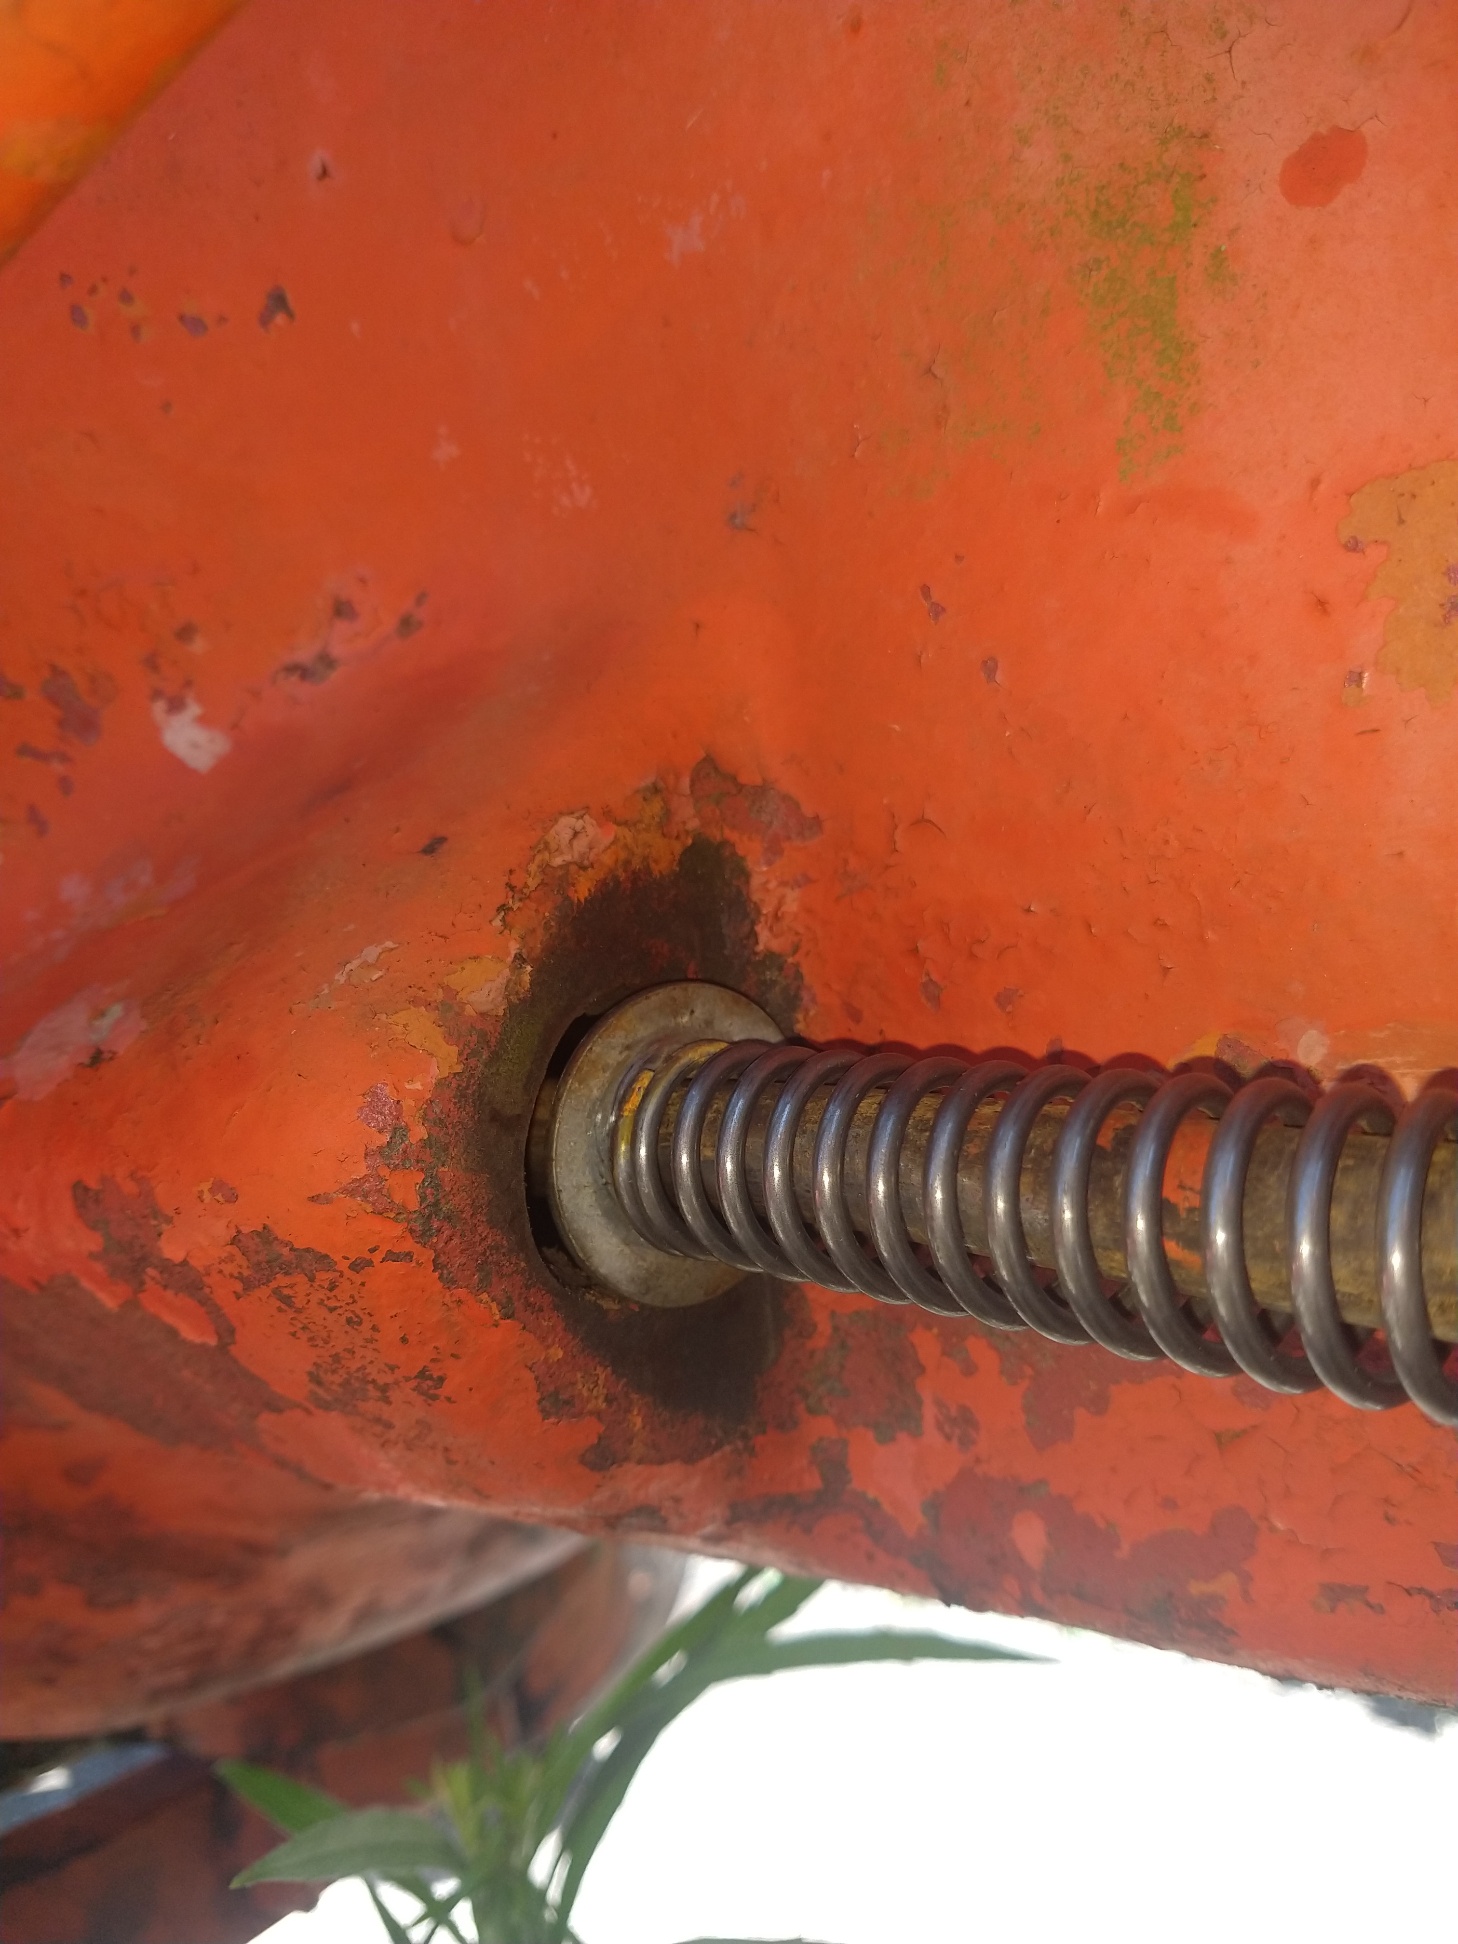 I unthreaded the rod, pulled off the big washer, removed the cotter key and slide the small orange washer up the shaft. Slid on the spring, then big washer and threaded the shaft back into the fork. Not fun, but whatever. Go to compress the spring and install the washer to find that the spring is nearly totally compressed and the washer binds on the shaft. Doh! Then common sense kicks in and I realize someone probably out a larger diameter spring on at some point and it must've rotted away, that's why there was a larger diameter washer, which was never painted orange. All it takes is time and money, right? |
Posted By: Strokendiesel002
Date Posted: 01 Aug 2019 at 3:46pm
|
Well, agco parts apparently no longer provides the parts diagrams they did a few months ago. I do have a parts book for 170/175 on loan from a friend, but it just lists 2 washers and a cotter pin. Guess maybe my housing is damaged? Really open to opinions at this point. Thanks for looking! |
Posted By: Jim.ME
Date Posted: 01 Aug 2019 at 4:58pm
| Parts books are still available on line. They changed the format so it looks different but still works. https://apb.agcocorp.com/#" rel="nofollow - AGCO Parts Books |
Posted By: Strokendiesel002
Date Posted: 01 Aug 2019 at 4:59pm
| Thanks! |
Posted By: Strokendiesel002
Date Posted: 26 Oct 2019 at 10:27am
Well it's been a while, but I've been running Allis around the property doing some mowing and borrowed a hay wagon for a family friendly Halloween party. Even did my first tractor pull a few weeks back at the Racine county Fair grounds! Just had family pics taken and I really liked how these two turned out so thought I'd share  Hope everyone is doing well! |
Posted By: SteveM C/IL
Date Posted: 26 Oct 2019 at 1:41pm
| Nice picture ...lucky boys....good father |
Posted By: Sugarmaker
Date Posted: 26 Oct 2019 at 2:48pm
|
Stroken, Great pictures! Thanks for sharing. Your making some memories with them and the Allis tractor too! Glad you got the tractor working! Regards, Chris ------------- D17 1958 (NFE), WD45 1954 (NFE), WD 1952 (NFE), WD 1950 (WFE), Allis F-40 forklift, Allis CA, Allis D14, Ford Jubilee, Many IH Cub Cadets, 32 Ford Dump, 65 Comet, 66 F100. |
Posted By: Strokendiesel002
Date Posted: 26 Oct 2019 at 9:49pm
| Thanks fellas! |
Posted By: Strokendiesel002
Date Posted: 22 Sep 2020 at 10:26pm
|
Evening all! I hope all is well! It's been a while, figured I'd give a little update. My little D17 is still running great, used it with a borrowed subsoiler to lay a few hundred feet of pipe. Had to hand dig out the trench, but it sure was a heck of a lot easier! as a part of dropping the draw bar, I changed the bell housing and replaced the non existent release lever. Also ran in another 5500lb class a few weeks ago and did ok, didn't win, but was competitive and the only Allis in that class. The crowd seemed to like seeing her run as there was a surprising amount of cheering towards the end of the run. This past week I went up and bought what I believe is a 400 series loader and got that bolted on today. Waiting on the U Bolts to mount the back half, and then it's on to making it functional!  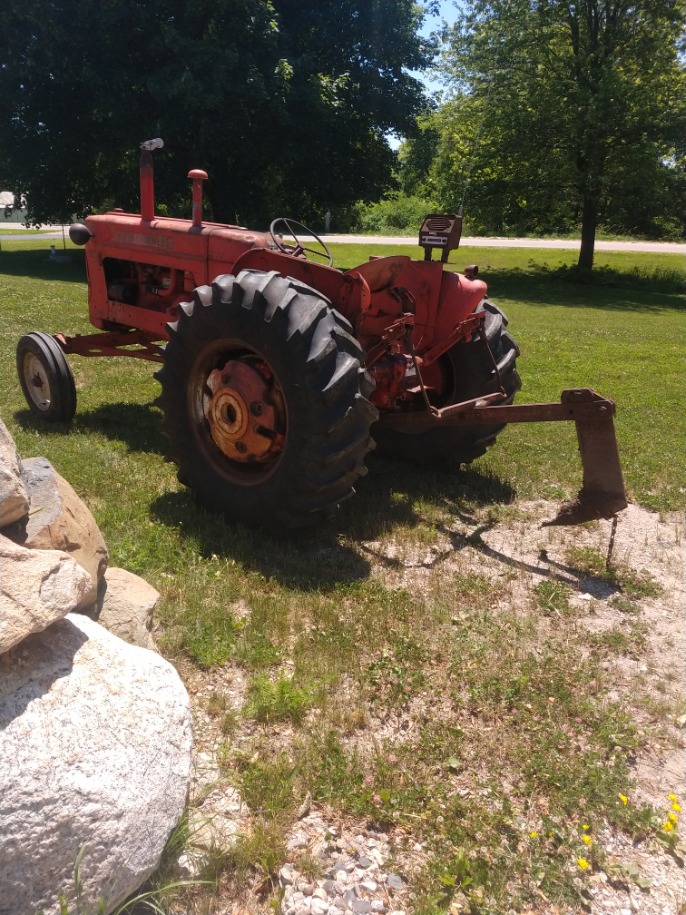   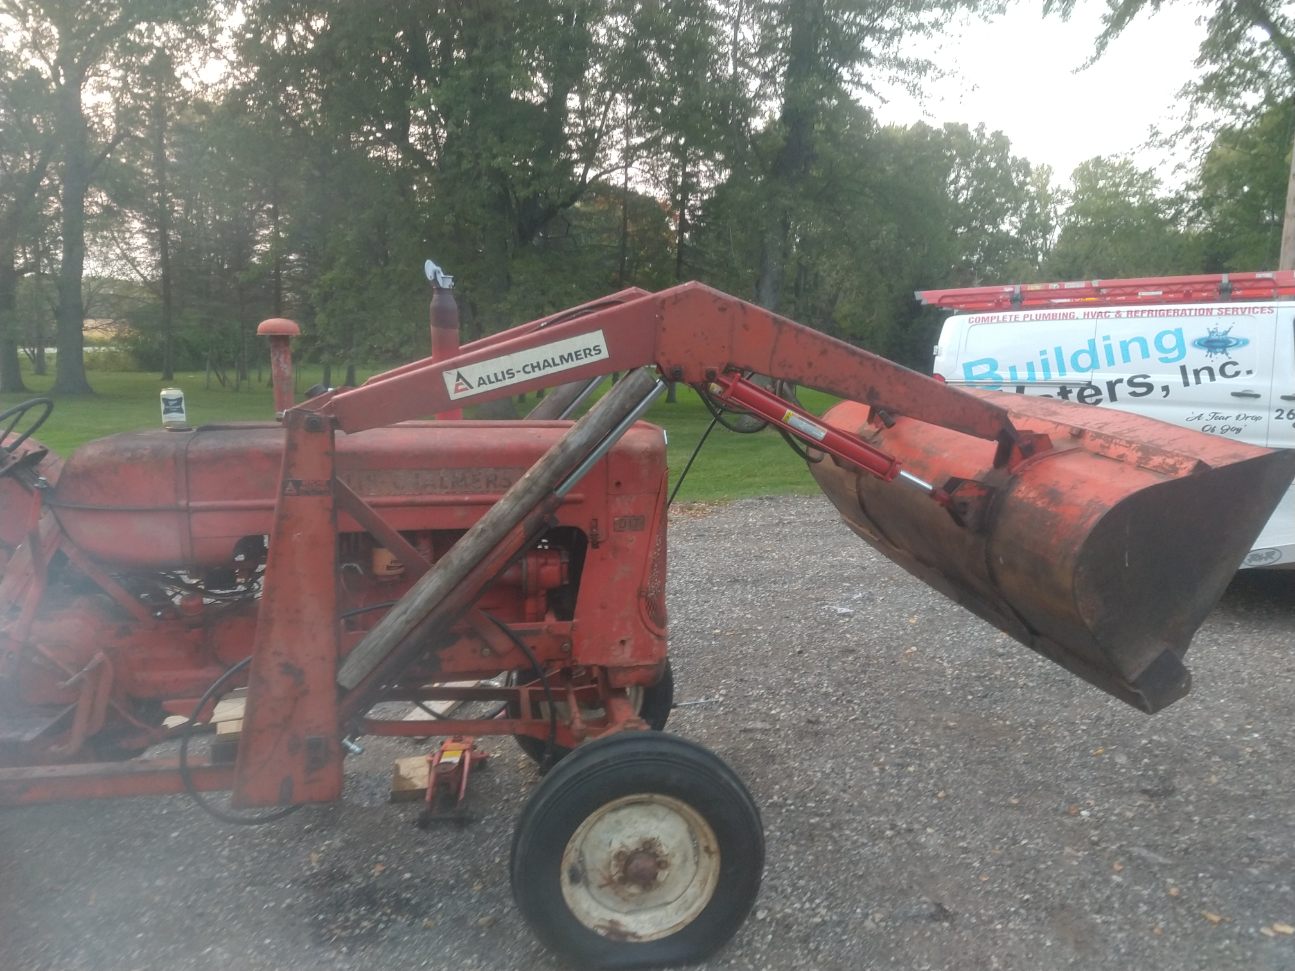
|
Posted By: Sugarmaker
Date Posted: 23 Sep 2020 at 6:26am
|
Ahh that loader looks like it came with the tractor! Nice addition to the family! You did a great job getting this tractor operational again and now that loader will help around the farm too. ( I could use a loader tractor some days too! ) I like the picture of the Ford assisting getting the loader in place! Thanks for sharing the pictures. Regards, Chris ------------- D17 1958 (NFE), WD45 1954 (NFE), WD 1952 (NFE), WD 1950 (WFE), Allis F-40 forklift, Allis CA, Allis D14, Ford Jubilee, Many IH Cub Cadets, 32 Ford Dump, 65 Comet, 66 F100. |
Posted By: Clay
Date Posted: 23 Sep 2020 at 11:05am
|
The tilt cylinders are not original. The original cylinders look like the lift cylinders. The tilt cylinders appear to be tie rod cylinders. I have a 500 loader on my series II D-17. Dealer installed it in 1972. Great loaders.
|
Posted By: Strokendiesel002
Date Posted: 23 Sep 2020 at 11:22am
| Correct clay, the person I bought from said they got bent so he replaced them and threw away the originals unfortunately |
Posted By: Strokendiesel002
Date Posted: 23 Sep 2020 at 11:23am
|
Chris, thank you for the kind words as always :) My uncle (same as who I got it from) was very excited to out the little Ford to work! |
Posted By: Strokendiesel002
Date Posted: 14 Oct 2020 at 7:34pm
|
Evening! I'm getting closer to having a functional FEL! So, a friend make me up the mounting plate and ordered some 1"OD .0.5" ID tubing and am waiting on a shaft and coupler for the flywheel. I test fit the pump in the bracket tonight and I suddenly realized what others were talking about with the 1/2" bolster bolts and pump interfering. Pics: 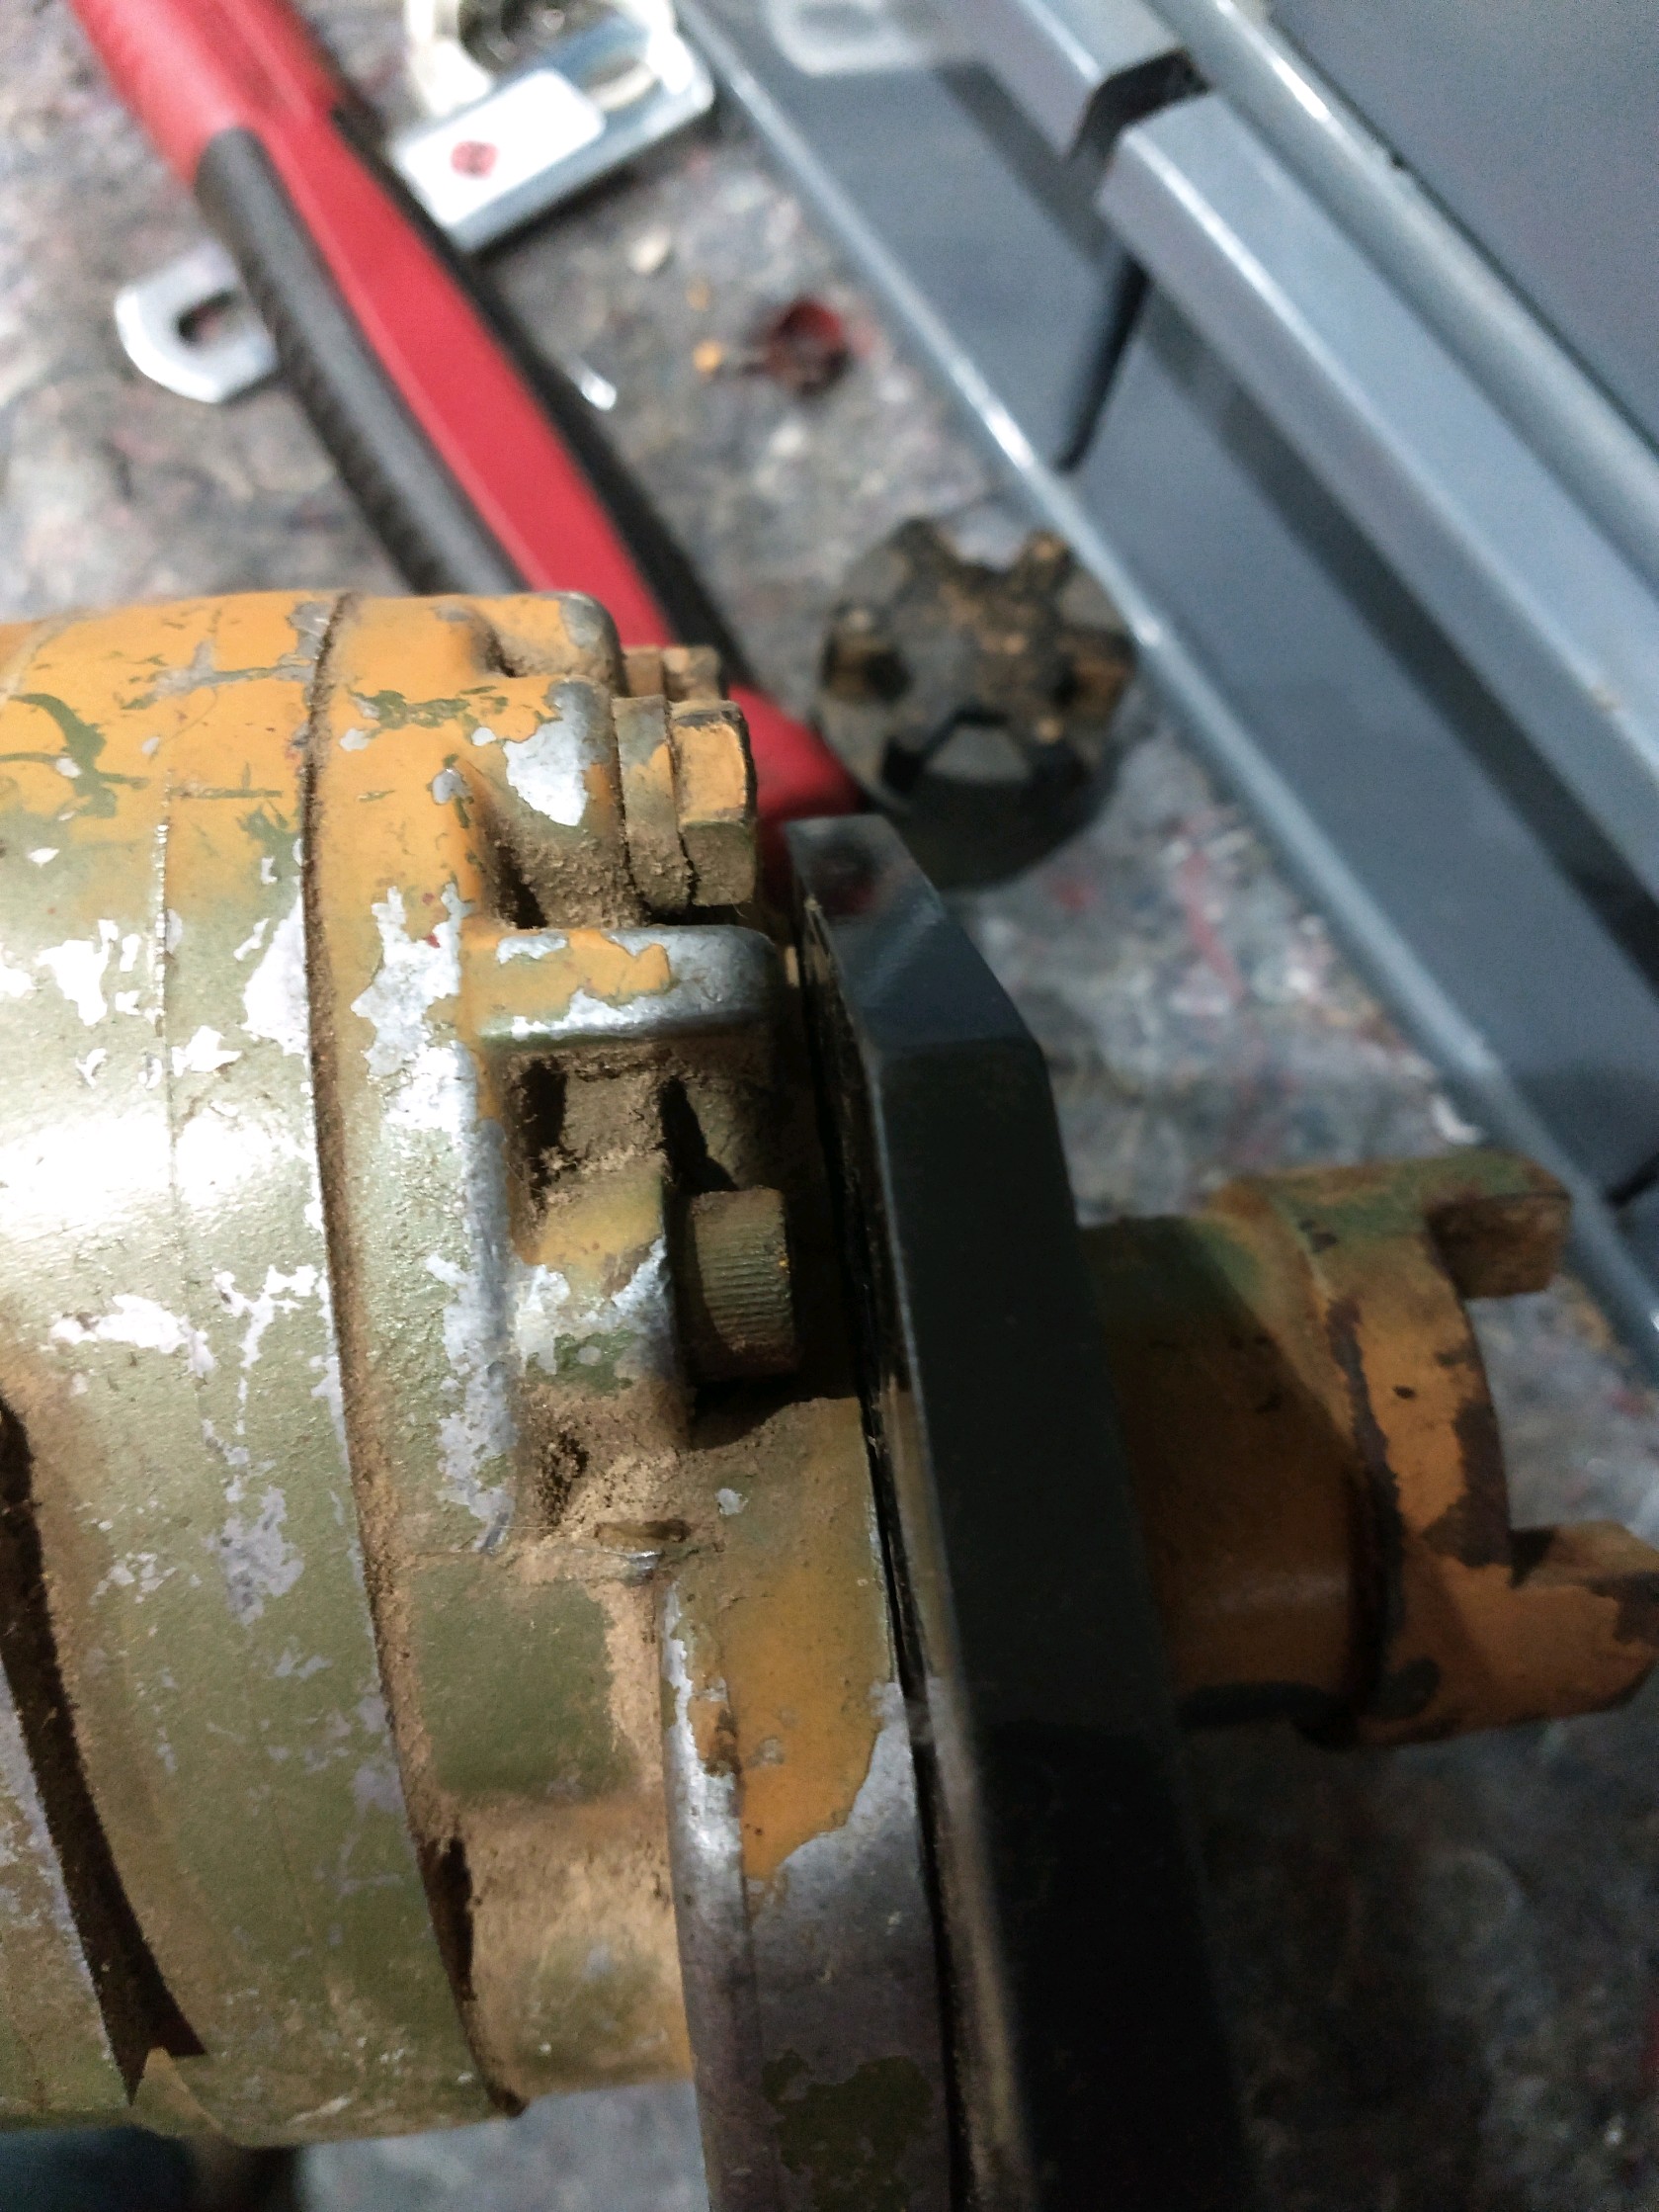 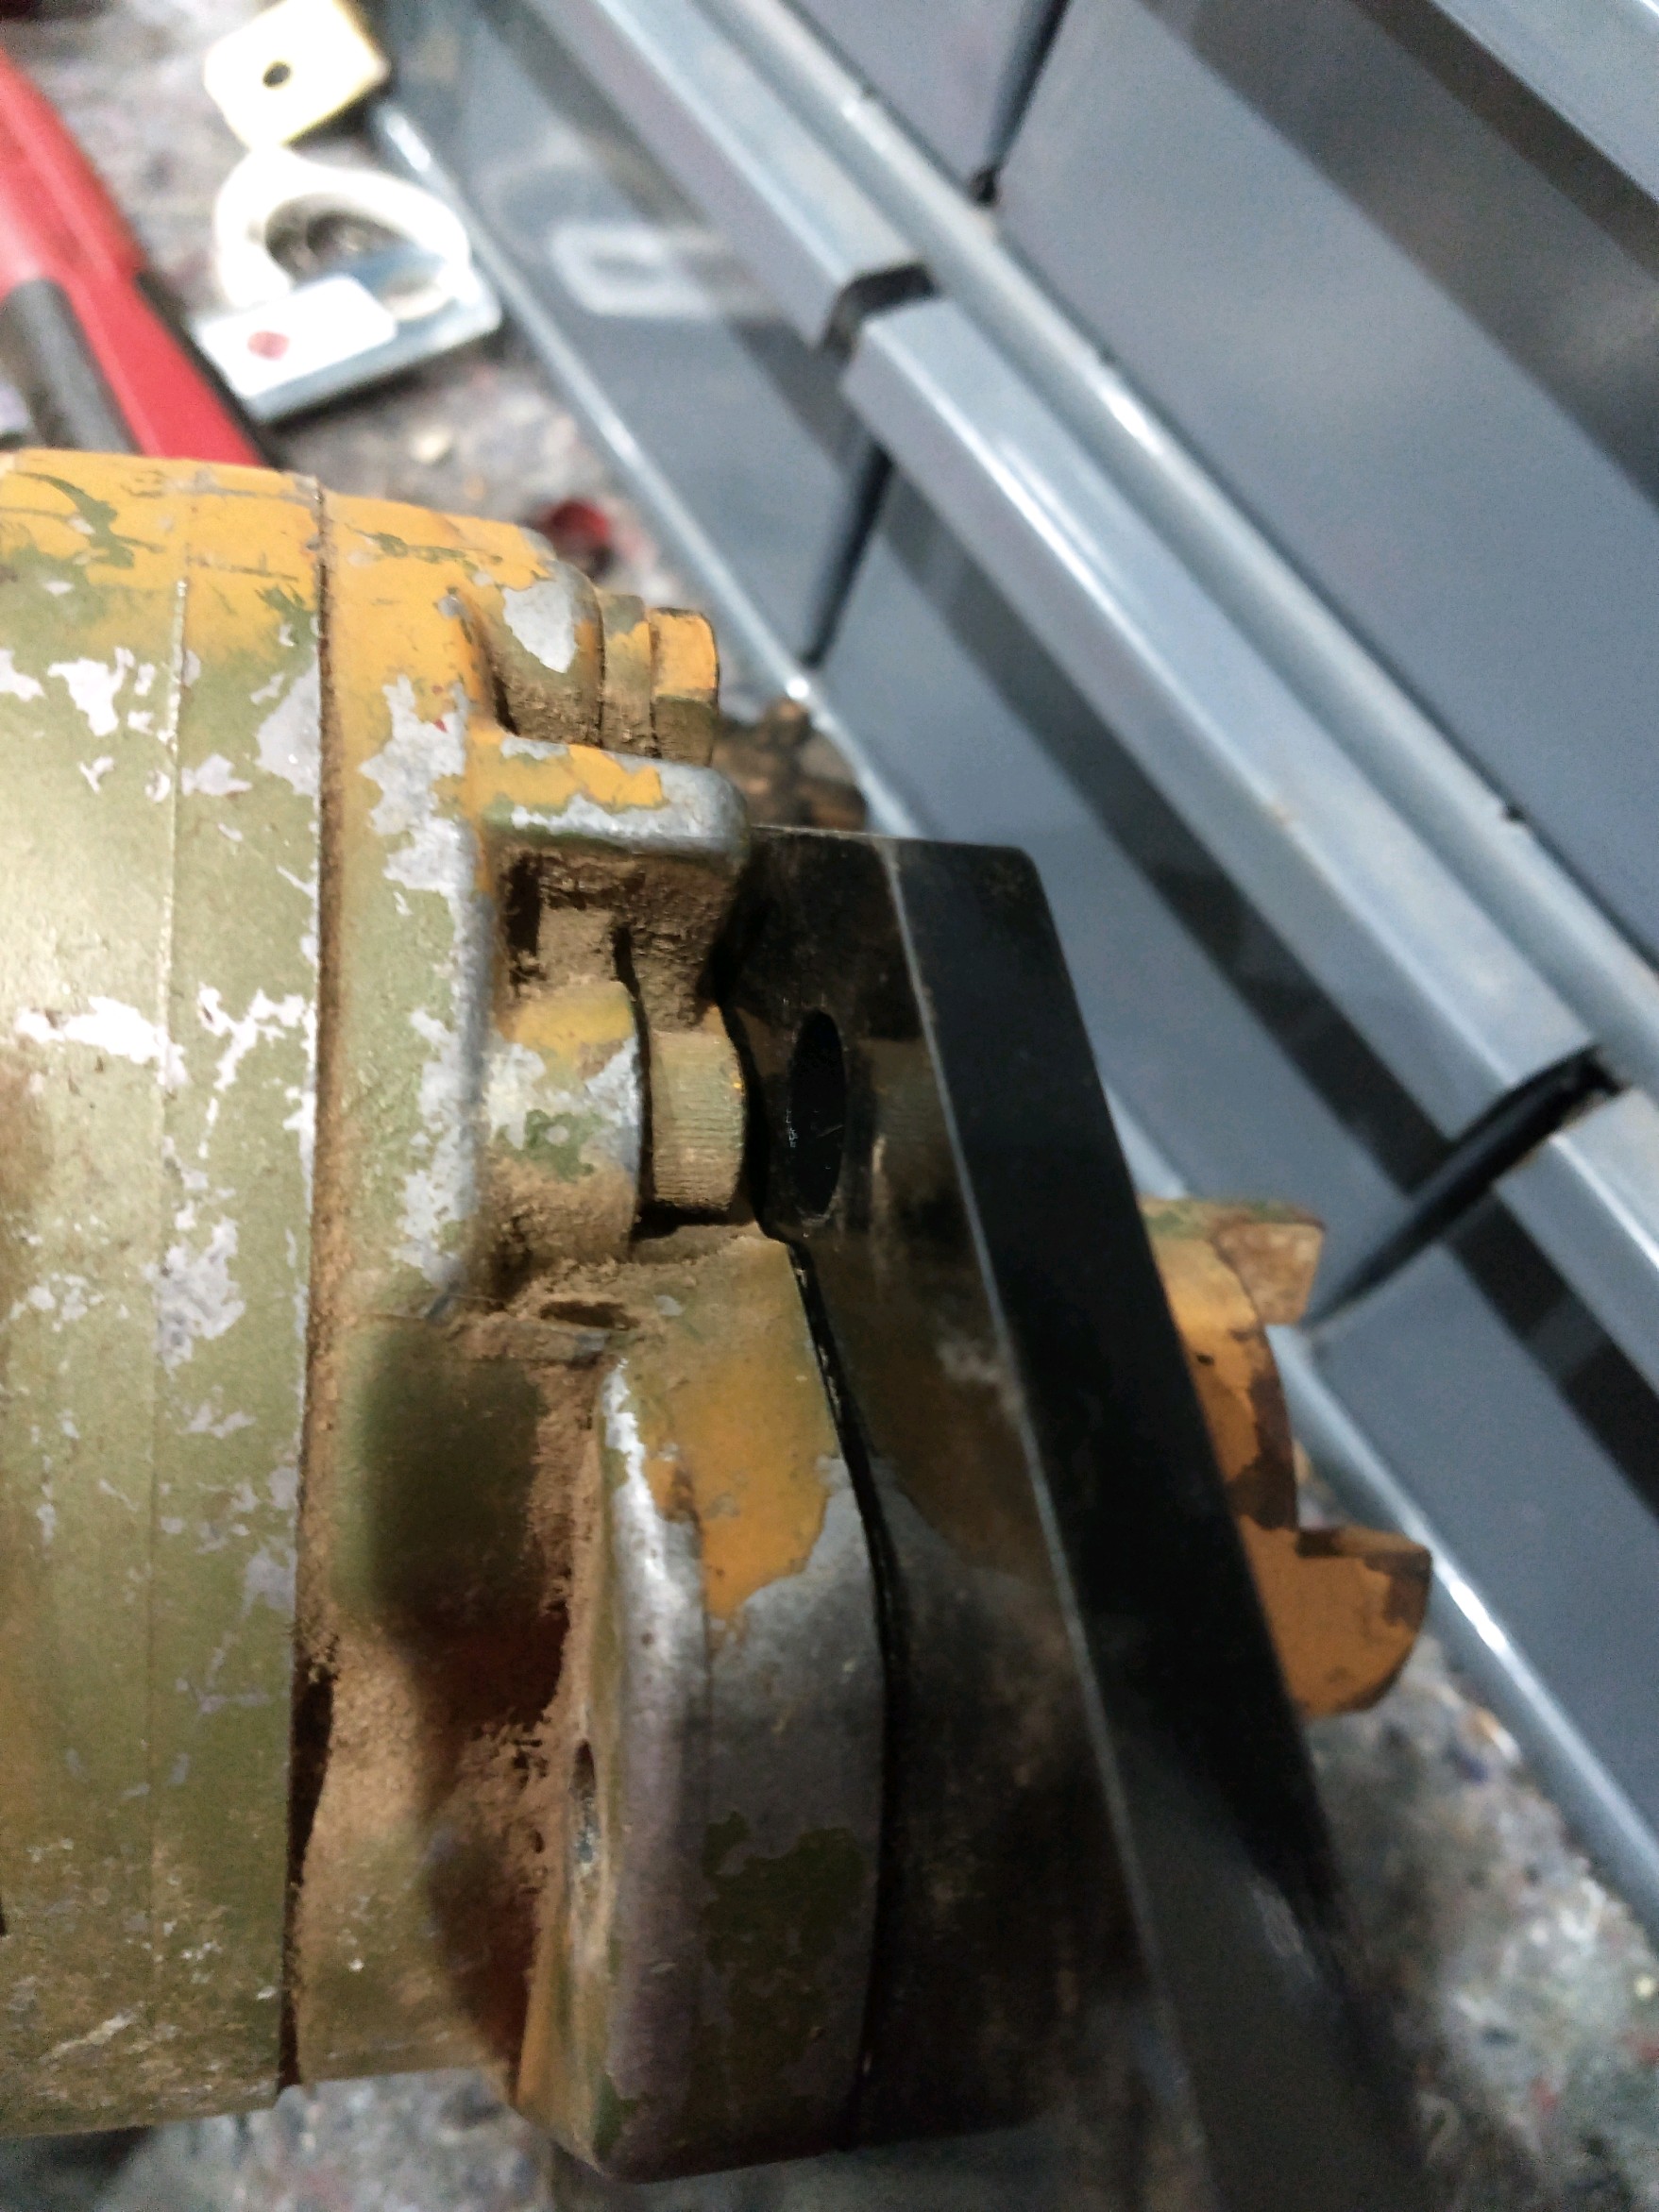 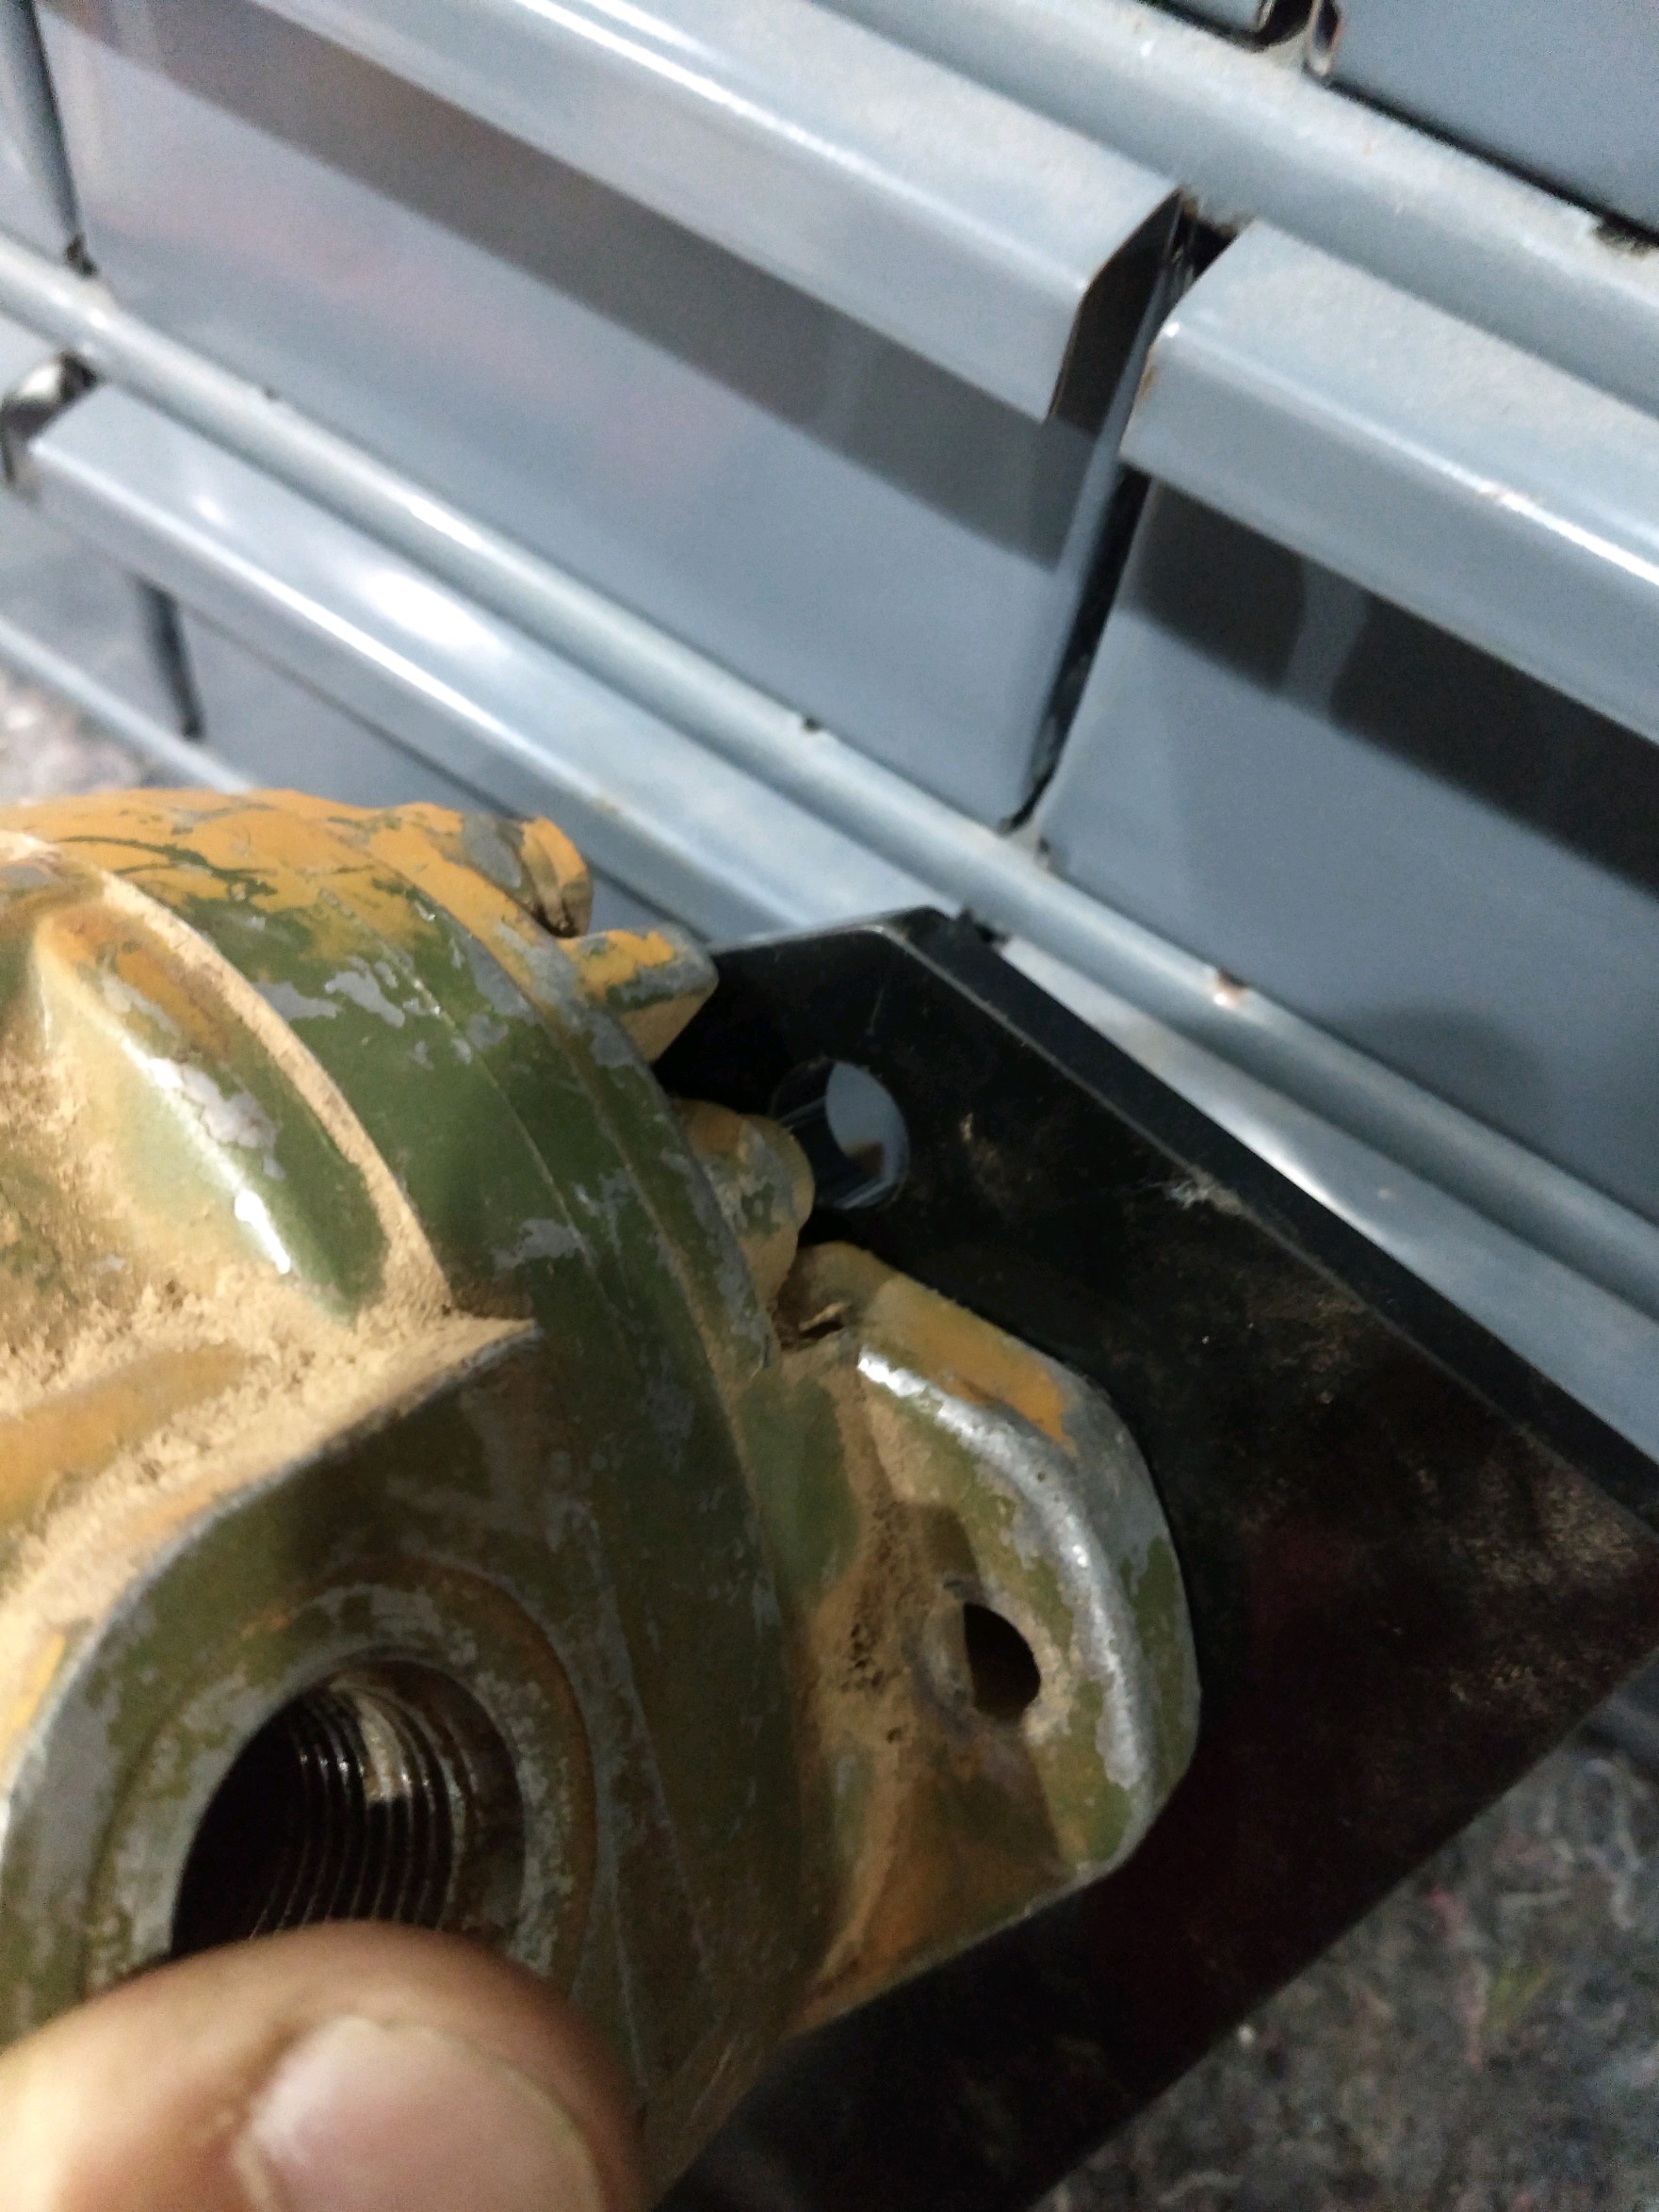 I'm thinking that it'd be acceptable to shorten up the bolster to bracket spacers by say 1/2" and then place 1/2" spacers between the bracket and pump... Thoughts? |
Posted By: HD6GTOM
Date Posted: 14 Oct 2020 at 9:29pm
| While you have it taken apart, unhook the drawbar where it hooks under the tractor and replace the double C spring that holds the snap coupler hook in place. They get weak and it will allow your plow to come unhooked. When that happens the tonge of the plow will dig into the ground and the plow will land on top of you. I still have the scar on my back when it happened to me. |
Posted By: Bill Long
Date Posted: 14 Oct 2020 at 9:51pm
|
You know, that brings back a lot of GREAT MEMORIES! The 58 D-17 was one of the last tractors I sold. Really a great machine. So long since I worked on them I won't try to give you any advice on how to rebuild cause there is just too much newer methods and equipment out there. We all wish you the very best. Keep us posted as to progress Good Luck! Bill Long
|
Posted By: Strokendiesel002
Date Posted: 14 Oct 2020 at 10:52pm
|
Tom- thank you, I will order a new spring. I lubricated all the pins, so it will be a... Snap ;) Bill- I certainly have enjoyed this thoroughly! I will certainly try to keep our escapades and frustrations posted :) |
Posted By: Strokendiesel002
Date Posted: 23 Oct 2020 at 12:27am
|
Evening! More progress on the live hydraulics! I pulled the shroud and radiator out, cleaned out the 7/16 NC threaded holes in the pulley and bolted up the adapter recommend earlier in the thread. I then slid the 3/4" shaft through the bolster only to find that it doesn't line up. As this ole girl is 62 years old and I'm probably not the first to have split her I suppose I shouldn't be surprised. It was really close, but no dice. I thought about blocking everything up and trying to raise the engine a hair, but remembered a post or two mentioning that the early bolsters weren't big enough for even the 3/4" shafts. So I got out the right angle whizzer and a couple mess makers and went to town! 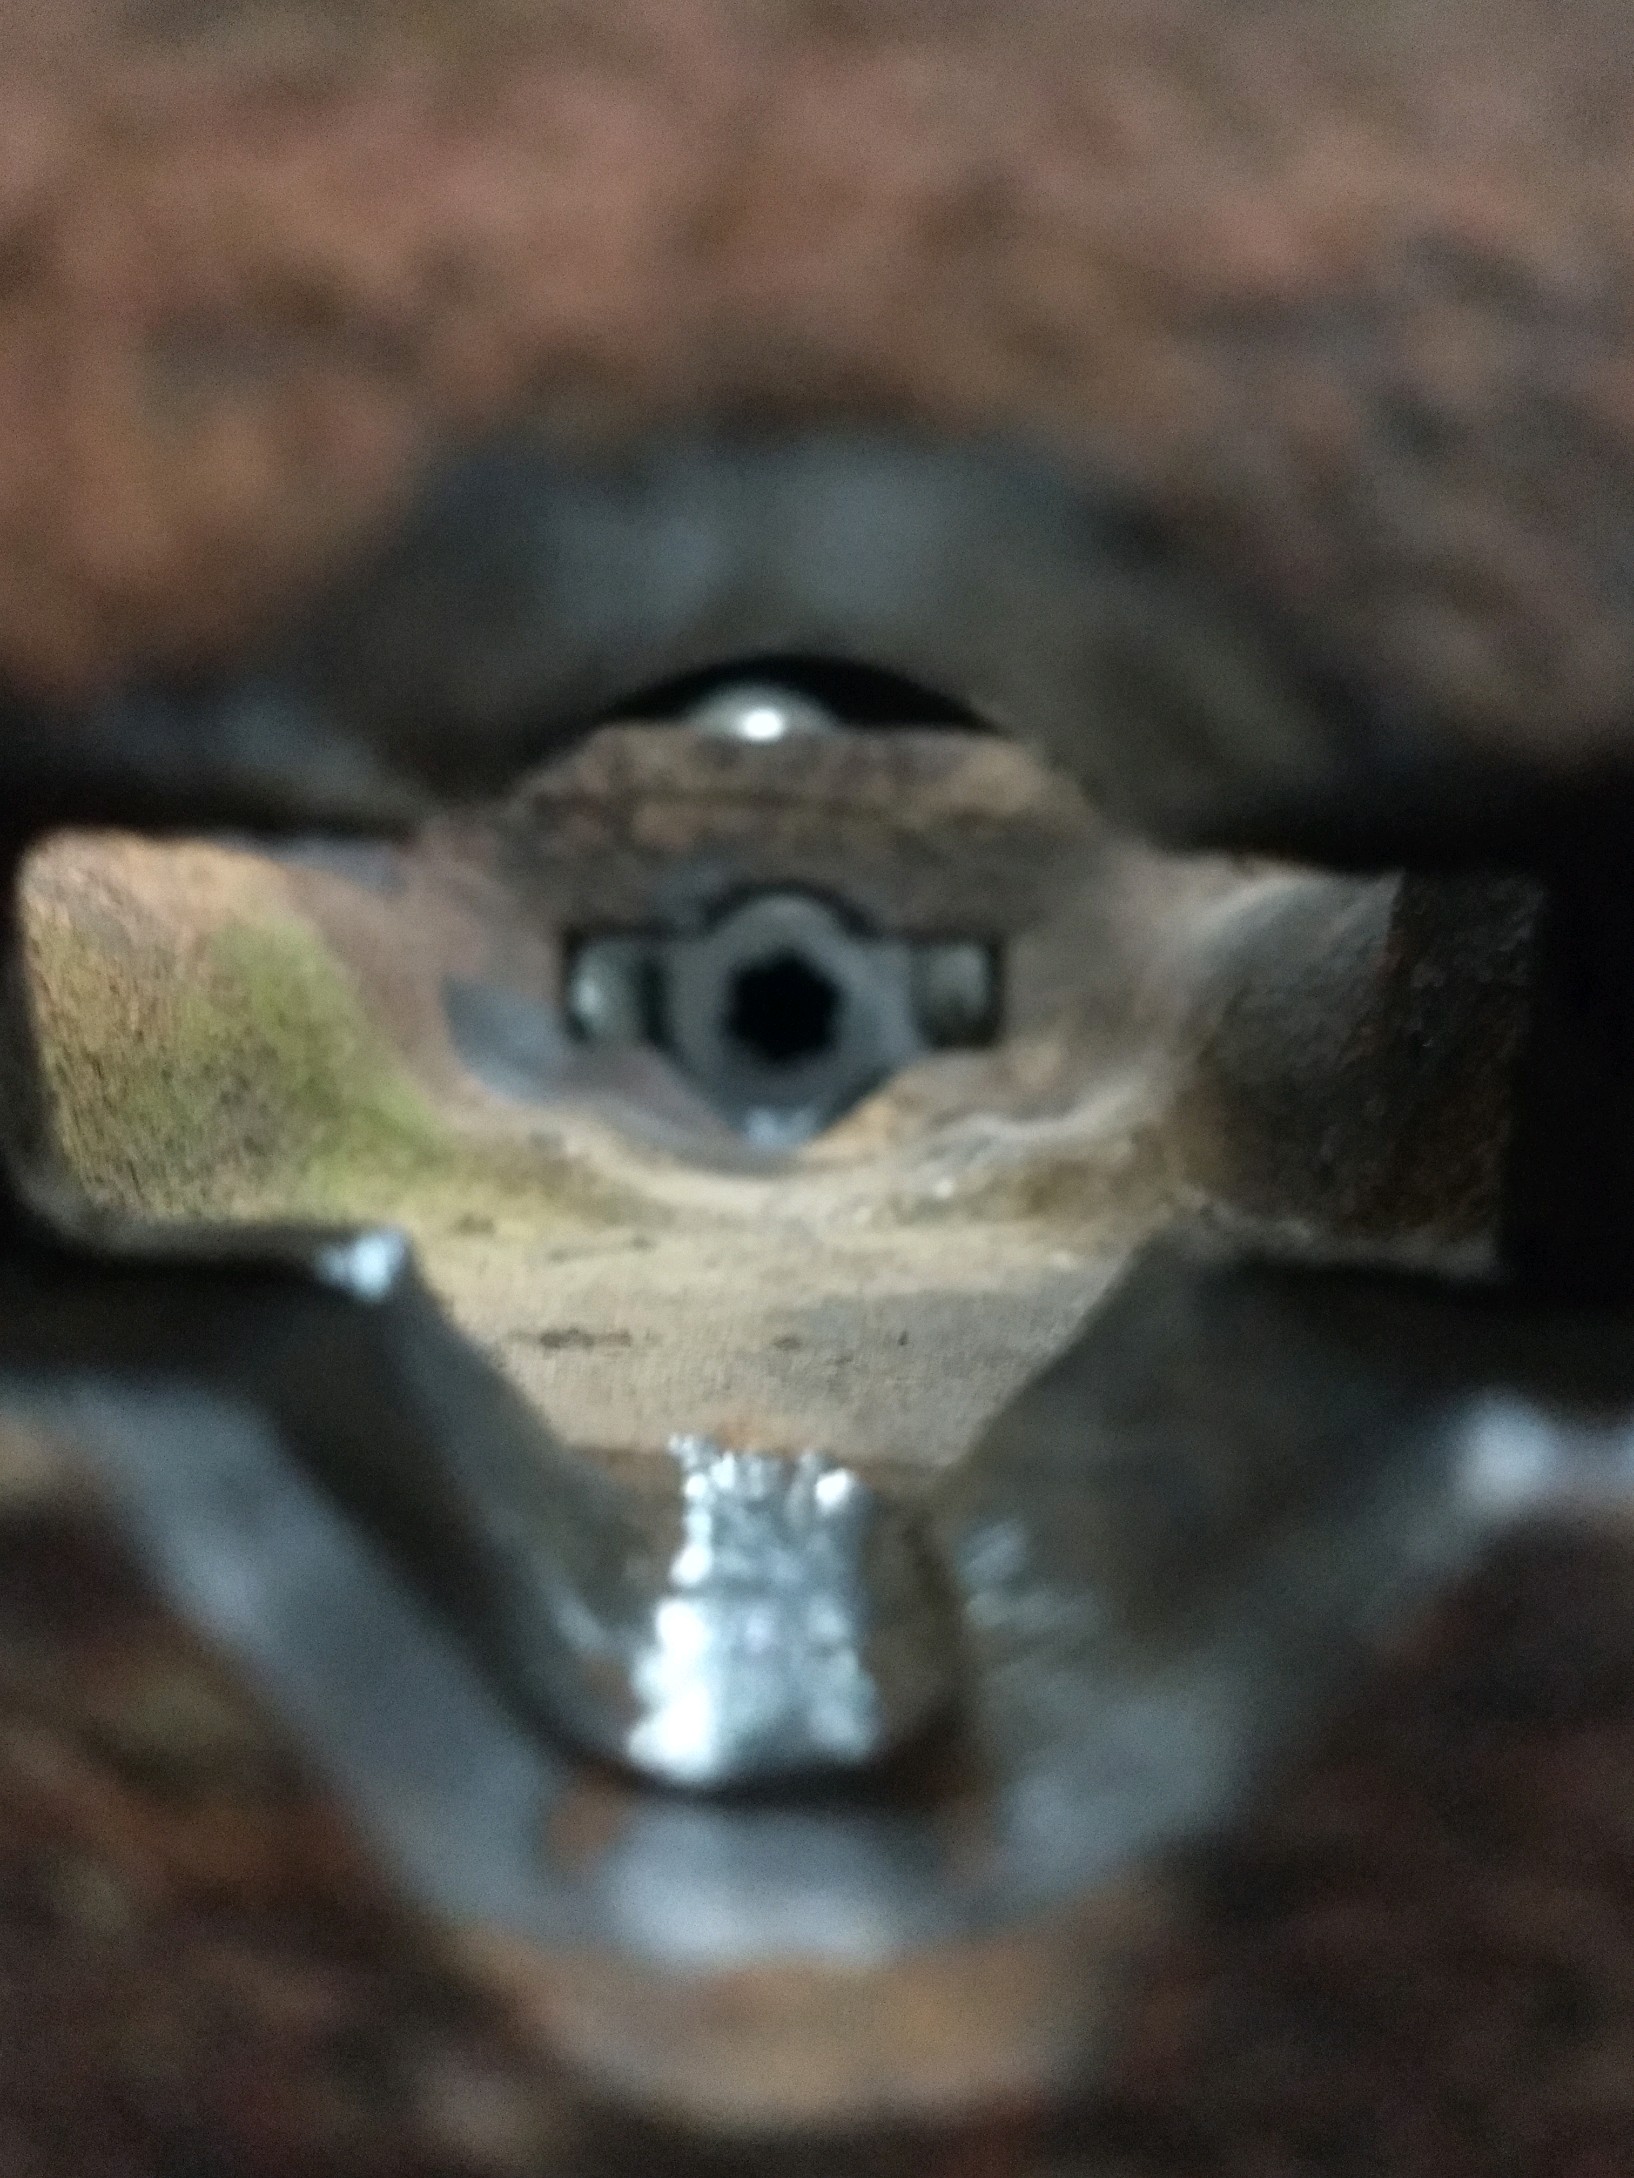 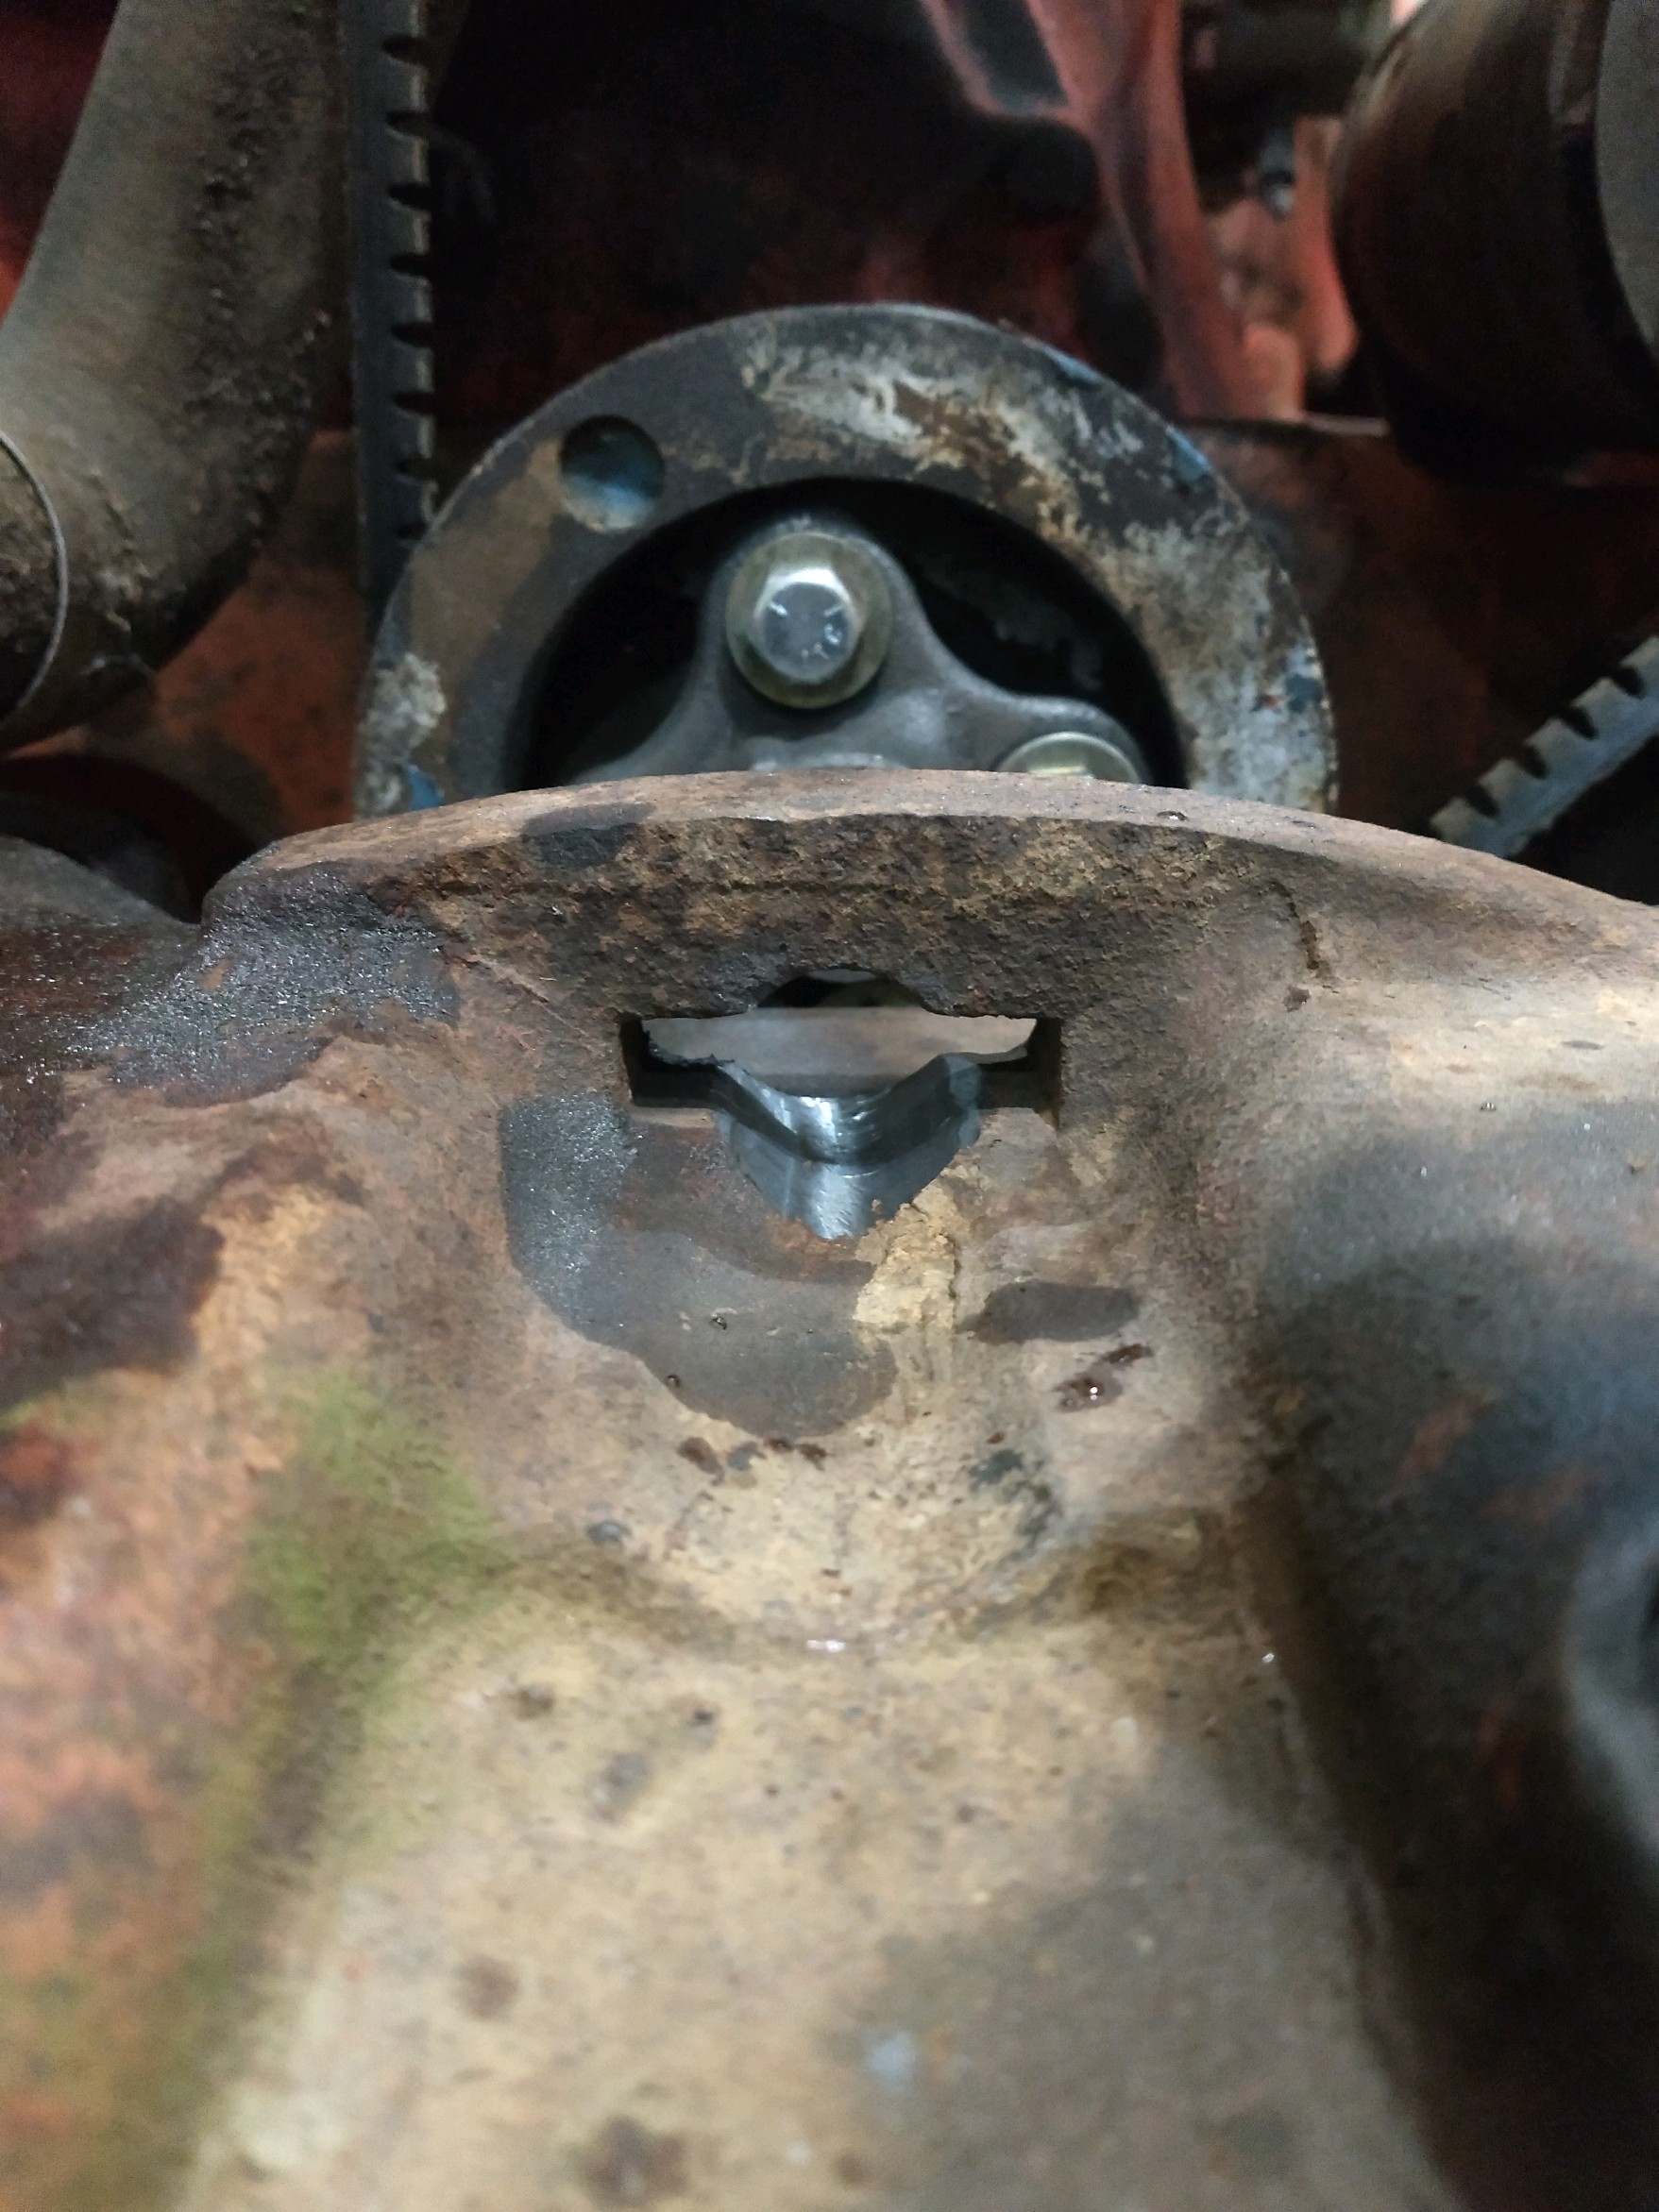 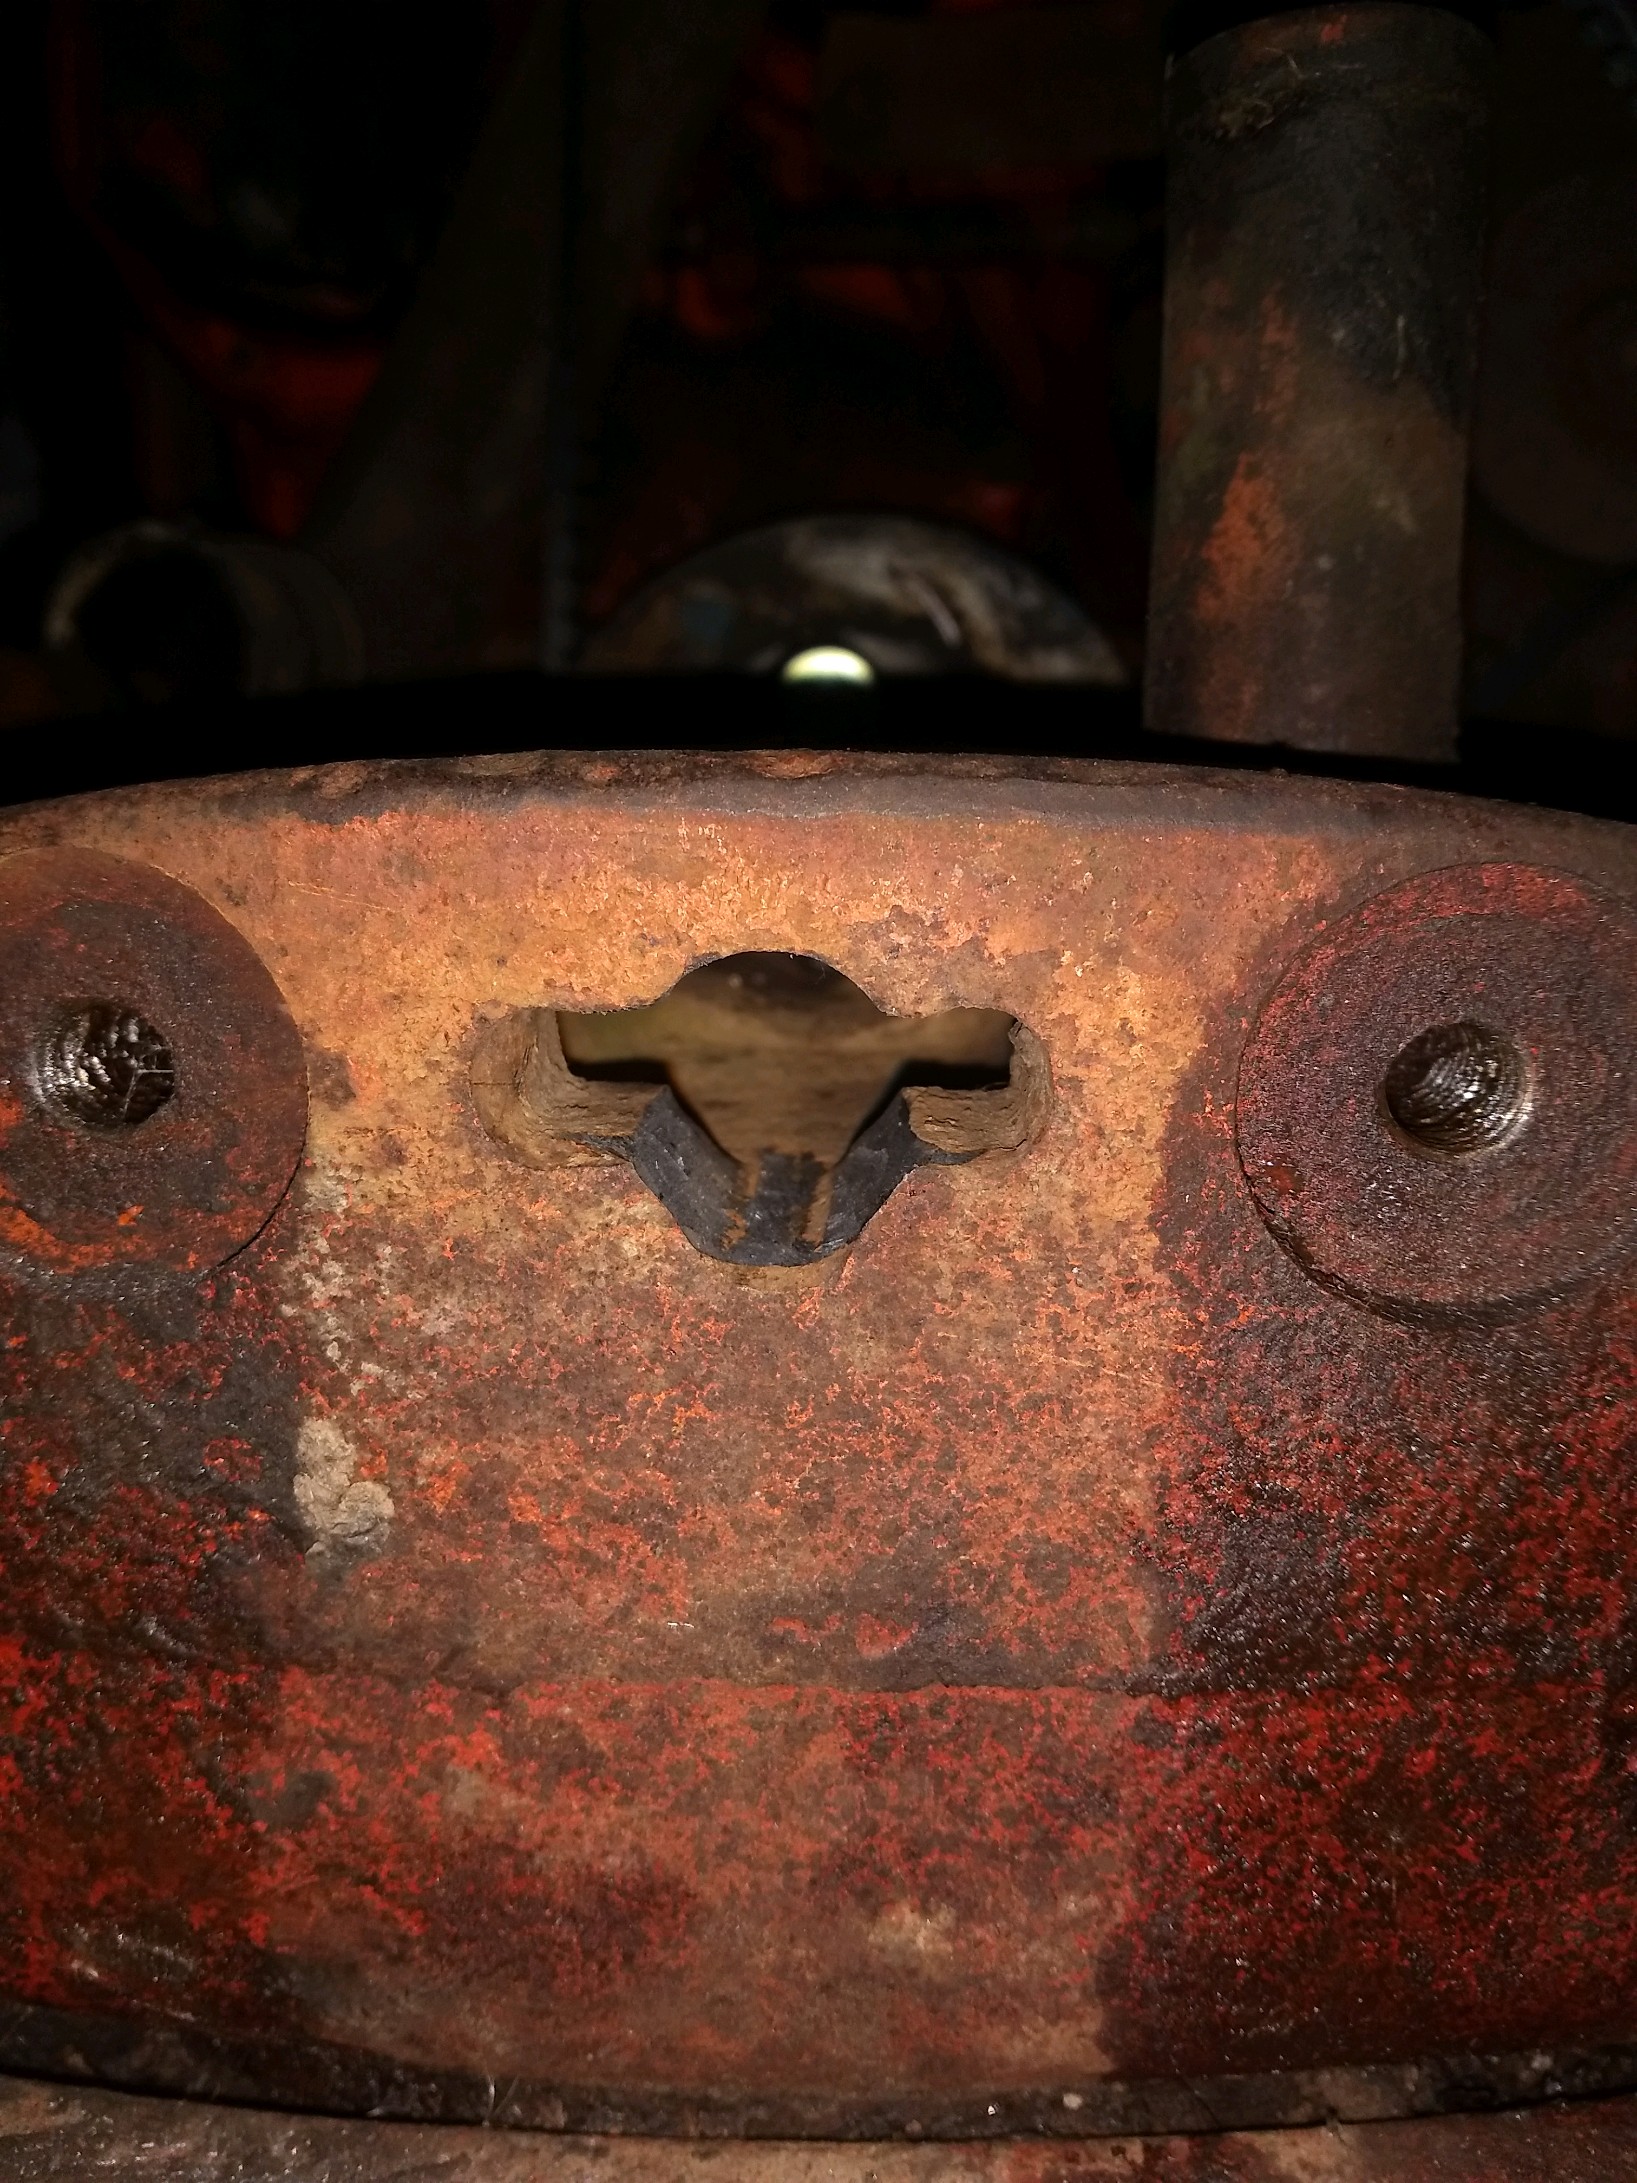 Now, the threaded holes in the bolster are 1/2"-13 for anyone wondering. After cleaning them I found I can run a bolt in 1". I'm using love joy couplers and my plate is 3/8" thick. Holding everything in place it looks like my spacers need to be 3.9" so I'll probably shoot for 4". I believe I mentioned earlier that the 1/2" bolts that secure the bracket to pedestal will interfere with the pump. It was suggested that I use flat head bolts to avoided interference, so I order 5" long flat heads and they should be showing up in a couple days! Just need to get a changed cut into the plate now and cut down the bar stock I bought for the spacers! 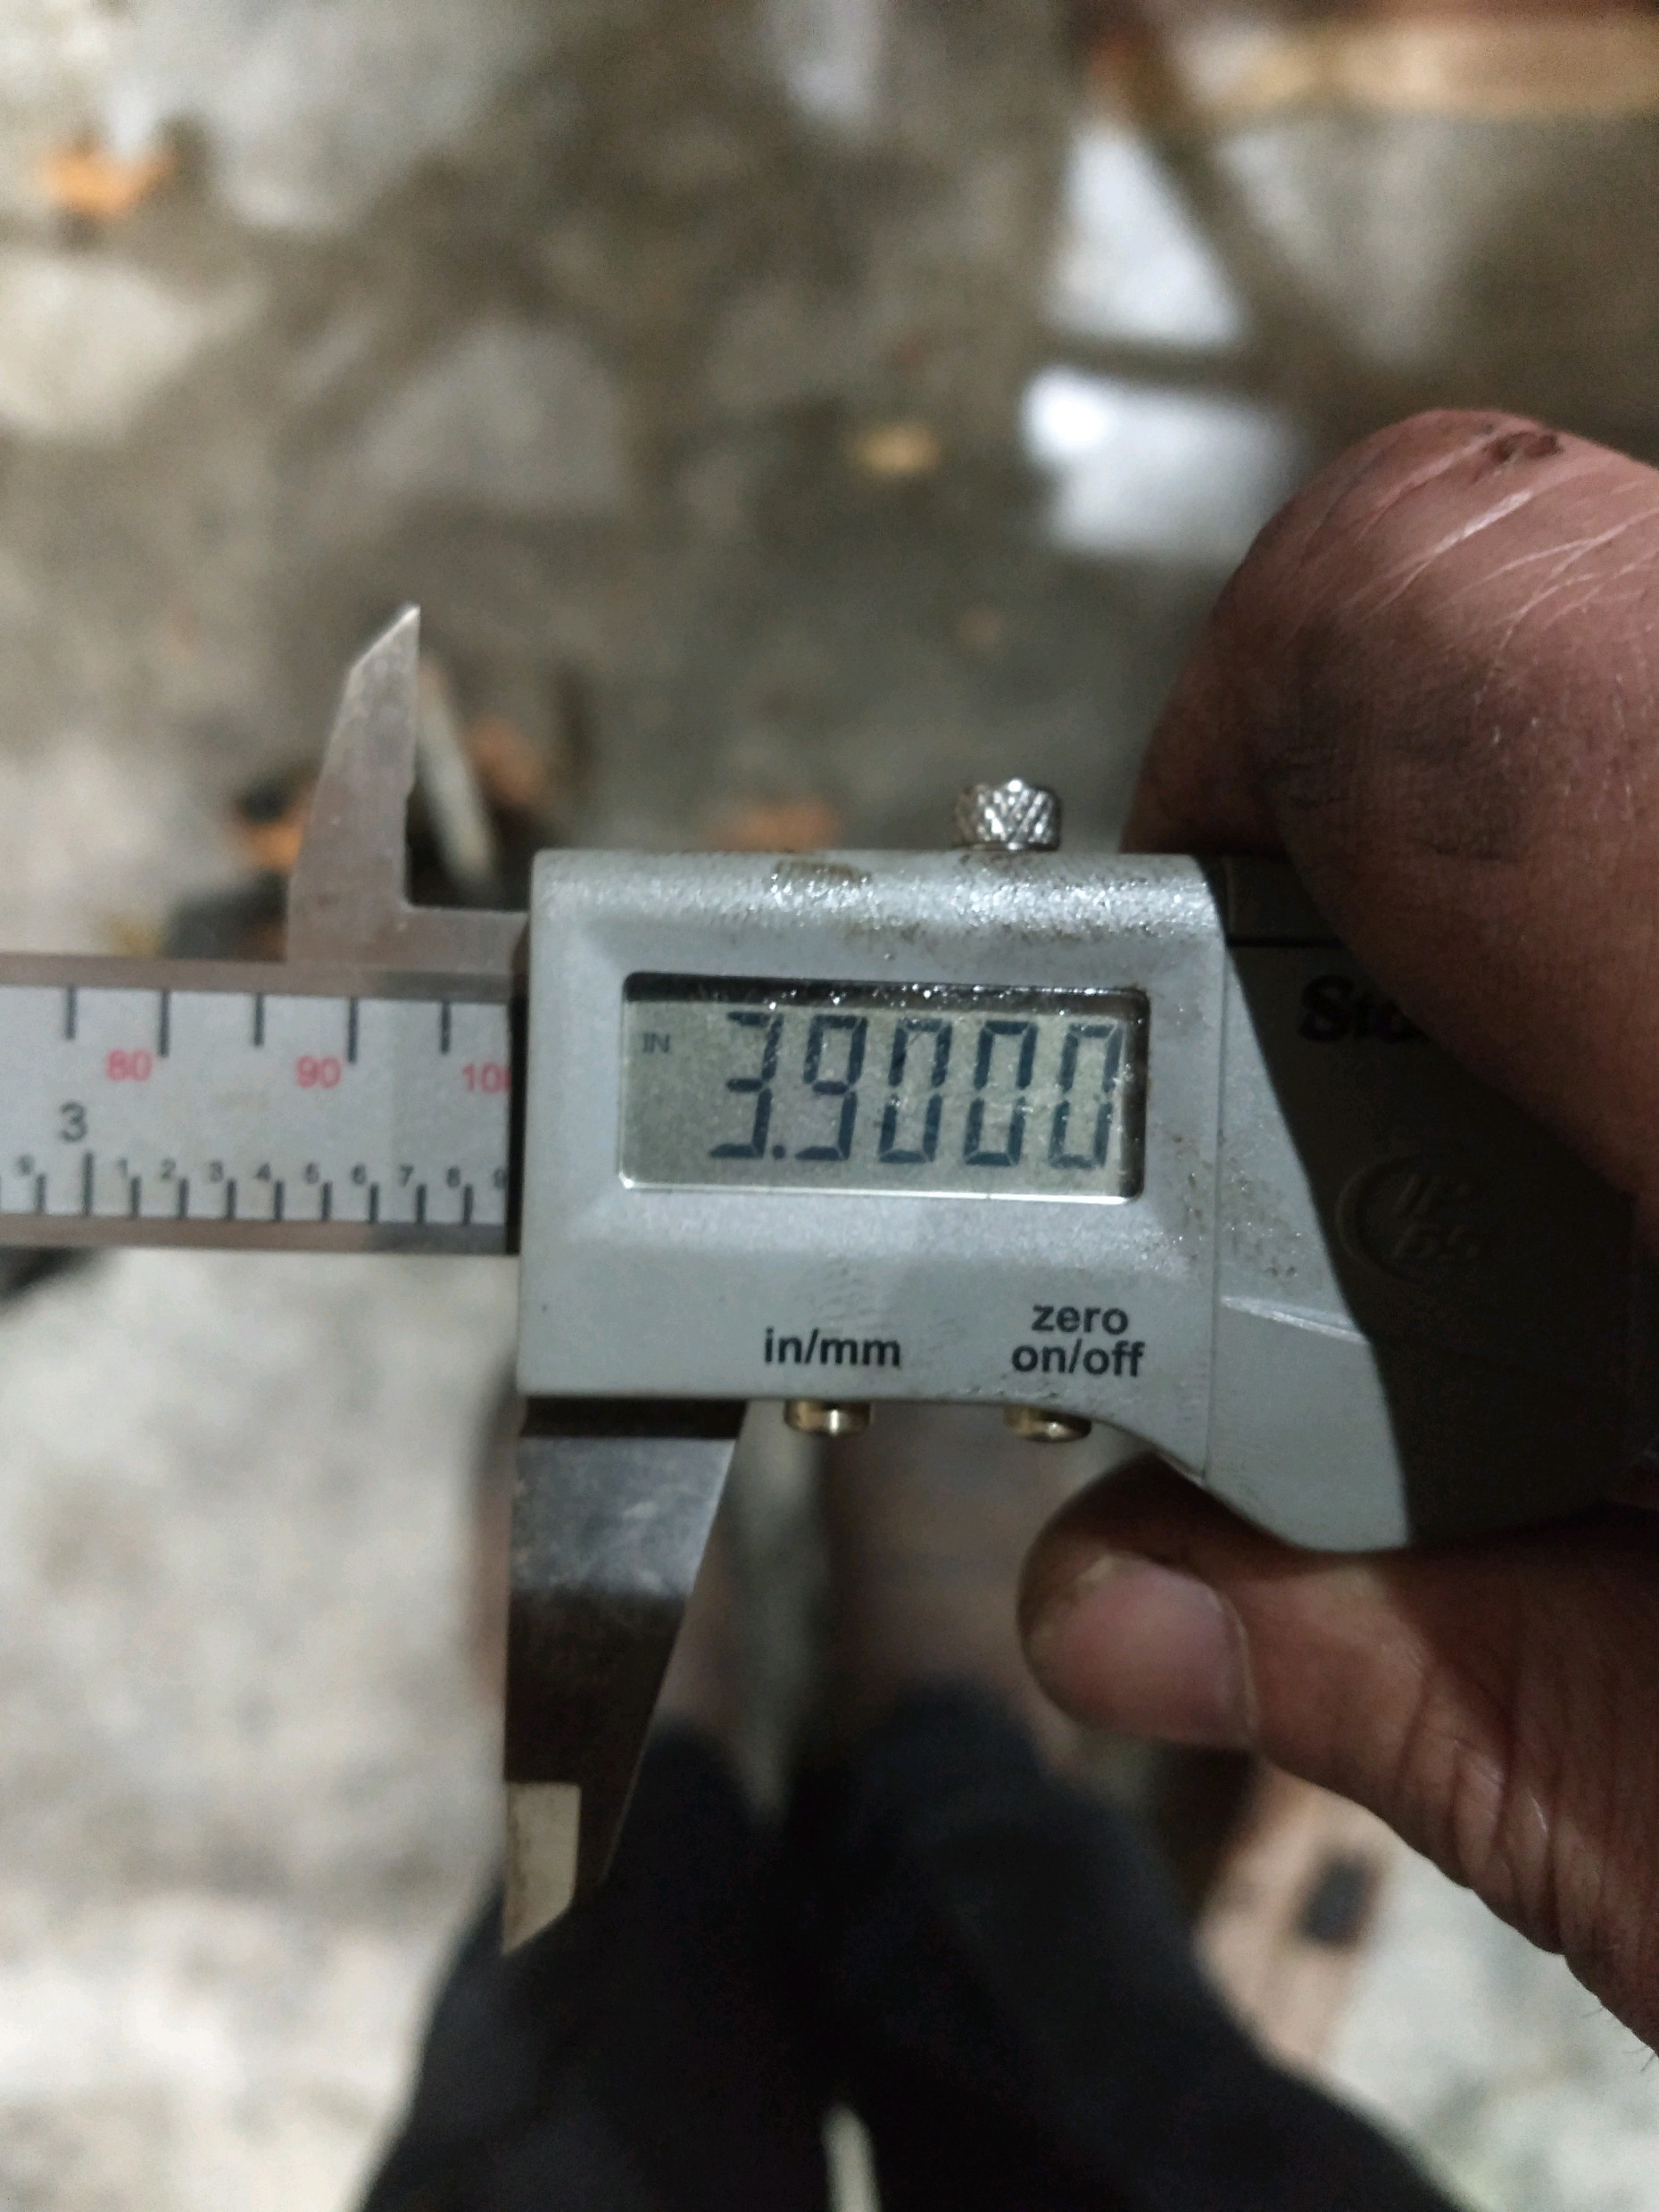
|
Posted By: Strokendiesel002
Date Posted: 24 Oct 2020 at 10:21am
| As I'm getting closer to completing mounting of the pump I've started to wonder... Can I use this pump to also get power steering? I see two plugs in the bolster... |
Posted By: DrAllis
Date Posted: 24 Oct 2020 at 5:56pm
| Allis-Chalmers power steering for a D-17 requires a lot more parts than just a pump. You'll need a control valve, power steering hydraulic cylinder and all the lines to connect everything. This front pump for a loader could be used to do the power steering if you adapted a priority valve somewhere that would direct 4 or more GPM to the power steering first and then the rest would go to the loader valve. A Char-Lynn brand add-on power steering torque generator could also use this front pump/priority valve arrangement. |
Posted By: Strokendiesel002
Date Posted: 24 Oct 2020 at 6:04pm
| Thanks Dr! |
Posted By: Strokendiesel002
Date Posted: 29 Jan 2021 at 10:50pm
| Say, would anyone happen to know the brand or model number of the hydraulic pump that was used on the front? |
Posted By: Brian G. NY
Date Posted: 30 Jan 2021 at 8:34am
| I don't know the name of the actual manufacturer but the A-C part number for the pump assembly used with the 400 and 500 loaders is 343343. Specs.: 11 GPM @ 1650 RPM. |
Posted By: Strokendiesel002
Date Posted: 30 Jan 2021 at 11:34pm
|
Thank you Brian! I went this morning and pulled the pump off the tractor. H39AA2B is the one I have. Turns out this pump was configured to run Clockwise, but is able to be reversed. Took the boys for a short snowmobile ride after reassembly  Then went back to the tractor to try my luck... Success! I'm hopeful to bring it home tomorrow and will try to get some video and pictures in case anyone else wants some ideas or is thinking about giving this a go :) |
Posted By: JayIN
Date Posted: 31 Jan 2021 at 7:59pm
|
Keep up the good work! Fun to follow! ------------- sometimes I walk out to my shop and look around and think "Who's the idiot that owns this place?" |
Posted By: Strokendiesel002
Date Posted: 31 Jan 2021 at 10:28pm
|
Thanks Jay! County roads were all hardpack today after 8" of snow last night, no sense in moving stuff down them that don't have to be moved, so I don't have any pics or videos yet. Did however make a "track" out back for the boys to ride their Kitty Cats. Sadly I was too busy getting them unstuck to think about getting any pics. Pretty fun to watch them cruise around :) |
Posted By: Strokendiesel002
Date Posted: 01 Feb 2021 at 9:56pm
Pics!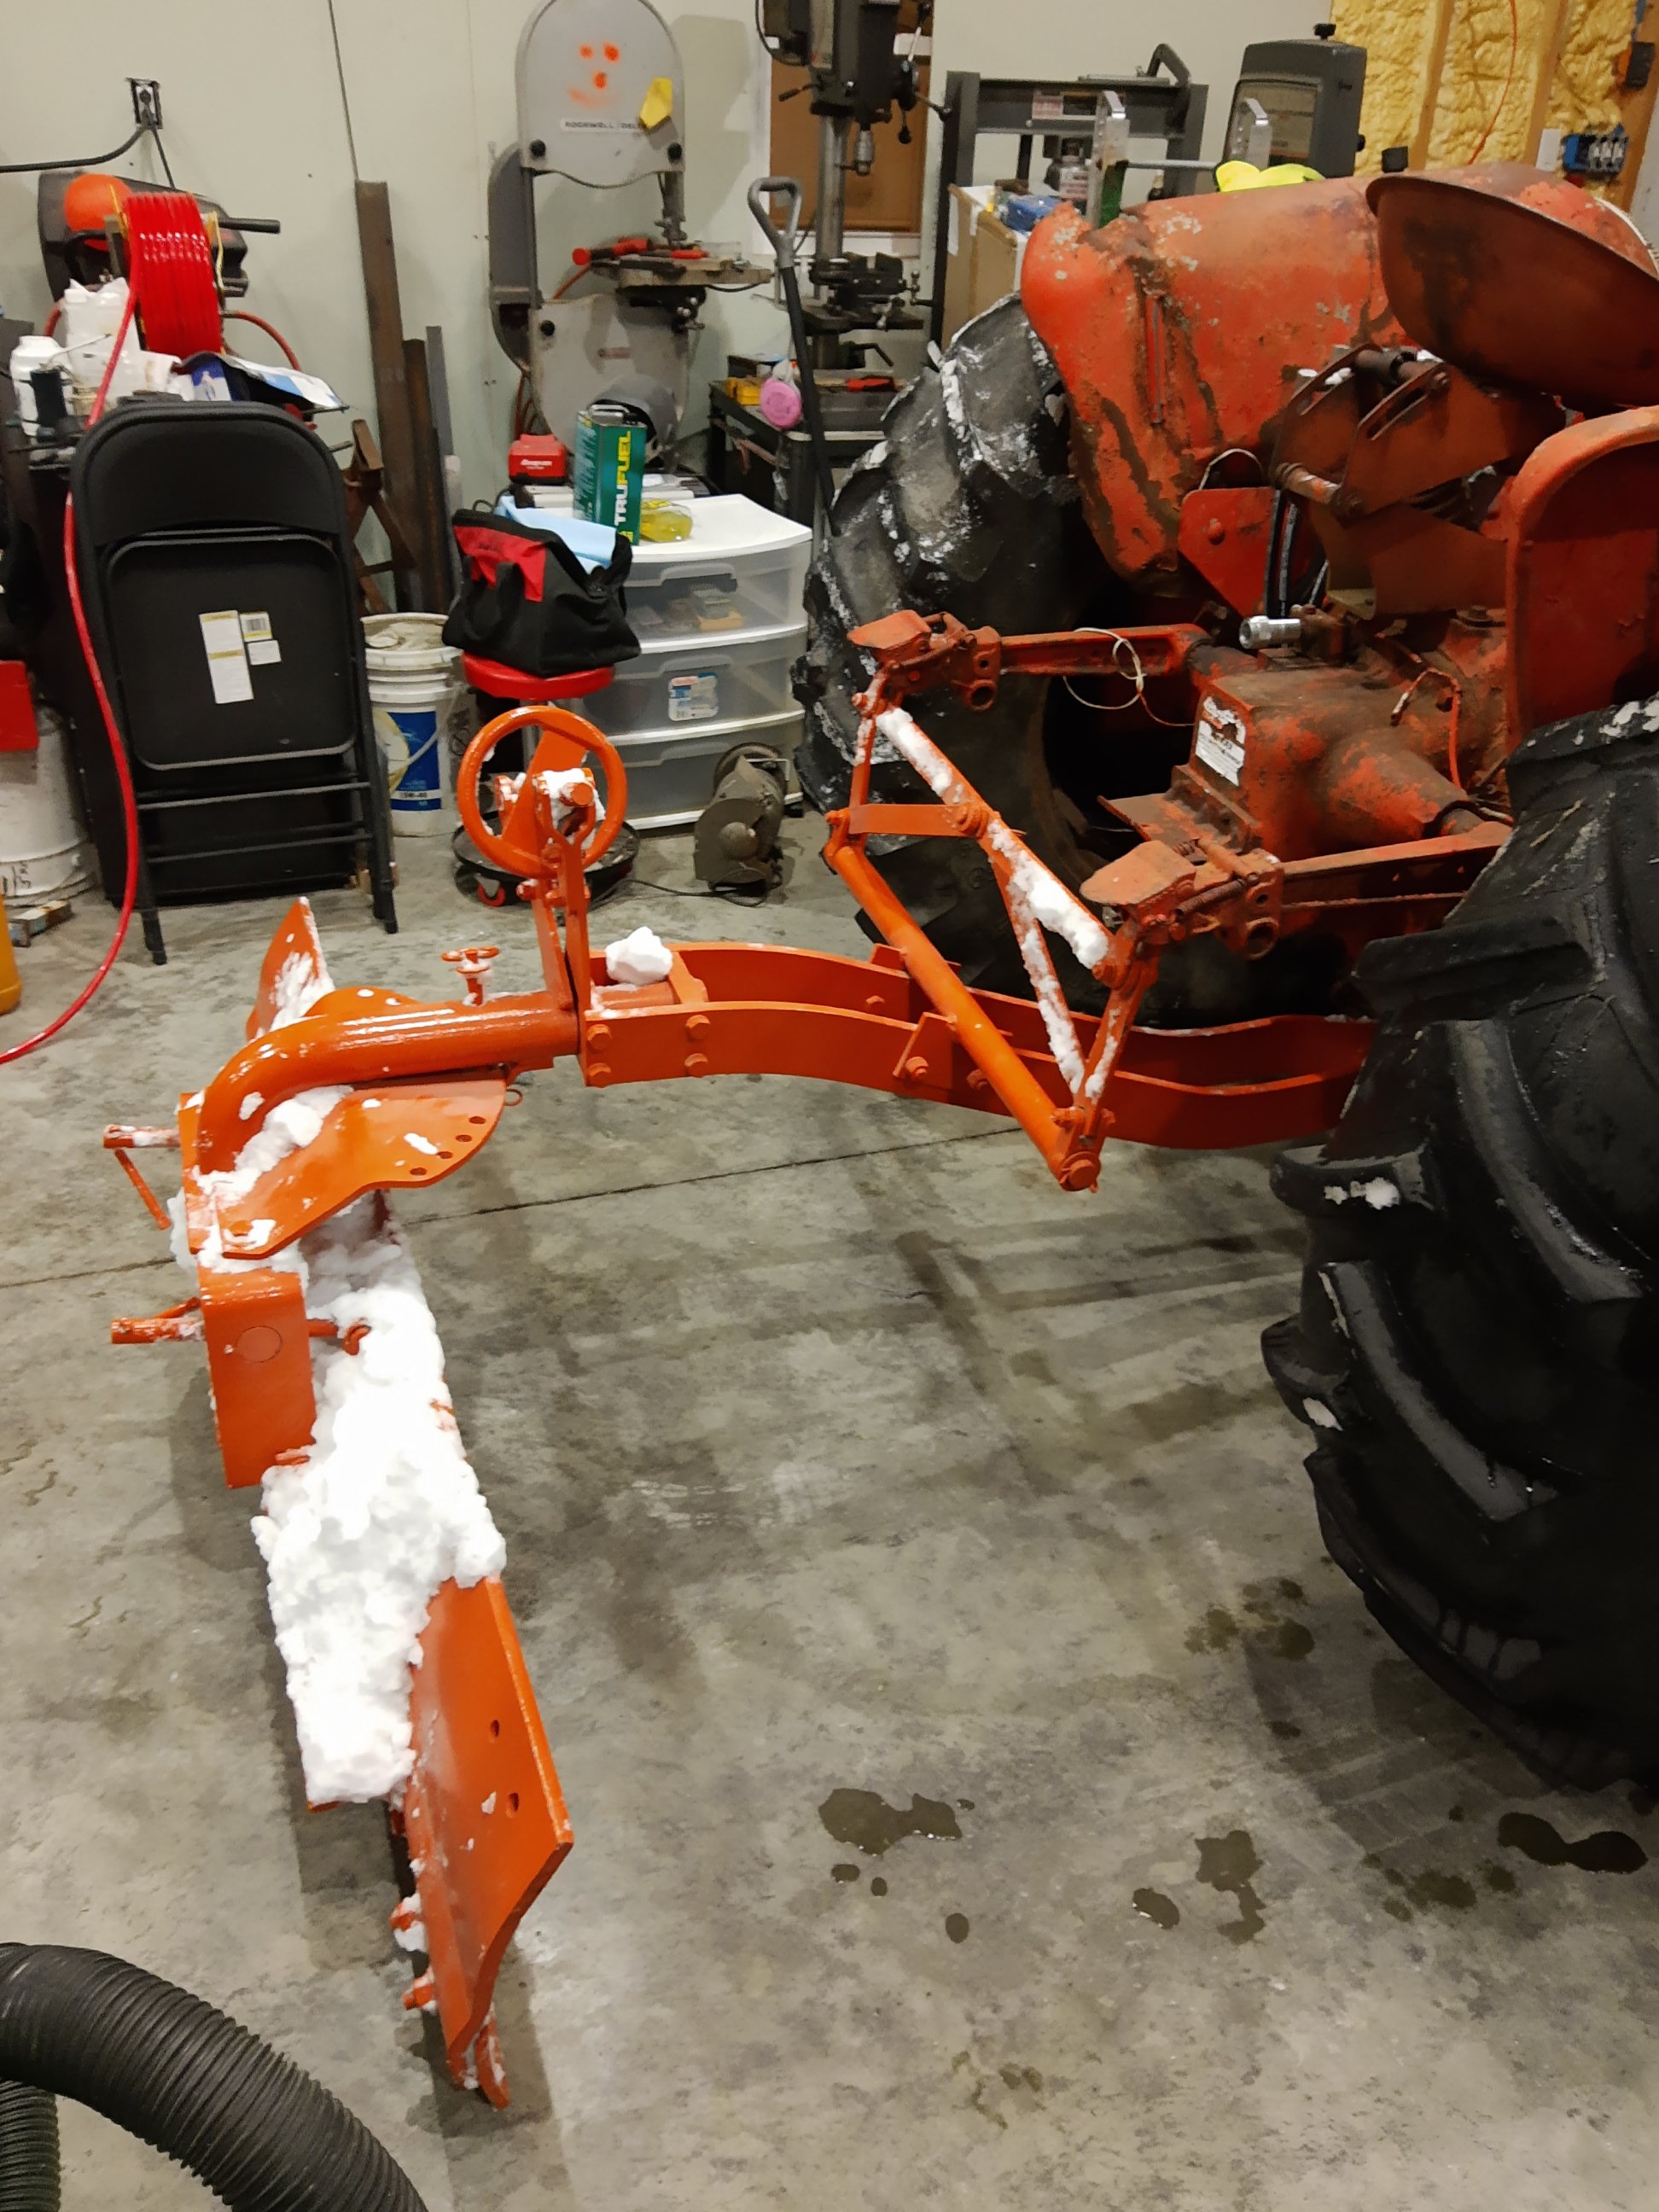 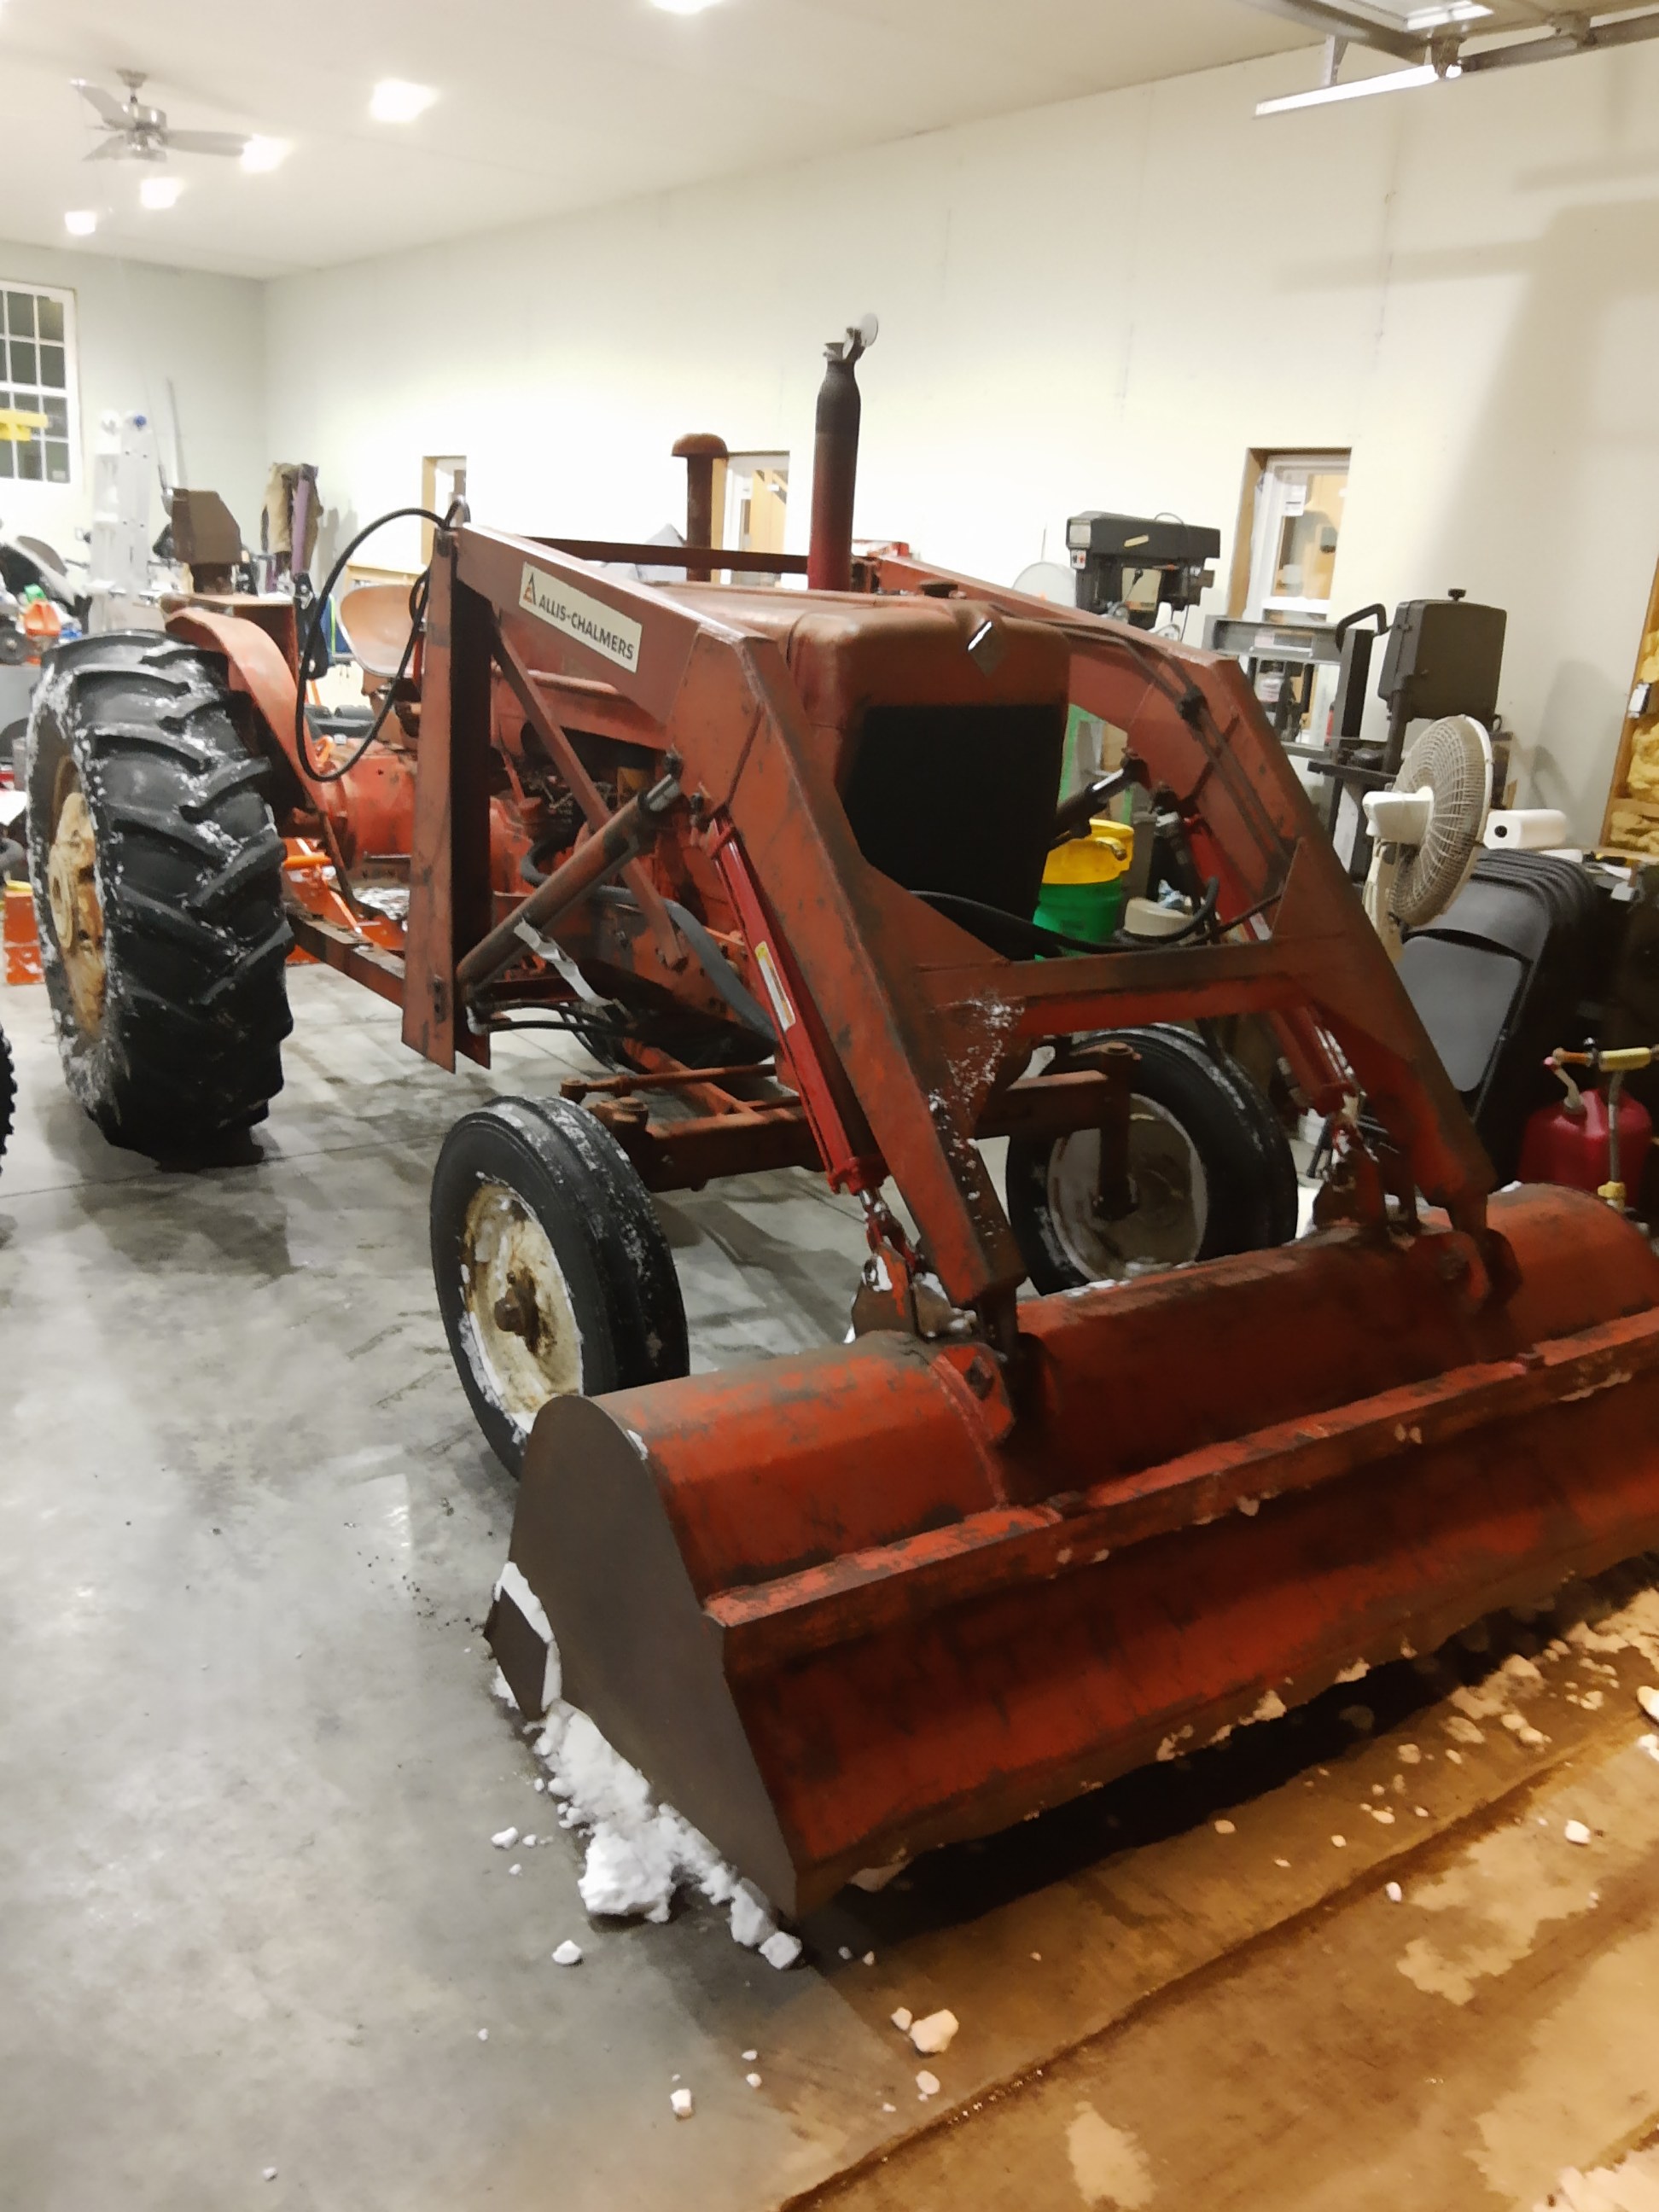
|
Posted By: Strokendiesel002
Date Posted: 02 Feb 2021 at 9:42am
|
So before I took those pictures last night I did play with it a little bit. When there's nothing in the bucket it goes up at a reasonable pace and comes down really quick. However fill that bucket up with this snow that we got and it it will not go up much higher than the top of the hood and it is slow to get there even running wide open. I suppose I need to get a manual for the valve and find out if there's any adjustments I can make there. The pump I have is rated for 6.66 GPM at 1800 RPM at 2,000 PSI... It is an h39aa1b, maybe I just need to go to the h62aa1b? That pump is rated at a little over 10 GPM 2000 PSI at 1800 RPM |
Posted By: DrAllis
Date Posted: 02 Feb 2021 at 9:48am
| The larger pump will not lift anymore weight, only faster. The psi rating will determine how much weight it will lift. I'd imagine you are expecting too much if the snow is wet and heavy. 2,200 psi probably won't hurt anything and is 10% more lift power. |
Posted By: Strokendiesel002
Date Posted: 02 Feb 2021 at 10:19am
|
Hey Dr! Well, if what I described sounds like it's running within specs, then I'm happy, I will try to get some footage and post a link, as that will be the best way for those who know what these should do to say "leave it be" or "you've got more work" One thing I though strange is that the lift cylinders wont pick the front of the tractor up off the ground, but the tilt cylinders will if I "roll" the bucket? |
Posted By: DrAllis
Date Posted: 03 Feb 2021 at 6:21pm
| First, how do you KNOW the relief valve is actually adjusted to 2,000 or 2,200 psi ?? You don't, unless you got a gauge plumbed into it somewhere. Second, are you sure the lift cylinders aren't already bottomed out when you can't lift the front wheels off the ground ?? |
Posted By: Strokendiesel002
Date Posted: 04 Feb 2021 at 2:19pm
|
You are correct, I don't know. I need to get a guage. There is about 4" of stroke left with the bucket face down on the ground, which is how I was shown years ago to lift/ steady the steer axle on a combination... Maybe I shouldn't be doing this with this loader? 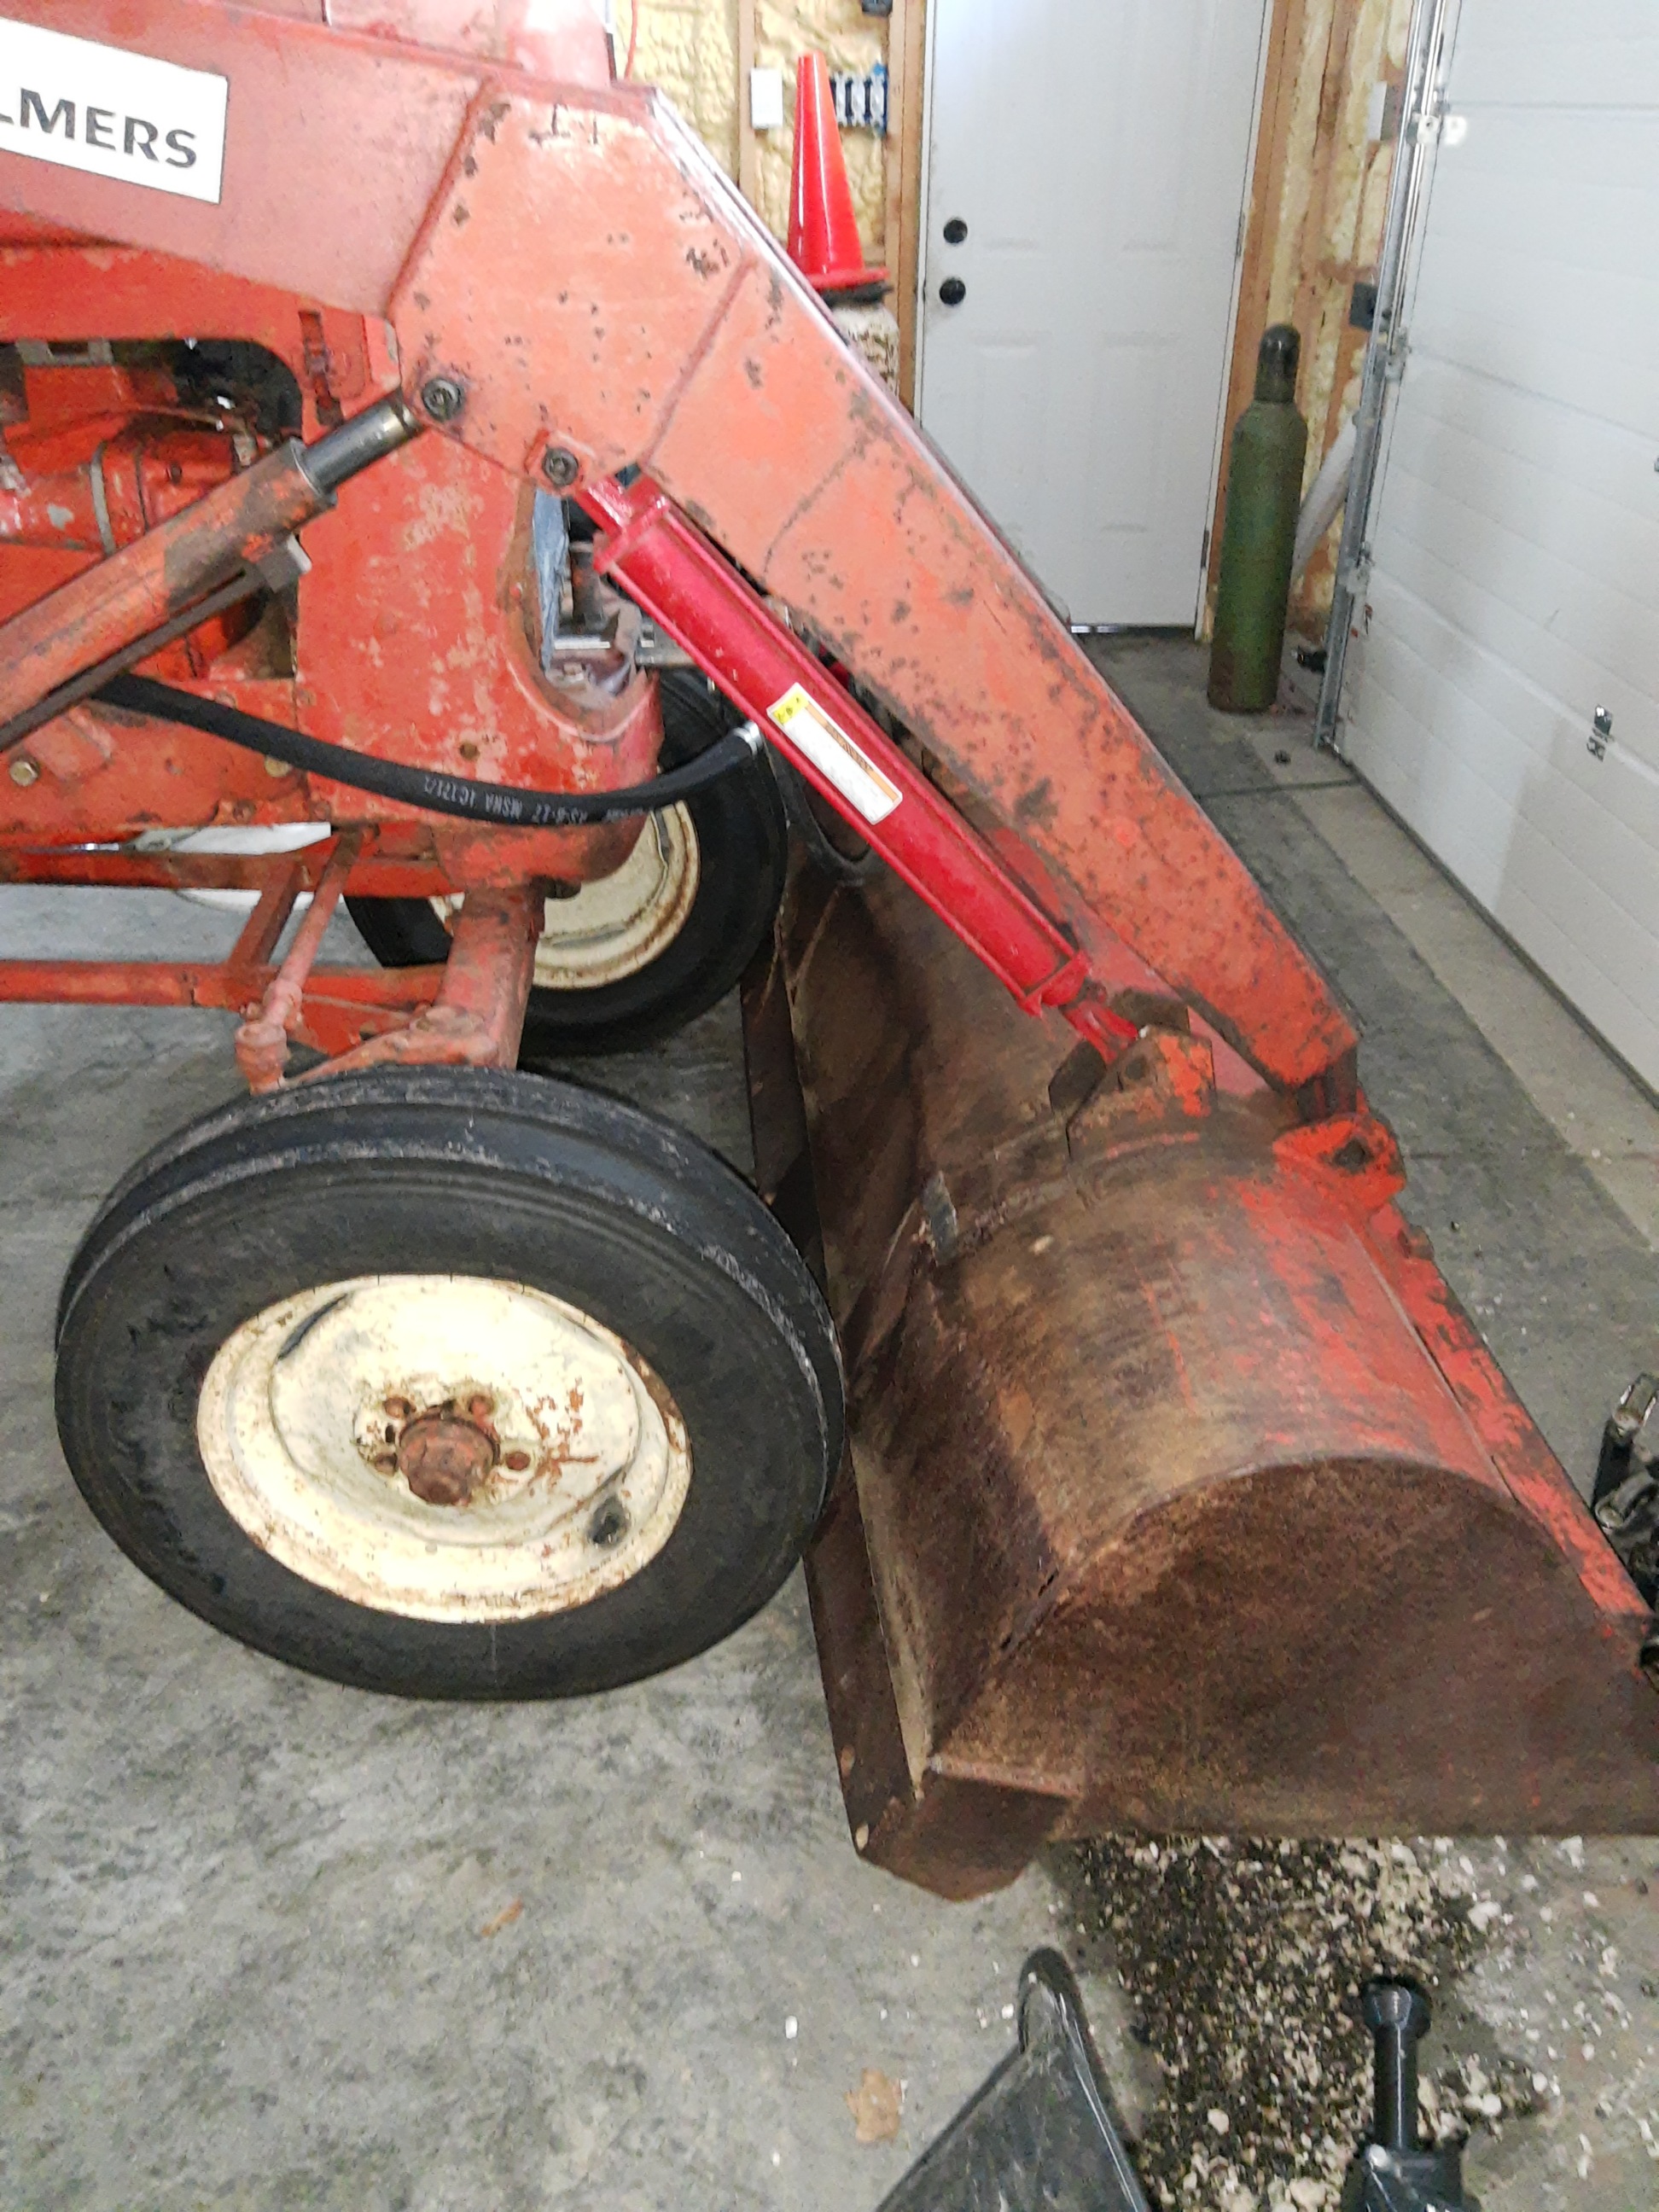
|
Posted By: DaveKamp
Date Posted: 04 Feb 2021 at 9:12pm
|
That much exposed rod doesn't necessarily mean your cylinders aren't bottomed-out... you could verify by curling bucket up, and going boom full down, and see if they get close enough to stall the pump against your check valve, and then look-see how much cylinder extension is still visible. Flattening face of the bucket against the ground isn't a problem, just realize that the blade of the bucket can damage front tires if you're not careful. When you're stuck good, spinning both back wheels, flat-face the bucket to the ground, and curl up, to push you backwards out of a mire. My gut feeling is that your pressure relief valve is bypassing at too low a pressure, which is why your hydraulics are sluggish. Without knowing the history of your loader's valve, I wouldn't be able to venture WHY, but it might actually be stuck open partially, and bypassing flow always. Take a wrench to it, with a catch pan under, and carefully remove the check valve section, clean it out good, reassemble and try again. Also... your hydraulic fluid may be an incorrect type or weight for this circumstance, and on cold days, not flowing from pickup into pump very well. Dirt in a pickup screen, or debris in a valve section, in a hose, tee, or even in a cylinder will cause bad things to happen where they should not. Contrary to what the 'good book' says, PLUMBING is the Root of all Evil... ------------- Ten Amendments, Ten Commandments, and one Golden Rule solve most every problem. Citrus hand-cleaner with Pumice does the rest. |
Posted By: Brian G. NY
Date Posted: 05 Feb 2021 at 9:34am
Do you have enough reservoir? It sounds like you could be running out of oil.
|
Posted By: Strokendiesel002
Date Posted: 06 Feb 2021 at 9:04am
|
Dave- sorry, I should have clarified. When I curl the bucket the rod does go all the way in. I'm running Farm and fleet Universal Hy Trans. I will be searching for information on this valve to see if I can get some type of reference and then do as recommended. I was dragging heels on pulling apart the valve until I get a pressure guage, so I know where I'm at least starting at. Brian- While cycling the lift and bucket I was pausing and filling it. Continued to do so until fluid was burping out of the reservoir. Adding a secondary reservoir to the post may be the fix, but I have to believe that it was designed with sufficient capacity, no? |
Posted By: DaveKamp
Date Posted: 08 Feb 2021 at 12:22pm
|
Brian may be on the right path here... and here's a little info that might help: When a hydraulic system is a little low, or a little high, it will suffer some very confusing maladies... and one of the prevalent, is aeration... air being drawn in, and mixed with the oil... aka... 'frothing'... Strawberry Milkshake. There's a BUNCH of things that'll cause aeration, but in all cases, the observed result is belching of foam from the reservoir, and lots of annoying operational foibles. Only being able to lift-so-far IS a symptom of low fluid level... and when the pump is trying to ingest aerated oil, it'll become incapable of lifting with any effectiveness at that point. Obvious cause of aeration, is simply low oil level, but that's not ALL... Insufficient seals... particularly, piston rod seals, hydraulic pump inlet-side seals, filter, spool valve... ANYTHING that's on a suction side can draw air IN... and once it's in, getting it OUT is a very tedious process. When hydraulic system components are old... have either never been used, or been out of service for a long time, there's a good chance the seals have become stiff and dried out. Lip seals on spinning shafts can cut into the shaft, leaving a groove that although seemingly good, WILL allow air to be drawn in. Cylinders which are lowered by gravity, regardless of wether they're single- or double-acting, WILL draw in air through a worn seal readily if the implement is lowered without the pump running... because gravity will displace the fluid from one side, but there's no pressure forcing oil into the BACK side. Single acting PISTON type cylinders (not a 'displacement type' cylinder) have breathers on their non-active side. under the same circumstance have the BACK of the cylinder (unplumbed) breathing air, and if they cannot breathe freely, will force air from back, through piston seal, into the 'wet' side of the piston through normal operation. Cold oil doesn't flow as well as warm oil. When oil passes through a pump, it goes from one pressure, to a higher pressure, the difference between the two being determined by load resistance... which is practically zero (in an open-center system, if no valve is operated, all pump discharge is returned to the tank) to full load (lifting at maximum load) or slightly higher (exceeding cracking pressure of a pressure relief valve). Your hydraulic system's relief valve may be bypassing when it shouldn't be. Pressure relief valves have THREE ratings- first is 'CRACKING PRESSURE'... the pressure point where it STARTS to bypass oil. Second is 'FULL PRESSURE'... the pressure at which it is fully open and bypassing... which also correlates to 'MAX FLOW RATE'... which is the maximum VOLUME that valve can flow. If you have a 10gpm pump, and a pressure relief valve with cracking at 2000psi, full pressure of 2100psi, and flow volume of 15gpm, you can safely assume that somewhere between 2000 and 2100psi is the highest you SHOULD see on the gauge... because the pump will only go to 10gpm, so the valve cracks at 2000, but will not see enough flow to hit the 15gpm/2100psi level. The antithesis to this, is if you have a 20gpm pump, but a 2000psi crack/ 15gpm@2100psi valve... if you stall the cylinders, your 20gpm pump will try to shove all 20 through that 15gpm bypass, and you'll see MORE than 2100psi, and things will start to break. A totally different concept: Plumbing sizes. A hydraulic system NEEDS to have plumbing sized large enough to do the job, and most critically, the RETURN and SUCTION sides. If there's insufficient return, or insufficient suction, the pump will withdraw all the fluid it can, and start ingesting air. This happens most readily when the oil is THICK, so starting up a cold machine, and expecting the hydraulics to work immediately, is expecting too much. Best to start it, and keep it idled down, so it's turning the pump slowly, and gently warming it all up. Environmentalists don't like this (because it is 'excessive idling', right?) but they don't know anything beyond the small fraction of the world they live in, so think like a cold machine. Back to aeration: When you take a volume of air, and compress it rapidly, it gets hot. Let's say you go from standard atmosphere to oh... 350psi or so... and you squirt a little oil into that air, it ignites, giving you a diesel engine. When you take foamed-up oil, and pass it from ambient pressure, up to 2500psi, you have THOUSANDS of little diesel engines. This is what happens when aeration occurs in a hydraulic pump. The result, is burning hydraulic fluid... it gets all sooty, and it gets really hot... partially from from the air being really hot when compressed, and the remainder from the tiny combustion events occuring inside the pump. There's a million techniques to bleeding aeration out of a hydraulic system, but the formula that always works best, is go slow, and keep the fluids warm. If it's foaming up, you've either got someplace drawing air IN, or the level is too low to assure withdrawl of just fluid. If you THINK there's an air leak, it can sometimes be confirmed (if your fluid is clear enough) by sticking a little camera into your tank to see the reservoir's return line. If you see bubbles coming IN, you've got air drawing in from somewhere. A larger reservoir HELPS reduce aeration (because the fluid has more TIME to displace air out), but it also means it takes MORE time for the fluid to warm in cold climates. A smaller reservoir will increase warming rate, but will not shed as much excess heat whilst working... and will not provide as much variation capacity (displacement change between all cylinders retracted vs extended)... or a little extra headroom in the event of leaks. ------------- Ten Amendments, Ten Commandments, and one Golden Rule solve most every problem. Citrus hand-cleaner with Pumice does the rest. |
Posted By: Brian G. NY
Date Posted: 09 Feb 2021 at 10:03am
| The reason I mentioned "running out of oil" was you have 4 long rams to feed now instead of that single ram inside the housing. Most of the A-C loaders that operate with four rams have a separate reservoir built into the loader frame to provide more volume. |
Posted By: DrAllis
Date Posted: 09 Feb 2021 at 10:30am
| Where is the reservoir ?? Once all four cylinders are full of oil it will require 2 gallons of oil in the reservoir to operate a loader like that. |
Posted By: Strokendiesel002
Date Posted: 24 Feb 2021 at 11:42am
|
I apologize for not responding sooner. I still need to get a pressure gauge to do testing The suction line is quite large. I believe that the pressure line is also larger than the lines that go from the valves to the cylinders as well. Brian, Dr - The tank is in the loader frame, left hand side.
|
Posted By: Strokendiesel002
Date Posted: 09 Mar 2021 at 1:10pm
|
I was asking around to see if I could borrow a gauge from friends that do hydraulic work, but came up empty handed, sort of. I showed them the specs of the pump and the valve that I have and was told to remove the cap, back the lock nut off and give the pressure screw a turn in and re test. If it's better and there is no audible change from the pump, continue until it'll lift the front of the tractor. VERY IMPORTANT NOTE - DO NOT BACK THE PRESSURE SCREW OUT WITH THE PUMP RUNNING OR ANY PRESSURE IN THE LINES. They made me repeat that many times before they let me leave. I believe one of them has seen someone start to back it off and the screw shot out and caused some severe personal injury. So, I believe I turned the screw in 2 rotations and it picks the front end right up, doesn't slow down through any of the strokes, either! I do plan to get a gauge set, as I hope to get more and more toys utilizing Hydraulic Pressure... any recommendations? I have seen quite a few kits on Amazon, but have recently started to question the legitimacy of the reviews. Thanks for checking in on me!
|
Posted By: Strokendiesel002
Date Posted: 09 Mar 2021 at 9:12pm
I plan to put the bucket that came with the loader off to the side for a while. To make it more functional for me and to save some wear on the front end I am planning to fab up a quick attach for skid steer attachments (J2513). My fork plate should be here tomorrow and the plates with the latches Monday. I still need to get some 3/8" flat stock - I'm hoping 4" width will work and some 1.5" OD 1/4" wall tubing for bushings. These loaders use 1" pins from what I can tell around 5" long. Here's what I've come up with so far: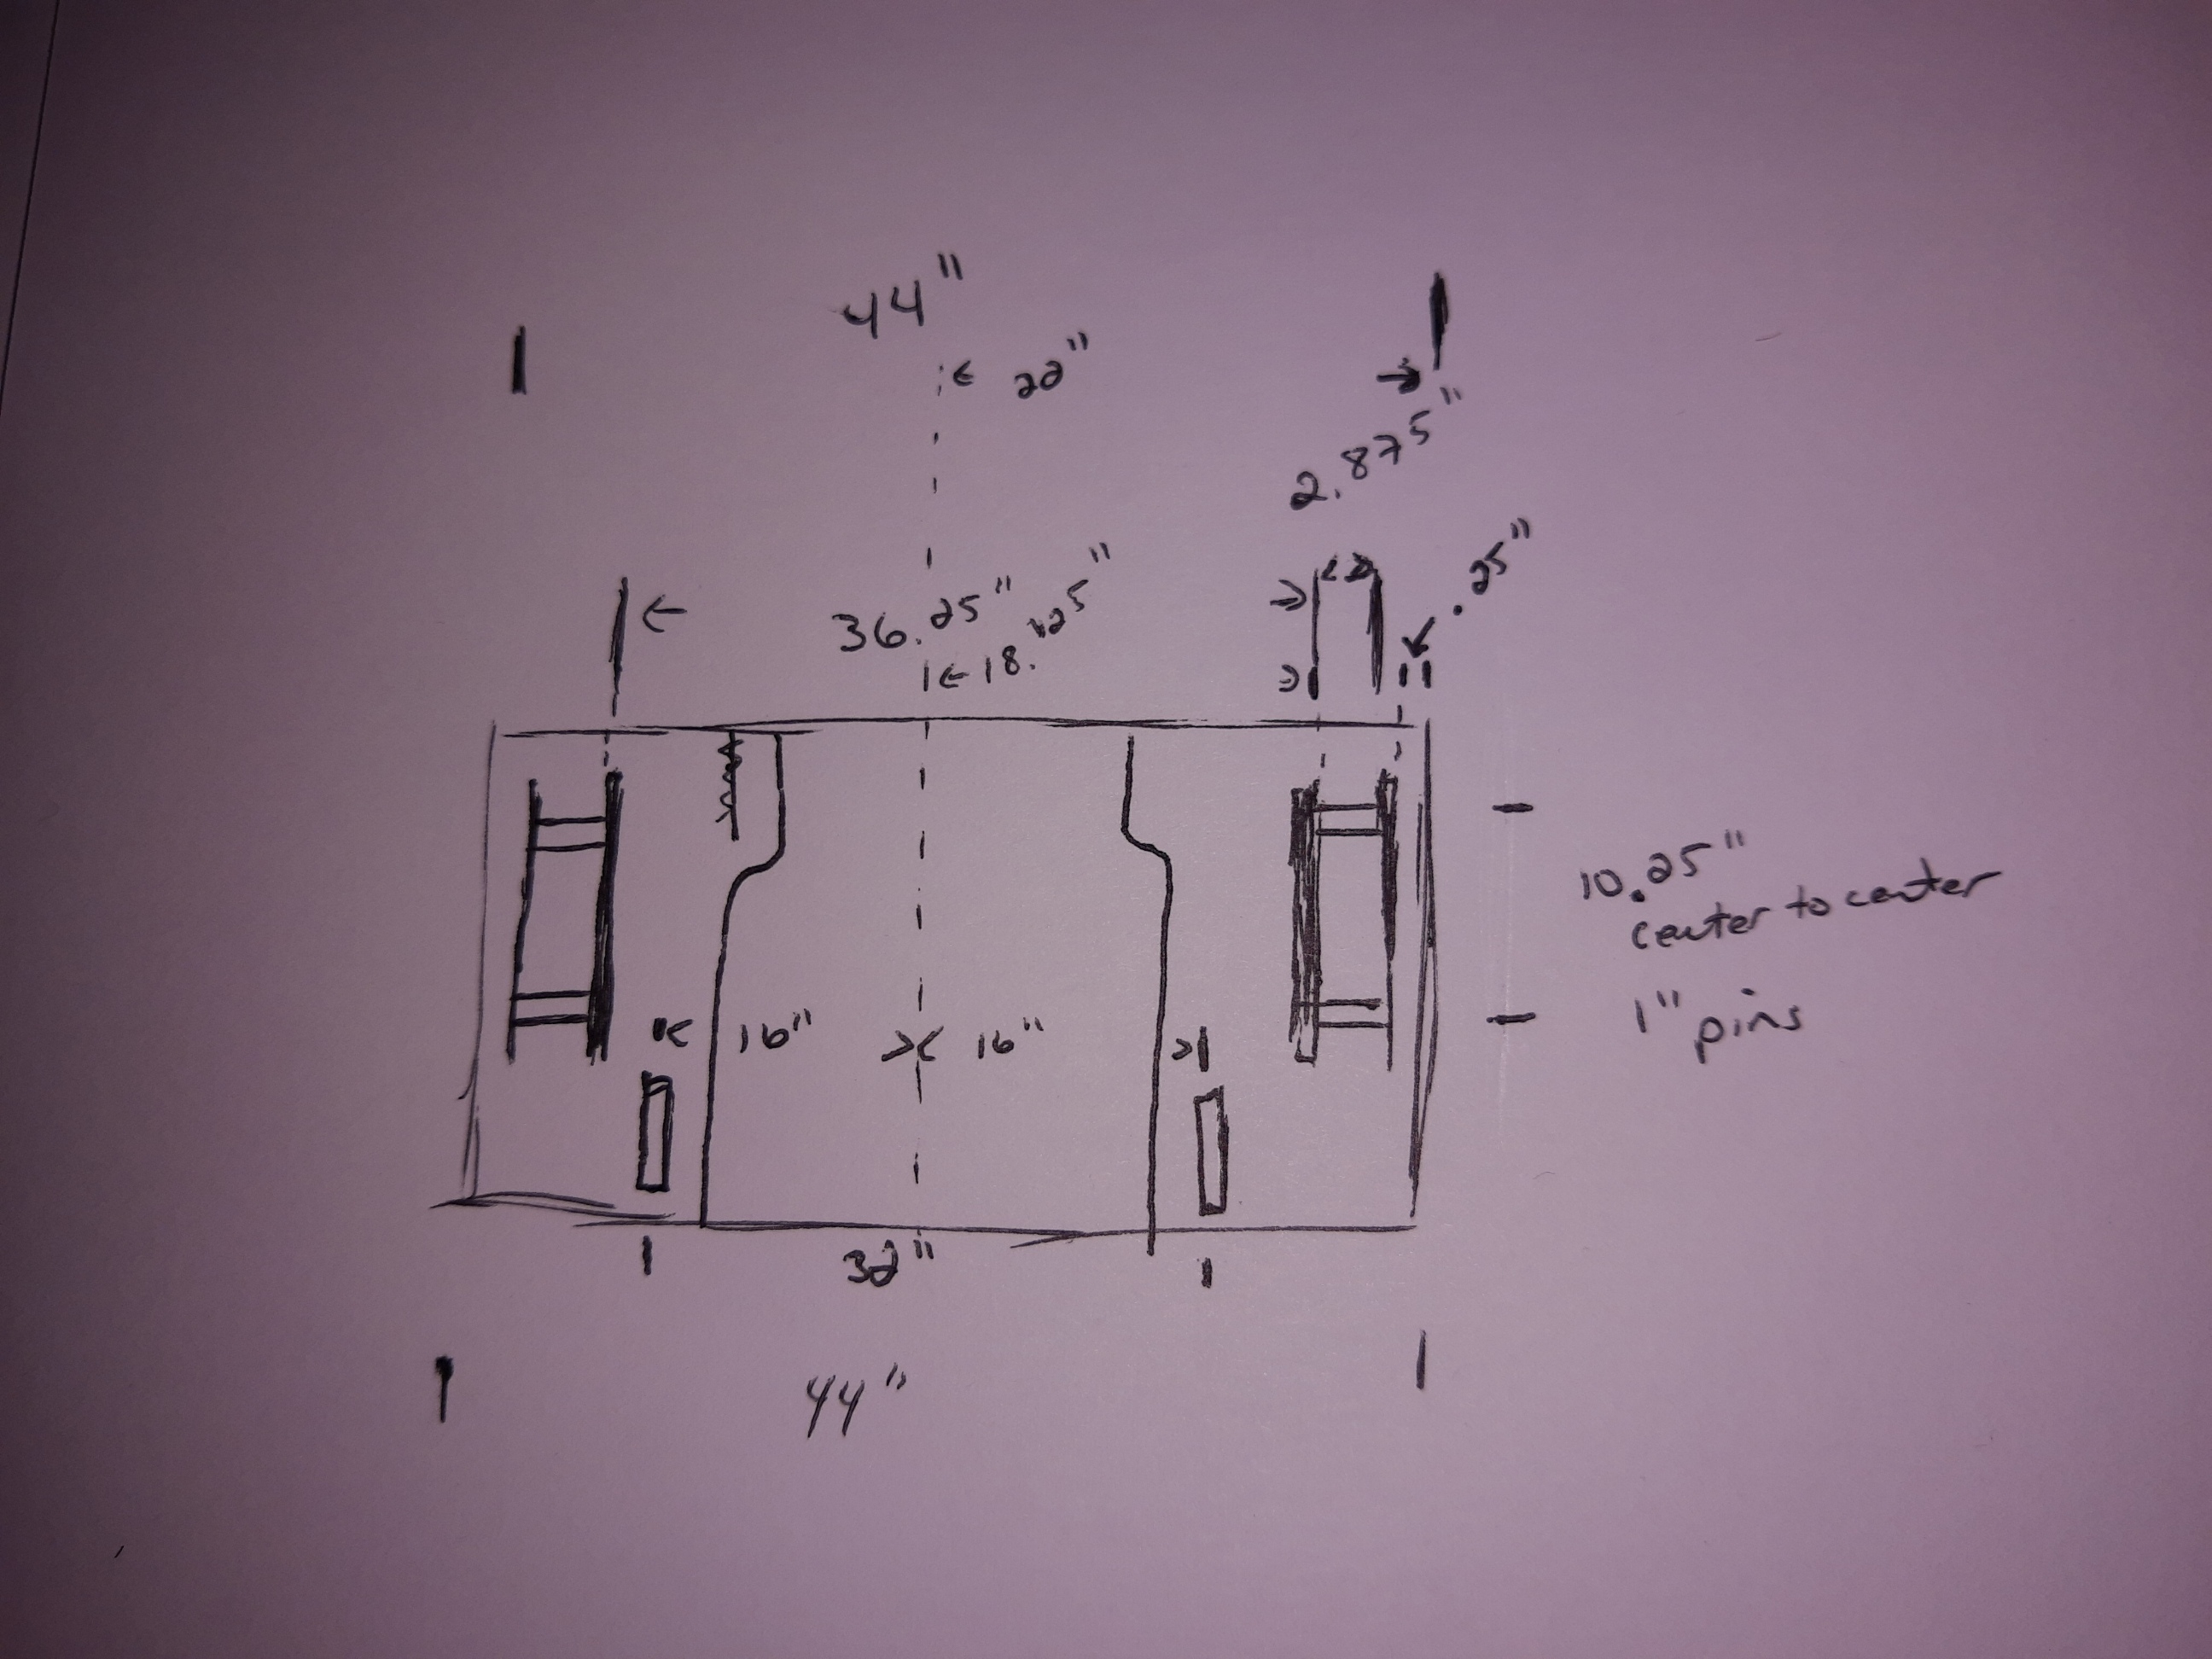 Once I have the plates, I'll be able to determine how wide the flat stock needs to be. I want to keep the pins as close to the plate as possible, reducing additional stress and leverage the attachments seem to have utilizing some of the "adapters" out there. Looking, many of them are 4-6" thick?! That's got to reduce capacity and add undue stress. If I get lucky and can pull this off (based on the measurements I've taken so far I'm pretty confident it I will) I think this will look less like an afterthought. Thoughts/ experience? |
Posted By: Strokendiesel002
Date Posted: 10 Jun 2021 at 1:16am
Truck and tractor pulls this Friday so I figured I'd pull the D17 in for a look over... Pooched the loaded inner tube. Was planning on replacing later this summer, but happening now instead! Removed 55 gal of CC and friend brought over a bead breaker. Slicker than snot that tool is!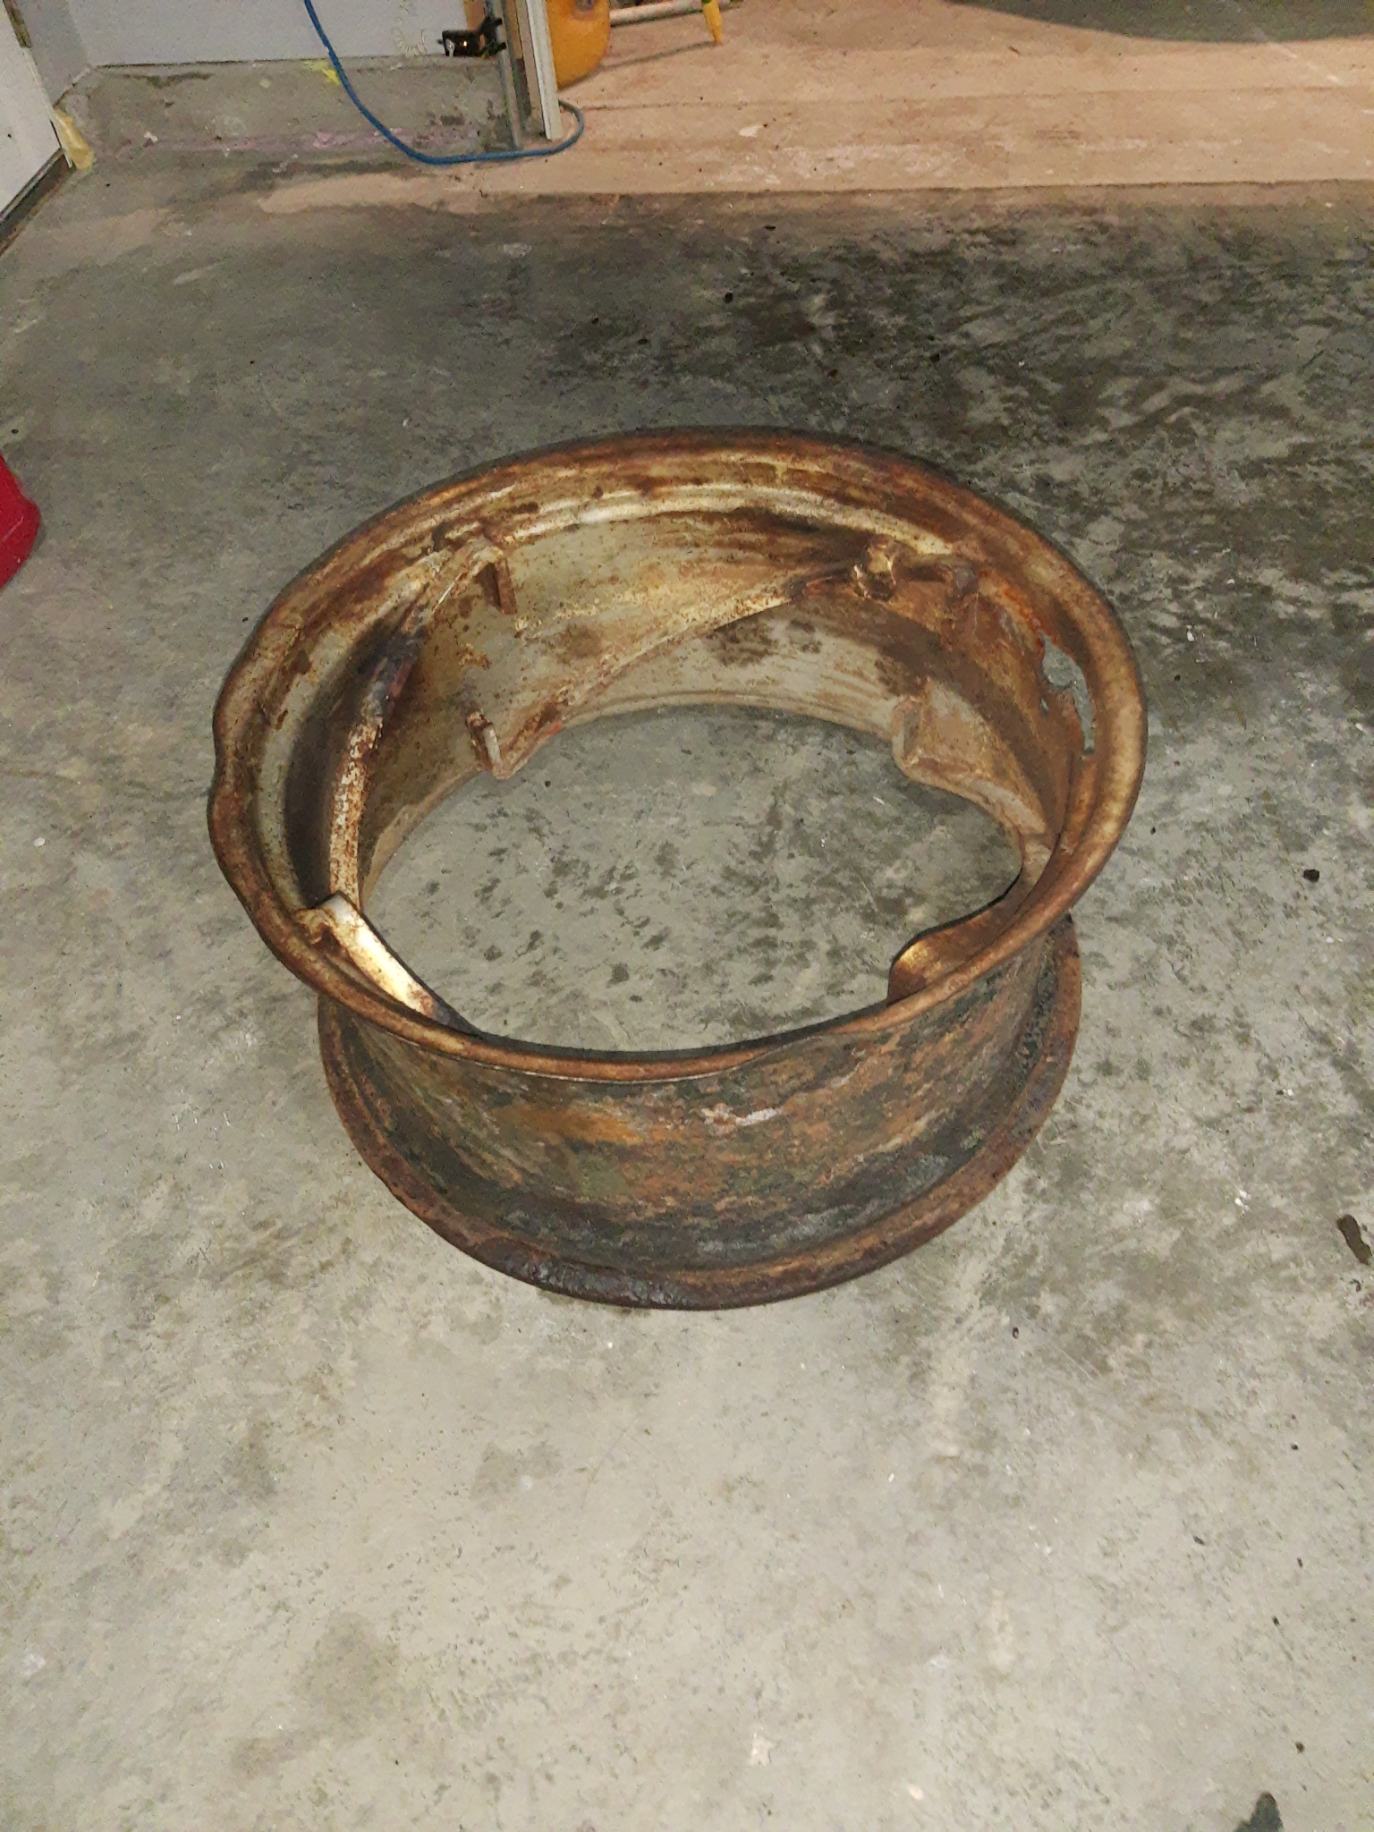 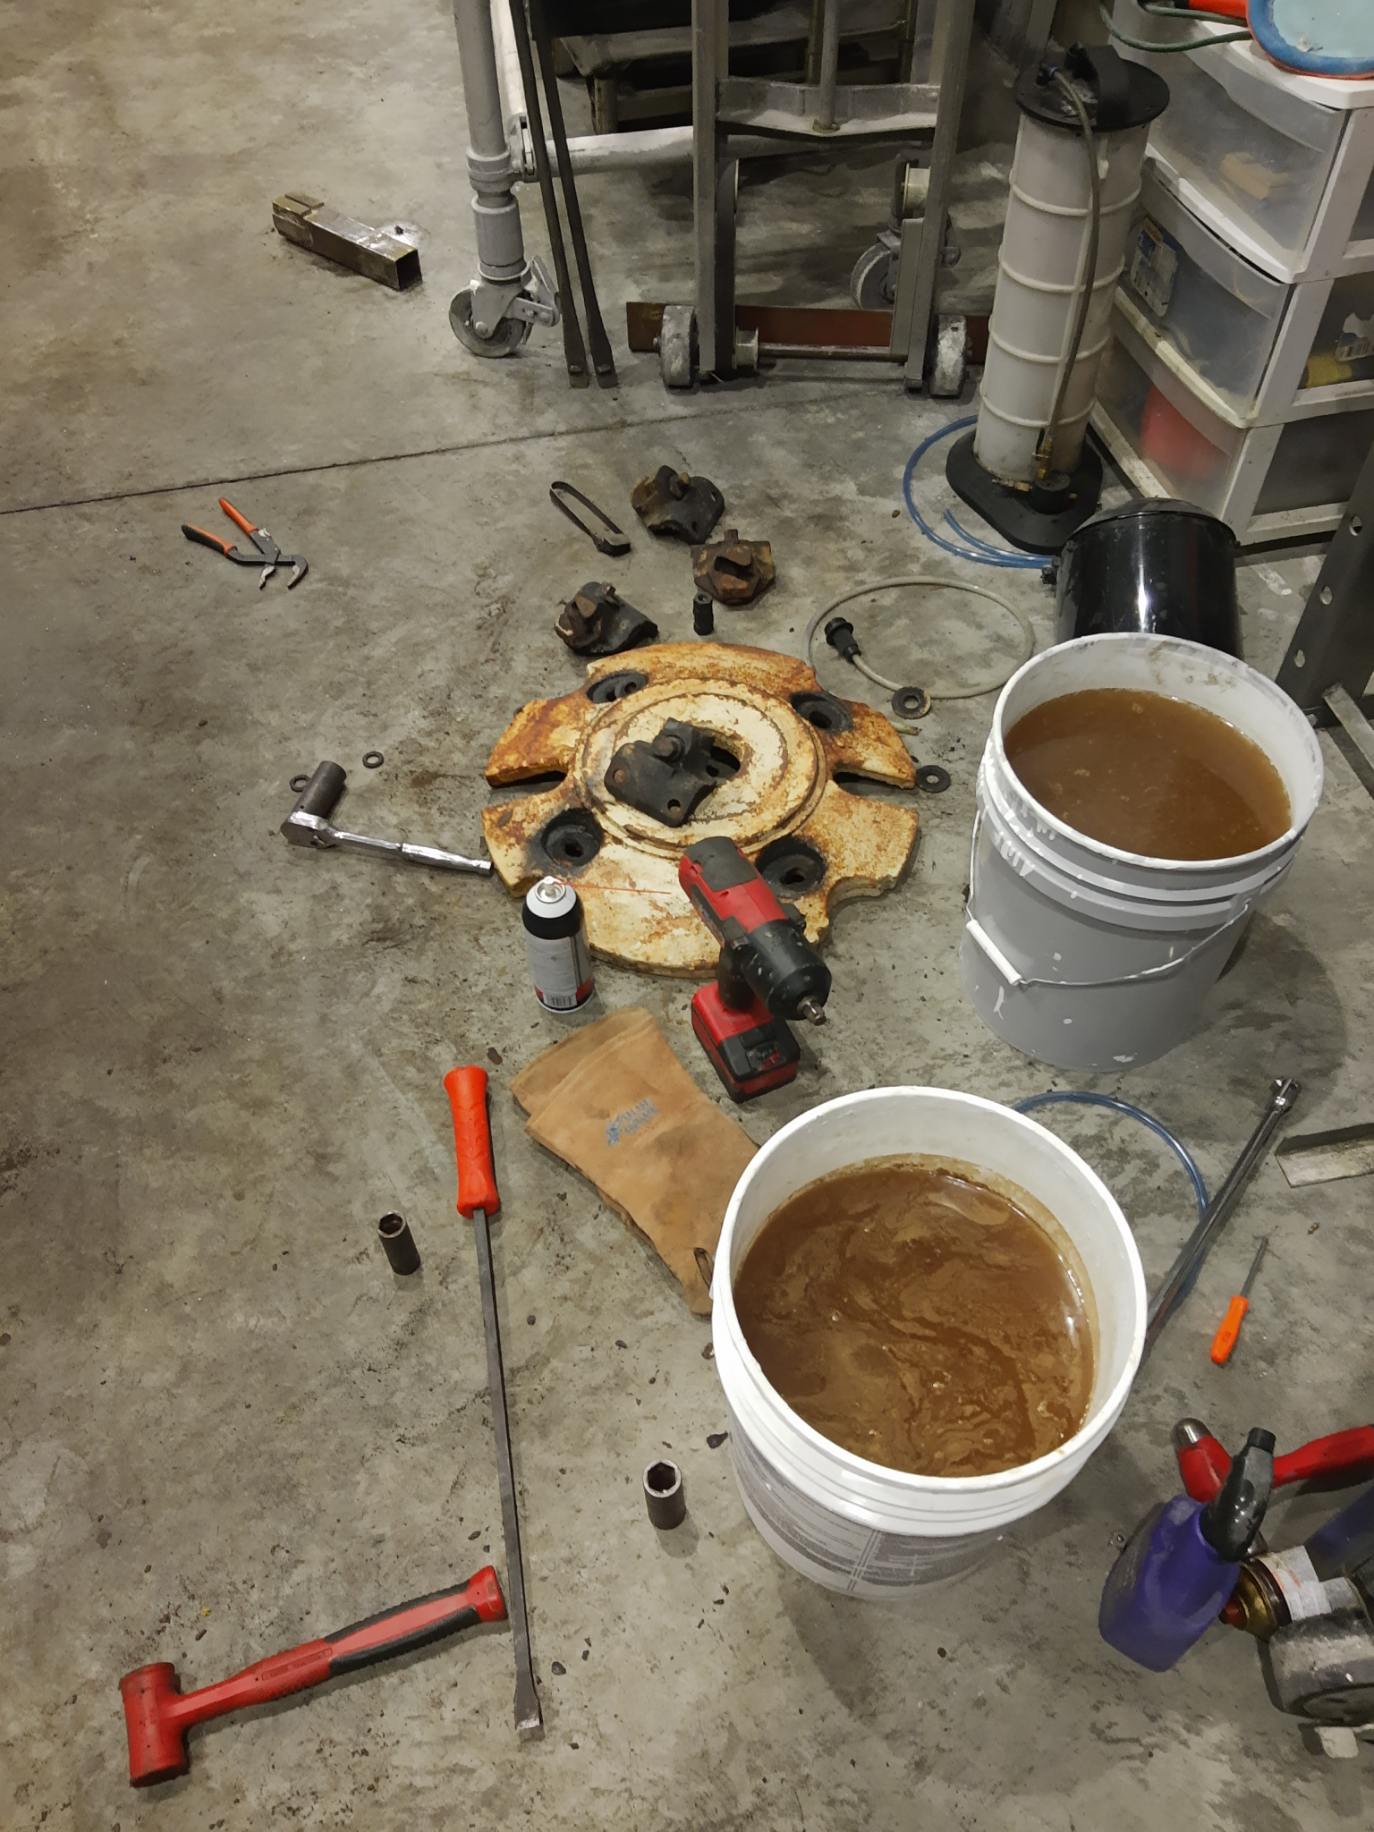 I had the wheel I removed from the other side sandblasted last spring but never got around to repairing it with a donor I was lucky to get. Well, last night was cut, weld grind, grind, weld, going, weld sand. I don't think it's near as nice as Sugarmakers, but it's MUCH better than what was on there!  
|
Posted By: IBWD MIke
Date Posted: 10 Jun 2021 at 7:50am
|
Good work! Takes a while to fit those patches in. |
Posted By: Strokendiesel002
Date Posted: 10 Jun 2021 at 8:16am
|
Thank you Mike! I doubt I would've searched for a donor wheel had I not seen Chris do his. It's not my best work, but I'm on limited time (which is completely my fault as I knew this was coming, just kept riding on hopes haha) |
Posted By: Strokendiesel002
Date Posted: 22 Jun 2021 at 7:36am
|
Couple weeks ago the Southeast Pullers came around, so off cam the loader and pump and out we went to play. Got 7 out of 8 and learned a few more things. In the process I removed the other tire and wheel which was still filled with C.C. Tuesday before the even I pulled into garage and it sprung a leak. Spent that evening patching the 1st wheel I took off 2 year ago and had sand blasted last year with good intentions. 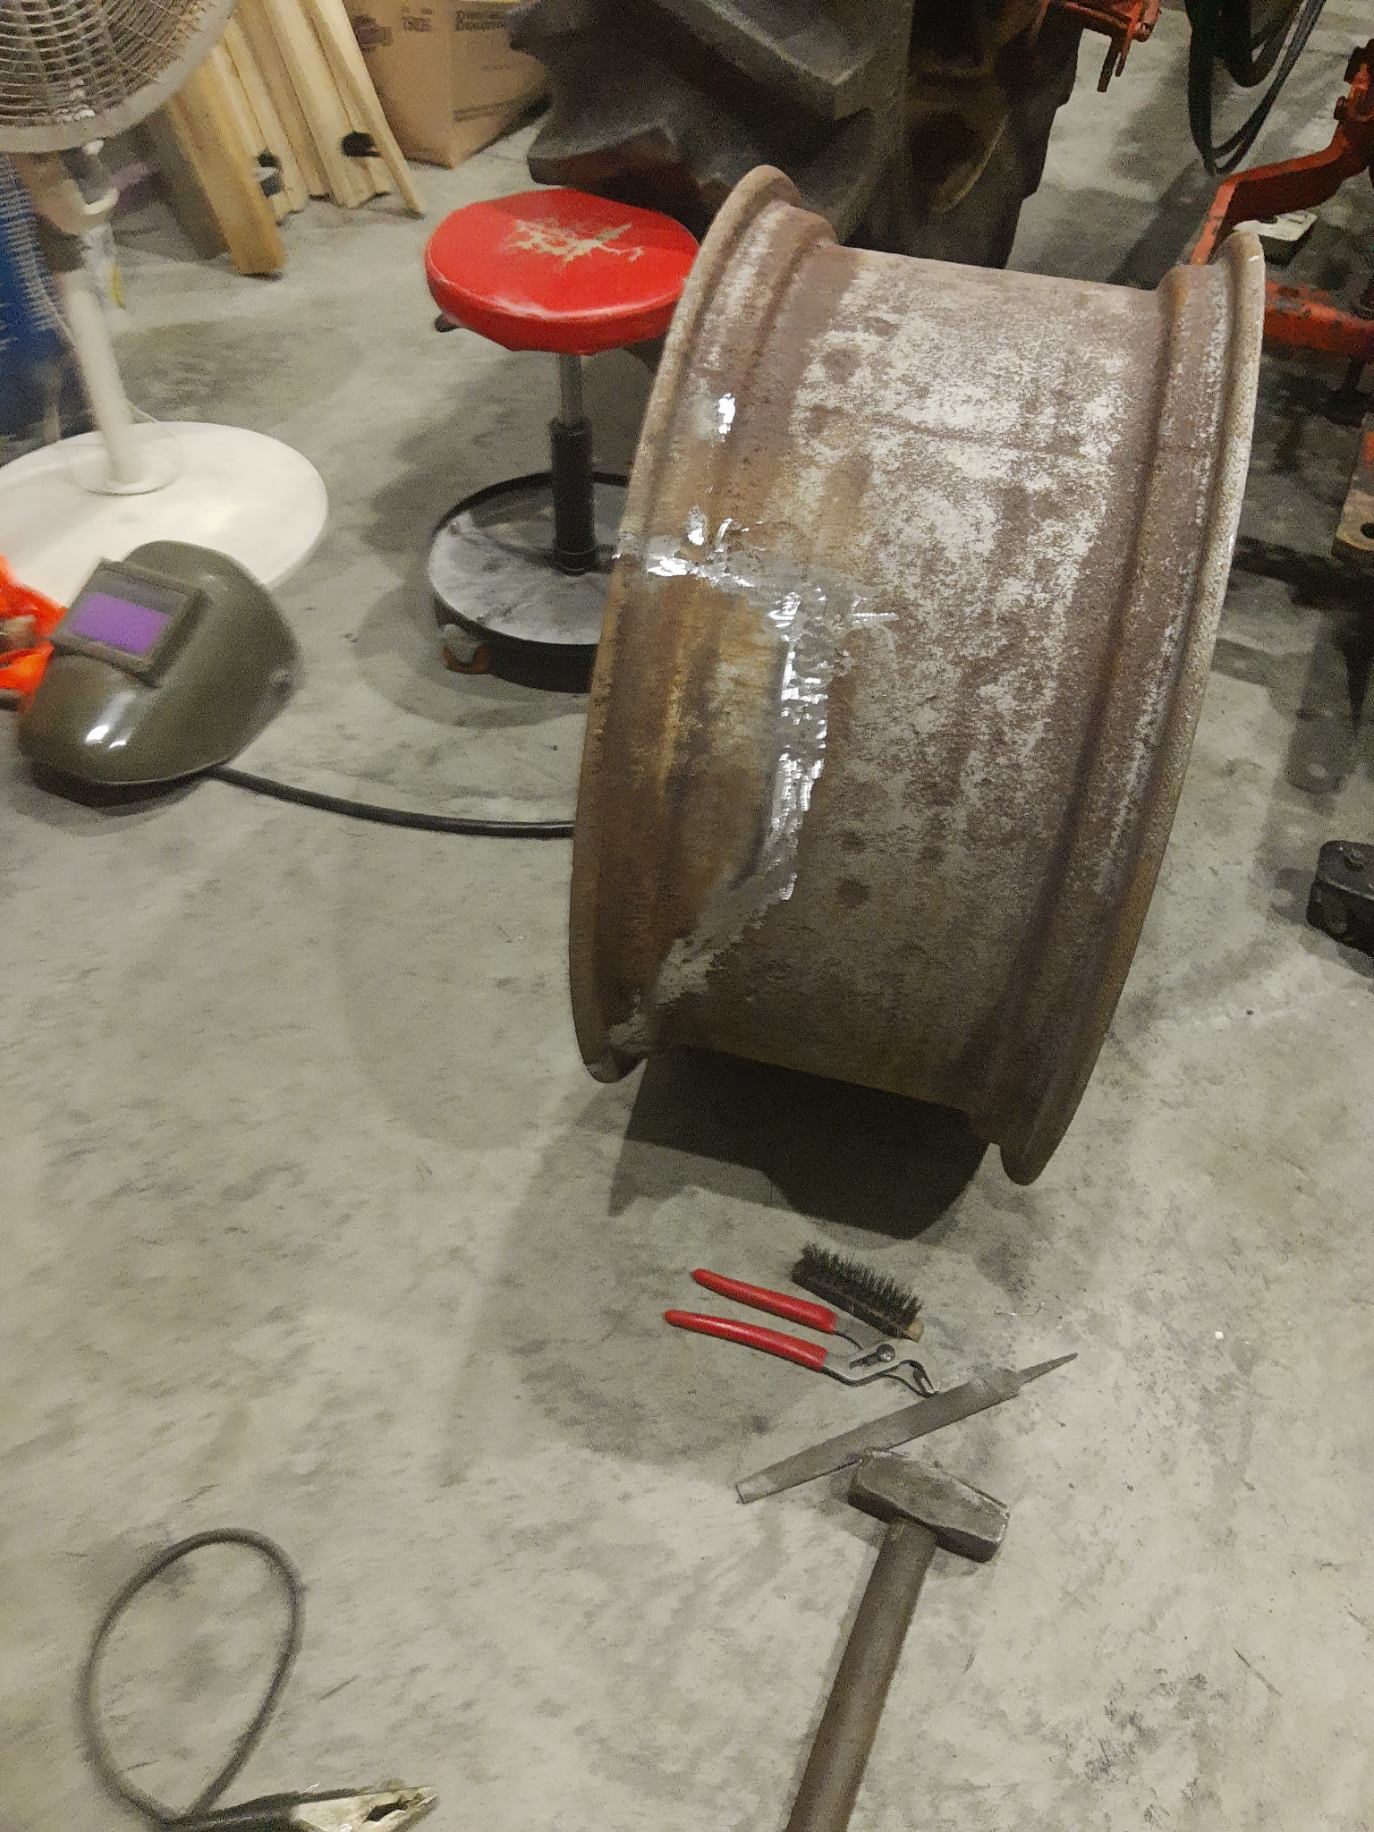 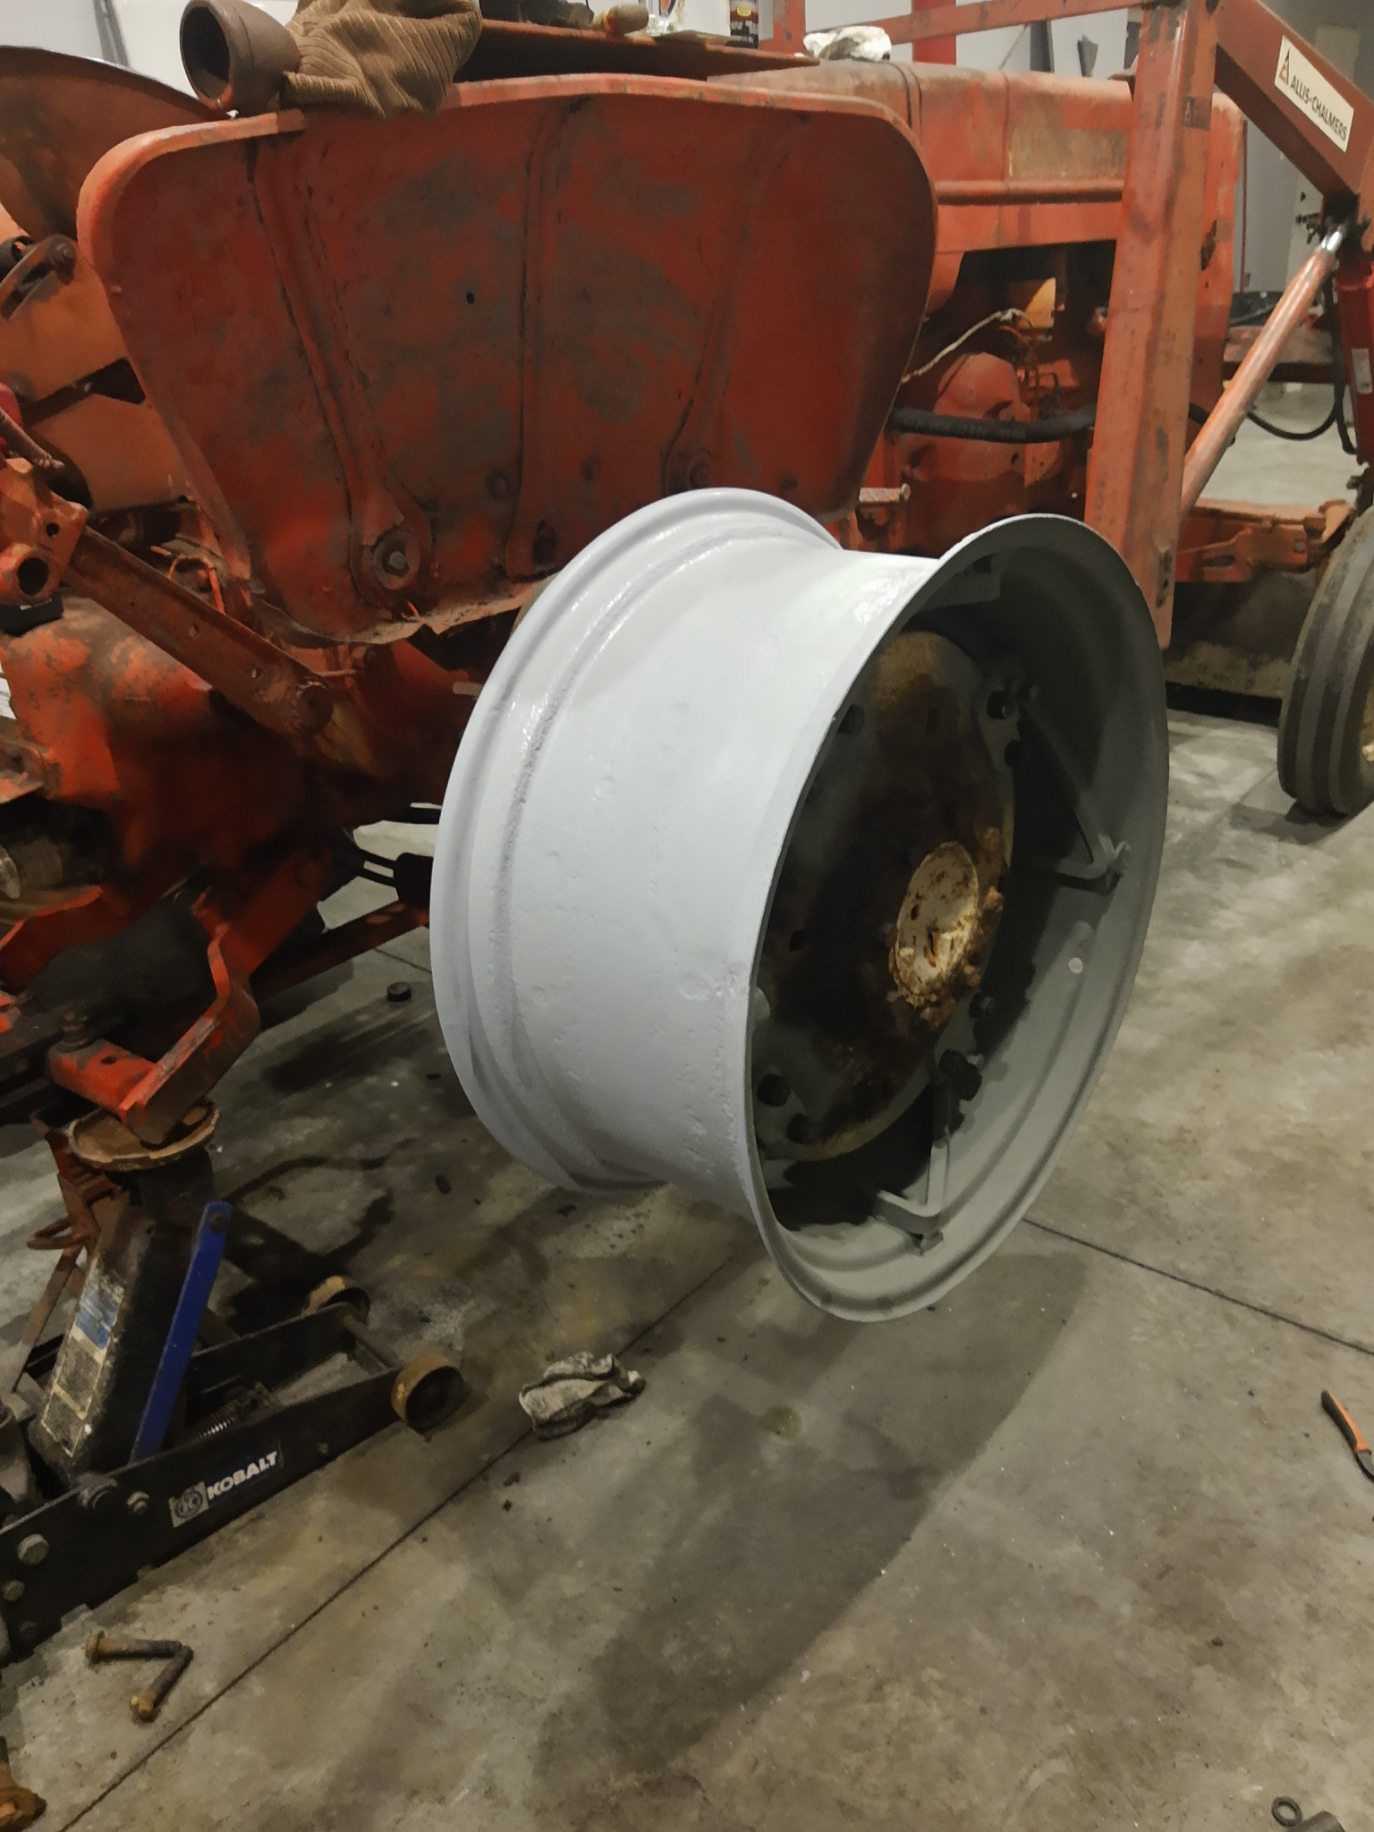 Buddy brought over a bead breaker and made short work of breaking the bead. Sure bears how I did it last time! Then we drew 55 gallons of C.C. out and mounted the repaired wheel. Next evening I mounted the replacement tube and tire back on after flushing and washing out the tire, the grinding and cleaning rust off the bead. Found out Thursday that I had pinched the tube. Loaded onto trailer and went to buddies farm where we bolted weights to the frame rails and hung 400lbs off the lift arms. Came in at 5400lbs and was again reminded that I could(should) raisey hitch height about 5 inches |
Posted By: steve(ill)
Date Posted: 22 Jun 2021 at 8:01am
|
anything related to tires and rims is a lot of dirty/ hard work... Looks like your well on your way with the repairs. ------------- Like them all, but love the "B"s. |
Posted By: Strokendiesel002
Date Posted: 22 Jun 2021 at 10:52am
|
Agreed Steve! I have to admit, after the pulls and mounting the loader frame back onto the tractor I just swung into the tire shop to have them pull out my damaged tube and install a new one. it's still holding haha! I've nearly completed the loader frame quick attach and will upload some pics of that soon. Need to burn a couple tabs to hold the pins, replace and install some new zerks, paint it and I can call it good for now. Already thinking about how I can set up remote actuated locking pins. Seen it done with hydraulics and also with electric servo... it'd sure up the convenience factor!
|
Posted By: Strokendiesel002
Date Posted: 23 Jun 2021 at 10:56pm
Her it is!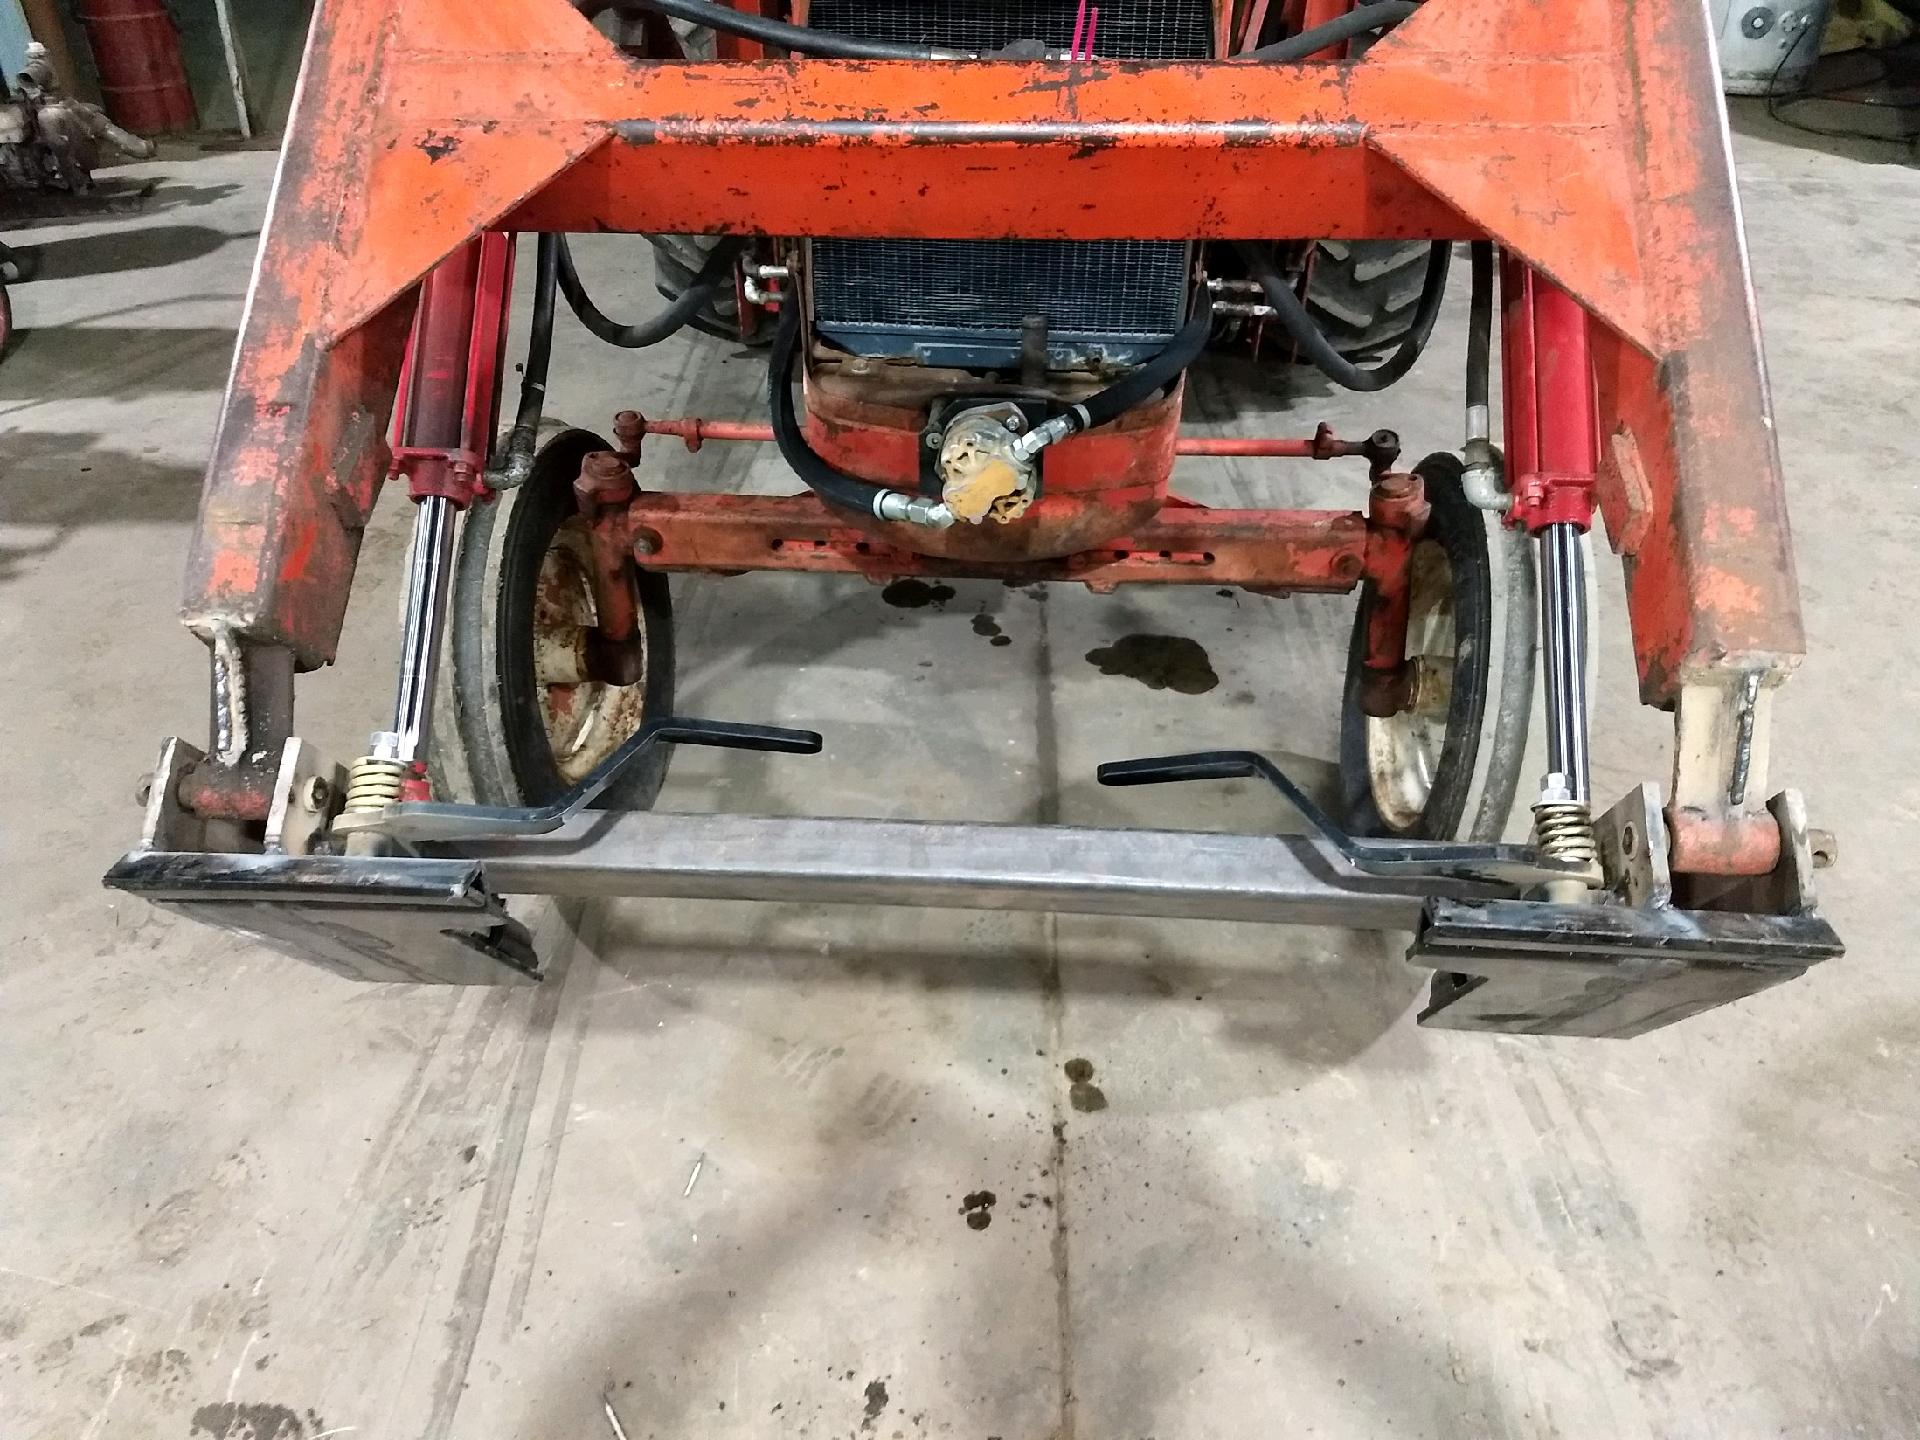 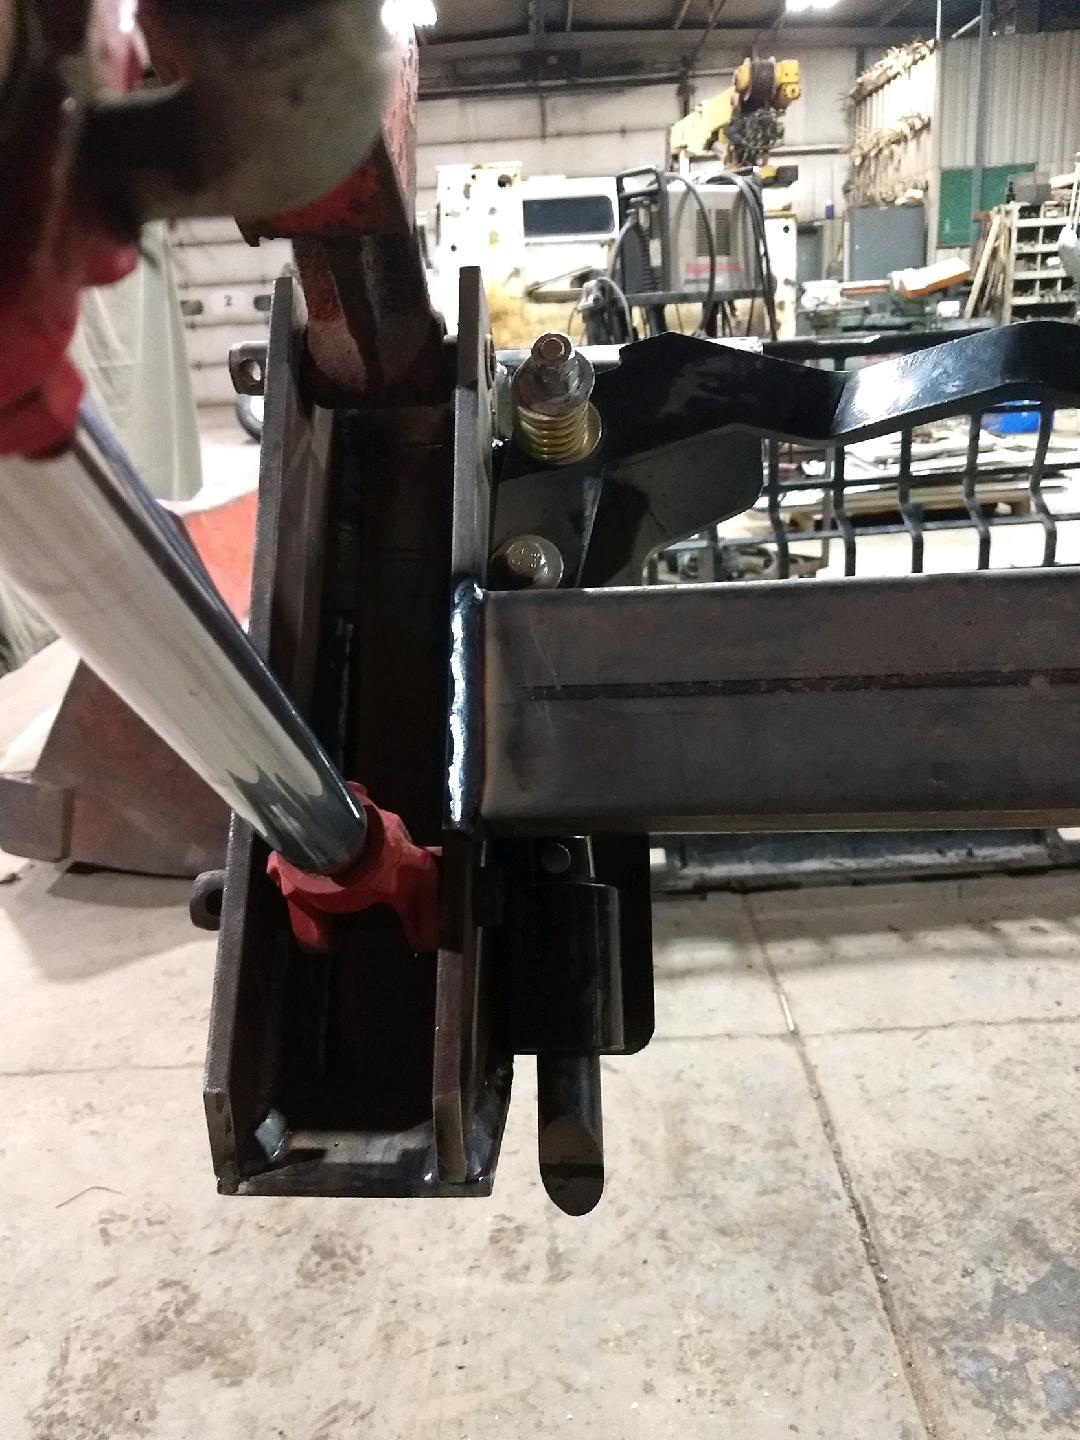 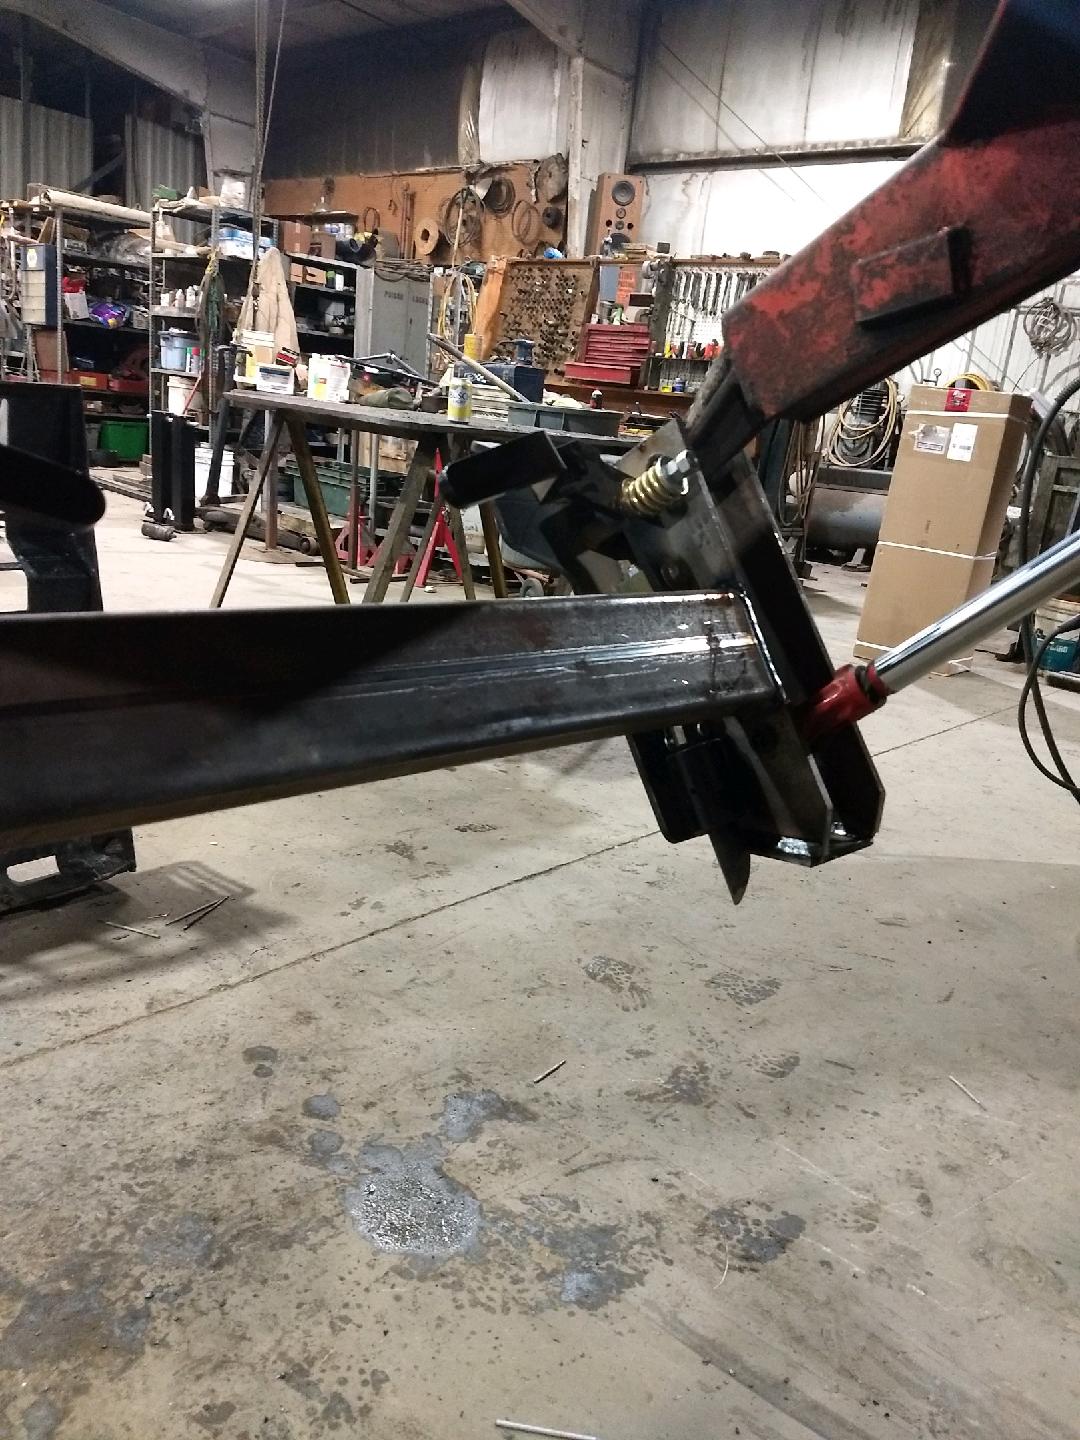 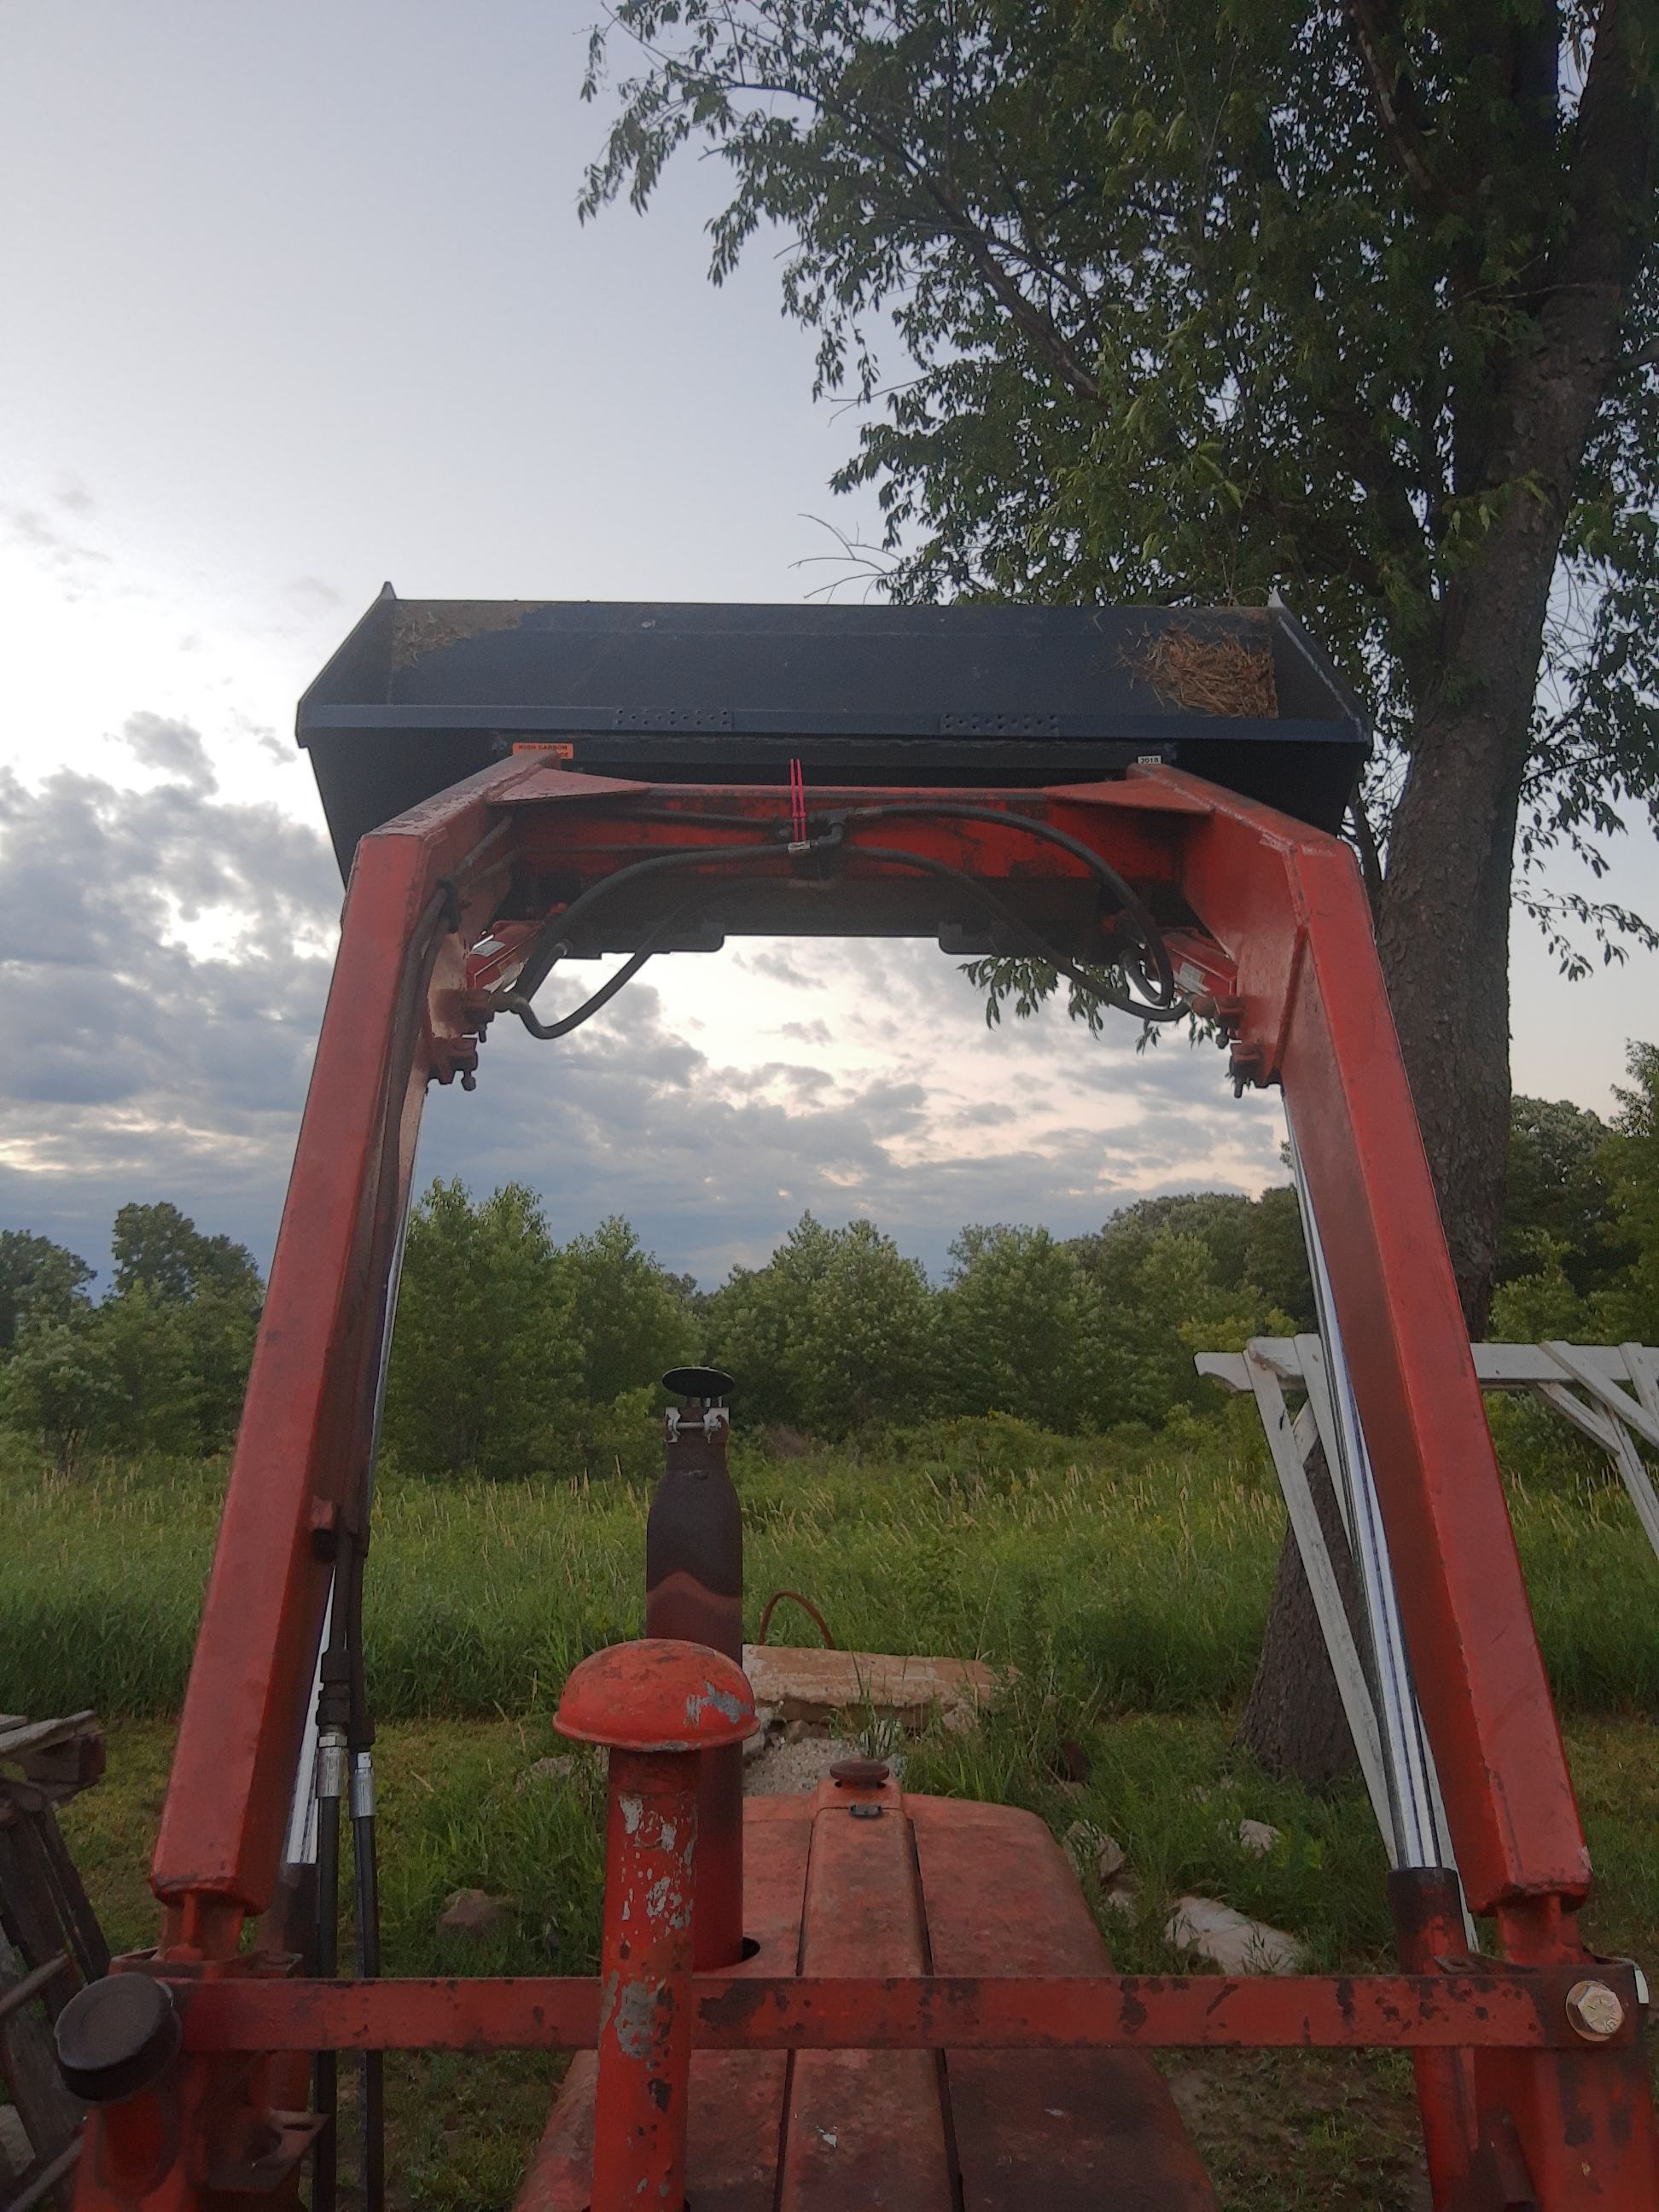 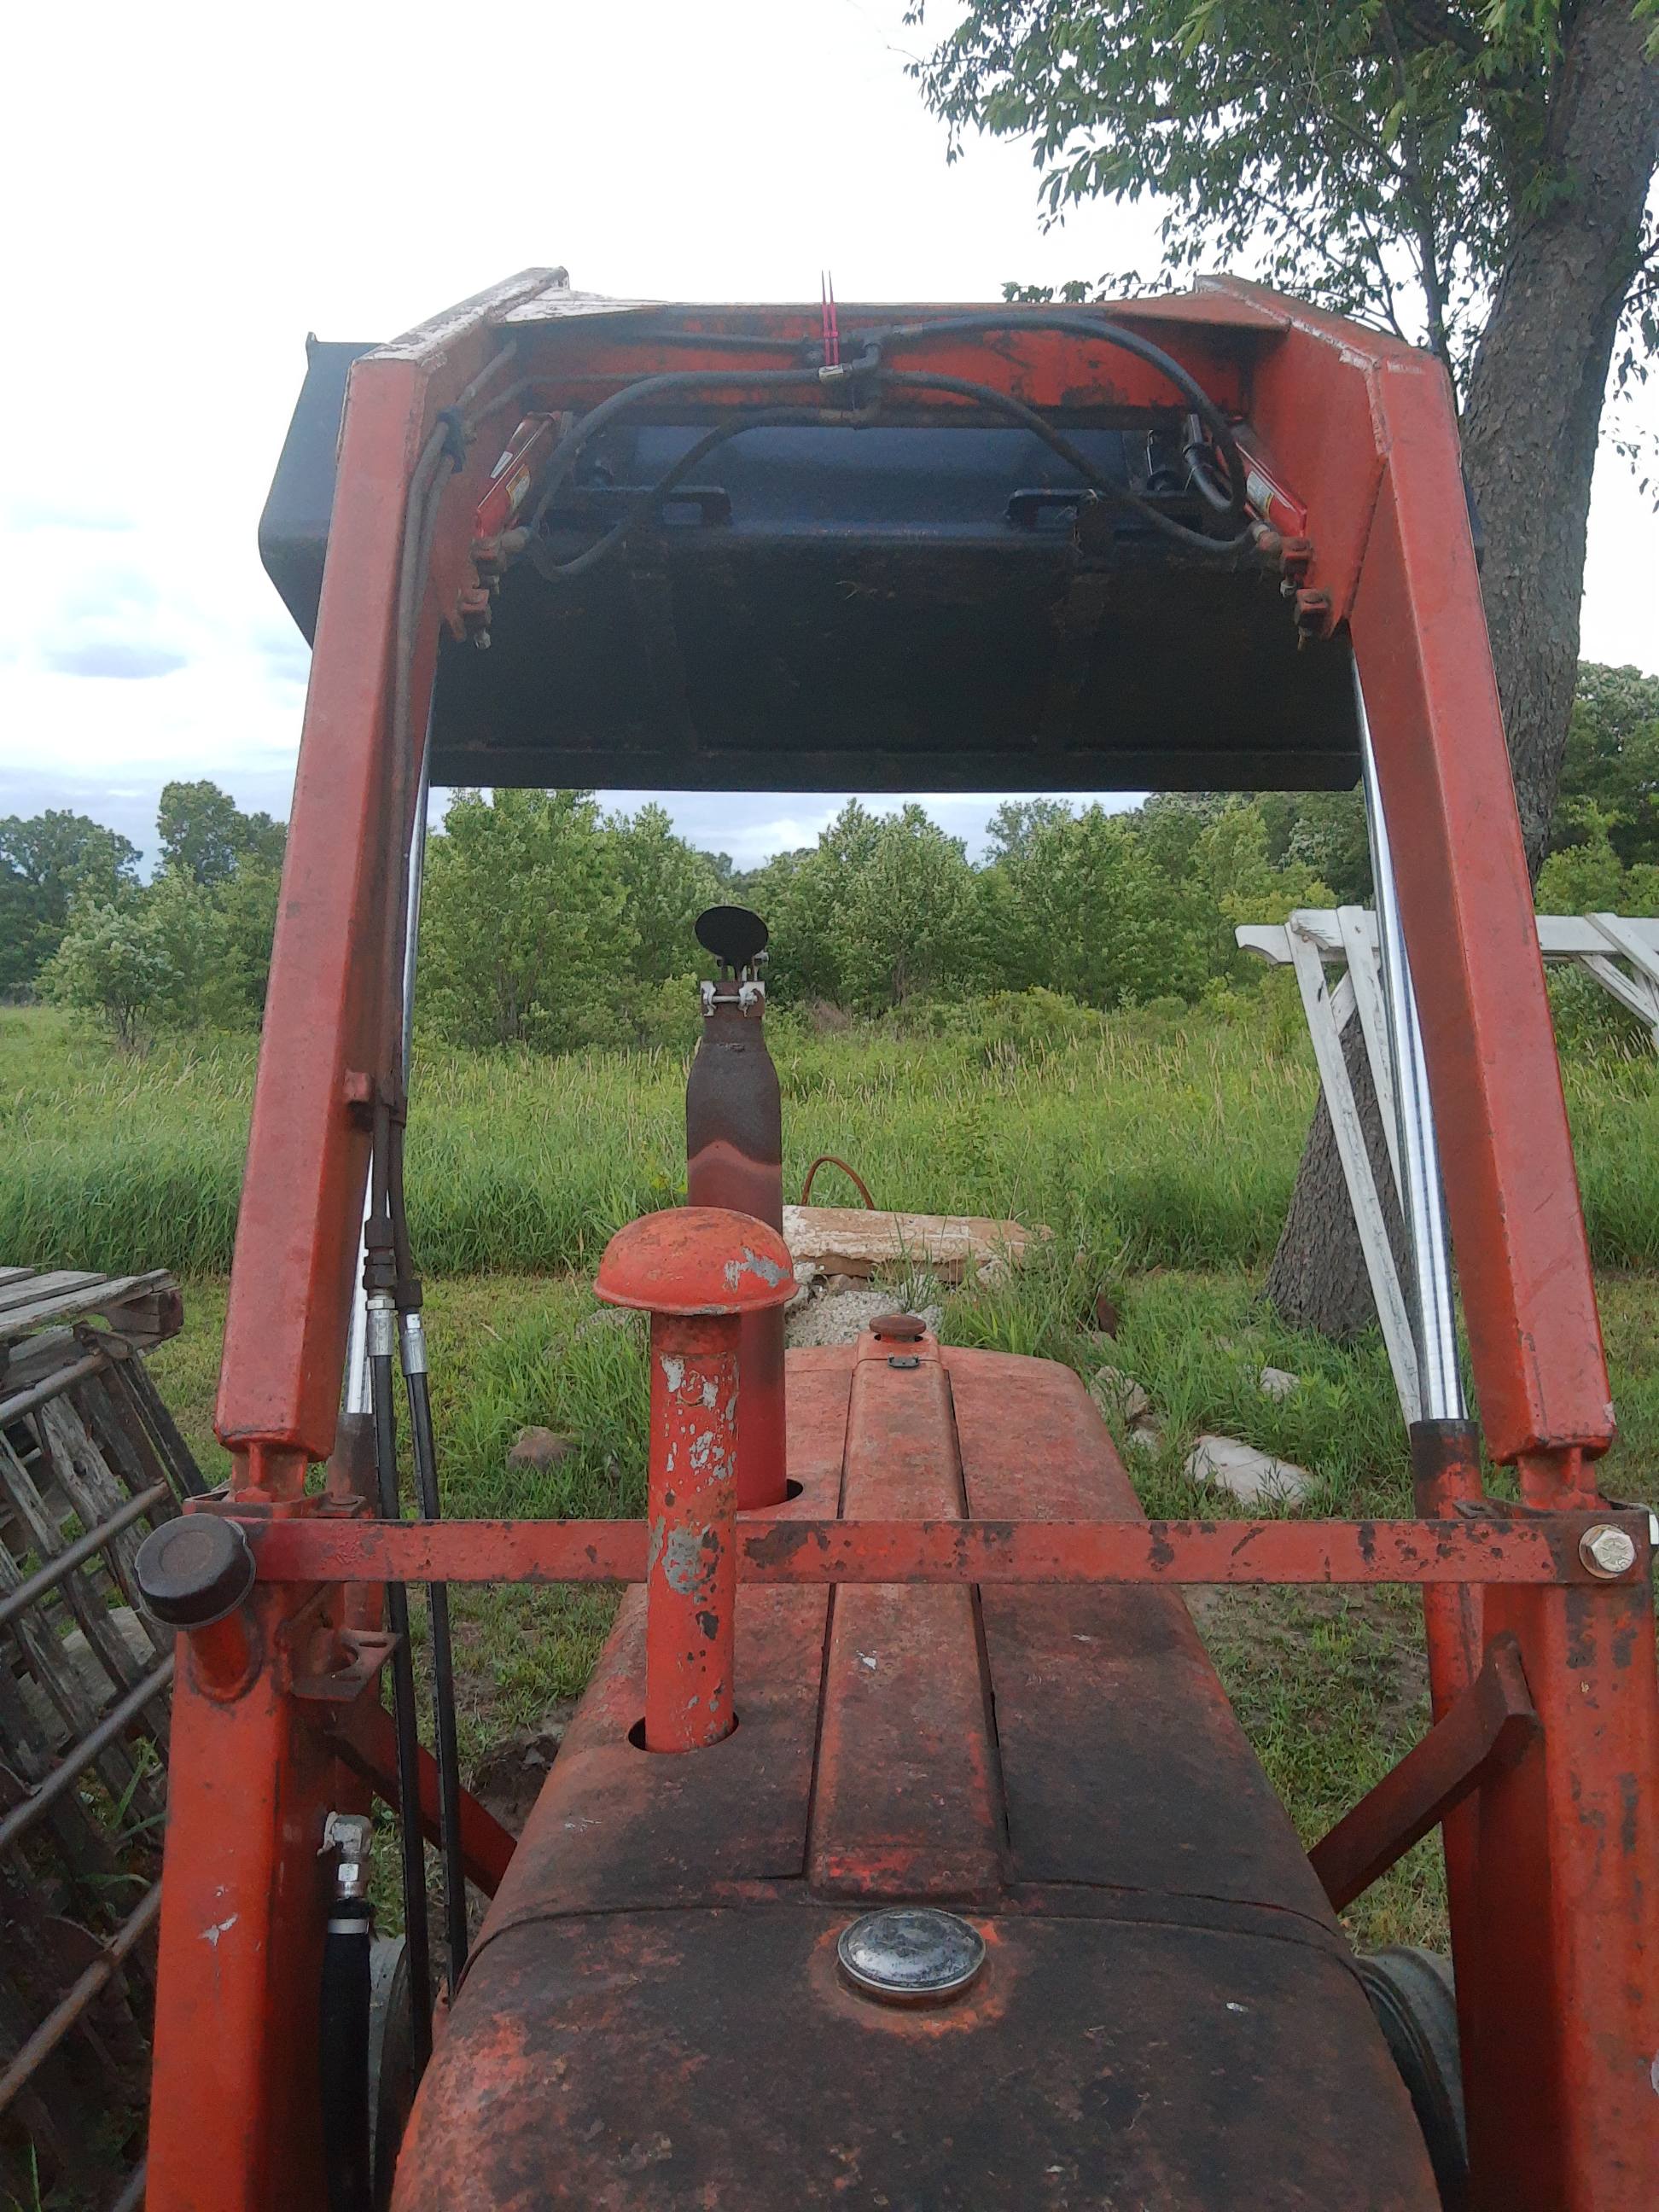 I'd have liked it to open a little further, but it'll work just fine :) Pretty nice tonight - moved a pallet of goodies, left the forks with the pallet, grabbed the bucket and I broke not a drop of sweat! I am very excited |
Posted By: Strokendiesel002
Date Posted: 15 Jun 2022 at 12:16am
|
One year later and Allis is still helping with projects and good times! Thank you to Steve@B&B for all new wiring and the alternator. I went with the heavy duty key and he was kind enough to add a couple extra circuits for lights I plan to add. Switched to his alternator and was able to use the upper adjusting bracket. Initially I tried using one of the bottom brackets flipped around, but it had a lot of wiggle, so I made up a bracket out of some flat stock and all is well now 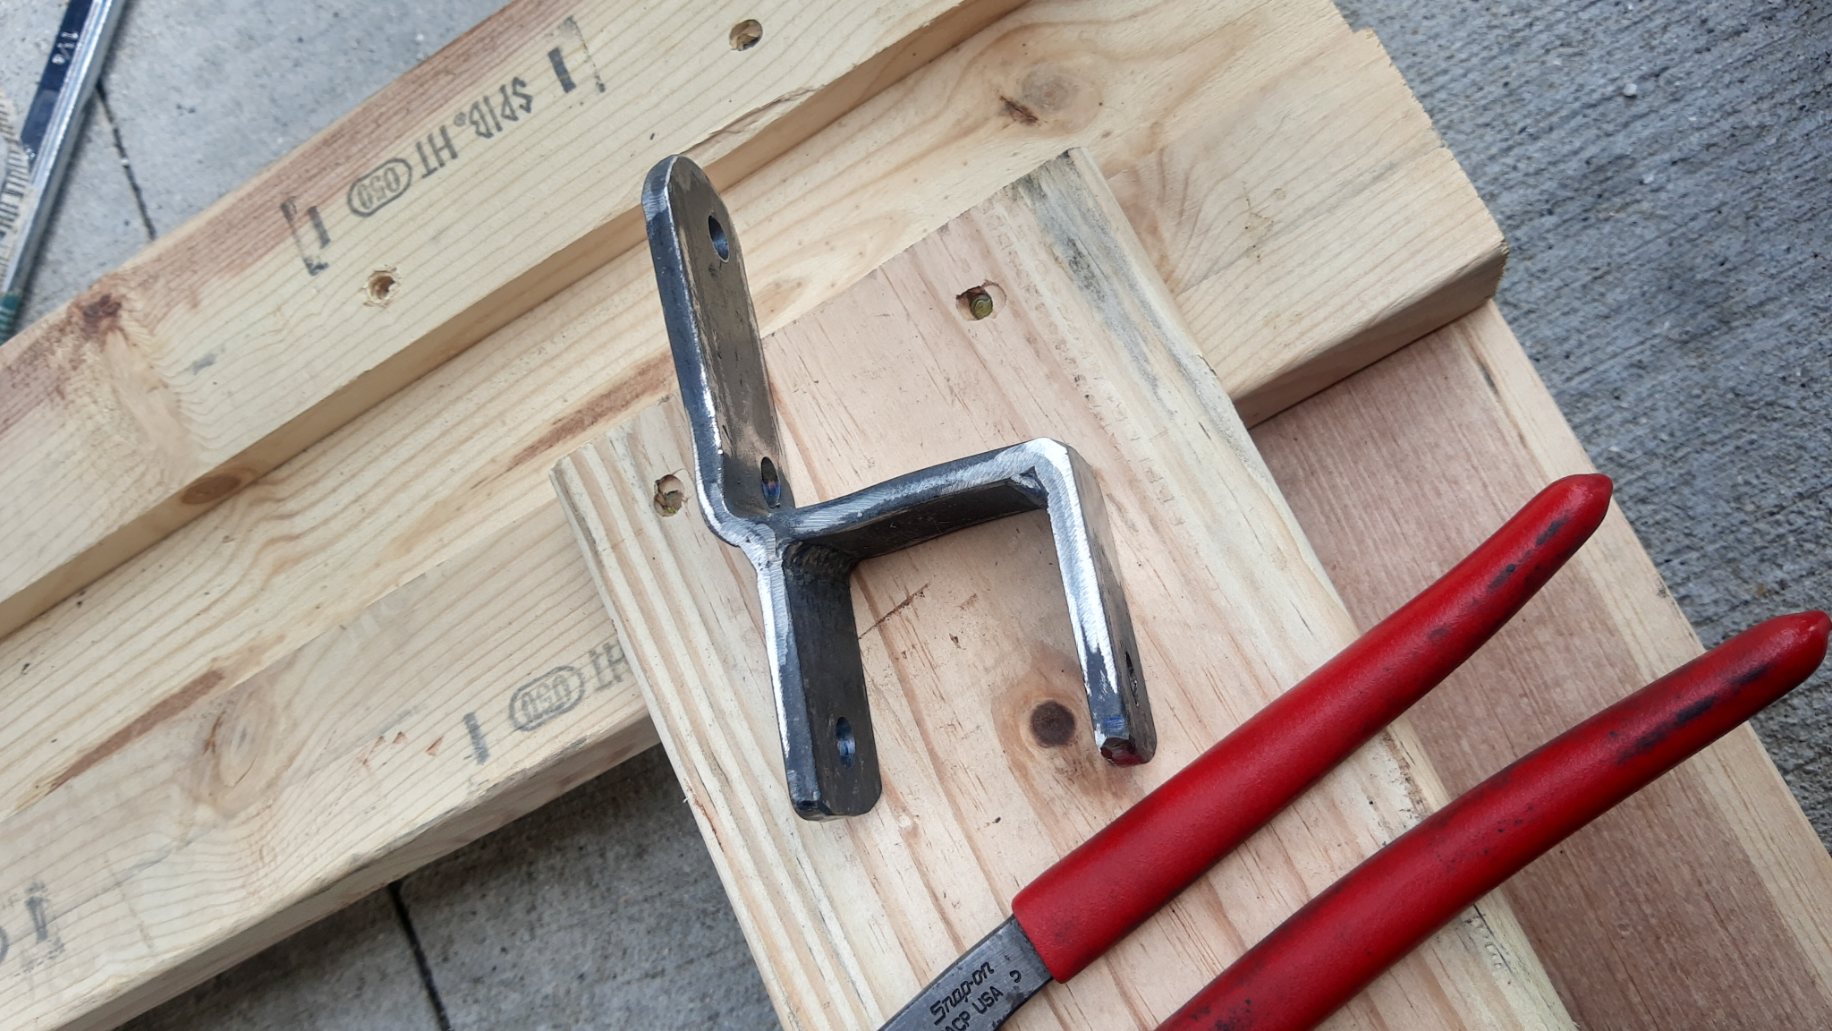 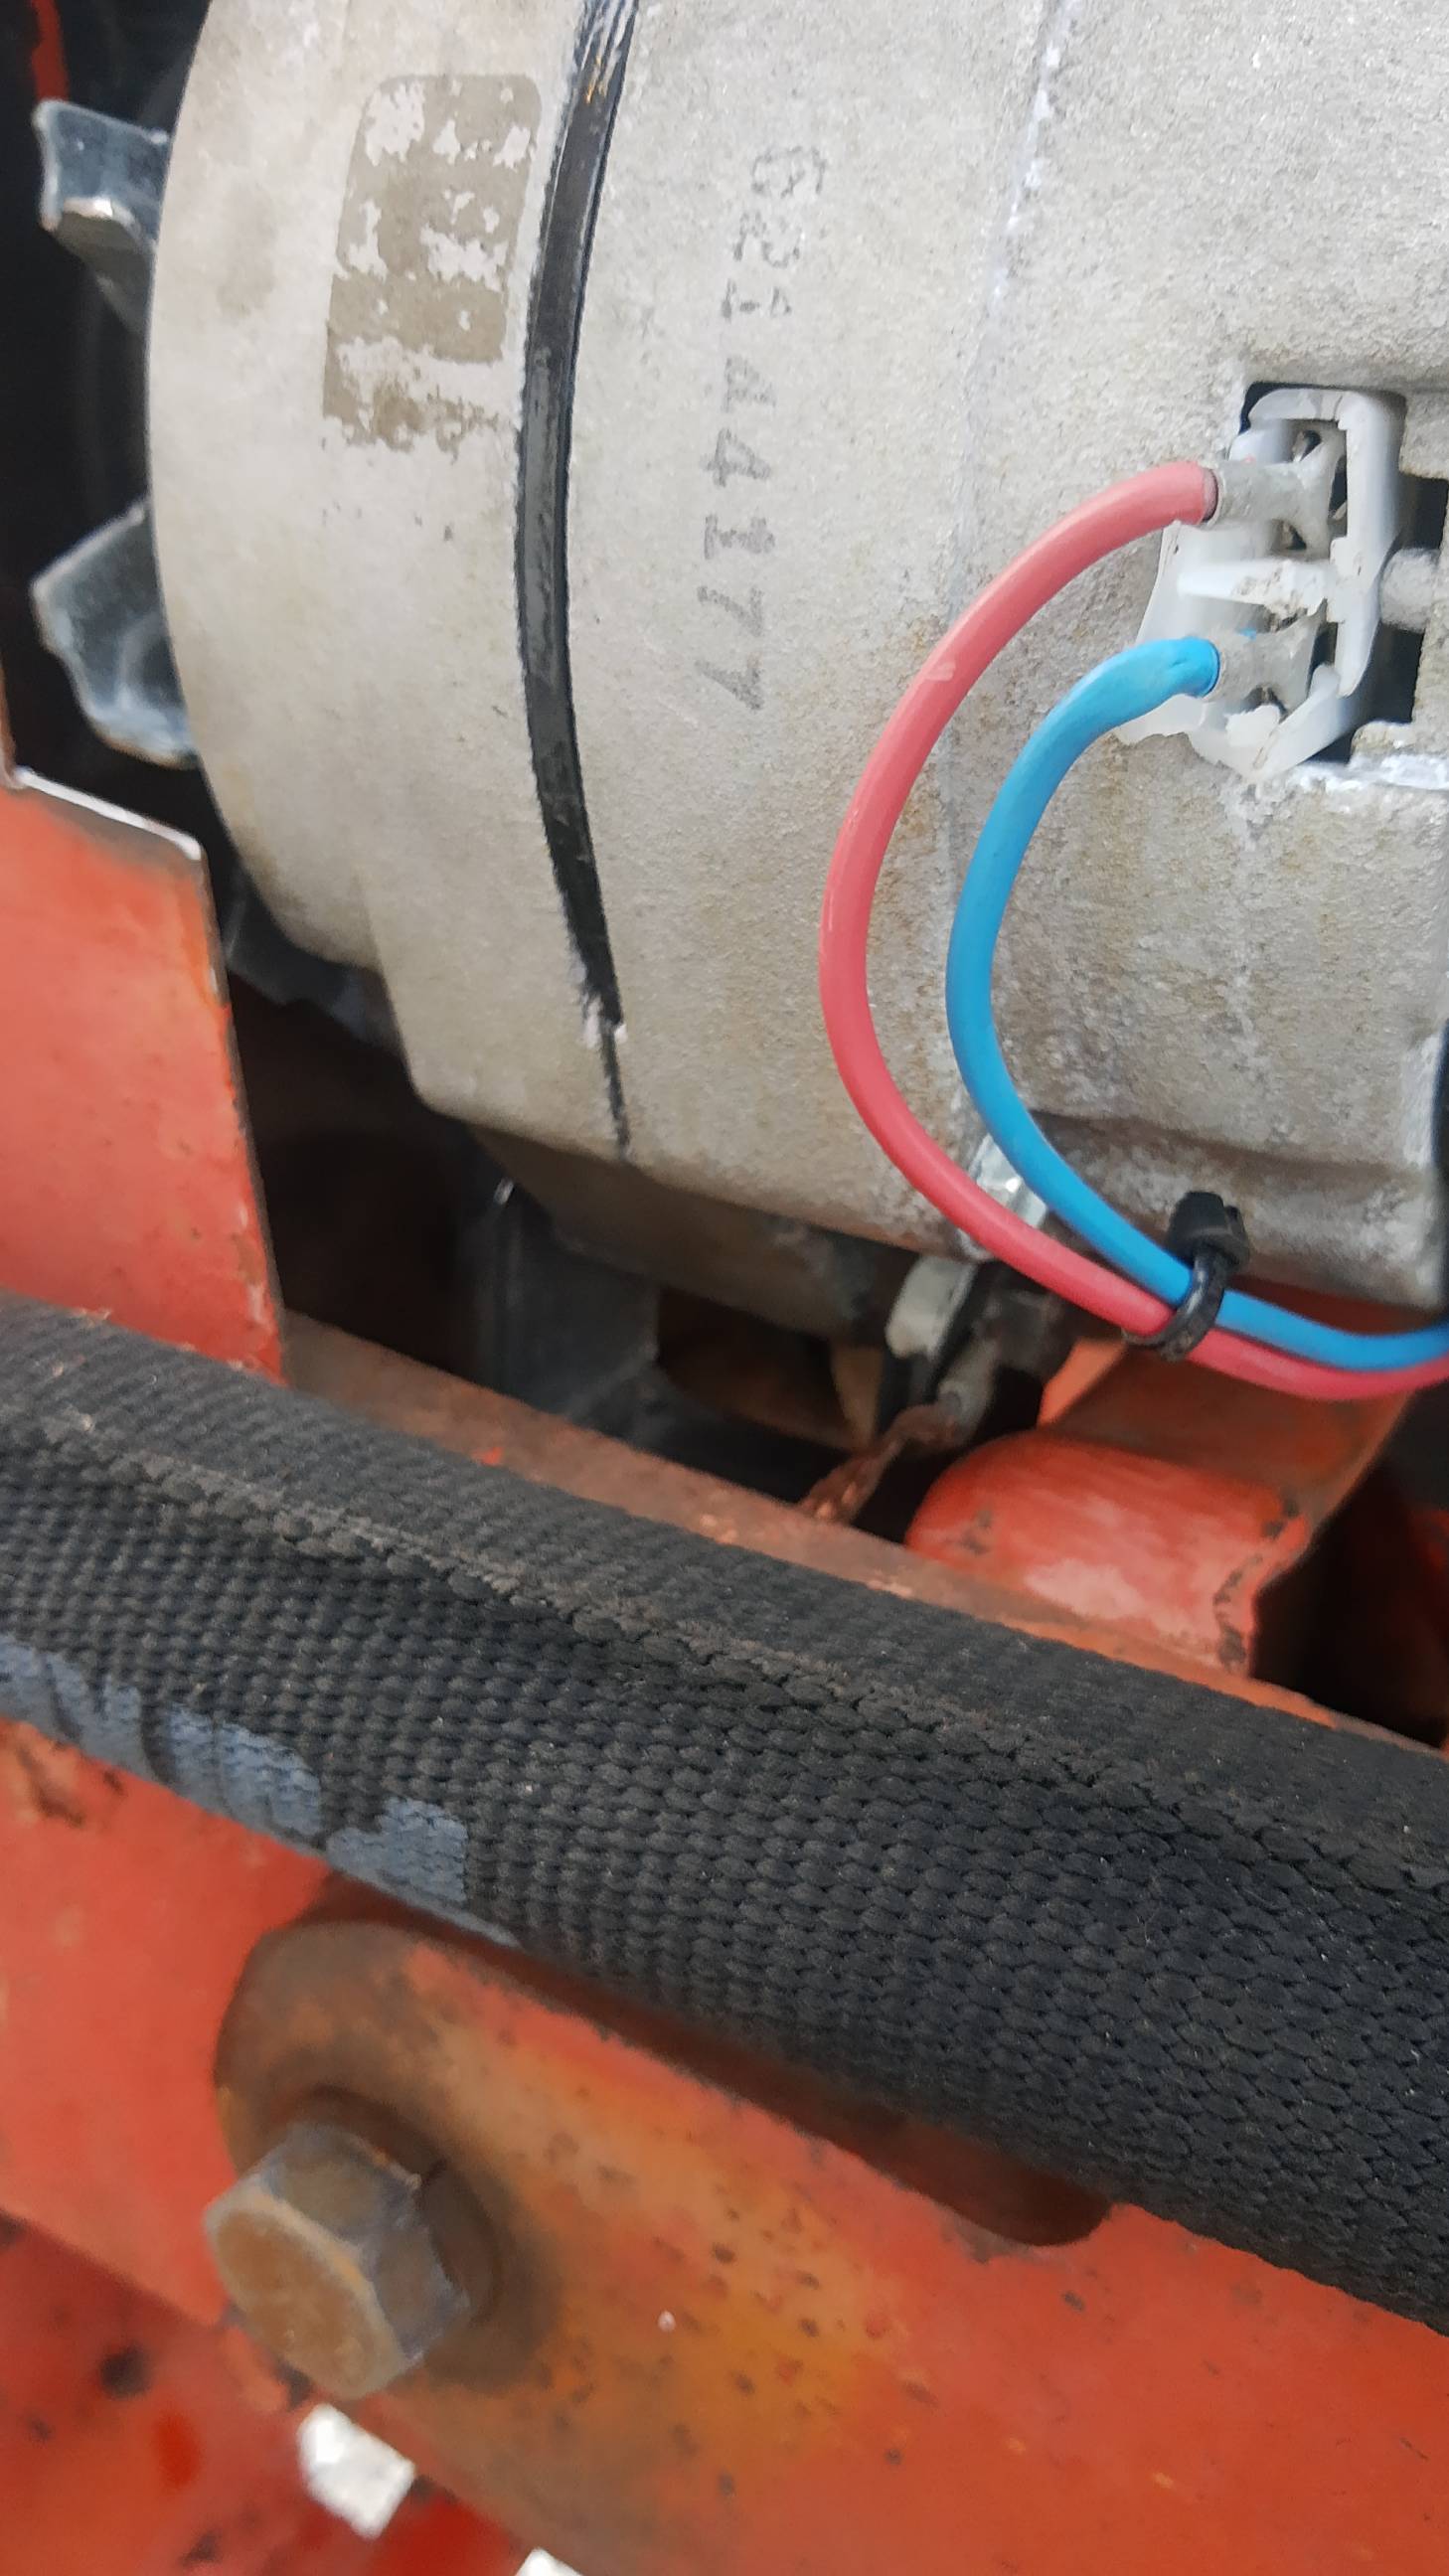  Went to a couple more pulls last year and first of this year last weekend, always a fun time! May even make it to two more this weekend. Think I'm going to pick up a few more hydraulic quick connects to make removing the loader lift arms easier. Also need to adjust the quick attach latches as I pop the bucket off when back dragging. They go a little too far past "lock" and the locks actually start to come back up. Hope you all are well and thank you again to all that have helped! |
Posted By: jeickman01
Date Posted: 15 Jun 2022 at 9:33am
| Once you get it running and are able to confirm you have a good drive train you may want to think about your endpoint in the project. You want to sell it simply as a running tractor. If you are planning on a full restoration, you'll probably have more invested in it than if you were to buy one in good shape and leave it in its "work clothes". I bought a Series III and probably have more in it at this point than what a Series IV would have cost me. |
Posted By: jeickman01
Date Posted: 15 Jun 2022 at 9:45am
| Oops, my mistake. I read only the first page of posts from back in 2019 before I posted my previous comment. Looks like you have done a very good job on this one. |
Posted By: Strokendiesel002
Date Posted: 01 Sep 2023 at 12:45pm
|
Hi All! Hope everyone is doing well. I took the whole loader frame off to try and balance it out better for pulling and it worked! 285' then as life happens, I missed the next couple pulls and as it's about to heat up again I thought I'd put the loader back on this morning. Got to trimming the grass around it and activated a swarm of ground bees, but I'd luckily already pulled the tractor away from the loader frame which is hanging on a gantry. Was pretty disappointed until I remembered I had a new fan belt to put on! Man, I don't know if they're all this way or if the 4 hole crank pulleys are different, but what a project to get the belt changed out! Had to remove the front shroud and loosen the 2 lower radiator bolts, lift the front end up and then loosen the 4 front bolster bolts enough to slide it forward a 1/4" to get the fan belts off and back on! Happy Labor Day! |
Posted By: AC720Man
Date Posted: 01 Sep 2023 at 10:30pm
|
Took me 5 minutes to put 2 new Gates belts on my series I D17 diesel yesterday. Fan shroud is quite tight at the fan blades, found a sweet spot on the left side to navigate the belts around the fan blades. But I don’t have a pump hanging out the front either lol. ------------- 1968 B-208, 1976 720 (2 of them)Danco brush hog, single bottom plow,52" snow thrower, belly mower,rear tine tiller, rear blade, front blade, 57"sickle bar,1983 917 hydro, 1968 7hp sno-bee, 1968 190XTD |
Posted By: Strokendiesel002
Date Posted: 08 Sep 2023 at 7:27am
|
Ok, so it's likely the pulley then! I had already removed the prop shaft for the pump, but... I'm suspecting that the 4 bolt pulley is maybe a little longer than the one that came on this originally. I'm glad it went smooth for you and thank you for sharing! |