CA Allis Chalmers
Printed From: Unofficial Allis
Category: Allis Chalmers
Forum Name: Farm Equipment
Forum Description: everything about Allis-Chalmers farm equipment
URL: https://www.allischalmers.com/forum/forum_posts.asp?TID=140867
Printed Date: 01 Jan 2026 at 12:03am
Software Version: Web Wiz Forums 11.10 - http://www.webwizforums.com
Topic: CA Allis Chalmers
Posted By: Tater
Subject: CA Allis Chalmers
Date Posted: 28 Jul 2017 at 7:14am
|
I am new to this site... have been reading it for years but never took the time to sign up until one of the strangest failures I have ever experienced occurred. I am rebuilding a B-125 gas engine in a 1952 CA. I pulled the engine, put it on a stand and completely tore it down. The block was steam cleaned and inspected, crank was ground .020 in. on the mains and .010 in. on the rods, head was magna-fluxed and new valves, springs and keepers installed. The connecting rods were inspected, rocker arms disassembled, cleaned, and inspected, the cam was mic'd and the lobes checked. I found one broken tappet on number four cylinder's exhaust lobe and replaced it. The corresponding rod had been straightened (not a very good job of doing so either, I might add). The sleeves were pitted. It was evident that water had been in this engine and it had seized. I installed new sleeves and replaced the cam bearings. The oil pump was disassembled and checked. Wear on the casing was about .002 in measured with a feeler gauge and the wipers looked good. I cleaned all the ports and passed a flexible wire through them to insure there were no blockages. Then I installed new main bearings and set the crush to .003 in. I rotated the crank once it was installed. Next, I assembled the piston - rod assemblies. I used a Tisco kit on this engine that I bought off Yesterday's Tractors web-site. They included Hastings piston rings and I found all the orientation marks on the rings except on the number one compression ring. There was no mark at all on it. It was made of chrome moly. I mic'd the ring to determine the taper. Next, I installed the piston assemblies and set the rod bearing crush to .002 in. I noticed that the engine was tight when I turned it but that is not that unusual on a new engine. I figured it would loosen up. The engine was assembled and installed back into the tractor. I rebuilt the governor and bushed the distributor drive and timed the engine. A friend of mine stopped in the shop and we fired the engine and it ran for maybe 20 seconds and locked up. We took the head off and checked for anything bent or jammed. I dropped the oil pan and the lower end looked good. Next, we began with number one piston, removing them and trying to turn the crank. When I got to number 3 we found the rod extremely difficult to pivot in the piston assembly. We finally got it centered and pushed it out of the liner. The wrist pin had welded itself to the boss. We tried to press the wrist pin out and the piston finally disintegrated under the force. The wrist pins on these Allis engines are unique as they are clamped in the rod and pivot in the bosses. Just about every other engine I have ever been in has a different arrangement. Case, John Deere, Cat, Oliver, Moline, White, Detroit, Cummins... all have a bushed connecting rod with a keeper to hold the wrist pin in place. I have been building engines for 25 years and have never seen a wrist pin in one of these engines seize to a piston pin boss like this. I called Tisco and they are sending a new assembly to warranty this one. My first suspicion was that the oil passage was plugged and number three was dry. Then, a "wait a minute" moment occurred. This is a wrist pin. I checked each set of rod bearings and all looked good except number 3. These were scored pretty deeply. I am thinking that they took a beating when the wrist pin seized. I checked the connecting rod and it isn't bent. I will put in a new set on all rods anyway. Too much invested to chance it. I am at a loss on this one. The only thing I can come up with is a defective piston during manufacture. Any of you guys ever ran into a problem like this? |
Replies:
Posted By: Orange Blood
Date Posted: 28 Jul 2017 at 7:28am
|
Did you follow the manual on which direction and how to install the rods? Was there oil everywhere/did you have oil pressure? Did you use assembly lube? Maybe you just had a bad piston, at least I hope so. ------------- Still in use: HD7 WC C CA WD 2-WD45 WD45LP WD45D D14 3-D17 D17LP 2-D19D D19LP 190XTD 190XTLP 720 D21 220 7020 7030 7040 7045 3-7060 Projects: 3-U UC 2-G 2-B 2-C CA 7-WC RC WDLP WF D14 D21 210 7045 N7 |
Posted By: Dick L
Date Posted: 28 Jul 2017 at 8:04am
As a guess without seeing the engine with the pan off before disassembly would be one rod was installed back ward. That would put a bind on both the wrist pin and rod bearing. If the piston boss was under sized enough to seize you would have had to drive it in to start with. At this point I would take two bearing caps and bolt the bearing shells together and measure the ID as well as the crankshaft journal OD to see the actual difference. 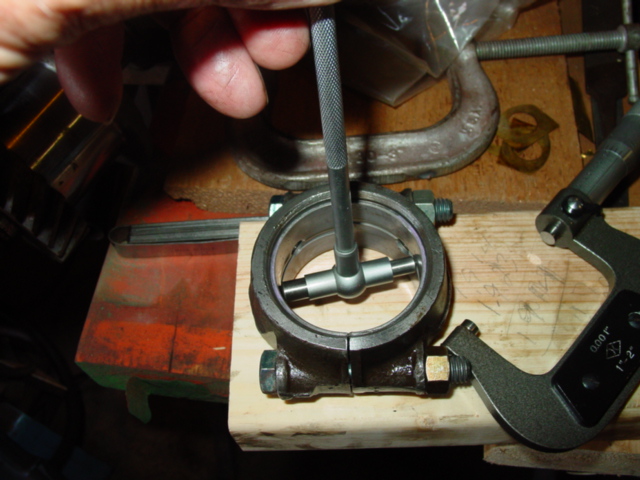
|
Posted By: Tater
Date Posted: 28 Jul 2017 at 8:15am
|
Yeah, used builders lube on everything. Checked the rod orientation when assembling, turn the long side away from the mains, just like the manual stated. One thing I did notice is that each piston top had a mark machined on it. I oriented them facing forward. All were oriented the same. |
Posted By: Tater
Date Posted: 28 Jul 2017 at 8:27am
|
That is the first thing I though too. I figured I had turned the rod in the wrong direction. When I get a new rod bearing set, I am going to mic everything. I checked the rod orientation and the long side was turned away from the mains, just like it is in the service manual. Another thing, when we pulled the number one piston rod assembly out I noticed a catch in the wrist pin on it when you slide it in the bosses. Talked to a Tisco rep. These guys don't actually make these kits, just bundle them. They want the old pistons back. I told them that one of them was in pieces as we had to cut the boss in half to get the rod out. They are sending two holes on warranty. |
Posted By: Tater
Date Posted: 28 Jul 2017 at 8:41am
|
I am going to put the engine back on the stand, drop out the crank and spin the cam with my air wrench. We can immerse the intake in a quart or so of oil with the pan off to test the pump. There was oil in the head but I am going to check the pump to make sure we are getting proper flow. The pumps on these engines only had 15 psi output pressure. With all the buillders lube that was used this thing should not have seized up in such a sort period of time. It popped off and ran only a few seconds. I am a mechanical engineer and have access to a metallurgy lab. I am going to take a piece off this broken piston and have it analyzed to determine mass density properties and hardness. I have the sections of the bosses I sawed out. I am wondering if it may be a casting defect. |
Posted By: Tater
Date Posted: 28 Jul 2017 at 9:36am
|
Oh yeah.... Thanks for the responses. Sometimes I get too immersed in thought for my own good. Especially when perplexed by a machine. Your comments are insightful and helpful. |
Posted By: Gerald J.
Date Posted: 28 Jul 2017 at 9:43am
|
I have a copy of the factory shop manual on line at: http://www.geraldj.networkiowa.com/Trees/Allis-Chalmers-G-B-C-CA-Service.pdf" rel="nofollow - http://www.geraldj.networkiowa.com/Trees/Allis-Chalmers-G-B-C-CA-Service.pdf Gerald J. |
Posted By: Dick L
Date Posted: 28 Jul 2017 at 12:32pm
On this engine the marks do not mean much. the important part is the orientation of the rods. 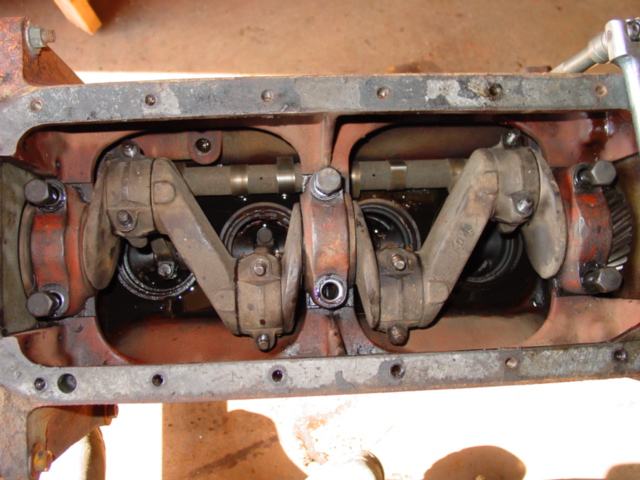
|
 Tater wrote:
Posted By: RLBPA1
Date Posted: 28 Jul 2017 at 7:51pm
| Check the wrist pin clearances on all four pistons. Today's engine kits leave a lot to be desired in terms of quality control. The last two engines kits I installed required several of the piston wrist pin bossed to be machined in order to obtain adequate pin clearence. |
Posted By: Tater
Date Posted: 07 Aug 2017 at 9:28pm
| The verdict is in... Defective piston. The piston was actually warped. |
Posted By: steve(ill)
Date Posted: 07 Aug 2017 at 10:17pm
|
Next, I installed the piston assemblies and set the rod bearing crush to .002 in. I noticed that the engine was tight when I turned it but that is not that unusual on a new engine. You shim the bearing cap to get a couple thousands clearance on the bearing, and then file the bearing so it will have a small crush on the two halfs.. With everything NEW, you should not have to file the bearing ends......... With all the mains in, the crank should turn EASY by hand...... with the rods and pistons in, you will have some ring drag so you will not be able to turn by hand.... I normally get about 25 ft pounds on a torque wrench to "ROLL" the motor over... If its TO TIGHT, you will take out the bearings in a few minutes running. ------------- Like them all, but love the "B"s. |