Coggonobrien's D15 Series III
Printed From: Unofficial Allis
Category: Allis Chalmers
Forum Name: Farm Equipment
Forum Description: everything about Allis-Chalmers farm equipment
URL: https://www.allischalmers.com/forum/forum_posts.asp?TID=133380
Printed Date: 24 Mar 2026 at 7:18pm
Software Version: Web Wiz Forums 11.10 - http://www.webwizforums.com
Topic: Coggonobrien's D15 Series III
Posted By: coggonobrien
Subject: Coggonobrien's D15 Series III
Date Posted: 04 Jan 2017 at 8:40am
|
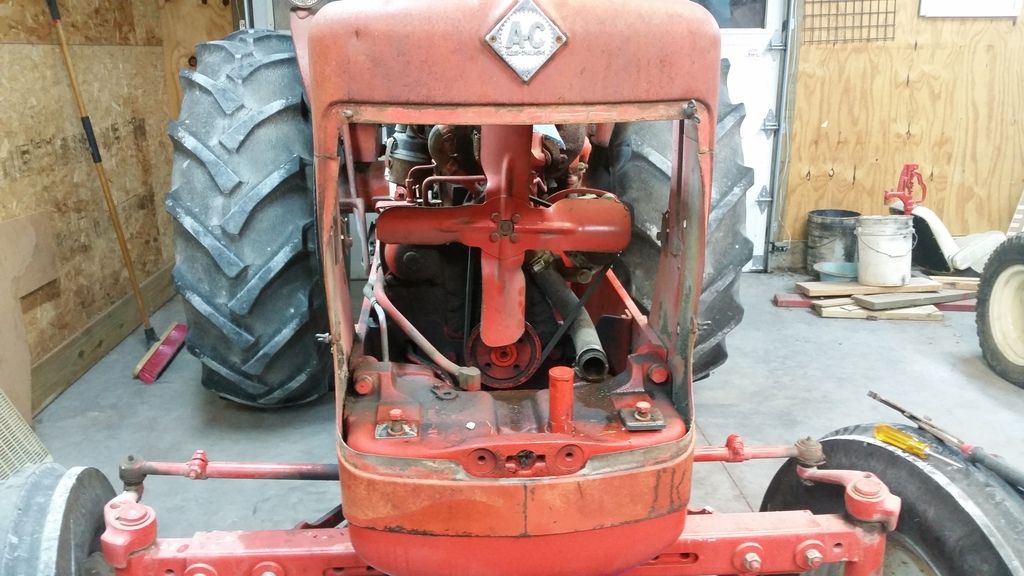
Continuing down the path with the d15 and the Dr. and I decided to convert the tractor to live hydraulics with console and remotes from a 180 (Orange Crush made a donation). David http://s161.photobucket.com/user/coggonobrien/media/d15/20170101_165144_zpscgisyztm.jpg.html" rel="nofollow"> 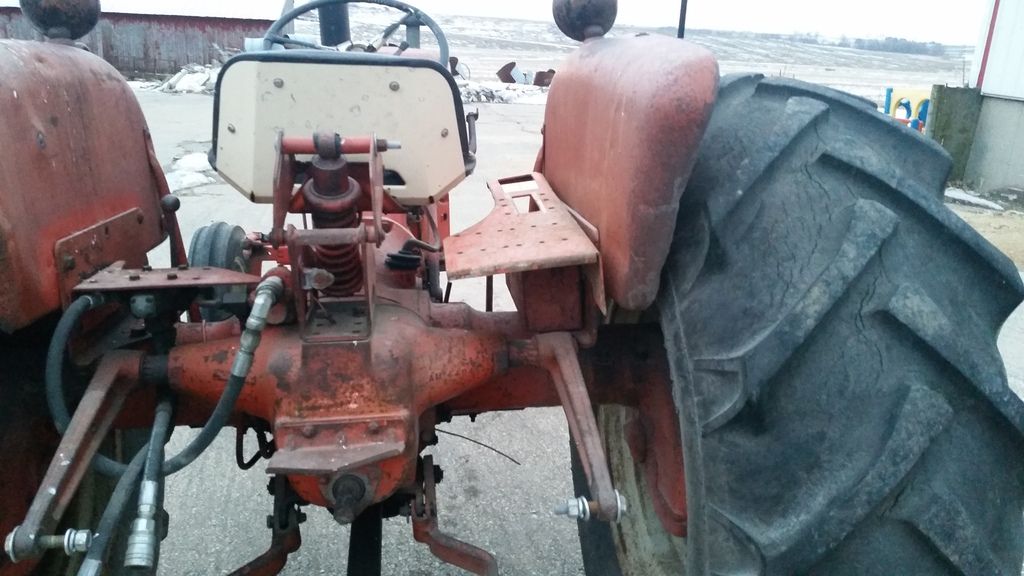 http://s161.photobucket.com/user/coggonobrien/media/d15/20170101_165222_zpsmry8njoe.jpg.html" rel="nofollow">
 |
Replies:
Posted By: JoeO(CMO)
Date Posted: 04 Jan 2017 at 9:56am
I have been saving this, a 615, hydraulics. ------------- |
Posted By: coggonobrien
Date Posted: 04 Jan 2017 at 10:00am
|
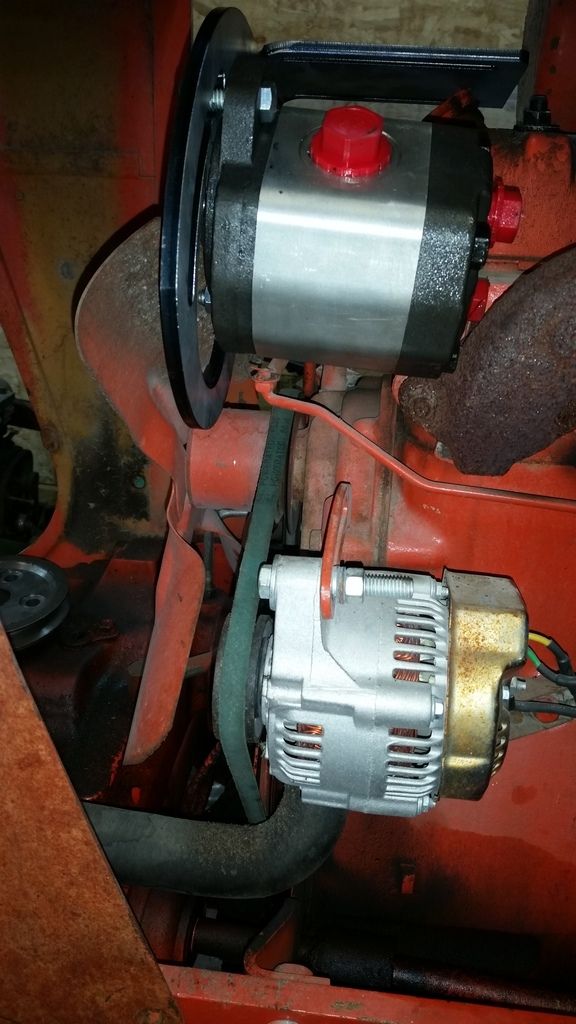
Pump will be belt driven and mounted above the alternator. Here's a link to the pump which is on sale http://www.northerntool.com/shop/tools/product_200641992_200641992?cm_mmc=Housefile-_-RECEIVED-_-707-_-CONF |
Posted By: TimNearFortWorth
Date Posted: 04 Jan 2017 at 10:39am
| Have not looked at that pump but curious what and where for having a reserve for fluids. Watching this thread with mucho interest as have a number of D15's. |
Posted By: aras
Date Posted: 04 Jan 2017 at 1:40pm
| If you want to sell the factory remote valve off that tractor I'd be interested! |
Posted By: coggonobrien
Date Posted: 05 Jan 2017 at 7:15am
| We will be plumbing into the original hydraulic reservoir, currently the original system will be intact as well even though we may run a T and a valve to the hitch so that unless we have a substantial load we can use the live hydraulic system. |
Posted By: coggonobrien
Date Posted: 05 Jan 2017 at 7:17am
| Aras, I would be interested in selling it for the right price since I will be moving the tool box to that side. Hoses are new and it's set up with pioneer fittings now. PM me an offer. |
Posted By: copyrite1972
Date Posted: 05 Jan 2017 at 12:21pm
 I will be watching this thread closely!!!! I will be watching this thread closely!!!!------------- D15 Series II |
Posted By: allischalmerguy
Date Posted: 05 Jan 2017 at 8:03pm
|
Neat idea guys! I hope to see it when you are done. Pastor Mike ------------- It is great being a disciple of Jesus! 1950 WD, 1957 D17...retired in Iowa, |
Posted By: coggonobrien
Date Posted: 06 Jan 2017 at 11:48am
| Thanks Mike, one of these years I will make the Dr's tractor ride again. If the d15 was pretty I'd take it, (does 21mph) |
Posted By: allischalmerguy
Date Posted: 06 Jan 2017 at 7:50pm
|
David, That would be great! I may have to get a D15 if they all go that fast!, mike ------------- It is great being a disciple of Jesus! 1950 WD, 1957 D17...retired in Iowa, |
Posted By: coggonobrien
Date Posted: 19 Jan 2017 at 7:27am
|
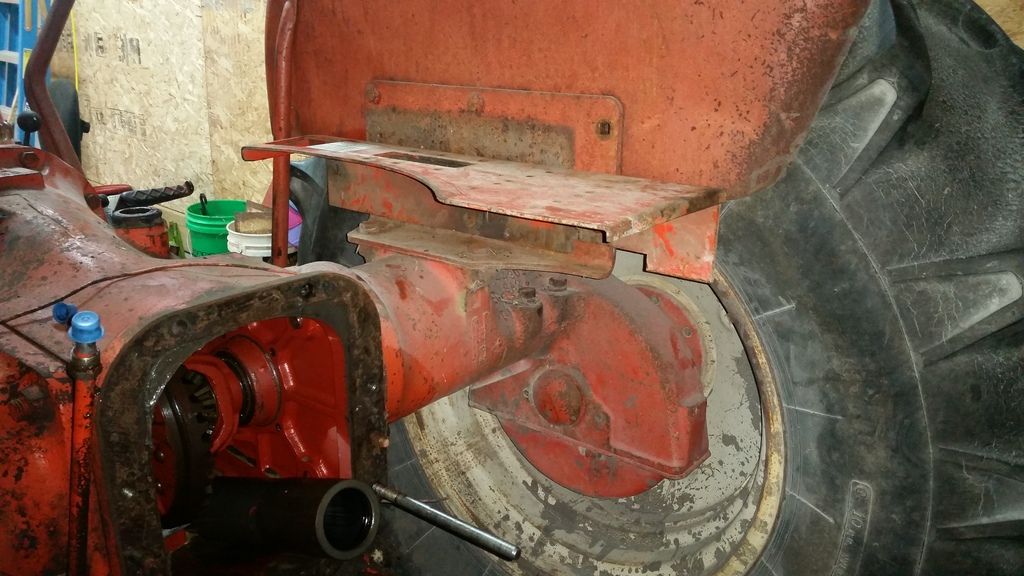
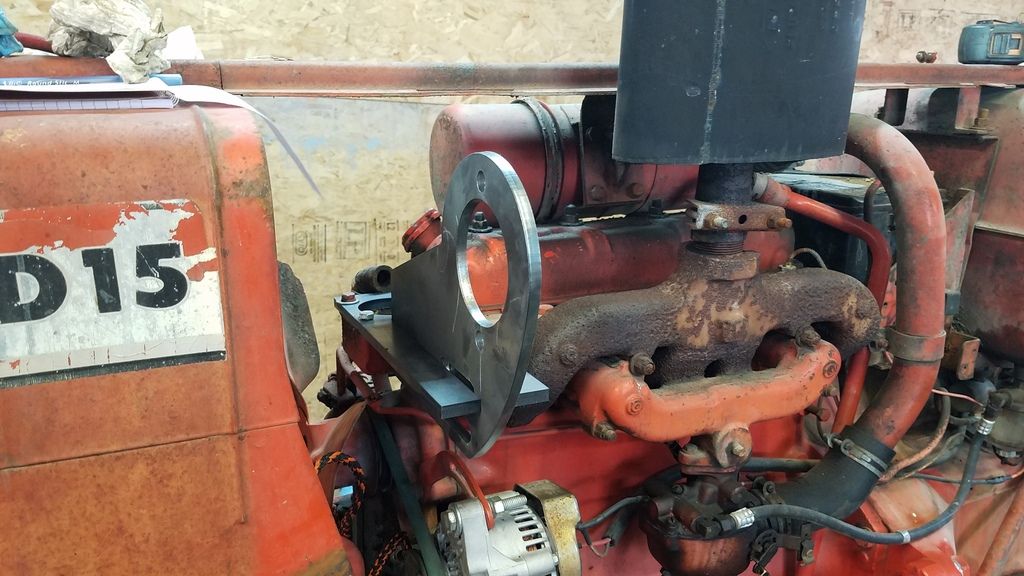
Mike, the 18.4/26 rear tires bumped up the speed quite a bit. I think with the original 14.9/26 it was around a 18mph tractor. Did some tear down work and have some parts being lasered to start mocking up the pump. The pump will be kept inside of the sheet metal profile. http://s161.photobucket.com/user/coggonobrien/media/d15/20170118_173451_zpsul5vuihs.jpg.html" rel="nofollow"> 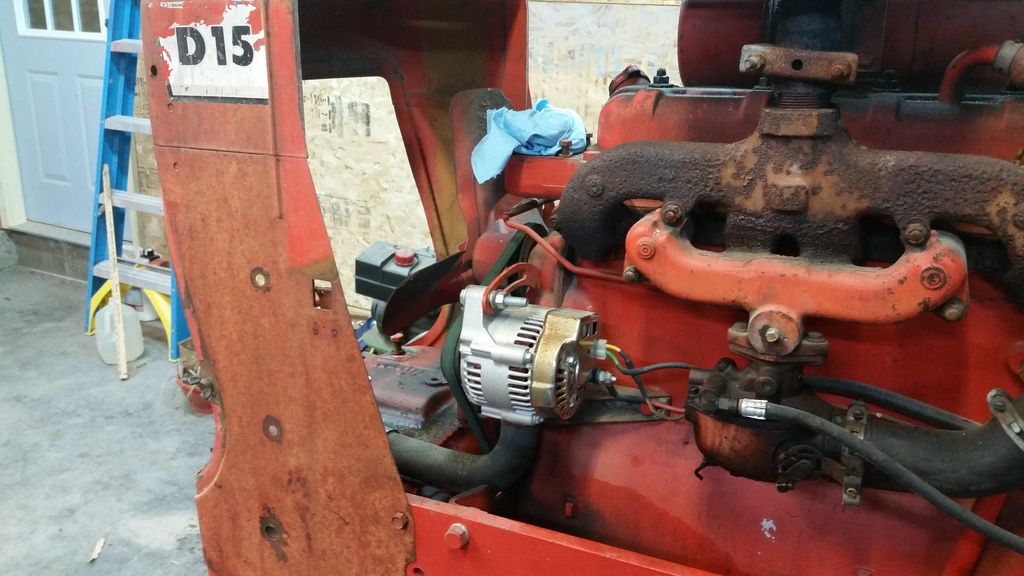 http://s161.photobucket.com/user/coggonobrien/media/d15/20170118_173443_zpslx8ldvpu.jpg.html" rel="nofollow">
 |
Posted By: allischalmerguy
Date Posted: 19 Jan 2017 at 8:13am
|
That is neat! Way to go ! ------------- It is great being a disciple of Jesus! 1950 WD, 1957 D17...retired in Iowa, |
Posted By: desertjoe
Date Posted: 19 Jan 2017 at 8:39am
|
Hey Coggin,,,that's a very interestin project and I wish you all the luck,,!! Something I been throwin around for my D14 so keep us informed,,,  |
Posted By: coggonobrien
Date Posted: 19 Jan 2017 at 10:26am
| When we are all said and done I will update the first post with parts/part #'s to try and keep the thread clean. We are hoping to mount the pump high above the alternator but worse case we will move the alternator up. |
Posted By: coggonobrien
Date Posted: 20 Jan 2017 at 1:25pm
|
First bracket was way too low and rearward, burned a medium and high position bracket today so lets try again. http://s161.photobucket.com/user/coggonobrien/media/d15/20170119_165918_zpswlacgjoj.jpg.html" rel="nofollow">
 |
Posted By: Kenny L.
Date Posted: 20 Jan 2017 at 8:22pm
I can just hear your dad saying what are you and you uncle up to now and walking away shaking his head.  Did you make your trip to Wi.? Kenny L. |
Posted By: JayIN
Date Posted: 21 Jan 2017 at 7:13am
|
Really cool! Keep up the good work! Sure miss my 15. ------------- sometimes I walk out to my shop and look around and think "Who's the idiot that owns this place?" |
Posted By: TimNearFortWorth
Date Posted: 21 Jan 2017 at 9:00am
|
Although the fan on the D15I and II push plenty of air for cooling, may want to consider some shielding for heat so close to the manifold. Keep up the great work as you are doing what many have considered! |
Posted By: desertjoe
Date Posted: 21 Jan 2017 at 9:37am
|
Hey Coggin,,,I tried to " Cut and Paste" your link, but didn't work for me,,,, what is the model # of the one you are going to try,,,Press and GPM,,?? Thx |
Posted By: coggonobrien
Date Posted: 23 Jan 2017 at 11:06am
|
# 47353 nortrac bi-directional gear pump 11 gpm at 3600rpm 3625psi at 3600 rpm, so at 2000rpm we are at 6gpm and 2050psi.
|
Posted By: coggonobrien
Date Posted: 23 Jan 2017 at 11:07am
Fan is going to be moved forward with the shroud cut before we are done. not necessary for this install but for cooling efficiency. pump is higher now, will post pictures tomorrow.
|
 TimNearFortWorth wrote:
Posted By: coggonobrien
Date Posted: 24 Jan 2017 at 6:50am
|
Before we get the console mounted and lines run the Dr is resealing the lift, we are having a new hose made and did a transmission inspection for 3rd gear. Gear's look fine so the Dr. is reworking the shifter rails. http://s161.photobucket.com/user/coggonobrien/media/d15/20170123_170832_zpsfjgad45l.jpg.html" rel="nofollow"> 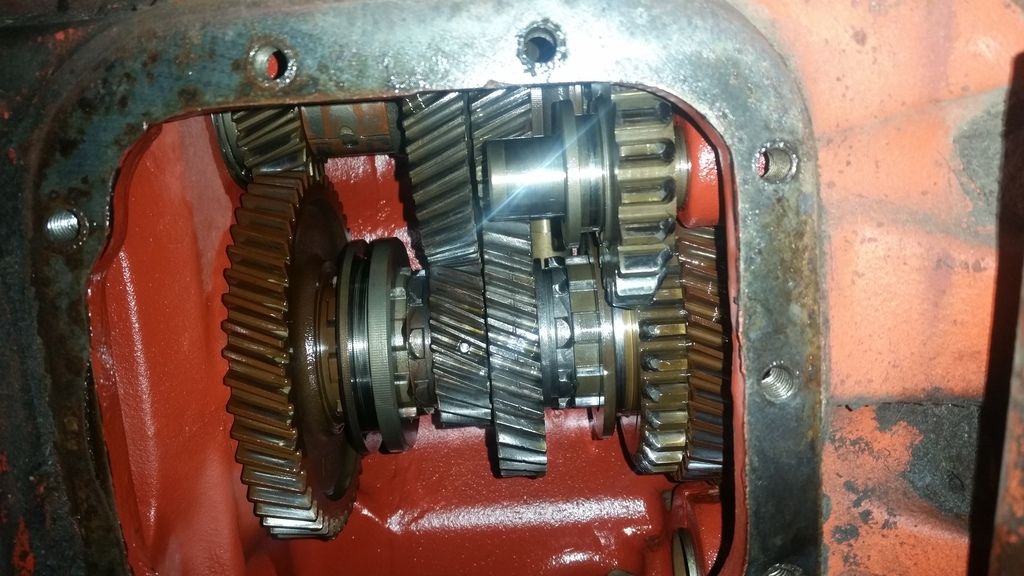 http://s161.photobucket.com/user/coggonobrien/media/d15/20170123_171018_zpsmm4jfpy4.jpg.html" rel="nofollow"> 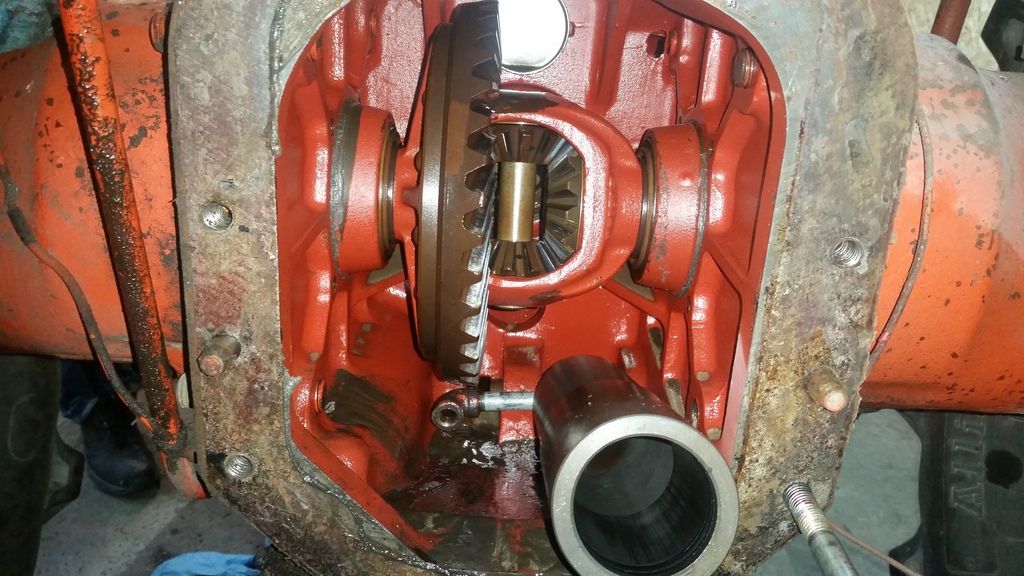 Mock up pictures of the pump http://s161.photobucket.com/user/coggonobrien/media/d15/20170123_171408_zpsxomhynup.jpg.html" rel="nofollow"> 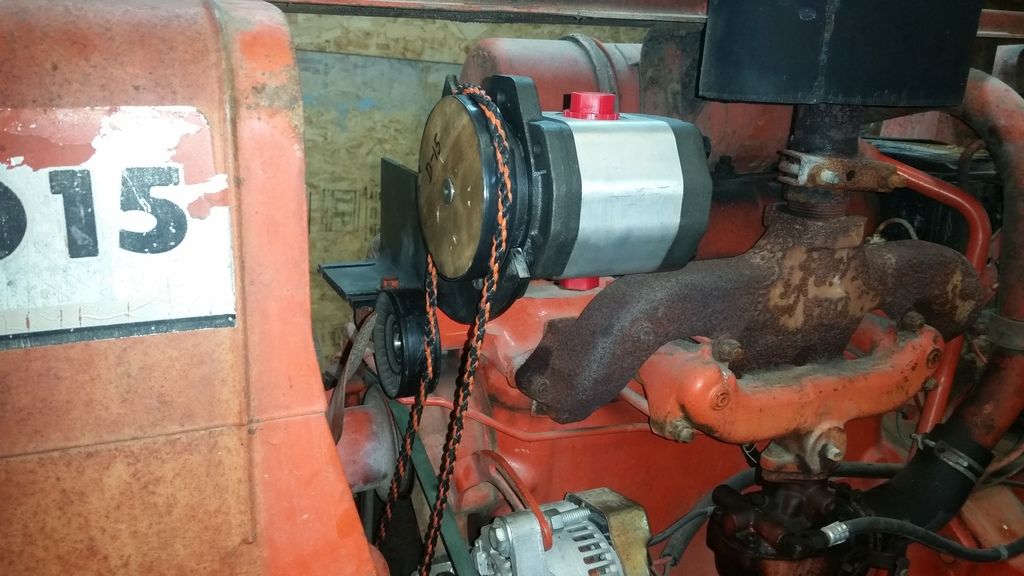 http://s161.photobucket.com/user/coggonobrien/media/d15/20170123_170252_zpsbauuqoxf.jpg.html" rel="nofollow">  http://s161.photobucket.com/user/coggonobrien/media/d15/20170123_173454_zpsxqhoisgn.jpg.html" rel="nofollow"> 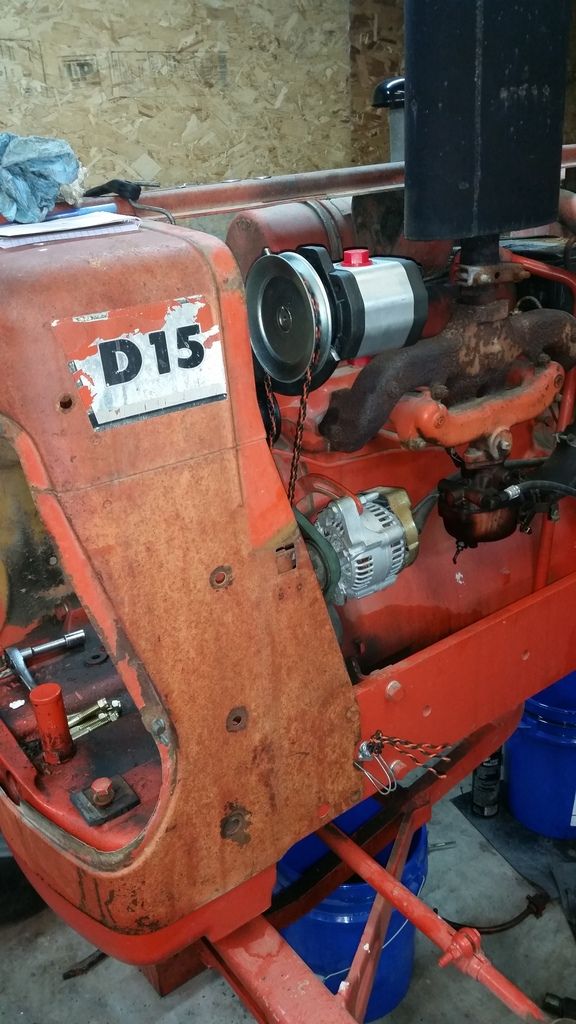 http://s161.photobucket.com/user/coggonobrien/media/d15/20170123_173309_zpslq768kor.jpg.html" rel="nofollow"> 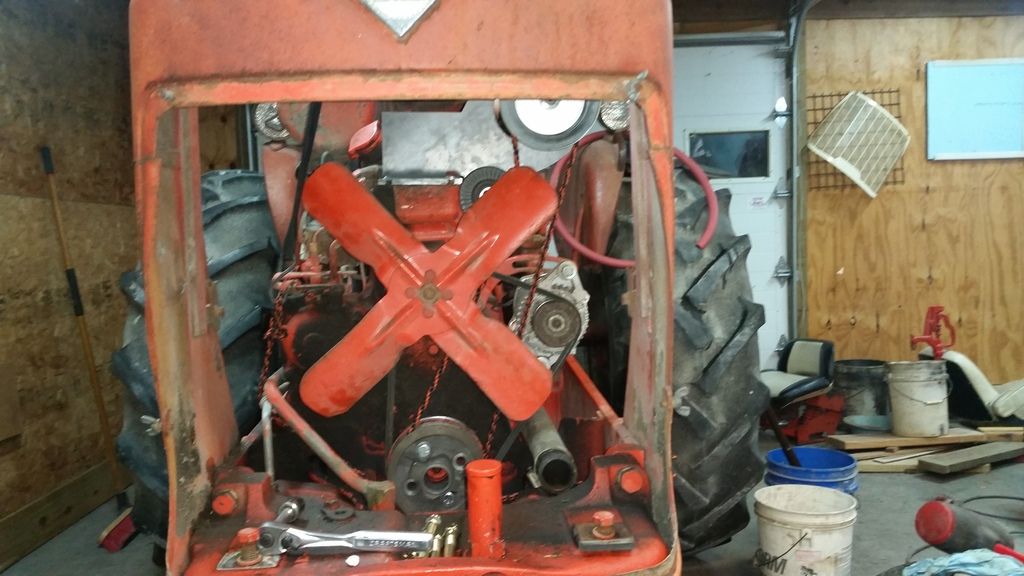 http://s161.photobucket.com/user/coggonobrien/media/d15/20170123_173300_zpsk2ofqwlo.jpg.html" rel="nofollow"> 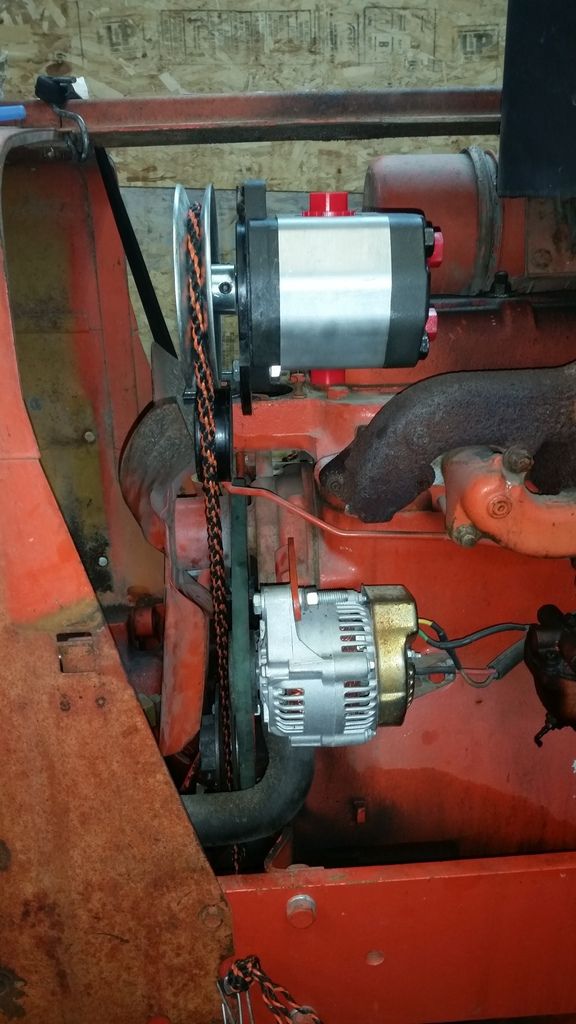 Console with 1 existing bolt in it, tool box will be moved over to the left hand fender. http://s161.photobucket.com/user/coggonobrien/media/d15/20170123_172821_zpscnoxeihj.jpg.html" rel="nofollow">
 |
Posted By: coggonobrien
Date Posted: 25 Jan 2017 at 11:09am
|
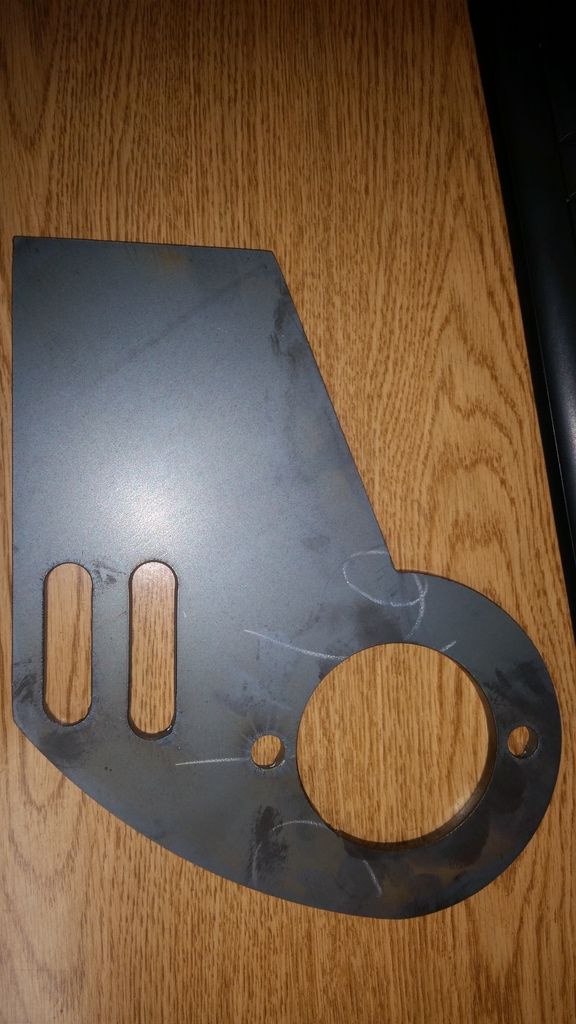
getting closer to a final mount for the pump. This plate is plasma'd out of 5/16" mild with 2 slots for us to choose from for idler pulley placement. David http://s161.photobucket.com/user/coggonobrien/media/d15/20170125_083651_zpsk7135zjf.jpg.html" rel="nofollow">
 |
Posted By: JoeO(CMO)
Date Posted: 31 Jan 2017 at 10:52am
|
How is this project coming along? Waiting in suspense mode! ------------- |
Posted By: coggonobrien
Date Posted: 31 Jan 2017 at 11:00am
|
Last Saturday consisted of reinstalling the hitch, the modified shifter assy and final fitment of the pump bracket. Just waiting for the final bracket to get cut. The Dr. http://s161.photobucket.com/user/coggonobrien/media/d15/20170128_102246_001_zpsrmuaiwo5.jpg.html" rel="nofollow"> 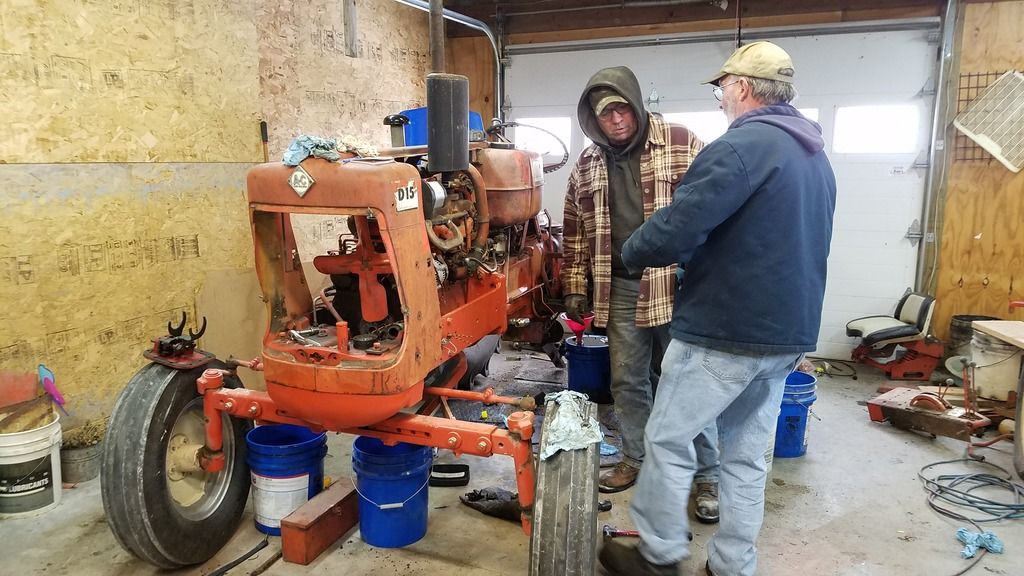 http://s161.photobucket.com/user/coggonobrien/media/d15/20170127_160648_001_zpsk0elhppg.jpg.html" rel="nofollow"> 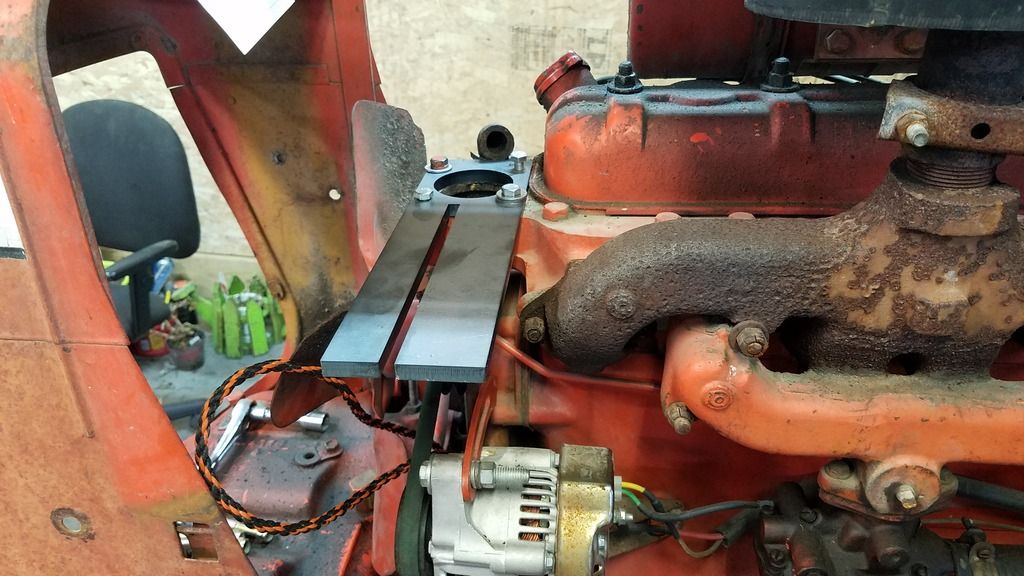 http://s161.photobucket.com/user/coggonobrien/media/d15/20170127_160827_zpstdyfuufo.jpg.html" rel="nofollow">
 |
Posted By: coggonobrien
Date Posted: 02 Feb 2017 at 6:54am
|
Pump mounting bracket is about 99% finalized, just need to trim some gussets and finish welding it. http://s161.photobucket.com/user/coggonobrien/media/d15/20170201_165002_zpsdyx2hpsq.jpg.html" rel="nofollow"> 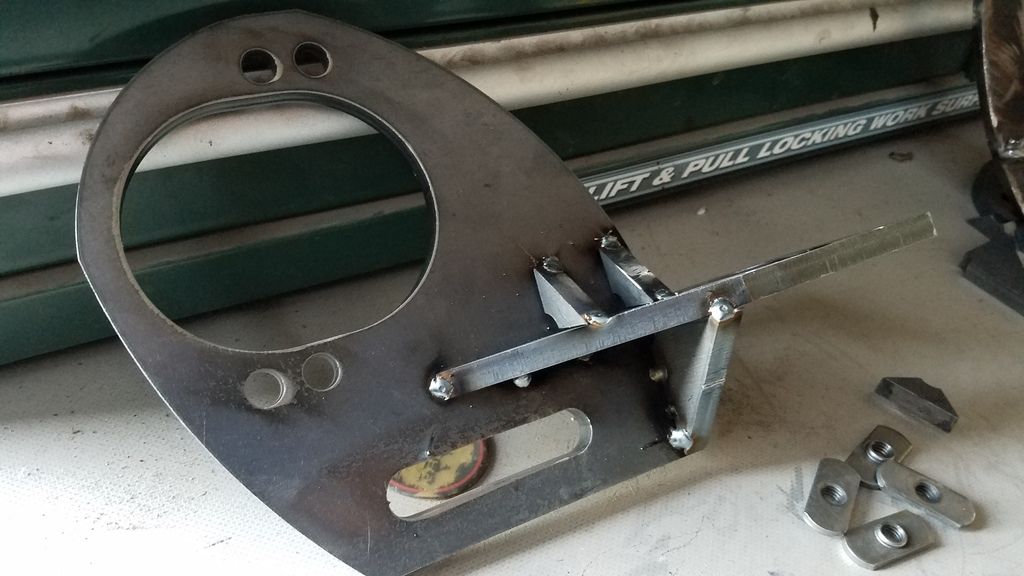 http://s161.photobucket.com/user/coggonobrien/media/d15/20170201_171300_zpsrlgzviw1.jpg.html" rel="nofollow"> 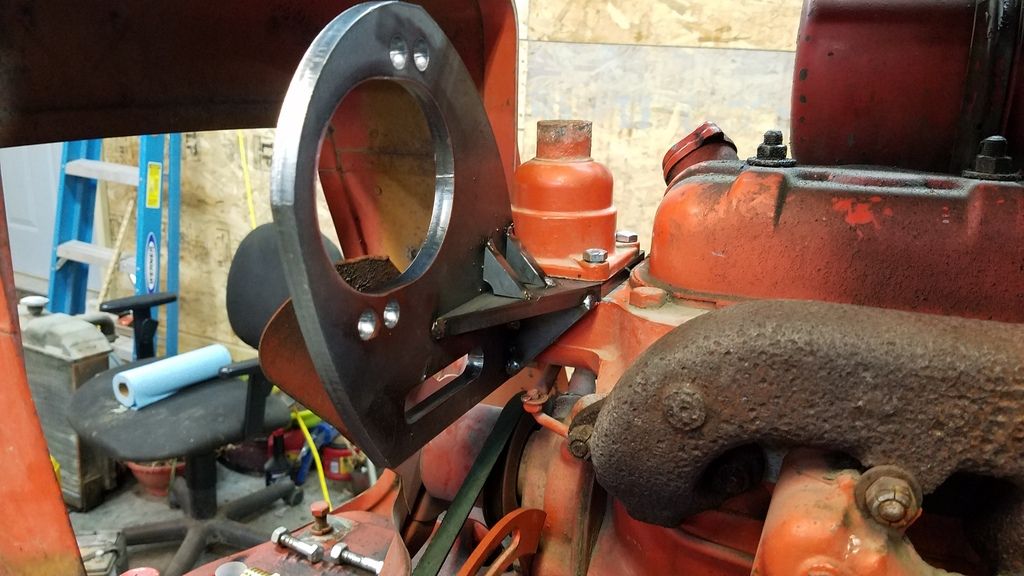 http://s161.photobucket.com/user/coggonobrien/media/d15/20170201_171310_zpsbaxewdwu.jpg.html" rel="nofollow"> 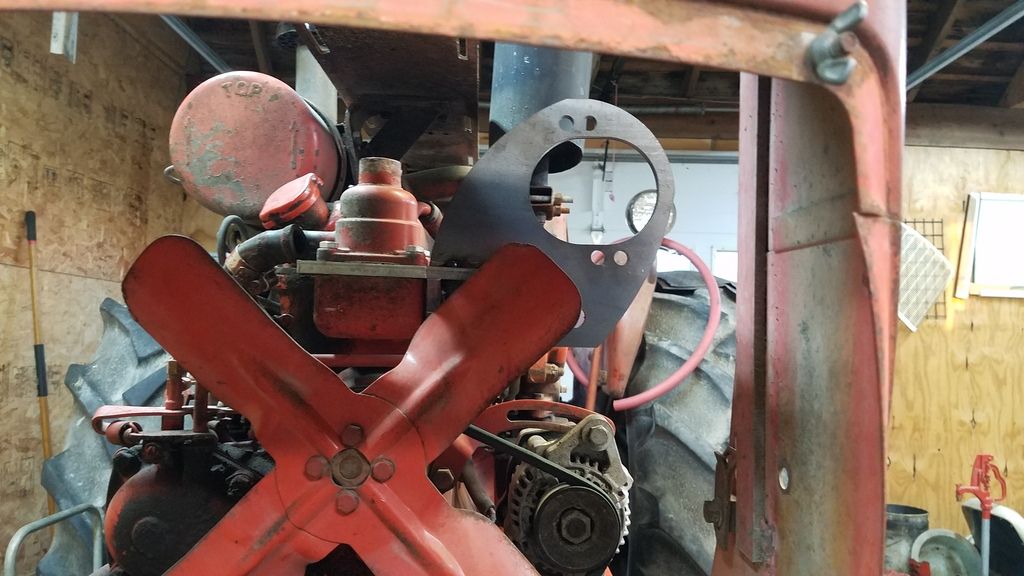 http://s161.photobucket.com/user/coggonobrien/media/d15/20170201_171733_zpsttlgrbzq.jpg.html" rel="nofollow">  http://s161.photobucket.com/user/coggonobrien/media/d15/20170201_171758_zps7pmh9jkn.jpg.html" rel="nofollow"> 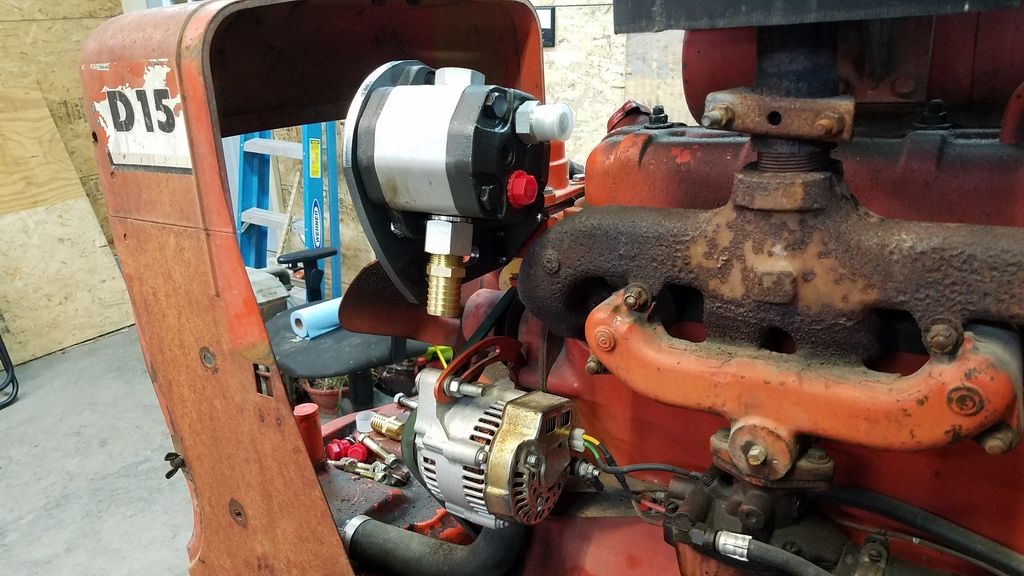 http://s161.photobucket.com/user/coggonobrien/media/d15/20170201_171805_zpsdqcfgjvk.jpg.html" rel="nofollow"> 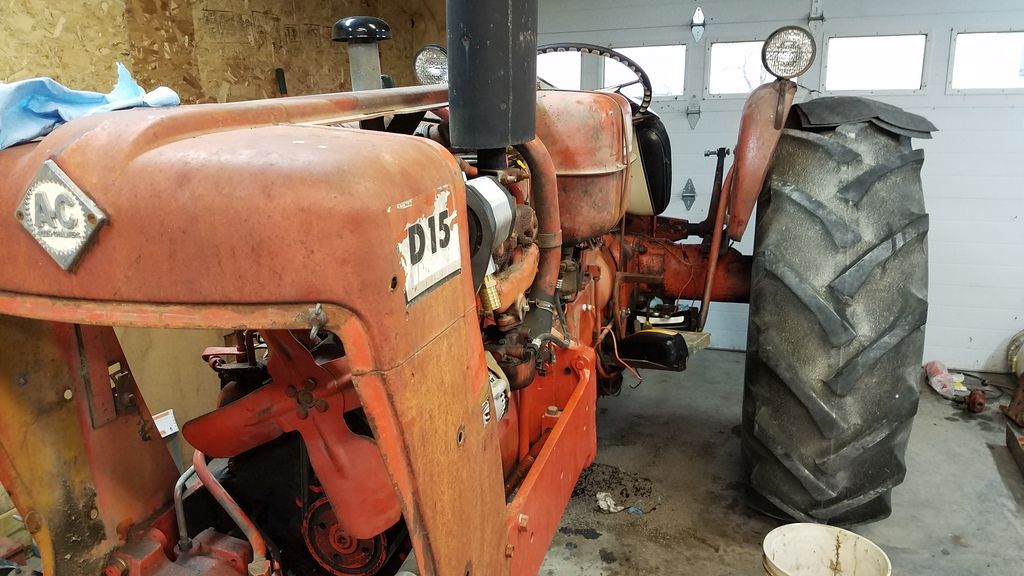 http://s161.photobucket.com/user/coggonobrien/media/d15/20170201_171841_zpsun19rnte.jpg.html" rel="nofollow"> 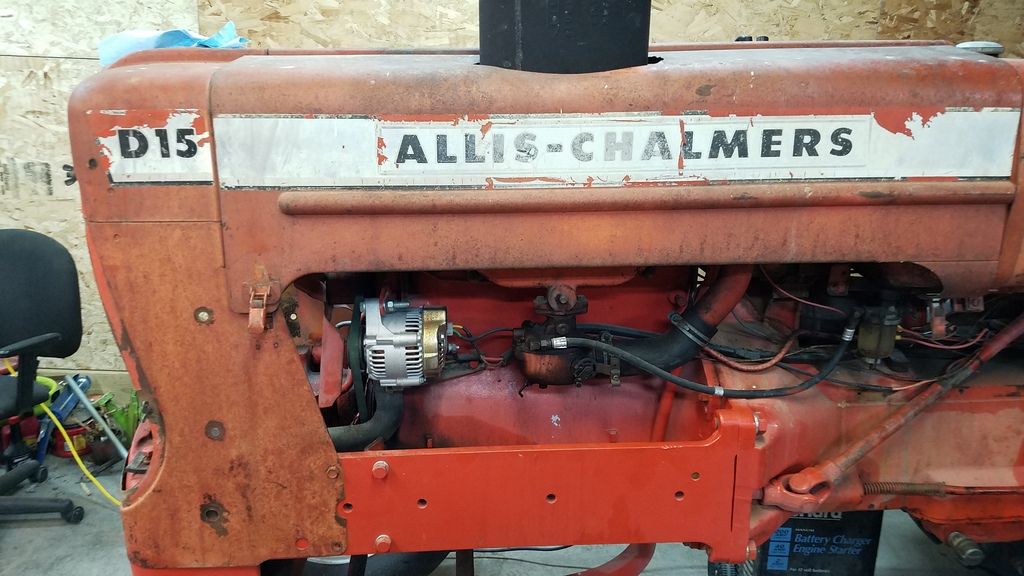 http://s161.photobucket.com/user/coggonobrien/media/d15/20170201_171848_zpsohls9phm.jpg.html" rel="nofollow"> 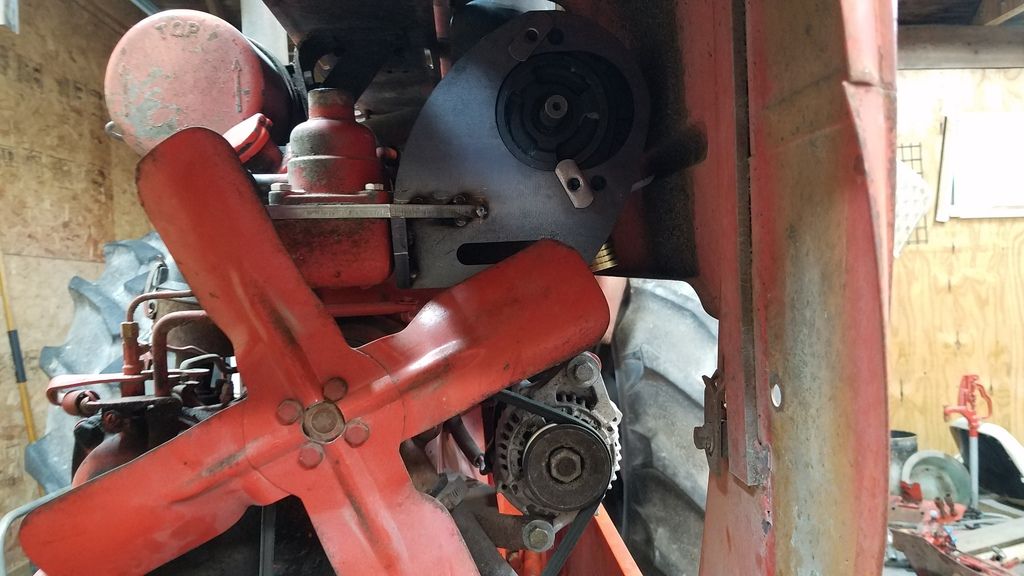 http://s161.photobucket.com/user/coggonobrien/media/d15/20170201_172018_zpsinfujkws.jpg.html" rel="nofollow"> 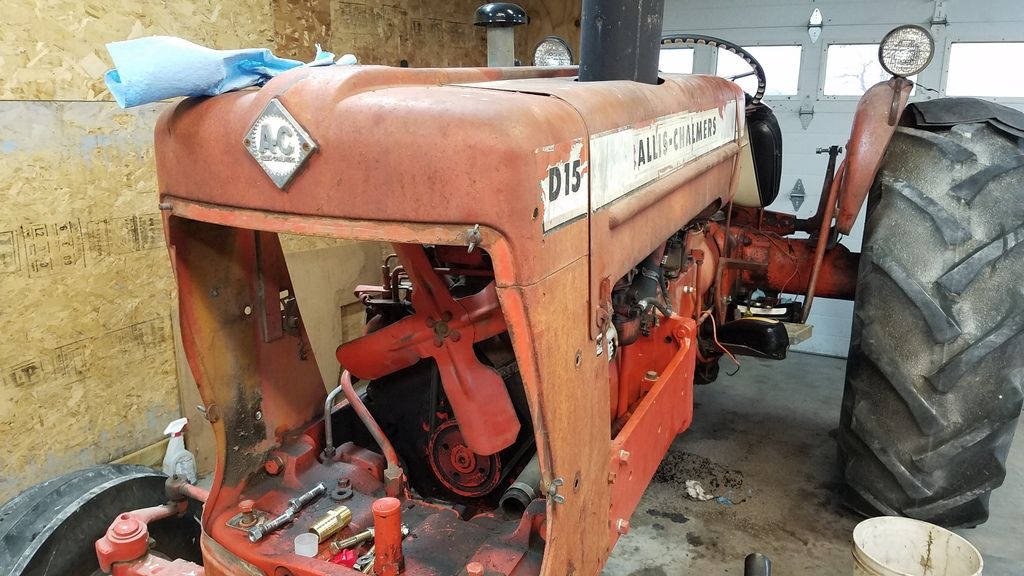 http://s161.photobucket.com/user/coggonobrien/media/d15/20170201_172028_zpssfsuydtd.jpg.html" rel="nofollow"> 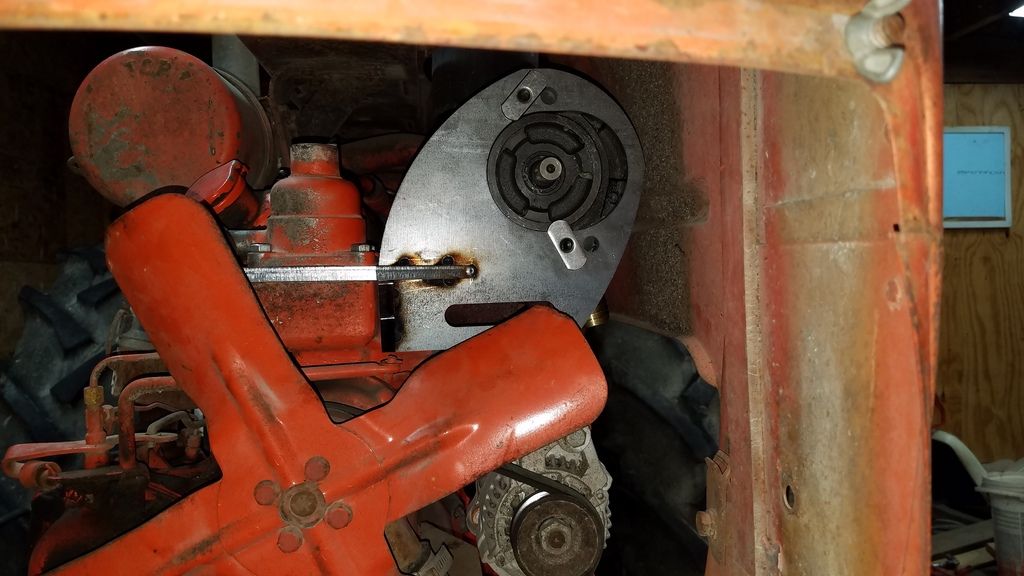 |
Posted By: farmboy520
Date Posted: 02 Feb 2017 at 7:48am
|
Looking good
|
Posted By: desertjoe
Date Posted: 02 Feb 2017 at 8:18am
|
Lookin Good,,,Coggin,,,Lookin Good,,,,,!!!! Did you wind up NOT havin to move the fan forward,,,?? How bout a pic of the relationships from both sides.,?? Great idea to use the thermostat housing for the anchor,,,!!! That is lookin so nice and lots of others just waitin for it's maiden voyage,,,,!!! This is goin to be a Game Changer for the D series AC's,,,includin my D14,,,, you'll surely have the FIRST D15 Series III,,,,, |
Posted By: coggonobrien
Date Posted: 02 Feb 2017 at 8:22am
| The fan does not need to move forward but the Dr and I were planning moving it forward sometime and cutting the fan shroud to increase the efficiency of the cooling system. Not sure what you mean by a picture of the relationship of both sides. Forgot to mention everything is laser cut form 3/8" mild steel. Dad has a pipe fitter buddy the will tig weld it. The pump pulley is 5" to go with the d14 crank pulley that will be driving it. Idler is a 2.5" flat idler for the 5/8" belt. |
Posted By: desertjoe
Date Posted: 02 Feb 2017 at 8:39am
|
Hey Coggin,,,can you post some side view pics of the engine that shows the Hyd. pump, idler, fan, water pump,,?? Thanks. You might want to consider a 5 blade fan that will move lots more air than the 4 blade. The D15 Series II, I used to have, had the 5 blade fan and was noticeably louder than the 4 blade on the D14. I was wonderin how you were going to address the additional pully to drive the new pump,, My D14 has the single pully and now driving the front mounted pump and don't look like any room to add another pully,,,???? Thanks,,, |
Posted By: dpower
Date Posted: 02 Feb 2017 at 10:08am
| which one is the DR.??? That guy is a walking book of knowledge on ACs |
Posted By: coggonobrien
Date Posted: 03 Feb 2017 at 7:08am
|
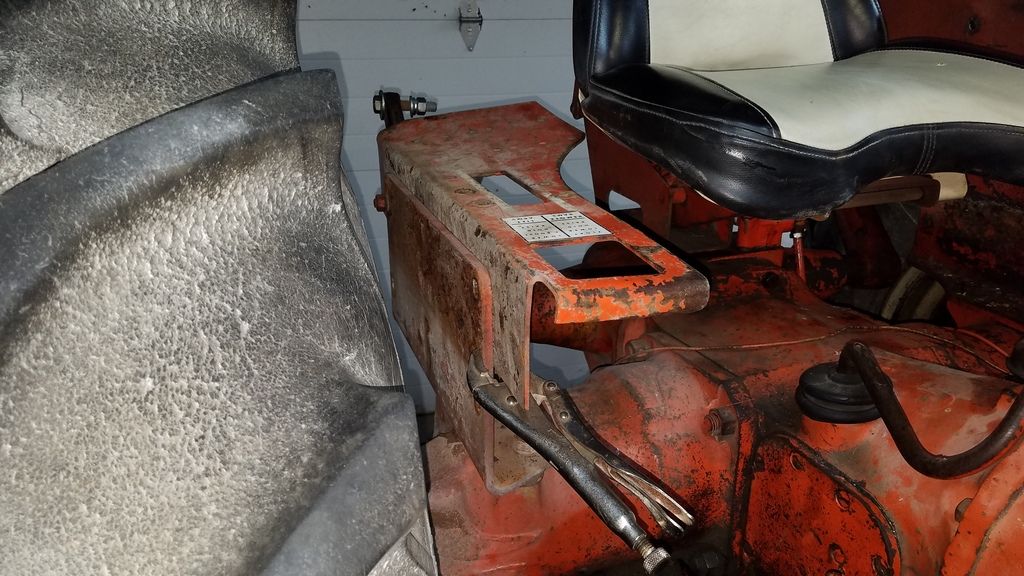
Started fitting up the console tonight, Looks like it's going to fit like it's meant to. just need to drill 2 new bolt holes. The 2nd picture is an illusion, my leg is not rubbing the console http://s161.photobucket.com/user/coggonobrien/media/d15/20170202_175416_zpskgamrx9b.jpg.html" rel="nofollow">  http://s161.photobucket.com/user/coggonobrien/media/d15/20170202_175344_zpsrrmmrmr7.jpg.html" rel="nofollow"> 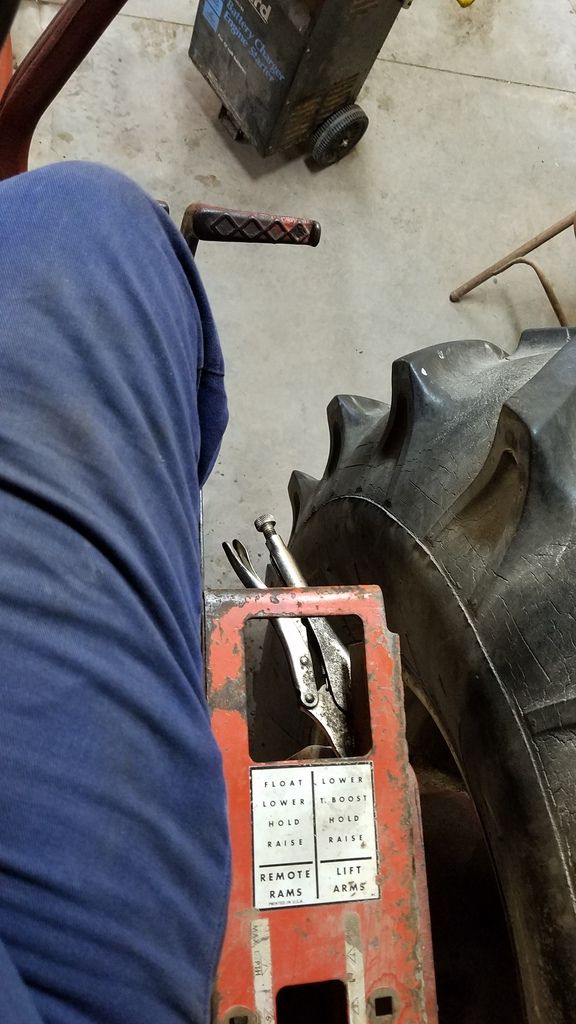 http://s161.photobucket.com/user/coggonobrien/media/d15/20170202_175131_zpsqrbzplbu.jpg.html" rel="nofollow">
 |
Posted By: TimNearFortWorth
Date Posted: 03 Feb 2017 at 9:35am
|
The more you show on this, the more it makes me wonder how easy it would be to adapt the controls plate like yours for right hand use on the 415 crank mounted pump, and use the loader reservoir like it is. Have been thinking about valving up something for rear two-way cylinder use off the crank pump and sure would be nice to have those controls on that right side. Excellent post and much appreciated that you are taking the time to document this work. |
Posted By: coggonobrien
Date Posted: 03 Feb 2017 at 9:37am
| It wouldn't be tough, it's just a matter running hose. The valve stack has 1 input and 1 outlet. |
Posted By: coggonobrien
Date Posted: 03 Feb 2017 at 10:22am
I will get you some more pictures this weekend. With a d14 pulley bolted to the front of the original d15 pulley we did miss the fan. Currently having what would be the motor side of the pulley machined down then we will reinstall.
|
Posted By: coggonobrien
Date Posted: 03 Feb 2017 at 10:23am
Doc is in the blue coat
|
Posted By: JohnCO
Date Posted: 03 Feb 2017 at 3:08pm
|
Wow, beautiful work. I see the D 15 is one of those extremely rare air cooled models! LOL
------------- "If at first you don't succeed, get a bigger hammer" Allis Express participant |
Posted By: coggonobrien
Date Posted: 03 Feb 2017 at 3:11pm
|
Wish me luck boys, I'm in the running for free paint and tires. http://600wmtradio.iheart.com/onair/wmt-ag-show-2017-45630/" rel="nofollow - http://600wmtradio.iheart.com/onair/wmt-ag-show-2017-45630/ |
Posted By: plummerscarin
Date Posted: 03 Feb 2017 at 7:08pm
| Well seeing as we didn't make the cut, I wish you all the luck! |
Posted By: coggonobrien
Date Posted: 03 Feb 2017 at 7:35pm
| What did you enter |
Posted By: plummerscarin
Date Posted: 03 Feb 2017 at 8:03pm
| Late FIL's Cub Loboy. Dad's WD and Gdad's WC aren't running right now |
Posted By: JayIN
Date Posted: 04 Feb 2017 at 6:52am
|
Again, very nice work. It proves to yourself that anything can be done. After doing a few things like this it makes you think from a different point of veiw when you do a project.Makes the "inventivness" come out. A lot of fun when not pressed for time. Good Job!!! ------------- sometimes I walk out to my shop and look around and think "Who's the idiot that owns this place?" |
Posted By: coggonobrien
Date Posted: 05 Feb 2017 at 8:25am
|
[TUBE]XJ16vPA4zKg[/TUBE]
[TUBE]vY6b1fqbG6w[/TUBE]
|
Posted By: desertjoe
Date Posted: 05 Feb 2017 at 9:40am
|
Gosh Dang Coggin,,,,,you and The Doctor just don't let much grass grow under your feet do Ya,,,???? . Thet set-up looks great,,,and again KUDOS for thinkin on the idea of using the thermo housing for the mounting of the bracket. (great!)You mentioned using a D14 pulley and machining the backside,,,,that one looks to be bigger,,,but,,,the big center hole would,,I think,,allow the drive shaft to go thru it to engage on inside pulley,,,,, HMMmmmmm,,,,I Like it,,,!!!! Now,,,all you need is to get you a 5 blade fan and lash it all up,,,,, American Engineuity at it's best,,,,,, |
Posted By: coggonobrien
Date Posted: 05 Feb 2017 at 9:55am
| This is the Doctors vision at my request. T stat housing mount is his idea. That pulley is a d14 pulley, we still need to machine a pocket so it seats into the d15 shoe string pulley |
Posted By: coggonobrien
Date Posted: 05 Feb 2017 at 10:22am
| Gotcha, just an FYI for next year but contest says the tractor needs to be mechanically sound |
Posted By: coggonobrien
Date Posted: 07 Feb 2017 at 5:50am
|
Here is the additional crank pulley. It is a d14 crank pulley (5/8" belt) bought new from DJS Tractor. We machined down the block side of the pulley and will bolt it together with grade 8, 7/16 bolts with centerlock nuts. Ignore the writing, they are just machinist notes. untouched front surface http://s161.photobucket.com/user/coggonobrien/media/d15/20170206_181029_zpsltyn25bl.jpg.html" rel="nofollow"> 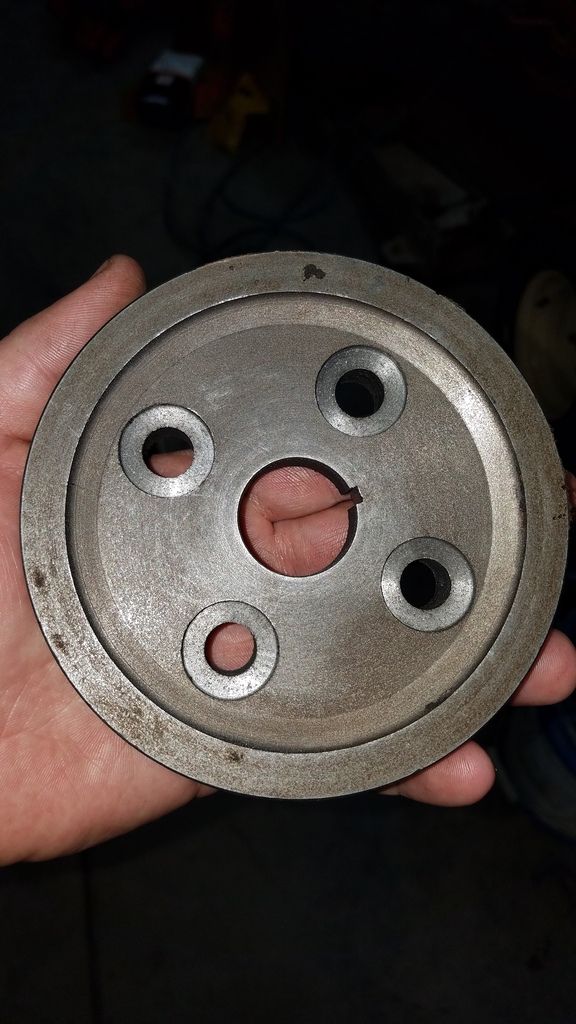 machined rear, the pocket seats into the original d15 pulley shoulder. http://s161.photobucket.com/user/coggonobrien/media/d15/20170206_181037_zpsx6qf1jyf.jpg.html" rel="nofollow"> 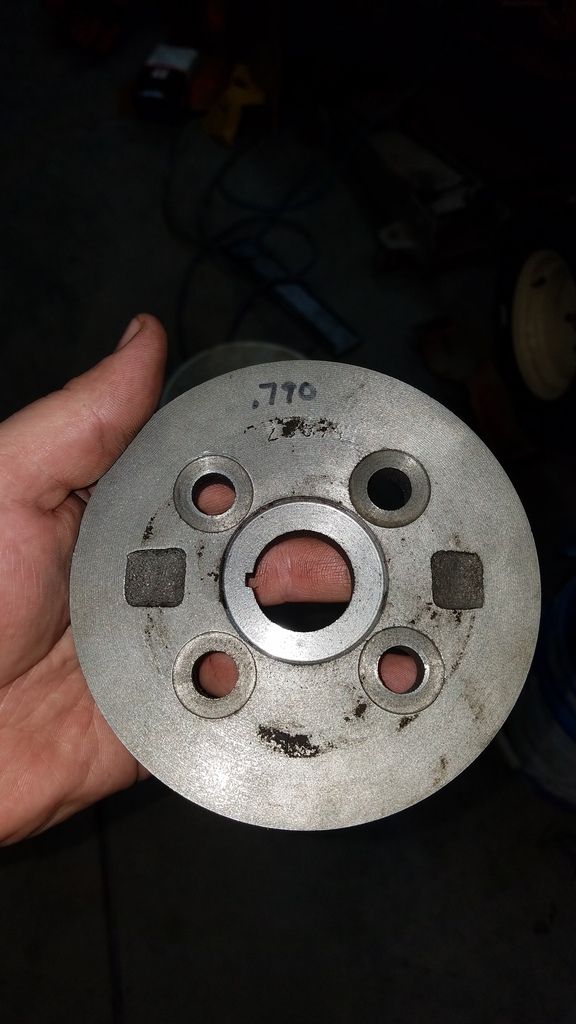 |
Posted By: desertjoe
Date Posted: 07 Feb 2017 at 6:14am
|
Hey Coggin,,,,,,you just goin right along ain't you,,,!!! I'm curious,, how much clearance did you wind up with from the D14 pulley to the back of the PS reservoir,,?? You just gave me an idea on how to address my set-up, which already has an additional pulley for the front mounted pump,,, I could possibly add the outer part of another sheave to the OD of the front pump for the additional belt,,,??? HMmmmm,,,, Gonna run out there when sun comes up and take a close look-see,,,,, |
Posted By: coggonobrien
Date Posted: 07 Feb 2017 at 6:26am
| I can post pictures when I put the pulley back on. There's plenty of room. |
Posted By: coggonobrien
Date Posted: 17 Feb 2017 at 8:46pm
|
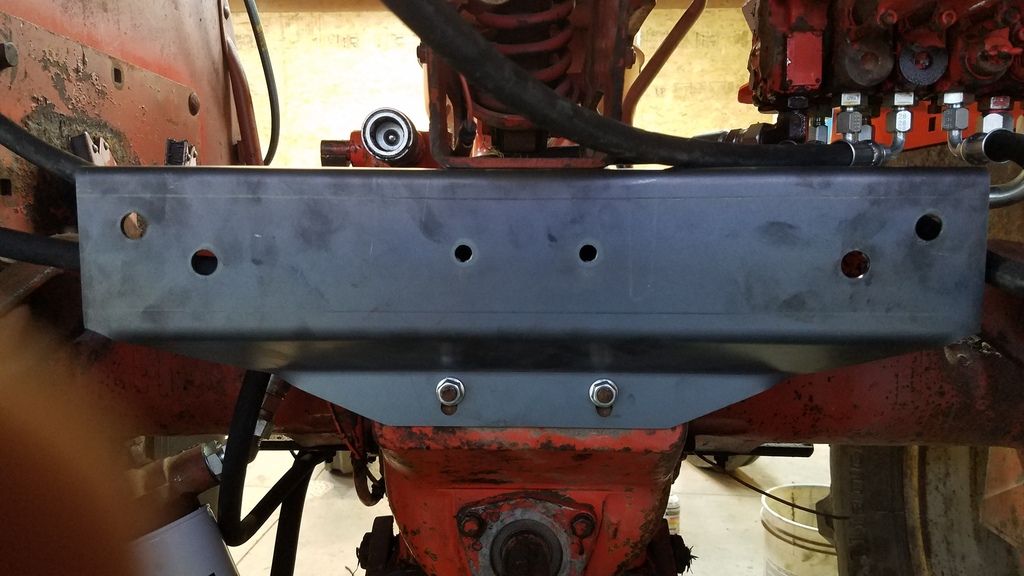
Well we are starting reassembly. belt is 54" long x 5/8". front pulley is held on with 7/16 gd 8 bolts. bought them long and cut them off to have as much unthreaded shank as possible. t-stat housing is held down with grade 8 bolts, hardened washers and lock washers. hydraulic remotes are all 3/8" jic with break away coupler's. New mounting plate is grade 50, 10 gauge mild. http://s161.photobucket.com/user/coggonobrien/media/d15/20170217_174409_zpsqrrfz1xz.jpg.html" rel="nofollow"> 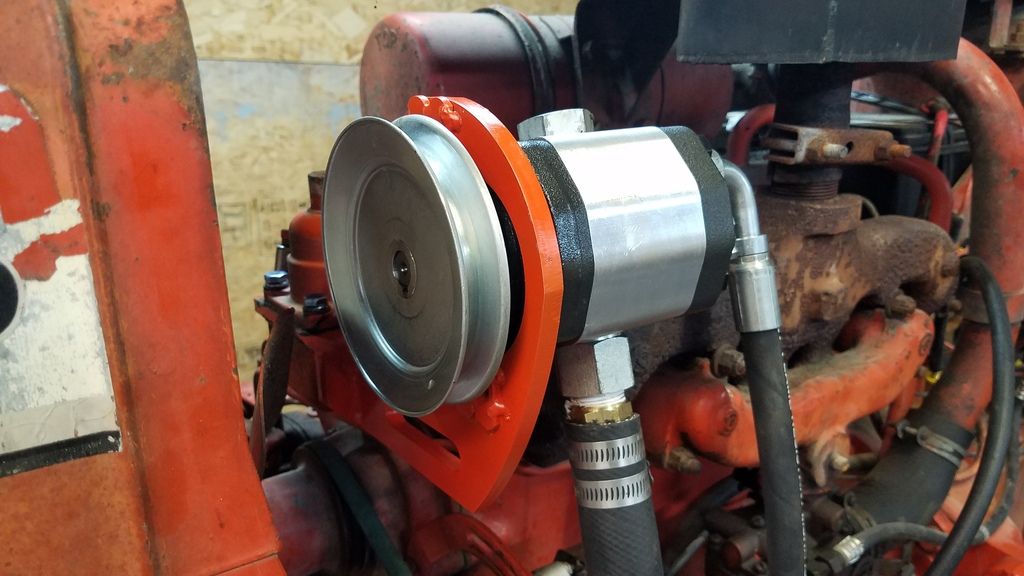 http://s161.photobucket.com/user/coggonobrien/media/d15/20170217_174359_zpsk6v2kyyf.jpg.html" rel="nofollow"> 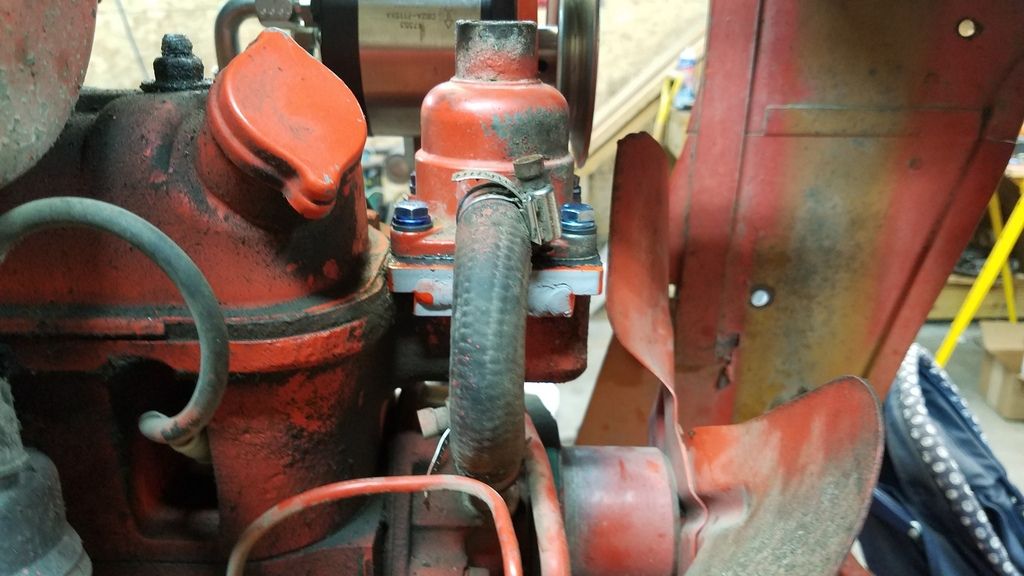 http://s161.photobucket.com/user/coggonobrien/media/d15/20170217_174352_zpsla314wsw.jpg.html" rel="nofollow"> 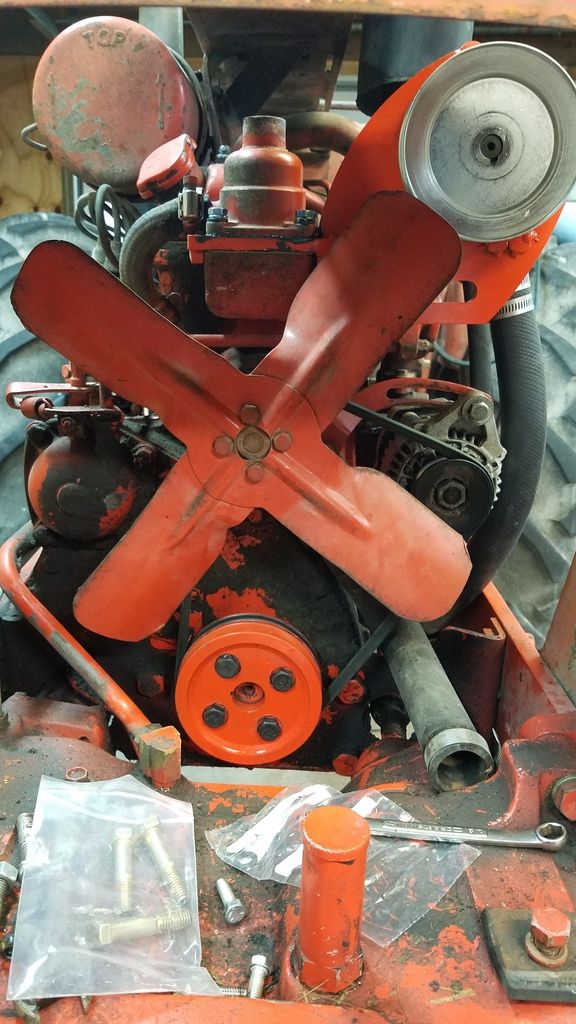 http://s161.photobucket.com/user/coggonobrien/media/d15/20170217_174301_zpsbvi8rcjq.jpg.html" rel="nofollow">
 |
Posted By: desertjoe
Date Posted: 18 Feb 2017 at 3:08am
|
Gosh,,Coggin,,,you're just goin right along ain't you,,?? That Dr. is something else,, I know it's an optical illusion but the fan blade in second pic sure looks like it's bent,,,,???My one little concern,,, due to havin broken the T-stat housing on my D14, ( pot metal) is to use some big flat washers on the 4 bolts to spread out the clamping forces as much as possible,,,?? Lookin good,,,,!!! |
Posted By: coggonobrien
Date Posted: 18 Feb 2017 at 7:35am
|
The fans not bent but the corners were clipped for the original loader hydraulic pump install. I would find hardened washers (black ones) vs larger ones. There really isn't any more surface area for a larger washer and the concern is when you crank on the bolts the force tries to draw the bolt through the center hole which distorts the washer and turns it into a wedge. If I was you I would find a new housing to ensure no failure http://www.ebay.com/itm/Allis-Chalmers-D14-D15-Tractor-Thermostat-Housing-/222407887785?hash=item33c88b0ba9:g:b8sAAOSw3v5YoQtp
|
Posted By: coggonobrien
Date Posted: 18 Feb 2017 at 12:18pm
|
Breakaways installed http://s161.photobucket.com/user/coggonobrien/media/d15/20170218_110253_zpsd2tspmwl.jpg.html" rel="nofollow"> 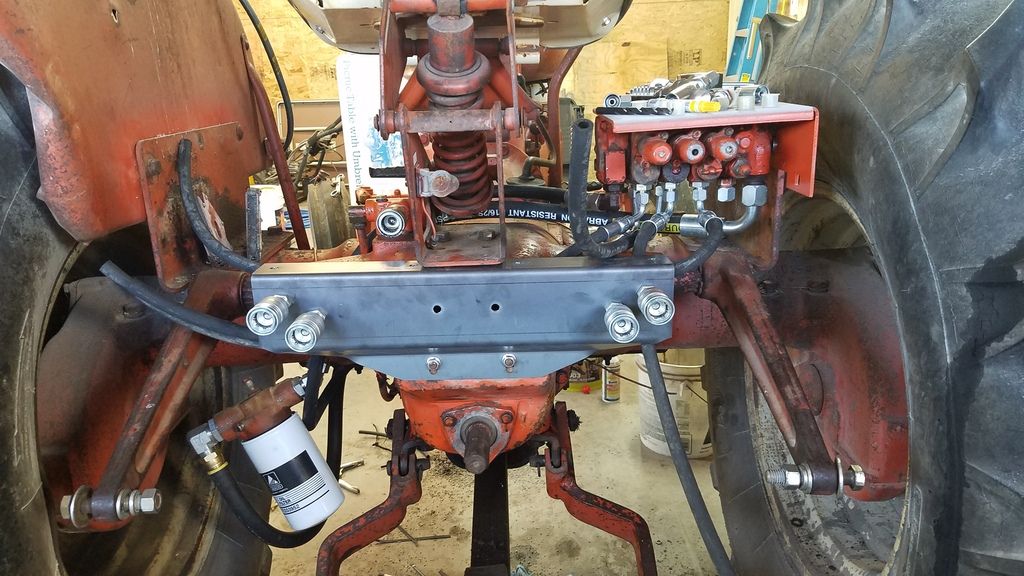
|
Posted By: coggonobrien
Date Posted: 04 Mar 2017 at 12:55pm
|
https://youtu.be/npgtGgWNgvc http://s161.photobucket.com/user/coggonobrien/media/d15/20170304_112044_zpscy41ljua.jpg.html" rel="nofollow"> 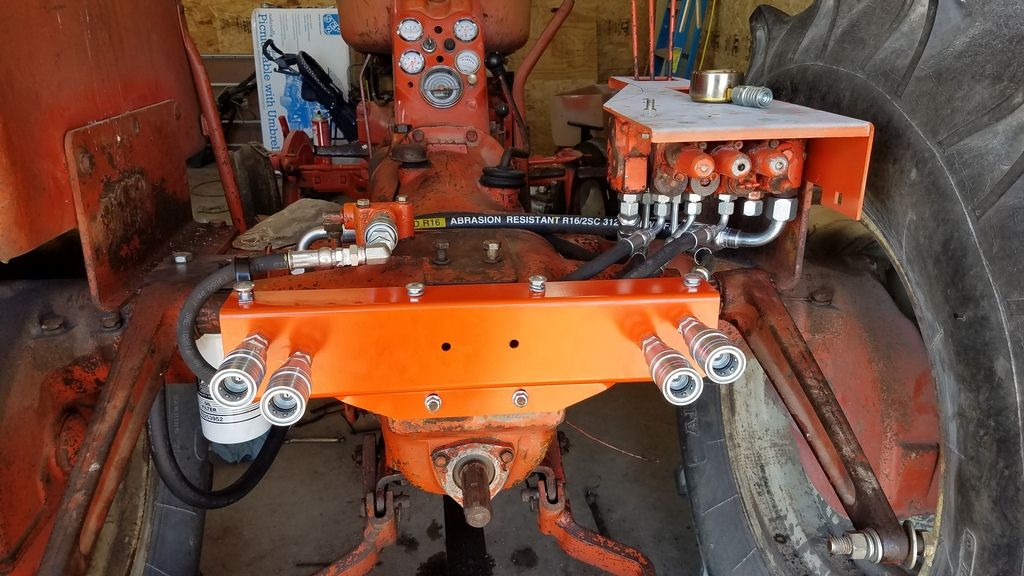 http://s161.photobucket.com/user/coggonobrien/media/d15/20170304_112054_zpsqhcdgwxi.jpg.html" rel="nofollow"> 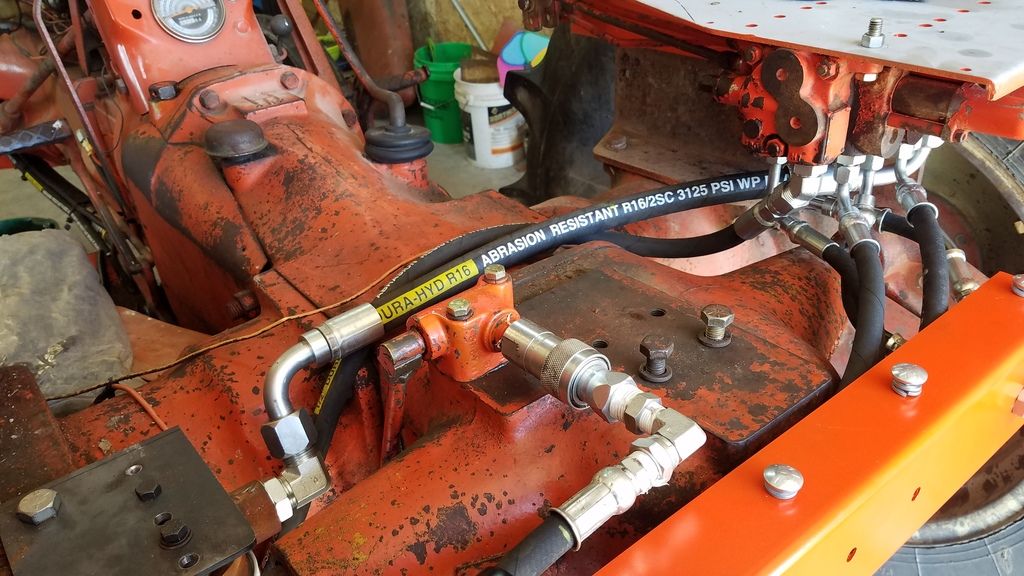 http://s161.photobucket.com/user/coggonobrien/media/d15/20170304_112106_zpsjnzmsduv.jpg.html" rel="nofollow"> 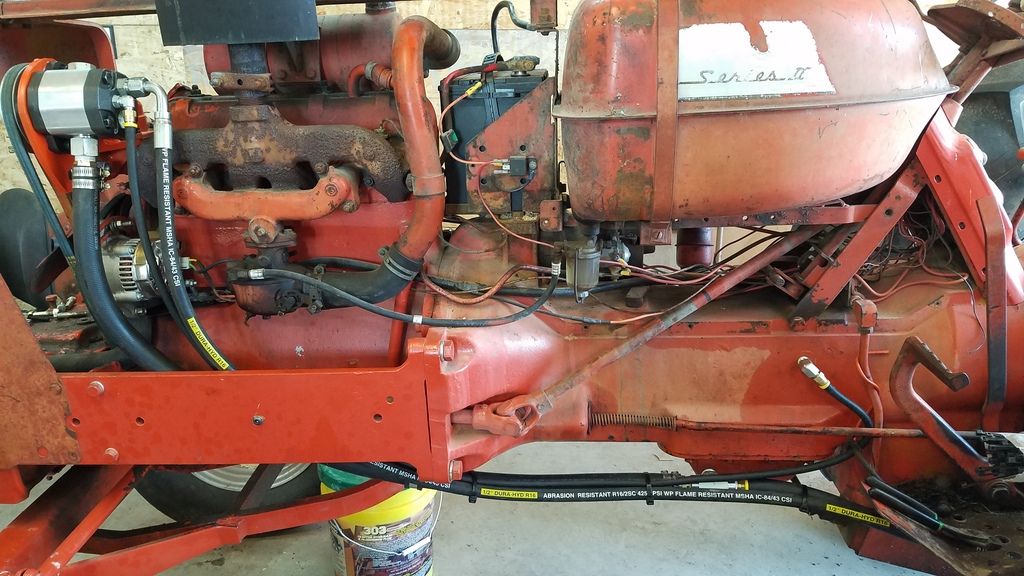 http://s161.photobucket.com/user/coggonobrien/media/d15/20170304_112133_zpsljizrnnu.jpg.html" rel="nofollow"> 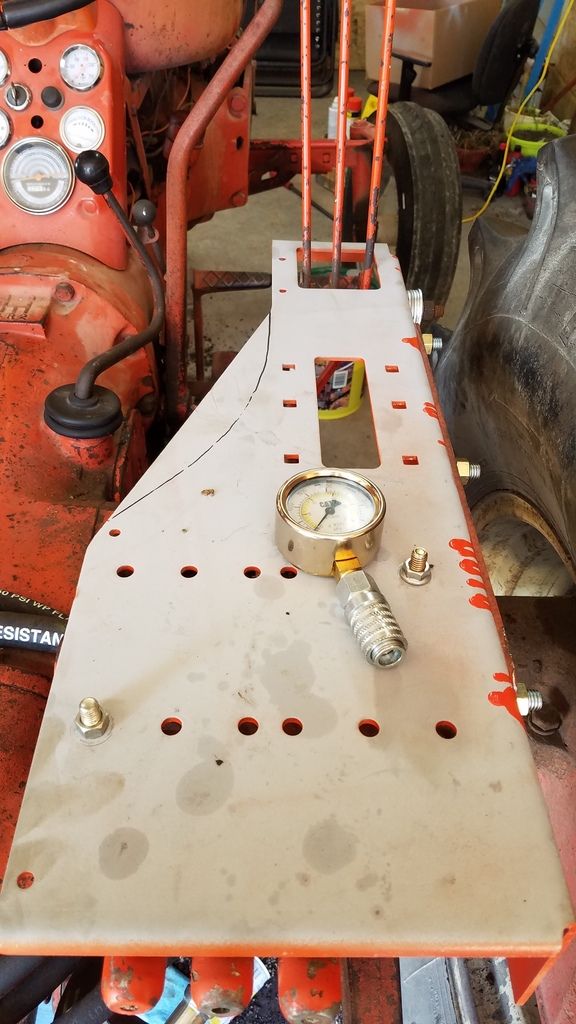 http://s161.photobucket.com/user/coggonobrien/media/d15/20170304_112141_zps7uwbl8k1.jpg.html" rel="nofollow"> 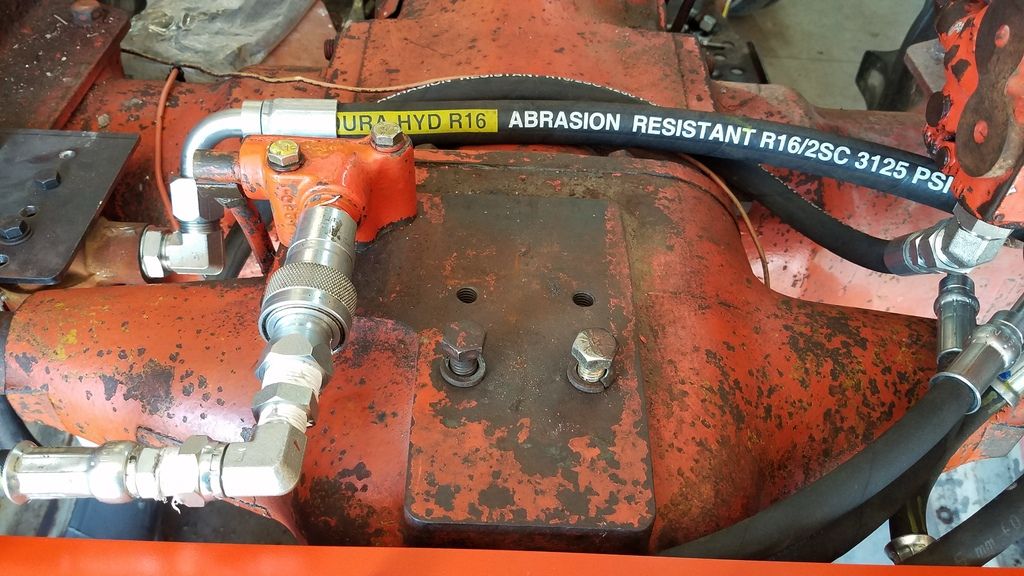
|
Posted By: Jim Hancock
Date Posted: 04 Mar 2017 at 10:06pm
|
Looking great! ------------- How blessed we are by HIS GRACE! |
Posted By: coggonobrien
Date Posted: 06 Mar 2017 at 3:01pm
|
[TUBE]npgtGgWNgvc[/TUBE]
|
Posted By: coggonobrien
Date Posted: 06 Mar 2017 at 3:09pm
|
The Dr. testing how the reworked shifter, no more popping out of 3rd gear [TUBE]P4VQbOnoDZo[/TUBE] |
Posted By: coggonobrien
Date Posted: 09 Mar 2017 at 5:53pm
|
Top plate lasered, just need to drill the seat bolt holes. http://s161.photobucket.com/user/coggonobrien/media/d15/20170309_171630_zpskgckwuwv.jpg.html" rel="nofollow"> 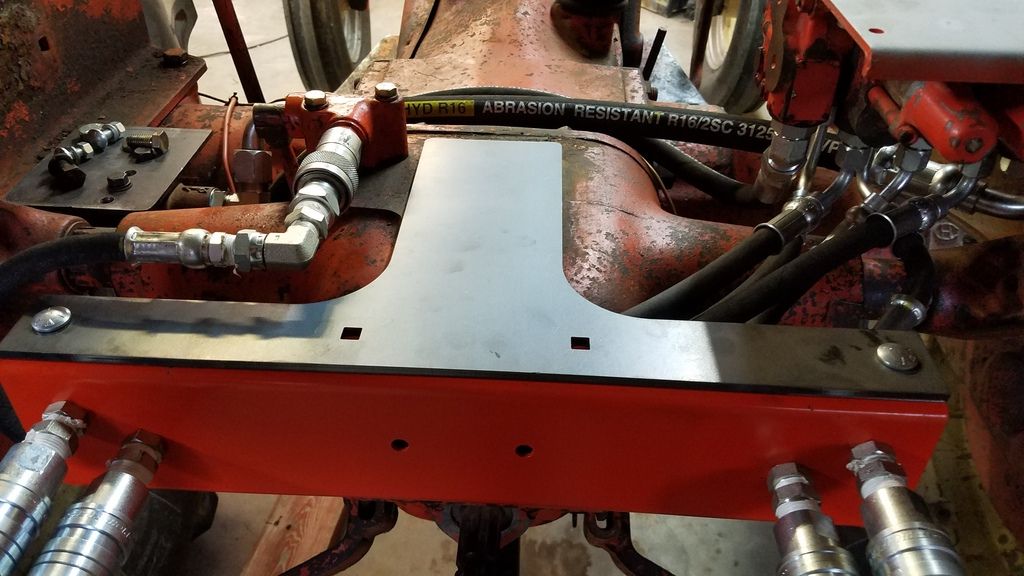
|
Posted By: copyrite1972
Date Posted: 09 Mar 2017 at 6:27pm
|
Great work guys!!!! ------------- D15 Series II |
Posted By: Dan73
Date Posted: 09 Mar 2017 at 6:45pm
| Nice I bet if you offered that hydraulic conversation as a kit you could sell them. That looks great. |
Posted By: coggonobrien
Date Posted: 09 Mar 2017 at 8:01pm
| Honestly I've got one buying the pump bracket but a kit as a hole is too rich for most. Roughly 350 in hoses and fittings alone |
Posted By: Dan73
Date Posted: 09 Mar 2017 at 8:52pm
| Yup it adds up fast. I put dual remotes on my d15 with a joystick valve for the loader as well. Spent a ton of money on that setup but if you use it for a work tractor it pays for itself in the long run. You can save a ton by buying the hoses and fitting from surplus center. But the plate you made up to mount the quick couplers in the back is alot nicer then just comming off the valves with black iron schedule 80 pipe to quick connects like I did. Both work but your looks alot nicer. |
Posted By: coggonobrien
Date Posted: 10 Mar 2017 at 8:09am
| Yeah, if people want to buy the fabricated steel parts i would sell them but anything store bought isn't worth my time to do. |
Posted By: coggonobrien
Date Posted: 13 Mar 2017 at 12:01pm
|
Getting closer. Rebuilding the seat while it's off http://s161.photobucket.com/user/coggonobrien/media/d15/20170311_113446_zpsboll4zqr.jpg.html" rel="nofollow"> 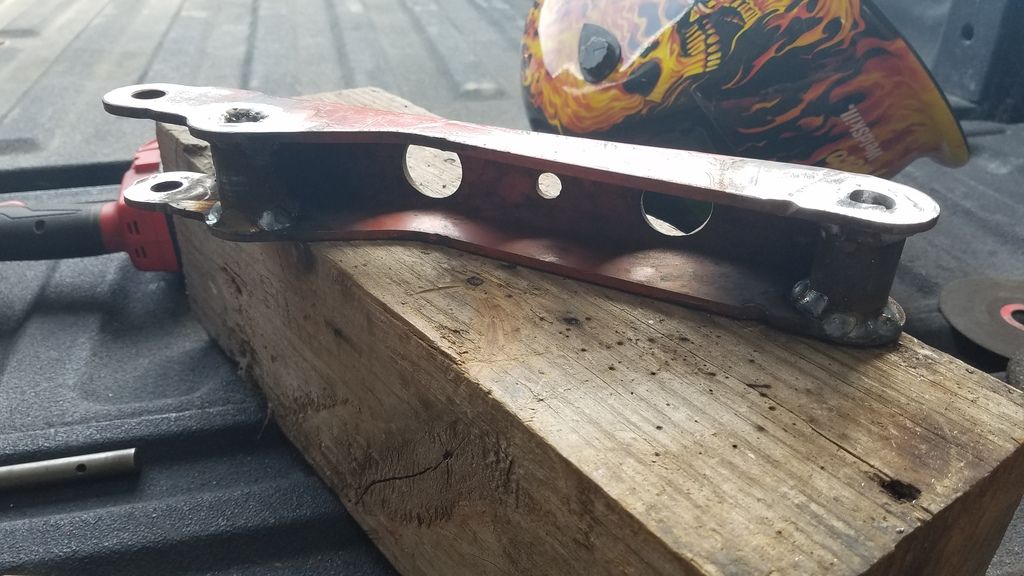 http://s161.photobucket.com/user/coggonobrien/media/d15/20170311_113451_zpsbfygbfwz.jpg.html" rel="nofollow">  http://s161.photobucket.com/user/coggonobrien/media/d15/20170311_132707_zpsungylb2h.jpg.html" rel="nofollow"> 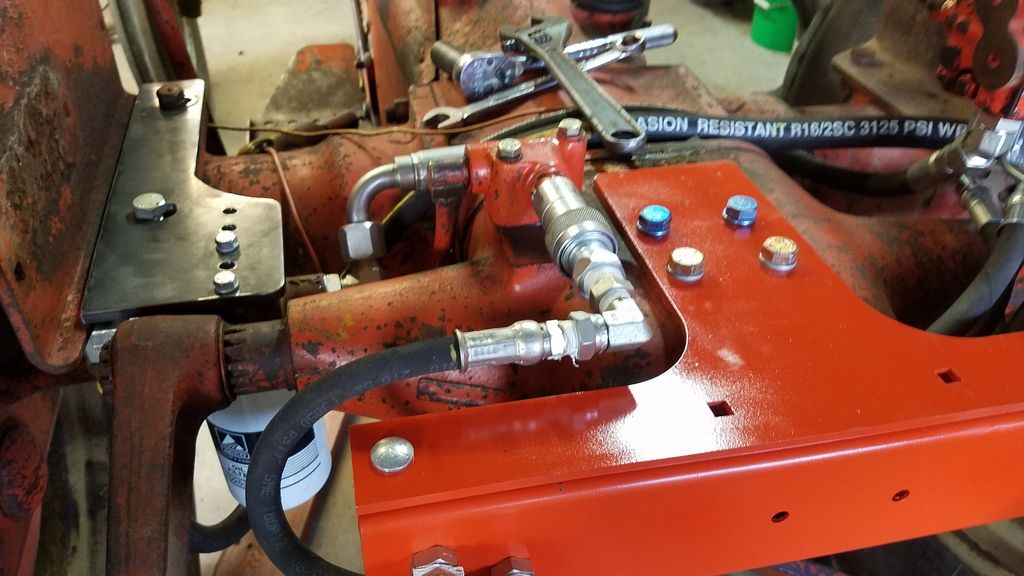
|
Posted By: Dan73
Date Posted: 13 Mar 2017 at 1:21pm
| You will like that the new shock absorber on the seat makes a world of difference. You get it all fixed up it will be too nice to take out and use. Lol |
Posted By: coggonobrien
Date Posted: 13 Mar 2017 at 1:30pm
| Oh that's how we get new tractors around here. People were really shocked to see us dual up our 220 open platform after painting it and field cultivate. |
Posted By: coggonobrien
Date Posted: 13 Mar 2017 at 4:23pm
|
Oil filter mount painted and installed. Still need to cut the return hose to length http://s161.photobucket.com/user/coggonobrien/media/d15/20170313_161817_zpsxmd6dkz8.jpg.html" rel="nofollow"> 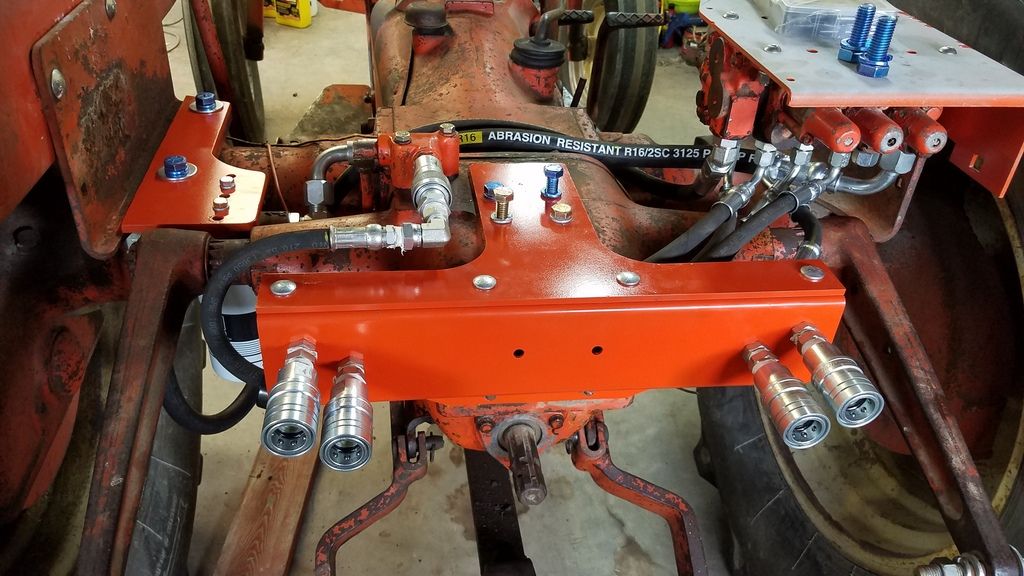 http://s161.photobucket.com/user/coggonobrien/media/d15/20170313_161957_zps5nxpsjhv.jpg.html" rel="nofollow"> 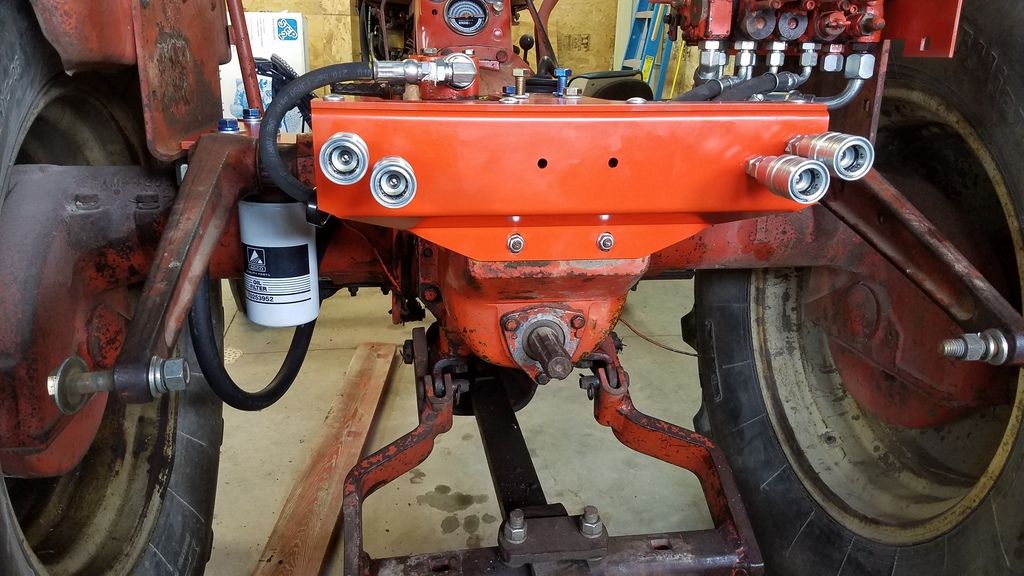
|
Posted By: IBWD MIke
Date Posted: 14 Mar 2017 at 12:29pm
| That is looking really sweet! |
Posted By: coggonobrien
Date Posted: 15 Mar 2017 at 11:15am
Joe, can you take a picture of where the pivot bolt for the hydraulic ties to the fender mount plate
|
Posted By: coggonobrien
Date Posted: 18 Mar 2017 at 11:31pm
|
Slowly putting the seat back together after fixing all the egg shaped holes. Once installed I can clearance the console top. Also drew and cut a new righthand fender mount. If it fits like it should I will mirror it for a lefthand http://s161.photobucket.com/user/coggonobrien/media/d15/20170318_114543_zpssjv3zqjz.jpg.html" rel="nofollow"> 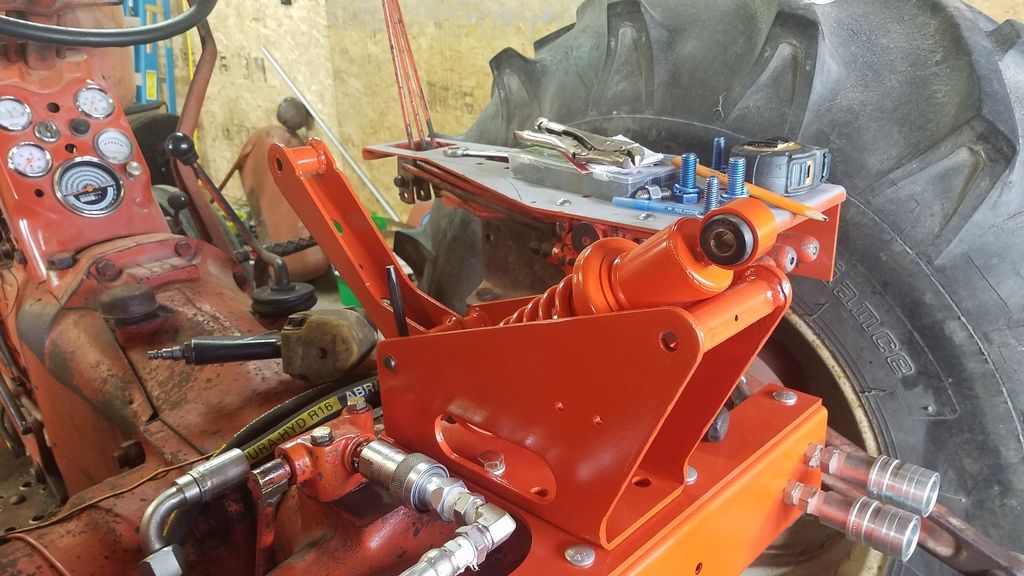 http://s161.photobucket.com/user/coggonobrien/media/d15/20170318_231226_zpsld0xb9ev.jpg.html" rel="nofollow"> 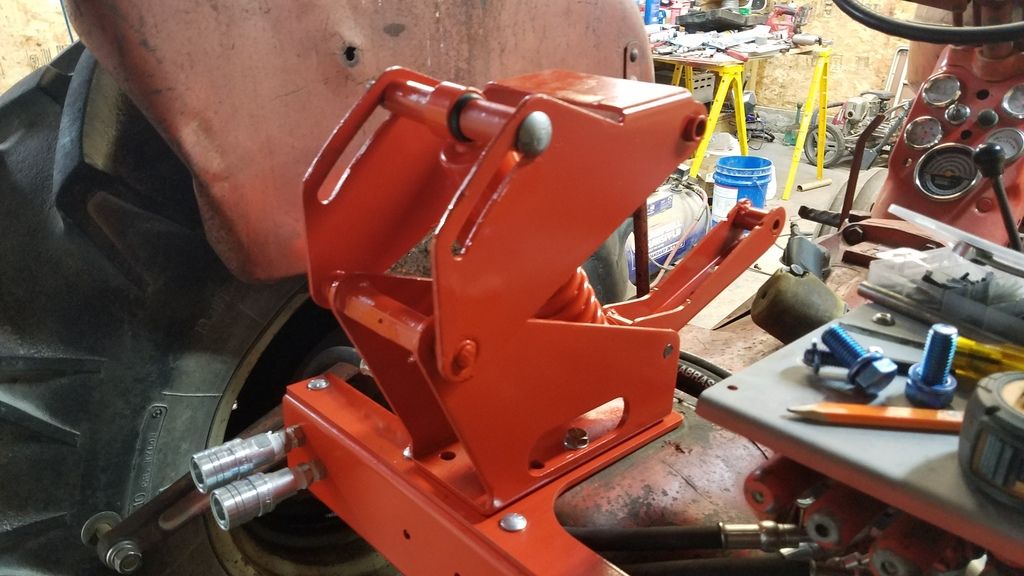 http://s161.photobucket.com/user/coggonobrien/media/d15/20170317_203928_zpslxudeg4y.jpg.html" rel="nofollow"> 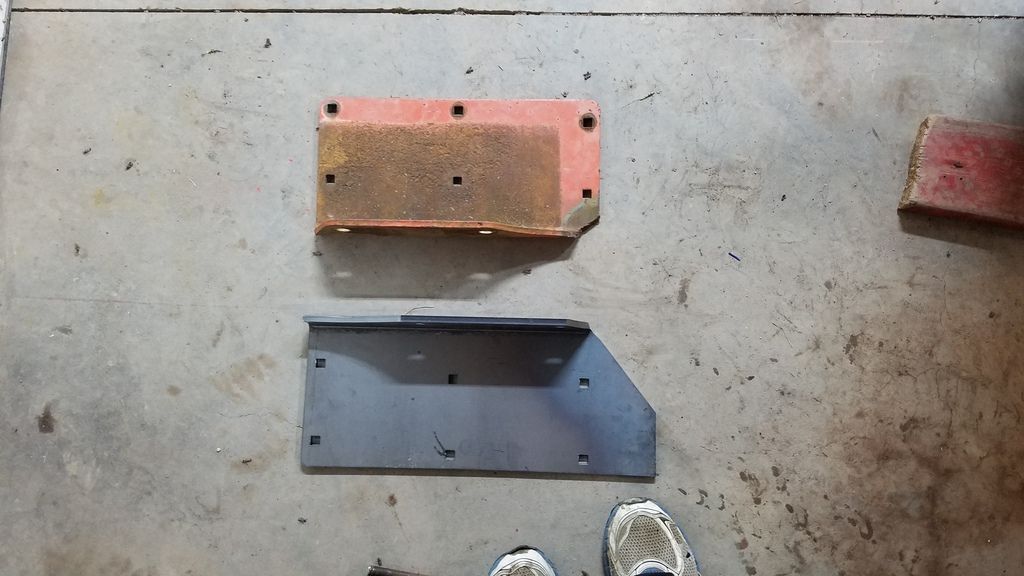
|
Posted By: coggonobrien
Date Posted: 23 Mar 2017 at 6:18pm
|
Seat suspension is done, going to touch up the back of the seat before putting it on then it's time to see how much of the console needs trimmed. http://s161.photobucket.com/user/coggonobrien/media/d15/20170319_140331_zpsys9rgu4g.jpg.html" rel="nofollow"> 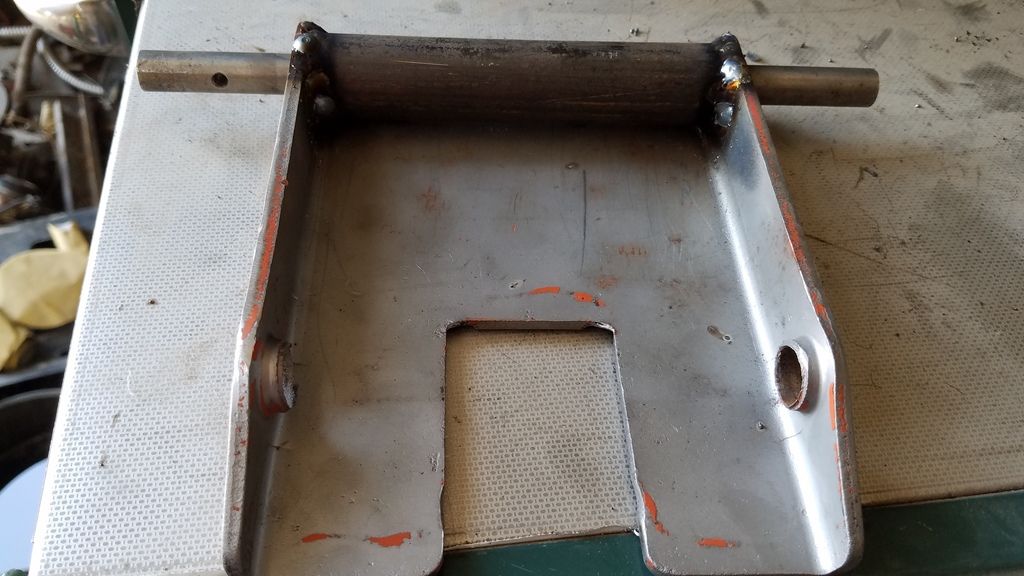 http://s161.photobucket.com/user/coggonobrien/media/d15/20170319_140337_zpsx99eiyag.jpg.html" rel="nofollow"> 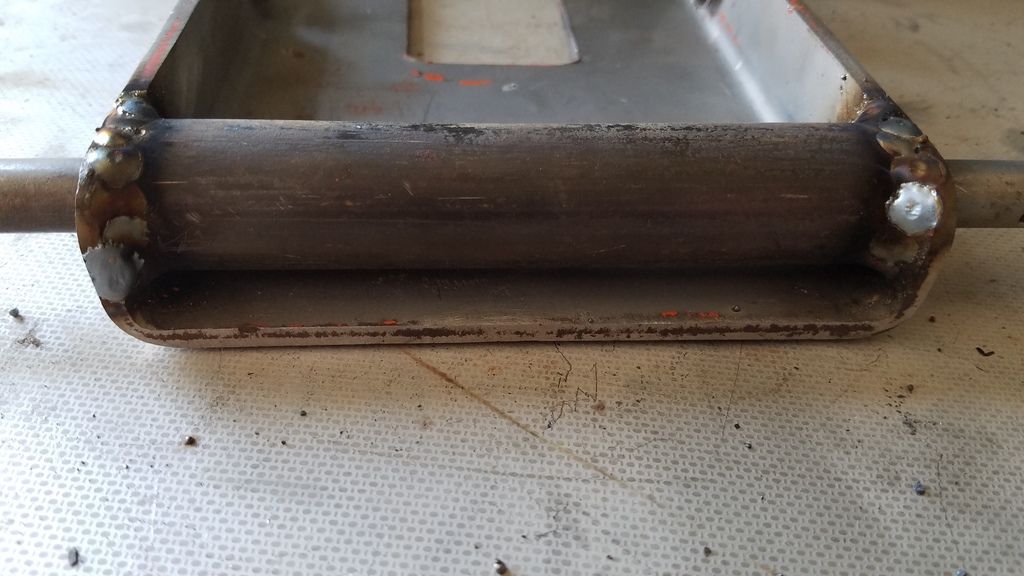 http://s161.photobucket.com/user/coggonobrien/media/d15/20170319_162236_zpswuntr3yd.jpg.html" rel="nofollow"> 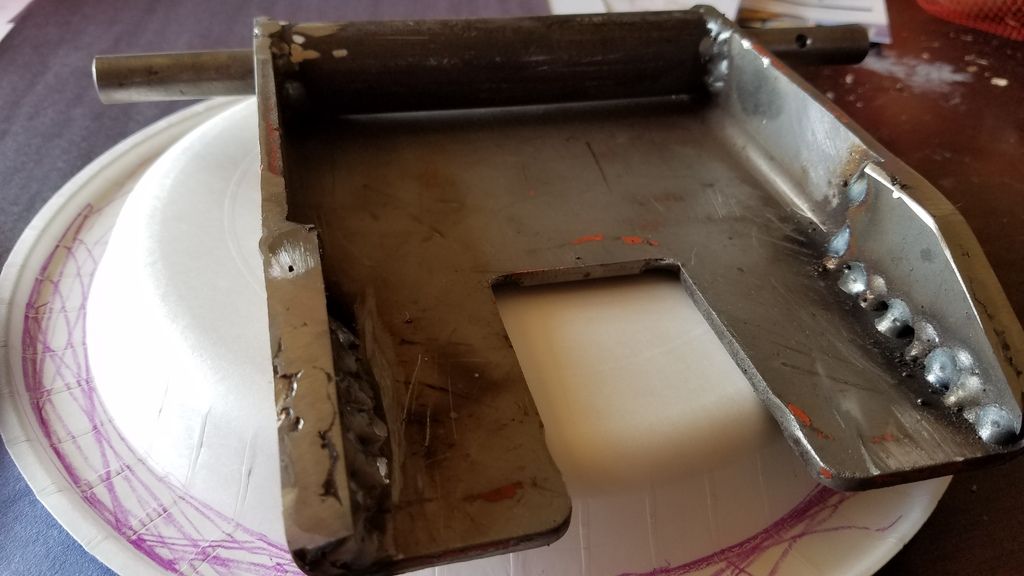 http://s161.photobucket.com/user/coggonobrien/media/d15/20170319_162241_zpssvhugcob.jpg.html" rel="nofollow"> 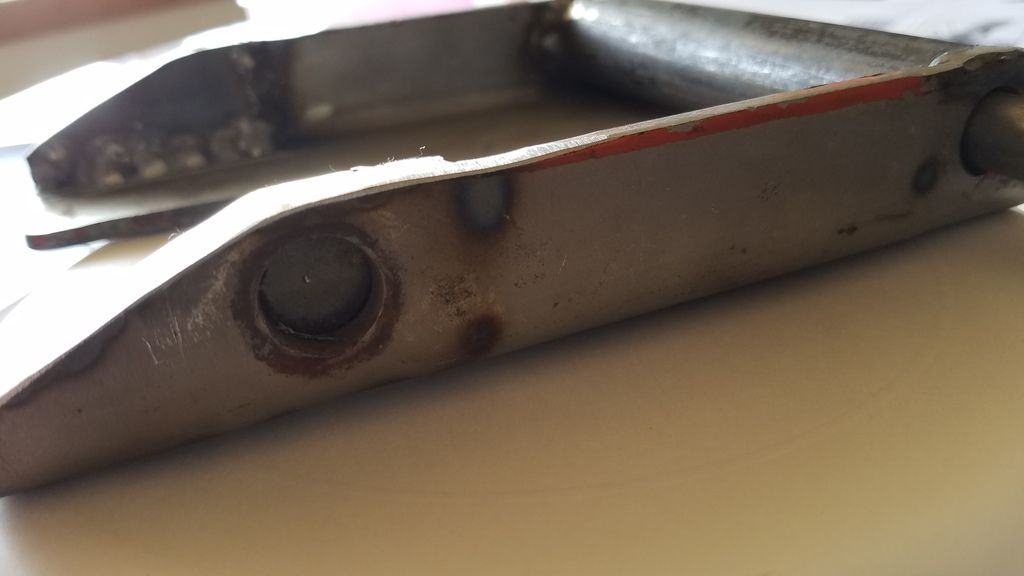 http://s161.photobucket.com/user/coggonobrien/media/d15/20170323_170046_zpswiahiktj.jpg.html" rel="nofollow"> 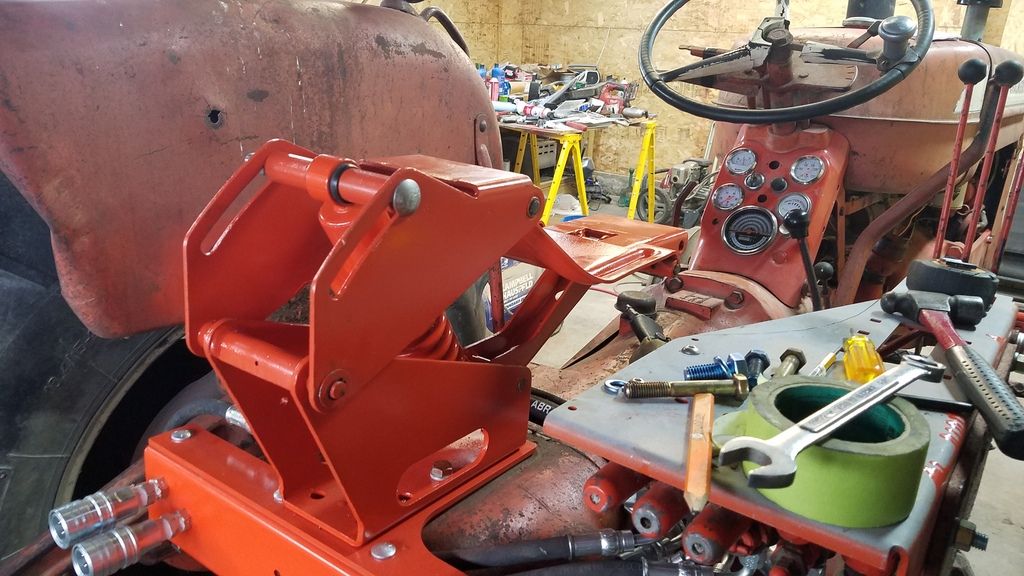 http://s161.photobucket.com/user/coggonobrien/media/d15/20170323_170051_zpsirebqqyq.jpg.html" rel="nofollow"> 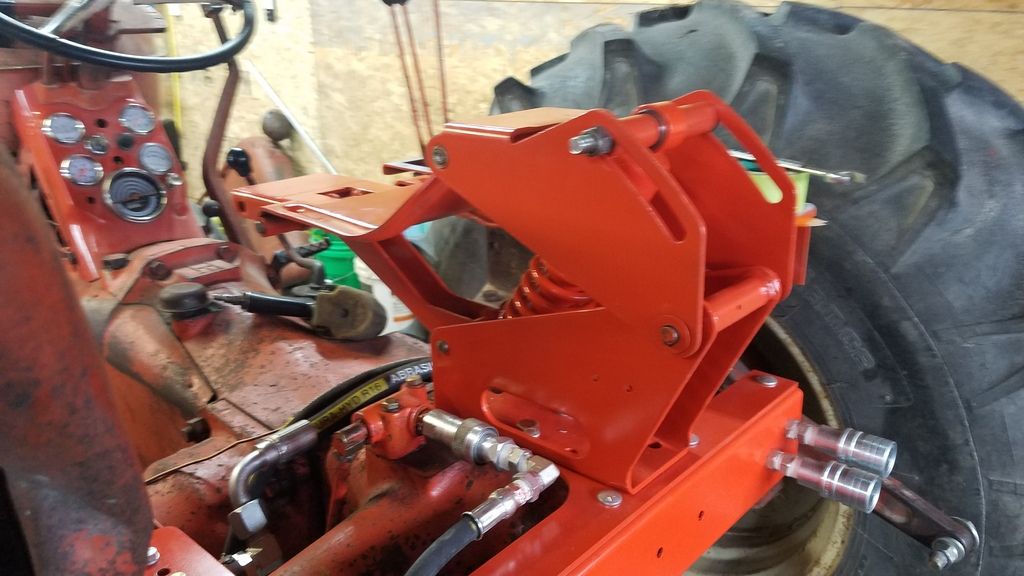 http://s161.photobucket.com/user/coggonobrien/media/d15/20170323_170746_zpsihnigzny.jpg.html" rel="nofollow"> 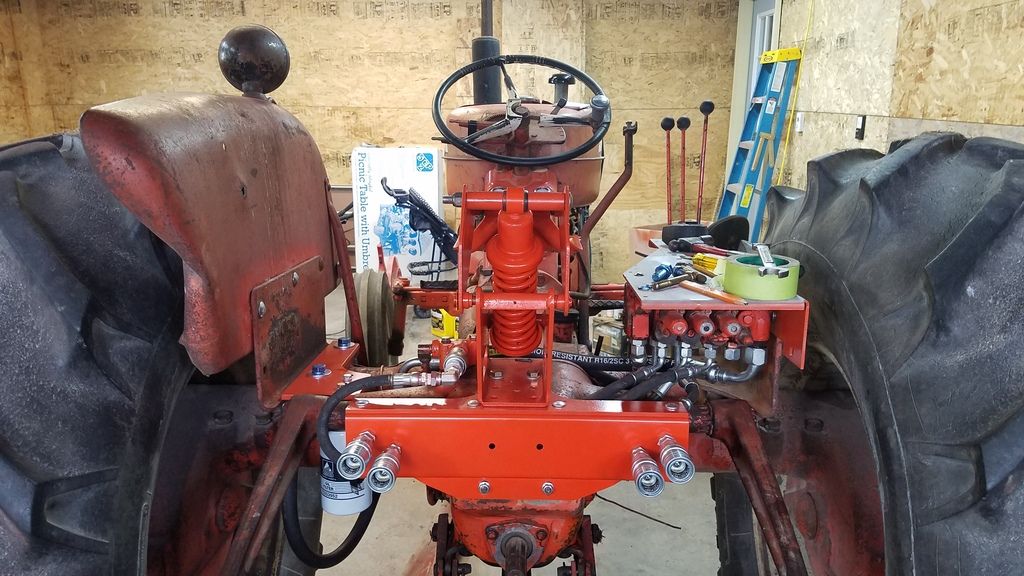 |
Posted By: coggonobrien
Date Posted: 27 Mar 2017 at 1:39pm
|
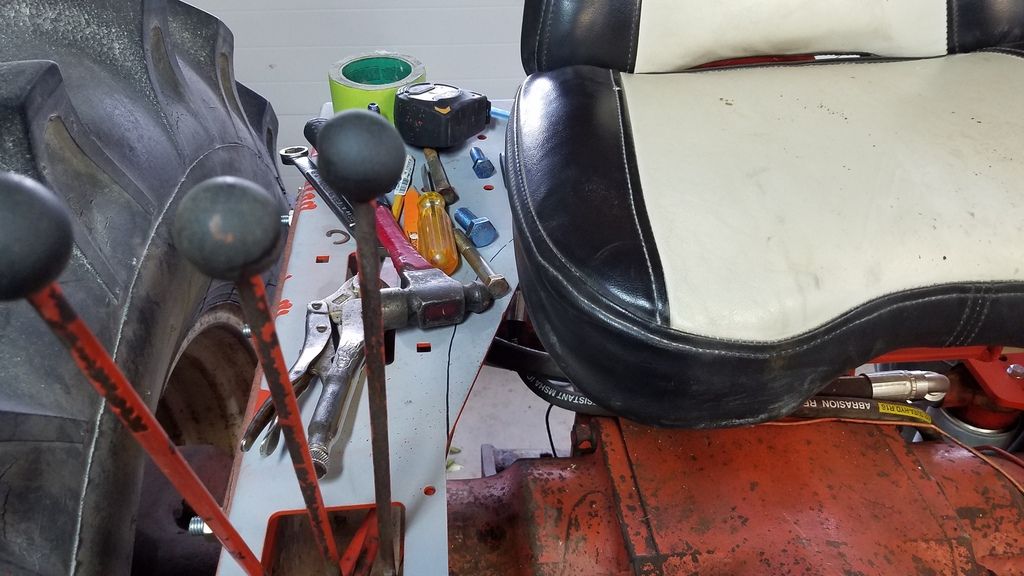
Seat is on now. You can see in the last picture how I will need to clearance the two twenty console for the seat. http://s161.photobucket.com/user/coggonobrien/media/d15/20170326_110154_zpsho3uyxip.jpg.html" rel="nofollow"> 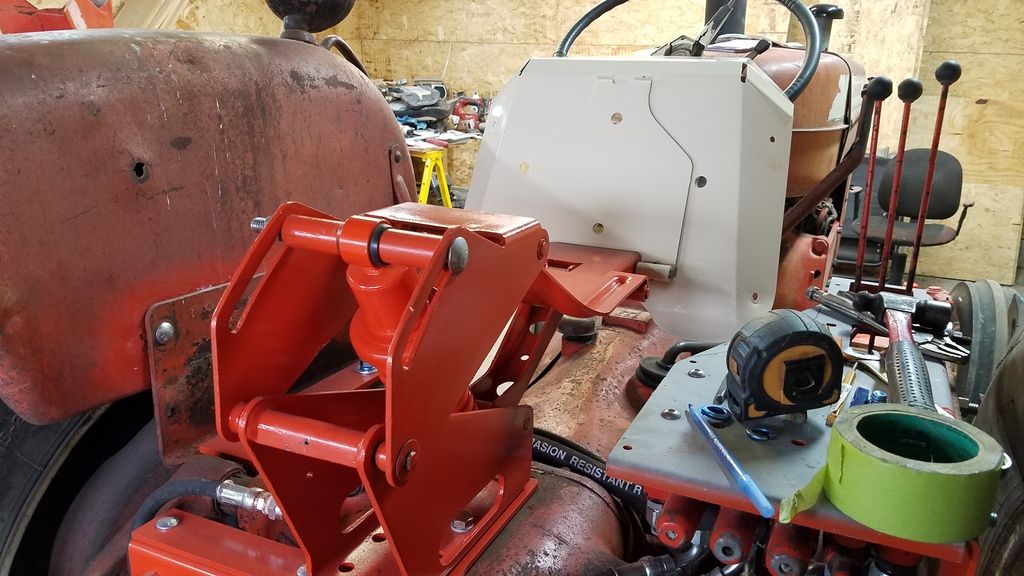 http://s161.photobucket.com/user/coggonobrien/media/d15/20170326_110207_zpsqta8krmu.jpg.html" rel="nofollow"> 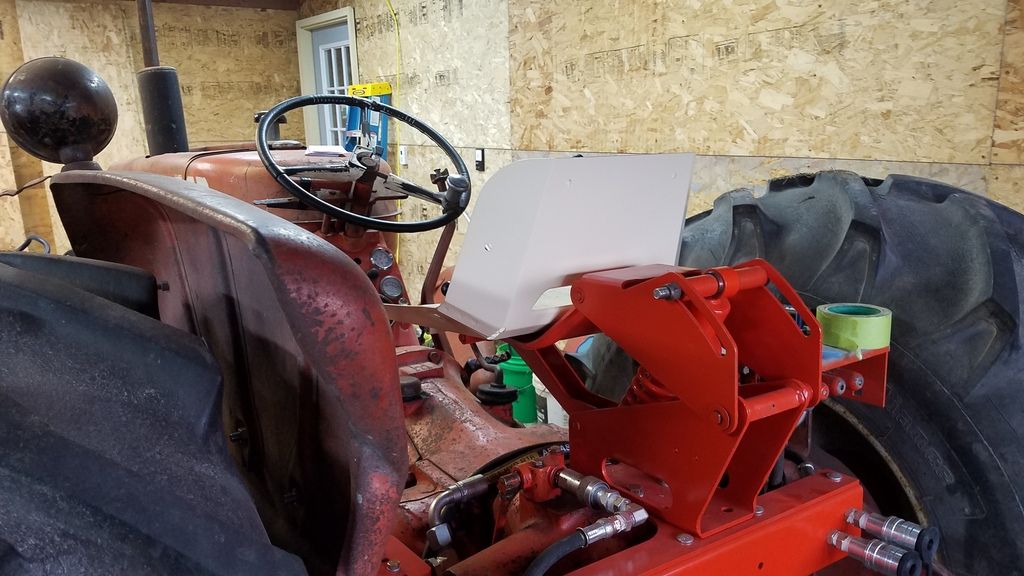 http://s161.photobucket.com/user/coggonobrien/media/d15/20170326_110813_zpss6mctvo7.jpg.html" rel="nofollow"> 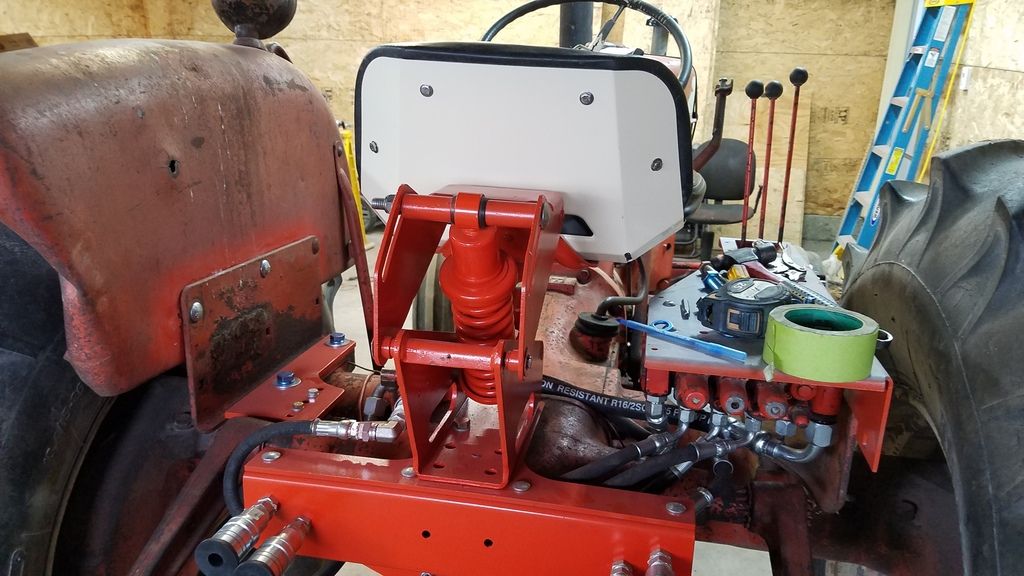 http://s161.photobucket.com/user/coggonobrien/media/d15/20170326_111032_zpsfvyfemay.jpg.html" rel="nofollow"> 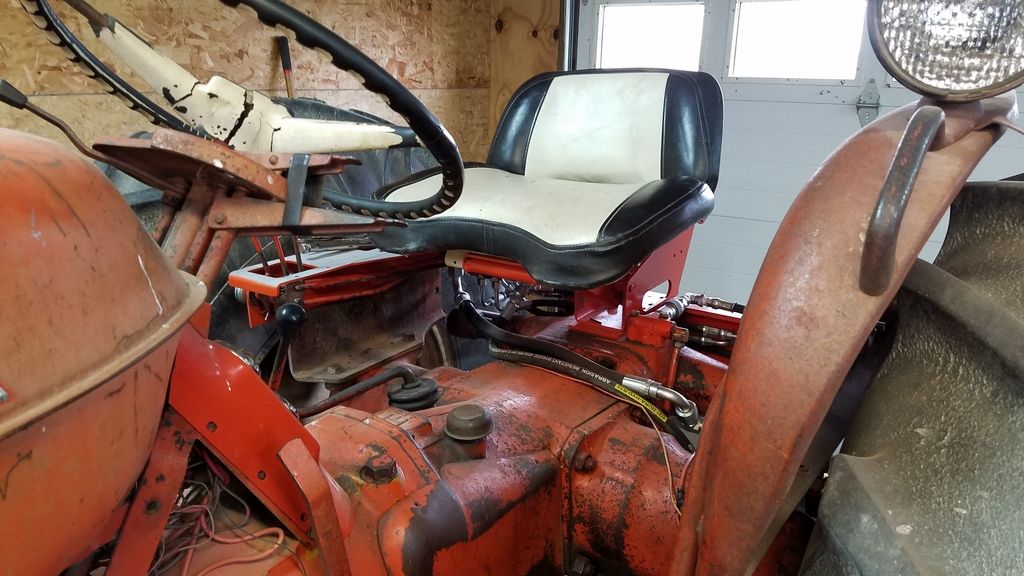 http://s161.photobucket.com/user/coggonobrien/media/d15/20170326_111103_zps3ljapaqt.jpg.html" rel="nofollow">
 |
Posted By: Allis dave
Date Posted: 27 Mar 2017 at 2:18pm
| You guys have some great skills there. It looks as good as factory. I bet a lot of people wouldn't even know. Definitely a cool project. |
Posted By: coggonobrien
Date Posted: 27 Mar 2017 at 3:53pm
| Doc has most of the talent, I just have modern technology making me look good on the fabrication end |
Posted By: Greg_WJP_(WI)
Date Posted: 28 Mar 2017 at 11:47am
|
It looks better than good!!! |
Posted By: coggonobrien
Date Posted: 06 Apr 2017 at 5:29pm
|
I got my Fender mounts laser danform today just need to drill the hole in the right hand side for the remote pivot Bolt http://s161.photobucket.com/user/coggonobrien/media/d15/20170406_171124_zpskz2qhjbt.jpg.html" rel="nofollow"> 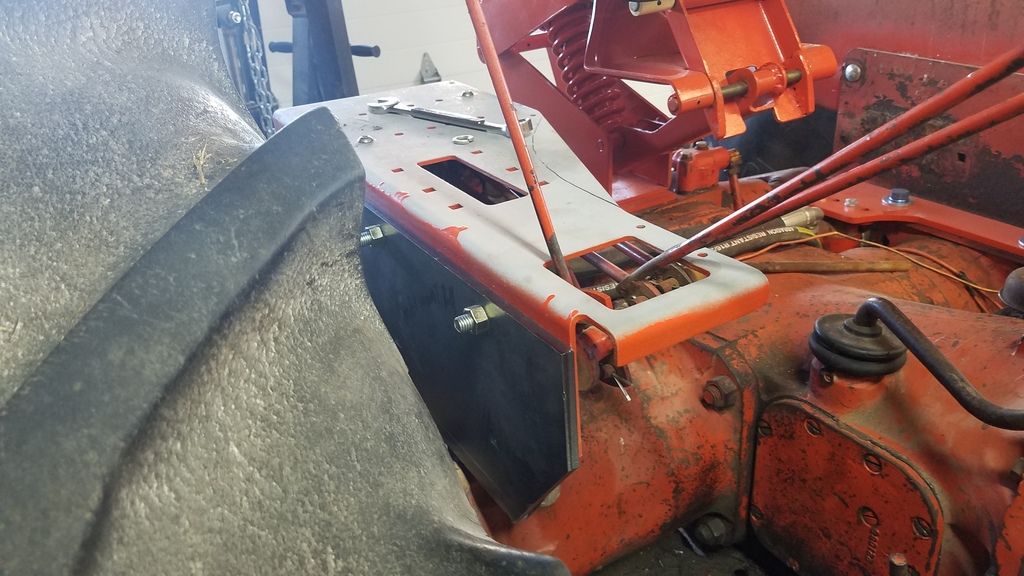 http://s161.photobucket.com/user/coggonobrien/media/d15/20170406_171127_zpste7ywkth.jpg.html" rel="nofollow"> 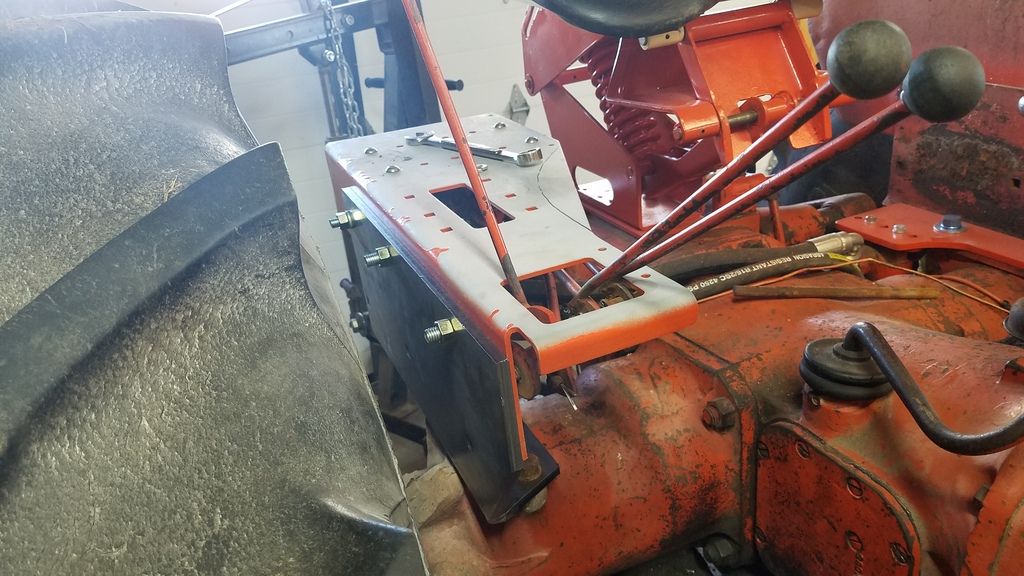 http://s161.photobucket.com/user/coggonobrien/media/d15/20170406_171129_zpsypbs14n3.jpg.html" rel="nofollow"> 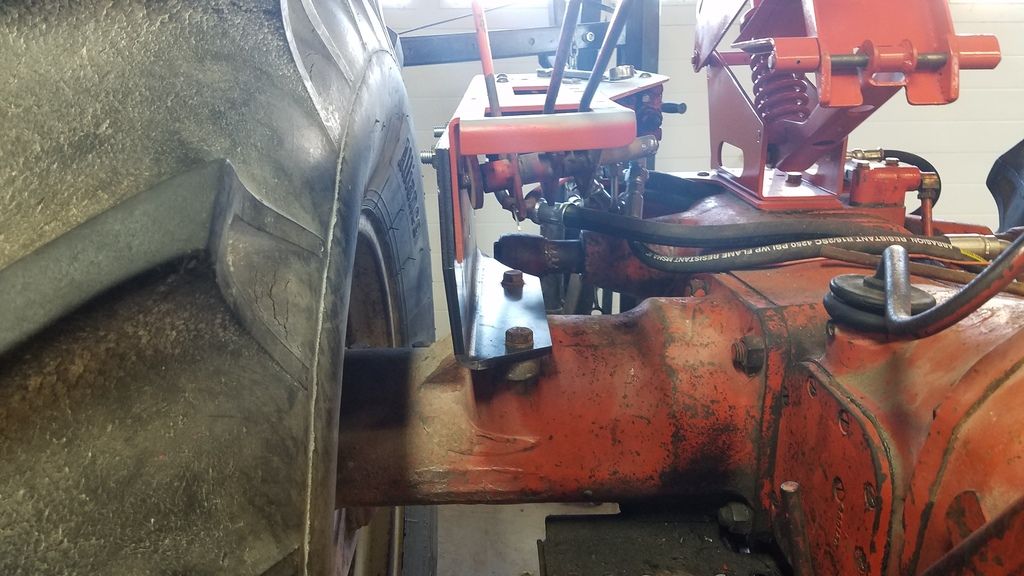 http://s161.photobucket.com/user/coggonobrien/media/d15/20170406_171135_zps0gkcplw4.jpg.html" rel="nofollow"> 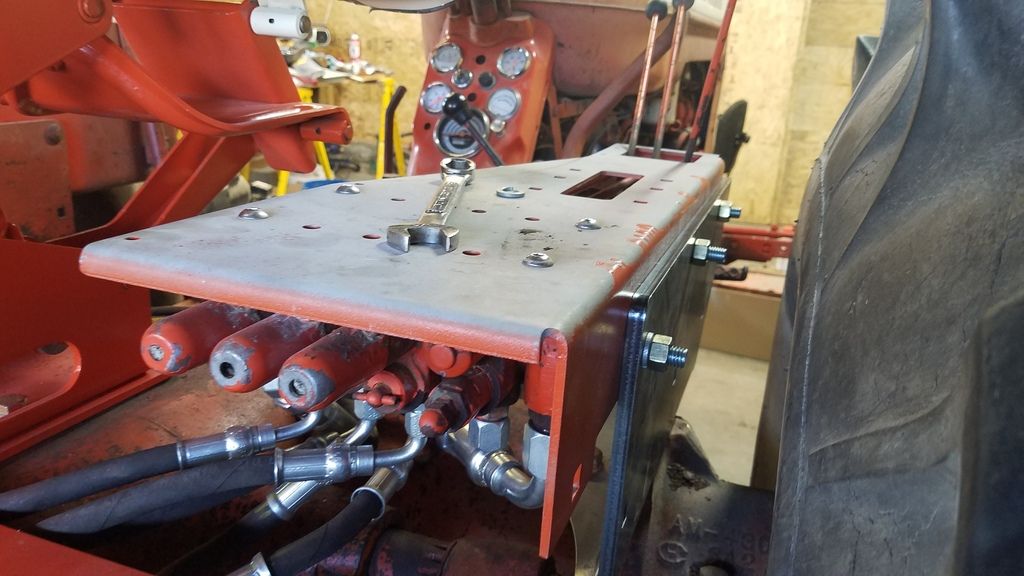
|
Posted By: JoeO(CMO)
Date Posted: 06 Apr 2017 at 8:04pm
|
Looking Good!! ------------- |
Posted By: allischalmerguy
Date Posted: 07 Apr 2017 at 11:13pm
|
What a neat working tractor you are going to have when you get this all done! Thanks for sharing your progress. It is amazing to watch people fabricate and build and make things work! It is beyond my ability. I am just amazed at you guys! Pastor Mike Townsley ------------- It is great being a disciple of Jesus! 1950 WD, 1957 D17...retired in Iowa, |
Posted By: desertjoe
Date Posted: 08 Apr 2017 at 5:45am
|
Hey Coggin,,,,Now,, that is sure lookin great,,,!!! but you KNOW,,,you is goin to have to go all the way and get you a claw hammer and a brick and straighten thet left fender,,,,,,,,,,,,,,,and,,,is a complete paint job in your plans for this tractor,,??Looking Good,,Guy,,,lookin good,,,, !!!! |
Posted By: coggonobrien
Date Posted: 09 Apr 2017 at 2:42pm
|
Well she's back together until we blow her apart next winter for brakes. http://s161.photobucket.com/user/coggonobrien/media/d15/20170408_181921_zpsn8u9bt1s.jpg.html" rel="nofollow"> 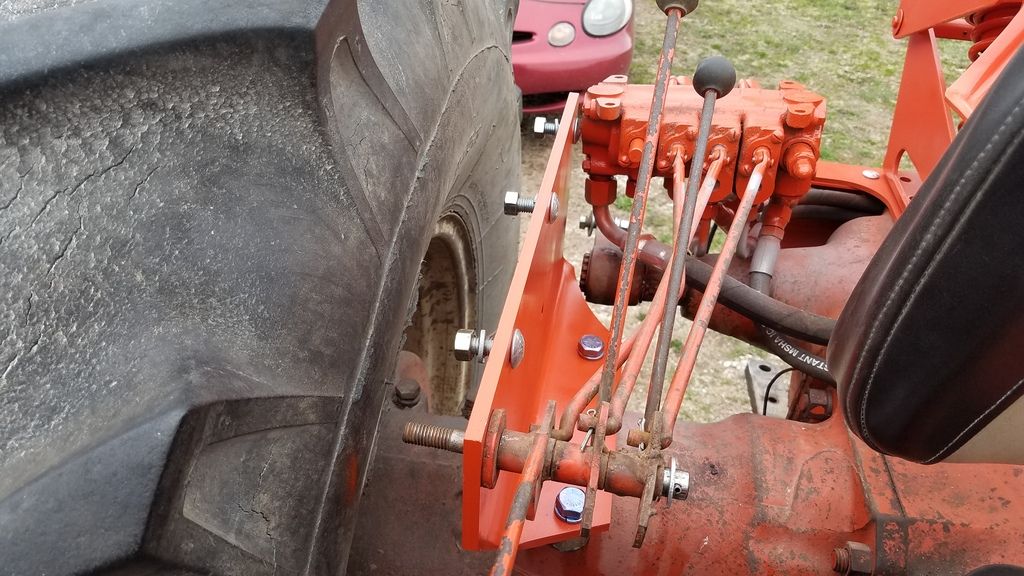 http://s161.photobucket.com/user/coggonobrien/media/d15/20170408_181921_zpsn8u9bt1s.jpg.html" rel="nofollow"> http://s161.photobucket.com/user/coggonobrien/media/d15/20170408_181941_zpsbyqeht5o.jpg.html" rel="nofollow"> 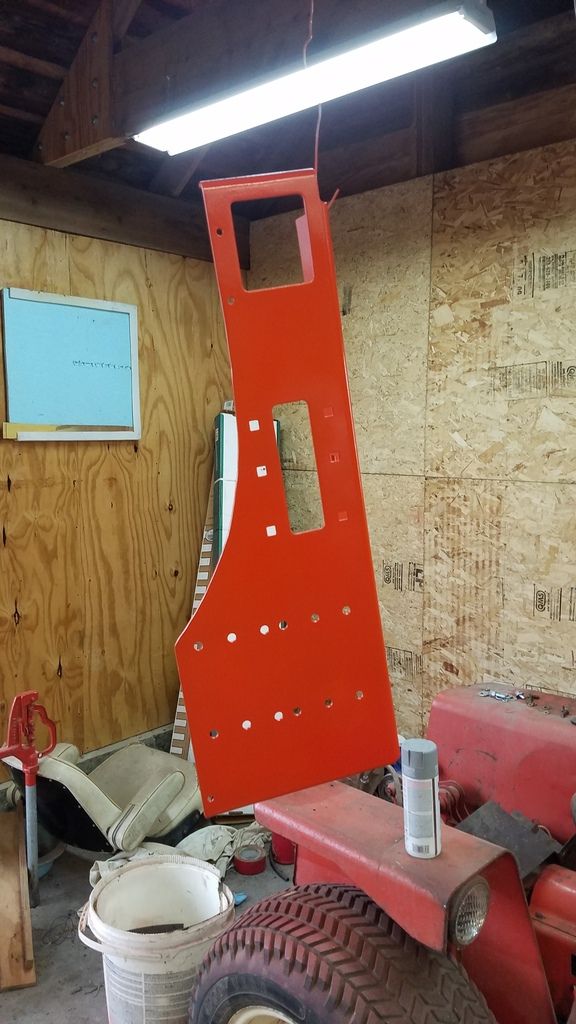 http://s161.photobucket.com/user/coggonobrien/media/d15/20170409_121826_zpshxfiutrj.jpg.html" rel="nofollow">  http://s161.photobucket.com/user/coggonobrien/media/d15/20170409_121832_zpsiolffurp.jpg.html" rel="nofollow"> 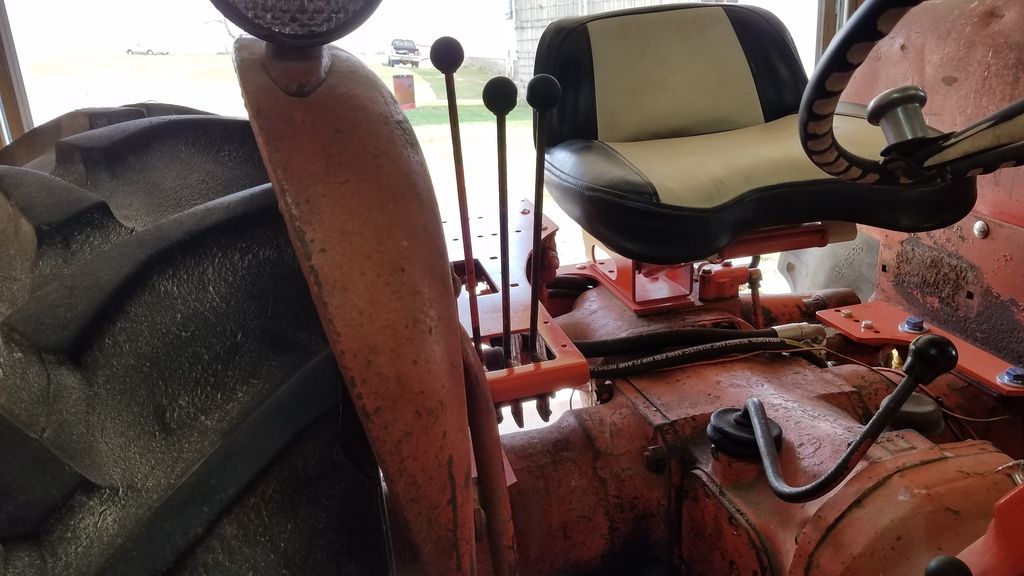 http://s161.photobucket.com/user/coggonobrien/media/d15/20170409_121837_zpsx34ltjyr.jpg.html" rel="nofollow"> 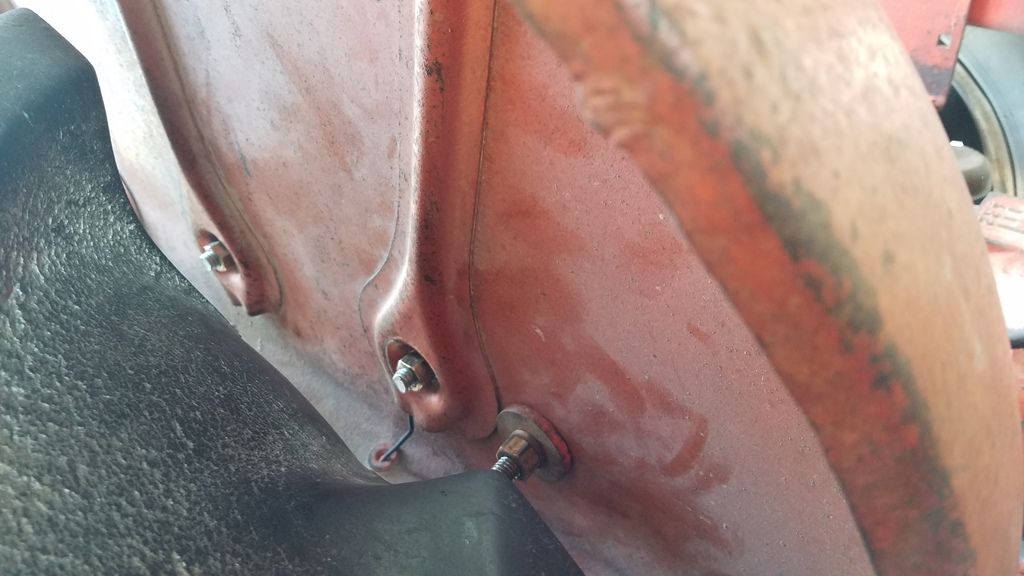 http://s161.photobucket.com/user/coggonobrien/media/d15/20170409_121842_zpsaml6qxc4.jpg.html" rel="nofollow">  http://s161.photobucket.com/user/coggonobrien/media/d15/20170409_121855_zpstvtnwmm0.jpg.html" rel="nofollow"> 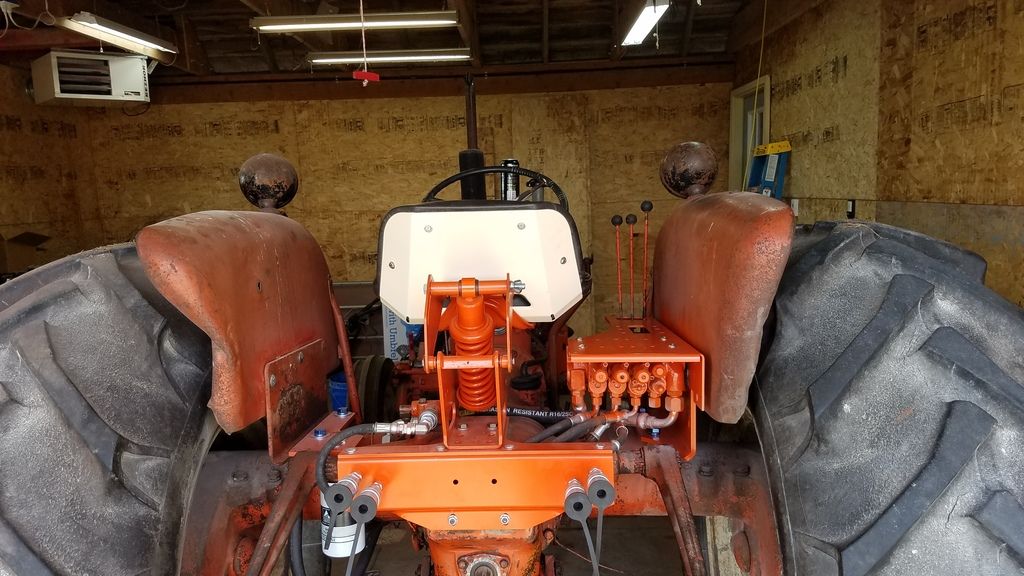 |
Posted By: Unit3
Date Posted: 09 Apr 2017 at 9:42pm
|
Will there be a factory 3 point on it someday? It is SO COOL!!! Time well spent. A1, top self, and high marks for you. ------------- 2-8070FWA PS/8050PS/7080/7045PS/200/D15-II/2-WD45/WD/3-WC/UC/C |
Posted By: coggonobrien
Date Posted: 10 Apr 2017 at 5:27am
| If a 3 pto happens we will build it. The factory one is too cheaply built for my taste |
Posted By: coggonobrien
Date Posted: 25 Apr 2017 at 12:29pm
|
Did a little garden plowing this week http://s161.photobucket.com/user/coggonobrien/media/d15/20170424_194655_zps7yqq0j2u.jpg.html" rel="nofollow"> 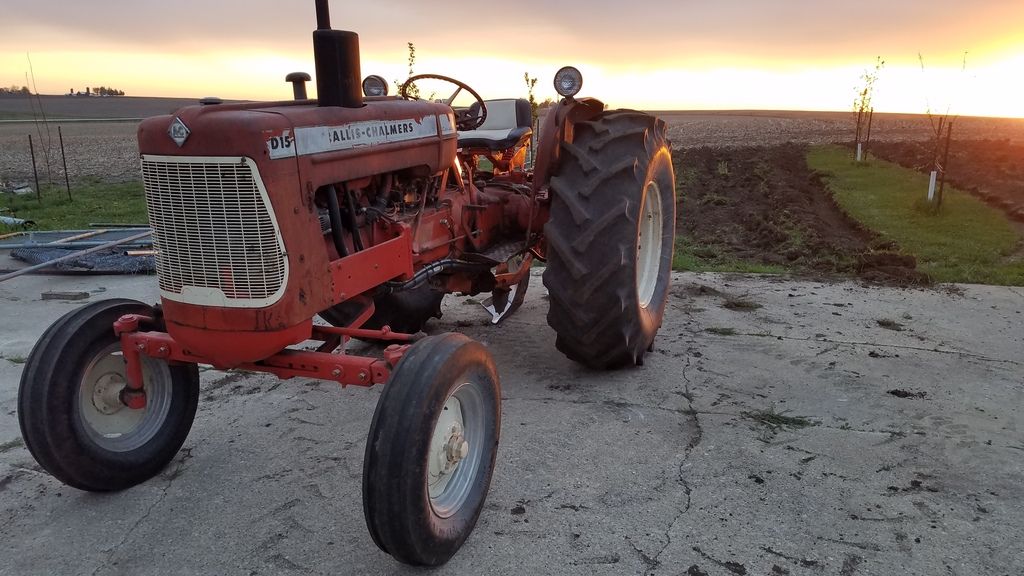 http://s161.photobucket.com/user/coggonobrien/media/d15/20170424_194636_zpsobn0krae.jpg.html" rel="nofollow"> 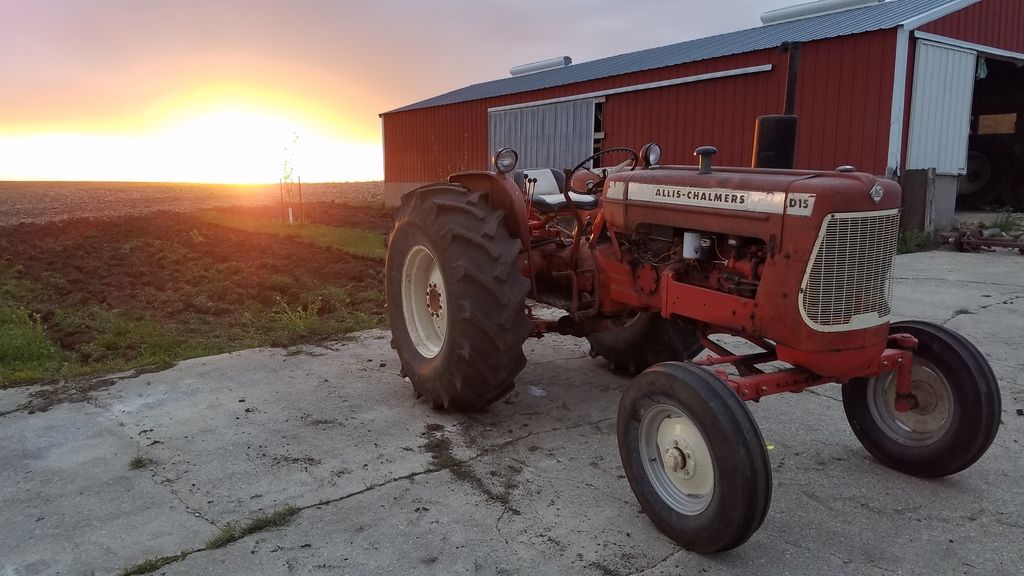 [TUBE]ye4Mwhjx5As[/TUBE] [TUBE]4Thal7YLNdE[/TUBE]
|
Posted By: desertjoe
Date Posted: 25 Apr 2017 at 12:59pm
|
Hey Coggin,,,Them right there are some great pics,,,especially the one with the Series II with the sun coming up behind it,,,good enough for a calendar shot,,,,,, Me thinks you might need another barn,,,,, sure wisht the power steering worked that good on my tractor,,,,, |
Posted By: Dan73
Date Posted: 25 Apr 2017 at 3:24pm
The pictures sure do look great. Joe just find a big rock to put in the backhoe bucket and extend it out a little she will turn like the front end is floating on air |
Posted By: coggonobrien
Date Posted: 09 May 2017 at 7:55am
|
Thanks Joe, just saw your post. Hopefully yours is up and rocking soon. Finally disced the garden last night. better late than never I guess. http://s161.photobucket.com/user/coggonobrien/media/d15/20170508_170621_zpsvjsqcplz.jpg.html" rel="nofollow"> 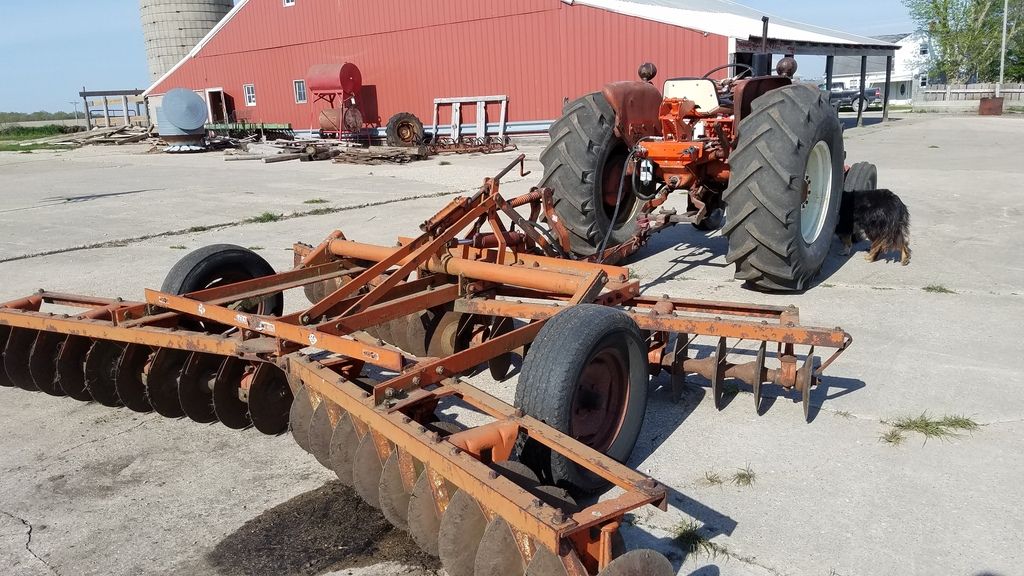 http://s161.photobucket.com/user/coggonobrien/media/d15/20170508_170614_zpsk4i5lswe.jpg.html" rel="nofollow">
 |
Posted By: coggonobrien
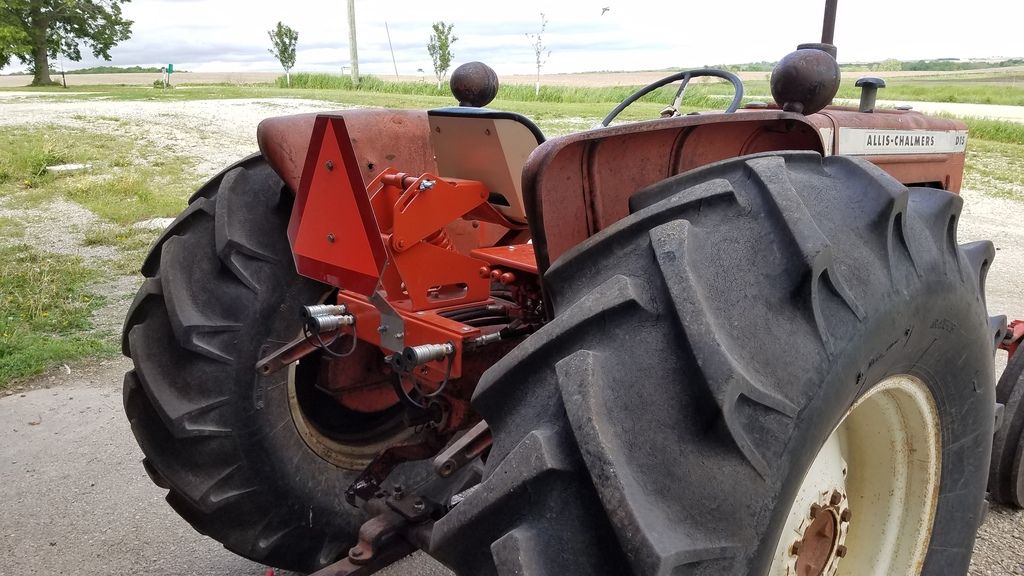
Date Posted: 19 May 2017 at 11:06am
|
went ahead and design/created a bracket for an SMV sign. http://s161.photobucket.com/user/coggonobrien/media/d15/20170518_164023_zpsuajujwjw.jpg.html" rel="nofollow"> 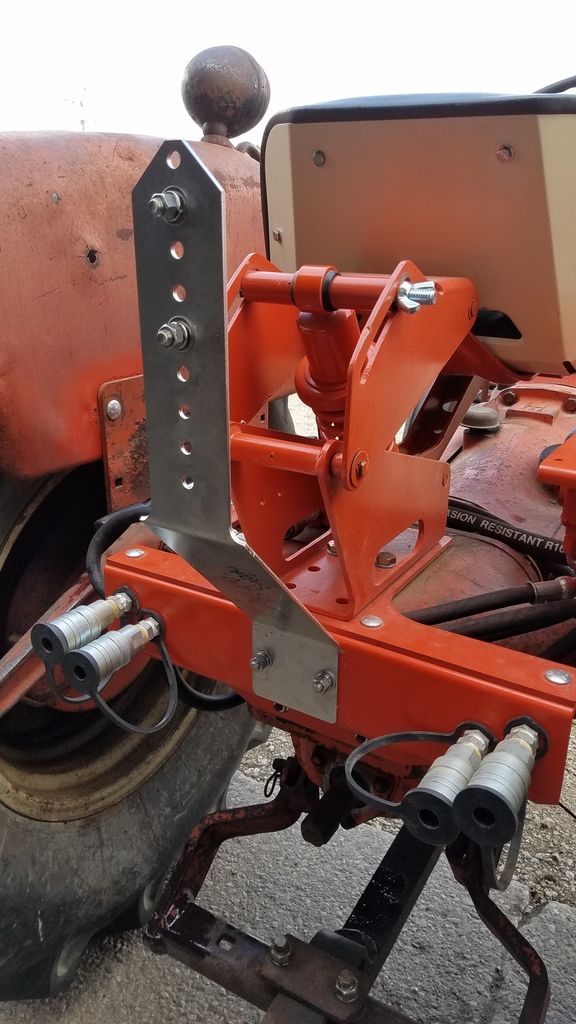 http://s161.photobucket.com/user/coggonobrien/media/d15/20170518_164310_zpsggwhxlby.jpg.html" rel="nofollow"> 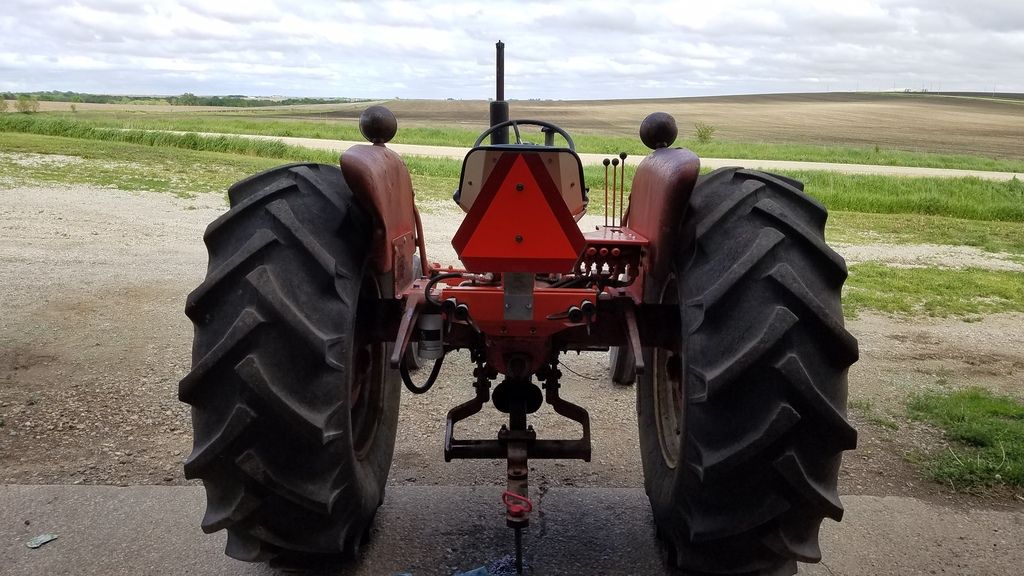 http://s161.photobucket.com/user/coggonobrien/media/d15/20170518_164317_zpswbtrntub.jpg.html" rel="nofollow">
 |
Posted By: coggonobrien
Date Posted: 09 Feb 2021 at 11:15am
| Pictures coming. Putting new shoes on the rear |
Posted By: JayIN
Date Posted: 09 Feb 2021 at 11:46am
|
Fun to watch on a winter day! ------------- sometimes I walk out to my shop and look around and think "Who's the idiot that owns this place?" |
Posted By: Gary
Date Posted: 09 Feb 2021 at 11:58am
|
Coggon Have you had an opportunity to use the R/H 3 Hydraulic Levers on your Ser.III while working outdoors in this extreme cold and wearing a pair of insulated mitts ? I think you will find it is a bit awkward. I did a similar revision to my D-12 Ser.III for the 2 R/H Valves. I mounted a Meyers 7' Snow Blade for winter Snow Plowing. The shorter inner lever is for Hydraulic Angle, longer outer lever for raise, lower. Both valve levers are similar to yours, close together, point straight up. It is a royal pain to use the inner hydraulic angle lever on a repetitive basis. I angle plow to only one side of my driveway, so I have to change the angle from right to left and vise versa at the end of each pass. Wearing a pair of insulated mitts, it's rather difficult. I need to rework these levers. G |
Posted By: DrAllis
Date Posted: 09 Feb 2021 at 10:46pm
| The custom live hydraulic system has been thru the summers of 2017-18-19 and 2020. It has never once failed to prime, which was my only concern with the pump mounted up as high as it is. It has worked well with no issues and makes the tractor very universal with modern hydraulics. Now maybe someday we can fabricate a real nice/heavy Category #2 three-point hitch that can easily be converted back to snap-coupler. |
Posted By: allischalmerguy
Date Posted: 17 Feb 2021 at 10:16am
|
Tom, I wish I had half your mechanical/fabricating skills! Well done! Pastor Mike ------------- It is great being a disciple of Jesus! 1950 WD, 1957 D17...retired in Iowa, |
Posted By: coggonobrien
Date Posted: 17 Feb 2021 at 10:47am
|
G, Tractor doesn't do much during the winter. The hydraulics are used for a deere barge box and a heston 1091 haybine. The Dr is right, after tires are done I need to fabricate a 3pt adapter similar to his. |
Posted By: JayIN
Date Posted: 18 Feb 2021 at 3:49pm
|
Hell, I would just screw on a 2" extension onto the middle lever and be done with it. That should make it easier to find with mittens on. ------------- sometimes I walk out to my shop and look around and think "Who's the idiot that owns this place?" |
Posted By: coggonobrien
Date Posted: 19 Feb 2021 at 11:30am
| I won't be changing or modifying them. If it was a concern I would careful bend them to spread them. As they are now I can run them just fine. |
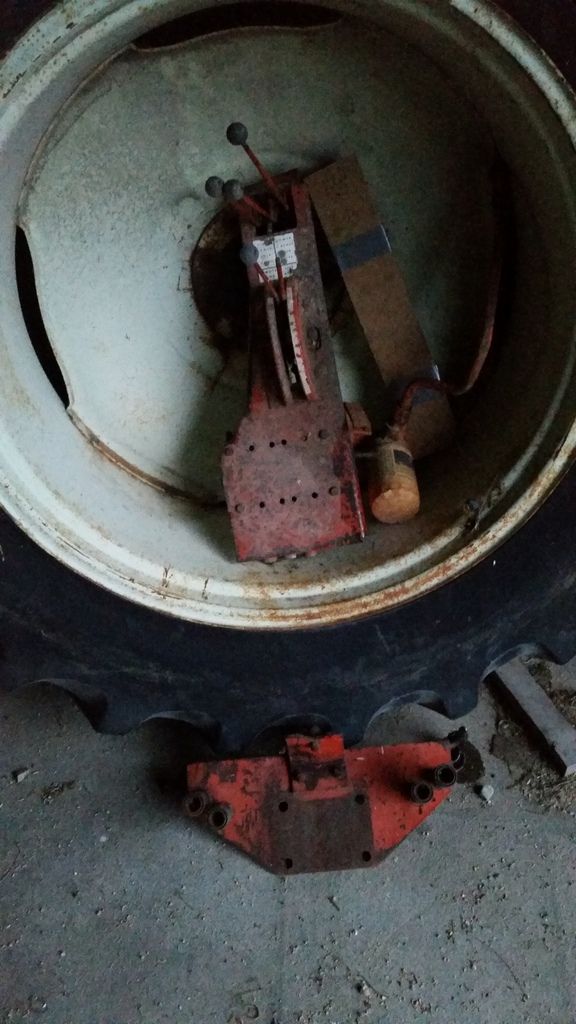
Posted By: coggonobrien
Date Posted: 01 Mar 2021 at 11:25am
Slow progress 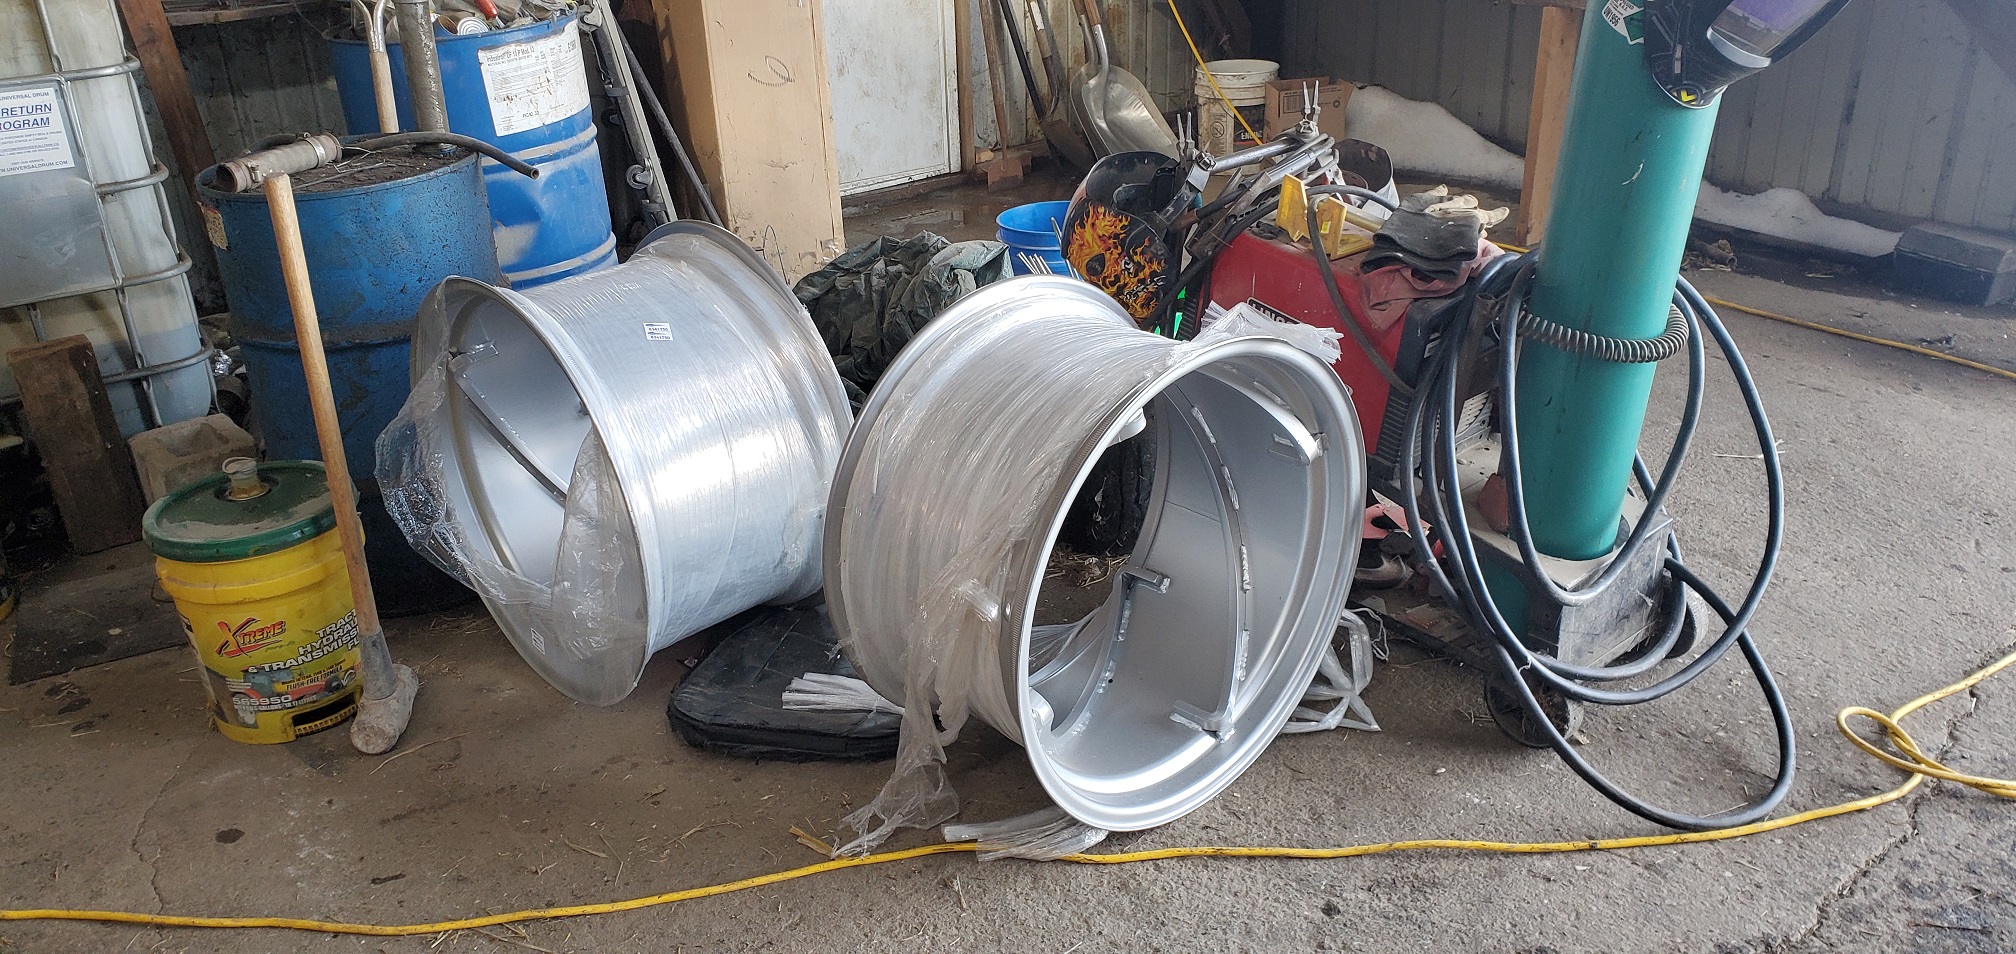    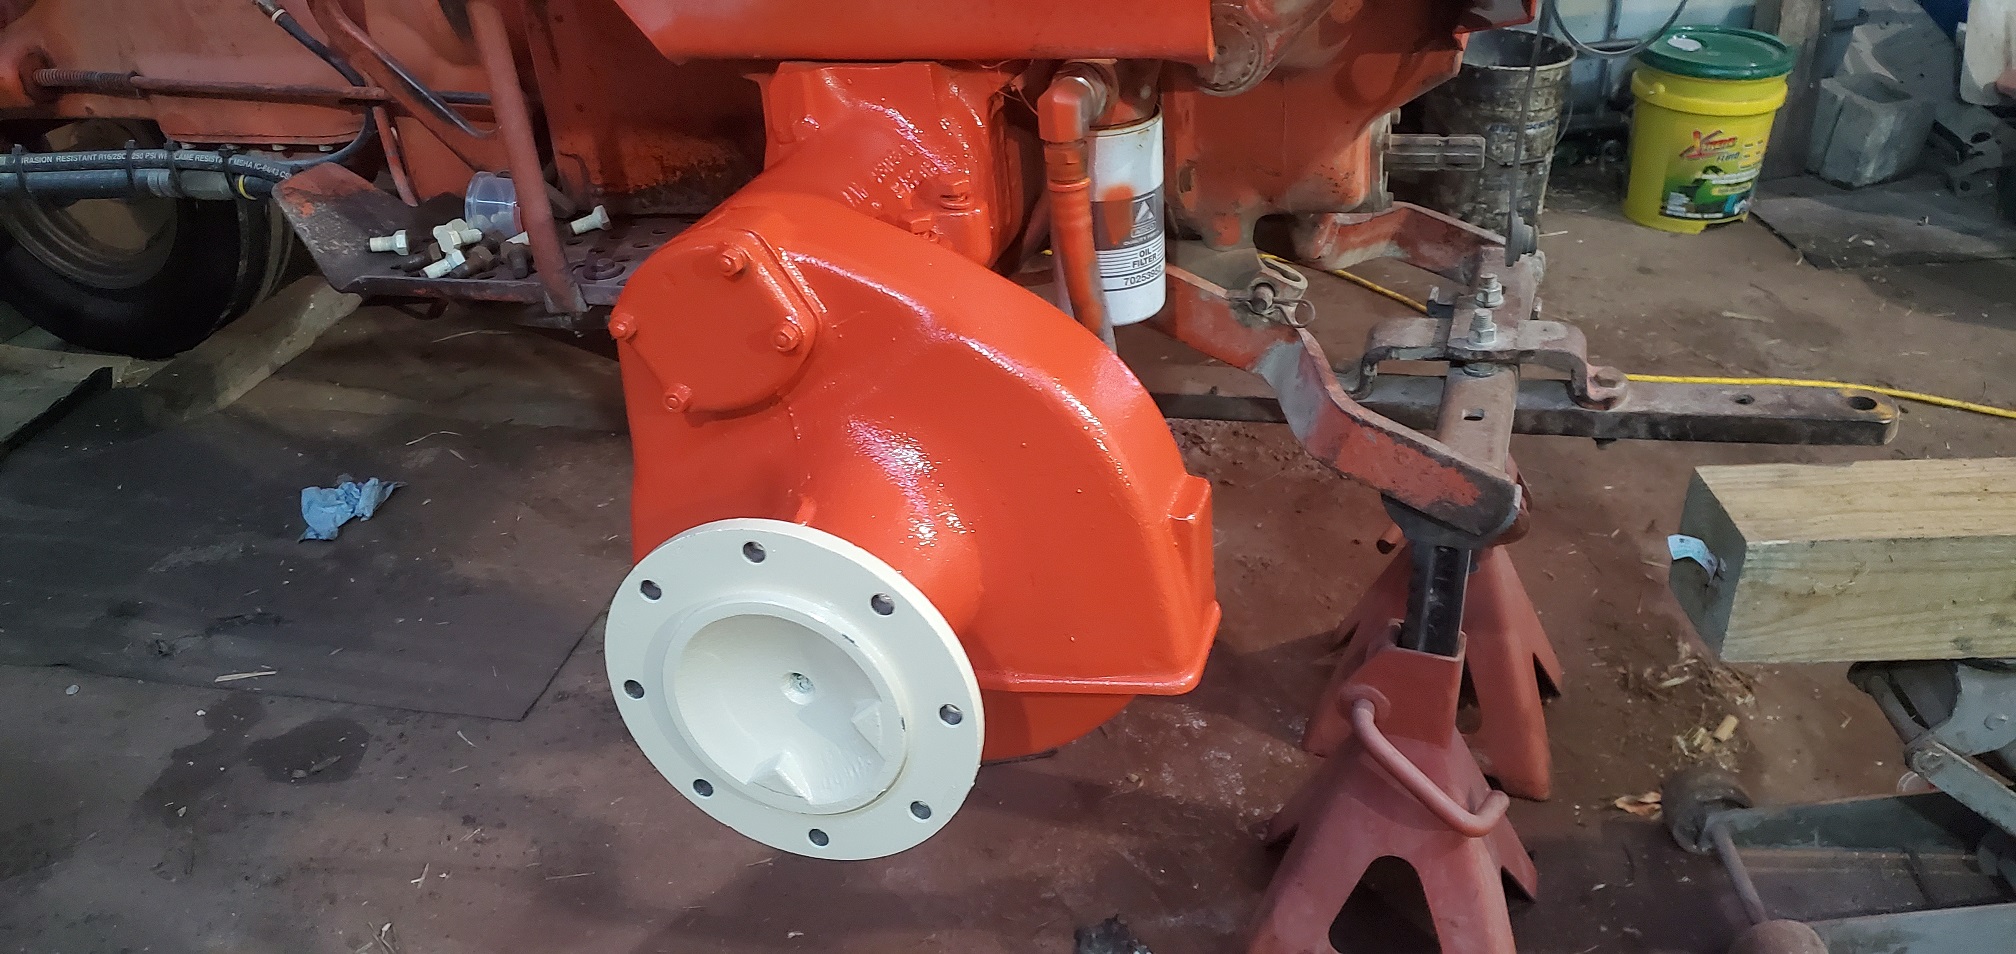 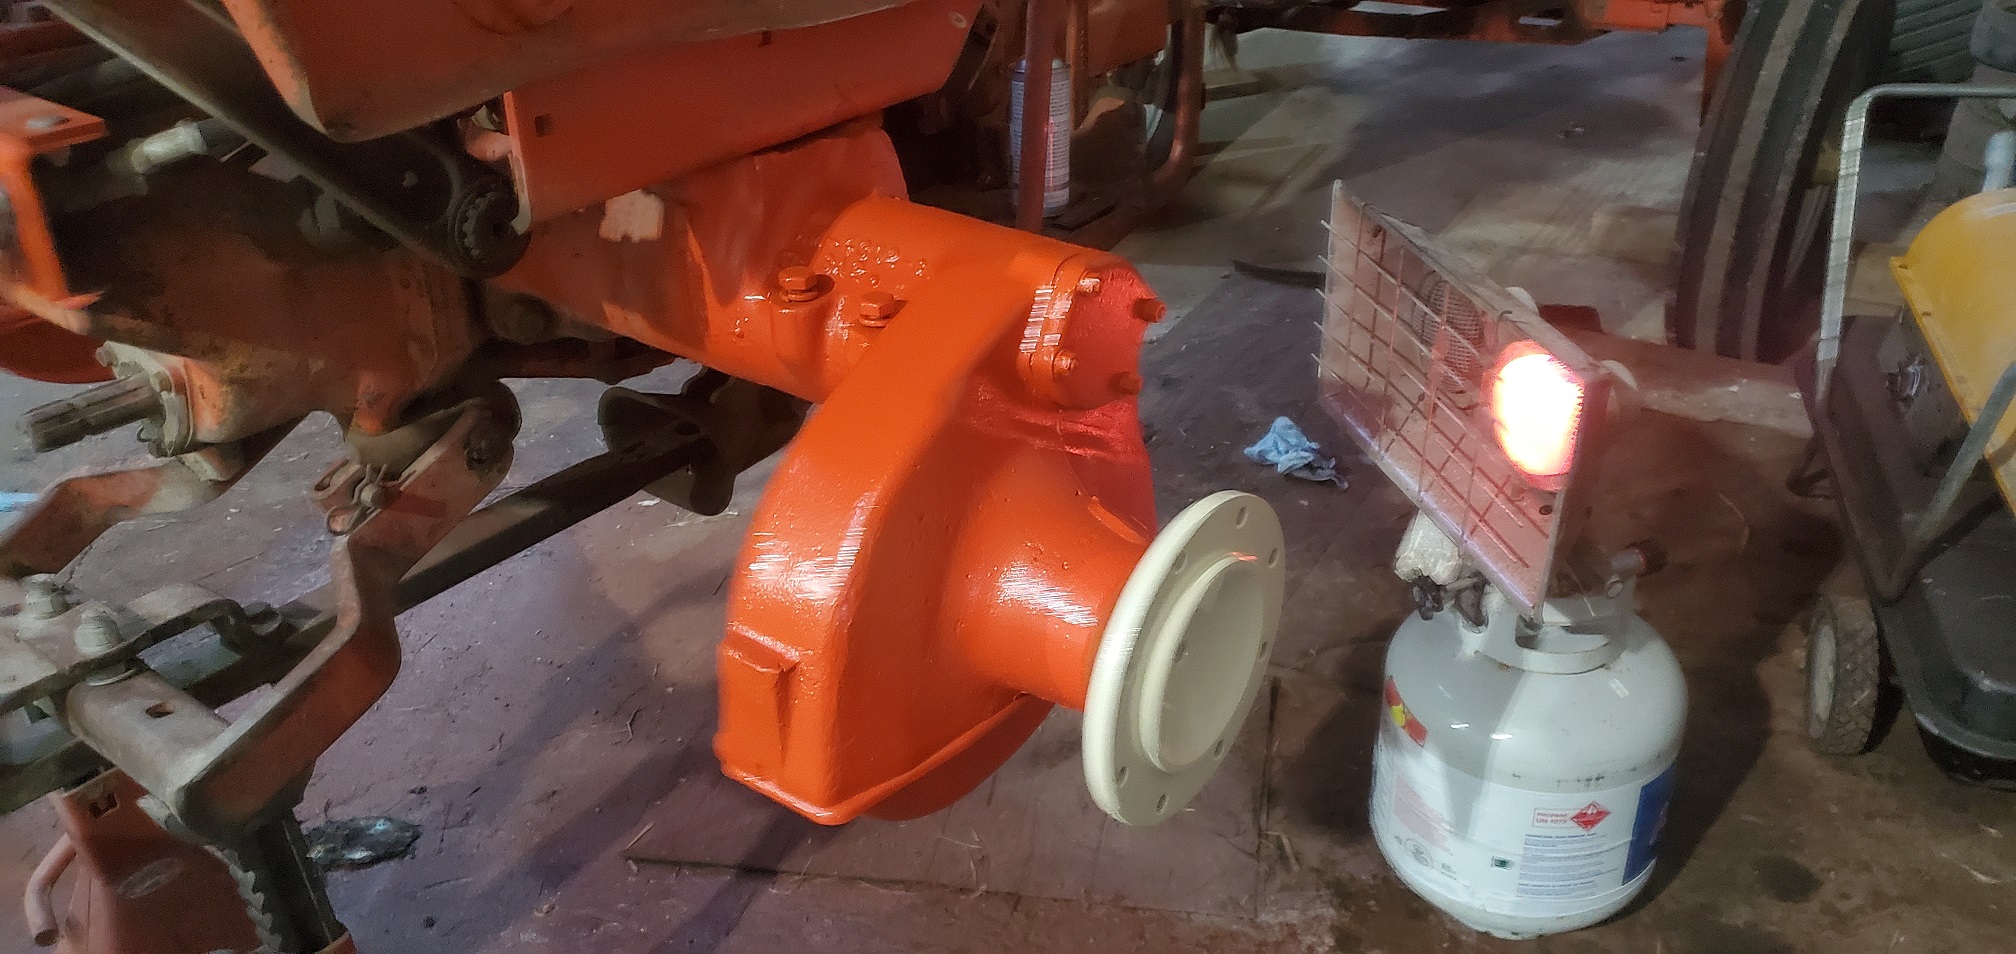 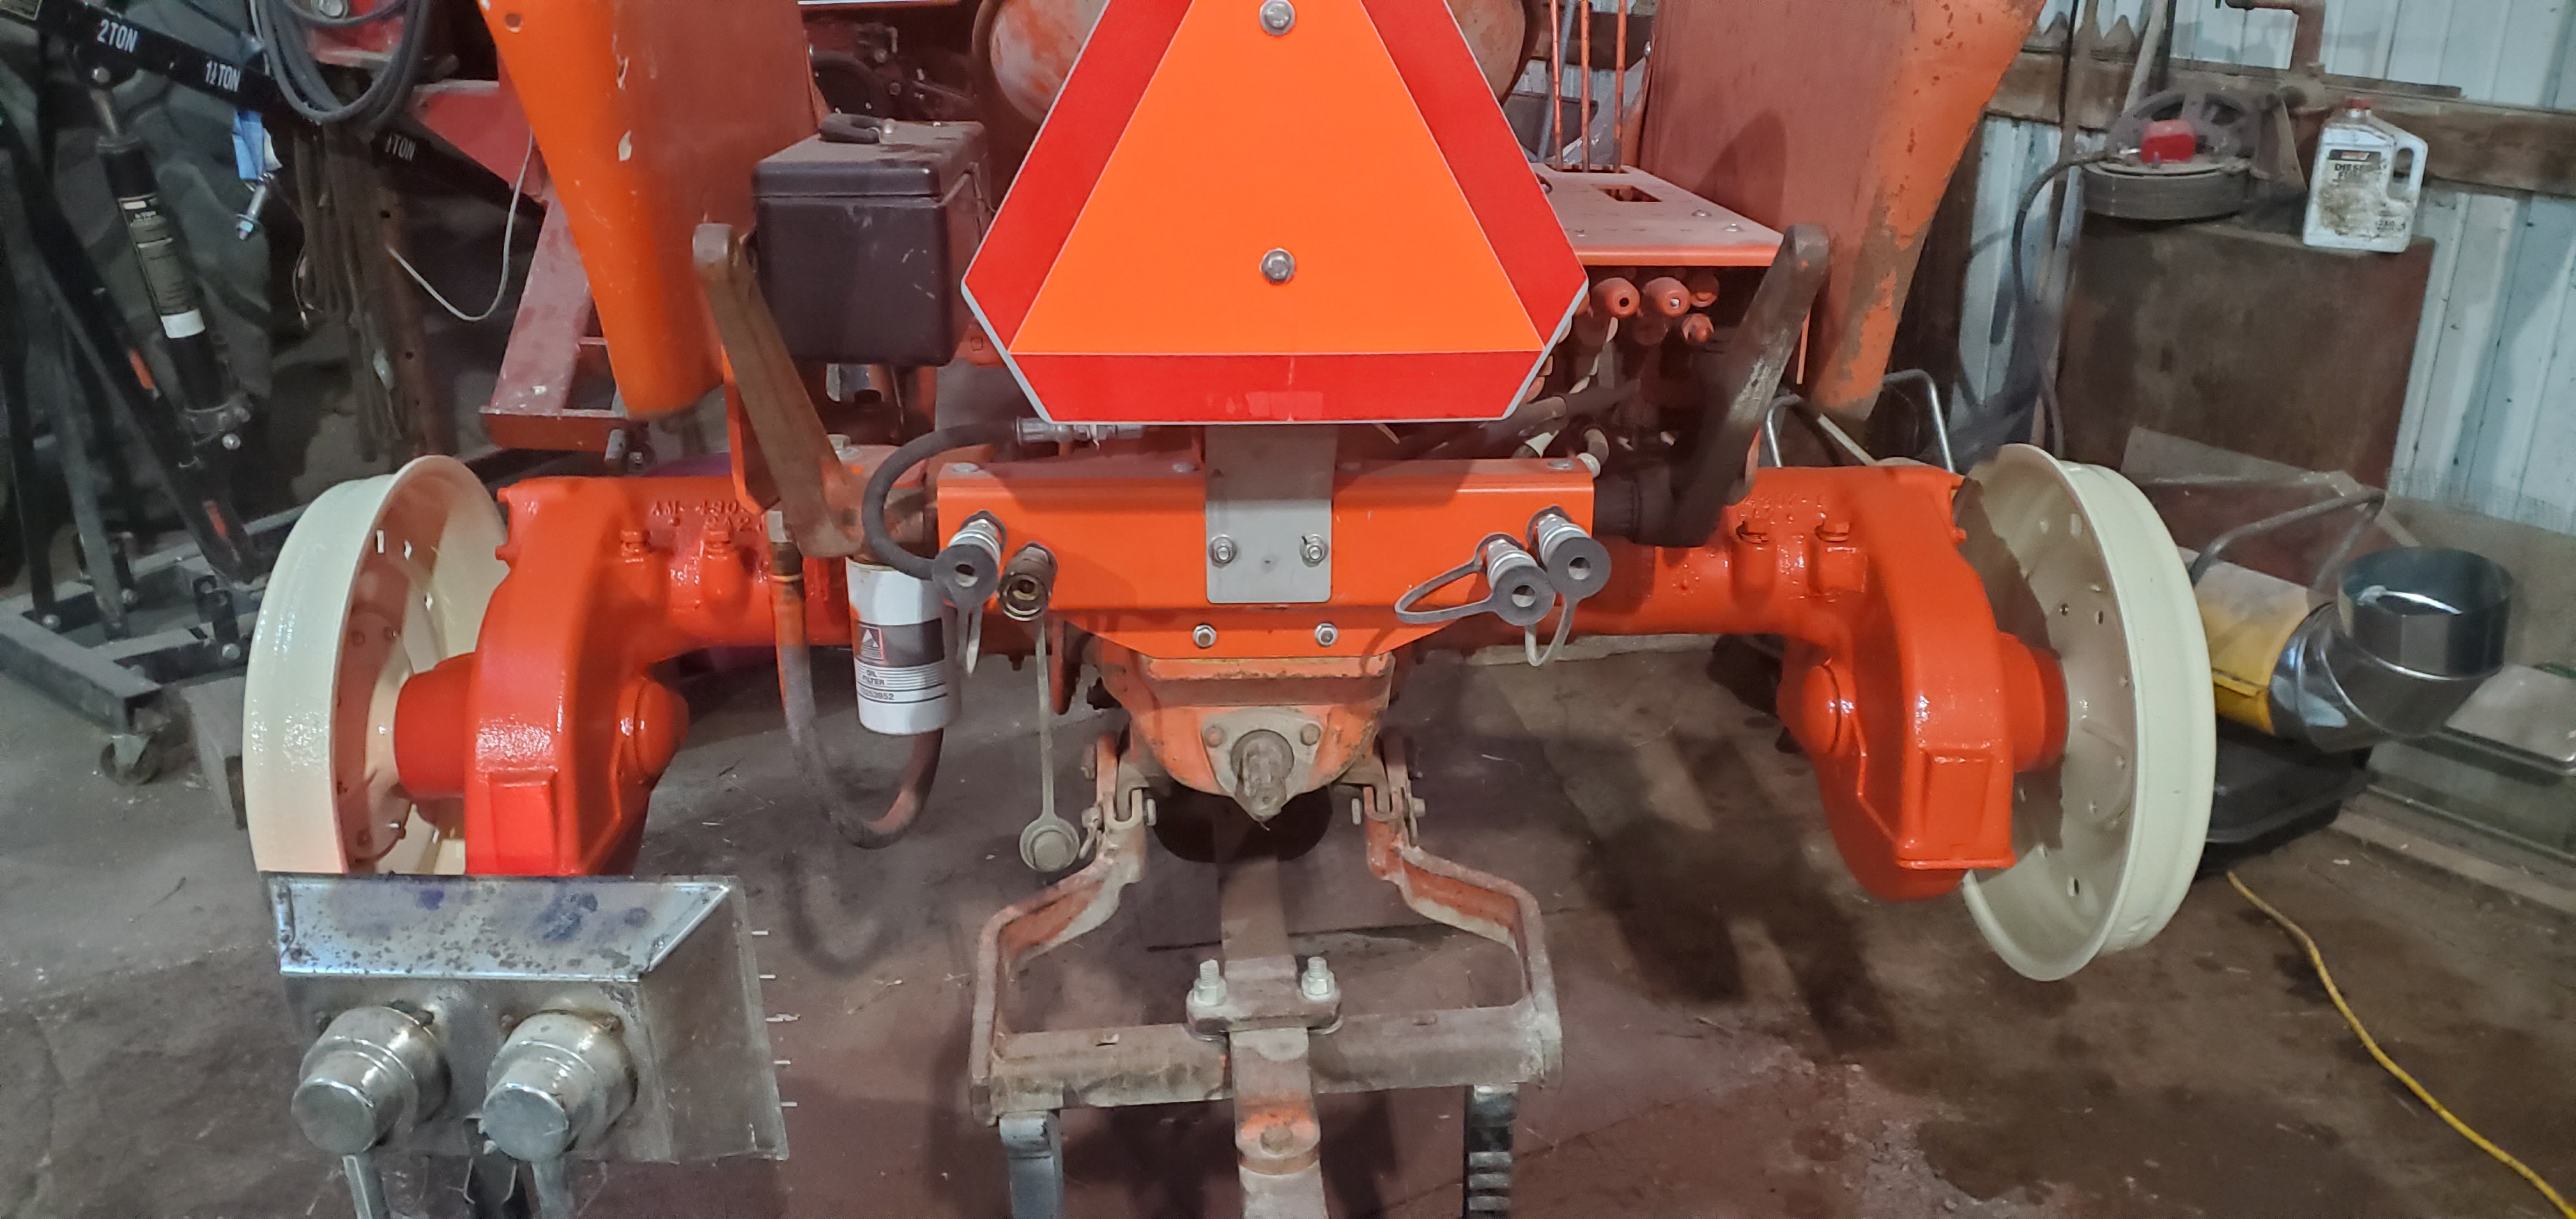 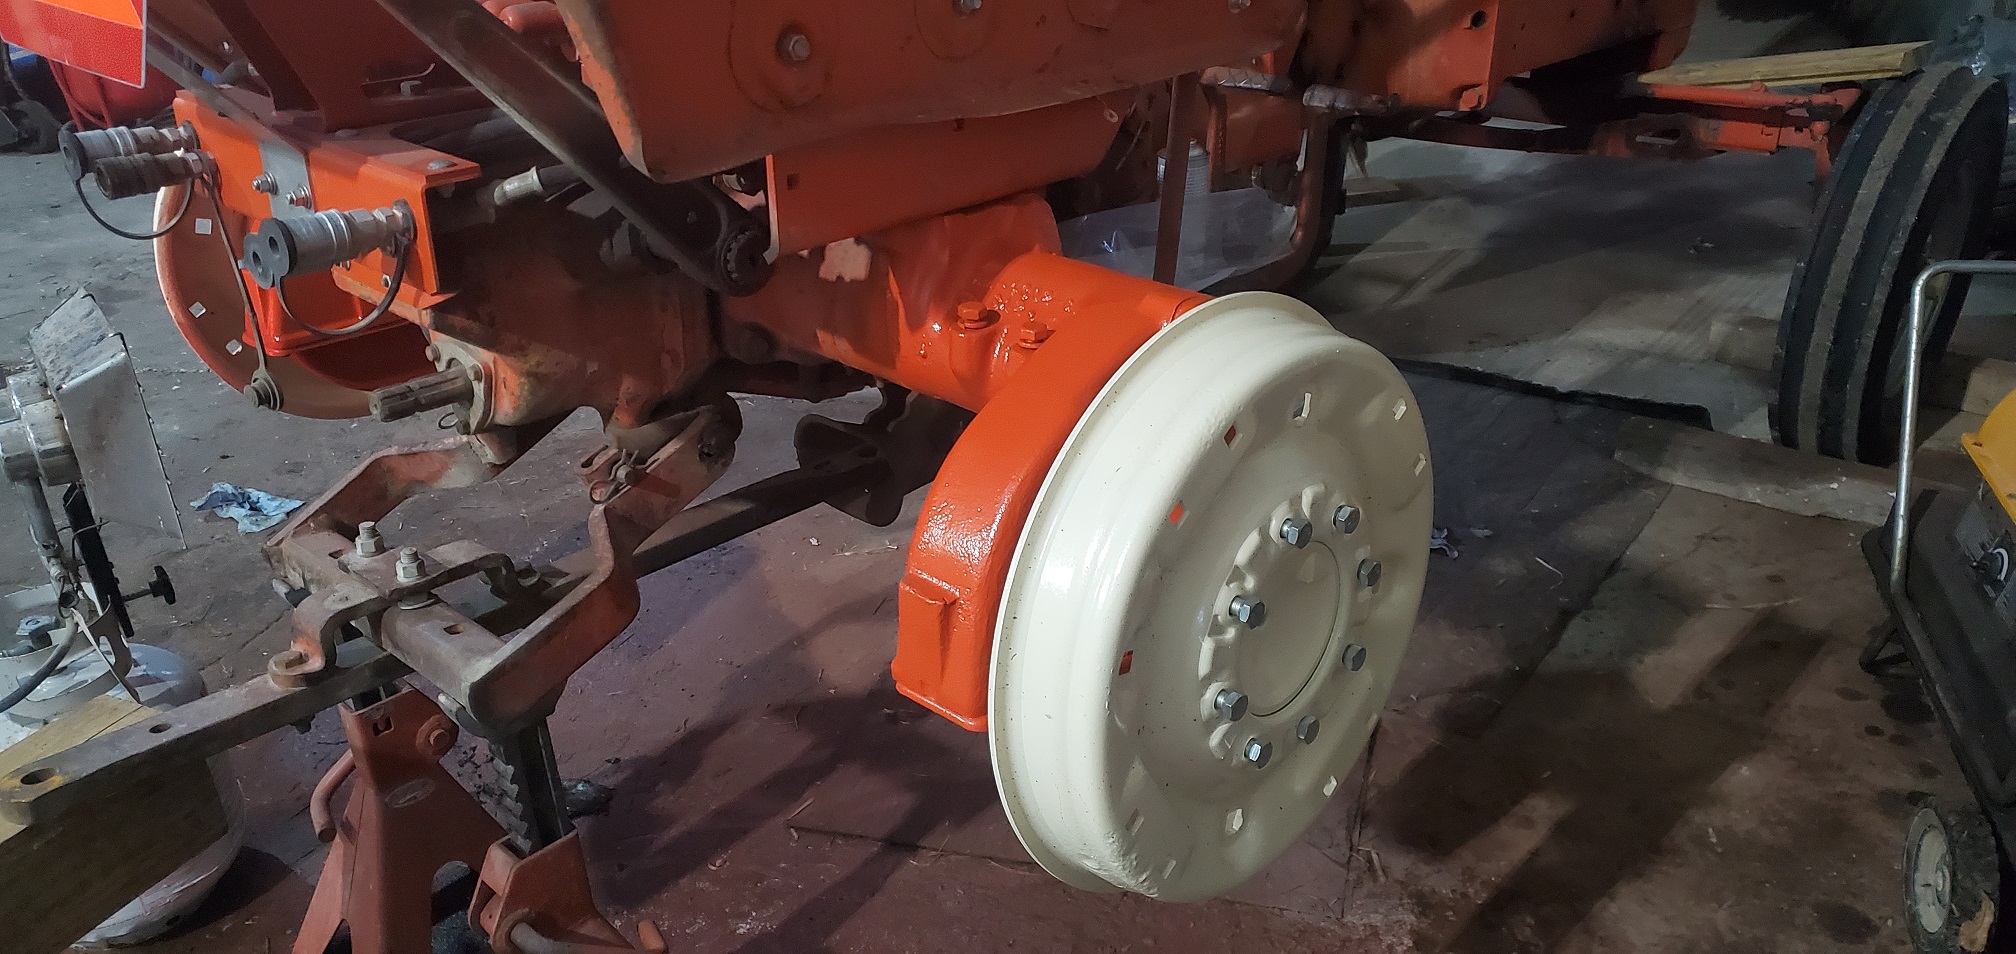 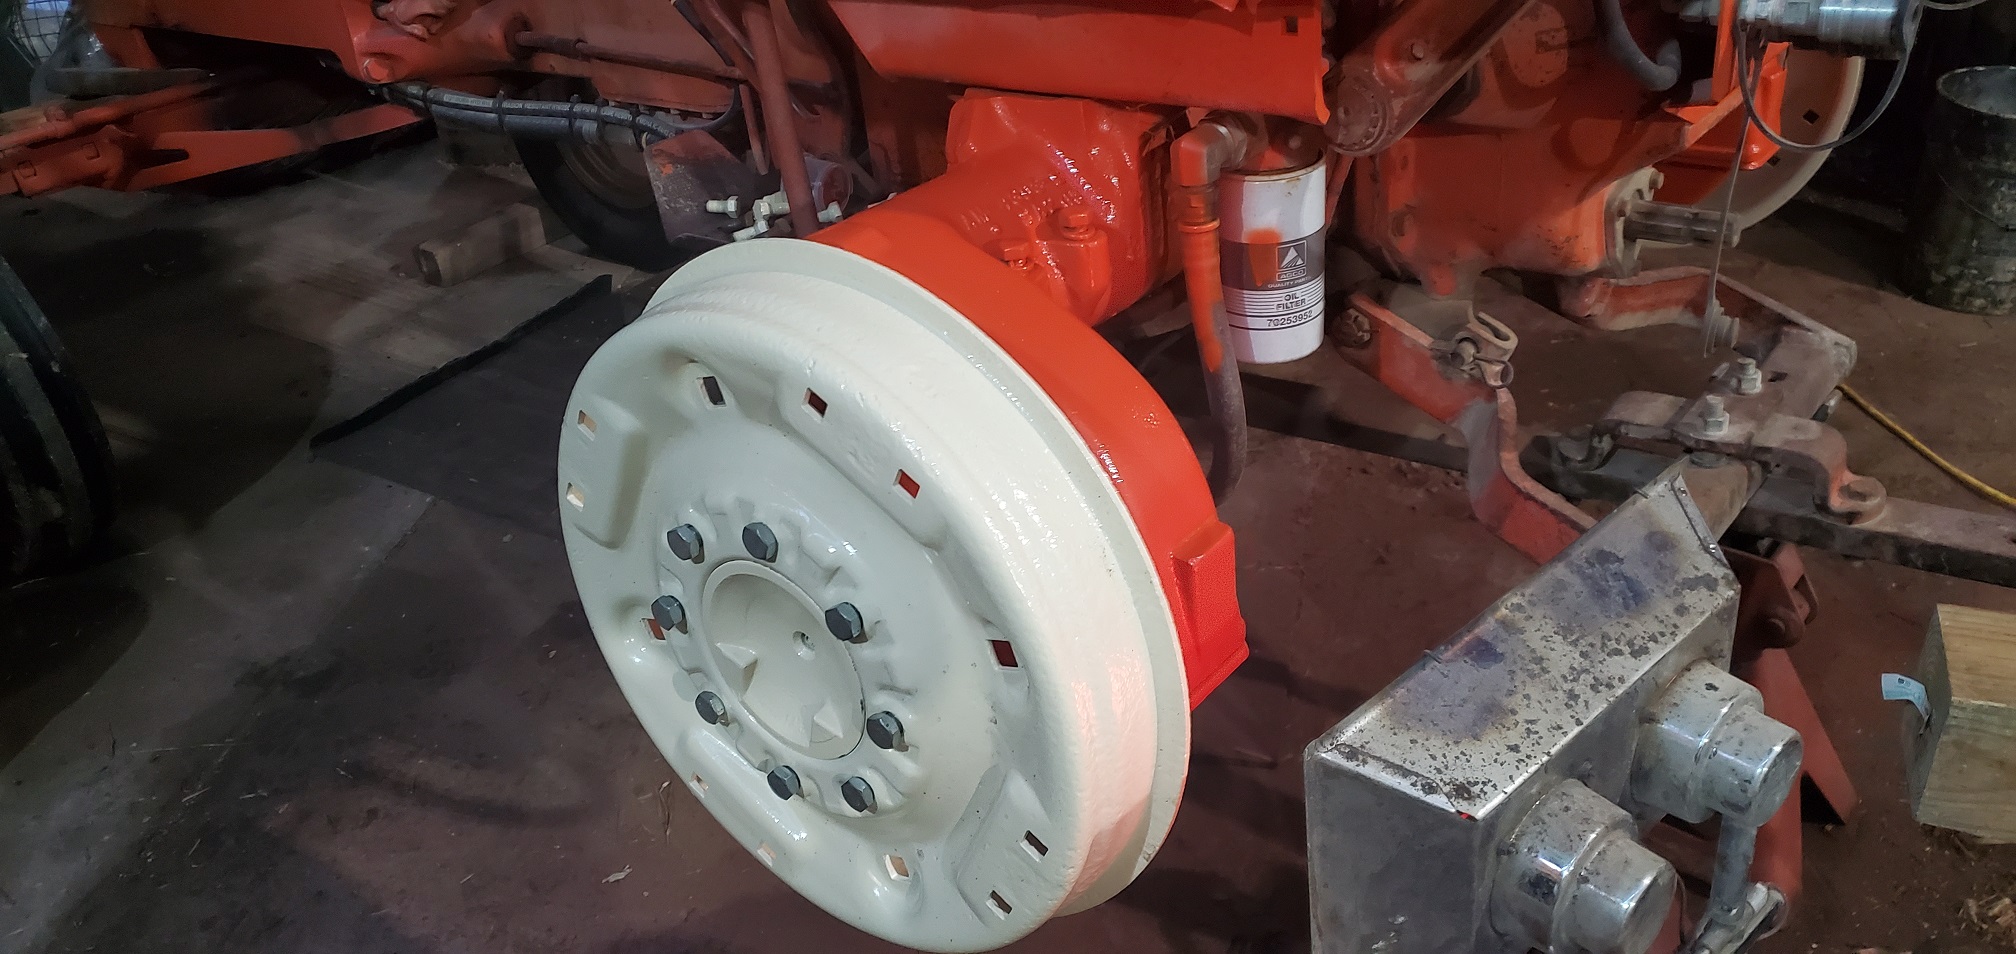
|
Posted By: plummerscarin
Date Posted: 01 Mar 2021 at 11:53am
| Looking good. Yes progress can be slow. Are rims new? Fits 16.9-28? |
Posted By: coggonobrien
Date Posted: 01 Mar 2021 at 12:42pm
| Rims are new from wold. 15" wide for 16.9x26 |
Posted By: coggonobrien
Date Posted: 08 Mar 2021 at 12:49pm
Mounted, ready for a drive an retorque. 59.75 center to center.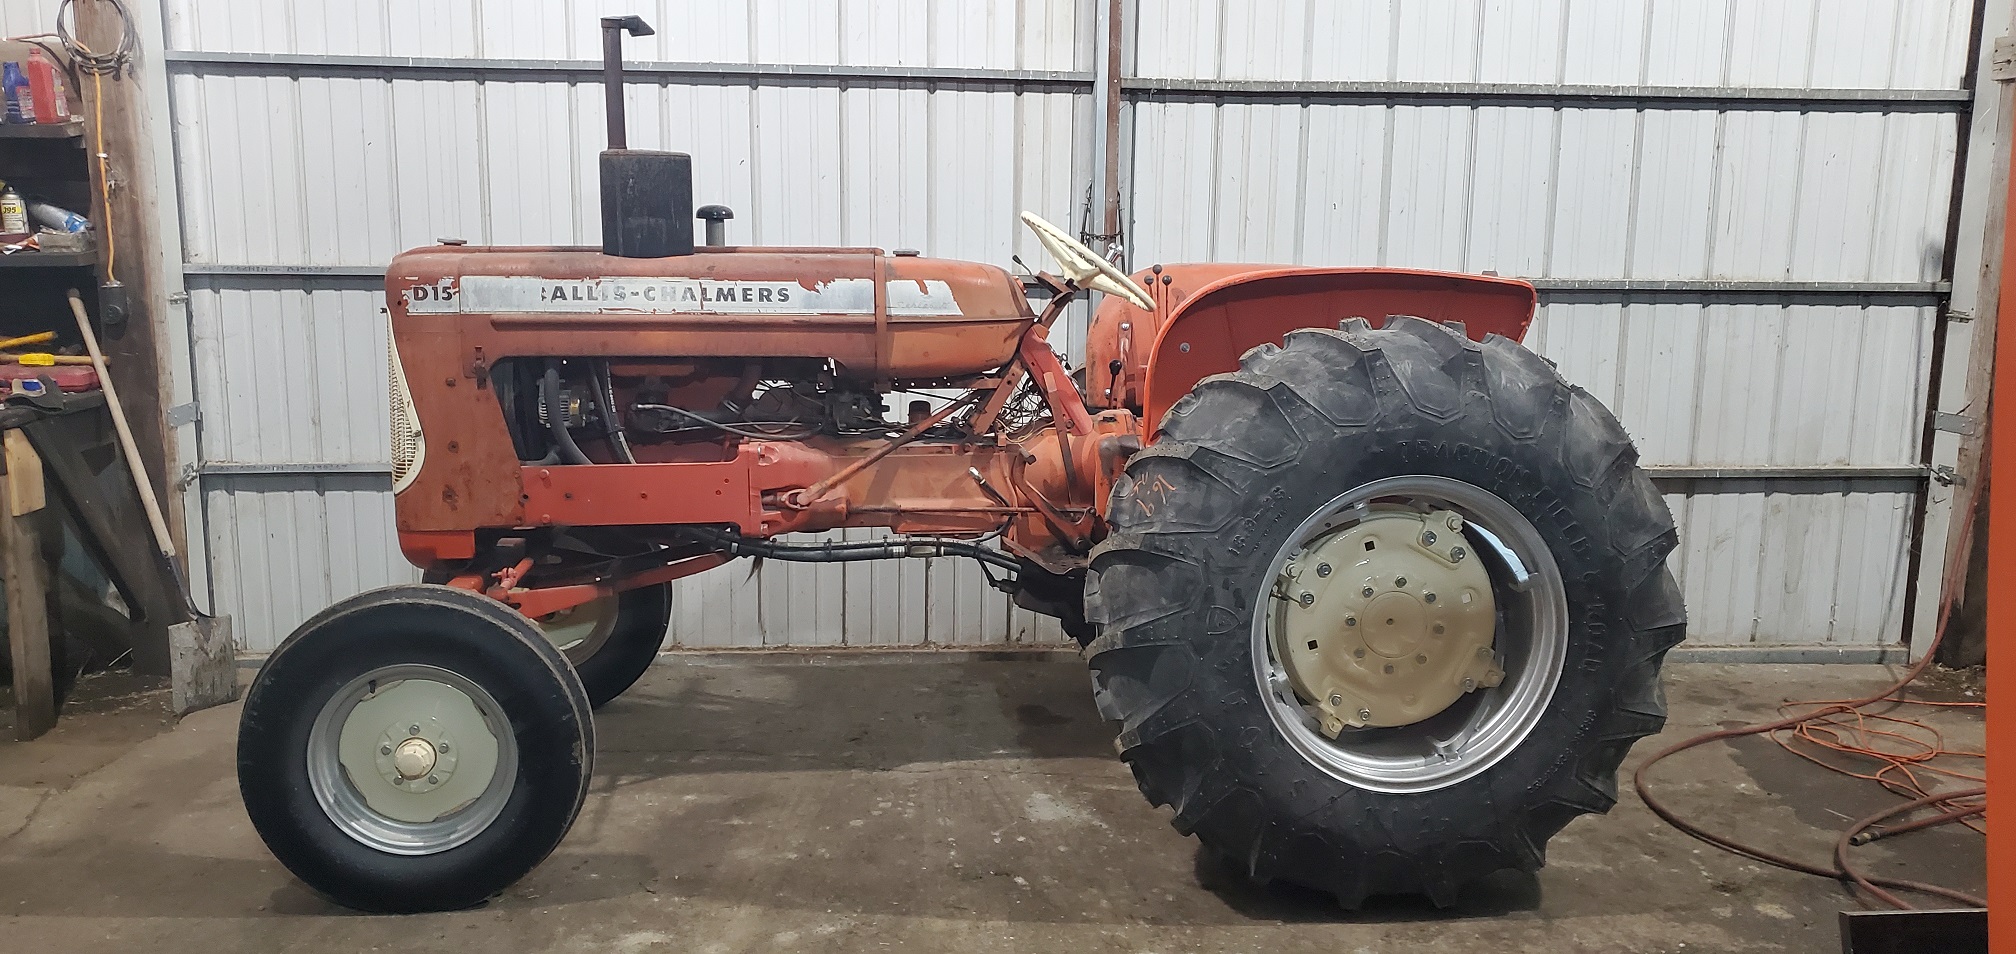 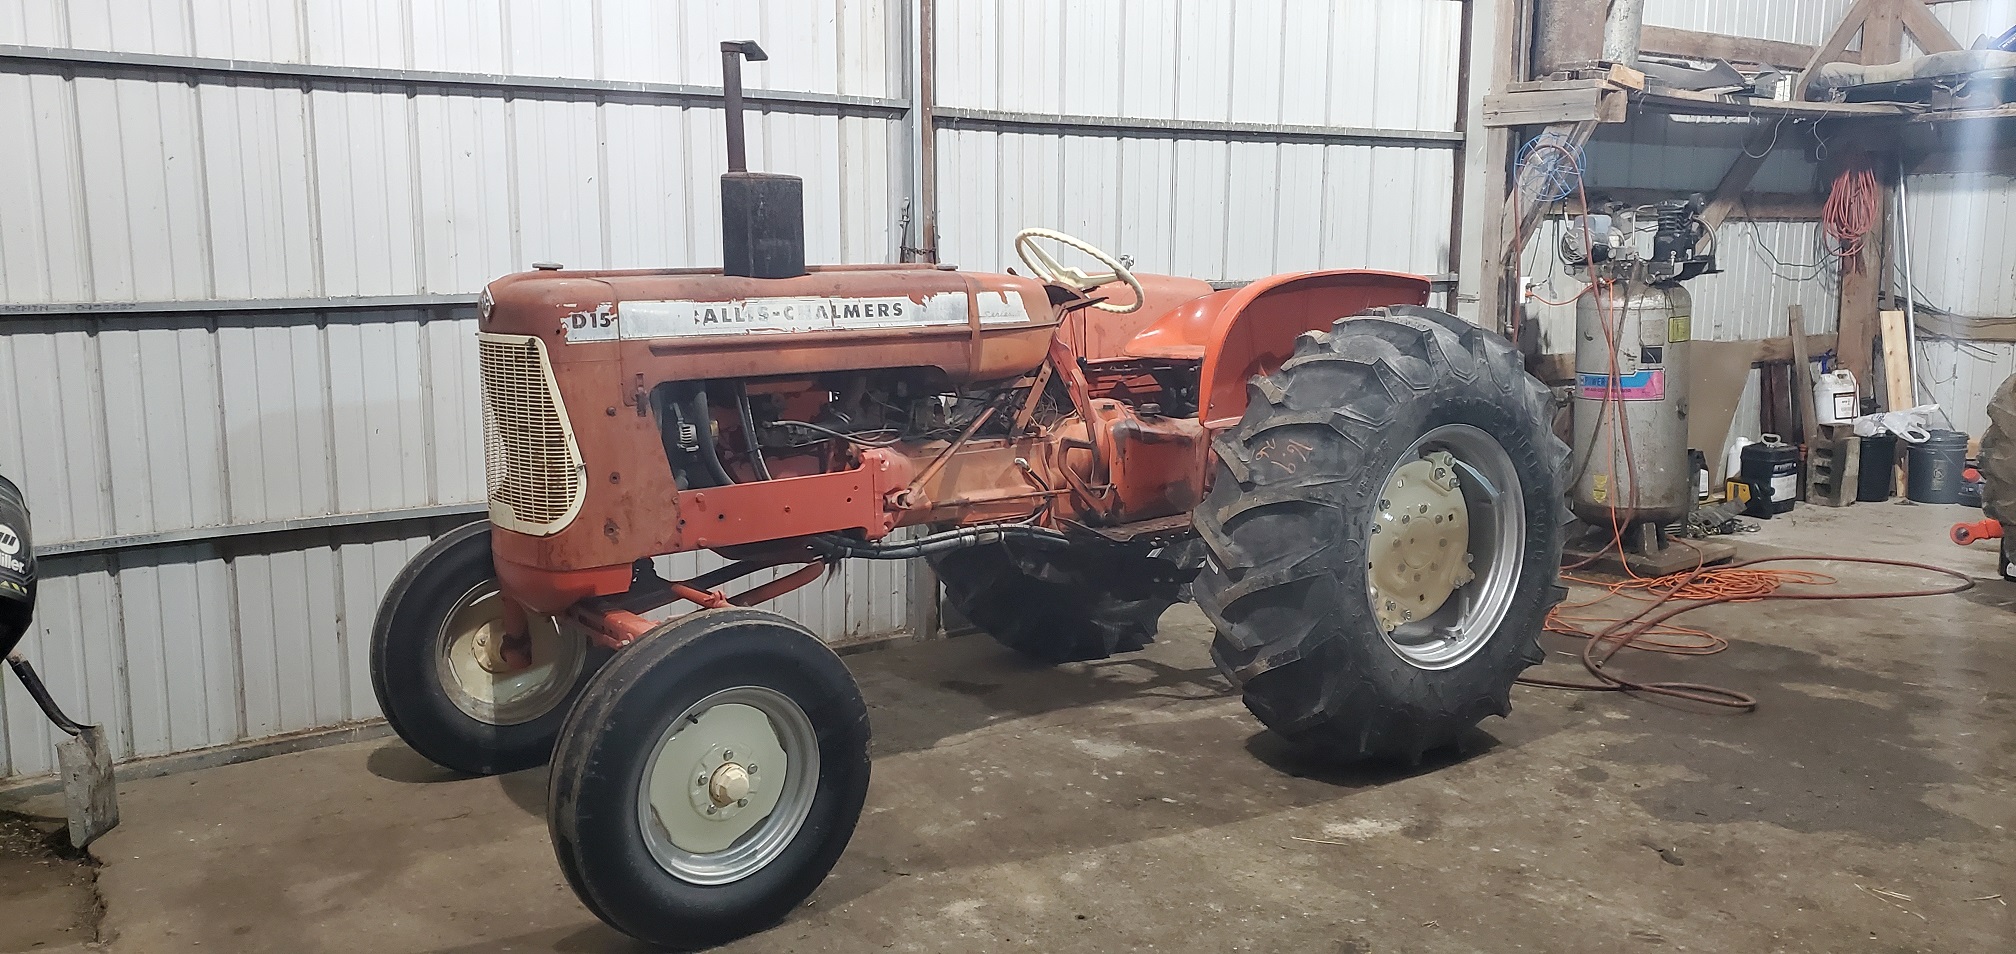  
|