Painting Reclaimed Tractor Parts
Printed From: Unofficial Allis
Category: Allis Chalmers
Forum Name: Farm Equipment
Forum Description: everything about Allis-Chalmers farm equipment
URL: https://www.allischalmers.com/forum/forum_posts.asp?TID=118747
Printed Date: 29 May 2025 at 7:28am
Software Version: Web Wiz Forums 11.10 - http://www.webwizforums.com
Topic: Painting Reclaimed Tractor Parts
Posted By: Bricklayer
Subject: Painting Reclaimed Tractor Parts
Date Posted: 09 Feb 2016 at 12:03pm
| I have been cleaning parts on my Allis Chalmers G. Using electrolysis I remove all paint back to bare metal. What, in everyone's opinion, are the best steps to prep, prime and paint bare metal tractor parts? Thanks for the help. ED |
Replies:
Posted By: Allis dave
Date Posted: 09 Feb 2016 at 2:08pm
| I am NOT a body man or painter, but I sandblasted or wire wheeled all parts than painted with self etching primer. You have to use some sort of etcher to stick to bare metal. |
Posted By: AC7060IL
Date Posted: 09 Feb 2016 at 4:10pm
| I have found that any effort towards doing a final fine grit sanding usually results in an excellent binding of the primer to the metal. Immediately after final sanding, tac cloth for any dirt, fines, etc before applying primer. Use good enamel paints. |
Posted By: CrestonM
Date Posted: 09 Feb 2016 at 4:46pm
| Back in the 40's when they were new they were just painted bare metal, right? |
Posted By: steve(ill)
Date Posted: 09 Feb 2016 at 4:55pm
I buy a gallon of "RED OXIDE" primer (enamel) and brush it on when the parts are clean and dry. Then I set them on the shelf. This will keep them from rusting, and the bolted faces get some primer between them...... Weeks or months later when the parts are ready to assemble I final sandpaper the fenders / hood / tank to get any brush marks out. I reassemble the tractor without the fender / hood / tank and final spray paint the frame unit separate, then install the tank and hood. I use auto quality enamel paint. No need to sand the cast parts.
 ------------- Like them all, but love the "B"s. |
Posted By: steve(ill)
Date Posted: 09 Feb 2016 at 5:03pm
tractor with some "red oxide" primer brushed on a rebuild transmission - final drive- fenders - front and rear hubs.... front end rebuild at later date.
 ------------- Like them all, but love the "B"s. |
Posted By: CTuckerNWIL
Date Posted: 09 Feb 2016 at 5:06pm
|
Using electrolysis, just be sure to get any residue off. I clean parts with lots of water after taking them out, dry off and lightly wire brush. I have left parts like that for some time without having rust form. Just before painting I spray or wipe things down with brake clean and blow dry. I am not a professional at painting but this has worked well for me.
------------- http://www.ae-ta.com" rel="nofollow - http://www.ae-ta.com Lena 1935 WC12xxx, Willie 1951 CA6xx Dad bought new, 1954WD45 PS, 1960 D17 NF |
Posted By: Dan73
Date Posted: 09 Feb 2016 at 5:39pm
| I was thinking that wiping the parts down with some sort of solvent to remove any oil was the one thing to add before any painting. If you forget that setup you can end up with some odd fingerprints in the final paint job. Repainted the grill of my 15 to hide some of them. |
Posted By: Play Farmer
Date Posted: 09 Feb 2016 at 6:27pm
| I use self etching primer on my bare metal, and its been successful long term. |
Posted By: JW in MO
Date Posted: 09 Feb 2016 at 8:56pm
|
As Charlie said, wash thoroughly, dry it as fast as possible and I use a self etching primer. I have to dry and prime asap as everything will flash rust if I don't. I really like electrolysis, it's like having someone else working while you do other stuff. ------------- Maximum use of available resources! |
Posted By: Stan IL&TN
Date Posted: 10 Feb 2016 at 1:34am
|
I hang the parts up then using a spray bottle of mineral spirits I wash the parts down. As soon as they dry I hit them with primer then a second coat of primer and maybe a third coat of primer. Non-sheet metal parts get painted as soon as the primer dries. Sheet metal gets a final sanding followed by a bath of denatured alcohol and then several coats of paint. ------------- 1957 WD45 dad's first AC 1968 one-seventy 1956 F40 Ferguson |
Posted By: Sugarmaker
Date Posted: 10 Feb 2016 at 10:51am
|
My Steps after electrolysis would be something like this. -Removed from bath. -Rinse with clean water. -Wire brush the black soot off as you rinse. -Blow dry with clean compressed air. -Wire brush again after dry and blow off. -Prime as soon as possible. -Set aside or top coat as desired. Even as slow as the process is I was still pressed to keep up with parts coming out of the E tank. One of the WD grills 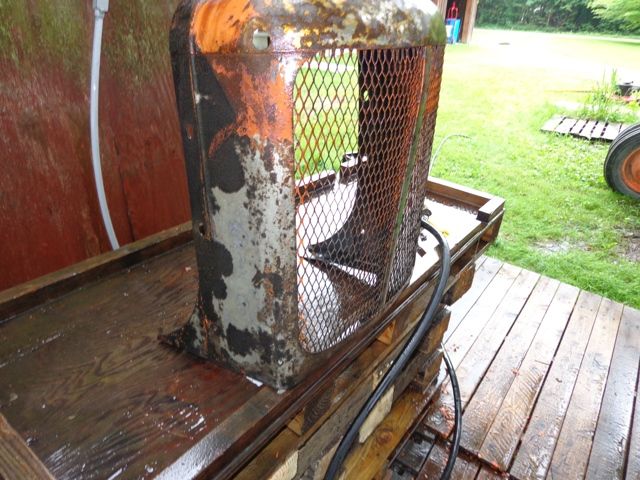 A WD fender 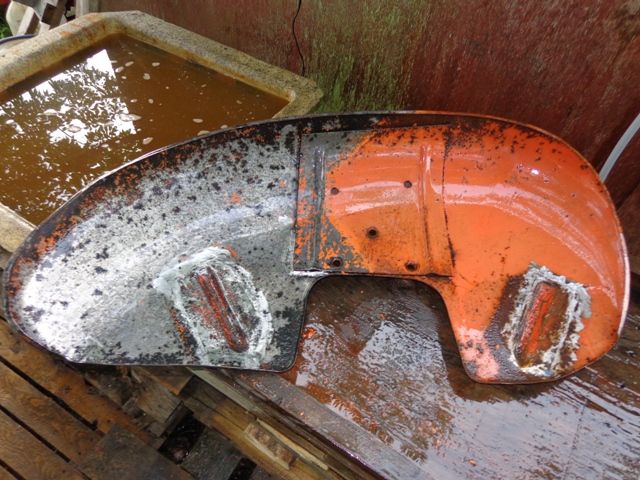 Regards, Chris ------------- D17 1958 (NFE), WD45 1954 (NFE), WD 1952 (NFE), WD 1950 (WFE), Allis F-40 forklift, Allis CA, Allis D14, Ford Jubilee, Many IH Cub Cadets, 32 Ford Dump, 65 Comet. |
Posted By: Bricklayer
Date Posted: 10 Feb 2016 at 12:25pm
|
Men, thanks for all the help and suggestions, I have started with these steps and it follows along with what you suggest. 1)Remove baked on grime, grease, caked on dust/oil, in Lye bath 2)Neutralize in Cleaning Vinegar 3)Rinse in cold water 4)Run through e tank (24-48) hours 5)Rinse with cold water 6)Brush-scrub-wire wheel-Dico wheel while still wet and rinse well 7)Dry thoroughly, towel, compressed air, and my secret, leaf blower 8)Sand, wire brush, scotch-brite a good dry cleaning 9)Blow off thoroughly and wipe down with acetone. 10)Prime with self etching primer or 11)Spray with a phosphoric acid based metal prep and rinse 12) Then you can spray with a good high build primer. Does this sound like a good process? My understanding on bare metal you need to use a self etching or red lead primer or the phosphoric wash. Thanks for all the great information! WOULD YOU TWEEK THIS IN ANY WAY? Ed |
Posted By: Ted J
Date Posted: 10 Feb 2016 at 5:05pm
Red Oxide is STILL the best primer as far as I am concerned!! FIL was a welder with almost 60 years experience and this is what he swore by and they used on EVERYTHING. Wish I had HALF his knowledge...he's dead now though... ------------- "Allis-Express" 19?? WC / 1941 C / 1952 CA / 1956 WD45 / 1957 WD45 / 1958 D-17 |
 Sugarmaker wrote:
Posted By: wdtom
Date Posted: 11 Feb 2016 at 1:42pm
| For clean metal and metal with the rust well removed or sandblasted I use Rustoleum white clean metal primer. One coat, then the Orange, Valspar tractor and implement paint I think it is, friend has the can now. I wipe down all surfaces with paint thinner before priming. |