| Author |
 Topic Search Topic Search  Topic Options Topic Options
|
plummerscarin 
Orange Level Access

Joined: 22 Jun 2015
Location: ia
Points: 3110
|
 Post Options Post Options
") Thanks(0) Thanks(0)
 Quote Quote  Reply Reply
 Posted: 23 Mar 2023 at 11:17pm Posted: 23 Mar 2023 at 11:17pm |
The rods came back from machine shop at last. New pin bushings installed and honed to fit new wrist pins. 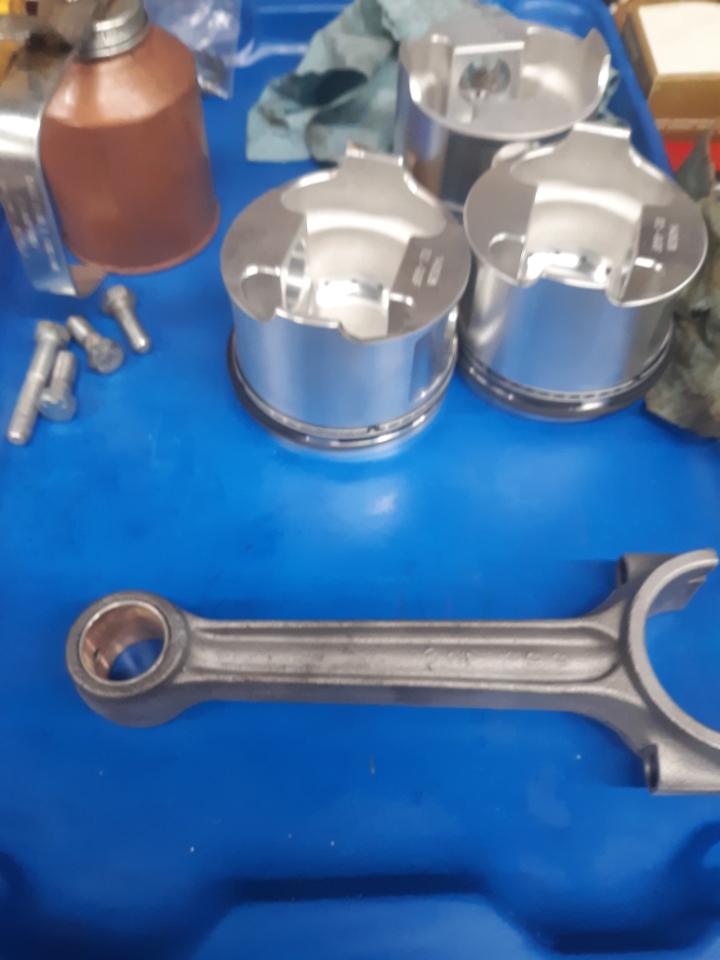 Got the rods and pistons assembled and installed tonight 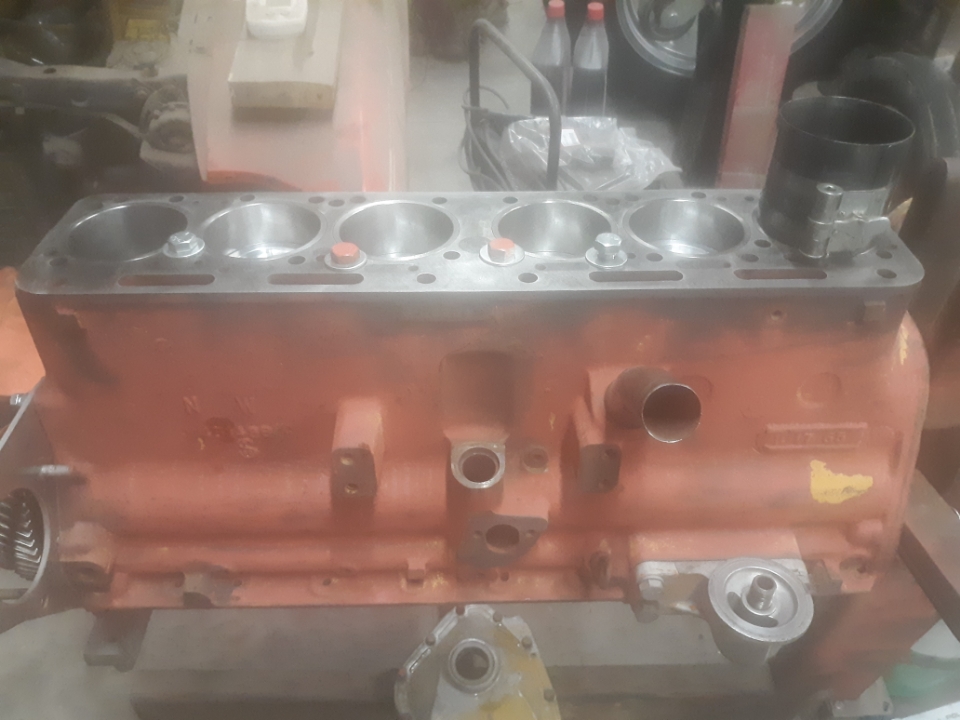 Rod side clearance is .004" 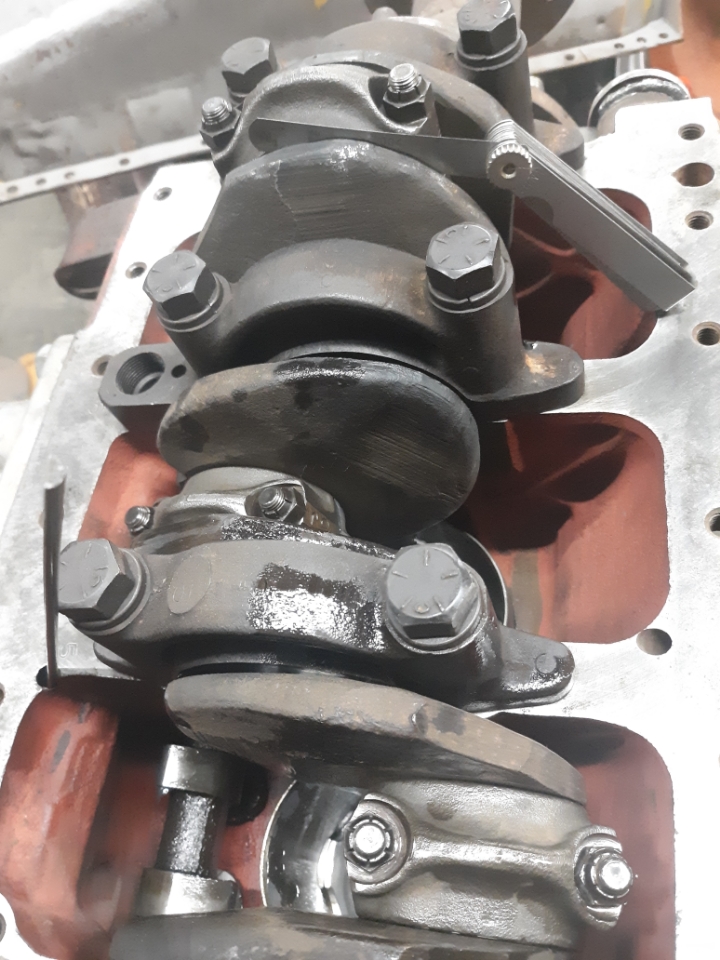 Have also been cleaning parts and have in primer. I started in on the brakes as well. Naturally the pins are stuck pretty good. I have some end mill bits so I decided to fab a pin puller using the drill press. A cross slide vise would be nice to have but managed without it. The bar stock is from some kind of brace off a McCormick something. Seems heavy enough 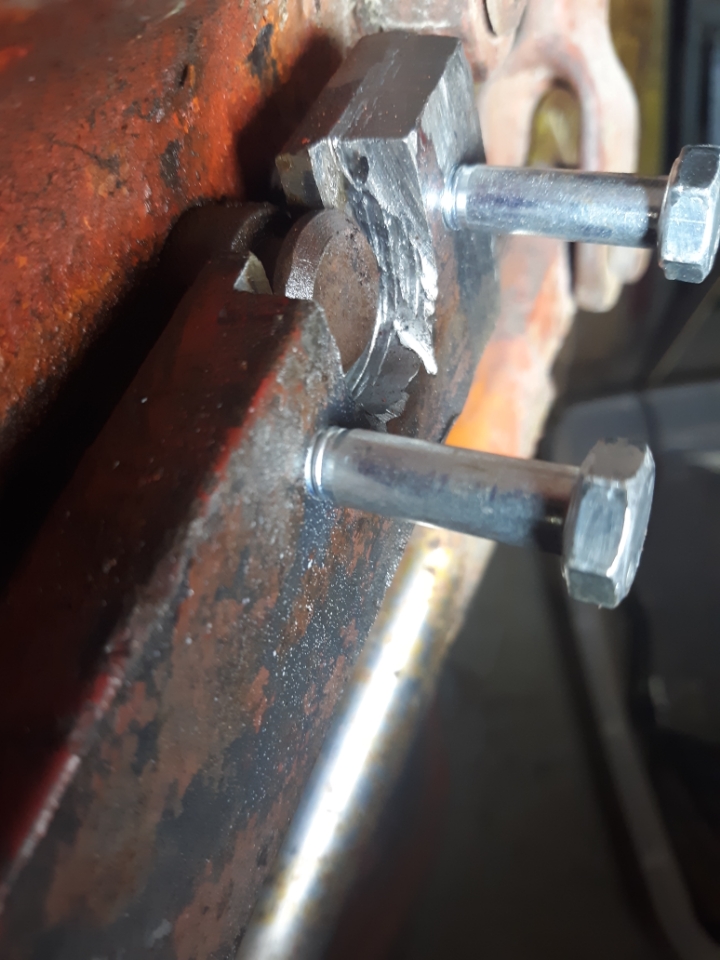 Remarkably, the pin was moving but I got a little overzealous and the head of the pin is starting to separate. I plan to weld it up a bit and keep at it with a bit more patience and plenty of lube. And maybe some heat.
|
 |
|
Sponsored Links
|
|
|
Kenny L.
Orange Level Access

Joined: 12 Sep 2009
Location: NEIOWA
Points: 1224
|
Post Options
Thanks(0)
Quote Reply
Posted: 24 Mar 2023 at 2:28am |
|
Looking good and the pictures are great, you're getting there
|
|
IBWD MIke
Orange Level

Joined: 08 Apr 2012
Location: Newton Ia.
Points: 3440
|
Post Options
Thanks(0)
Quote Reply
Posted: 24 Mar 2023 at 9:45am |
Good to see you're making progress on this!
I happen to have a cross-slide vise I would part with.....
|
|
plummerscarin
Orange Level Access
Joined: 22 Jun 2015
Location: ia
Points: 3110
|
Post Options
Thanks(0)
Quote Reply
Posted: 27 Mar 2023 at 10:02pm |
Set the fuel tank outside and set up the electrolysis to remove rust inside the tank 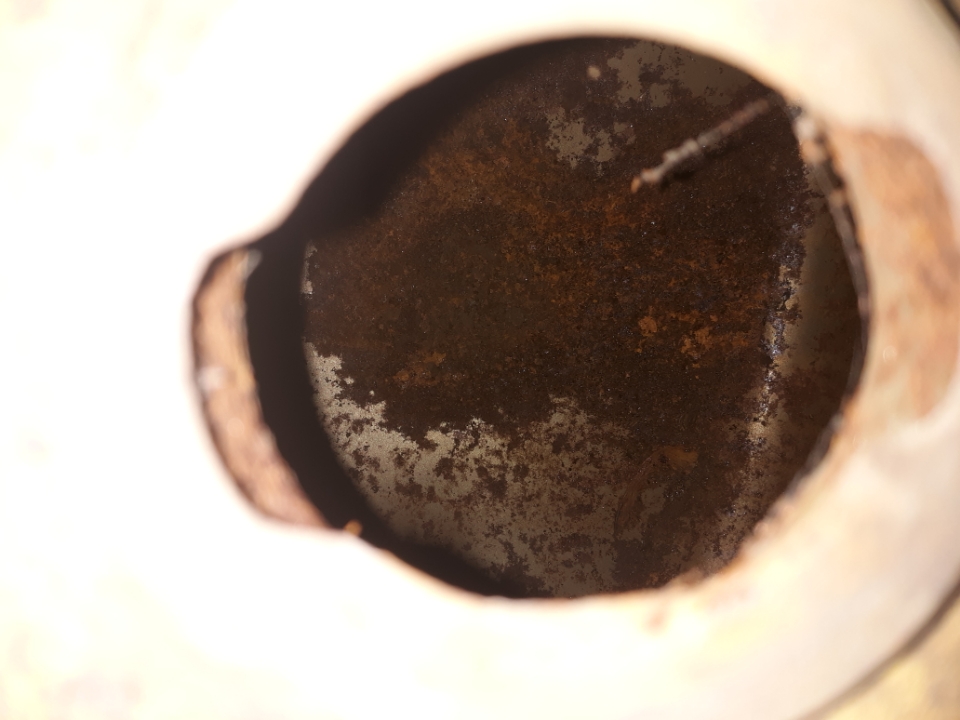 A view inside the tank. After 24 hours there does not appear to be much rust collected on the anode yet but can see plenty of gas bubbles so it is doing something. May not be as bad as I thought. Gonna leave it cook another day and drain it. Will get it clean dry then plan to seal it. Mike, I just might take you up on that cross slide
|
|
AC720Man
Orange Level

Joined: 10 Oct 2016
Location: Shenandoah, Va
Points: 4635
|
Post Options
Thanks(0)
Quote Reply
Posted: 27 Mar 2023 at 10:36pm |
|
When I replaced my brakes a few months ago on my D17 I put a large punch in through hole and banged on the pin after I soaked it with Kroil. It came loose with little effort when I put my puller n it.
|
|
1968 B-208, 1976 720 (2 of them)Danco brush hog, single bottom plow,52" snow thrower, belly mower,rear tine tiller, rear blade, front blade, 57"sickle bar,1983 917 hydro, 1968 7hp sno-bee, 1968 190XTD
|
|
plummerscarin
Orange Level Access
Joined: 22 Jun 2015
Location: ia
Points: 3110
|
Post Options
Thanks(0)
Quote Reply
Posted: 29 Mar 2023 at 10:09pm |
Here's the electrolysis setup on the gas tank 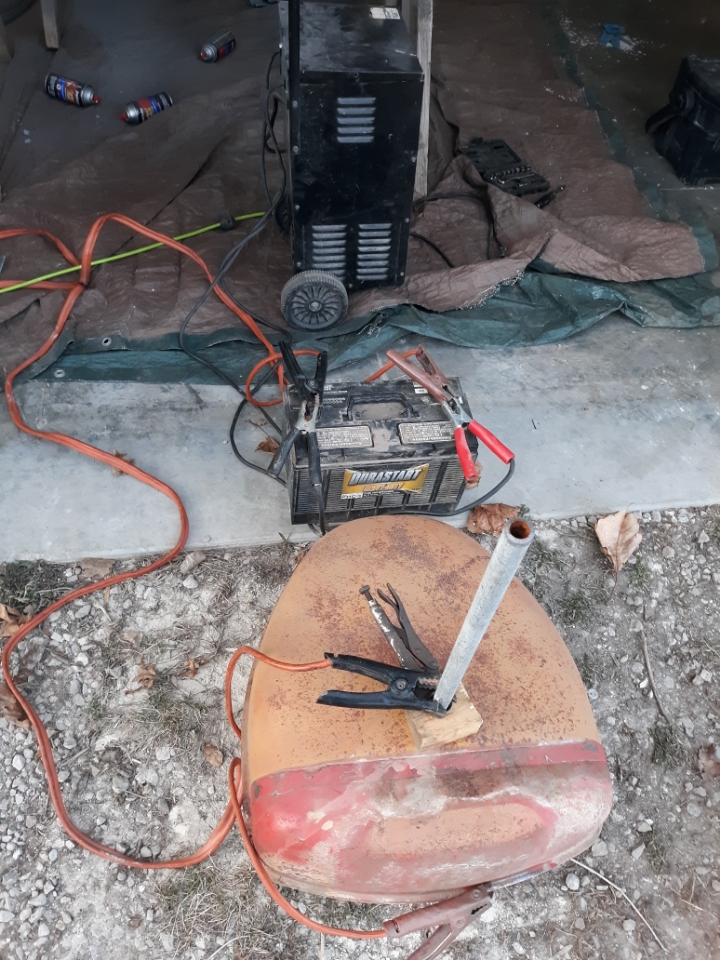 Not much on the anode. It's a steel pipe that had the galvanized coating ground off. Plenty of rust came out when I drained and rinsed it 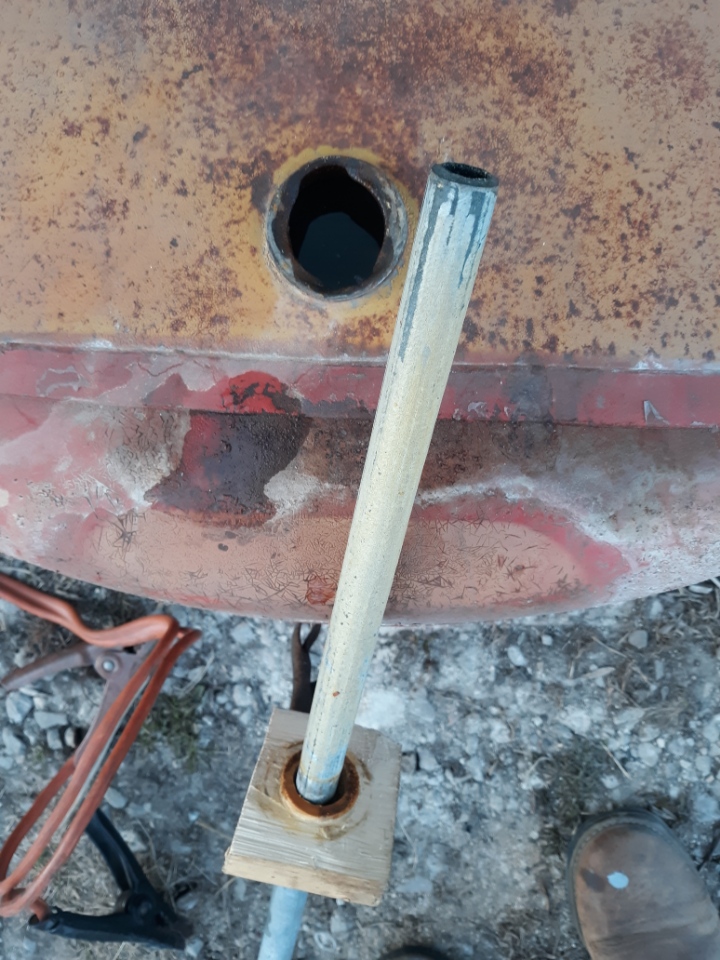 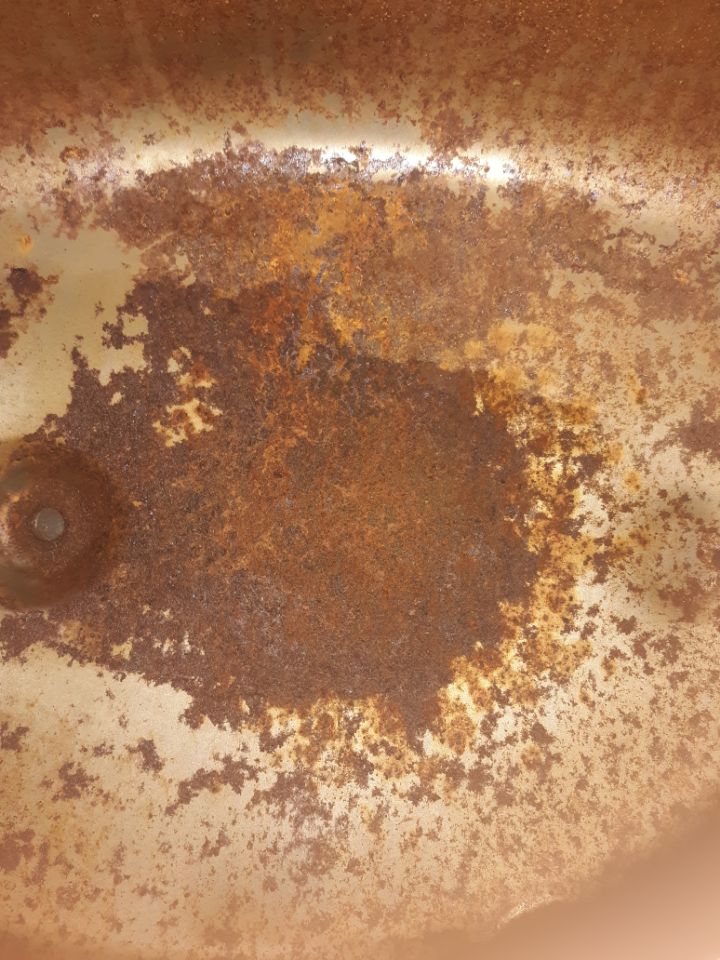 Will be sealing this soon
|
|
IBWD MIke
Orange Level
Joined: 08 Apr 2012
Location: Newton Ia.
Points: 3440
|
Post Options
Thanks(0)
Quote Reply
Posted: 30 Mar 2023 at 9:27am |
|
I made a similar setup when I did the tank for WD Grandpa. Worked good.
|
|
plummerscarin
Orange Level Access
Joined: 22 Jun 2015
Location: ia
Points: 3110
|
Post Options
Thanks(0)
Quote Reply
Posted: 01 Apr 2023 at 11:29pm |
Eureka!! Got one brake pin out tonight. Welded that pin top 3 times. Moved the pin in and out multiple times keeping the penetrating oil to it. Once I was able to rotate the pin it came quite easily.  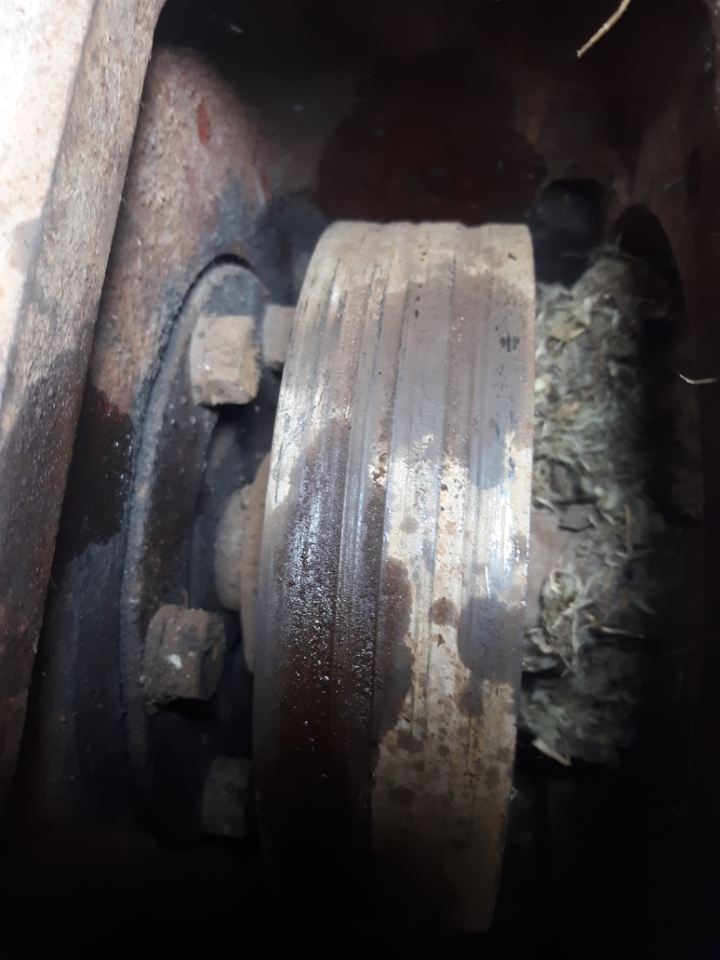 Drum and lining don't look so good though but I kinda figured that  That'll need to come apart so's I can clean out the mouse house
|
|
AC720Man
Orange Level
Joined: 10 Oct 2016
Location: Shenandoah, Va
Points: 4635
|
Post Options
Thanks(0)
Quote Reply
Posted: 01 Apr 2023 at 11:37pm |
|
That looks like my D17 brake drum did. A good chain hoist will become your best friend. I chose to cut off the old drum instead of pulling it. A V cut and then a wedge chisel, one smack of a hammer and it fell apart. Replaced the pinion seal while apart even though it wasn’t leaking oil.
|
|
1968 B-208, 1976 720 (2 of them)Danco brush hog, single bottom plow,52" snow thrower, belly mower,rear tine tiller, rear blade, front blade, 57"sickle bar,1983 917 hydro, 1968 7hp sno-bee, 1968 190XTD
|
|
wjohn
Orange Level

Joined: 19 Jan 2010
Location: KS
Points: 1797
|
Post Options
Thanks(0)
Quote Reply
Posted: 02 Apr 2023 at 9:12am |
|
Nice! Those pins sure can be a royal pain. I don't see any rivet heads above the lining in your pic, so someone must have changed the lining once before after the heads had dug in, then put that current lining on and it just wore into the grooves already in the drum?
|
|
1939 B, 1940 B, 1941 WC, 1951 WD, 1952 CA, 1956 WD-45
|
|
plummerscarin
Orange Level Access
Joined: 22 Jun 2015
Location: ia
Points: 3110
|
Post Options
Thanks(0)
Quote Reply
Posted: 02 Apr 2023 at 12:12pm |
My thoughts exactly. Truth be told it is likely my fault. Decades ago I was helping Dad haul manure. I pulled the spreader with this tractor while he loaded it with the WD45 with no power steering. I learned a great deal backing trailers cuz I had no power steering either and he was very specific on placement to load Anyway, I hauled a load out and for whatever reason I had gotten off the tractor in the back of the field. When I jumped back on, put the trans in road gear and forgot to release the brake. Soon I heard a POP so I stopped to see what happened. It was then I realized what I'd and later found out that drum had split. I got an earful over that. So he replaced the drum at some point but probably held off on the lining due to budget restrictions. So I guess this is payback? 
|
|
wjohn
Orange Level
Joined: 19 Jan 2010
Location: KS
Points: 1797
|
Post Options
Thanks(0)
Quote Reply
Posted: 03 Apr 2023 at 10:03pm |
 plummerscarin wrote: plummerscarin wrote:
So he replaced the drum at some point but probably held off on the lining due to budget restrictions. So I guess this is payback? |
Haha, I think you're right!
|
|
1939 B, 1940 B, 1941 WC, 1951 WD, 1952 CA, 1956 WD-45
|
|
plummerscarin
Orange Level Access
Joined: 22 Jun 2015
Location: ia
Points: 3110
|
Post Options
Thanks(0)
Quote Reply
Posted: 03 Jun 2023 at 8:26pm |
Ordered the new wiring harness and charging system from Steve. No where near ready but should help with motivation. Soooooo many other things to do. Had gotten some used radials and power shift rims at auction for another tractor. While cleaning those rims, took the Scotch pad on the high speed angle grinder to the gas tank. 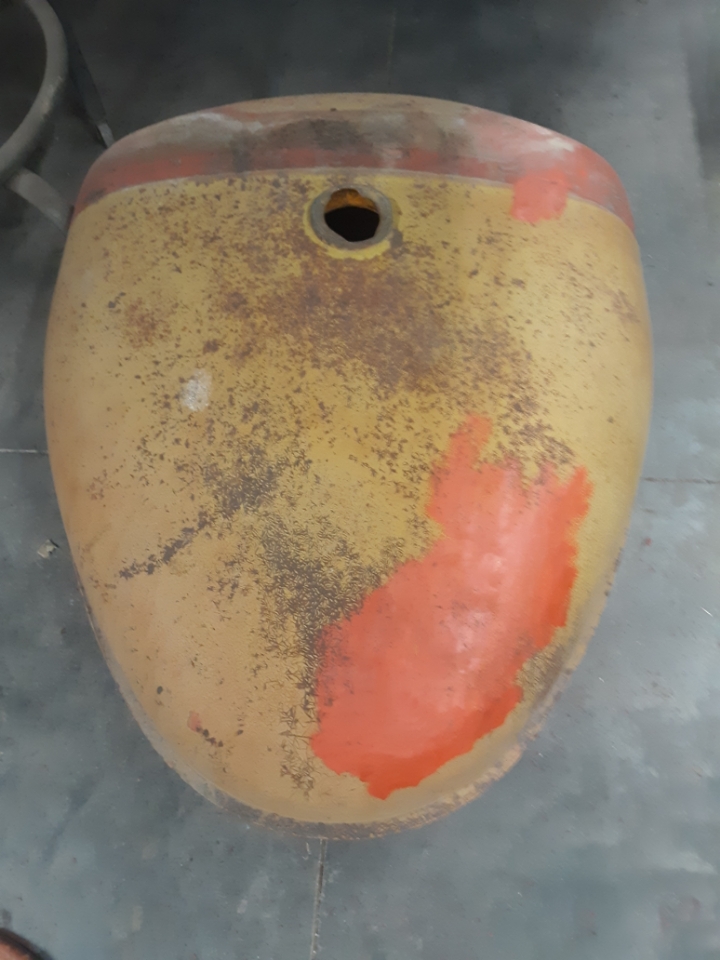 Thought it interesting that the abrasive pad took off the faded paint and left a reasonably good paint finish. As if Dad had painted over the existing finish way back when.
|
|
plummerscarin
Orange Level Access
Joined: 22 Jun 2015
Location: ia
Points: 3110
|
Post Options
Thanks(0)
Quote Reply
Posted: 02 Sep 2023 at 12:19pm |
|
Just a thought, the crackling of the top coat appears to maybe have been lacquer as that was common then with just a scuffing for prep. Seen a similar story cleaning wheel centers.
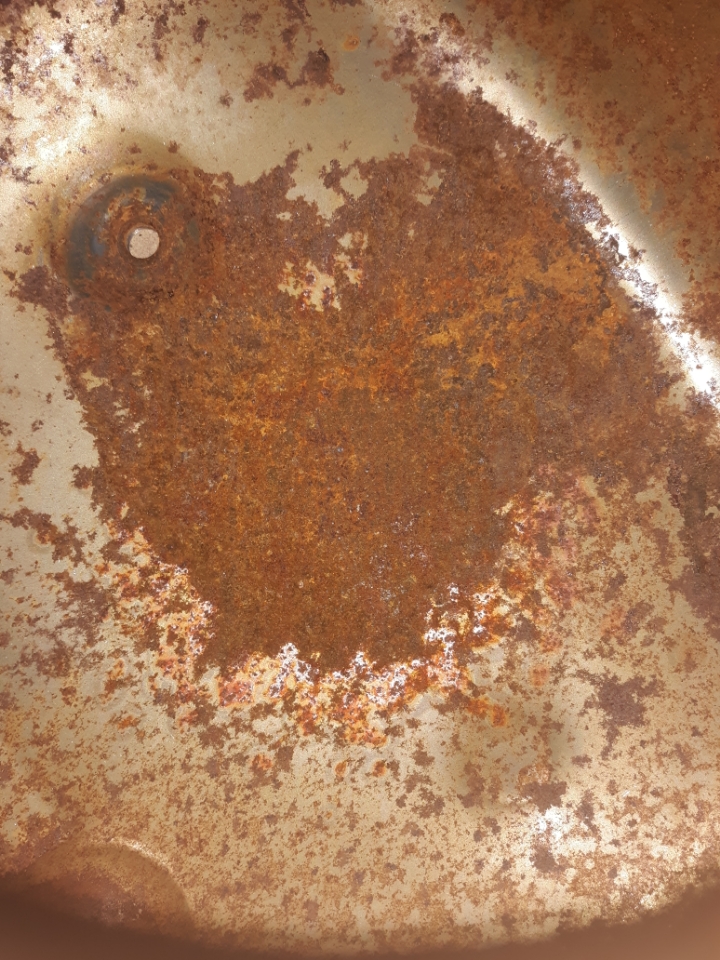
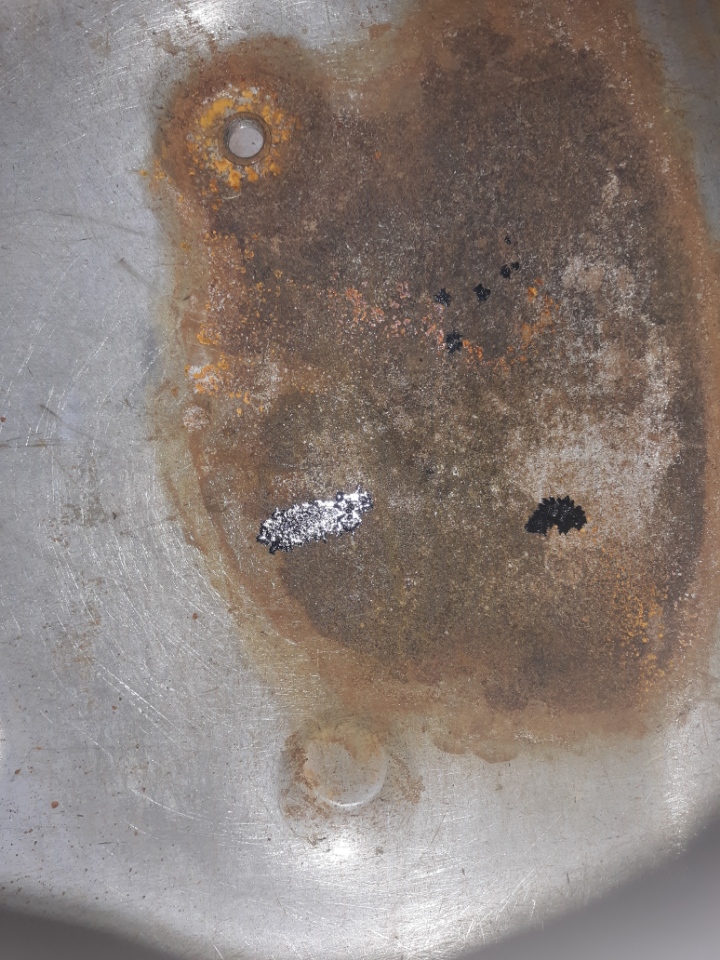
Anyway, today have started the process of cleaning the fuel tank along with the tank from the narrow front. Turns out, after all the time spent using electrolysis may not have cleaned those tanks all that well. The narrow front tank did develop some pinholes though. They were flushed then and today I poured in the cleaning solution from the kit I bought, along with a chain and swirled it around for quite some time. I was stunned how much crap came out of them. Dad's tank not too bad it didn't stain the solution much but the narrow front tank turned the clear solution dark brown and clogged the screen in the funnel when draining out. It got washed 3 times before the magnet stopped coming out dirty. Thoroughly rinsed and dried. I have them sitting in the sun to ensure it is dry before the etching step. In all, I spent over 3 hours on this first step.
|
|
IBWD MIke
Orange Level
Joined: 08 Apr 2012
Location: Newton Ia.
Points: 3440
|
Post Options
Thanks(0)
Quote Reply
Posted: 03 Sep 2023 at 7:48am |
|
Are you using por-15? I used it on a CA tank earlier this summer. Seems to be working good so far.
|
|
plummerscarin
Orange Level Access
Joined: 22 Jun 2015
Location: ia
Points: 3110
|
Post Options
Thanks(0)
Quote Reply
Posted: 03 Sep 2023 at 2:16pm |
|
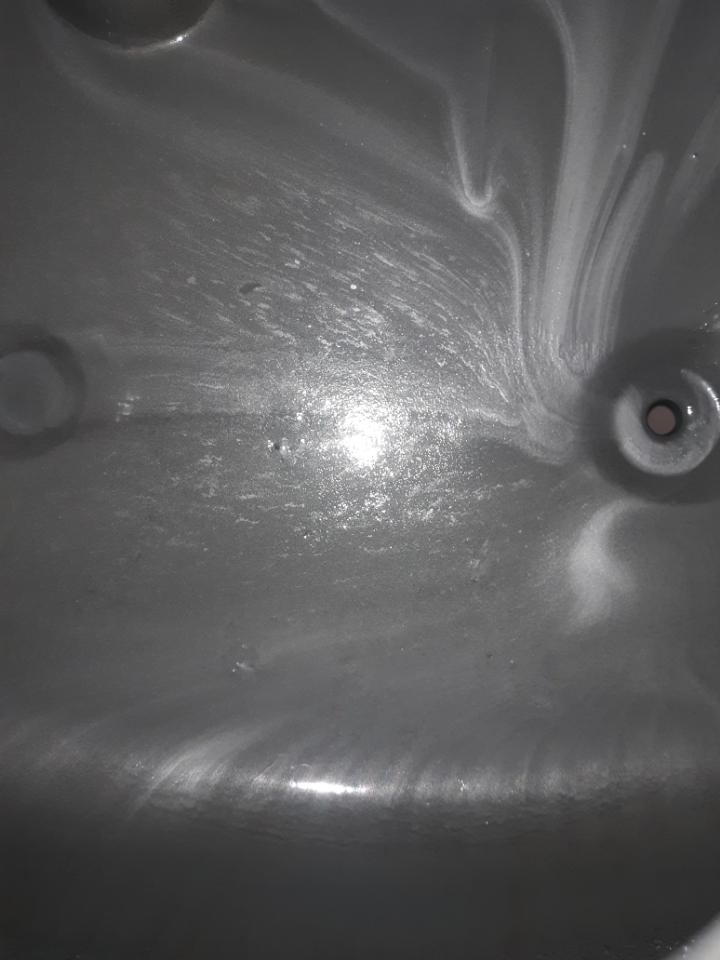
I went with a kit from KBS. I have POR-15 but using it for external. That said, when I coated the bottom of the narrow front tank it dripped right through the pinholes
Applied the etching primer this morning. Between sloshing the tanks and shocking sweet corn it has been a very busy morning. Tanks have been quadruple ri sed and drying now.
Edited by plummerscarin - 03 Sep 2023 at 2:19pm
|
|
IBWD MIke
Orange Level
Joined: 08 Apr 2012
Location: Newton Ia.
Points: 3440
|
Post Options
Thanks(0)
Quote Reply
Posted: 04 Sep 2023 at 5:15am |
|
I 'shocked' my sweetcorn last weekend with the 756 and 7' bushhog! Always a good feeling when that's done.
|
|
plummerscarin
Orange Level Access
Joined: 22 Jun 2015
Location: ia
Points: 3110
|
Post Options
Thanks(0)
Quote Reply
Posted: 04 Sep 2023 at 6:31am |
|
Oops, I meant shucking. Damn auto correct. Freezing third planting sweet corn. So I looked up the POR 15 you mentioned. It appears to be the same stuff I'm using just a different brand.
|
|
plummerscarin
Orange Level Access
Joined: 22 Jun 2015
Location: ia
Points: 3110
|
Post Options
Thanks(0)
Quote Reply
Posted: 04 Sep 2023 at 7:52pm |
|
|
|
IBWD MIke
Orange Level
Joined: 08 Apr 2012
Location: Newton Ia.
Points: 3440
|
Post Options
Thanks(0)
Quote Reply
Posted: 05 Sep 2023 at 7:30am |
|
Looks like you're on the right track.
|
|