| Author |
 Topic Search Topic Search  Topic Options Topic Options
|
Play Farmer 
Orange Level

Joined: 13 Jan 2016
Location: NNY
Points: 732
|
 Post Options Post Options
") Thanks(0) Thanks(0)
 Quote Quote  Reply Reply
 Topic: Brake Pins üòÆ‚Äçüí® Topic: Brake Pins üòÆ‚Äçüí®
Posted: 09 Jul 2022 at 6:43am |
|
^^^ I was thinking the same thing!
That one pin had an interesting life.
|
 |
|
Sponsored Links
|
|
|
BrianC
Orange Level
Joined: 16 Jun 2011
Location: New York
Points: 1613
|
Post Options
Thanks(0)
Quote Reply
Posted: 08 Jul 2022 at 6:08pm |
That one pin is a work of art. Who would have know a simple pin could change into a hydraulic spool. Has anyone ever seen a WD/45 pin looking like that?
I am still trying to figure out how it got like that. Rust and wear. I can see the rust in earlier pic, looks like an antique ships anchor on display at the harbor. I cut up some rotted pallets, they had nails
rusted in interesting shapes. Seen fertilizer spreaders in bad shape.
Don't want to be a pest, but I wish I could see your replacement shoes nested together with that rusted pin placed. That would be my "huh, look at that" moment.
|
|
INV3RSE
Bronze Level

Joined: 23 Apr 2022
Location: Cornwall
Points: 50
|
Post Options
Thanks(0)
Quote Reply
Posted: 08 Jul 2022 at 10:01am |
|
|
|
INV3RSE
Bronze Level
Joined: 23 Apr 2022
Location: Cornwall
Points: 50
|
Post Options
Thanks(0)
Quote Reply
Posted: 08 Jul 2022 at 9:51am |
Cheers everyone. I’ve spent all afternoon under the tractor again…. And Success! Final pin is removed! It doesn’t look bad as the other one but it put up more of a fight! 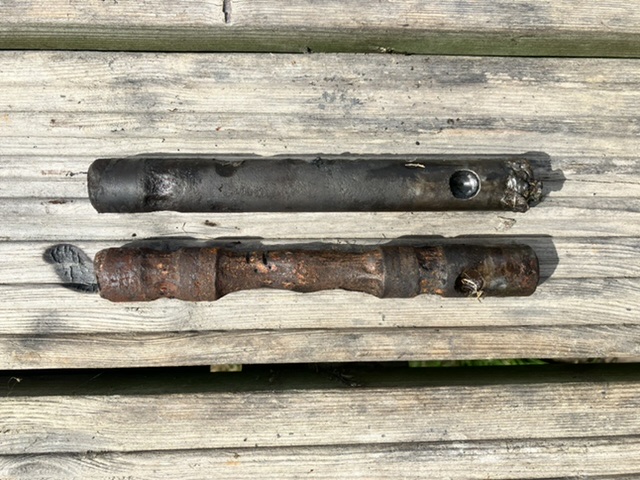
|
|
Sugarmaker
Orange Level

Joined: 12 Jul 2013
Location: Albion PA
Points: 8167
|
Post Options
Thanks(0)
Quote Reply
Posted: 08 Jul 2022 at 7:26am |
INV3RSE, I have been down this road too. Had to cut chunks out of center with a torch, let them fall out the bottom and then drive the pin inward and cut off another chunk. Not for the weak of heart for sure. If you can do this job there is no reason you need to send the shoes for relining. You can do those standing on your head. Assuming you can get the pads and rivets for a supplier like Sandy Lake or others on this forum. That tractor is testing you. But now you have the passion. Great projects to take our minds off the real world stuff. Family tractor too! We need some additional pictures! Regards, Chris
Edited by Sugarmaker - 08 Jul 2022 at 7:26am
|
|
D17 1958 (NFE), WD45 1954 (NFE), WD 1952 (NFE), WD 1950 (WFE), Allis F-40 forklift, Allis CA, Allis D14, Ford Jubilee, Many IH Cub Cadets, 32 Ford Dump, 65 Comet.
|
|
INV3RSE
Bronze Level
Joined: 23 Apr 2022
Location: Cornwall
Points: 50
|
Post Options
Thanks(0)
Quote Reply
Posted: 08 Jul 2022 at 5:39am |
|
I think it probably is
|
|
BrianC
Orange Level
Joined: 16 Jun 2011
Location: New York
Points: 1613
|
Post Options
Thanks(0)
Quote Reply
Posted: 07 Jul 2022 at 3:41pm |
The pin that he got out, is anyone doubting that it is original design pin?
|
|
Gatz in NE
Orange Level
Joined: 11 Sep 2009
Location: Lincoln, NE
Points: 1029
|
Post Options
Thanks(0)
Quote Reply
Posted: 07 Jul 2022 at 1:16pm |
|
On closer look, 4” might not be sufficient length
Edited by Gatz in NE - 07 Jul 2022 at 1:17pm
|
|
INV3RSE
Bronze Level
Joined: 23 Apr 2022
Location: Cornwall
Points: 50
|
Post Options
Thanks(0)
Quote Reply
Posted: 07 Jul 2022 at 11:50am |
|
Thanks Gatz
|
|
Gatz in NE
Orange Level
Joined: 11 Sep 2009
Location: Lincoln, NE
Points: 1029
|
Post Options
Thanks(0)
Quote Reply
Posted: 07 Jul 2022 at 11:05am |
take a look at these......
|
|
INV3RSE
Bronze Level
Joined: 23 Apr 2022
Location: Cornwall
Points: 50
|
Post Options
Thanks(0)
Quote Reply
Posted: 07 Jul 2022 at 9:28am |
|
Cheers Steve, I certainly will be. Probably be my son who takes it apart next time!
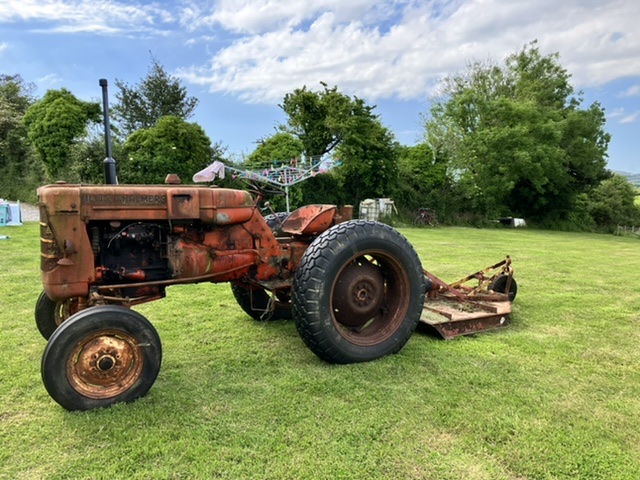
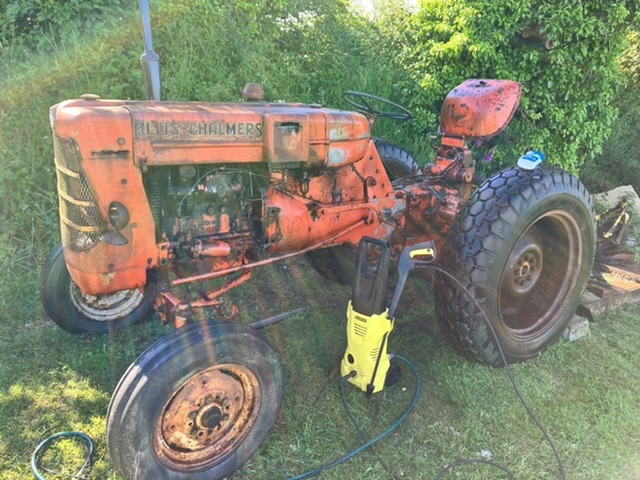
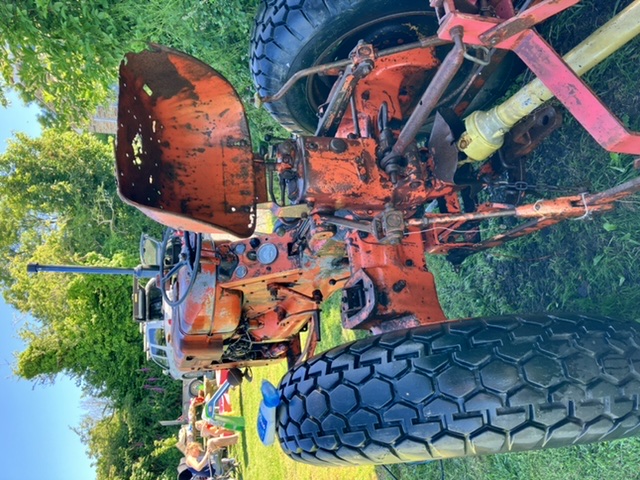
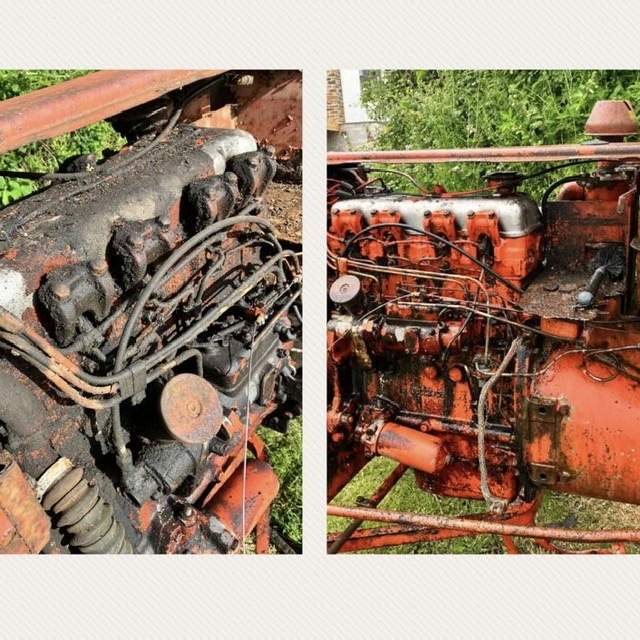
The tractor was my dads, he had it for as long as I can remember and before. It’s never seen a oil change and almost rusted to nothing. I spent some time changing fluids replacing blown hyd hoses it preparation to sell.
But…
Iv become hooked, managed to find all the replacement parts secondhand ( what a mission, I had no idea the parts were so rare )
Allis is putting up a fight every time I try and work on her but I know itl be worth it!
Once I get this last pin rest of the way out the replacement shoes will be sent off for reline. In theory after that all that‚Äôs left is sand and spray panels, add a engine stop pull knob and she‚Äôll be show ready! Oh and I need to make up a battery tray. All seems easy compared to these pins üòÇ üòÜ üòÇ
Thanks for the comments everyone, you ideas have all been helpful for me! üôè
|
|
steve(ill)
Orange Level Access

Joined: 11 Sep 2009
Location: illinois
Points: 77632
|
Post Options
Thanks(0)
Quote Reply
Posted: 07 Jul 2022 at 9:08am |
|
Reuben... do you guys use Anti Sieze or something similar on these parts ? Good wire brushing and liberal coat of ANTI and you should be good for another 60 years !
|
|
Like them all, but love the "B"s.
|
|
INV3RSE
Bronze Level
Joined: 23 Apr 2022
Location: Cornwall
Points: 50
|
Post Options
Thanks(0)
Quote Reply
Posted: 07 Jul 2022 at 8:56am |
|
|
|
INV3RSE
Bronze Level
Joined: 23 Apr 2022
Location: Cornwall
Points: 50
|
Post Options
Thanks(0)
Quote Reply
Posted: 07 Jul 2022 at 8:52am |
|
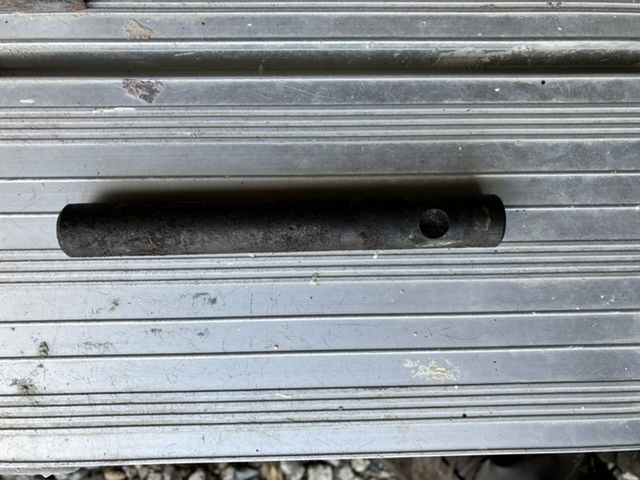
Pin 2 is is about 1/4 of the way out. It’s out the blind hole but is binding on the shoes despite feeling loose!
That’s enough tractor for one day, hopefully get it out tomorrow.
Iv attached a picture of my replacement pin, it‚Äôs second hand but not as worn as mine. Just to give you a idea what it‚Äôs supposed to look like üòä
|
|
BrianC
Orange Level
Joined: 16 Jun 2011
Location: New York
Points: 1613
|
Post Options
Thanks(0)
Quote Reply
Posted: 07 Jul 2022 at 7:37am |
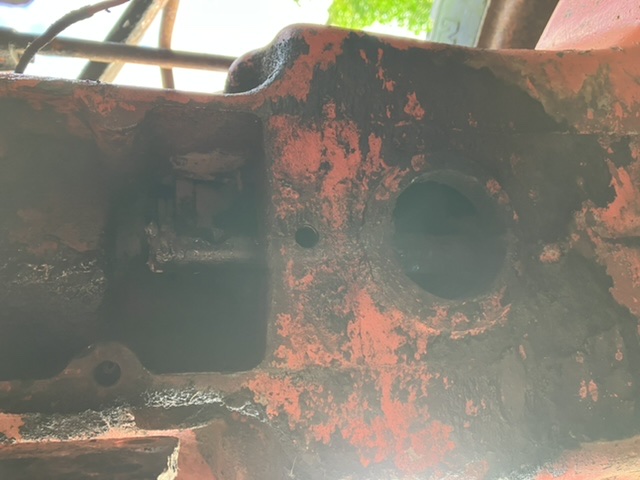
Wow that is a lot different from a WD45 pin. Also doesn't look like illustration in the acgo parts book.
The left side of the pin is in the blind end? I would say there is twice the engagement at that end vs. a WD45.
The brake shoes must be touching (bearing on) the two inner full size diameters areas?
Edited by BrianC - 07 Jul 2022 at 7:42am
|
|
INV3RSE
Bronze Level
Joined: 23 Apr 2022
Location: Cornwall
Points: 50
|
Post Options
Thanks(0)
Quote Reply
Posted: 07 Jul 2022 at 7:08am |
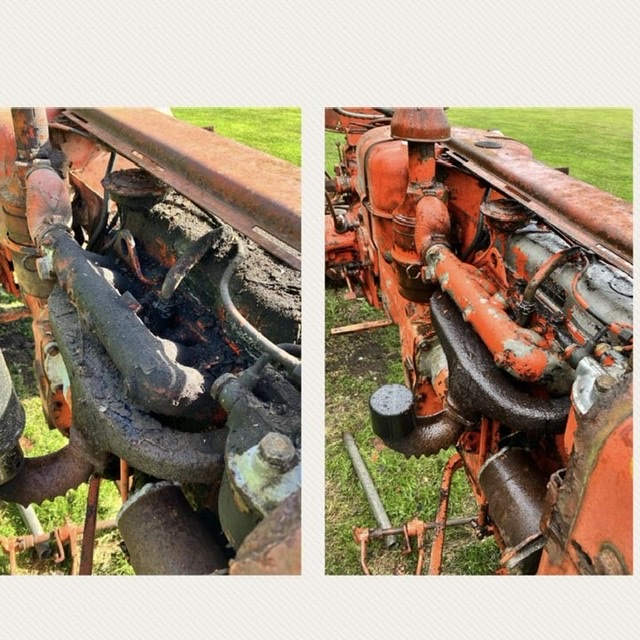
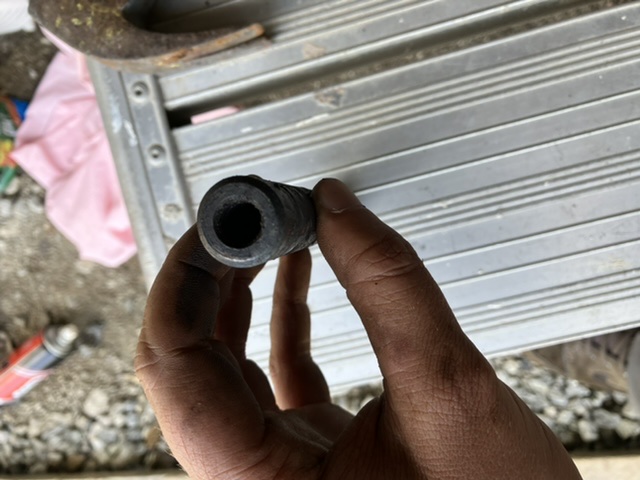
Woooooo! After getting the threaded rod stuck in the pin.. and trying to weld a nut on ( unsuccessfully). i focused my attention on the other side to have a brake from welding. And‚Ķ success! It came out with heat force and a SDS drill on hammer mode! Check out the pin üìç 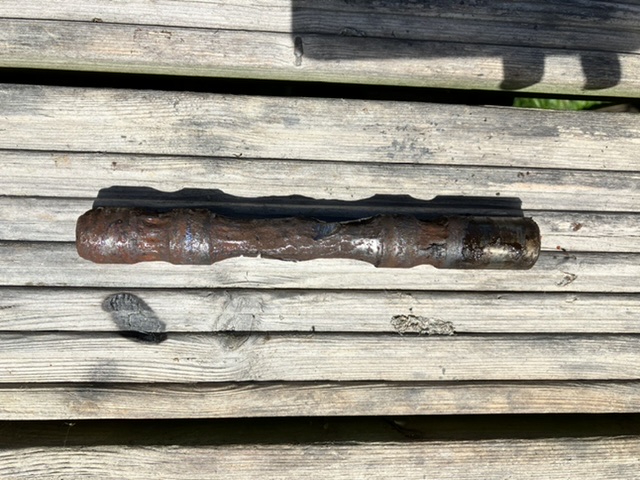 Back to the other side again now I guess! Wish me luck with pin 2 üòÇ
|
|
SteveM C/IL
Orange Level Access
Joined: 12 Sep 2009
Location: Shelbyville IL
Points: 7970
|
Post Options
Thanks(0)
Quote Reply
Posted: 07 Jul 2022 at 6:28am |
|
My experience with these pins has been that the trouble spot is on the outer end. Have not had a pin stuck in the inner hole. It's always the outer end.
|
|
Sanchez
Bronze Level
Joined: 01 Apr 2020
Location: Alberta
Points: 47
|
Post Options
Thanks(0)
Quote Reply
Posted: 06 Jul 2022 at 11:12pm |
|
While removing brake pins on my WD45 I found that the brake shoes will bind on the pin as the pins move outward. What worked best for me was once I had the pin out a bit a big pair of vice grips on the pin and rotate it back and fourth while prying out seemed to release the binding of the shoes. One other member said they had welded a piece of 1” flat bar stock to the pin and used it as wrench to rotate the pin back and fourth and work it out. It seemed like a good idea.
|
|
BrianC
Orange Level
Joined: 16 Jun 2011
Location: New York
Points: 1613
|
Post Options
Thanks(0)
Quote Reply
Posted: 06 Jul 2022 at 5:13pm |
Sorry about your covid, I know three people who died from it.
So it traveled out 20mm? I would say the end should be nearly out of the blind hole.
So I think cutting out a section(s) of pin and pushing remainder through would work.
About removing the pin from a WD45. He ended up cutting the pin in stages and driving it back in, so it dropped out that view port hole. Welding on a nut did not work.
If the end piece didn't want to just drop out easy , then weld a length of All-thread to it and a nut&washer could pull it through. Leave enough length to allow this.
So how to cut? Can a reciprocating saw (Saws-All) fit through that hole? In that video he used cutting torch. It's moving! You will get it.
There is a UK base Facebook page about the ED40.
I have been to Bristol, but not to far southwest of there. Countryside looks about the same?
|
|
steve(ill)
Orange Level Access
Joined: 11 Sep 2009
Location: illinois
Points: 77632
|
Post Options
Thanks(0)
Quote Reply
Posted: 06 Jul 2022 at 4:12pm |
|
instead of welding a nut on the end... you could stick a STUD in the hole and welded it... then you have a threaded rod to pull on with your puller and NUT.......... clean up the pin thru the BRAKE ACCESS HOLE . so there will be less resistance as that pulls into the outer PIN HOLE.
Edited by steve(ill) - 06 Jul 2022 at 4:14pm
|
|
Like them all, but love the "B"s.
|
|
INV3RSE
Bronze Level
Joined: 23 Apr 2022
Location: Cornwall
Points: 50
|
Post Options
Thanks(0)
Quote Reply
Posted: 06 Jul 2022 at 1:04pm |
|
Update!
I have 1 pin about 20mm out!
Is doesn‚Äôt seem like much but this is a huge achievement for the amount of effort I‚Äôm putting in üòÇ.
I got carried away and sheered off the threaded bar inside the pin but am ready with a nut and welder. I will hopefully be able to stick a weld through the nut on the the end of the sheered bar and wind it out. Then will repeat what I was doing before it sheered but with a little less muscle!
Now the pins moving I’m confident it will come free!
Anyway pin 1 of 2 is slowly being defeated.
üçª üçª
|
|
DiyDave
Orange Level Access

Joined: 11 Sep 2009
Location: Gambrills, MD
Points: 50489
|
Post Options
Thanks(0)
Quote Reply
Posted: 03 Jul 2022 at 5:16pm |
Next time you get it hot, lay a bees wax candle against the pin. The wax will wick its way in. 
|
|
Source: Babylon Bee. Sponsored by BRAWNDO, its got what you need!
|
|
steve(ill)
Orange Level Access
Joined: 11 Sep 2009
Location: illinois
Points: 77632
|
Post Options
Thanks(0)
Quote Reply
Posted: 03 Jul 2022 at 3:57pm |
|
When you get it HOT... SMACK it good with a hammer, even INWARD, then pull TIGHT and smake the puller... IMPACT always helps.
|
|
Like them all, but love the "B"s.
|
|
INV3RSE
Bronze Level
Joined: 23 Apr 2022
Location: Cornwall
Points: 50
|
Post Options
Thanks(0)
Quote Reply
Posted: 03 Jul 2022 at 1:30pm |
|
Im back!
Sorry guys been out with covid for a few days! Feel much better now.
I my mapp torch arrived a couple days ago. I had a go with it this afternoon and it does get the pin glowing! Yes!
I got the puller tight then heated it right up and tried to tighten the puller some more.. it was a bit looser the before heating so I’m presuming somethings happening! Hopefully! Il report back when Iv had a few more hot cold cycles.
Yes I’ll measure the pin for you tomorrow as well
Cheers
|
|
BrianC
Orange Level
Joined: 16 Jun 2011
Location: New York
Points: 1613
|
Post Options
Thanks(0)
Quote Reply
Posted: 29 Jun 2022 at 7:20pm |
I was wondering if you got a torch and tried the heat.
If you have the replacement pins I would like to know the diameter and length. What is the existing thread size of the internal hole?
|
|
INV3RSE
Bronze Level
Joined: 23 Apr 2022
Location: Cornwall
Points: 50
|
Post Options
Thanks(0)
Quote Reply
Posted: 29 Jun 2022 at 4:54pm |
|
I will certainly coat the new pins in anti seize! Judging by the state of the one’s coming out I doubt the new ones will need to come out for 50 - 60 years!
|
|
corbinstein
Orange Level
Joined: 31 Jul 2014
Location: Oklahoma
Points: 796
|
Post Options
Thanks(0)
Quote Reply
Posted: 29 Jun 2022 at 6:32am |
|
made my own stainless pins on the lathe.
|
|
WF owner
Orange Level
Joined: 12 May 2013
Location: Bombay NY
Points: 4380
|
Post Options
Thanks(0)
Quote Reply
Posted: 27 Jun 2022 at 7:35am |
Stainless pins would be nice, if they are available, but the originals have lasted over 50 years. Chances are good they will never be pulled again.
I always put a little anti-seize (the messiest thing available) on the new pins, just in case I have to take them apart again.
|
|
corbinstein
Orange Level
Joined: 31 Jul 2014
Location: Oklahoma
Points: 796
|
Post Options
Thanks(0)
Quote Reply
Posted: 27 Jun 2022 at 7:26am |
What I would do, is clean that thing up in the center as best I could, weld a puller on the outside, heat up the area around the pin, seal up the inspection hole, and dump in some penetrating oil. let it sit for a day and start banging on the puller.
Go back with a stainless pin.
|
|
steve(ill)
Orange Level Access
Joined: 11 Sep 2009
Location: illinois
Points: 77632
|
Post Options
Thanks(0)
Quote Reply
Posted: 26 Jun 2022 at 9:23am |
|
If you cut out the center section, you have to be able to get to the BACKS SIDE to get the piece in the blind hole.... as said before, sometimes you can DRILL a hole from the back to get access, if the hole was not thru.......... On the B/C tractors, the hole was sometimes BLIND.. sometimes you could see where the drill point started to come thru.. I have drilled out several so i could IMPACT HAMMER from the backside.
|
|
Like them all, but love the "B"s.
|
|