| Author |
 Topic Search Topic Search  Topic Options Topic Options
|
miketothesteve 
Bronze Level

Joined: 27 Sep 2019
Location: Nova Scotia
Points: 41
|
 Post Options Post Options
") Thanks(0) Thanks(0)
 Quote Quote  Reply Reply
 Posted: 29 Sep 2019 at 5:41am Posted: 29 Sep 2019 at 5:41am |
 DaveKamp wrote: DaveKamp wrote:
miketothesteve wrote:
Also, as an update, I was there last night to move it out. The left rear wheel basically disintegrated when it moved. ...
...This will make getting it on a trailer much harder... |
Actually, if the tire disintegrated, that makes life easier... you don't hafta fight them off. Use a sawzall with a metal-cutting blade to cut the bead enough to remove whatever's left, and it'll roll nicely on just the rim. 
Back a trailer up to the REAR of the tractor. Place a 4x4 on the ground behind the tractor's 'bad' wheel, and atop the trailer deck. Place a ramp behind the OTHER tire. use a come-along to winch it up onto the trailer. The 4x4 will serve as a 'rail' for the tire-less wheel... it'll climb on fine.
|
Wasn't just the tire, it's tire and rim. Once it's jacked up, I can probably pull both off with my hands. Think I might try strapping a log or 6x6 to the empty hub. Cut angles on the ends, and use it like a ski.
|
 |
|
Sponsored Links
|
|
|
mdm1
Orange Level


Joined: 12 Sep 2009
Location: Onalaska, WI
Points: 2592
|
Post Options
Thanks(0)
Quote Reply
Posted: 30 Sep 2019 at 7:47am |
|
Hey post some pics of how you end up doing it!
|
|
Everything is impossible until someone does it! WD45-trip loader 1947 c w/woods belly mower, 1939 B, #3 sickle mower 1944 B, 2 1948 G's. Misc other equipment that my wife calls JUNK!
|
|
miketothesteve
Bronze Level
Joined: 27 Sep 2019
Location: Nova Scotia
Points: 41
|
Post Options
Thanks(0)
Quote Reply
Posted: 30 Sep 2019 at 6:37pm |
mdm1 wrote:
Hey post some pics of how you end up doing it! |
Will do. I have a bunch more pictures, but I need to be at a pc to upload to reformat them. Size is too large to upload directly :S
|
|
miketothesteve
Bronze Level
Joined: 27 Sep 2019
Location: Nova Scotia
Points: 41
|
Post Options
Thanks(0)
Quote Reply
Posted: 01 Oct 2019 at 6:30am |
Another update now that I'm at a computer. I was with the AC every day from Fri thru Sunday.
Friday we moved it, which was interesting on its own. We started with pulling it out the barn with the excavator (which was a massive machine). As soon as it started to roll, it was obvious the wheel was not going to make it. We got it out of the barn just enough to wrap chains around the front and rear, loop them around the teeth of the excavator, and lifted the ol' AC off the ground and moved it out of the way.
Saturday; couldn't stop thinking about what the tractor # might be, and tire and wheel sizes were because I forgot to check on Friday. So off the boy and I went Saturday morning, 30 min. one-way, to spend 10 minutes there getting that info, just because I wanted to.
Sunday; I went back on my own with some action items. Figure out the state of the left tire/rim, remove if possible. Bring some boards to slide this sucker on when loading day comes, and make sure the exhaust was covered. The exhaust has one of those flappers, but not sure it would prevent water getting in if it were windy. I also removed whatever the bucket/trailer was on the back-end. Had no plans on keeping that. So now the pictures..
Jacked up and tire removed Rotten Wheel (I also figured out the puzzle of removing those chains). There was only half a rim left once removed. And holes in the inner tube. So the chains came off, and the tube emptied (liquid filled). To make moving it easier. The bolts actually came off fairly easily. Not sure the wedges (I think that's what they are called) are still usable.
Bolt and Wedge:
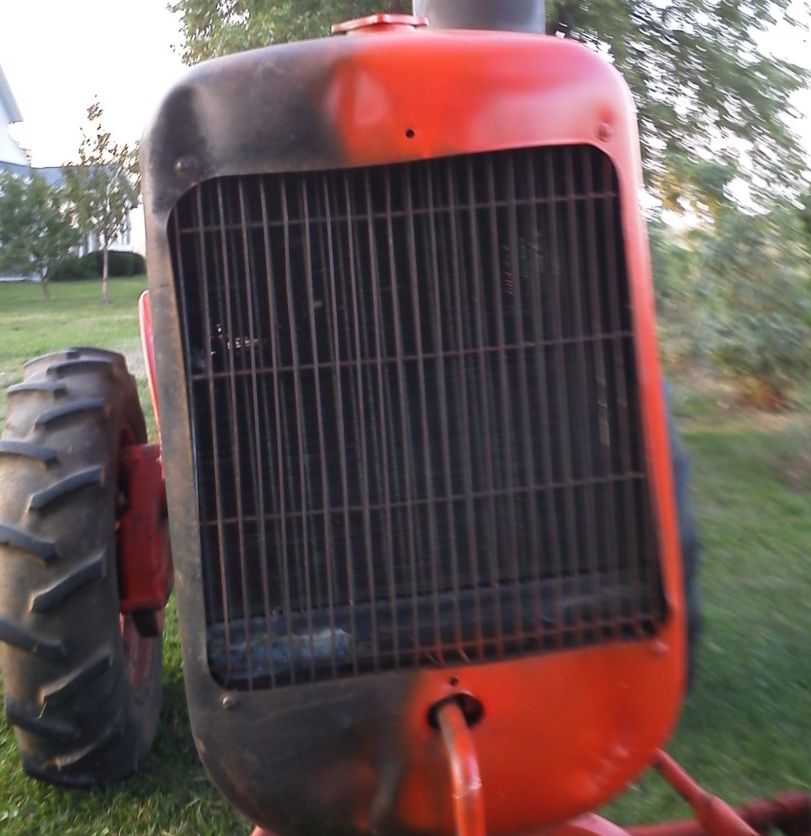
More daylight pictures of AC:
Current plan is to try and get it home this weekend. Few questions I have: Any idea what the rim size would be, 8 or 10"? I tried measuring the right, and I think I'm measuring 10" from the outside of the rim, one side to the other.
I'm not seeing anywhere upfront to crank start, I also don't have a crank. So using that as an option to test if it'll turn over is a no go. Should I just top the oil up to test if it'll turn? Should I put a drop or two of oil in the cylinders (remove plugs)?
What do you think is the better option for moving; original plan of "ski" on the left hub, or remove the right wheel and move it on the hubs (resting on 2x8's)?
What's the preferred method of photo uploads, like I've been doing with links, or having actual images?
|
|
mdm1
Orange Level
Joined: 12 Sep 2009
Location: Onalaska, WI
Points: 2592
|
Post Options
Thanks(0)
Quote Reply
Posted: 01 Oct 2019 at 7:18am |
|
The wedges as you called them are eccentrics. They hold the rim on the hub. There is a definite way to reinstall them. If you are going to use them make sure you get the proper rim. I like the looks of the tractor. Should be fun to have. Can you pick it up with the excavator and put it on a trailer? One thing someone should have told you at the beginning is to take sack fill it with money and throw it at the tractor. (That's what most of us do when you start a project) Have fun with it!!
|
|
Everything is impossible until someone does it! WD45-trip loader 1947 c w/woods belly mower, 1939 B, #3 sickle mower 1944 B, 2 1948 G's. Misc other equipment that my wife calls JUNK!
|
|
mdm1
Orange Level
Joined: 12 Sep 2009
Location: Onalaska, WI
Points: 2592
|
Post Options
Thanks(0)
Quote Reply
Posted: 01 Oct 2019 at 7:23am |
 Here is a pic of the tractor
|
|
Everything is impossible until someone does it! WD45-trip loader 1947 c w/woods belly mower, 1939 B, #3 sickle mower 1944 B, 2 1948 G's. Misc other equipment that my wife calls JUNK!
|
|
miketothesteve
Bronze Level
Joined: 27 Sep 2019
Location: Nova Scotia
Points: 41
|
Post Options
Thanks(0)
Quote Reply
Posted: 01 Oct 2019 at 7:33am |
mdm1 wrote:
The wedges as you called them are eccentrics. They hold the rim on the hub. There is a definite way to reinstall them. If you are going to use them make sure you get the proper rim. I like the looks of the tractor. Should be fun to have. Can you pick it up with the excavator and put it on a trailer? One thing someone should have told you at the beginning is to take sack fill it with money and throw it at the tractor. (That's what most of us do when you start a project) Have fun with it!! |
By pick up, do you mean manually lift it? Haven't tried, not sure how heavy it would be? Does it look like something two people could lift if removed?
|
|
miketothesteve
Bronze Level
Joined: 27 Sep 2019
Location: Nova Scotia
Points: 41
|
Post Options
Thanks(0)
Quote Reply
Posted: 01 Oct 2019 at 7:40am |
post removed.
Edited by miketothesteve - 01 Oct 2019 at 9:05am
|
|
mdm1
Orange Level
Joined: 12 Sep 2009
Location: Onalaska, WI
Points: 2592
|
Post Options
Thanks(0)
Quote Reply
Posted: 01 Oct 2019 at 8:04am |
|
No I meant can you pick it up with the excavator. Will the excavator lift up the entire tractor? I had a hard time getting rid of 2 rims with tires that held air. $100.00 for the pair.
|
|
Everything is impossible until someone does it! WD45-trip loader 1947 c w/woods belly mower, 1939 B, #3 sickle mower 1944 B, 2 1948 G's. Misc other equipment that my wife calls JUNK!
|
|
miketothesteve
Bronze Level
Joined: 27 Sep 2019
Location: Nova Scotia
Points: 41
|
Post Options
Thanks(0)
Quote Reply
Posted: 01 Oct 2019 at 8:12am |
mdm1 wrote:
No I meant can you pick it up with the excavator. Will the excavator lift up the entire tractor? I had a hard time getting rid of 2 rims with tires that held air. $100.00 for the pair. |
Excavator would've been able to lift it and put it on a trailer, if I could have gotten a trailer there, while the excavators were there. They are no longer there.
The trailer I have lined up does not have a winch, and the owner seems a little leery of attempting this with one wheel and a come-along.
|
|
miketothesteve
Bronze Level
Joined: 27 Sep 2019
Location: Nova Scotia
Points: 41
|
Post Options
Thanks(0)
Quote Reply
Posted: 01 Oct 2019 at 8:16am |
So my options now are to find a rim, which i can't seem to find locally. Cheapest online is roughly $200. And probably a 2 week wait time. Then my buddy and I could trailer it home.
Or I can pay a towing/hauling company $200 to move it...
|
|
Wayne180d
Orange Level
Joined: 08 Dec 2015
Location: Gilman, Il
Points: 5923
|
Post Options
Thanks(0)
Quote Reply
Posted: 01 Oct 2019 at 9:29am |
|
Not to be smart but do you know someone who has a B or an extra tire and rim you could borrow to just get it home. I have brought some home that look worse than that and used a 2 x 12 to lay the wheel center on and slid it right on the trailer with no problem. That tractor is very restorable
|
|
miketothesteve
Bronze Level
Joined: 27 Sep 2019
Location: Nova Scotia
Points: 41
|
Post Options
Thanks(0)
Quote Reply
Posted: 01 Oct 2019 at 9:33am |
Wayne180d wrote:
Not to be smart but do you know someone who has a B or an extra tire and rim you could borrow to just get it home. I have brought some home that look worse than that and used a 2 x 12 to lay the wheel center on and slid it right on the trailer with no problem. That tractor is very restorable |
But you are being smart, literally. I welcome any and all idea's here. But I did already try this. No such luck.
|
|
Gordy
Orange Level Access

Joined: 12 Sep 2009
Location: SWMI
Points: 2533
|
Post Options
Thanks(0)
Quote Reply
Posted: 01 Oct 2019 at 11:20am |
I'm not seeing anywhere upfront to crank start, I also don't have a
crank. So using that as an option to test if it'll turn over is a no go.
Should I just top the oil up to test if it'll turn? Should I put a drop
or two of oil in the cylinders (remove plugs)?
Looks like that tractor has pump driven from front of engine which gives it live full time
Hydraulics very good but prevents hand cranking.
|
|
“If you can't explain it simply, you don't understand it well enough”
|
|
HoughMade
Orange Level

Joined: 22 Sep 2017
Location: Valparaiso, IN
Points: 691
|
Post Options
Thanks(0)
Quote Reply
Posted: 01 Oct 2019 at 11:27am |
|
Top up the oil, sure, put some oil or WD40 through the spark plug holes and use the electric starter to crank it over, and if no battery, put in neutral, pull the PTO lever up and put a pipe wrench on the PTO, turning it clockwise. This is just to see if the engine is free. Make sure the mag is on kill...you don't want it starting like that.
|
|
1951 B
|
|
miketothesteve
Bronze Level
Joined: 27 Sep 2019
Location: Nova Scotia
Points: 41
|
Post Options
Thanks(0)
Quote Reply
Posted: 01 Oct 2019 at 11:45am |
HoughMade wrote:
Top up the oil, sure, put some oil or WD40 through the spark plug holes and use the electric starter to crank it over, and if no battery, put in neutral, pull the PTO lever up and put a pipe wrench on the PTO, turning it clockwise. This is just to see if the engine is free. Make sure the mag is on kill...you don't want it starting like that. |
I've got two switches on the little box up front, left and right. Do you know which is the kill for the magneto? I suspect the right. Do you know which direction the switch needs to be flipped?
|
|
miketothesteve
Bronze Level
Joined: 27 Sep 2019
Location: Nova Scotia
Points: 41
|
Post Options
Thanks(0)
Quote Reply
Posted: 01 Oct 2019 at 11:48am |
miketothesteve wrote:
Wayne180d wrote:
Not to be smart but do you know someone who has a B or an extra tire and rim you could borrow to just get it home. I have brought some home that look worse than that and used a 2 x 12 to lay the wheel center on and slid it right on the trailer with no problem. That tractor is very restorable |
But you are being smart, literally. I welcome any and all idea's here. But I did already try this. No such luck. |
Just had another idea; I've got a 24 tall x 16 wide rim with a larger tire on it. Bolts up similar to a car tire. There's enough room in the empty cavity of the rim to put it over the hub, and strap the rim to the hub. The hub would like just end up scrapping the inside of the rim, but it would roll.
|
|
mdm1
Orange Level
Joined: 12 Sep 2009
Location: Onalaska, WI
Points: 2592
|
Post Options
Thanks(0)
Quote Reply
Posted: 01 Oct 2019 at 11:49am |
|
follow the wire back from the magneto to the switches. Someone will chime in on how to test a switch or do a google search.
|
|
Everything is impossible until someone does it! WD45-trip loader 1947 c w/woods belly mower, 1939 B, #3 sickle mower 1944 B, 2 1948 G's. Misc other equipment that my wife calls JUNK!
|
|
HoughMade
Orange Level
Joined: 22 Sep 2017
Location: Valparaiso, IN
Points: 691
|
Post Options
Thanks(0)
Quote Reply
Posted: 01 Oct 2019 at 12:00pm |
|
Unlike a battery coil ignition, a magneto is killed when the switch is closed providing a stright path to ground. Ot just put a jumper on the lug coming out the side of the mag to a good ground...or heck, just leave the plugs out. That's probably the easiest just to see if the engine isn't stuck.
|
|
1951 B
|
|
Alberta Phil
Orange Level

Joined: 13 Sep 2009
Location: Alberta, Canada
Points: 3647
|
Post Options
Thanks(0)
Quote Reply
Posted: 01 Oct 2019 at 6:47pm |
|
Seeing you have it blocked up, remove the spark plugs, squirt a little oil in the cylinders, put in third gear and see if you can roll the engine over by turning the hub of the jacked up wheel. It should roll over if it isn't stuck.
|
|
SteveM C/IL
Orange Level Access
Joined: 12 Sep 2009
Location: Shelbyville IL
Points: 7968
|
Post Options
Thanks(0)
Quote Reply
Posted: 02 Oct 2019 at 8:54pm |
|
It is possible that the points in the mag may need cleaned to make it spark after setting that long.Just don't think it's junk if it don't spark
|
|
CTuckerNWIL
Orange Level

Joined: 11 Sep 2009
Location: NW Illinois
Points: 22807
|
Post Options
Thanks(0)
Quote Reply
Posted: 03 Oct 2019 at 6:55am |
miketothesteve wrote:
I've got two switches on the little box up front, left and right. Do you know which is the kill for the magneto? I suspect the right. Do you know which direction the switch needs to be flipped? |
There is NO WAY anyone can tell which switch is which, unless they were the one that wired the tractor up. Remove the kill switch wire from the magnet and it doesn't matter. Without KNOWING how things are wired, I wouldn't crank the engine over with anything hooked to the charging system, battery or ignition.
|
|
|
|
miketothesteve
Bronze Level
Joined: 27 Sep 2019
Location: Nova Scotia
Points: 41
|
Post Options
Thanks(0)
Quote Reply
Posted: 06 Oct 2019 at 5:13am |
This is how we got it moved. That was a car hauler with a hydraulic winch on the front. We expected it to slide on top of the 12ft 6x6, but instead it dragged the whole thing with it. Once it was on the trailer, we jacked it up, and swapped 12ft of 6x6 for 1ft.
Reversed the process to remove, except we tied the tractor to a tree, and drove the trailer out from under it.
|
|
mdm1
Orange Level
Joined: 12 Sep 2009
Location: Onalaska, WI
Points: 2592
|
Post Options
Thanks(0)
Quote Reply
Posted: 06 Oct 2019 at 7:11am |
|
Looks like you got it done. I would love to have that loader. Keep us posted.
|
|
Everything is impossible until someone does it! WD45-trip loader 1947 c w/woods belly mower, 1939 B, #3 sickle mower 1944 B, 2 1948 G's. Misc other equipment that my wife calls JUNK!
|
|
miketothesteve
Bronze Level
Joined: 27 Sep 2019
Location: Nova Scotia
Points: 41
|
Post Options
Thanks(0)
Quote Reply
Posted: 06 Oct 2019 at 3:59pm |
|
I can't believe how much frame is attached just for the bucket. It makes sense just never realized it till I took more time to look at it.
Need to source some oil filter and get to work on cleaning out fuel lines and components.
Confirmed today that it turns over with a battery.
|
|
miketothesteve
Bronze Level
Joined: 27 Sep 2019
Location: Nova Scotia
Points: 41
|
Post Options
Thanks(0)
Quote Reply
Posted: 08 Oct 2019 at 5:20am |
So the choke in the carb doesn't want to move, so I'm guessing the carb is gummed up or something.
I've never worked on a carb before, but I've seen the occasional video (Mustie1 on YouTube is a favorite of mine).
What's the best way to approach cleaning this? I do not have a parts cleaner bucket to submerge it in, or an ultrasonic cleaner. I've had a mechanic tell me that a carb cleaner could do more harm than good?
Also had someone at carquest suggest submerging in Seafoam. Hot Seafoam if I could manage it.
|
|
miketothesteve
Bronze Level
Joined: 27 Sep 2019
Location: Nova Scotia
Points: 41
|
Post Options
Thanks(0)
Quote Reply
Posted: 09 Oct 2019 at 5:36am |
Removed the carb last night and have it soaking in a bath of seafoam.
Drained the old fuel mostly. There was a lot more than I thought, as I tried to siphon it on the weekend and couldn't get anything. With the line disconnected from the carb, I drained it from there, and had about 5L of dark brown fuel come out.
|
|
Rhoadesy_65
Bronze Level

Joined: 28 Jul 2019
Location: Versailles, OH
Points: 147
|
Post Options
Thanks(0)
Quote Reply
Posted: 09 Oct 2019 at 5:44am |
|
when i did the farmall h carb a few years ago i used crc braklene, a wire brush, and a screwdriver/pick to clean the carb. I recommend alteast getting a gasket kit for the carb. For the H i bought a complete rebuild kit and worked slow and careful. I had never done work on a carb but the tractor ran when done.
|
|
Farmin' with 1981 7010 PD, Great Grandpas 1947 Farmall H, JD 7000 planter, JD model B drill, NH 316 Baler, NH 1411 Discbine ,JD 100 8 Shank Chisel. Darke County OH
|
|
DaveKamp
Orange Level Access
Joined: 12 Apr 2010
Location: LeClaire, Ia
Points: 5637
|
Post Options
Thanks(0)
Quote Reply
Posted: 09 Oct 2019 at 7:22am |
Soaking the whole thing as one piece in SeaFoam might be enough to make it operable, but the best way to do it, is to carefully disassemble, clean, and then reassemble with a carb-kit.
The most difficult part is usually getting some of the screws (like the throttle and choke plate screws) and mebbie a jet or two, and the emulsion tube out... patience and gentle care is necessary.
My guess is that your toolbox doesn't include a bead-blasting cabinet, but a carbeurator-cleaner 'dip tank' is a gallon-paint-can size thing that most auto stores will have on their shelves. They include a little basket that fits inside. Once the carbeurator is disassembled, you can place the parts in the basket, lower them in for a good soaking.
Once out, I spray out the orfices with aerosol carb-choke cleaner, then I follow up with air hose to clear it all off.
once all cleaned, I give it a really close inspection.
Most of the time, the float bowl will still be useable. A good test is to pour some Acetone into a cup, and submerge the float in an inverted position. If you see air bubbles coming up, there's a leak that requires the float must either be fixed, or replaced. If no bubbles, and it's not crushed or mangled, it's good. Typically they get crushed either by mishandling, or if the fuel system gets water into the bottom of the bowl and it freezes, crushing the float. Oftentimes, if I find a crushed float, I inspect the carb casting, as it's likely there's a crack or two in there somewhere.
I use a 'master' kit... not just the jets, but also the throttle
plate seals (usually felt, with a little metal press-in retainer).
Also note that SOME carbeurators have a catch screen integrated into the fuel inlet adapter fitting... if you see one, look closely at it... and spray it out good if there IS one there.
Most of the time, if a guy does the disassembly with care, photographs everything before, and reassembles it in reverse of assembly, it turns out fine...
but remember- when you're doing all this carb work, there's a tank, sediment bowl, and fuel line feeding it. It pays great dividends to remove the lines and sediment bowl, clean out the tank, disassemble and clean, then reassemble and then replace the cork gasket in the sediment bowl.
You have a dandy machine there, Mike- get it started and running, and get a pair of good wheels on the back, and it'll do tasks that keep you young for decades.
|
|
Ten Amendments, Ten Commandments, and one Golden Rule solve most every problem. Citrus hand-cleaner with Pumice does the rest.
|
|
miketothesteve
Bronze Level
Joined: 27 Sep 2019
Location: Nova Scotia
Points: 41
|
Post Options
Thanks(0)
Quote Reply
Posted: 09 Oct 2019 at 8:03am |
This is the approach I want to follow, as close as is feasible. Oddly enough, I'm having a hard time finding those part cleaner can's around here. Closest I've found has been a gallon jug of the cleaner (no strainer), @ $70.
I just had my generator into a "Classics Rebuild.." shop for a warranty issue. I asked them some similar questions about cleaning the carb.. and in short, they have an ultrasonic cleaner I can use. So I'll likely give that a try as well.
DaveKamp wrote:
Soaking the whole thing as one piece in SeaFoam might be enough to make it operable, but the best way to do it, is to carefully disassemble, clean, and then reassemble with a carb-kit.
The most difficult part is usually getting some of the screws (like the throttle and choke plate screws) and mebbie a jet or two, and the emulsion tube out... patience and gentle care is necessary.
My guess is that your toolbox doesn't include a bead-blasting cabinet, but a carbeurator-cleaner 'dip tank' is a gallon-paint-can size thing that most auto stores will have on their shelves. They include a little basket that fits inside. Once the carbeurator is disassembled, you can place the parts in the basket, lower them in for a good soaking.
Once out, I spray out the orfices with aerosol carb-choke cleaner, then I follow up with air hose to clear it all off.
once all cleaned, I give it a really close inspection.
Most of the time, the float bowl will still be useable. A good test is to pour some Acetone into a cup, and submerge the float in an inverted position. If you see air bubbles coming up, there's a leak that requires the float must either be fixed, or replaced. If no bubbles, and it's not crushed or mangled, it's good. Typically they get crushed either by mishandling, or if the fuel system gets water into the bottom of the bowl and it freezes, crushing the float. Oftentimes, if I find a crushed float, I inspect the carb casting, as it's likely there's a crack or two in there somewhere.
I use a 'master' kit... not just the jets, but also the throttle
plate seals (usually felt, with a little metal press-in retainer).
Also note that SOME carbeurators have a catch screen integrated into the fuel inlet adapter fitting... if you see one, look closely at it... and spray it out good if there IS one there.
Most of the time, if a guy does the disassembly with care, photographs everything before, and reassembles it in reverse of assembly, it turns out fine...
but remember- when you're doing all this carb work, there's a tank, sediment bowl, and fuel line feeding it. It pays great dividends to remove the lines and sediment bowl, clean out the tank, disassemble and clean, then reassemble and then replace the cork gasket in the sediment bowl.
You have a dandy machine there, Mike- get it started and running, and get a pair of good wheels on the back, and it'll do tasks that keep you young for decades.
|
|
|


