| Author |
 Topic Search Topic Search  Topic Options Topic Options
|
CA13414 
Bronze Level

Joined: 25 Feb 2024
Location: Nebraska
Points: 70
|
 Post Options Post Options
") Thanks(0) Thanks(0)
 Quote Quote  Reply Reply
 Posted: 03 May 2024 at 7:23pm Posted: 03 May 2024 at 7:23pm |
Agree and thank you!
I do have new bushings! Planning to put them in this weekend and finish up the front. Will still need to sandblast the front rims with the back rims and mount new tires.
Getting closer!!
< id="idg-io-safe-browsing-enabled" ="" oninit="true">
Edited by CA13414 - 03 May 2024 at 7:24pm
|
|
Helping the aged survive and thrive! 1953 CA
|
 |
|
Sponsored Links
|
|
|
CA13414
Bronze Level
Joined: 25 Feb 2024
Location: Nebraska
Points: 70
|
Post Options
Thanks(0)
Quote Reply
Posted: 05 May 2024 at 6:44pm |
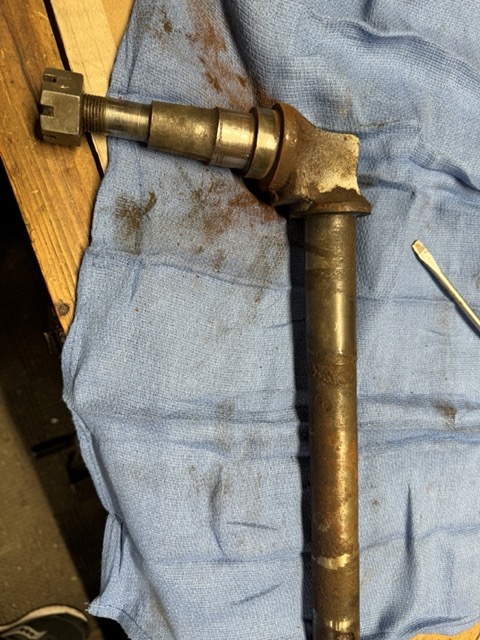
We worked on the front axil bearing and hubs. Cleaned them up. Wire brush, drill with a wire burr, and emory cloth.
Then pressed on the front wheel seals. Used the front wheel hub flipped over and with a rubber mallet "pressed" them....... or more appropriately hammered them on! The bearing cones were in good condition thus, we repacked them using a bearing repacking cup, cone and grease gun.
WOW the cup and cone was a ton easier and faster than doing it by hand!!!
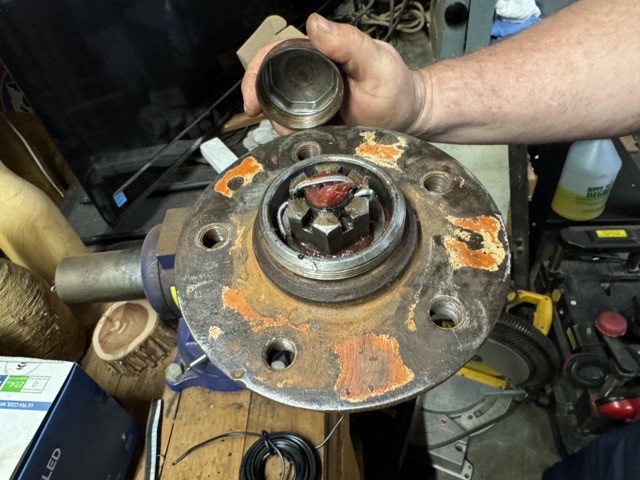
Here it is reassembled with a new cotter pin!!
The assembled hubs, ready to put into the front end.
We did have enough time to press in three of the spindle bushings. However, we didn't really press them in (just like the front wheel seals) but used a rubber mallet and a piece of hard wood to set them in the front end spindle. Was a bit of a pain to get the job done without damaging the bushings, but we succeeded.
This is where I miss all the tools on the farm. Today I wish I had the hydraulic press!!!
Finally, started painting parts that we have stripped and cleaned. This is going to look awesome!!
< id="idg-io-safe-browsing-enabled" ="" oninit="true">
Edited by CA13414 - 05 May 2024 at 9:21pm
|
|
Helping the aged survive and thrive! 1953 CA
|
|
IBWD MIke
Orange Level


Joined: 08 Apr 2012
Location: Newton Ia.
Points: 3490
|
Post Options
Thanks(0)
Quote Reply
Posted: 06 May 2024 at 7:12am |
That's progress for sure.
I use a 1" piece of all thread to pull those bushings in with, works pretty good.
|
|
CA13414
Bronze Level
Joined: 25 Feb 2024
Location: Nebraska
Points: 70
|
Post Options
Thanks(0)
Quote Reply
Posted: 06 May 2024 at 8:00am |
 IBWD MIke wrote: IBWD MIke wrote:
That's progress for sure.
I use a 1" piece of all thread to pull those bushings in with, works pretty good.
|
That is awesome!! Will definitely do that for the last one vs. taking it off the front end.
Thank you!
< id="idg-io-safe-browsing-enabled" ="" oninit="true">
Edited by CA13414 - 06 May 2024 at 8:01am
|
|
Helping the aged survive and thrive! 1953 CA
|
|
IBWD MIke
Orange Level
Joined: 08 Apr 2012
Location: Newton Ia.
Points: 3490
|
Post Options
Thanks(0)
Quote Reply
Posted: 07 May 2024 at 9:13am |
|
You're welcome. I've changed more of those bushings than it seems like I ever should have had to! If I have a spindle out for whatever reason, new bushings go in. I kind of have a thing about sloppy steering.
|
|
CA13414
Bronze Level
Joined: 25 Feb 2024
Location: Nebraska
Points: 70
|
Post Options
Thanks(0)
Quote Reply
Posted: 07 May 2024 at 8:54pm |
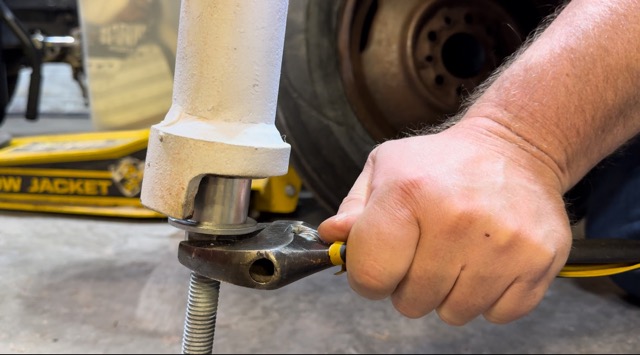
I could not find a 1" all-thread, but did find a 5/8"! It really worked awesome to set the spindle bushings.
The washer did spin a bit and flared the bushing. Nothing that a dill burr and emory cloth won't quickly fix. Awesome job!!! Very much appreciate the suggestion, IBWD Mike!!!
< id="idg-io-safe-browsing-enabled" ="" oninit="true">
Edited by CA13414 - 07 May 2024 at 8:58pm
|
|
Helping the aged survive and thrive! 1953 CA
|
|
IBWD MIke
Orange Level
Joined: 08 Apr 2012
Location: Newton Ia.
Points: 3490
|
Post Options
Thanks(0)
Quote Reply
Posted: 08 May 2024 at 8:36am |
|
Glad it worked for you! I think I have used two big flat washers on both ends. 1" are pretty heavy stuff and didn't deform.
|
|
CA13414
Bronze Level
Joined: 25 Feb 2024
Location: Nebraska
Points: 70
|
Post Options
Thanks(0)
Quote Reply
Posted: 11 May 2024 at 5:27pm |
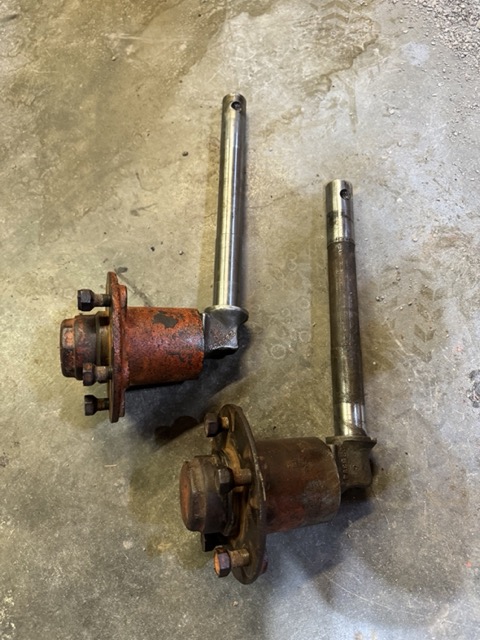
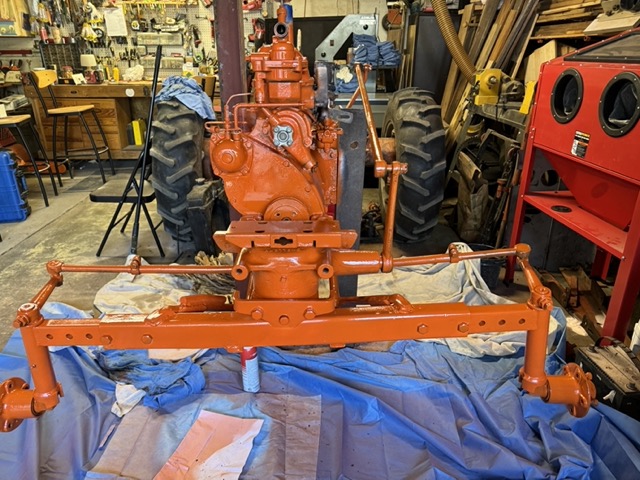
Well had Friday off from work and got a ton done. Finished assembling the front end by installing the spindles and attaching the tie rods. Had a few burrs, wear edges and rust on the spindles that had sat for 40 years in the trees. Took them off and finished up with some emory cloth. When installed, were awesome, tight and rotated super easy. Thanks to everyone for their help!! Also the first coat of paint!
< id="idg-io-safe-browsing-enabled" ="" oninit="true">
Edited by CA13414 - 11 May 2024 at 5:29pm
|
|
Helping the aged survive and thrive! 1953 CA
|
|
CA13414
Bronze Level
Joined: 25 Feb 2024
Location: Nebraska
Points: 70
|
Post Options
Thanks(0)
Quote Reply
Posted: 11 May 2024 at 5:37pm |
Today we spent some time cleaning up other parts. Again love that brake clearner. While I was working on the CA, we also installed new bearings and hubs on the trailer that went out.
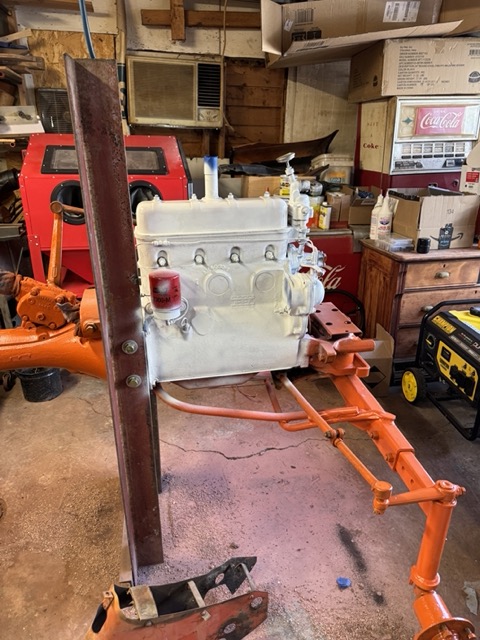
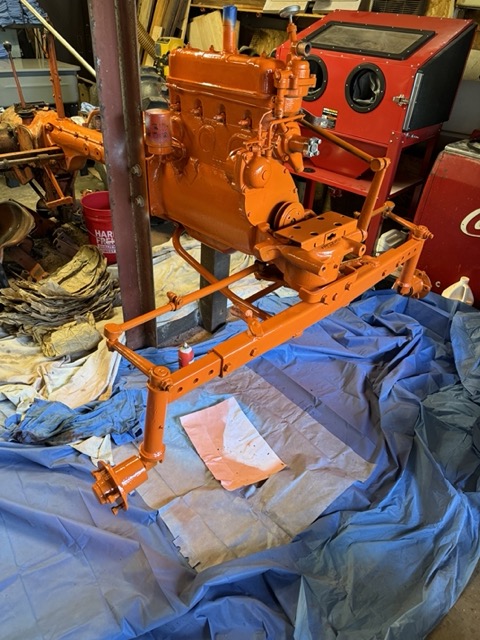
Primed the engine first.
Next is black manifold paint. Ceramic and "resistant" to 2000 degrees. We will see, but I am skeptical!!
Cleaned up the rims with a wire brush and drill. There were a few bent parts of the rims that we straightened and cleaned up. Then primed them and finally at the end of the day gave them the first coat of gloss black. New tires go on this week.
You can also see the air filter that has its first coat of gloss black.
Then after more clean up..... and when the primer was dry, we painted more.
It looks awesome!!! 
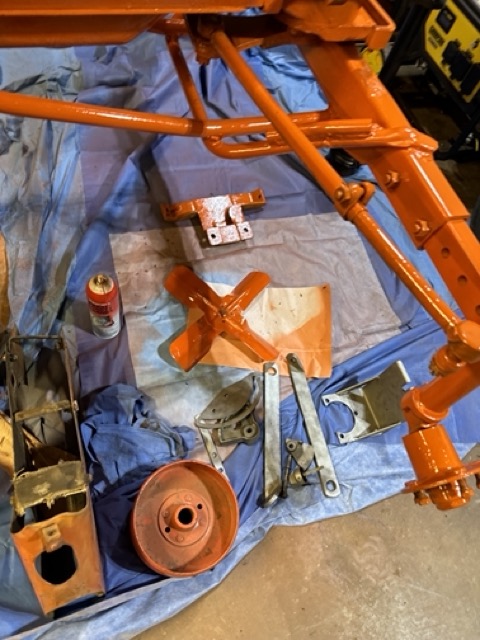
And some miscellaneous pieces painted and to be painted.
< id="idg-io-safe-browsing-enabled" ="" oninit="true">
Edited by CA13414 - 11 May 2024 at 8:25pm
|
|
Helping the aged survive and thrive! 1953 CA
|
|
CA13414
Bronze Level
Joined: 25 Feb 2024
Location: Nebraska
Points: 70
|
Post Options
Thanks(0)
Quote Reply
Posted: 11 May 2024 at 7:52pm |
As an aside, the Northern Lights were spectacular here in Nebraska early this AM. We were up at 0200 this morning and took these pictures.
< id="idg-io-safe-browsing-enabled" ="" oninit="true">
Edited by CA13414 - 11 May 2024 at 8:08pm
|
|
Helping the aged survive and thrive! 1953 CA
|
|
CA13414
Bronze Level
Joined: 25 Feb 2024
Location: Nebraska
Points: 70
|
Post Options
Thanks(0)
Quote Reply
Posted: 12 May 2024 at 2:56pm |
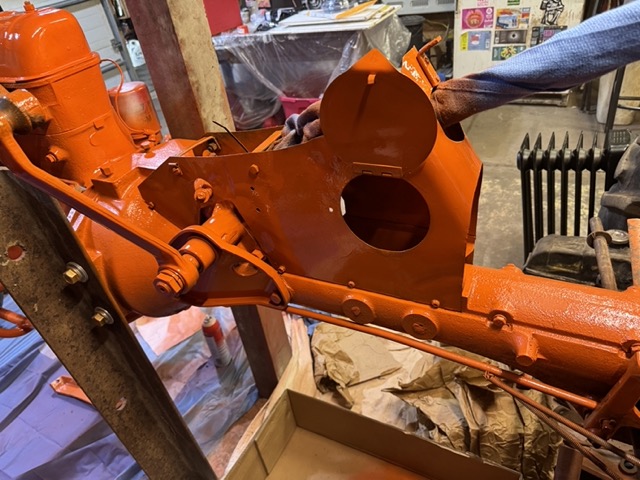
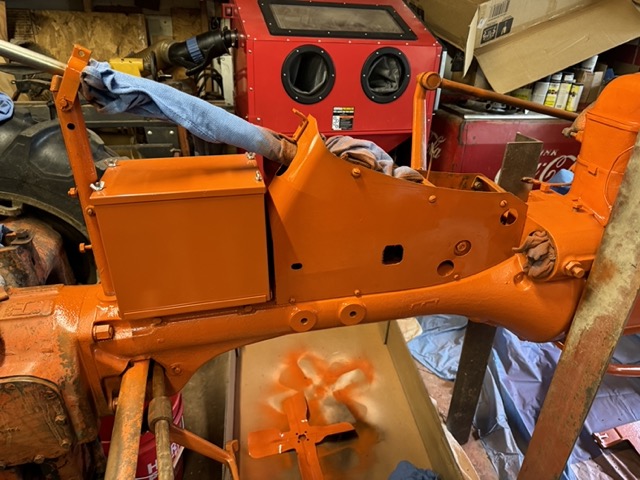
As a general rule, we are straightening everything but not making it perfect to show the years. We plan to finish the fenders, tank, engine cover and radiator cover/grill as a professional finish with a clear coat.
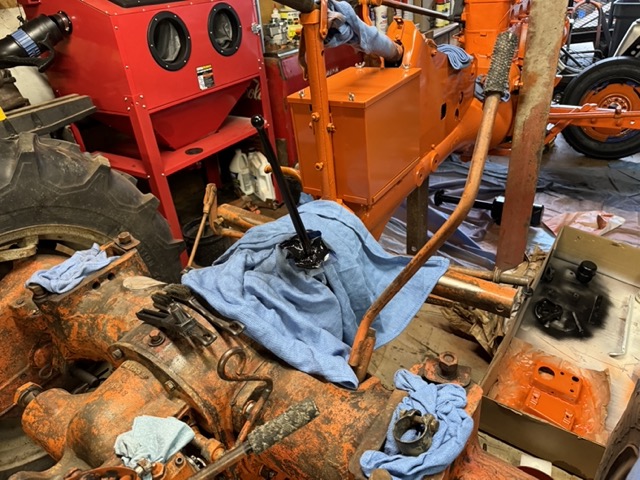
Today, we straightened out the "tool box", took off the old hinge to the tool box cover and ground down the prior spot welds. Then wire welded the new cover on and ground down the wire weld.
Also cut a hole for an hour meter just because...... I am curious how much we run the CA in its new life!
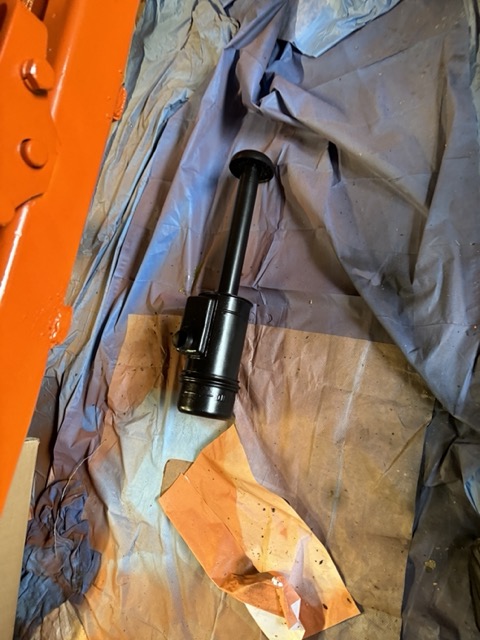
After sliding it over the steering shaft and onto the torque tube we did have to use a tap to clean out the threads.
Then hit it with a coat of paint.

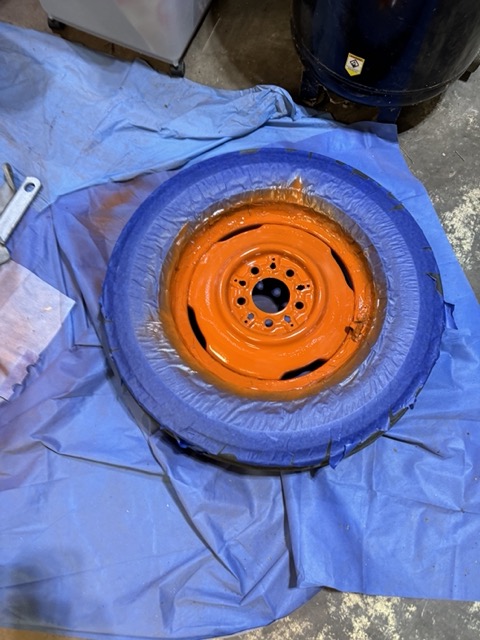
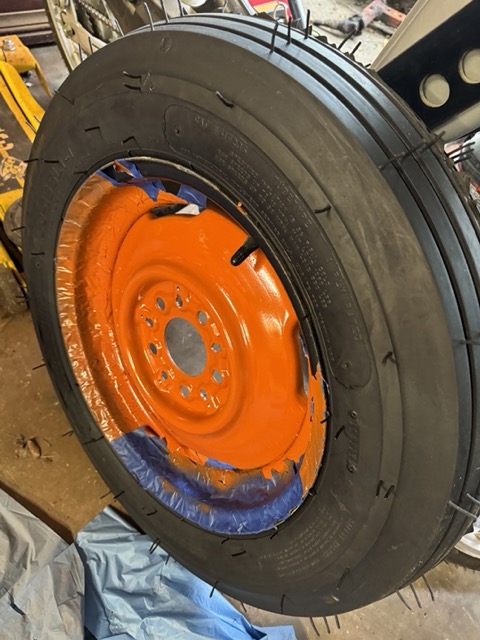
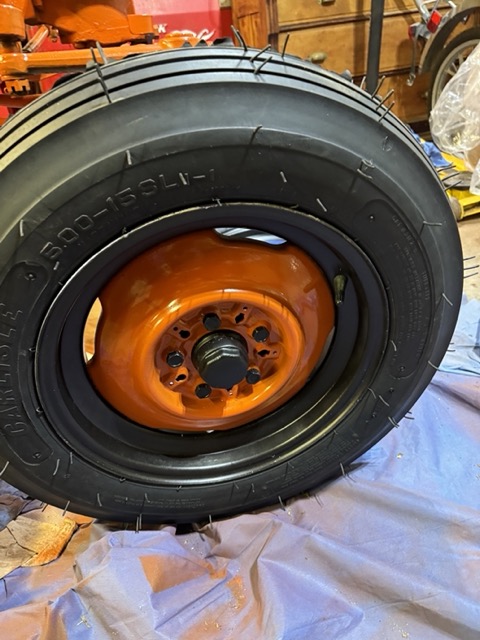
Then hit the tire center with paint. The outer rim will be black, then the middle orange and the wheel hub and hub bolts black. My bother masked this off and put on the first coat. His idea.... I think it will look awesome.
Plan the new battery box this week with new tires on the front rims. Did find a battery that will fit in the battery box. Ended up being a DieHard, which I thought was fitting!
Finally bought a Delco-Remy 63 amp alternator. Partly straightened the old generator bracket..... need some heat to finish. Then chop saw some iron and weld the support for the alternator mount on the underside, and finally drill new mounting holes.
Next time on the farm need to snag an alternator off one of the old cars so I can get the core charge refunded!
< id="idg-io-safe-browsing-enabled" ="" oninit="true">
Edited by CA13414 - 12 May 2024 at 9:01pm
|
|
Helping the aged survive and thrive! 1953 CA
|
|
IBWD MIke
Orange Level
Joined: 08 Apr 2012
Location: Newton Ia.
Points: 3490
|
Post Options
Thanks(0)
Quote Reply
Posted: 13 May 2024 at 5:19am |
|
It's coming right along.
|
|
CA13414
Bronze Level
Joined: 25 Feb 2024
Location: Nebraska
Points: 70
|
Post Options
Thanks(0)
Quote Reply
Posted: 13 May 2024 at 6:02pm |
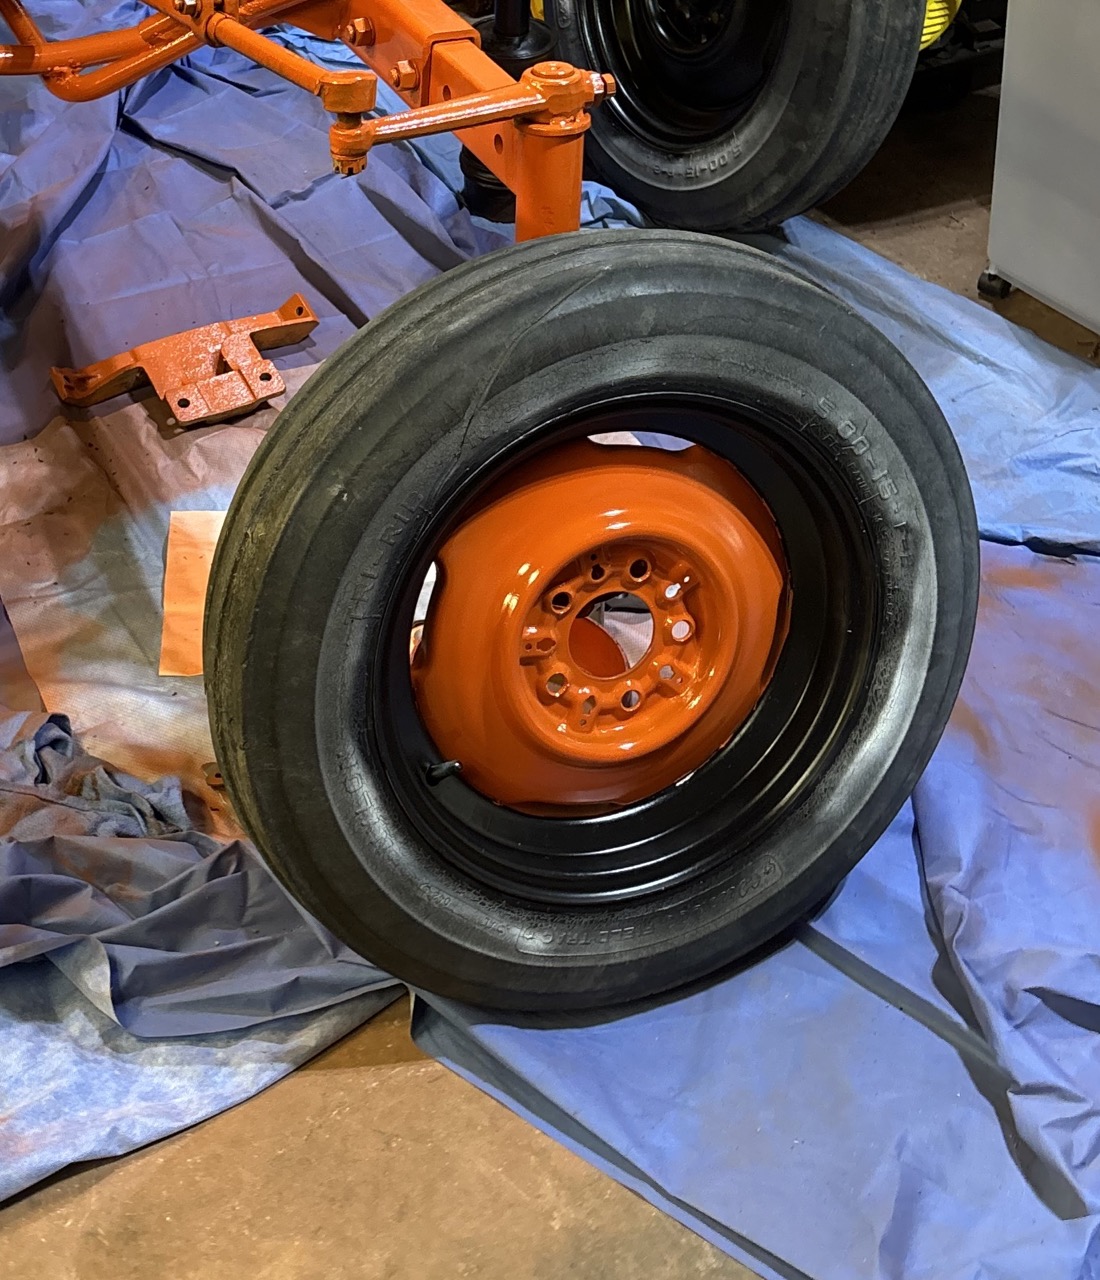
My brother has been painting....... ready for the new tire!! Excited to see how it looks with the black hub!
< id="idg-io-safe-browsing-enabled" ="" oninit="true">
Edited by CA13414 - 13 May 2024 at 7:16pm
|
|
Helping the aged survive and thrive! 1953 CA
|
|
CA13414
Bronze Level
Joined: 25 Feb 2024
Location: Nebraska
Points: 70
|
Post Options
Thanks(0)
Quote Reply
Posted: 14 May 2024 at 7:36pm |
Attached the battery box tonight. Also painted the first coat of black on the front wheel hubs.
< id="idg-io-safe-browsing-enabled" ="" oninit="true">
Edited by CA13414 - 14 May 2024 at 7:36pm
|
|
Helping the aged survive and thrive! 1953 CA
|
|
CA13414
Bronze Level
Joined: 25 Feb 2024
Location: Nebraska
Points: 70
|
Post Options
Thanks(0)
Quote Reply
Posted: 17 May 2024 at 6:03pm |
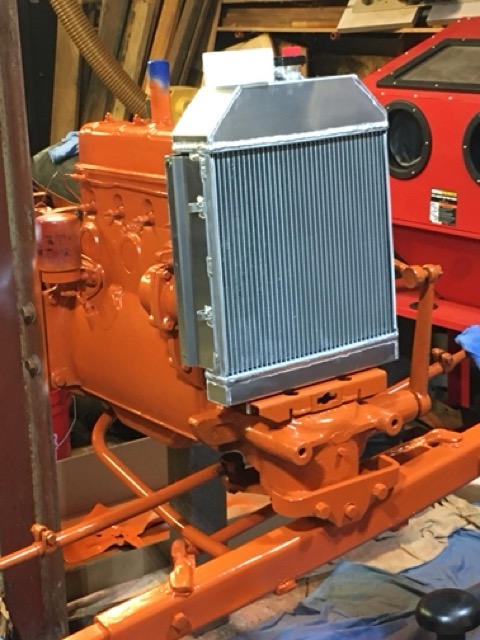
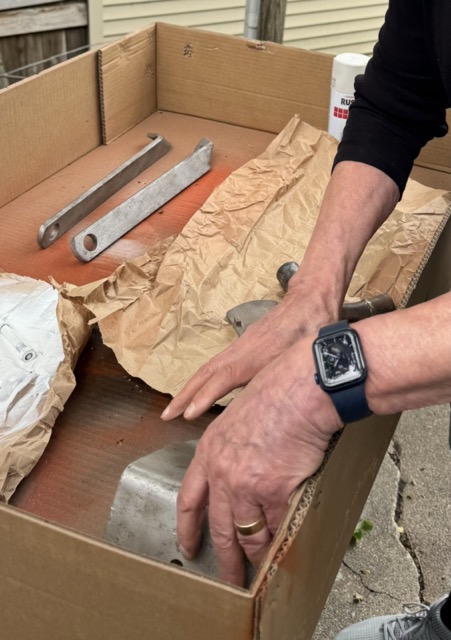
Yes, I was planning to fix the radiator myself, but realized the leak was from one of the inner rows and the top of the radiator, thus realized not as simple as hoped. After getting an estimate for fixing the leak, $$$, decided to buy a new one for $179.
Here is a three row aluminum that fits perfectly...... Just need to make sure the hood and grill fit without issue!! < id="idg-io-safe-browsing-enabled" ="" oninit="true">
Edited by CA13414 - 19 May 2024 at 6:58am
|
|
Helping the aged survive and thrive! 1953 CA
|
|
CA13414
Bronze Level
Joined: 25 Feb 2024
Location: Nebraska
Points: 70
|
Post Options
Thanks(0)
Quote Reply
Posted: 19 May 2024 at 10:45pm |
Was a busy weekend with the fam...... but did spend a few hours with my father-in-law cleaning parts and spraying them with primer! Was great to spend the time together rebuilding a bit of history!! Sorry not a lot of pictures, but some to show progress
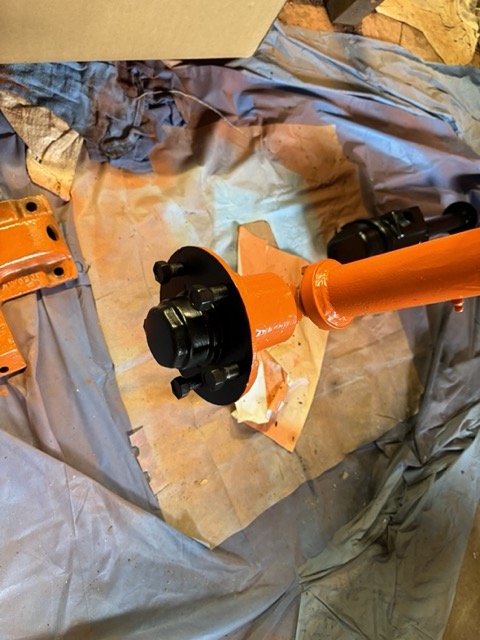
Here we cleaned the lower radiator pipe with the drill and wire brush. Excited to connect them to the new radiator. After cleaning with a wire brush, we primed them!!
Also cleaned up a number of small items and primed them including the stearing tube and PTO guard.. more pictures later to show these items.....
< id="idg-io-safe-browsing-enabled" ="" oninit="true">
Edited by CA13414 - 19 May 2024 at 11:04pm
|
|
Helping the aged survive and thrive! 1953 CA
|
|
CA13414
Bronze Level
Joined: 25 Feb 2024
Location: Nebraska
Points: 70
|
Post Options
Thanks(0)
Quote Reply
Posted: 21 May 2024 at 8:22pm |
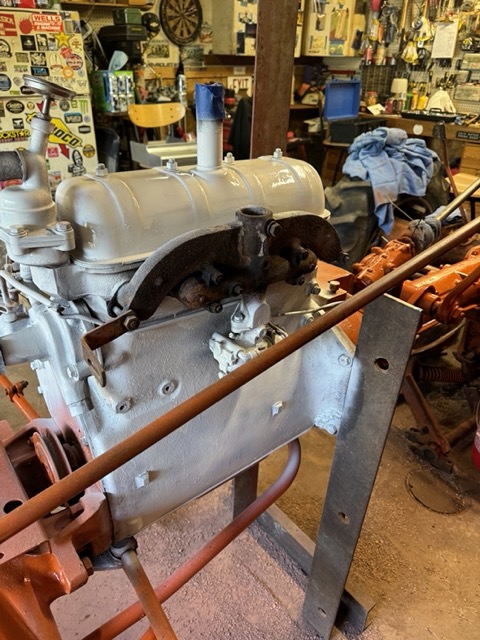
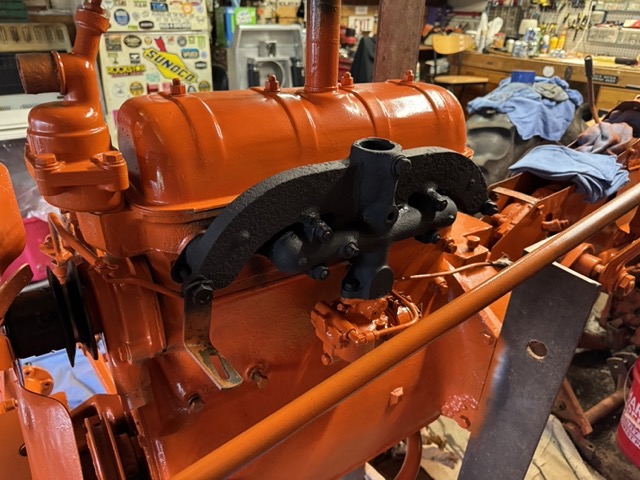
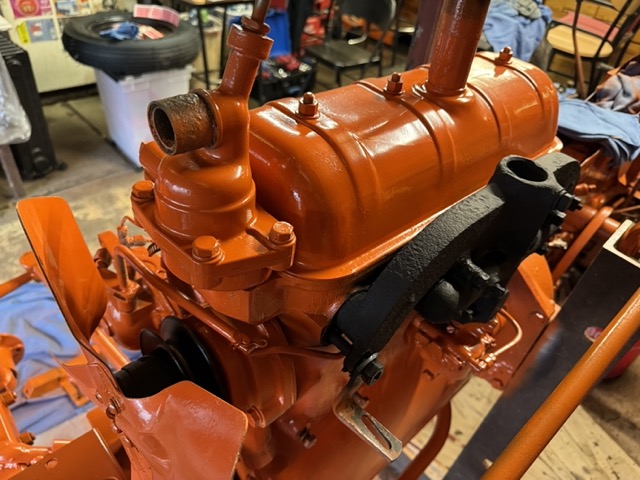
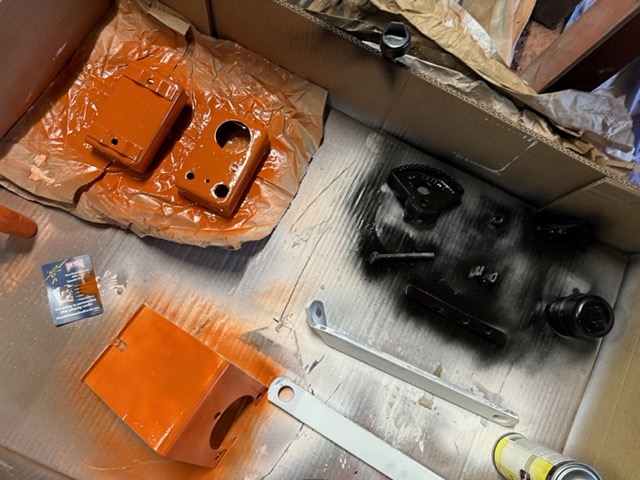
Spent part of the day putting things together and painting a few items. Seems like it was a day to work on the parts that we want to paint black!
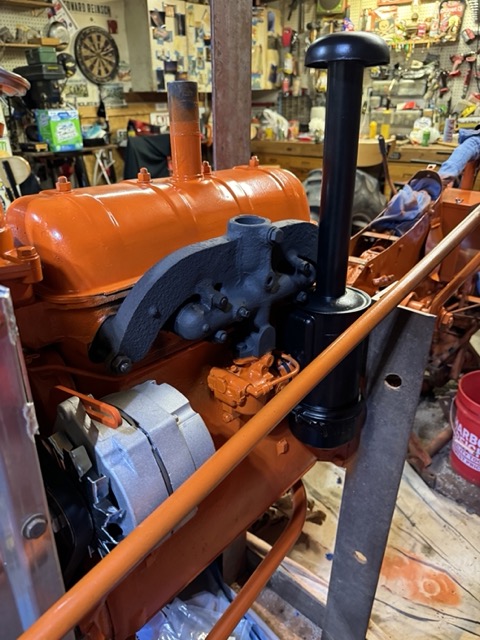
Here is the fan installed with the fan pulley painted black. Also you can see the manifold that we painted black with 2,000 degree ceramic paint. Always a bit skeptical of heat resistant paint and if it really is heat resistant..... we will see.
Another view of the manifold and assembled fan and pulley. Excited to install the new aluminum radiator this weekend.
Final touch up of the air filter. Plan to install this Friday when the new air cleaner hose arrives.
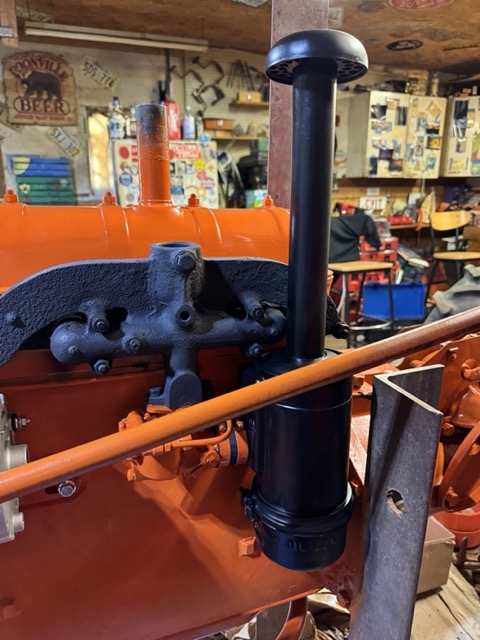
Painted the gear shift black.. Next is to paint the clutch handle black.
... and the steering tube black as well! It will need a bit of sanding and a final coat before we re-install the steering tube and steering wheel.
Final coat of paint to the front wheel hubs.
Just need the final touches on the front wheels and tires and then install. More to come on that.....
Finally a few random parts we painted!
Next is the alternator when it arrives and then the wiring. Just remembered I want to paint the starter black and need to re-install the magneto.
< id="idg-io-safe-browsing-enabled" ="" oninit="true">
Edited by CA13414 - 21 May 2024 at 10:16pm
|
|
Helping the aged survive and thrive! 1953 CA
|
|
CA13414
Bronze Level
Joined: 25 Feb 2024
Location: Nebraska
Points: 70
|
Post Options
Thanks(0)
Quote Reply
Posted: 21 May 2024 at 8:43pm |
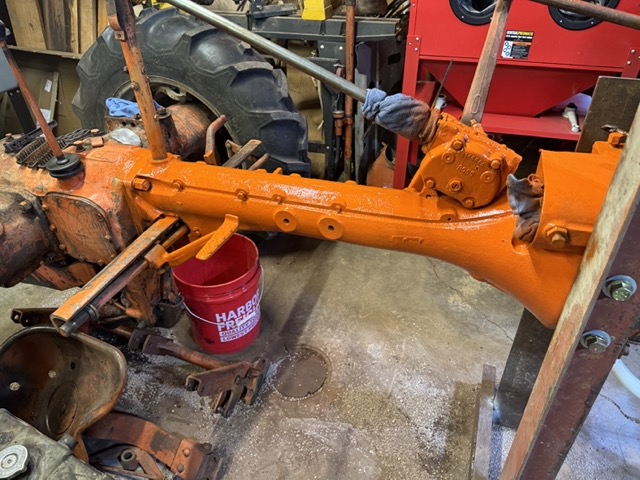
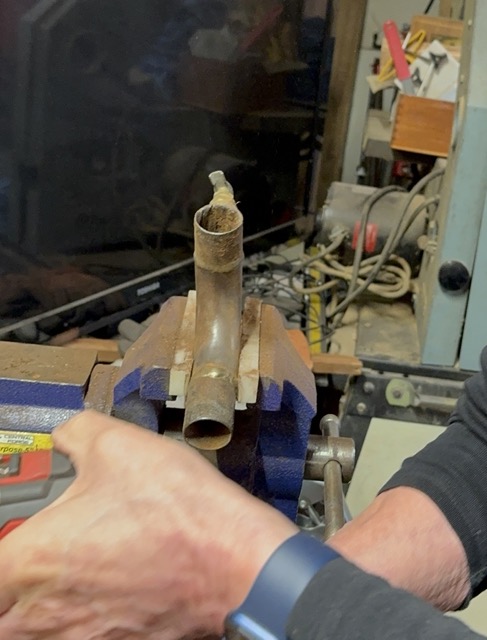
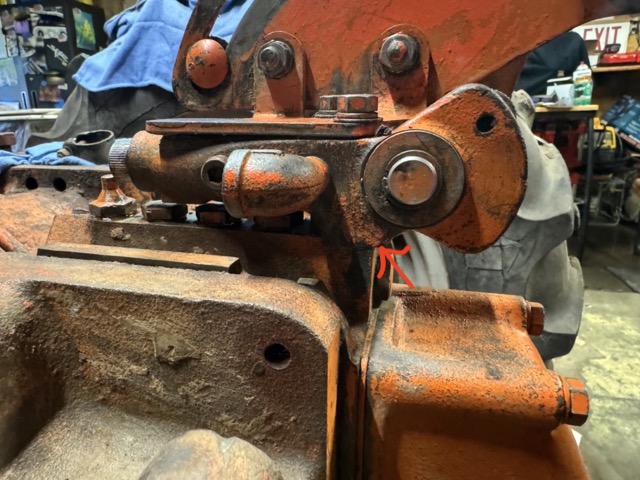
Started to break down the hydraulic and quickly realized where the leaks were coming from.
First there was no gasket between the upper controller lever and the pump at the arrow below. No doubt this was leaking when the hydraulics were under pressure with a load on the cylinders. Thus, I cleaned up both surfaces which had pieces of old gasket and made a new gasket with a ball-ping hammer.
Hahaha, in looking at these pictures above, I see yet more 70 year old hard dirt/grime/grease on the differential..... just more to clean before we paint!!
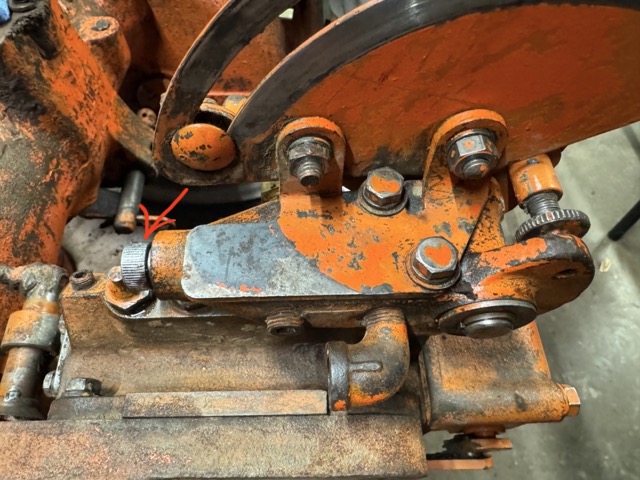
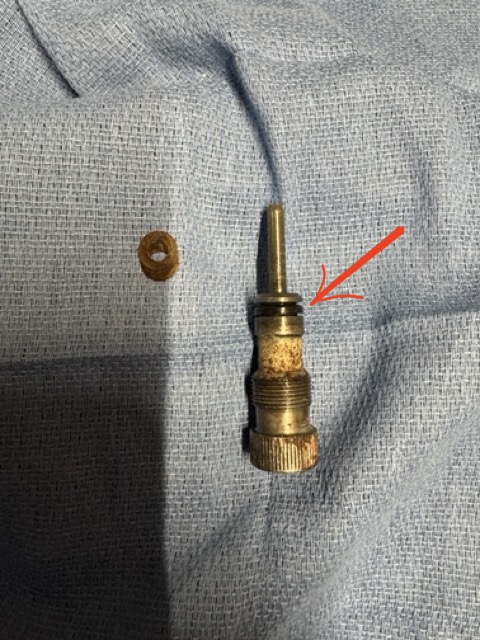
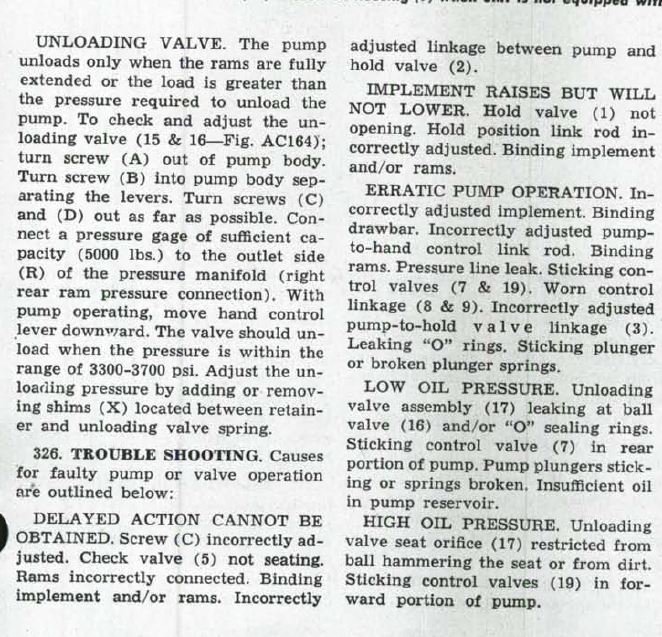
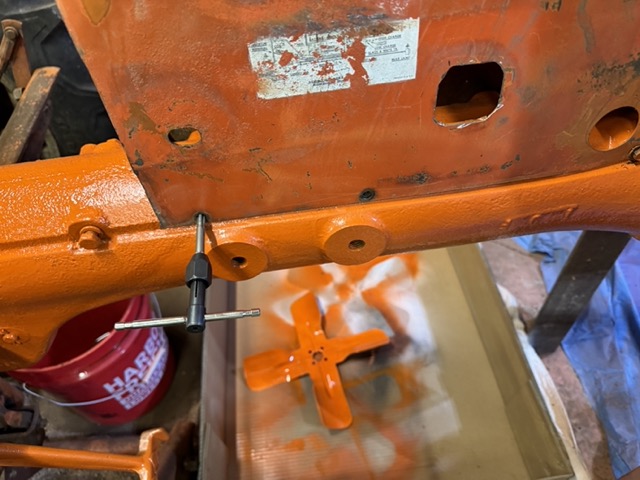
Another area there is a leak... what is referred to as "screw C" in the service manual (red arrow).
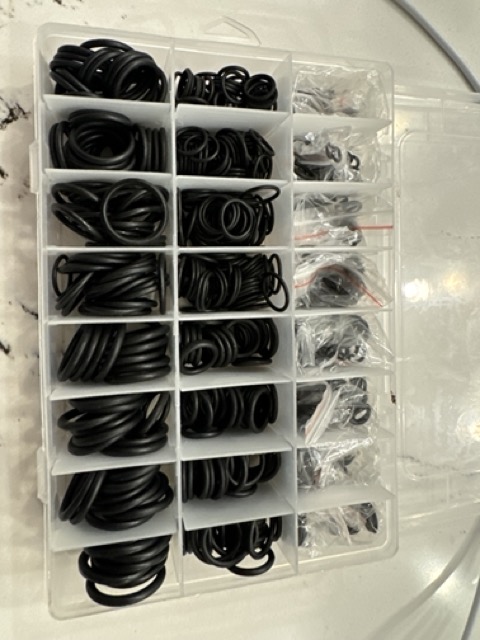
Not sure what that is at this point, but when removed you can see the "O"-ring is hard as a rock and flat. Will need to find one that will replace this "O"-ring (see red arrow below).
Anyone with insight on what "Screw C" does would be awesome?
I have "O"-rings and hopefully something will fit and take care of the leak.
< id="idg-io-safe-browsing-enabled" ="" oninit="true">
Edited by CA13414 - 21 May 2024 at 10:22pm
|
|
Helping the aged survive and thrive! 1953 CA
|
|
IBWD MIke
Orange Level
Joined: 08 Apr 2012
Location: Newton Ia.
Points: 3490
|
Post Options
Thanks(0)
Quote Reply
Posted: 22 May 2024 at 10:11am |
As to the high heat paint; I've used grill paint some, think it's supposed to be good to 1400 degrees. It does hold up better than regular paint but still burns off manifolds. Recently picked up a can of VHT header paint, haven't tried it yet. Says good to 2000 degrees and has a good reputation, we'll see.
You're doing a great job on this and documenting it well. Keep up the good work!
|
|
WF owner
Orange Level
Joined: 12 May 2013
Location: Bombay NY
Points: 4433
|
Post Options
Thanks(0)
Quote Reply
Posted: 22 May 2024 at 8:06pm |
|
When I was a kid, riding on the fender of Dad's WD45, I have seen him (many times) get off and light a cigarette off the exhaust manifold. I expect the CA manifold reached similar temperatures. I doubt that any paint is going to hold up to those temperatures, very long.
|
|
CA13414
Bronze Level
Joined: 25 Feb 2024
Location: Nebraska
Points: 70
|
Post Options
Thanks(0)
Quote Reply
Posted: 22 May 2024 at 9:11pm |
IBWD MIke wrote:
As to the high heat paint; I've used grill paint some, think it's supposed to be good to 1400 degrees. It does hold up better than regular paint but still burns off manifolds. Recently picked up a can of VHT header paint, haven't tried it yet. Says good to 2000 degrees and has a good reputation, we'll see.
You're doing a great job on this and documenting it well. Keep up the good work!
|
Thank you! It has been fun for us to hang and work on this. We often joke to our better-halves that we are off to "hammer on the tractor" or we are "tractoring" today!!
< id="idg-io-safe-browsing-enabled" ="" oninit="true">
Edited by CA13414 - 22 May 2024 at 9:12pm
|
|
Helping the aged survive and thrive! 1953 CA
|
|
CA13414
Bronze Level
Joined: 25 Feb 2024
Location: Nebraska
Points: 70
|
Post Options
Thanks(0)
Quote Reply
Posted: 22 May 2024 at 9:15pm |
WF owner wrote:
When I was a kid, riding on the fender of Dad's WD45, I have seen him (many times) get off and light a cigarette off the exhaust manifold. I expect the CA manifold reached similar temperatures. I doubt that any paint is going to hold up to those temperatures, very long. |
I would agree, maybe this "Ceramic Black" will actually hold a color. Ceramic does appear to work on the space-shuttle...... so maybe we can light a cigarette and not burn off the black paint. I hope to get it running again soon once I rewire and connect everything.
I'm thinking I try lighting one up!!
< id="idg-io-safe-browsing-enabled" ="" oninit="true">
Edited by CA13414 - 22 May 2024 at 9:17pm
|
|
Helping the aged survive and thrive! 1953 CA
|
|
steve(ill)
Orange Level Access

Joined: 11 Sep 2009
Location: illinois
Points: 78202
|
Post Options
Thanks(0)
Quote Reply
Posted: 22 May 2024 at 10:07pm |
|
|
|
Like them all, but love the "B"s.
|
|
CA13414
Bronze Level
Joined: 25 Feb 2024
Location: Nebraska
Points: 70
|
Post Options
Thanks(0)
Quote Reply
Posted: 22 May 2024 at 10:28pm |
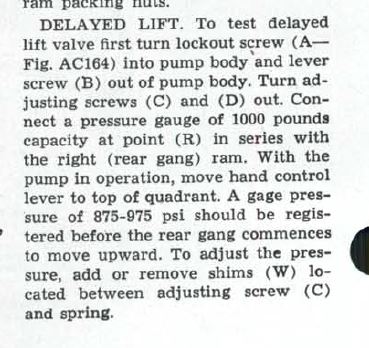
steve(ill) wrote:
|
< id="idg-io-safe-browsing-enabled" ="" oninit="true">
Thank you Steve. That make sense now reading that. What manual is that you posted. Need to get buy that for reference!!
|
|
Helping the aged survive and thrive! 1953 CA
|
|
CA13414
Bronze Level
Joined: 25 Feb 2024
Location: Nebraska
Points: 70
|
Post Options
Thanks(0)
Quote Reply
Posted: 22 May 2024 at 10:43pm |
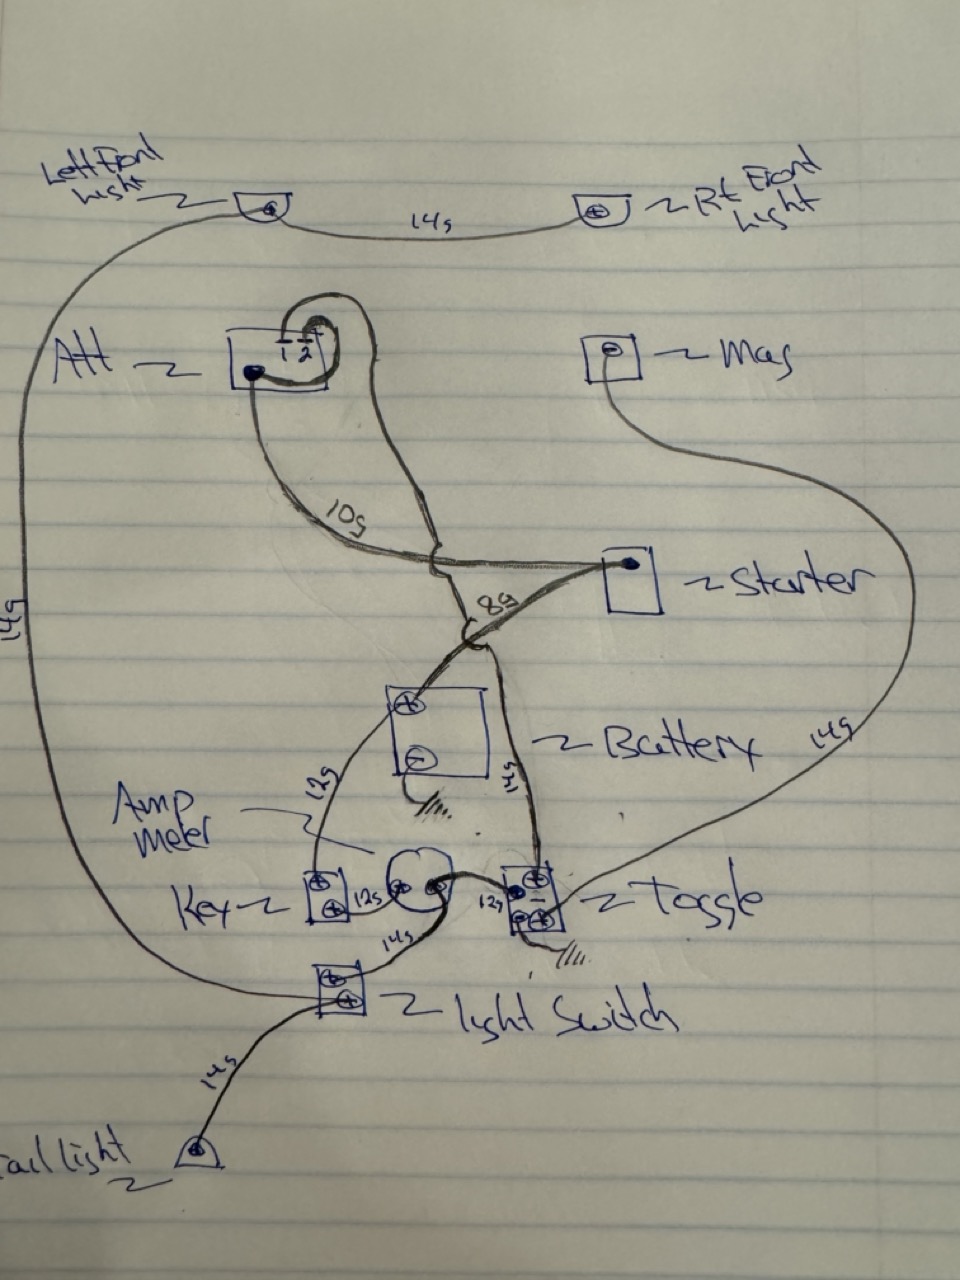
So I am ready to rewire everything and I do have 10, 12 and 14 gauge heat resistant wire that I have planned to use to do the rewire.
We will have a new single wire alternator and front lights with the single rear light.
Want to have the "Key" turn every thing on and the toggle switch with two positions control the engine and alternator. When the toggle switch is grounded we kill the magneto and remove power from the alternator. When the toggle switch is on, the alternator is powered (only when the key is on) and the magneto is "hot" and we can start the CA. That way I can run the lights when the key is on weather or not the toggle switch is on or off.
Thoughts??
< id="idg-io-safe-browsing-enabled" ="" oninit="true">
Edited by CA13414 - 22 May 2024 at 11:01pm
|
|
Helping the aged survive and thrive! 1953 CA
|
|
CA13414
Bronze Level
Joined: 25 Feb 2024
Location: Nebraska
Points: 70
|
Post Options
Thanks(0)
Quote Reply
Posted: 23 May 2024 at 10:09pm |
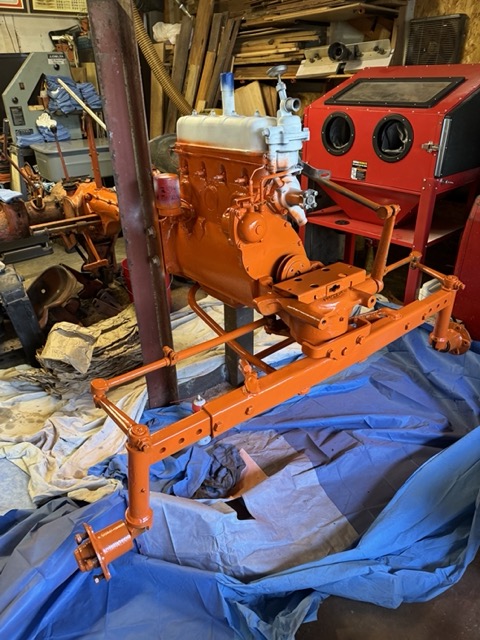
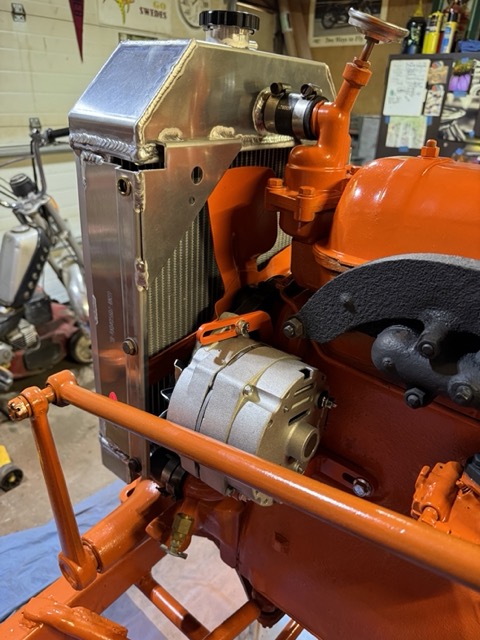
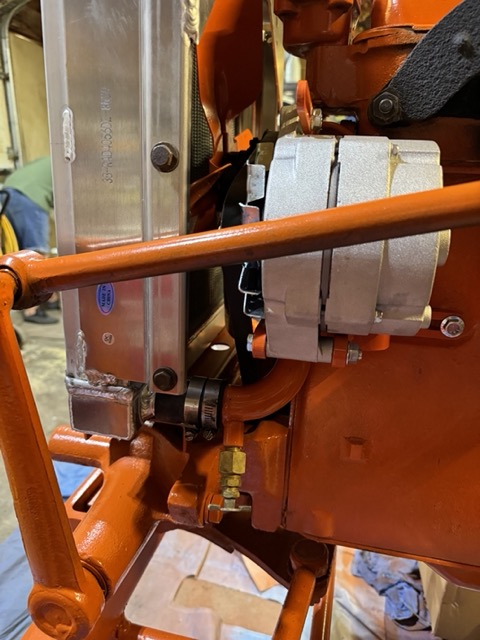
A bit more today. Installed the alternator, radiator and the air filter.
With the alternator, had to modify the bracket and drill a hole for the "adjustable" part of the alternator. Other wise was a simple install. Awesome job on the bracket from DJ's since it fit perfectly in the tight space. Much more efficient that making my own.
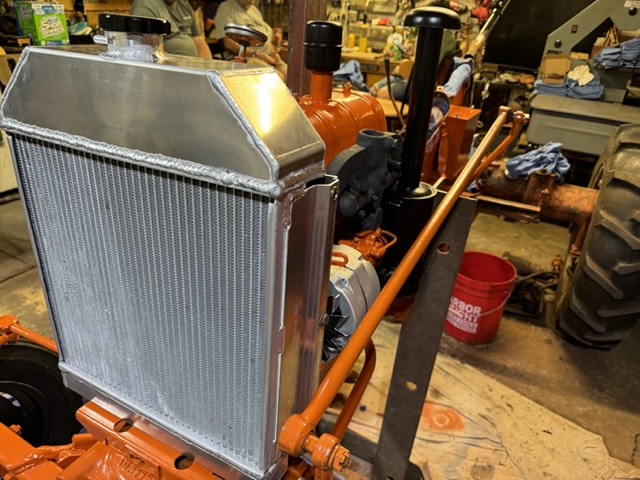
The radiator with the rubber pads and after connecting all the the hoses and radiator tube.
Radiator tube/drain looks awesome.
Here is the radiator and a side shot of the alternator and air filter installed.
Air filter and connected to the carb.
Finally bolted on the right tire. Once the left tire is done with paint, will bolt that in place then remove the angle iron supports we have been using for working on the front end.
Next is the wiring, fuel tank then final drive seals.
< id="idg-io-safe-browsing-enabled" ="" oninit="true">
Edited by CA13414 - Yesterday at 9:03am
|
|
Helping the aged survive and thrive! 1953 CA
|
|
IBWD MIke
Orange Level
Joined: 08 Apr 2012
Location: Newton Ia.
Points: 3490
|
Post Options
Thanks(0)
Quote Reply
Posted: Yesterday at 10:16am |
You keep making progress, that always feels good!
Stupid weather around here, can't string two days together to work on anything.
I may change my CA-1 over to 12v and alternator. Had the generator rebuilt some years back but it periodically quits charging. I can never remember how to 'flash' the stupid thing and getting tired of having to run a battery charger. CA-2 is 12v and alternator but not wired correctly so it doesn't charge right either. Doesn't help that I'm electrically challenged!
|
|